

Purchasing
Copy
Dept
HIGH
GM700 Series
HIGH-SPEED
Instruction
LEAD
OVERLOCK
SEWING MACHINE
Manual
Parts
SHANGHAI
HlliGONG
N0.3
Catalog
SE,VING
MACHINE
FACTORY

-INTRODUCTION-
Thank
This
in
Please
you
instruction
the
best
study
very
much
manual
possible
this
manual very
conditions.
CHUTION
OBSERVE
Though
should
• To
• Do not leave tools
machine.
8
Before
accidents,
pedal is
THESE
Pegasus
follow
prevent
maintenance,
pressed.
SAFETY
takes
these
basic
accidents,
be sure the
for
purchasing
describes
the
utmost
safety
do
or
other
adjusting,
power
700
Series
daily
routine
carefully
PRECAUTIONS
rules.
not
remove
before
care
to
safety
unnecessary
cleaning,
is
turned
machine.
maintenance
operating
produce
devices
objects
threading
off,
Check
safe
or
on the
that
the
machine.
sewing
parts
or
the
and
safety
machines
while
machine
replacing
machine
precautions
and
operating
table
the needle,
will
devices,
the
while
not
to keep
machine.
operating
and
operate
the
operators
to
prevent
when
machine
the
the
NOTE
In
case a crutch type motor
0). If the machine pedal ®
on
unexpectedly. Keep
otf
power supply
• Turn
8
8
In
the
Check
the
power
event
that the machine
stepping on the machine pedal
CD.
off
before
of a power
is
used,
it
will keep on rotating by inertia after turning
is
stepped on inadvertently,
',
~·--~~~~)
',
.,
'
leaving
failure. be
is
securely
the
machine
sure
to turn the
grounded.
it
is
dangerous because the machine will move
(2.)
until the machine comes to a stop after turning
table.
machine
off.
off
power supply
•
BEFORE
CONTENTS
OPERATING
1 . Schematic diagram
2.
Installing the machine head
3.
The machine speed and the turning direction
4. Lubrication
5.
Manual lubrication
6. Filling the HR device with silicon oil
7. Threading
•
TEST
1 . Adjusting the presser foot pressure
2.
Adjusting the diff. feed ratio
3.
Adjusting the stitch length
4. Adjusting the thread tension
.•...................................................................
.....•.........................................
SEWING
of
the machine table
..••.••........••....•.•......•............•.....•......
••........•.......••....................•....................•.
...................................................
.......................................................
......•.................................................
.......................................................
• MAINTENANCE DURING USE
1 . Cleaning the machine
2.
Replacing the needle
3.
Checking the oil circulation
4. Replacing the oil
5. Replacing the lower knife
6. Adjusting dimensions
7. Standard needle Comparison table
...•.......................................................
...............•............................................
...................
...............................................................
........................................................
............................................................
of
.....•••....•.•.............•••.....•..........
..........•................................
.....................................••.........
;
...................................
equivalent sizes
.................................
~
......................
1
2
3
4
5
6
7
8
9
10
11
12
13
14
15
16
17
17
• PARTS CATALOG
...................................................................
18-25
Ill
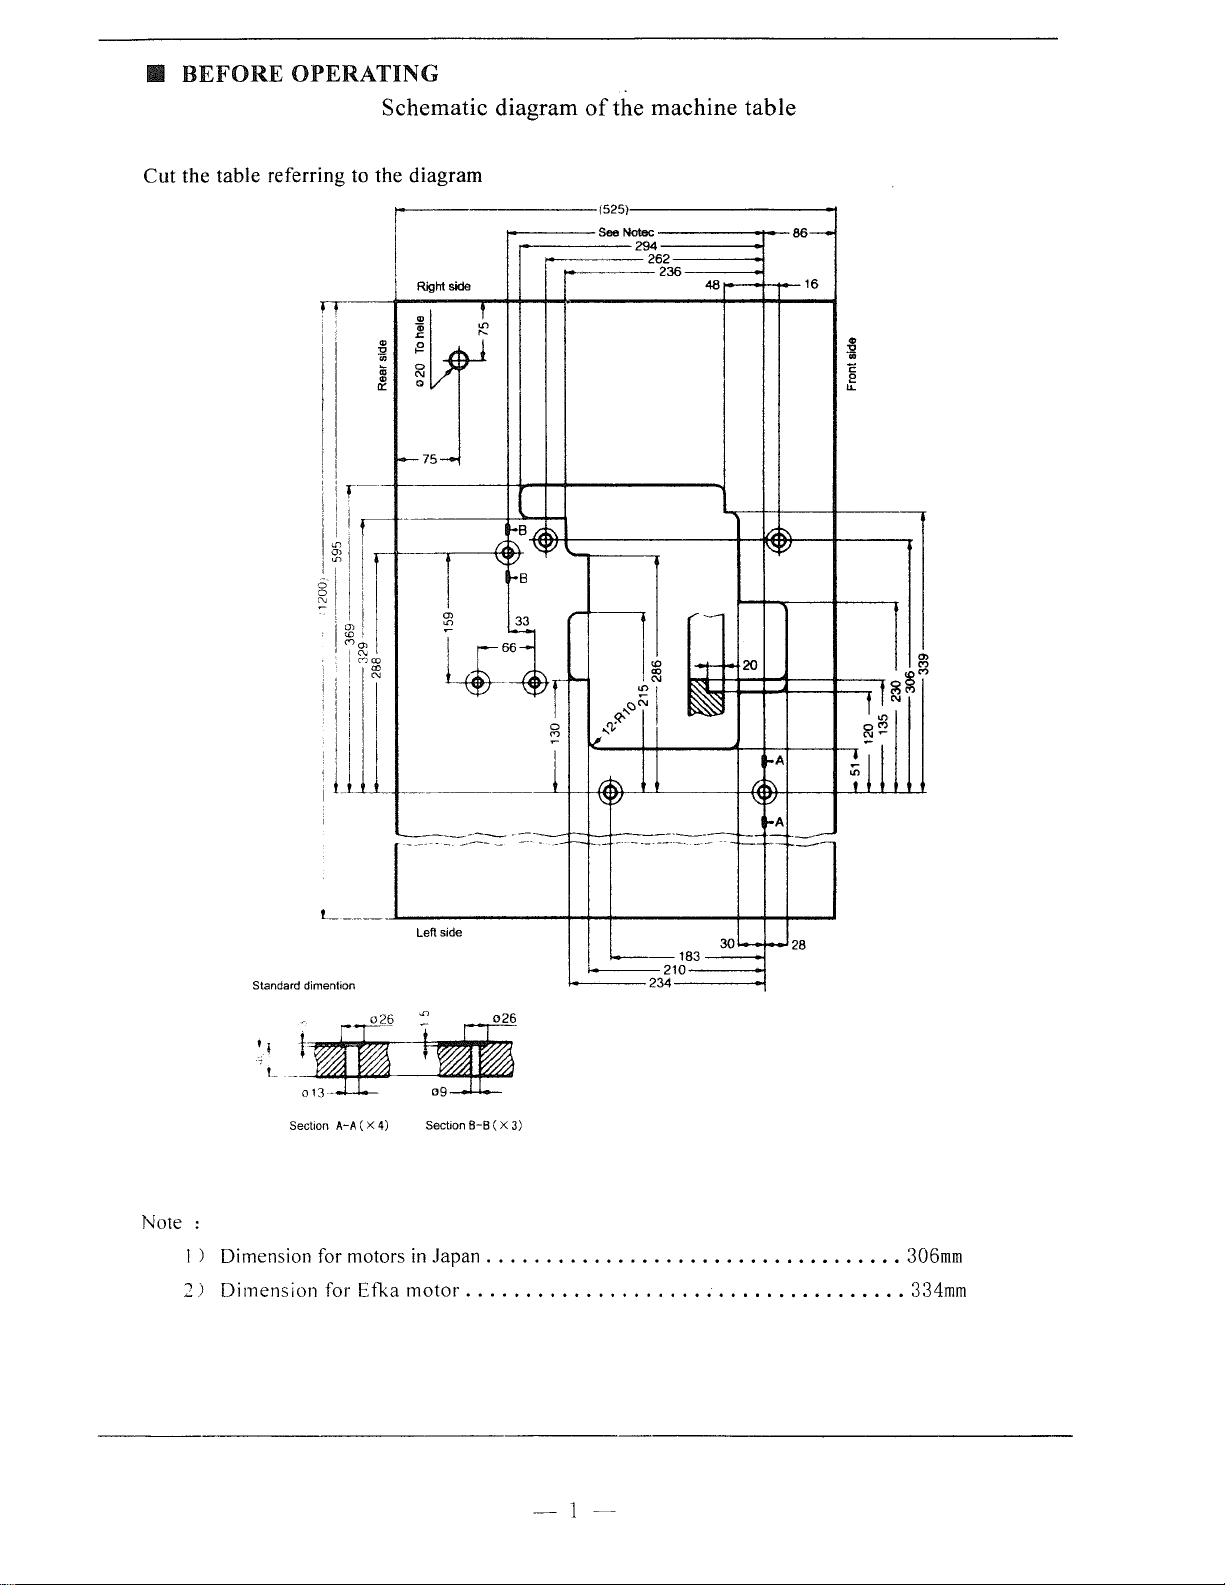
BEFORE
OPERATING
Schematic diagram
Cut
the table referring to the diagram
of
the machine
table
I!
"0
"'
u;
a;
ct:
"'
r-
I
(J)
"'
"'
6
0
~
lJ)
<D
7~co
co
N
i
I
I
I
See
Notec
236
Right
side
48
j J
;}
1--
75_,.
r.;~Br.~
"~
-..:
':/
~B
r
~
~
'---
33
[~"~~~~
cC\i
<!,;«-"'
0
(')
i.t"
;;
1
~
-..:
~
------
----
~
-
~
---
--
-··
---
"'
--
<D
co
"'
,_
~20
_T
~
---
;;
-..:
,_
16
v,~
I\::~
I-A
~
':/
I-A
:2
"'
..
E
e
u..
f t
;g"'
0
"'
!!1
"'
"'
Standard dim ention
Section A-A
Note :
I l Dimension for motors
2)
Dimension for Efka motor
L~----
(X
4)
Left side
Section
8-8
(X
3)
in
Japan
............................•......
.....................................
234
183
30-
-28
306mm
334mm
-
l-
BEFORE
OPERATING
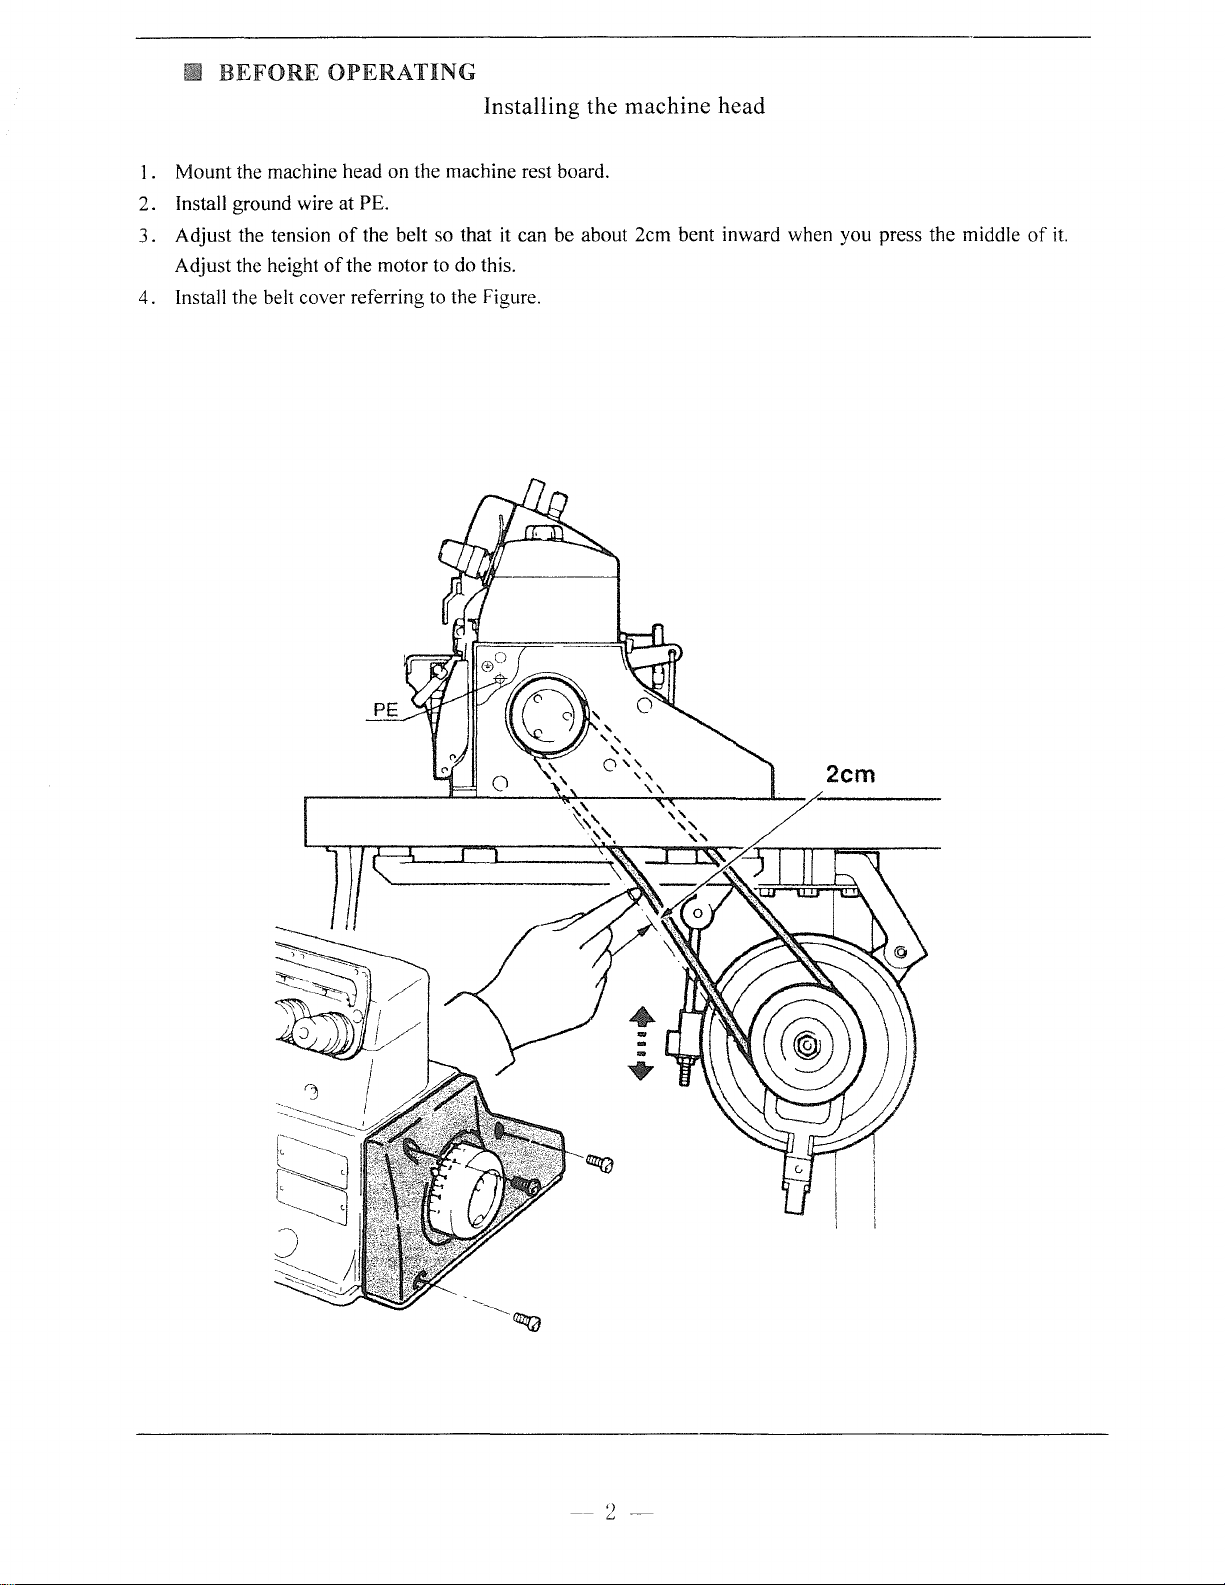
Installing the machine head
1 . Mount the machine head on the machine rest board.
2. Install ground wire at
3.
Adjust the tension
Adjust the height
4. Install the belt cover referring to the Figure.
PE.
of
the belt so that it can be about 2cm bent inward when you press the middle
of
the motor to do this.
of
it.
2cm
--
2-
1111
BEFORE
OPERATING
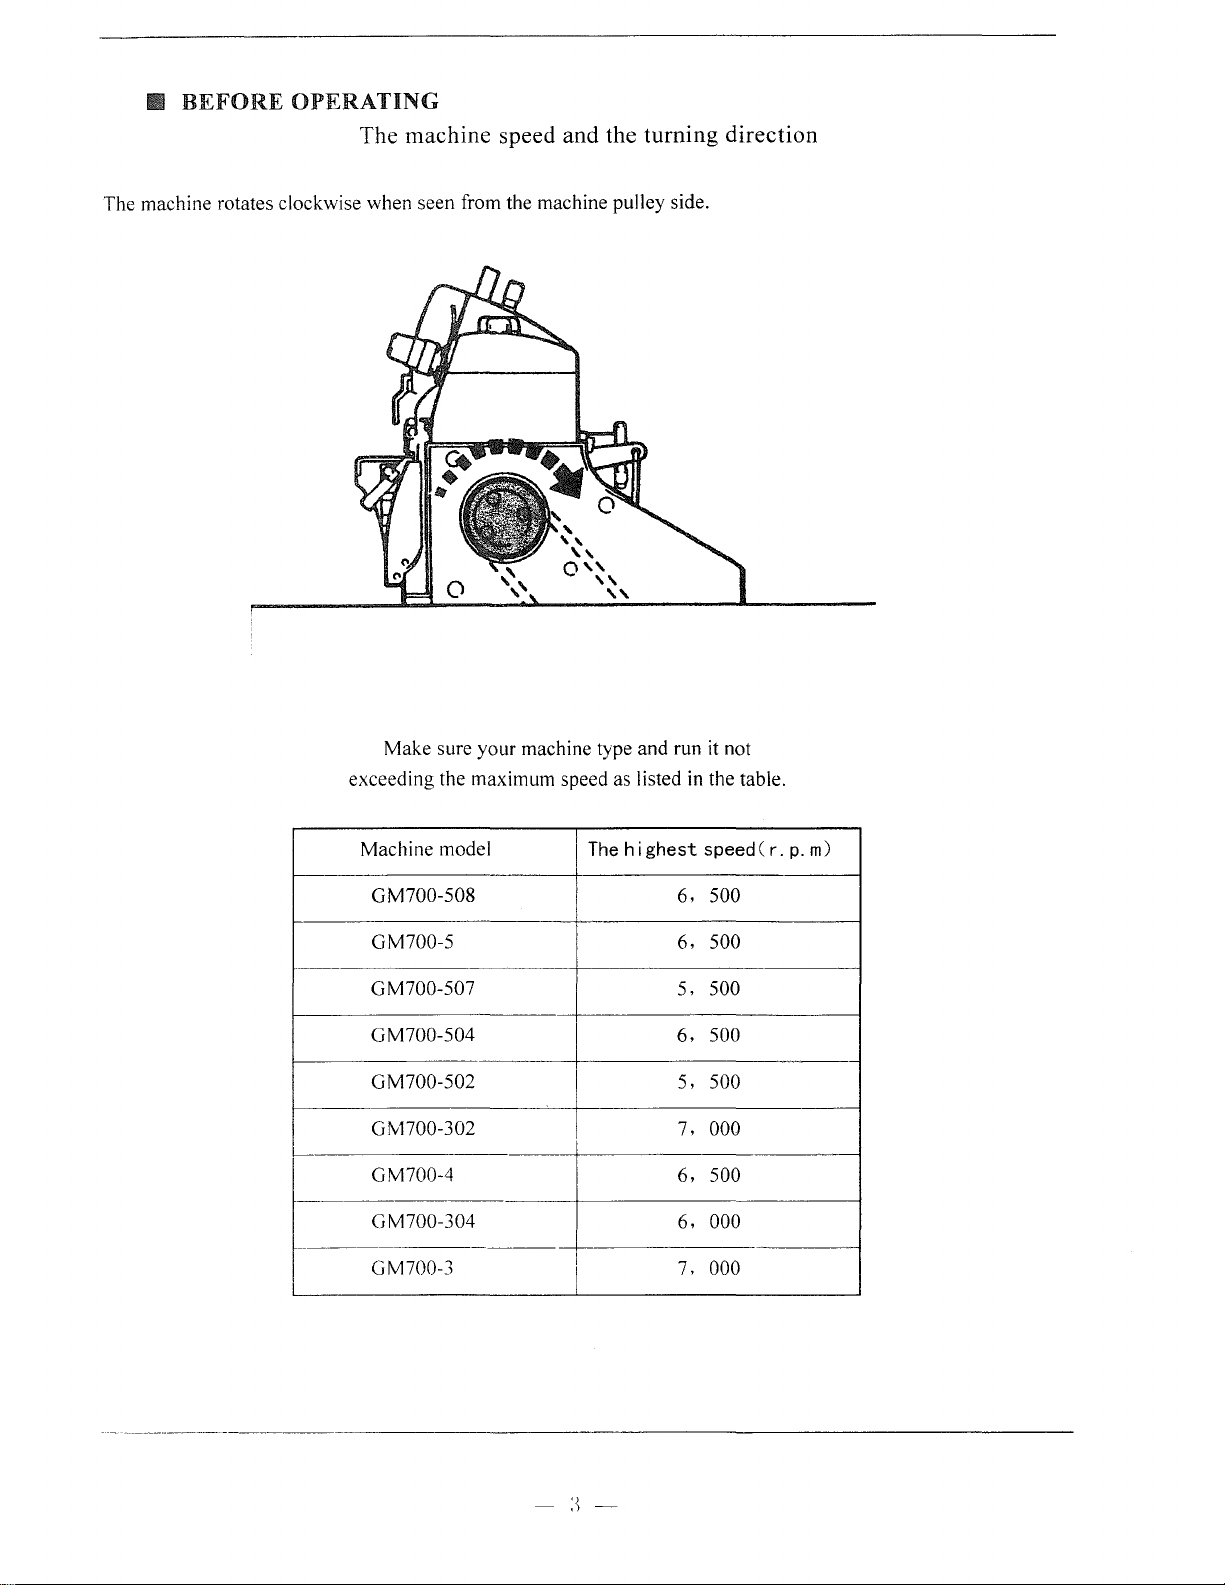
The machine speed and the turning direction
The machine rotates clockwise when seen from the machine pulley side.
Make sure your machine type and run it not
exceeding the maximum speed as listed
Machine model
r---
GM700-508
GM700-5
GM700-507
GM700-504
GM700-502
GM700-302
GM700-4
GM700-304
GM700-3
I
The
highest
6,
6,
5,
6,
5,
7,
6,
6,
7,
in
the table.
speed(r.
500
500
500
500
500
000
500
000
000
p.
m)
II
BEFORE
OPERATING
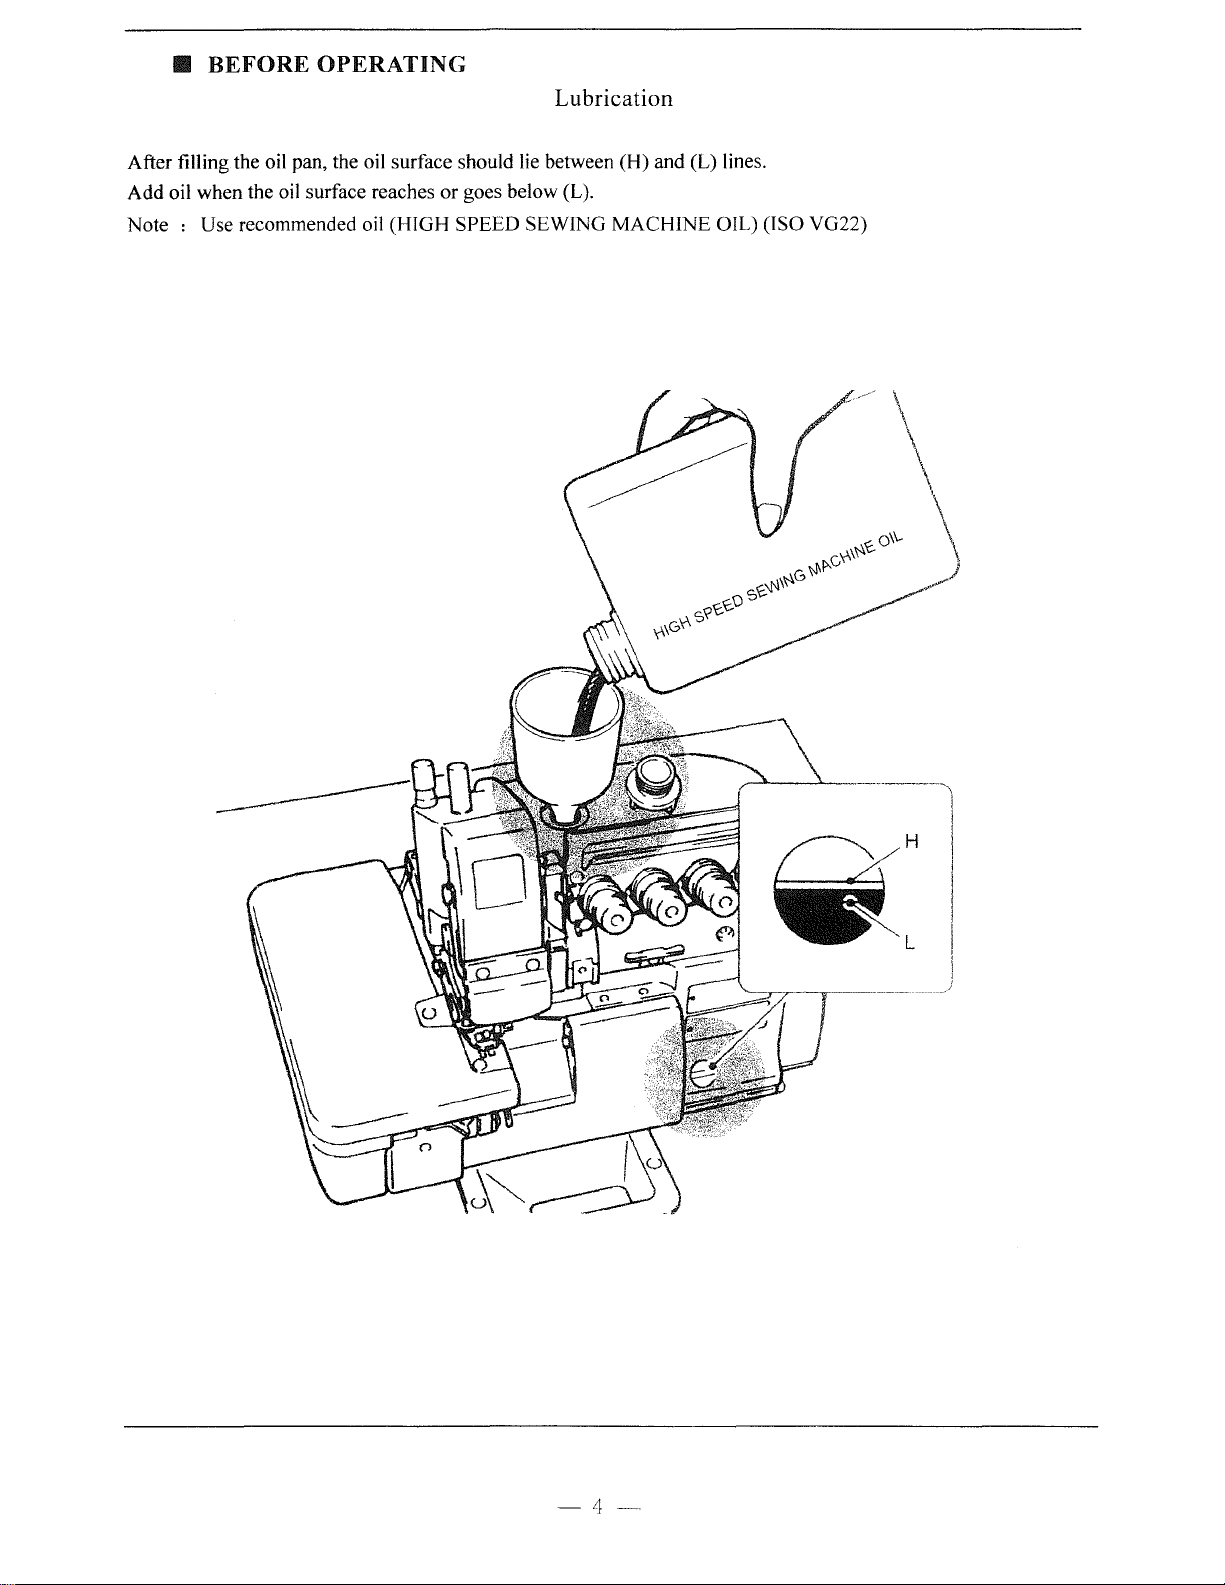
Lubrication
After filling the oil pan, the oil surface should lie between (H) and (L) lines.
Add oil when the oil surface reaches or goes below (L).
Note :
Use recommended oil (HIGH SPEED SEWING MACHINE OIL) (ISO VG22)
-4-
Ill
BEFORE
OPERATING
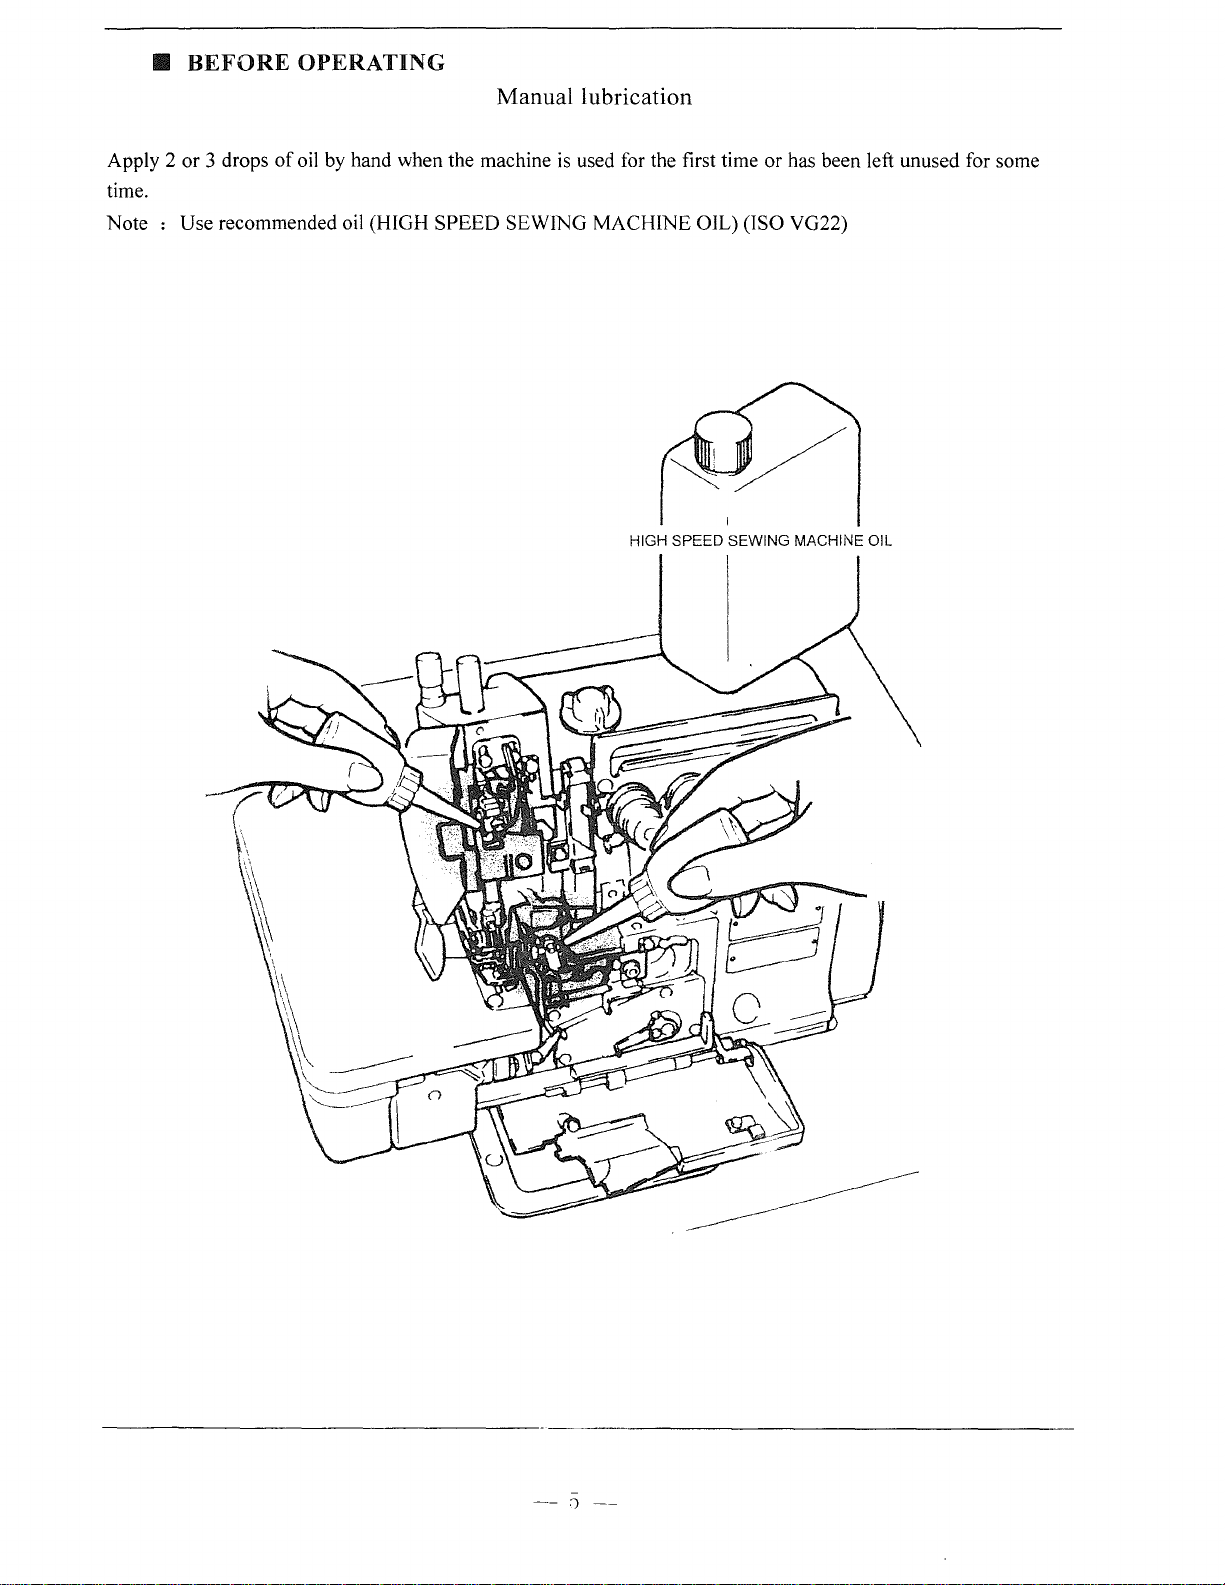
Manual lubrication
Apply 2 or 3 drops
of
oil by hand when the machine
is
used for the first time
or
has been left unused for some
time.
Note : Use recommended oil (HIGH SPEED SEWING MACHINE OIL) (ISO VG22)
I
HIGH SPEED SEWING MACHINE OIL
-
:)

• BEFORE
OPERATING
Filling the HR device. with silicon oil
Fill the HR device with oil before it is too low in order to prevent needle thread breakage and fabric
damage.
Note :
Use recommended silicon oil
-6-
 Loading...