

He
s
U
ser Ma
n
201
per
ua
l V1.0
8.1

Contents
Legend. .............................................................................................................. 1
ReadingSuggestions. .............................................................................................................................................. 1
DownloadingtheApp. ..............................................................................................................................................1
Produc
tProfile. ................................................................................................. 2
Introduction. ............................................................................................................................................................ 2
FeaturesHighlights. ................................................................................................................................................. 2
FlightGo. ..................................................................................................................................................................... 2
VisualPositioning. .................................................................................................................................................... 2
HighDefinitionPhoto&VideoShooting. .................................................................................................................... 2
EIS (Electronic Image Stabilisation). .............................................................................................................. 2
Target Trac king. ...................................................................................................................................................... 2
Orbit. ........................................................................................................................................................................... 2
IntelligentOperation. ............................................................................................................................................. 3
One-KeySharing. .................................................................................................................................................... 3
AircraftDiagram. .................................................................................................................................................... 3
A
ircraft. ............................................................................................................. 5
Ai
rcraftProfile. .........................................................................................................................................................
5
O
n/Off Switch andPowerIndicator ................................................................................................................. 5
AircraftStatusIndicator ....................................................................................................................................... 5
GPSPositioning ........................................................................................................................................................ 5
Optic Flow andUltrasonicPositioning. ............................................................................................................ 6
Usage ConditionsandRestrictions. .................................................................................................................... 6
Replacing the Propeller Blades. ........................................................................................................................ 8
Camera. .................................................................................................................................................................... 11
SignalFrequency .................................................................................................................................................... 11
Micro-USBPort. .................................................................................................................................................... 11
ResetButton. ........................................................................................................................................................... 11
App. ...........................................................................................................................................................................12
A
ppProfile. ............................................................................................................................................................
12
App O
peration Interface. ..................................................................................................................................12
Back to main interface. .....................................................................................................................................13
Wi-Fi Connection Status. ..................................................................................................................................13
Current Flight Distance. ....................................................................................................................................13
Current Flight Height. ........................................................................................................................................13
Aircraft Battery ...................................................................................................................................................13

Positioning Status. ...............................................................................................................................................14
Status Bar ...............................................................................................................................................................14
APP Settings. .........................................................................................................................................................14
Target Tracking. ...................................................................................................................................................14
Photo/Video Switch. ...........................................................................................................................................14
Shutter .....................................................................................................................................................................15
Camera Setting. ....................................................................................................................................................15
Media Library ........................................................................................................................................................15
Hesperoff/Landing/Stop. ..................................................................................................................................15
Return toHome. ....................................................................................................................................................15
App Settings. .........................................................................................................................................................15
Compass Calibration. ..........................................................................................................................................15
PhotographVibration ..........................................................................................................................................15
AppMute. .................................................................................................................................................................16
ControlMethod. .....................................................................................................................................................16
ChangeWi-FiInformation. .................................................................................................................................16
Hesper FC Update. ...............................................................................................................................................16
Hesper OS Update. ..............................................................................................................................................16
Available. ..................................................................................................................................................................16
Personal Center ....................................................................................................................................................16
Setting. .....................................................................................................................................................................16
Quick Guide. ...........................................................................................................................................................16
Malfunction Report .............................................................................................................................................17
Suggestions and Feedback. ...............................................................................................................................17
Change Password. ................................................................................................................................................17
Language..................................................................................................................................................................17
About.........................................................................................................................................................................17
Media Library ........................................................................................................................................................17
Photos. ......................................................................................................................................................................17
Selecting Photos. ...................................................................................................................................................18
Deleting Photos. ....................................................................................................................................................18
Downloading & Browsing. ................................................................................................................................18
Photo Sharing. .......................................................................................................................................................18
Videos. .......................................................................................................................................................................18
Flying/Shooting .....................................................................................................................................................20
Flight Environment Requirements. ...............................................................................................................20
Outdoors. .................................................................................................................................................................20
Indoors. .....................................................................................................................................................................20
Flight Restrictions. ...............................................................................................................................................20
No-Fly Zone. ..........................................................................................................................................................21
Preflight Checklist. ...............................................................................................................................................21
Calibrating the Compass. ..................................................................................................................................21
Connecting the Aircraft to Hesper. ..............................................................................................................22
Hesperoff/Landing. ..............................................................................................................................................23

Hesperoff. .................................................................................................................................................................23
Landing. ...................................................................................................................................................................23
Flight Control. ........................................................................................................................................................23
Free Sticks Method. .............................................................................................................................................24
Safe Sticks Method. .............................................................................................................................................26
Taking Photos/Video Recording. ....................................................................................................................26
Taking Photos. .......................................................................................................................................................26
EIS ..............................................................................................................................................................................26
Orbit (Only under Outdoor GPS Positioning). .........................................................................................27
Target Tracking (Only under Outdoor GPS Positioning)...30 Return to Home (Only under Outdoor
GPS Positioning)..31
Warranty Card. ....................................................................................................................................................32
Purchase Information. ........................................................................................................................................32
Maintenance Records. .........................................................................................................................................32
Sym
b
Rea
d
HIG
H
for H
(Bat
t
Discl
a
Star
t
(Hes
p
(Q
uali
f
To le
man
u
(Disc
l
learn
Do
w
Be
fore
can sc
or logi
n
He
s
p
ols
ing Sug
gest
GREAT ha
s p
r
es
per users: (I
n
ery Safe
ty Ins
t
i
mer) (Hespe
r
Guide)
er User M
anu
a
i
ed C)
ar
n how to u
als
in this or
d
ai
mer) and t
h
mo
re, please
nl
oading the
usi
ng this produc
t
an
the following Q
an
d download fr
o
er su
pports Andr
o
Leg
e
Wa
rning
ions
ovided the
fol
l
th
e Box)
ruc
tions
Quick
l)
se Hespe
r, w
e
er: (In t
he B
o
en (Hespe
r Q
u
rea
d (Hesper
U
Ap
p
,
you need to do
w
R c
odes, or searc
h
m Hi
ghGreat we
b
i
d 4.3 and later v
e
nd
Tips
owing m
anua
l
suggest y
ou
x
), (Battery S
a
ick Start Gui
d
ser Manual).
nl
oad and install t
h
f
or Hesper in Ap
si
te.
rsi
ons, iOS 9.0 a
n
s
rea
d the pro
v
fety Inst
ruct
i
e). If you wa
n
e
Hesper app. Y
o
p St
ore or Google
d
later versions
.
ided
ons)
,
t to
u
Pla
y,

Product Pro
file
This section will introduce Hesper’s features and the names of Hesper’s
structural components.
Introd
uction
H
esper is a portable and easy-to-use drone for entertainment. It consists of the
aircraft itself and an accompanying app.
Th
rough using the app, you can control Hesper’s flight, He s per phot os an d rec o rd vide os.
Fe
atures Highlights
In o
rder to give you a convenient and safe flying and photographing experience, Hesper has
vari
ous great features:
Flig
htGo
Th
eappisspecificallydevelopedforHesperandisreallysimpletouse.Itcanbeusedasa
remotecontrollerforflightcontrola ndphoto&videoshooting.
Remote Contr
oler
He
pser can be operated by both remote controller and APP in smart phone. Remote
controller is special designed and have a different exp eri enc e when flying. It will
have a individual user manual.
Mech
anical Gimbal
O
ne-axis mechanical gimbal can support wider angel shooting when flying. Can
operate the angle of camera by remote controller or A PP..
Visu
al Positioning
H
esperusestheopticflowandultrasonicpositioningsystemtosupportflight.Whenthereis
no
GPSsignalorweakGPSsignal.Pleaseinstallpropellerprotectorwhenindoorflying.
High De
finition Photo & Video Shooting
H
esper is equipped with a professional high definitio n ca me ra- S ON Y IMX 21 4, 13 MP, tha t
sup
ports 4208x3120 photo shooting and 192 0x 10 80 vid eo shooti ng.
EIS (Electro
nic Image Stabilisation)
A
fterEIS,your4Kvideofootagesbecome1080phighdefinitionvideos,Andimagevibration

whenHesperflyingcanberemovedunderEIS.
T
arget Tracking
By image recognition technology, Hesper can follow and record video on the moving target
you’ve chosen.
Orbit
Au
tomatically fly and record video around a certain point with a certain radius and at a certain
altitude.

Intelli
gent Operation
When outdoor flying, FlightGo support multiple One-key Operations by just one tap on the
screen. Such as One-key Hesperoff, One-key Landi ng, One- key Ret urn .
On
e-Key Sharing
Di
rectly share your photos & Videos with your frien ds on SN S.
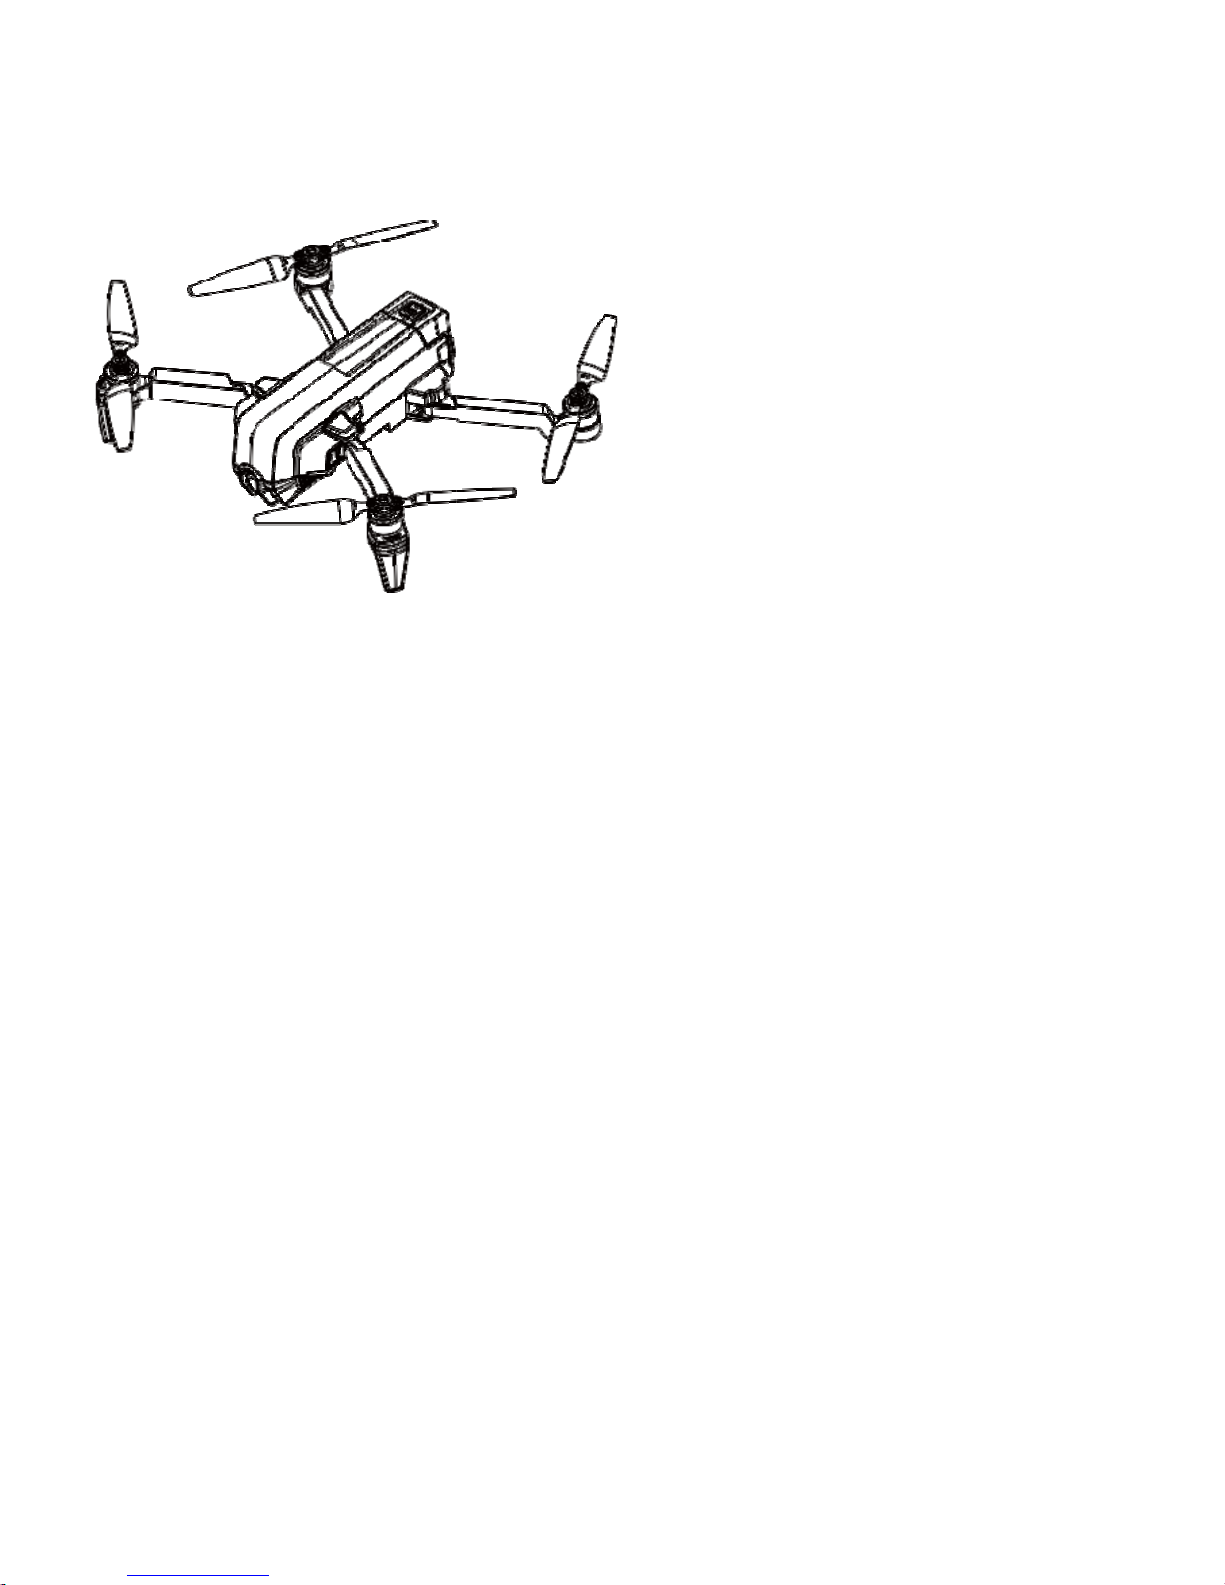
A
ircraft Diagram
① Propel
ler
② Arm
③ Camera
④ Bat
tery

⑤ switch
⑥ indicator ligh
t
⑦ optical flow
⑧ Ultrasonic

Aircraft
A
ircraft Profile
H
esper mainly consists of the flight system, the positioning system, the
communication system, the power supply system and the camera system.
This section will explain the functions of each of the parts.
On/Off
Switch and Power Indicator
Th
e On/Off Switch has an inbuilt Power Indicator.
Hold the On/Off Switch for 3 seconds. Wait until the Power Indicat or starts solid
green, then remove your finger and Hesper will swi tch on. Af ter a fe w sec on ds,
Hesper will make a noise alerting you that the ESC has turned on.
After connecting to the app, the Power Indicator will tu rn flas h gre en.
Hold the On/Off Switch for 3 seconds. Wait until the blue light of the Po w er Ind icato r
goes
out, then remove your finger and Hesper will switch off.
A
ircraft Status Indicator
On t
he tail of the aircraft, there
’
s
an RGB indicator that shows the status of Hesper.
The Aircraft Status Indicator
’
s
status and the corresponding meanings are as
follows:

GPS
Hespe
positio
During
GPS
s
a
Opti
c
He
spe
r
w
isweak
aut
om
a
Usa
g
Th
eop
t
for
out
d
syste
m
Wh
en
to 0.5
m
they
h
a
duri
ng
Requi
r
syste
m
the ar
e
---
---
Pos
itioning
uses a GPS&GL
O
ning system is G
P
outdoor flights, He
s
tellit
es ≥8.
Fl
ow and U
illusetheopt
icflow
a
(thenumbero
fsearc
h
tic
allyuseopticflo
w
e
Condition
s
i
cflowandultrason
oo
rflightiftheGPS
s
is
0.5-3m.
using this position
,
it will determine
ve
not, it will initi
a
flig
ht, the aircraft
w
e
ments for the op
t
,
a un
derneath the
--
--------------
-
The optic flo
w
work under
t
◎
A
bove highl
◎
A
bove wate
◎
A
bove peo
p
◎
In
areas wit
h
◎
Abo
ve very
b
◎
Abo
ve objec
t
◎
Abo
ve surfa
c
◎
During
fast
f
and
ultrasonic
p
NASS dual-mod
e
S based, with GL
O
per uses GPS pos
ltraso
nic Po
s
ndultrasonicposit
i
o
ed-outGPSsate
llit
e
an
dultrasonicpos
an
d Restri
c
icp
ositioningsyste
m
ig
nalisweak.Theo
ing system, after t
h
if th
e requirement
s
te
landing. If the r
e
ill al
so initiate la
n
ic flo
w and ultras
o
ai
rcraft needs to
h
-
---------------
-
an
d ultraso
n
hese circumst
a
y
reflective surf
a
r
or transparent
l
e or moving obj
r
apidly changi
n
rig
ht or very dar
k
s t
hat easily abs
o
es wi
thout clear
t
li
ght at low leve
l
o
sitioning syste
m
satellite position
i
NASS acting as
a
itioning when the n
u
ition
ing
ningdur
ingindoorfli
s<8
)duringoutdoo
r
itio
ningassupplem
tions
ar
eusedforindoo
r
p
eratingheightran
g
e airc
raft has He
s
fo
r using this sy
s
qu
irements are n
di
ng.
nic posi
tioning sy
s
ave
a clear textur
e
-
---------------
-
ic p
ositioning
nce
s, please
u
ce
s;
objects;
ects;
g/
flashing light
s
su
rfaces;
r
b ultrasonic wa
v
extu
res or with t
o
s (0
.5m or less)
,
m
ay not work.
ng system. The s
a
supplementary s
mber of searched
-
ght
.IftheGPSsignal
f
light,theaircraftwill
ents.
fli
ght.Itisalsoused
ef
orthispositionin
g
pe
rn off and asce
te
m have been m
ot met for this sys
t
te
m: When using
d s
urface.
---
-------------
sys
tem may
n
se with cautio
;
es;
o sparse or
too
d
the optic flow
tellite
ystem.
out
n
ded
et. If
em
this
-
---------------
ot
n:
ense tex
tures;

---
---
------
Pro
p
Hes
pe
r
onlyne
e
b
lades
The bl
a
as
sho
w
Repl
Bl
ad
e
top
m
r
epla
c
How t
o
Use
a
the
ne
w
------
------
Batt
e
--
--------------
-
◎
Ensure that
t
◎
Because th
e
waves emitted
b
ultrasonic equip
◎
The Ultrason
but may make
s
--
--------------
-
eller
ha
s4setsoffoldabl
dtoexpandtheA
rm
s
to
prevent damagi
n
des have e
ither
“
n in
the following
acin
g the Pr
o
s m
ust be replac
ust be r
eplaced
w
ed wi
th ones tha
t
r
eplace the pro
p
wr
ench or a s
c
on
es onto the b
a
----------------
-
P
lease ens
u
screwscomi
obere- tig
ht
--
--------------
-
ry
-
---------------
-
he lens of the op
t
ultrasonic positi
o
y other ultrasoni
c
ment, including
o
ic Sensor will em
o
me animals ner
v
-
---------------
-
eP
ropellers.Thepr
o
before
theflight.Wh
g them
.
H
”
or “G” on t
h
fig
ure:
peller Blade
ed wi
th ones tha
t
i
th ones that al
s
al
so have a “G”,
el
ler blades:
re
wdriver to loo
s
s
e, as shown in t
h
----------------
-
re
that the propelle
nglooseandthepro
p
en
edafterevery10
h
-
---------------
-
-
---------------
-
ic flow camera i
s
ning system ma
y
equipment, ple
a
ther drones.
it ultrasonic wav
e
ou
s. Please do
n
-
---------------
-
pell
erbladesarea
l
en
you’redonewithfl
y
e top
to indicate in
s
sp
in in the sam
e
o have an “
H”.
B
as i
n the above
f
en the s
crews,
r
e
following figure
----------------
-
r
is tightly screwed
elle
rsbladescomin
g
ou
rsofflight.
-
---------------
-
---
-------------
clear.
be disturbed by
se do not use H
e
s that are inaudi
b
ot
use Hesper cl
---
-------------
rea
dymounted;us
e
ing,
foldtheArms
a
n
which d
irection th
e
di
rection. Blad
e
l
ades with a “G”
igur
e on Page 8.
em
ove the old
o
:
----------------
in,
to prevent agai
n
offdu
ringflight.Itwil
l
---
-------------
-
---------------
ultrasonic
sper near other
le to humans
ose to animals.
-
-------------
rs
d t
he
y spin,
s
with an “H” on
on top must be
n
es and mount
----------------
st
the
needt
-
---------------
The b
a
and a
n
Usin
Pleas
e
---
---
------
Cha
r
Th
e
Th
e b
a
◎
ttery is designed
s
ominal voltage o
f
g the Batter
y
plug the battery i
n
--
--------------
-
◎
Pleas
e do
n
◎
Ba
ttery ov
e
envi
ronments
(
◎
If
the batter
y
etc.
), changes
please remov
e
◎
Do
not u
s
irrev
ersible da
m
d
rop. Please
w
high
er is bette
r
----------------
-
ging the
Bat
t
battery co
mes
w
tt
ery charger’s m
a
Bal
ance Chargin
g
pecifically for use
11.4V.
to the battery co
m
-
---------------
-
’
t re
move the batt
e
r
heating may aff
e
ov
er 40
°
C)
.
le
aks, emits an
o
co
lor or shows an
the battery imme
d
e
the battery in
ag
e to it. When t
a
rm it up to 5
°
C
.
----------------
-
er
y
i
th a charger, an
jor
characteristics
Pr
otection: Aut
o
with Hesper. It h
a
partment before
u
-
---------------
-
ri
es while the air
c
ct
the performan
c
d
or, generates h
e
y
other abnormali
t
iat
ely and cease
t
co
ld environmen
t
he
temperature is
or higher before
p
----------------
-
adapter, and a
U
are as follows:
m
atic balance of
s a rated capacity
sing Hesper
.
---
-------------
raf
t is turned on.
e of
Hesper. Do
at
by itself, chang
ies
during use, ch
o us
e.
s (u
nder 50C),
o
lo
w, the battery
’
s
u
l
ugging it into the
----------------
S
B cable.
the battery’s inte
of 1450mAh
-
--------------
no
t use it in hot
es shape (swells,
arging or storage
r
it may cause
sa
ge time may
aircraft, 200C o
r
----------------
r
nal

cell voltage
to preserve the battery;
◎
Overcharge Protection: Overcharging can seriously damage the battery.
The battery
will stop charging once it’s charged to 13.05V;
◎
Battery Fault testing: stop charging once test and find battery internal fault, overheat
and so on, warning with flash red light.
P
ut the battery into the battery charger, the indicator will show the current
battery level and go out automatically after 5 seconds. The indicator’s status and
the corresponding battery level in percentage are shown as follows:
Pl
ug the battery down into the charger. Use the USB cable to connect the
charger to the adapter. Plug the adapter into a power socket to begin charging.

Th
e
with t
h
Indi
ca
t
pr
ovid
e
Indi
ca
t
If t
h
fu
lly c
h
char
g
e
Th
e
show
n
------
d
echpo
---
---
------
------
Cam
He
spe
suppo
r
charger uses Q
e acco
mpanying
or
will be fast fla
s
d adapter
, it ma
y
or
will be slow fl
a
e Char
ging Stat
u
a
rged. Please t
u
r.
Char
ging Statu
s
as follow
s:
----------------
-
◎
W
e sugges
t
vices to cha
rge
t
ar
ging equipme
n
◎
Do not cha
r
wer sou
rce. If n
o
--
--------------
-
----------------
-
◎
User
s can
u
Pl
ug the battery
the charger to t
h
◎
The adapte
--
--------------
-
era
is e
quipped with
ts 42
08x3120 ph
o
ualcomm Quick
C
adapter
allows f
o
h gr
een during t
h
only achi
eve sl
o
sh o
range durin
g
s Indicator tu
rns
r
n off the power
s
Indicator
’s statu
----------------
-
you
use the pro
v
he batter
y. Any i
s
t shal
l be the re
s
ge b
atteries in th
t i
t shall be the r
e
-
---------------
-
----------------
-
se a
power ban
k
do
wn into the ch
a
e
power bank or
r can only be us
e
-
---------------
-
a p
rofessional hig
h
to
shooting and 1
9
harge 3.0 techn
o
r
quick charges.
e qui
ck charge.
I
w char
ge instea
d
the sl
ow charge
.
s
olid green, this
m
ource and r
emo
v
s and the cor
res
p
----------------
-
i
ded HighGreat
H
s
ues that occur
d
po
nsibility of the
e aircraft by con
n
s
ponsibility of th
e
-
---------------
-
----------------
-
or
a ca
r
char
ger
r
ger, and use th
e
car
charger to be
d bel
ow 2000m
a
-
---------------
-
d
efinition camer
a
2
0x1080 video s
h
logy. Using it tog
The Charging
S
f you don’
t use t
h
. The Char
ging
S
e
ans the batter
y
e the batter
y fro
m
o
nding meaning
s
----------------
es
pe
r
battery
c
h
ue
to use of oth
e
use
r.
ecti
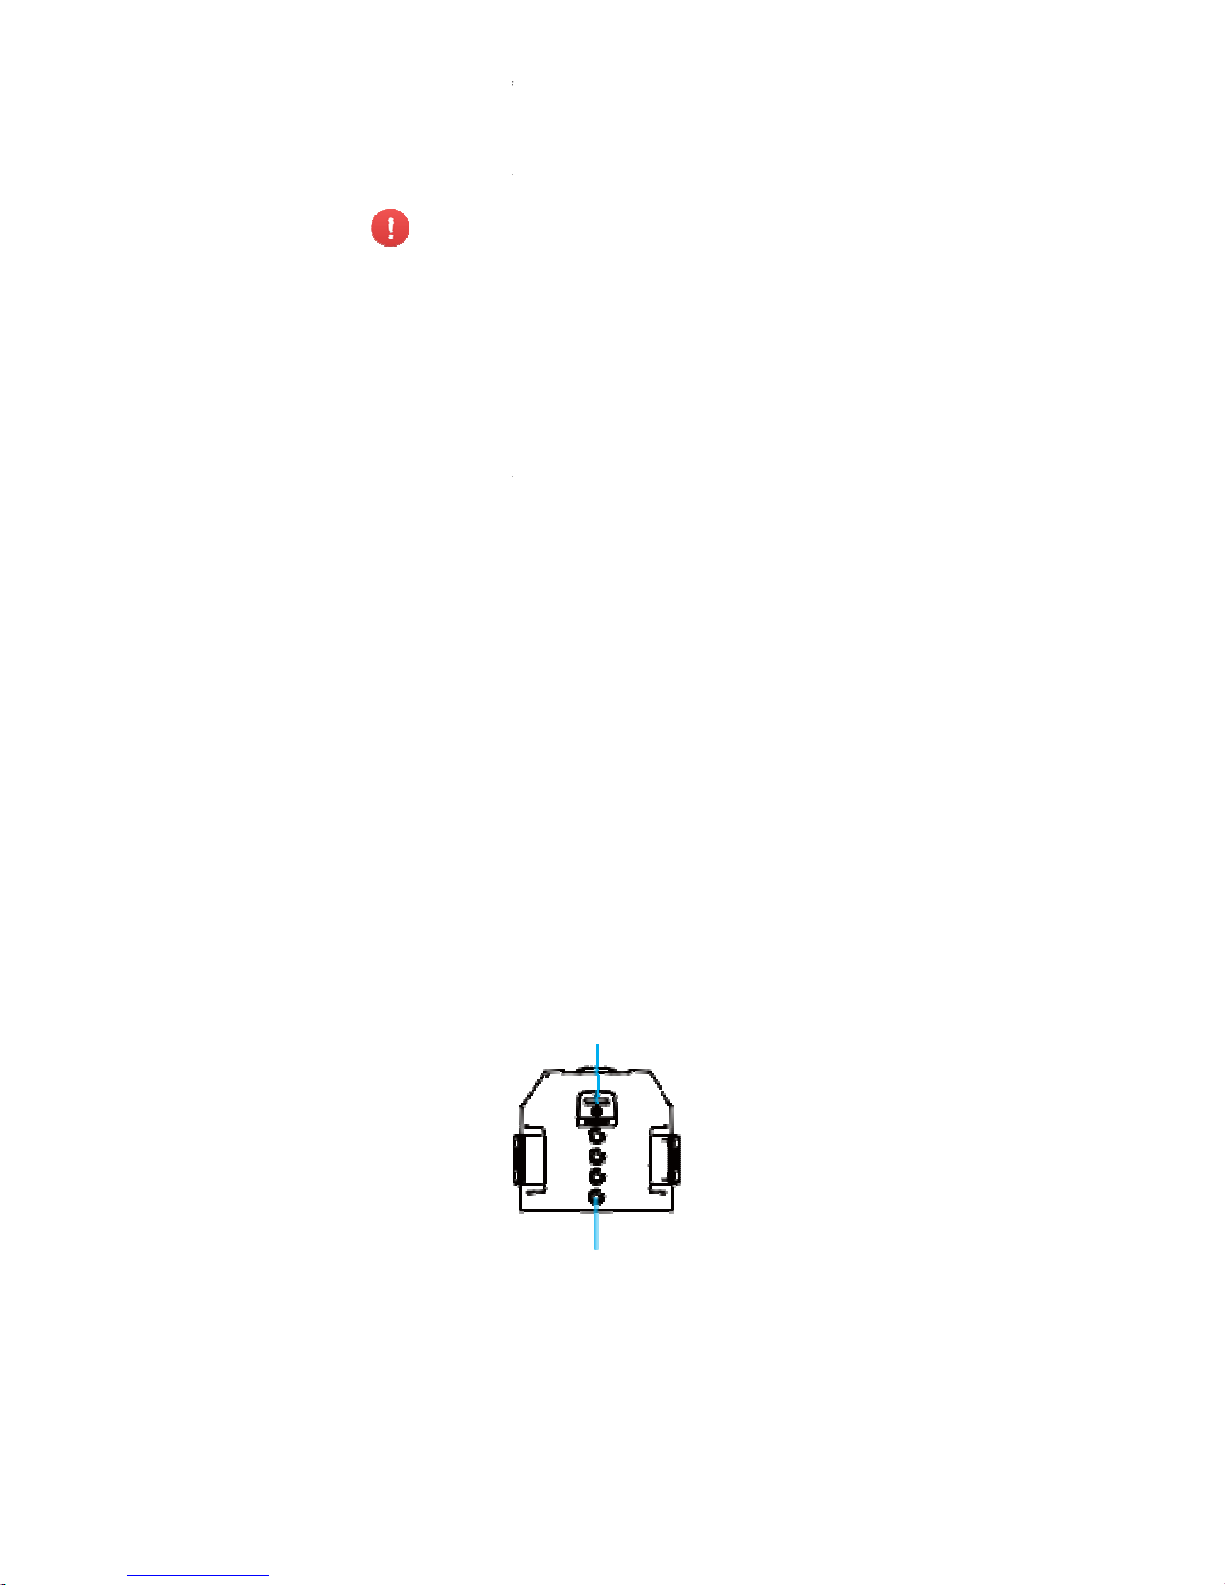
ng Micro-US
B
us
er.
---
-------------
----------------
to char
ge the ba
t
USB
cable to c
o
gi
n charging.
bo
ve sea level.
---
-------------
- SONY
IMX 214
,
ooti
ng.
ether
ta
tus
e
ta
tus
is
the
are
----------------
ar
ging
r
to a
-
---------------
----------------
tery.
nnect
-
---------------
13
MP, that

Mec
h
Hespe
remot
e
Rem
Hepse
control
have
a
Sign
Air
craf
t
sho
uld
from t
h
Micr
o
W
hile
H
co
mpu
---
---
co
mm
u
---
---
Res
e
Ho
ld d
o
Air
craf
t
pass
w
o
SS
ID:
H
ai
rcraft
Passw
o
an
ical Gim
b
is equipped with
control or APP.
ote
Controll
e
can be operated
ler is special desi
g
individual user m
a
a
l Frequenc
y
hav
e two version
relate to the mobi
e pa
ckage.
-USB Port
es
per is turned
o
ter
. You can then
--
--------------
-
◎
Hes
per mus
t
◎ He
sper
’
s
nic
ation ports, do
--
--------------
-
t Button
w
n the Reset Bu
t
St
atus indicator
f
rd:
esper-
XXXXXX. L
, the XXXXXX are
rd:
highgreat
al
a one-axis mecha
by both remote c
o
n
ed and have a d
nu
al.
fo
r the signal fre
q
le wi
th relative ba
n
n,
use the provide
copy your photos
a
-
---------------
-
b
e turned on to b
e
Mic
ro-USB port c
a
n
ot connect it to
p
-
---------------
-
t
on on the base o
f
in
ishes blue, so a
s
abeled
beside the
b
T
HE LAST 6 alph
nical gimbal, user
ntroller and APP i
ifferent experienc
e
ue
ncy-2.4GHz/5.
8
ds.
Please check
d USB cable to c
o
n
d videos onto y
o
-
---------------
-
abl
e to connect
t
n
only be connec
ow
er sources or
p
-
---------------
-
t
he aircraft for 3
s
to
reset the Wi-F
a
ttery compartme
n
an
umeric digits of
can change the c
a
n smart phone. R
e
when flying. It wi
l
GHz
. Different ve
r
th
e aircraft frequ
e
nn
ect Hesper to y
o
ur
computer.
---
-------------
o y
our computer.
ted to data
o
wer banks.
---
-------------
e
conds until the
i, The default SSI
D
t
on the base of th
e
the
Wi-Fi’s MAC
a
mera angle by
mote
l
s
ions
ncy
ur
-
---------------
----------------
an
d
dd
ress

This
s
Ap
p
Flig
ht
G
as a
r
e
dire
ctl
y
Ap
p
All t
he
interfa
c
1. B
a
c
in
terf
a
4.Cur
r
Heigh
t
7.Sta
t
10.O
r
13.Ca
16.Re
t
He
re’s
ection will co
v
Profile
o is
specifically d
e
mote
controller fo
r
sh
are your phot
o
O
peration In
t
n
ecessary status
e.
The layout is a
k to
main
ce
en
t Flight
5
us Bar
8
it
1
S
mera Setti
ng
1
urn to
Home
a
brief descriptio
n
Ap
er the main
p
vel
oped to be us
e
flig
ht control and
s
and videos to s
o
erface
i
ndicators and ma
i
s f
ollows:
2.Wi-
Fi Connec
t
Status
.Aircr
a
f
t B
atte
r
.APP
Settings
1.Photo/
Video
wit
ch
4.Me
dia Li
b
ra
r
y
o
f these status in
p
arts of the Fli
g
d
with Hespe
r
. U
s
ph
oto & video sh
o
cial
networks.
n f
unction buttons
io
n 3. Curren
t
Dista
nce
y 6.Positi
o
n
Status
9.Target
T
12.Shutt
e
15.Hespe
r
ding/Sto
p
dic
ators and funct
htGo and the
ers
can use Fligh
t
oti
ng. You can al
s
are on the operat
Fligh
t
in
g
ra
cking
off/L
an
ion but
tons. For m
settings.
Go
o
ion
ore
details on

flight-
c
1.
Ba
c
2.
Wi
-
W
W
-----
------
-
l
-----
------
-
3.
Cu
T
4.
Cu
T
5.
Ai
r
Fullb
a
icon)
Low
b
eicon
)
-----
------
-
-----
------
-
ontrol and camer
a
k to maini
n
t
Return back
t
enter into a
p
Fi
Connecti
o
i-
Ficonnecte
d
i-
Fidisconne
c
-
-------------------------------
If th
e Wi-Fi co
and if the GPS
p
if the
optic flo
w
-
-------------------------------
rre
nt FlightD
h
ecurrentflightdi
s
rre
nt FlightH
h
ecurrentflighthe
cr
aftBattery
t
tery(Thebat
t
at
tery(Thebat
t
-
-------------------------------
Once th
e bat
t
initia
te landin
g
-
-------------------------------
operation, pleas
e
erfac
e
o the main i
n
ersonal inter
f
nStatus
te
d
-
-------------------------------
-
nnect
ion is los
t
os
itioning is
b
and
ultrason
i
-
-------------------------------
-
istance
ta
ncewillbedispla
y
eig
ht
ig
htwillbedisplaye
d
erylevelwil
lbe
d
erylevelwil
lbe
d
-
-------------------------------
-
e
ry level gets
.
-
-------------------------------
-
refer to “Flight/S
h
terface after
c
ace in the ma
----
---------------------------
-
during f
light,
H
eing us
ed or i
n
c pos
itioning a
----
---------------------------
-
e
daftertheicon.
af
tertheicon
isplayedinpe
r
c
isplayedinpe
r
c
----
---------------------------
-
t
oolow during
----
---------------------------
-
ooting” on page 2
3
licking it, you
in interface.
----
----------------------------
e
sperwill retur
n
it
iate landing
re beingused.
----
----------------------------
enta
geafterth
e
enta
geaftert
h
----
----------------------------
fli
ght, Hesper
w
----
----------------------------
.
can
---
-------
an
d
---
-------
---
-------
ill
---
-------

---
---
◎
---
---
6.
Po
s
GPS p
O
-----
------
-
-----
------
-
7.
St
a
Th
e s
t
displ
a
y
Th
e a
b
info
r
m
8.
AP
9.
Ta
r
A
10.
O
A
--
--------------
-
◎
A full char
g
of flight time.
Please schedu
l
battery level,
a
--
--------------
-
ition
ingSta
t
ositio
ning status n
displayed after t
h
G
PS positioning
be displayed aft
e
ptic
flowandultra
s
Optic
flowandultra
s
-
-------------------------------
Ifth
epositioning
s
the po
sitioning s
t
-
-------------------------------
tusBar
at
us bar will displ
a
e
d in different co
l
n
ormal status wil
atio
n. Tap to see
t
PS
ettings
T
ap to enter the
a
So
me of the sett
to router Wi-Fi.
g
etTracking
ir
craft auto
m
rbit
ir
craftautomatical
-
---------------
-
ed battery will
e your shootin
g
nd charge the
-
---------------
-
us
or
mal(The numbe
e ic
on. The numb
status abnormal(
T
r th
e icon. The nu
o
nicpositioningst
a
o
nicpositioningst
a
-
-------------------------------
-
tat
usgetsabnorm
a
at
us returns to no
-
-------------------------------
-
y
the current sta
t
o
rs; red-abnormal
l be displayed by
p
h
e fault status inf
o
pp
setting.
ings will need acc
e
atically follo
w
l
yflyaroundthecho
s
-
---------------
-
allow for appr
o
progress acc
o
battery timely.
-
---------------
-
r
of searched-out
s
er≥8 me
ans norm
a
he
number of sea
mber
<
8
means
t
usnormal
t
usabnormal
----
---------------------------
-
l
duringflight,Hesp
e
r
mal or user lands
----
---------------------------
-
us
information. Di
f
st
atus,yellow-sta
t
ri
ority if there are
r
mation.
s
s to the Internet
the chosen t
a
e
ntargetandrecor
d
---
-------------
ximately 16mi
n
rding to the c
u
---
-------------
atelli
tes will be
l)
rc
hed-out satellite
s
ab
normal)
----
----------------------------
willsta
rttohoveru
it.
----
----------------------------
fer
ent levels of s
t
us w
arning, blue-
n
sev
eral pieces of
s
by
using mobile d
rget a
nd reco
vi
deo.
-
---------------
utes
rrent
-
---------------
will
---
-------
ntil
---
-------
a
tus will be
or
mal status.
ta
tus
ata or switching
rd
video.

11.
Photo/V
ideoS
w
Toggle to swi
t
conventional
itch
ch between t
h
video recordi
n
e main interf
a
g interface.
ce and the

12.S
h
13.
C
a
T
Mod
e
Par
a
m
14.
M
T
15.
H
e
16.
R
e
Ap
p
Com
Fligh
t
utter
Tap to Hesper
p
meraS
ettin
g
a
p to enter t
h
s
Sin
g
Burs
t
selec
t
eters AWB:
T
EV:
Tap to
e
diaLibrary
a
p to enter y
sp
e
r
off/Lan
d
Ta
p to initiat
e
Ta
p to initiat
e
T
ap to stop d
turn toHom
e
Airc
raft a
u
Settings
p
ass Calibra
Go will ass
ist
c
hoto(s)/Vide
o
e camerasett
i
le shot: T
ap t
o
shot: Tap
to
how man
y p
h
a
p to set the
selec
t the exp
o
our
medialibr
a
i
ng/Stop
H
esperoff.
l
anding.
uring Hesperoff/land
tom
atically r
e
tion
ompass cali
b
r
(s)
ngs:
e
nter the sin
g
ente
r the bur
s
otos to
Hesp
e
whit
ebalance
sure v
alue
ry.
ing.
turn t
o the H
ation. Details
p
le s
hotmode
t sh
ot mode a
r.
esper
off point
lea
se refer to
nd
and
land.

“Compass Calibration” on Page 29.
Photo
graph Vibration
It’s turned off by default. When it is activated, your mobile device
will vibrate after taking photos.
A
pp Mute
It’s
turned off by default. When it is activated, your mobile device
will be mute when the app is used.
Control Me
thod
It’s se
t to “Safe Sticks” by default.
FlightGo comes with 3 control methods that users can choose between
“Motion
Sensing”, “Free Sticks” and “Safe Sticks”.
The motion sensing method uses your mobile device’s gravity
sensor. It allows you to control
H
esper’sflightbytiltingyourmobiledevice.Forspecificsonoperation,pleasereferto“Motion
Sensing Method
” on page27.
Justliketheremotecontroller,thefreesticksmethod
all
owsyoutocontrolH
esper’sflightby
hold
ingthevirtualsticksandtogglingup/down/left/right.Forspecificsonoperation,please
refer t
o “Free Sticks Method”on page 30. You can choose between
“Mode 1”(right-hand throttle) and “Mode 2” (left-handthrottle).
Justliketheremotecontroller,thesafesticksmethod
all
owsyoutocontrolH
esper’sflightby
tapp
ingonthearrowsonthefourdirectionsinthevirtualsticks.Forspecificsonoperation,
ple
ase
refer to “Safe Sticks Method”on page 32. Also, you can choose
between “Mode 1”(right-hand throttle) and “Mode 2” (left-handthrottle).
Change Wi-Fi
Information
Y
ou can change the WiFi’s SSID and password. The SSID can be
up to 16 characters. The password has to be between 8-20
characters long and can be made up of numbers, letters and/or
specialcharacters.

Hesp
erFCUpdate
Upgrade the aircraft flight control through APP.
Hesper OS Update
Upgrade the aircraft operating system through APP.
Av
ailable
C
heck the available storage space on Hesper. Please schedule your shooting progress
according to the available storage space and timely clear Hesper
’
s me
mory.
Pe
rsonal Center
Setting
Quick Guide
D
ownload Hesper Quick Start Guide, which may help you to lear n to use.
Ma
lfunction Report
Ple
ase describe the fault information, we will receive the first time to reply to you.
Sugge
stions and Feedback
En
ter your feedback, we give you the first time to reply.
Ch
ange Password
Yo
u can change your personal login password.(not aircraft WiFi connection password)
La
nguage
Se
veral Choice for Languages.
A
bout
Hi
ghGreat Website, User Agreement, et c.
Me
dia Library
Wh
en opening the media library, it will go to the photo gallery by default. Tap the
“
Vi
deo
”
butt
on at the top of the screen to switch to the video gallery.
Photos

When
autom
a
Swipe
If a ph
the to
p
Sele
c
Ta
p th
e
the da
t
Dele
t
Aft
er
s
re
mov
e
the
fil
e
Th
e br
o
---
---
dele
te
---
---
Do
w
you are connect
tically be sent to
y
up to load more t
h
oto is already do
w
right-hand corne
r
ting Pho
tos
p
hoto to select.
T
e.
ing Phot
os
elec
ting photos, t
a
th
em from your
s f
rom Hesper.
W
ws
ing page also
--
--------------
-
Wh
en an Androi
d
fr
om the mobile d
e
--
--------------
-
nl
oading &
B
ed to Hesper’s
W
our mobile devic
e
umbnails and swi
p
nloaded to your
m
of the thumbnail.
o s
elect all the p
h
p the “
Del
ete
”
b
medi
a library. Wh
e
he
n the Wi-Fi is
n
ha
s a
“
De
lete
”
b
u
-
---------------
-
device is conne
c
v
ice or from Hes
p
-
---------------
-
ro
wsing
i-Fi after you H
. The photo galle
r
e down to load n
e
obile device, a
m
ot
os Hespern in
o
ut
ton in the uppe
r
n y
ou are conne
c
o
t connected, it
w
tt
on, so you can
d
-
---------------
-
te
d to Hesper
’
s
Wer
.
-
---------------
-
esper photos, th
e
y displays thumb
n
w thumbnails.
obile phone ico
n
ne
day, tap the
“
S
r
ight-hand corne
r
ted to H
esper
’
s
W
i
ll not delete the
f
ele
te photos dire
c
---
-------------
i-
Fi, it will ask
y
---
-------------
thumbnails will
ails in date order
will be added to
elect
All
”
ne
xt to
of
the screen to
i-
Fi, it will delete
i
les from Hesper.
tl
y.
-
---------------
o
u to choose to
-
---------------

downl
o
on the
left/ ri
g
------
------
Pho
t
to y
ou
r
---
---
------
Vide
o
do
wnl
o
han
d
c
can
do
w
a “Sh
a
vide
os
---
---
After selecting p
h
ad them to your
m
thumbnail. You
c
ht on the photo br
o
----------------
-
If
you have
a
syste
m setti
the “Downlo
a
downloa
d p
h
met
hods will
be able to do
----------------
-
o S
haring
Th
ere is a
“
S
har
e
SNS
.
--
--------------
-
Sharing you
r
using m
obile
--
--------------
-
s
Br
owsing throug
h
ad vi
deos to your
or
ner after sele
c
n
load multiple vi
d
re” but
ton on b
o
dire
ctly with your
--
--------------
-
iOS mobile
d
in system s
e
downloa
d vi
d
gallery.
otos, tap the
“
D
obile device. Yo
u
an directly downl
o
wsing page. Tap
p
----------------
-
n i
OS device
,
ng
s, otherwis
d”
button in
ot
os to yo
u
do
wnload ph
o
wn
load photo
s
----------------
-
”
butt
on on the br
-
---------------
-
p
hotos will
data or switc
h
-
---------------
-
vide
os is basic
a
mobil
e device yo
u
t
ing them. There
eo
s at the same
th
the video gall
e
fr
iends on SNS.
-
---------------
-
evice users, p
l
tti
ngs, other
w
eo
s into a
n
ownload” butto
n
can also downl
o
ad and browse
t
ing on a photo wi
----------------
-
allo
w access
e, you will o
n
th
e top rig
h
r gallery.
O
to
s into a ne
w
to
your galle
r
----------------
-
o
wsing page, tap
p
-
---------------
-
nee
d to acce
s
ing to rou
ter
-
---------------
-
lly
the same as
need to tap the
“
will be a
progre
time. You can
a
ry
page and the
-
---------------
-
ease allow ac
c
ise, you wil
ew
folder a
n
in the bottom
o
ad and browse a
he previous/next
ll make it full scre
e
----------------
t
o your galle
r
ly
be able t
o
- h
and corn
e
th
er downlo
a
fol
der and
w
y.
----------------
in
g it will directly
s
---
-------------
s th
e Intern
e
Wi-Fi.
---
-------------
br
owsing throug
h
Do
wnload
”
bu
tto
n
ss b
ar during th
e
lso
background d
o
p
laying page. Yo
u
---
-------------
ess to your g
a
l o
nly be ab
l
d n
ot into
f the screen to
photo by tapping
photo by swiping
n.
----------------
y i
n
ta
p
r t
o
din
g
on’
t
----------------
ha
re your photos
-
---------------
t b
y
-
---------------
p
hotos, but to
on the top right-
do
wnload. You
w
nload. There
’
s
can share you
r
-
---------------
lle
ry
e to
your

Bef
o
preca
u
bef
or
e
Flig
h
------
------
Out
d
1.
D
on’
t
2.
Wh
e
n
3.
volta
g
4.
Ple
a
s
5.
build
6.
Do
n
o
7.
stati
o
8.
Do
n
inte
rfe
r
9.
Flig
h
10.
11.
affe
ct
e
12.
13.
positi
o
“Usag
e
Indo
o
1.
Du
ri
n
nee
ds
2.
Ind
o
o
3.
Du
ri
n
positi
o
Flig
h
◎
Ma
x
re flying please r
e
tions. This secti
o
flyi
ng Hesper, as
t En
vironme
----------------
-
Wesu
ggestyouco
n
thenovicemodeto
c
--
--------------
-
oors
fly
Hesper in bad
flyi
ng, always ke
e
wires, trees an
d
e fly
in an open a
ings, for fear that
t
t fly ne
ar comple
x
n,
for fear that th
e
ot
fly near areas
ed
. Hesper cann
o
t hei
ght should be
flight heig
h
In ar
eas
d du
e to
environm
e
If t
he G
P
ni
ng. Please fulfil
Co
nditions and
R
rs
gt
heindoorflight,
H
to be
above a cle
a
rflig
htneedstobec
g fast
flight at lo
w
ni
ng system may
n
t Restrictio
n
i
mum ascent he
Fl
ying/S
ad Disclaimer an
d
n will cover wha
t
well as de
tailson
f
nt Re
quirem
e
----------------
-
du
ctthefirstflightin
a
onduct
indoorflight
a
-
---------------
-
we
ather conditio
n
ep
Hesper in your
sh
rubbery, grou
p
re
a, do not fly nea
he GP
S signal wo
ele
ctromagnetic
Wi
-Fi signal woul
with abnormal
m
t
fly in the north a
n
l
ess than 120 me
t
t is
over 120 met
e
30
00m or highe
r
nt
al conditions. P
S
signal is we
a
l th
e requirement
est
rictions”.
esperus
estheopti
c
r t
extured surfac
e
o
nductedinawell-li
t
le
vels (0.5m or le
s
ot w
ork.
s
i
ght under the G
P
hooting
Battery Safety I
n
you need to kn
o
lig
ht and photo &
v
nts
----------------
-
nope
noutdoorare
a
f
tergettingfamiliar
w
-
---------------
-
s
, such as in high
line of sight. Ens
u
s
of people, bodi
e
r
buildings and ke
e
uld
be blocked.
environments, su
c
d
be interfered.
a
gnetic fields, fo
r
d s
outh poles.
ers
, it shall be the
rs.
a
bove sea lev
e
le
ase use with ca
u
k, Hes
per will
u
s
for the optic fl
o
flo
wandultrasonic
p
.
ar
ea(luminosity>
1
s)
, the optic flow
S posi
tioning: 5
0
structions to und
e
w and how you
i
deo shooting op
e
----------------
,andyou
canturnoff
ith
theflightcontrol.
---
-------------
wi
nd, rain, snow.
r
e that you avoid
o
s o
f water.
p a
good distanc
e
h as
near signal t
o
fe
ar that the co
responsibility of t
h
l,
the flight perf
o
ti
on.
se
the optic flo
w
w a
nd ultrasonic
ositio
ning.Theflig
5l
ux).
and
ultrasonic
m.
rstand the safety
need to prepare
ra
tions.
----------------
----------------
b
stacles, high
fr
om tall
we
r, base
mpass would be
e u
ser if
rm
ance may be
an
d ultrasonic
positioning, see
htarea

◎
Ma
x
◎
Ma
x
No-
F
Pleas
e
Acc
or
d
Inn
o-fl
y
St
atus
Prefl
Ple
as
e
OK:
1.Che
c
2.
Che
c
3.Che
c
4.Che
c
Cali
b
Hespe
r
The co
can le
a
condi
ti
o
help
th
e
---
---
◎
Bef
o
---
---
The p
r
o
Expan
d
imum ascent he
imum control di
s
ly
Zone
do not fly in area
s
in
g to regulations
,
z
ones,Hesperwill
n
In
dicatorwillbeslo
w
ig
ht Checkli
s
c
heck the followi
n
kthatH
esperandyo
u
k
thattheArmsaref
u
kthat
thepropellerbl
a
kthat
thelensesonb
o
rating the C
o
relies on the com
p
mpass is
easily int
e
d to
data inaccura
c
n a
lso affects the
a
compass to work
--
--------------
-
You’re re
quir
e
r
ethefirstflight,a
n
◎
The l
ocation
◎
Th
e Aircraft
S
◎
Th
e Aircraft
d
Ex
pand the
a
Don
otcalibratey
o
ma
gnetic fieldint
e
Do not
place
electronic de
v
and stereo e
q
--
--------------
-
cess o
f compass
c
the
Arms. Turn o
n
ight under the op
t
tance: 120m (in
o
where flying is ill
e
1
0km surroundin
g
ot
beabletoflywhil
e
yello
wflashing.Th
t
g
items before fly
rmobiledev
icehav
e
l
lyexpanded;
desandothe
rparts
o
th
theopticflowcam
e
mp
ass
ass to
determine it
s
rfe
red by other ma
g
ies,
unsafe flight, e
ccuracy o
f the co
m
a
t its best.
-
---------------
-
d to
calibrat
e
dbefor
ethefirsto
u
yo
u are flying is
q
tat
us Indicator i
s
rift
s severely, fo
r
rms b
efore c
a
ur
compassnearla
r
rf
erences.
He
sper close
t
ices (such a
s
m
uipment).
-
---------------
-
al
ibration is as foll
o
the
aircraft. Conn
e
ic flow and ultra
s
pen air free of in
gal or restricted.
areas of airports
us
ingtheGPSpos
i
ea
ppwillpromptth
e
i
ng. You can Hes
p
enoughpo
wer;
fthea
ircraftarenotl
o
raandthe
frontfacin
heading.
netic
materials an
d
ven crash
. And the
pass. So
, regula
r
c
-
---------------
-
you
r compas
s
tdoor
flight;
uite
far from the
fast
purple flash
e
xample: canno
libr
ating, so a
s
ge
metalobjectsori
o ot
her magn
e
ag
net, mobil
e
-
---------------
-
ws:
ct
to the aircraft
’
s
onic positioning:
terference).
ar
e strictly no-fly
z
tioni
ng.TheAircraf
t
no
-flyzonewarnin
g
er of
f only if all of
oseordamaged;
gcameraarec
lean.
e
lectronic device
s
on
-site magnetic fi
e
al
ibrations before f
---
-------------
in the foll
ow
i
l
ast location you
ing, indicating co
t fly straight.
to a
void inte
npl
aceswithstron
g
tic
materials
a
pho
ne, table
t
---
-------------
Wi-F
i. Enter Hesp
e
3m.
o
nes.
t
he items are
. This
ld
light
-
---------------
ng cases!
flew;
m
pass failure;
r
ference.
nd
PC
-
---------------
’
s

“
Setti
n
1.
Kee
p
turn s
o
2-3 ti
m
solid g
to ad
j
aut
om
a
2.
Ke
e
p
St
atus
angle)
.
the i
n
d
well.
O
3.
Th
e
this p
o
actu
al
------
------
Flig
h
Ino
rde
r
flight
p
---
---
gs” - “Compas
s
the aircraft hori
z
lid green if it’s se
t
es. During this r
o
reen, which mean
s
ust t
he aircraft’
s
tic
ally jump to th
e
th
e aircraft he
a
In
dicator will tur
n
S
lowly rotate it 2
-
ic
ator stays soli
d
r y
ou will need to
a
ap
p will notify yo
u
i
nt, the Aircraft
S
s
tatus.
----------------
-
◎
Af
ter the
h
vert
ical calib
r
◎
The calibr
a
resta
rt the a
i
--
--------------
-
t Pro
tection
toensuresa
feusea
n
r
otectionmeasure
s
--
--------------
-
◎
Ift
hebatterylev
e
Initie landin
g.
◎
Ifb
oththeGPS
a
working, He
s
status retur
n
level gets to
o
◎
If
the Wi-
F
Hesper will r
e
Calibration”, and
ontal (the Aircraf
t
to the required a
tation, make sur
calibration goes
w
an
gle once a
next step once it’
d
downwards v
e
soli
d white if it’
s
3 ti
mes.During thi
w
hite, which m
e
djus
t the aircraft’
s
on
ce the calibr
a
ta
tus Indicator w
i
----------------
-
o
rizontal cali
b
at
ion, don’t s
t
ti
on will Hes
p
rc
raft).
-
---------------
-
dtoavoiddamage
,
H
:
-
---------------
-
l
getstooloworam
a
n
dtheopticflowan
d
pe
r will star
t
s to normal o
r
low while ho
v
i connection
i
tu
rn and lan
d
tap on “Start”.
Status Indicator
ngle). Slowly rota
t
e the indicator st
a
ell. Or you will n
e
gai
n. The app
s done.
rti
cally (the Airc
s
et to the requi
s rotation, make s
ans calibrat
ion g
o
angle once agai
n
tio
n is completed
.
ll sh
ow the aircr
a
----------------
-
r
ation, imme
d
op m
idway.
er e
ffective i
m
-
---------------
-
IGH
GREAThasfitt
e
-
---------------
-
j
orfailureoccurs,
H
ult
rasonicposition
to hover u
n
user lands it
.
erin
g, Hesper
w
s lo
st or the a
p
if
the GPS p
o
will
e it
ys
ed
will
raft
red
ure
es
.
At
ft’s
----------------
iately begin
t
med
iately (no
---
-------------
dH
esperwithmultipl
---
-------------
esperwillimme
dia
t
in
gsystemsarenot
til th
e positi
o
But if th
e ba
t
ill ini
tiate la
n
p d
rops out,
sition
ing is b
e
----------------
he
need
to
-
---------------
e
-
---------------
ely
nin
g
tery
ding.
ing

---
---
Con
n
Co
nne
Hespe
r
you ca
n
C
hec
k
that
t
h
s re
a
d
---
---
good
---
---
Hes
p
Hes
p
Tap
i
indo
o
La
n
d
Tap i
t
Flig
h
used, or initi
a
◎
if the optic fl
o
◎
When th
e
Hesper will
s
But if the ba
will initiate l
a
◎
W
hen flying
protect
or fo
r
--
--------------
-
ectin
g the
A
c
t your mobile de
v
-XXX
XXX. Click t
o
ch
ange them in
if i
t shows that it
’
e opti
c flow positi
o
y t
o fly, and you c
a
--
--------------
-
◎
W
henflying,ke
e
d
istance awa
y
◎
Hespe
r extr
a
--
--------------
-
eroff/Landin
eroff
t, Hespe
r will
rs)
.
in
g
, it will st
art
t Control
te landing.
w and ultrasoni
c
app is mini
m
tart to hove
r
ttery level ge
t
nding.
i
ndoor or outdoo
r
a
ircraft.
-
---------------
-
ircraft to He
s
ic
e to the aircraft
’
s
co
nnect this SSI
D
“
Ap
p Settings
”
.
s c
onnected to t
h
nin
g status is nor
m
n
Hesper off.
-
---------------
-
p
Hesperinyourlin
e
from
people.
care not to run i
n
-
---------------
-
g
direc
tly Hesp
e
to desc
end a
n
positioning are
b
ized or you
until you ar
e
s too low whi
l
where are crow
d
-
---------------
-
per
Wi-Fi. The defau
, a
nd input the d
e
e
Wi-Fi, that the
a
al or th
e GPS p
o
-
---------------
-
o
fsight.Pleaseen
s
to p
eople or obj
e
-
---------------
-
r
off and asc
e
d la
nd onto t
h
eing used.
get a phone
back to the
e hovering, H
e
s of peopl
e, plea
s
---
-------------
lt S
SID(WiFi nam
e
fa
ult password is
ircr
aft
’
s bat
tery l
sitio
ning status is
---
-------------
ur
eyoukeepHesp
e
ct
s during indoo
r
---
-------------
nd
to 1.5 me
e ground.
call,
app.
sper
e add propel
le
r
-
---------------
) is lik
e
highgreat. And
e
vel is high, and
normal. If so, it
’
-
---------------
a
fl
ight.
-
---------------
ters (
1 m fo
r

---
---
Moti
o
Us
ing
y
devic
e
The le
f
the
rig
h
pictu
r
e
Fly fo
r
w
hold d
o
you
r
m
sensi
n
g
devic
e
◎
During yo
u
small scale.
P
slowly working to
w
◎
Please do
n
collision.
--
--------------
-
n Se
nsing
M
ou
r mobile devic
e
.
t-
hand half of the
t
-hand half is the
be
low:
a
rd/backward/le
f
wn
on any part
o
ob
ile device forw
a
c
an be activat
e
’s an
gle from hori
z
r first flight,
ay
attention to t
h
ards
moderate
’t operate on
a
-
---------------
-
etho
d
’s
gravity sensor
s
scr
een is the swi
p
m
otion zone whic
t/ri
ght: Your mobi
l
f
the right-hand
h
r
d/backward/left/
r
d by
holding do
w
o
ntal is within 45°
please begin
w
e flight direction a
n
-scale operati
o
too large sc
a
-
---------------
-
yst
em, you can c
o
e z
one which co
n
h
controls flying f
o
e de
vice tilted wi
t
al
f (motion zone)
i
ght. For fear of
m
n
on the screen
.
ith operating
d adjust the flight
s
n.
le, so as to av
o
---
-------------
nt
rol flight by tilti
n
tr
ols ascent/desc
e
r
ward/backward/l
e
hin 45
° from hori
z
of y
our screen,
a
i
soperation, the
m
only
when the
m
on a
peed,
id accidental
-
---------------
g yo
ur mobile
nt an
d direction;
f
t/ right, as in the
on
tal,
n
d tilt
otio
n
o
bile

Asc
en
t
S
wipe
Swipe
contin
u
F
ree
Just li
k
holdi
n
g
He
spe
directi
o
pictu
r
e
/d
escent: Swipe
and hold to contin
the left-hand hal
f
e t
he movement.
Sticks M
eth
o
e th
e remote cont
th
e virtual sticks
the American O
p
n (l
eft-hand throt
t
be
low:
th
e left-hand hal
f
u
e the movement.
(s
wipe zone) of
y
T
urn left/right:
d
roll
er, the free stic
k
a
nd toggling up/d
o
e
rator mode as a
le
); the right stic
k
(s
wipe zone) o
f
o
ur screen up/d
o
s
method allows
y
w
n/left/right.
n example, the le
f
co
ntrols flying fo
yo
ur screen lef
t
wn. S
wipe and
h
ou to co
ntrol Hes
t sti
ck controls as
rward/backward/l
e
/ri
ght.
ol
d to
pe
r
’s flig
ht by
c
ent/descent and
f
t/right, as in the

Ascen
t
and d
o
Turn l
e
and ri
g
Fly f
or
w
the ri
g
mov
e
m
---
---
the po
i
---
---
Safe
Just li
k
by t
ap
p
Th
e o
p
tap
pin
g
“Fr
ee
S
---
---
◎
/descent: Hold do
w
wn. Toggle and h
o
ft/right: Hold dow
n
ht. Toggle and ho
ar
d/backward/le
f
ht circl
e) and to
ent.
--
--------------
-
Ho
ld down on
a
nt w
here you hold
--
--------------
-
Sticks M
eth
o
e th
e remote cont
i
ng on the arrow
s
er
ations of the sa
on th
e arrows o
n
t
icks Method” on
--
--------------
-
Af
ter choosin
g
“Am
erican
O
“Japanese O
p
n on the left stic
k
ld to continue the
on the left stick
ld to continue the
m
t/ri
ght: Hold down
ggle up/down/left
/
-
---------------
-
ny
part of the left
s
d
own; so it is for
t
-
---------------
-
d
roll
er too, the safe
o
n the four direct
i
fe
sticks method
a
t
he four directio
n
pa
ge 30.
-
---------------
-
“Safe sticks
”
pe
rator”(left-
er
ator” (righ
t
(the dot at the c
e
movement.
(the dot at the ce
n
ovement.
on the right stick
(
rig
ht. Toggle an
d
-
---------------
-
i
de of the screen,
h
e right stick.
-
---------------
-
sti
cks method all
o
on
s in the virtual
s
re
similar to the f
r
s i
nstead of togg
l
-
---------------
-
,
you can cho
o
h
and throttl
e
-h
and thrott
l
nter of the left cir
c
terof the left circl
th
e dot at the ce
n
hol
d to contin
u
---
-------------
and the left stick
w
---
-------------
ws
you to control
ticks
.
ee
sticks method.
i
ng. For the detail
---
-------------
se between
) and
e).
le) and toggle up
e) and toggle left
ter o
f
e t
he
-
---------------
ill
follow to
-
---------------
He
sper’s flight
How
ever, it uses
s, please refer to
-
---------------

T
aki
n
T
aki
n
Single
will He
Burst
s
will He
Yo
u c
earph
o
---
---
------
EIS
E
IS(El
e
appl
ie
s
re
cordi
How to
Con
v
1.
Tap
2.
The
but
ton
of the
i
you w
a
g Ph
otos/Vi
d
g Ph
otos
sh
ot: In the singl
e
sp
e
r
on
e photo.
h
ot: In the burst
s
sp
e
r
a
series of b
u
an H
esper phot
o
n
es. It is the sam
e
--
--------------
-
◎
Thede
fault
m
amer
a Sett
i
mo
de
a
andselectho
w
Modes”menu
.
P
lease refer
t
◎
Thephototi
m
button to
ac
t
co
untdown.
P
----------------
-
ct
ronicImageStabi
l
to
both the con
v
ng
. It defaults to s
w
disable
EIS: You
c
e
ntional Vid
the Photo/V
ideo S
w
conventiona
l vide
o
t
o start recording.
n
terface to end yo
u
nt.
The duration wi
l
eo
Recordi
n
sh
ot mode, ever
y
ho
t mode, every
rs
t shot photos.
s
using the vol
u
method as usi
n
-
---------------
-
odeissettosin
g
ngs” button
t
nd
the
m
anyphotost
o
o
“Camera Se
er
isclosedby
d
ivate the pho
t
lea
se refer to
----------------
-
ization
)candeblurt
h
entiona
l video rec
i
tch on.
an close E
IS in
“
C
a
eo
Recordin
g
itch” to
go to the
c
recording
interfa
Tap the
“
St
o
r
recording. Conv
e
l be
displayed at th
g
ti
me you tap the
time you tap the
me bu
ttons on
g
the “Shutt
e
-
---------------
-
leshot.Y
oucan
t
o switc
h betw
burst
Hes
per(3phot
o
ttings” on pa
g
ef
ault.Youcan
t
o ti
mer and s
e
“Photo Tim
er
----------------
-
eimagesofavideo,
e
ord
ing and the 1
0
mera Se
ttings
”
-
“
onventiona
l video
r
ce is as
follows.
T
p R
ecording
”
but
t
o
nt
ional video reco
e top of the interfa
c
“Shutter” bu
t
“Shutter” bu
t
y
our mobile dev
i
r
” button.
---
-------------
apt
he “
een the single
shot
m
sby
default)in
t
e 17.
apt
he “Ph
o
lect the
” o
n page 17.
----------------
l
iminatingjitter,jelly,
s au
to-track short
Se
ttings
”
- “EIS”.
eco
rding interface.
ap
the
“
R
e
n
on the right-ha
n
r
ding can last as l
o
e.
to
n, it
to
n, it
ce o
r
-
---------------
C
shot
ode,
he“
to
Timer”
----------------
etc
. It
video
cord”
d
side
ng as

---
---
------
Orbi
t
Or
bit
e
origi
n)
When
flies b
a
cou
nt
e
--
--------------
-
Duringt
heco
n
hod,
the fr
ee sticks m
e
--
--------------
-
(O
nly unde
r
na
bles the aircraf
t
w
ith a certain radi
using it, first, you
ck
ward and upw
a
rcl
ockwise or cloc
-
---------------
-
ventionalvide
o
t
hod or the safe
s
-
---------------
-
Outdo
or G
P
to
automatically f
l
us
and at a certai
n
s
et the radius an
d
r
d from the origin
kwise. Shown as
f
-
---------------
-
rec
ording,you
c
tick
s method to c
o
-
---------------
-
S Positionin
g
y
and record vide
o
a
ltitude.
t
he altitude to d
e
t
o the orbit. Finall
y
oll
ows (taking cou
---
-------------
anuset
hemot
i
ntr
ol the flight.
---
-------------
)
ar
ound a certain
ter
mine the orbit.
, yo
u control it to
nterclockwise for
e
-
---------------
onsensi
ngmet
-
---------------
po
int (the
T
hen, the aircraft
fly along the orbit
xam
ple):

Ho
w to use it:
1.
Fly Hesper to any position (the origin). Then tap the “Orbit” on the left side of the
interface, and select.
2.
In the settings interface, drag the drone icon to the blue area to set the altitude
and the radius of the orbit. The horizontal axis shows the radius, a nd the vertical
axis shows the altitude. Please make sure that there is no obstacle near the orbit.
Th
eaircraftwillflytothepositionwhereyoudragitto.Theradiusandthealtitudewillbe
displayed on the screen as foll ows. After you’ve set the radius and the altitude, tap
the “Start” button to go to the control interface.
3.
In t
he control interface, the two round buttons respectively represent
counterclockwise orbiting and clockwise orbiting, as shown below. Click the left
button, and the aircraft will
flyandrecordvideoaroundtheorigincounterclockwisewiththesetradiusandattheset
altitude;Clicktherightbutton,andtheaircraftwillflyandrecordvideoaroundtheorigin
clockwise. The duration will be displayed at the top of the interface.

---
---
------
--
--------------
-
◎
The shor
t
positioning.
◎
Pl
easebecare
f
finger
offthebutt
o
--
--------------
-
-
---------------
-
video f
eature
c
ul
nottocollidewith
o
ntostopi
fnecess
a
-
---------------
-
-
---------------
-
an be used o
n
th
erobjectsduring
o
ry.
-
---------------
-
---
-------------
ly for
outdoo
r
r
biting.Releasey
o
---
-------------
-
---------------
GPS
ur
-
---------------

Ta
rg
Target
movin
g
How t
o
1.
Fly
corne
r
2.
Dr
a
w
Co
ver
3.
Ta
p
red fr
a
mov
es
et T
racking (
tracking enables
target you’ve ch
o
use it:
Hespe
r
to
over 3
of the operation i
n
a f
rame on the
s
th
e target with the
the “Start Tracki
n
me will
turn gree
n
,
Hesper will follo
w
O
nly under
O
the aircraft to aut
o
sen.
meters above th
e
t
erface, and sele
c
cr
een to select th
e
re
d frame.
g
” button in the b
, in
dicating the t
a
it.
utdo
or GPS
matically follow
a
ground. Then t
a
t list.
ta
rget to follow.
A
o
ttom left-hand c
o
rg
et tracking is s
Positioning)
nd record video
o
p t
he bottom lef
t
red frame will sh
rn
er of the scree
n
tar
ted. When the
n the
-
hand
ow up.
. T
he
target

4.
Afte
r
------
------
Retu
Retu
r
to th
e
to H
o
---
---
------
------
-
------
you’vefinishedthe
t
----------------
-
◎
The target tra
c
◎
If
the illumina
t
s
udden turn or o
v
◎
He
sper will h
o
◎
Please be ca
r
“
St
op Tracking
”
--
--------------
-
rn to Ho
me (
O
n to
Home e
n
H
esperoff po
me”
in the b
o
--
--------------
-
◎
I
f there are t
r
r
eturn, Hesper
m
between the
curr
e
◎
I
f it is about t
o
to
avoid the obst
a
--
--------------
-
--
--------------
-
◎
T
he return to
h
◎
Y
ou can tap t
h
--
--------------
-
argettracking,tap
p
----------------
-
king feature can
b
i
on changes dras
t
e
rlaps with a sim
i
ver f
or next order
e
ful not to collide
w
bu
tton if necessa
r
-
---------------
-
nly
under
O
ables t
he airc
r
int and land.
H
tt
om of the i
n
-
---------------
-
ees,
utility poles, h
ay col
lide with it.
nt
position of Hes
p
co
llide, please tap
cle manually.
-
---------------
-
-
---------------
-
om
e feature can
b
e
“Stop” button to
s
-
---------------
-
ingthe“StopTrack
i
----------------
-
e used only for o
u
ic
ally, or the targe
t
l
ar object, Hespe
r
if l
ose the target
d
ith
other objects
d
y.
-
---------------
-
utdoor G
PS
af
t to automa
ow to use it:
terfa
ce.
-
---------------
-
ighline o
r other ob
s
Please
confirm th
a
er and
the Hesper
o
the “s
top” button,
o
-
---------------
-
-
---------------
-
e used on
ly for out
d
top
for other oper
a
-
---------------
-
ng”buttontoquit.
----------------
tdoor GPS positi
o
mo
ves too fast,
m
may lose the targ
uri
ng the target tr
a
u
ring target trac
k
---
-------------
Positioning)
tic
ally return
Tap “Return
---
-------------
tacles on
the way
t
there are no ob
s
f
f point.
r immed
iately cont
r
---
-------------
---
-------------
oor
GPS positioni
n
t
ions in the way to
---
-------------
----------------
ning.
ak
es a
et.
cki
ng process.
i
ng. Tap the
-
---------------
----------------
of the
tacles
ol
it
-
---------------
----------------
g.
retu
rn.
-
---------------

FCC Statem
ent
This equipment has been tested and found to comply with the
limits for a Class B digital device, pursuant to Part 15 of the
FCC Rules. These limits are designed to provide reasonable
protection against harmful interference in a residential
installation. This equipment generates uses and can radiate radio
frequency energy and, if not installed and used in accordance
with the instructions, may cause harmful interference to radio
communications. However, there is no guarantee that
interference will not occur in a particular installation. If this
equipment does cause harmful interference to radio or television
reception, which can be determined by turning the equipmentoff
and on, the user is encouraged to try to correct the interference
by one or more of the following measures:
-- Reorient or relocate the receiving antenna.
-- Increase the separation between the equipment and receiver.
-- Connect the equipment into an outlet on a circuit different
from that to which the receiver is connected.
-- Consult the dealer or an experienced radio/TV technician for help.
This
devicecomplieswithpart15ofth eFCCRules.Operationissubjecttothefollowing two
conditions:(1) This device may not cause harmful interference,
and (2) this device must accept any interferencereceived,
including interference that may cause undesired operation.
C
hanges or modifications not expressly approved by the party responsible for compliance
could void t
he user's authority to operate the equipment.
This equipment complies with FC
C radiation exposure limits set
forth for an uncontrolled environment. This equipment should be

installed and operated with minimum distance 20cm between the
radiator & your body.

In
need of maintenance service, please contact your dealer,
or contact HIGHGREAT customer service in the following
ways:
E-mail: ser
vice@hg-fly.com
T
EL: 400-888-9686
W
echat: HighGreat-service
 Loading...