

Page 1
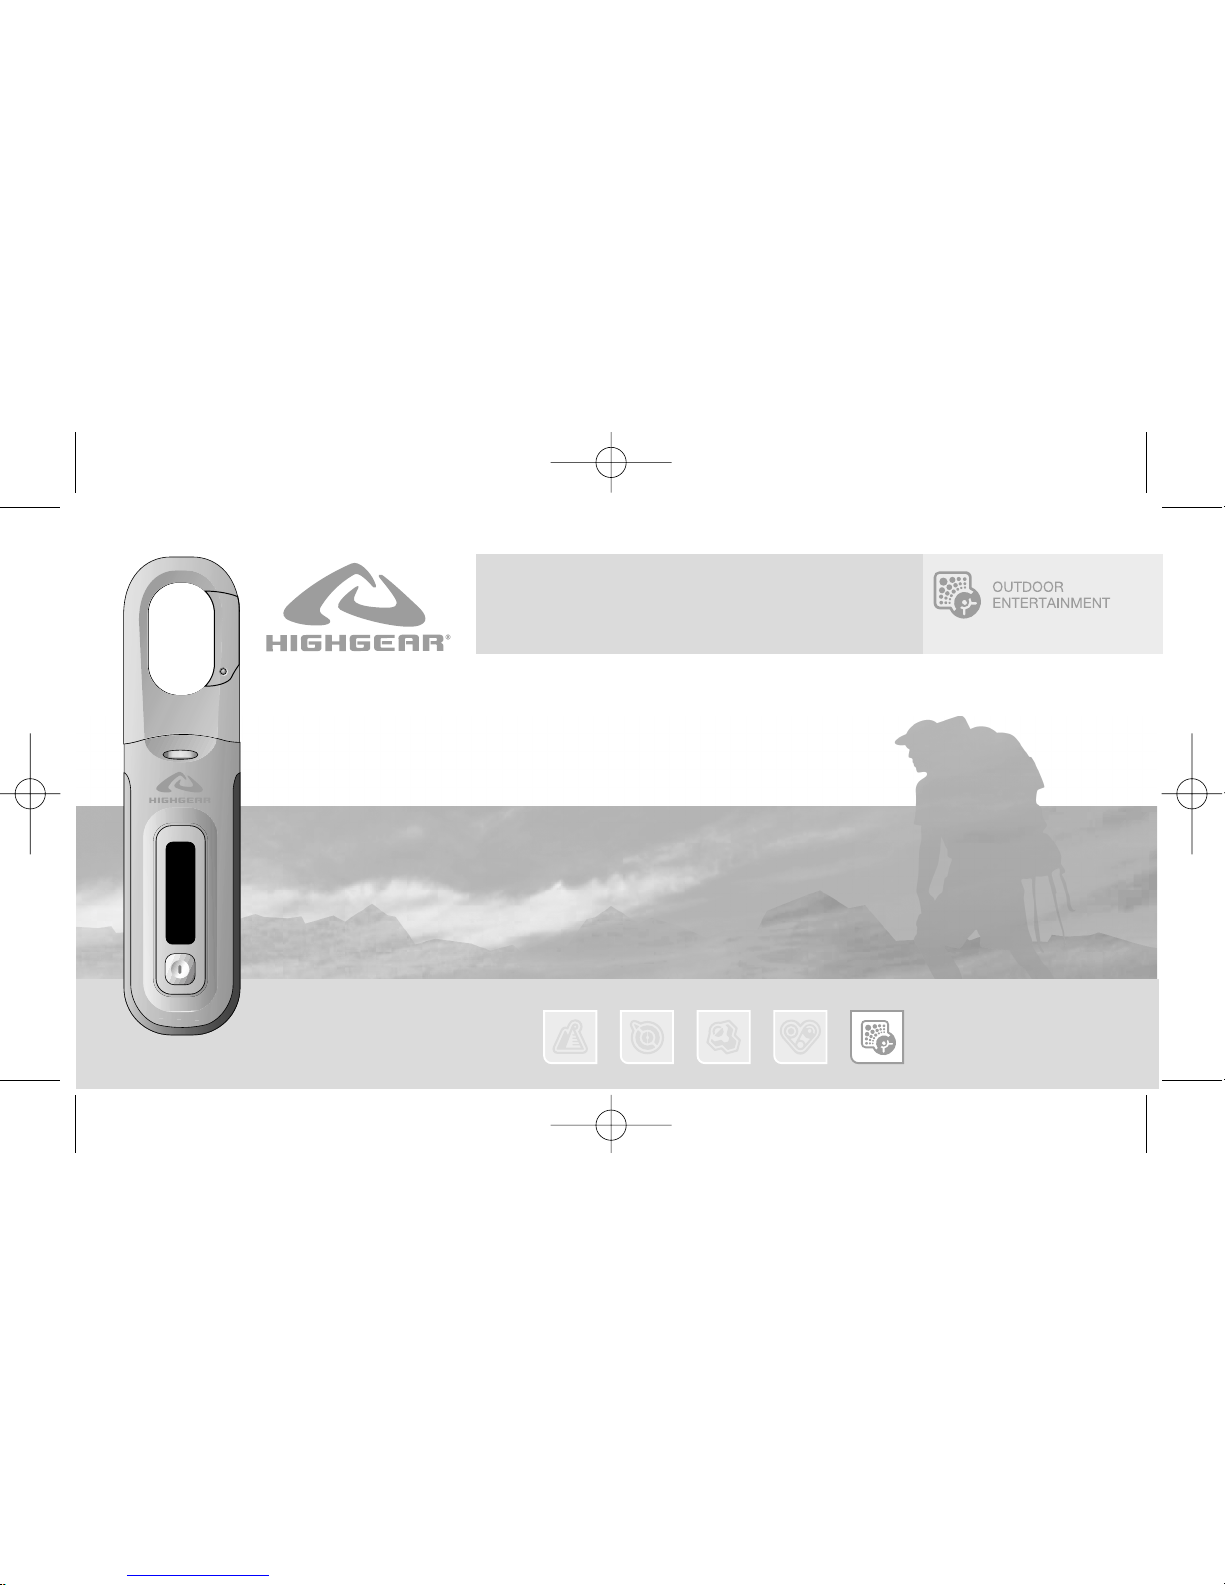
TrailAudio
Digital Outdoor Audio
HGTrailAudio_man 4/14/05 11:50 AM Page 1
Page 2
TRAILAUDIO
Digital Outdoor Audio
TABLE OF CONTENTS
english français español japan china
GENERAL INFORMATION
Introduction 1
Safety Information 2
Warnings and Cautions 3
Product Contents 4
Product Specifications 5
System Requirements 6
BASIC OPERATION
Connecting to Your Computer 7
Use as an External Hard Drive 8
3rd Party Music Software 8
Firmware Upgrades 8
Trail Audio Display, Parts and Controls 9, 10
Using the Menu System 11
Modes of Operation 12
MUSIC MODE – BASIC FUNCTION
Playing Music Files 13
Selecting Tracks 13
Fast Forward and Reverse 13
A-B Looping 13
Line-In Recording 14
MUSIC MODE – MENU OPTIONS
Playback (Playmode) 15
Equalizer 16
Recording Bit Rate 17
Delete File 18
System Settings 19
HGTrailAudio_man 4/14/05 11:50 AM Page 2
Page 3
SYSTEM SETTINGS – MENU OPTIONS
Sleep Timer 20
Idle Time 21
Resume 22
Backlight Time 23
Contrast 24
Scroll Speed 25
Default 26
Firmware Version 27
Automatic Silence Detection (ASD) 28
FM RADIO MODE – BASIC FUNCTION
FM Radio Mode 29
Manual and Preset Modes 30
Setting Channel Presets 31
Deleting Channel Presets 32
Stereo/Mono Operation 33
Recording From FM Radio 34
Formatting your Trail Audio Player 34
TROUBLESHOOTING 35
TRAILAUDIO
Digital Outdoor Audio
TABLE OF CONTENTS
english français español japan china
HGTrailAudio_man 4/14/05 11:50 AM Page 3
Page 4
INTRODUCTION
Congratulations on your purchase of your Trail Audio device. Designed to meet the needs of outdoor enthusiasts, Trail Audio
units are among the worlds first MP3 players water and shock resistant enough to be safely used in the types of environments
commonly found while participating in outdoor recreational activities. The design of Trail Audio units make it easy and
convenient to use in an outdoor environment. Large buttons make operating the unit quick and easy and the carabiner clip system
allows you to easily attach the player to your belt, jacket, backpack or hydration device. Trail Audio products also feature a fully
integrated USB connection which eliminates the need for a USB cable and allows the unit to be directly attached to your
computers USB ports. Besides being used as an MP3 player, your player may also be used as an external hard drive storage
device for your computer.
Please read the following manual carefully to familiarize yourself with the functions of the unit. Here are some of the key
features of your Trail Audio unit:
TRAILAUDIO
Digital Outdoor Audio
GENERAL INFORMATION1
english français español japan china
➥ 256MB or 512MB internal memory
(depending on product version)
➥ MP3, WMA, ADPCM playback
➥ FM with 12 preset channel
➥ Supports ID3Tag
➥ Firmware upgrades available
➥ No PC software required for file
transfer
➥ Acts as an external drive, supports
file storage and transfer
➥ Real time Clock display
➥ Negative LCD display
➥ Direct USB connection with
computer
➥ A-B looping
➥ 5 Graphic equalizers
➥ Sleep preset
HGTrailAudio_man 4/14/05 11:50 AM Page 4
Page 5
GENERAL INFORMATION 2
english français español japan china
COPYRIGHT NOTICE
Distribution of MP3 files
without permission from the
content owner is against the
copyright laws. HIGHGEAR,
Inc. will not be liable for such
actions.
SAFETY INFORMATION
Modifications not authorized by the manufacturer may void user’s authority to operate this device.
This equipment has been tested and found to comply with limits for class B digital device, pursuant
to part 15 of the FCC rules. These limits are designed to provide reasonable protection against
harmful interference in a residential installation. This equipment generates, uses and can radiate
radio frequency energy. If not installed and used in accordance with the instruction, may cause
harmful interference to radio communications. However, there are no guarantees that interference
will not occur in a particular installation. If this equipment does cause harmful interference to radio
or television reception, which can be determined by turning the equipment off and on, the user is
encouraged to try to correct the interference by one or more of the following measures:
➥ Reorient or relocate the receiving antenna.
➥ Increase the separation between the equipment and receiver.
➥ Connect the equipment into an outlet on a circuit different from that to which the receiver is
connected.
➥ Consult the dealer or an experienced radio / TV technician for help. Keep in mind, that
modifications not authorized by the manufacturer may void users authority to operate this
device.
Strong electro static charges may render the Trail Audio unit inoperable and it will not respond to
key presses. If this occurs, simply open the unit, remove and reinstall the battery.
TRAILAUDIO
Digital Outdoor Audio
HGTrailAudio_man 4/14/05 11:50 AM Page 5
Page 6
WARNINGS AND CAUTIONS
WARNING: Do not use your Trail Audio player under conditions which require you to be aware of
your surroundings such a bicycling, skiing, running in populated areas. Wearing your Trail Audio
player may impair your ability to hear and quickly respond to certain situations.
CAUTION: Do not expose your Trail Audio Player to unnecessary shock or extreme vibration.
CAUTION: Do not expose your Trail Audio Player to chemicals, direct sunlight or extreme heat.
CAUTION: Keep your Trail Audio Player away from strong magnetic fields as this may cause you to
lose information stored in the unit’s memory.
CAUTION: While your Trail Audio player is designed to be water resistant when not being used, we
strongly recommend you avoid allowing the unit to become wet or submerged. When in use, the unit
remains mostly water resistant. However, it is possible for water to enter the unit at the headphone
jack when the headphones are installed. Failure to properly install any of the seals of the unit will
result in a reduction or elimination of water resistance.
Care should also be taken not to press any keys while the unit is submerged or wet as this may
cause water to be forced past the key seals damaging the unit..
TRAILAUDIO
Digital Outdoor Audio
GENERAL INFORMATION3
english français español japan china
HGTrailAudio_man 4/14/05 11:50 AM Page 6
Page 7
TRAILAUDIO
Digital Outdoor Audio
GENERAL INFORMATION 4
english français español japan china
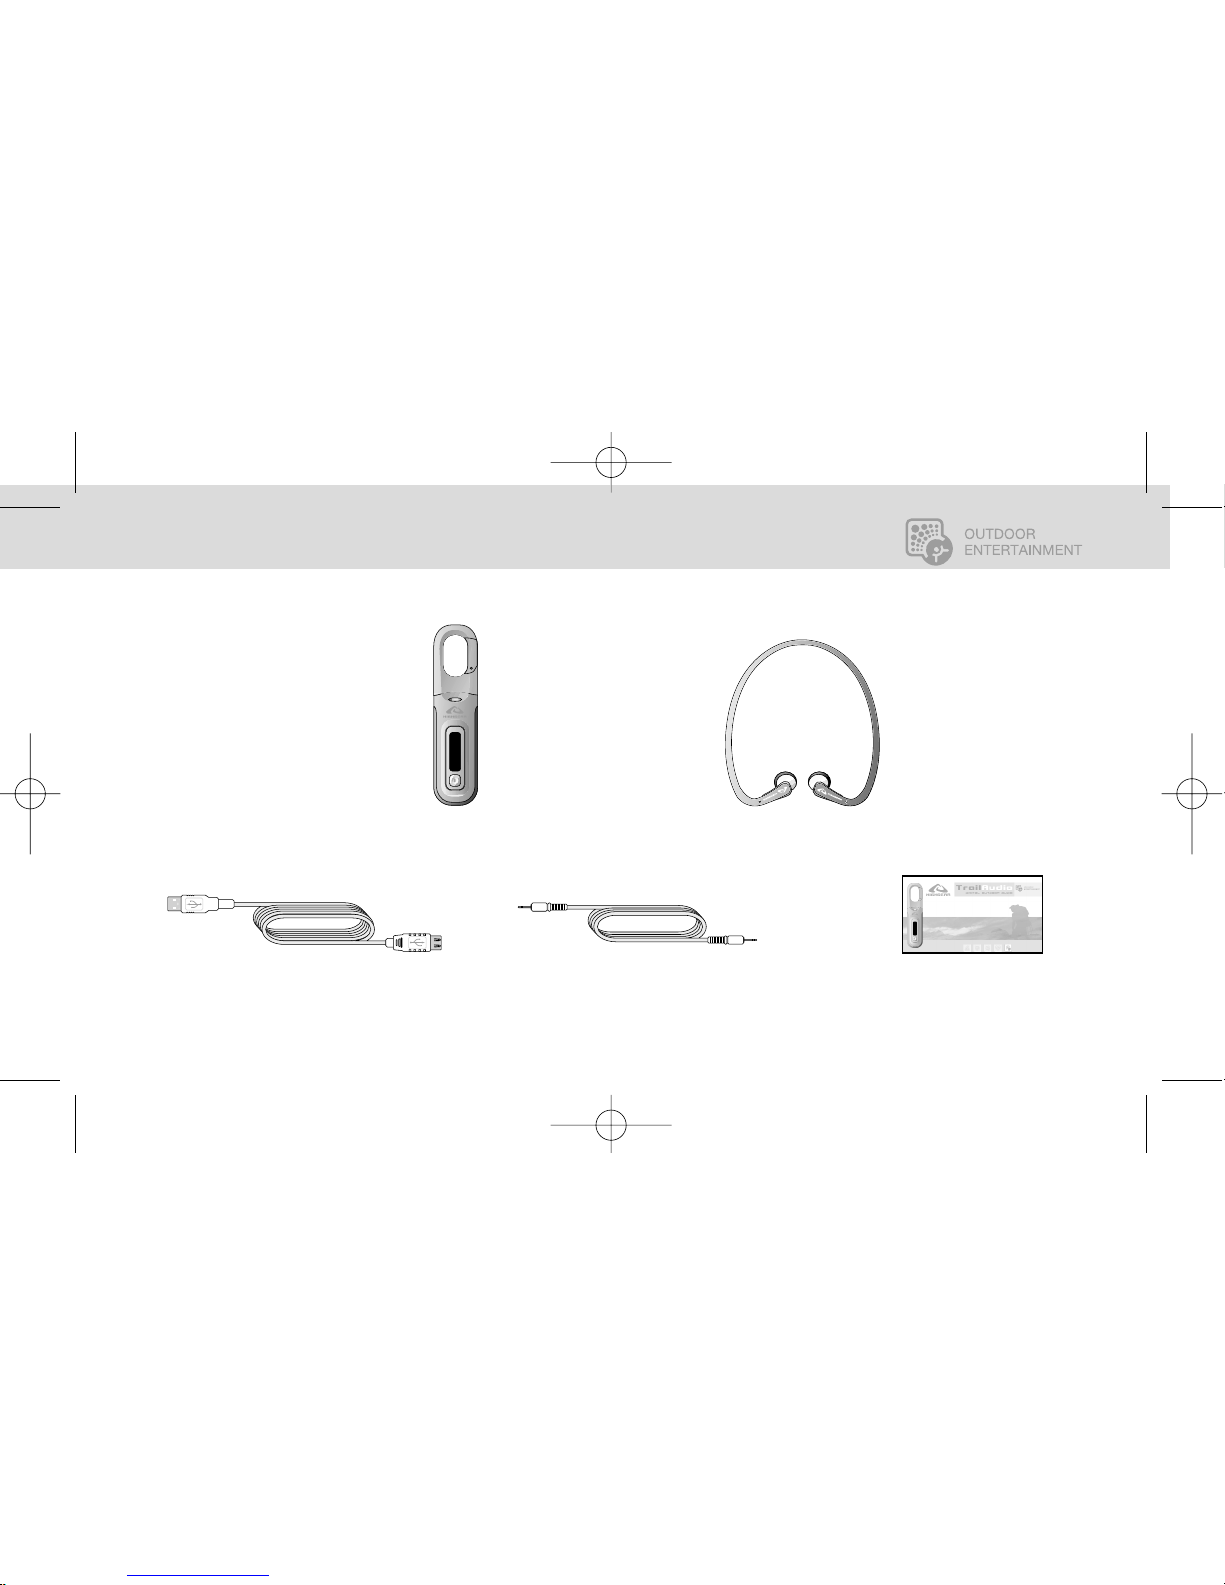
Main Unit
USB Extension
Cable
Line-In Cable User Manual
Stereo Earphones
PRODUCT CONTENTS
HGTrailAudio_man 4/14/05 11:50 AM Page 7
Page 8
PRODUCT SPECIFICATIONS
Dimensions (L x W x H) 141 x 34 x 22mm
Net Weight 49 grams
Internal Flash Memory 256MB/512MB (Dependent on Model)
Power Supply 1.5v AAA
PC Interface Direct USB
Radio Function FM with auto scan and 12 preset channels
Digital Music Format Playback MP3, WMA, all bit rates including VBR
Signal to Noise Ratio > 90dB
Frequency Range 20Hz-20KHz
Battery Life Approximately 10 hours
Equalizer Normal, Jazz, Rock, Classic, Pop, User Default
Play Mode Normal, Repeat one, Repeat all, Shuffle, Repeat
Shuffle
TRAILAUDIO
Digital Outdoor Audio
GENERAL INFORMATION5
english français español japan china
HGTrailAudio_man 4/14/05 11:50 AM Page 8
Page 9
SYSTEM REQUIREMENTS
Your PC must have the following minimum specifications:
➥ Windows 98SE, ME, 2000, XP
➥ Pentium II 200
➥ 64MB RAM
➥ 500MB Hard disk space
➥ CD-ROM drive
➥ USB 1.1
Trail Audio players should work with Apple Macintosh products running OS X and higher. However,
Trail Audio players may not be supported by future generations of Apple Macintosh operating
systems.
The MP3 player is installed as a mass storage device. The driver installation is not necessary unless
your PC is running Windows 98/SE.
Windows 98, ME, 2000 and XP are registered trademarks of the Microsoft Corporation. Pentium is a registered trademark of the Intel Corporation.
Apple and Macintosh are registered trademarks of the Apple Corporation.
TRAILAUDIO
Digital Outdoor Audio
GENERAL INFORMATION 6
english français español japan china
HGTrailAudio_man 4/14/05 11:50 AM Page 9
Page 10
Trail Audio players are mass storage devices and function like a small external hard drive to your computer. Simply plug the unit
into any functional USB port and your computer will, in most cases, automatically recognize it. Once recognized, you can simply
drag and drop file from your computer to your Trail Audio player in the same manner as you would move any other file.
With most operating systems, no driver or software installation is required. A special driver is required for users running
Windows 98SE, please download the driver to your desktop from the High Gear website (www.highgear.com) After
downloading the file to your desktop; double click the driver file (setup.exe). Follow onscreen prompts to complete the driver
installation process.
CONNECTING YOUR TRAIL AUDIO PLAYER TO YOUR COMPUTER:
1. Switch on the player and connect it directly to your computer using the USB jack located underneath the
carabiner cover. If it is not possible to connect the unit directly to a USB port, please use the USB extension cable
supplied in the package.
2. Double click on "My Computer" on the desktop of windows, there will be an additional drive created and given a
drive letter.
3. If properly connected to your PC, you will see "USB Connected" displayed on the player's screen.
4. To transfer music files to your MP3 player, simply drag the files from the Windows File Explorer and drop them to
the drive corresponding to your Trail Audio player. You can also upload files from the player to the PC by doing the
reverse.
TRAILAUDIO
Digital Outdoor Audio
BASIC OPERATION7
english français español japan china
HGTrailAudio_man 4/14/05 11:50 AM Page 10
Page 11
USING YOUR TRAIL AUDIO PLAYER AS AN EXTERNAL HARD DRIVE
Your Trail Audio player can also be used as a "memory stick" for the storage of any type of nonmusic file as long as it does not exceed the available memory of the unit. This makes the unit
extremely useful for quickly transferring small to medium sized files between computers.
USING THIRD PARTY MUSIC MANAGEMENT SOFTWARE
Your Trail Audio player is compatible with Music Match and other music management software. You
can directly rip your audio CDs to WMA or MP3 format using most music management software and
directly drag and drop from the software to the player.
FIRMWARE UPGRADES
Check www.highgear.com for new firmware upgrades. New firmware developments may provide
additional functions as well as improvements of the Trail Audio operating system. Upgrades will be
posted as they become available.
TRAILAUDIO
Digital Outdoor Audio
BASIC OPERATION 8
english français español japan china
CAUTION: Only unplug
the USB cable when all
download procedures
are completed.
Do not unplug the USB cable
when the LCD is still
displaying "USB writing" as
doing so may corrupt the files
stored in the player and you
will need to re-format the
MP3 player. If the player
encounters abnormal
interruption during recording
such as battery removal, you
may also need to reformat it.
HGTrailAudio_man 4/14/05 11:50 AM Page 11
Page 12
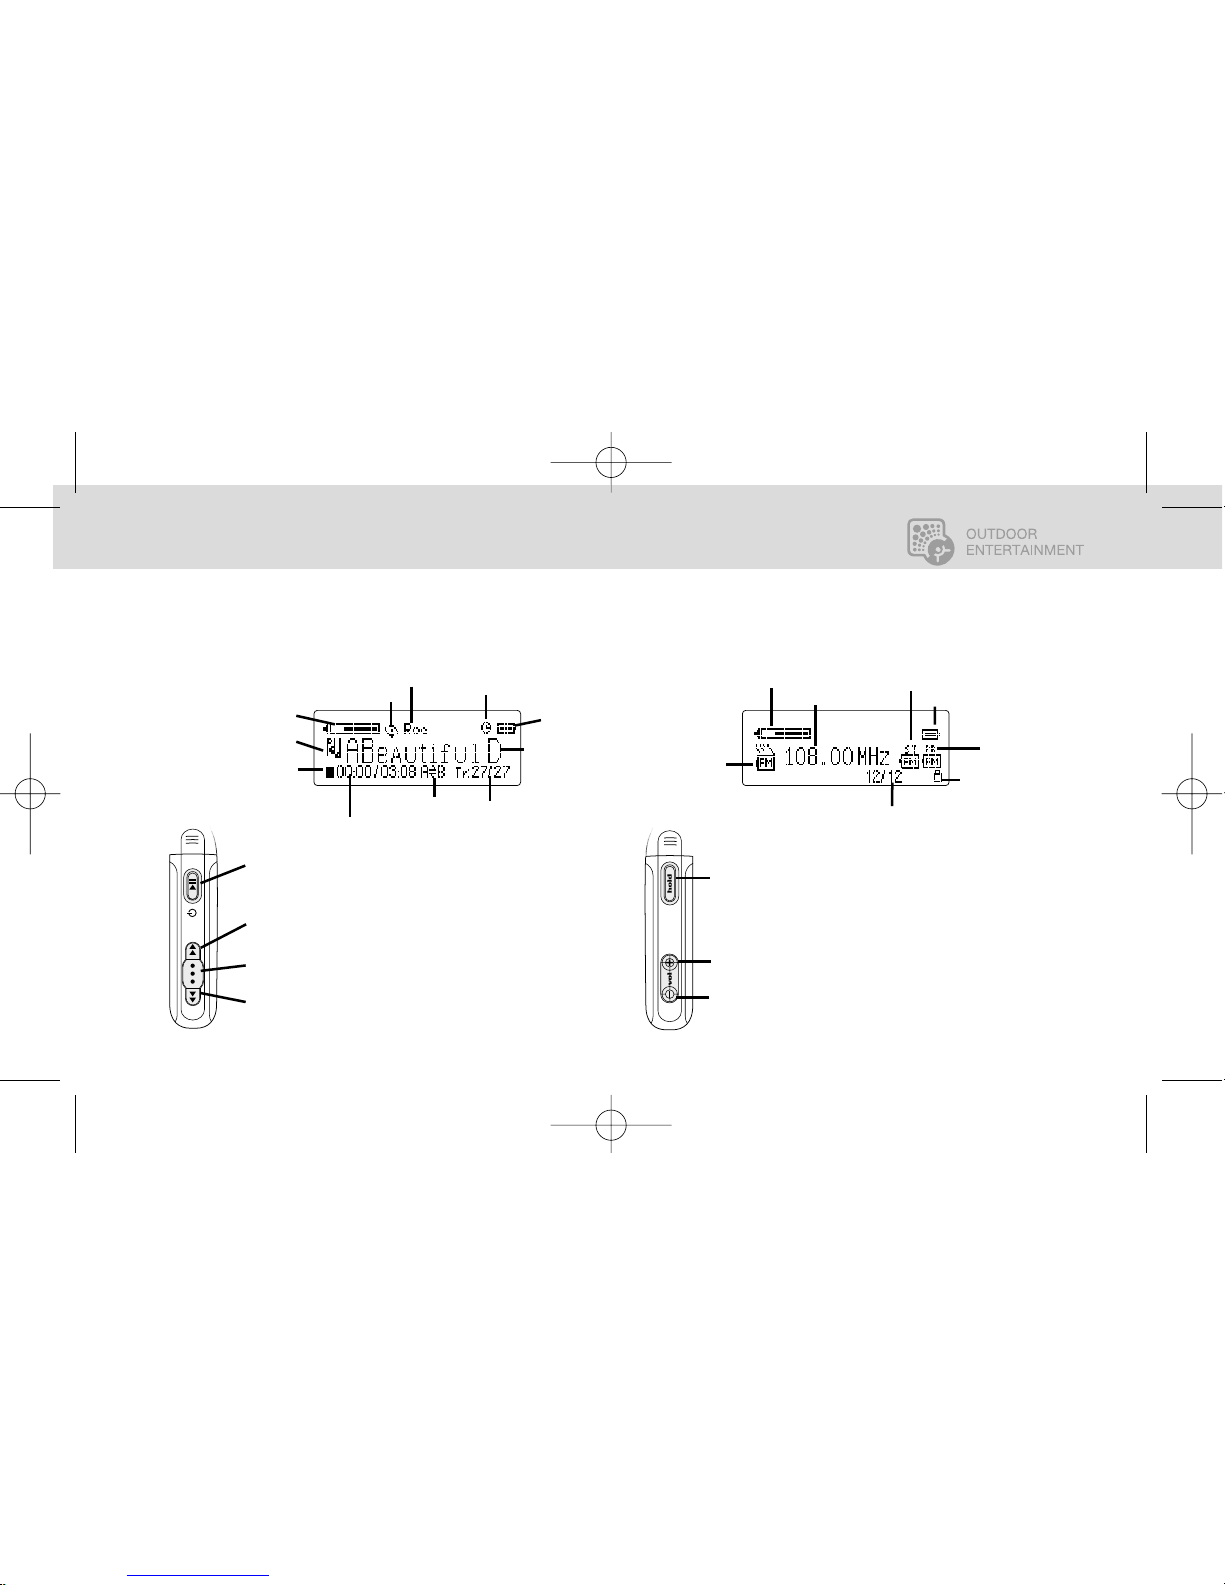
DISPLAY, PARTS AND CONTROLS OF YOUR TRAIL AUDIO PLAYER
TRAILAUDIO
Digital Outdoor Audio
BASIC OPERATION9
english français español japan china
FORWARD KEY press to scroll forward through songs. Press and
hold to fast forward through a song while playing.
MENU KEY press to enter the programming menu of the Trail Audio
Player.
BACKWARD KEY press to scroll backward through songs. Press and
hold to fast backward through a song while playing.
PLAY/PAUSE – ON/OFF press and hold to turn the Trail Audio player
on and off. Press to play or pause the playing of any individual file.
SLEEPTIME INDICATOR
FILE NAME/SONG TITLE
VOLUME LEVEL
PLAY STATUS INDICATOR
PLAY MODE INDICATOR
MODE INDICATOR
CURRENT PLAYTIME/ TOTAL PLAYTIME
A-B LOOPING
HOLD KEY press and hold for 2 seconds to lock all key functions—
when activated the hold icon will appear on the display.
VOL + press to increase volume.
VOL - press to decrease volume.
BATTERY LEVEL
EQ SETTING
FREQUENCY
FM MODE
INDICATOR
STEREO/MONO
INDICATOR
MANUAL/PRESET
MODE INDICATOR
VOLUME LEVEL
BATTERY LEVEL
STATION PRESET INDICATOR –
(FREQUENCY SEARCH INDICATOR
APPEARS HERE IN NORMAL
MODE)
KEY HOLD INDICATOR
TRACK NUMBER
MUSIC DISPLAY
FM RADIO DISPLAY
HGTrailAudio_man 4/14/05 11:50 AM Page 12
Page 13
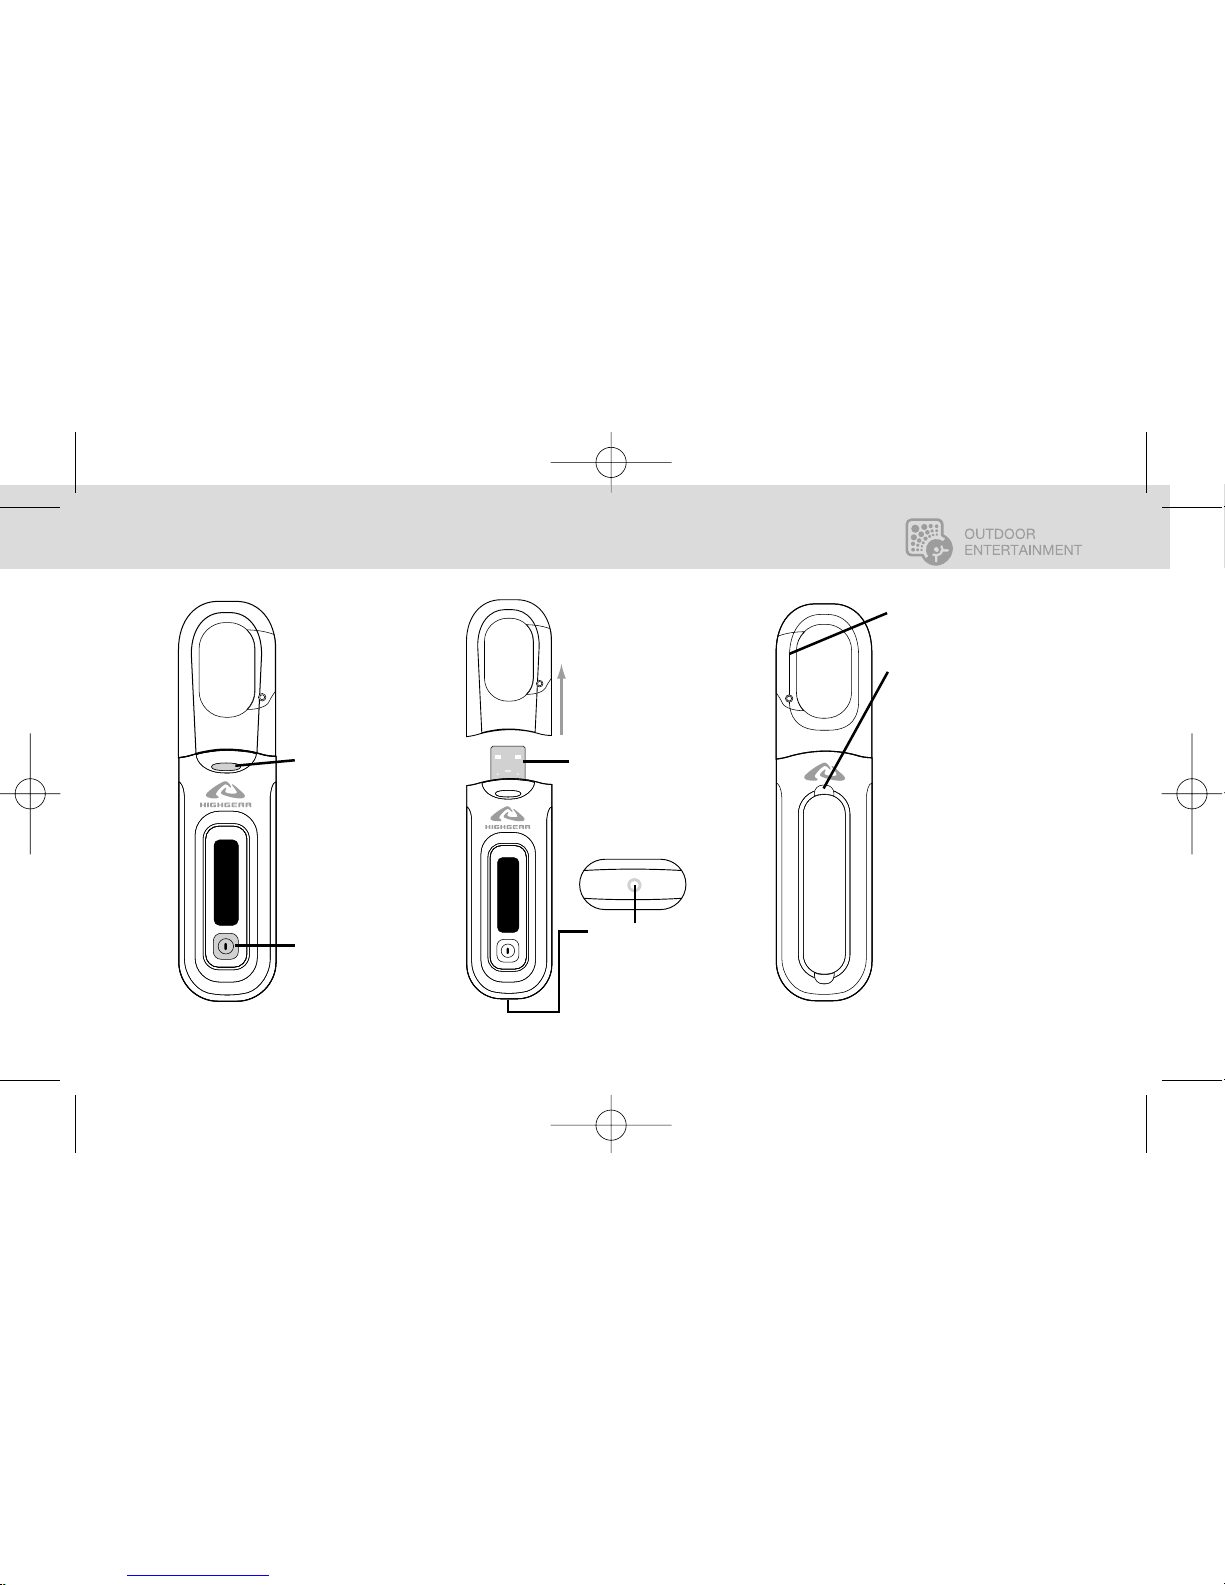
HEADPHONE JACK
allows you to connect
the Trail Audio Player to
headphones or other
output source.
RECORD/A-B press to
start and stop recording
from the FM radio or linein source. Or capture an
a-b segment during
playback.
TRAILAUDIO
Digital Outdoor Audio
BASIC OPERATION 10
english français español japan china
USB PORT allows direct
connection of the Trail Audio
Player to a computer for
transferring files.
LINE-IN PORT
allows you to
connect the Trail
Audio Player to an
external music
source.
BATTERY COVER secures power
source of the Trail Audio Player.
The battery cover of the Trail Audio
Player is specially designed to form
a water tight seal when properly
closed. To assure a proper seal,
press the door fully into position
until it is fully flush with the main
body of the player. Failure to fully
seal the battery door may result in
moisture entering the unit.
The Trail Audio Player uses one 1.5v
AAA battery as its power source.
When replacing the battery pay
attention to the polarity of the
battery. The positive (+) terminal of
the battery should be facing AWAY
from the carabiner clip of the unit.
CARABINER CLIP allows you to
secure the Trail Audio Player to
clothing, backpack, etc.
HGTrailAudio_man 4/14/05 11:50 AM Page 13
Page 14
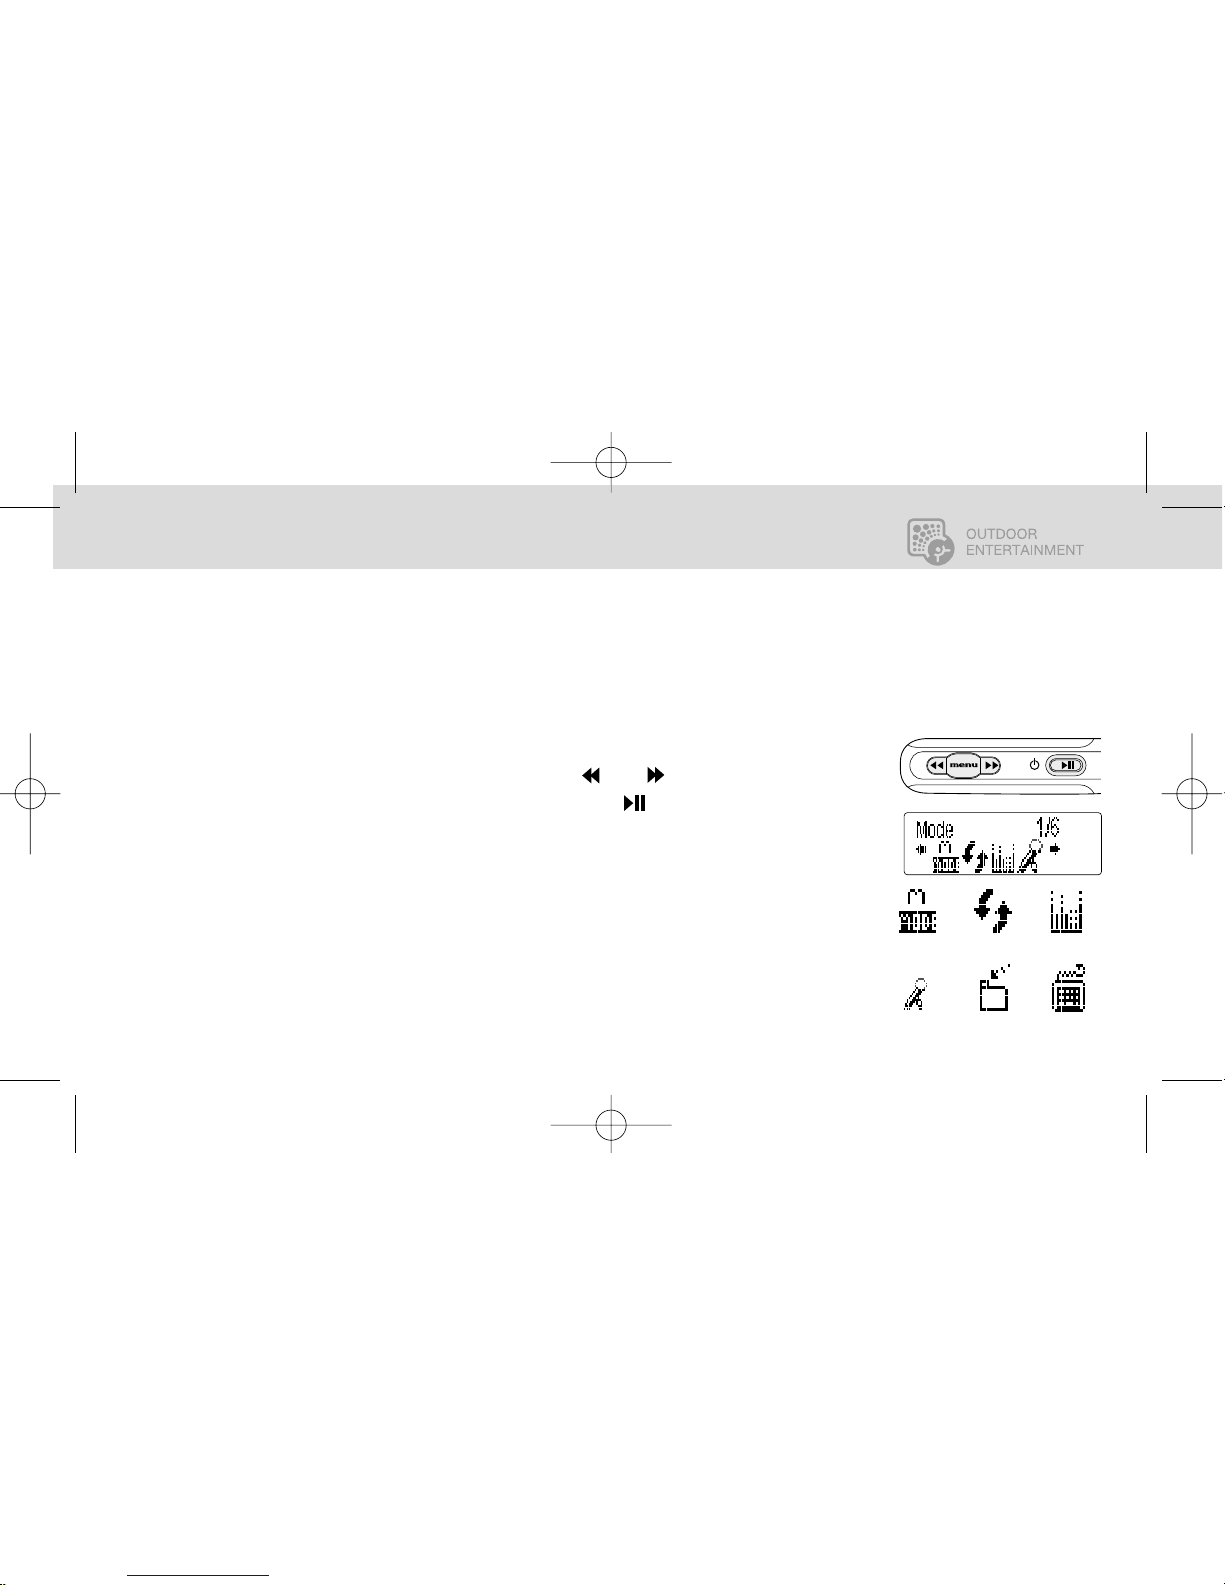
TRAIL AUDIO MENU SYSTEM
Your Trail Audio player uses an icon based menu driven user interface. Each function of the unit is
identified by an icon along the lower edge of the display and a written description along the top
edge.
NAVIGATE THE MENU SYSTEM
1. Enter the setup menu for the unit by pressing and releasing the MENU key
2. Navigate through the menu options using the and keys.
3. Select menu options by pressing and releasing the key
The accompanying pictures show the icons that will appear on the display when you press the
MENU key along with their names as they will be displayed along the bottom of the display.
Within each of the primary Menu items (MODE, PLAYMODE, EQ, RBR, DELETE AND SETTING)
there are sub-menu items corresponding to each of these functions.
TRAILAUDIO
Digital Outdoor Audio
BASIC OPERATION11
english français español japan china
MODE PLAYMODE EQ
DELETE
RBR
SETTING
HGTrailAudio_man 4/14/05 11:50 AM Page 14
Page 15
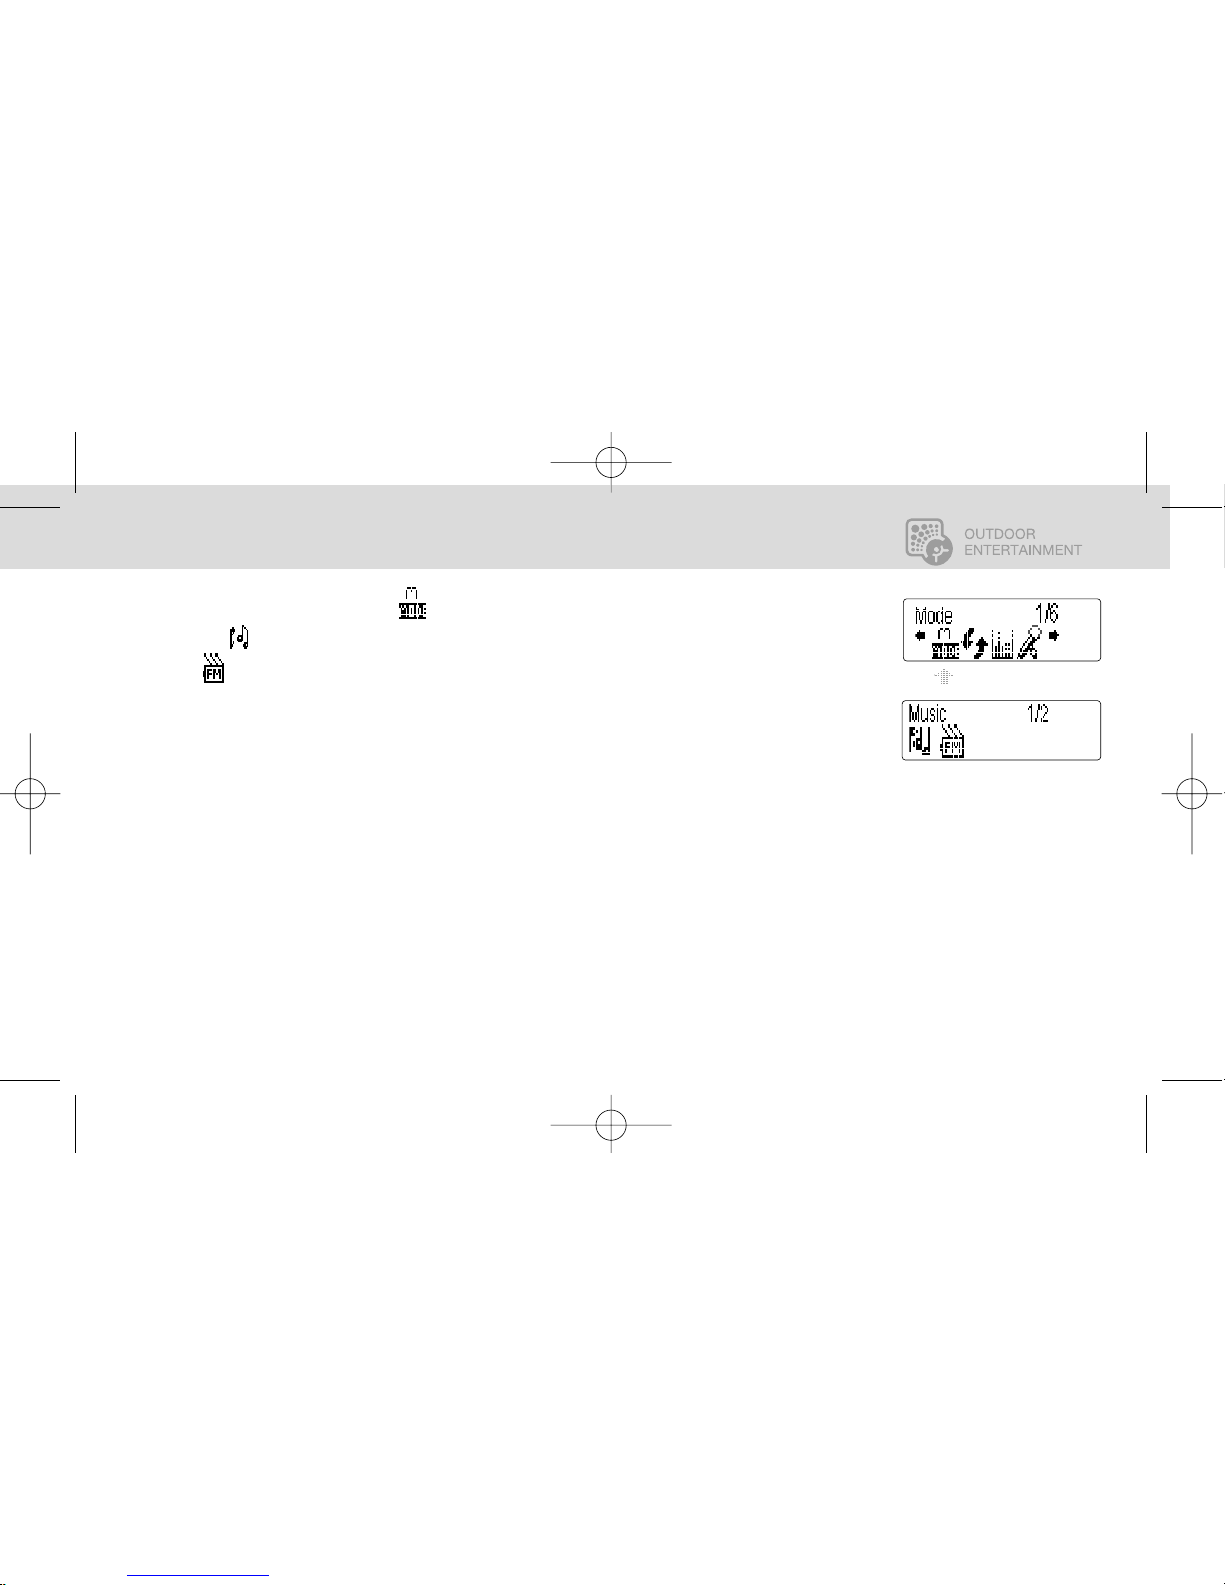
The first menu option is MODE. Your Trail Audio player has two operational MODES.
MUSIC: Prepares the unit to playback MP3 files
FM: Activates the FM radio system for use
TRAILAUDIO
Digital Outdoor Audio
MODES OF OPERATION 12
english français español japan china
HGTrailAudio_man 4/14/05 11:50 AM Page 15
Page 16
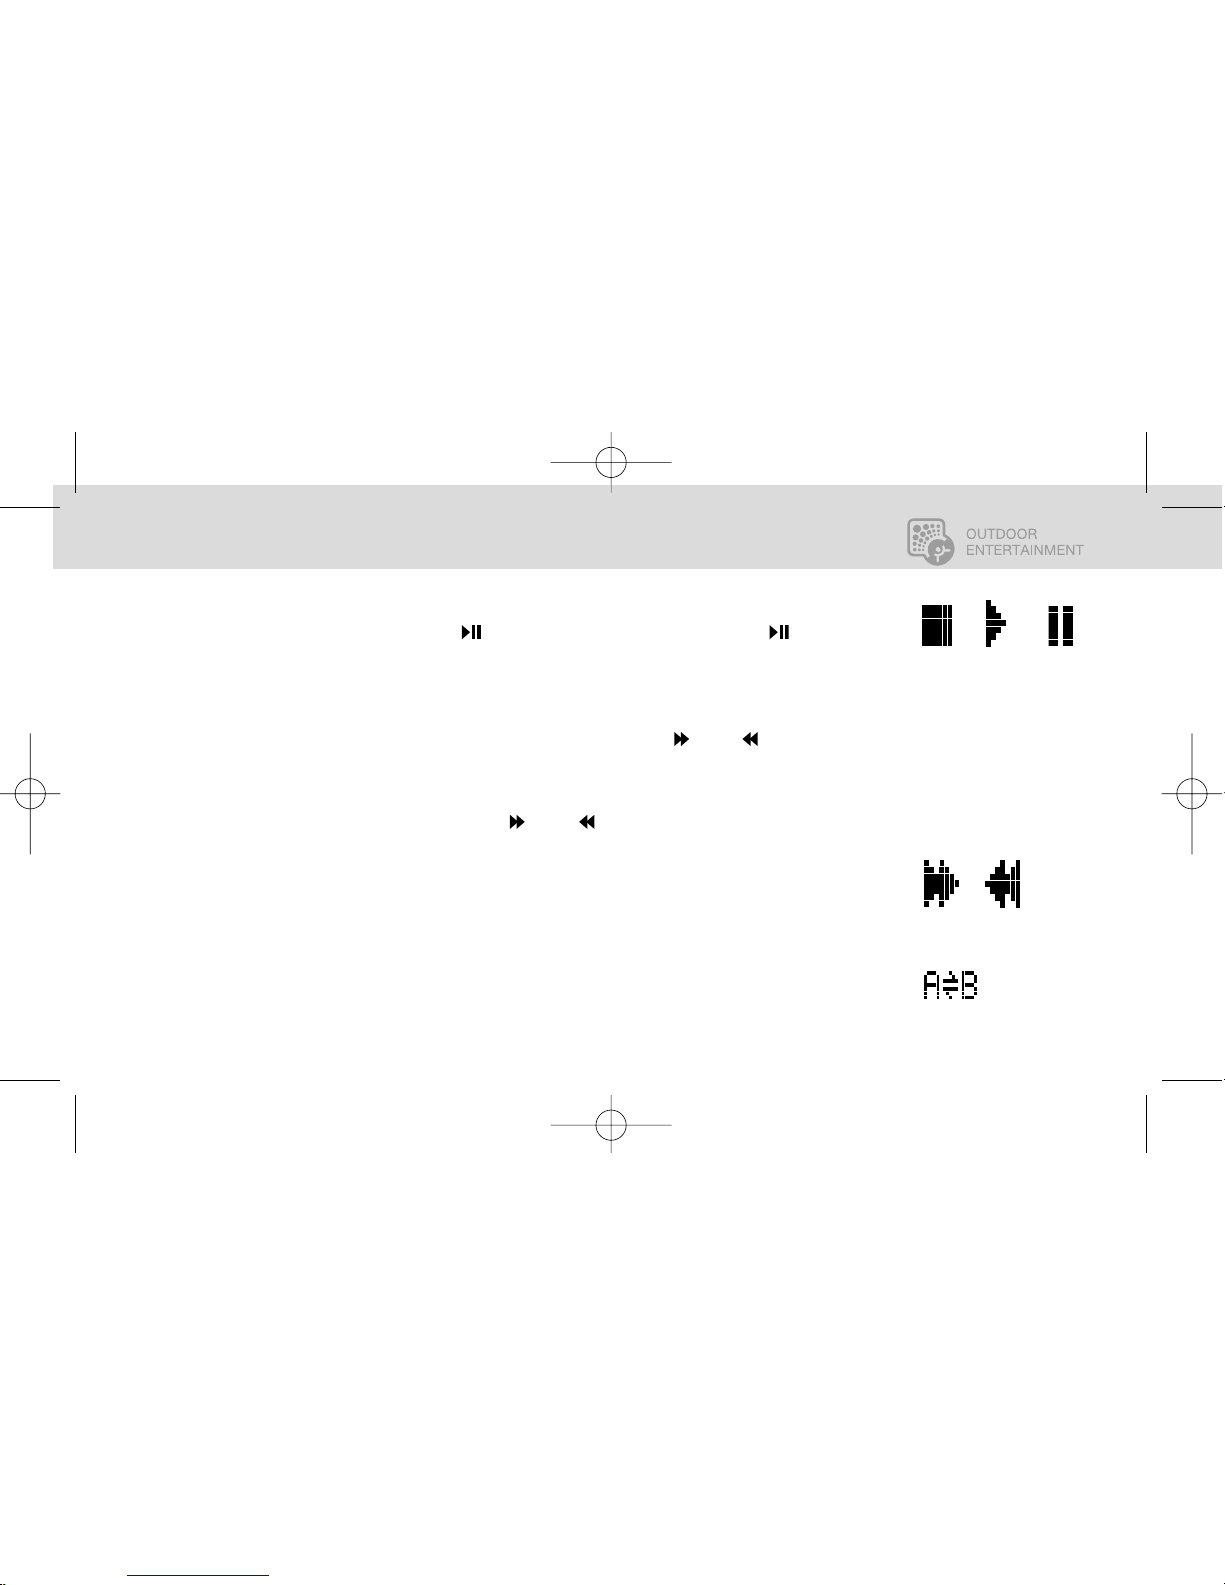
PLAYING MUSIC FILES
With the player in MUSIC MODE. Press to start playback. While playing, press to pause.
When Stopped, Playing and Paused, the adjacent icons will be shown on the display to the left of
the song playtime.
SELECTING TRACKS
When the player is playing, stopped or paused, press and release the or the control to
advance through the tracks.
FAST FORWARD/FAST REVERSE
When the player is playing, press and hold the or the control for more than one second to
start fast forwarding or reversing. When using the fast forward or fast reverse commands, the
adjacent icons will be shown on the display to the left of the song playtime.
A-B LOOPING
Allows you to capture and replay a specific segment of a music file. While playing a music file,
press REC/A-B to mark the point where you want the loop to start (A). Press REC/A-B again where
you want the section to end (B). The marked section will start to repeat. Press REC/A-B one more
time to cancel the loop. A-B looping will be shown by the adjacent Icon appearing on the display.
TRAILAUDIO
Digital Outdoor Audio
MUSIC MODE - BASIC OPERATION13
english français español japan china
STOPPED PLAYING PAUSED
FAST
FORWARD
A-B LOOPING
FAST
REVERSE
NOTE Advancing more
than 3 tracks in rapid
succession may cause the
player to skip. If this
occurs, remove and
reinsert the battery to
reset the flash memory.
HGTrailAudio_man 4/14/05 11:50 AM Page 16
Page 17
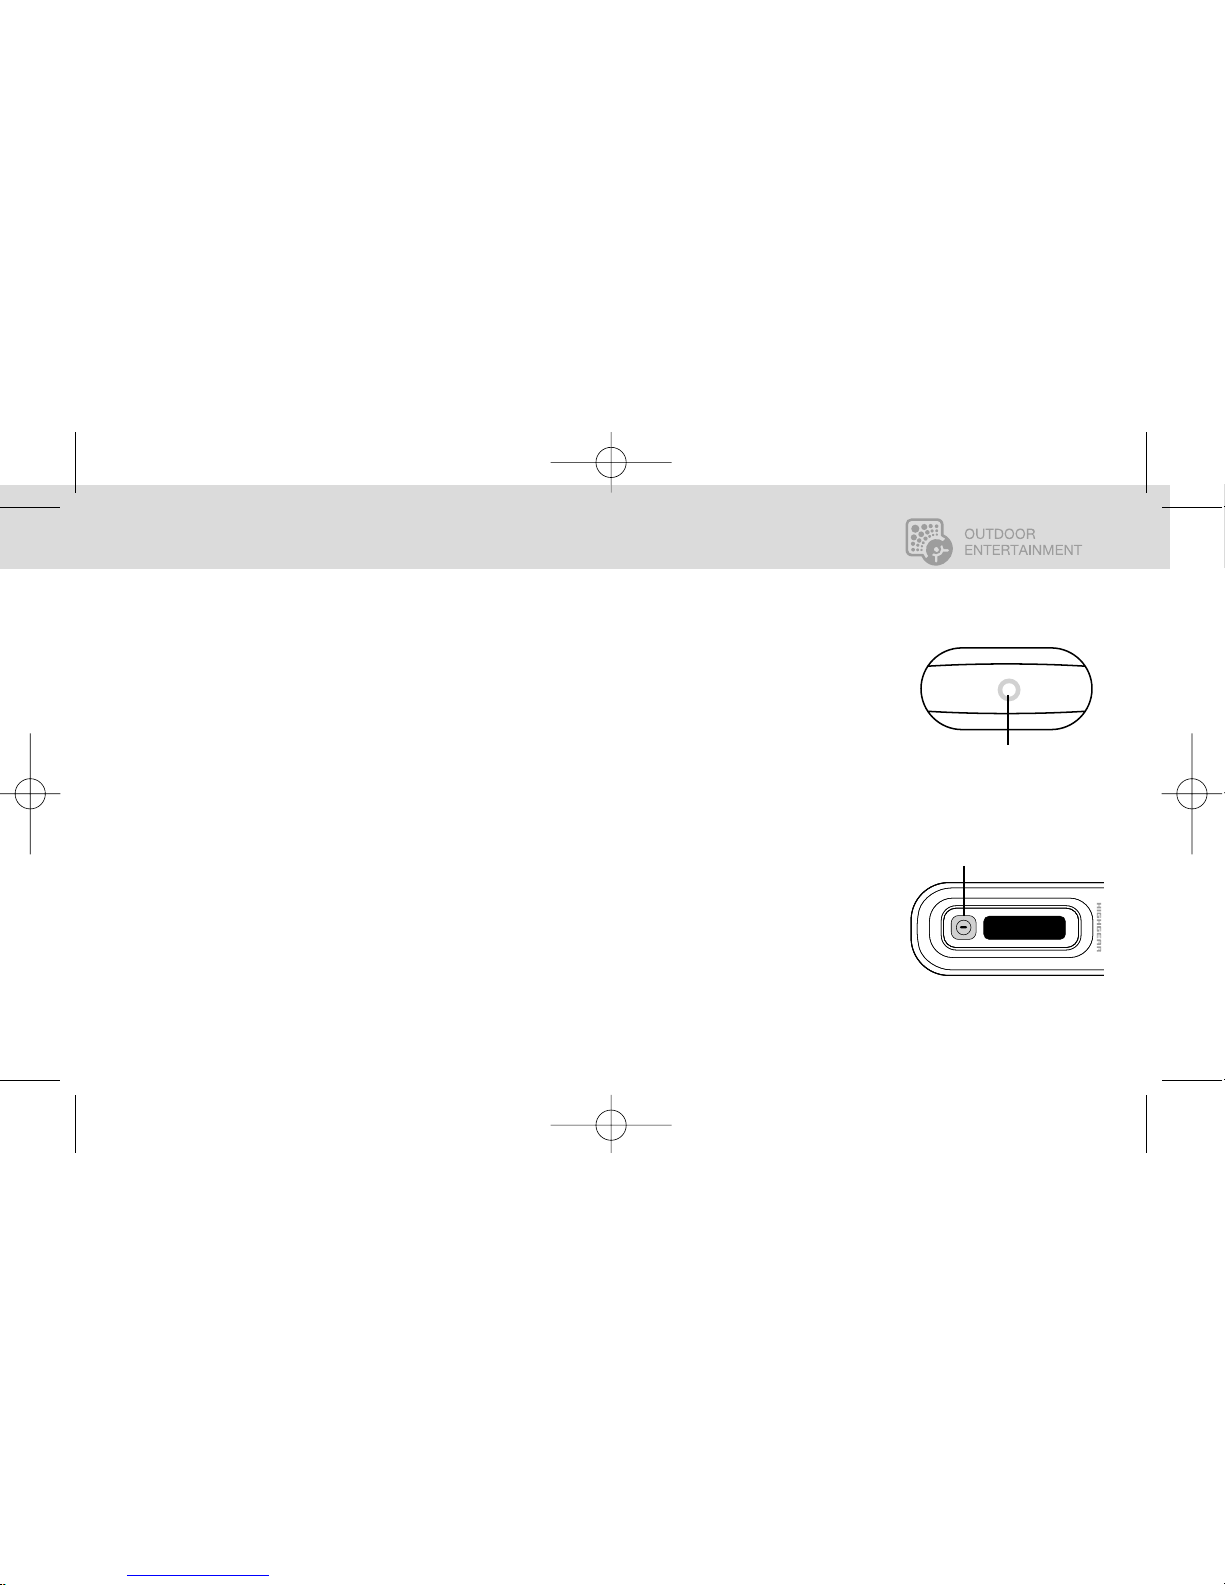
RECORDING FROM LINE-IN PORT
The Trail Audio player is capable of recording from an external source like another MP3 player via
the Line-In port located at the bottom of the unit. Simply connect the Line-Out port (Headphone
Jack) of the external source to the Line-In port of the Trail Audio Player using the supplied patch
cable.
With the external source connected, simply press the REC/A-B button to start and stop the recording
process.
Files recorded using the Line-In port are numbered sequentially in the order recorded. Files can then
be uploaded to your computer and the file name changed if desired.
TRAILAUDIO
Digital Outdoor Audio
MUSIC MODE - BASIC OPERATION 14
english français español japan china
LINE-IN PORT
REC/A-B BUTTON
HGTrailAudio_man 4/14/05 11:50 AM Page 17
Page 18
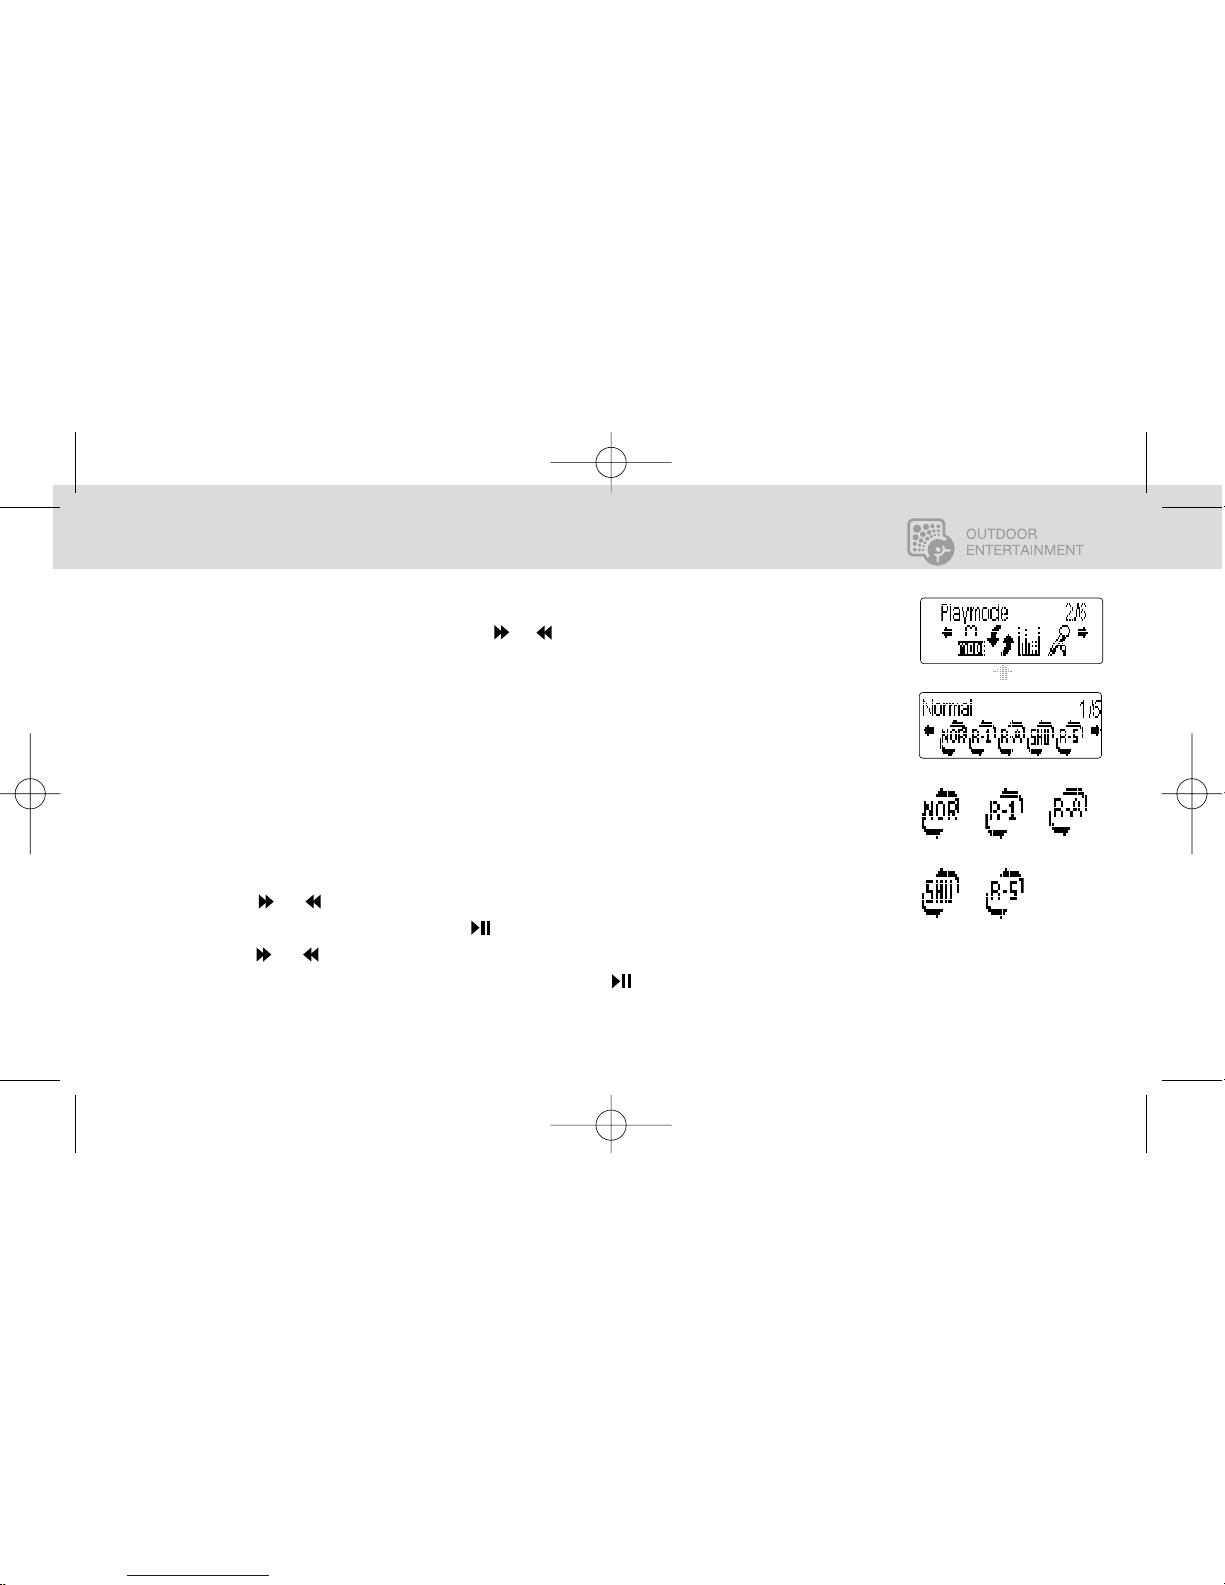
When in MUSIC MODE, there are a range of programming options available to the user. Press the
MENU key to enter the setup menu. Use the or keys to advance to the setup option you wish
to program.
MUSIC PLAYBACK (PLAY MODE) MENU
Your Trail Audio Player allows you to program several different ways to playback the
music files you have stored.
1. Press the MENU key to enter setup menu.
2. Use the or keys to advance to the PLAY MODE menu.
3. Select PLAY MODE by pressing the key.
4. Use the or keys to advance through the playback options.
5. Select the play back mode you want by pressing the key
TRAILAUDIO
Digital Outdoor Audio
MUSIC MODE - MENU OPTIONS15
english français español japan china
NORMAL: Play all tracks in order.
REPEAT ONE: Play the current track repeatedly.
REPEAT ALL: Play all tracks in order continuously.
SHUFFLE: Play all tracks in random once.
RPT SHUFFLE: Play all tracks in random continuously.
NORMAL REPEAT 1 SHUFFLE
REPEAT
ALL
RPT SHUFFLE
HGTrailAudio_man 4/14/05 11:50 AM Page 18
Page 19
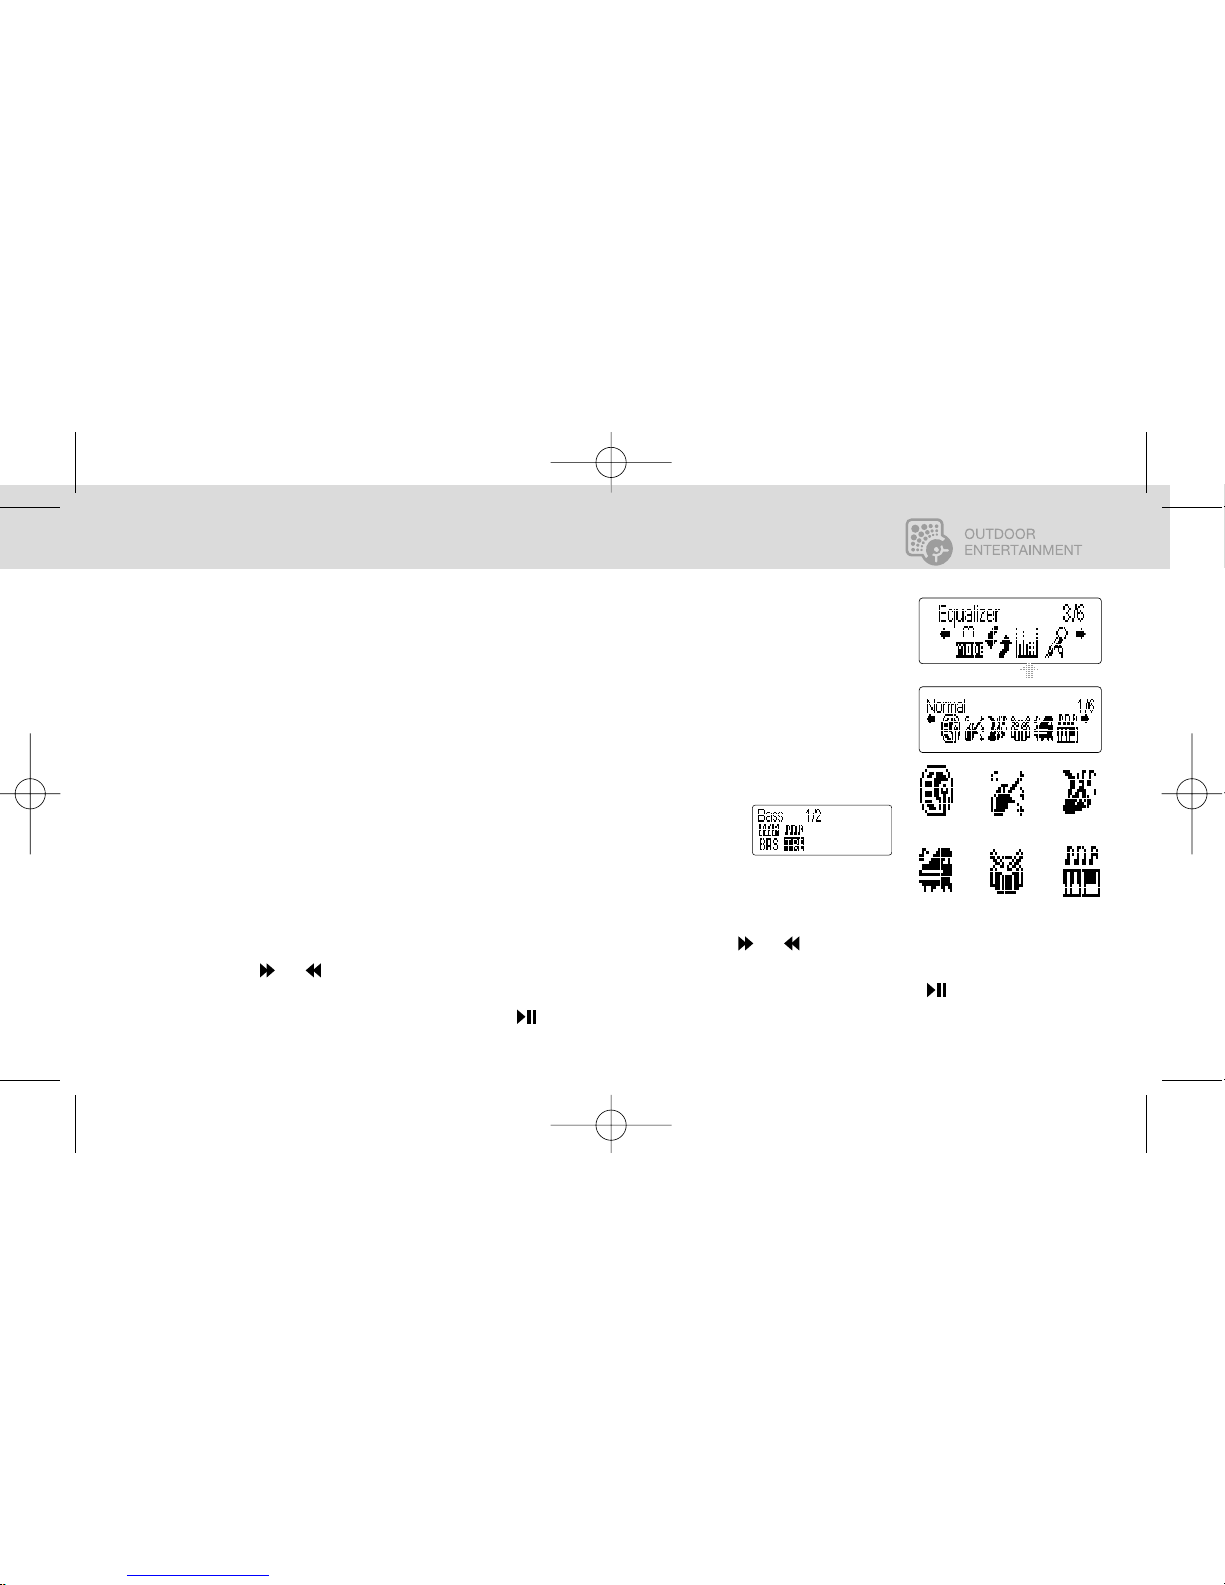
EQUALIZER MENU
Your Trail Audio player is equipped with several preset equalizers to allow you to
customize the sound for the type of music you most commonly listen to. There is also a
custom USER DEFAULT option which allows you to set your own TREBLE and BASS levels.
The adjacent drawings show the icons for the equalizers as they will appear on the
screen.
The preset equalizers are: NORMAL ROCK JAZZ
CLASSIC(AL) POP USER
There are two setting options under USER DEFAULT – BASS and TREBLE
as shown in the drawings, each with 4 levels.
TRAILAUDIO
Digital Outdoor Audio
MUSIC MODE - MENU OPTIONS 16
1. Press the MENU key to enter setup menu.
2. Use the or keys to advance to the EQUALIZER
MODE
menu.
3. Select EQUALIZER MODE by pressing the key.
4. Use the or keys to scroll through the various
equalizer settings.
5. Select a setting by pressing the key.
NORMAL ROCK JAZZ
CLASSIC POP USER
DEFAULT
english français español japan china
HGTrailAudio_man 4/14/05 11:50 AM Page 19
Page 20
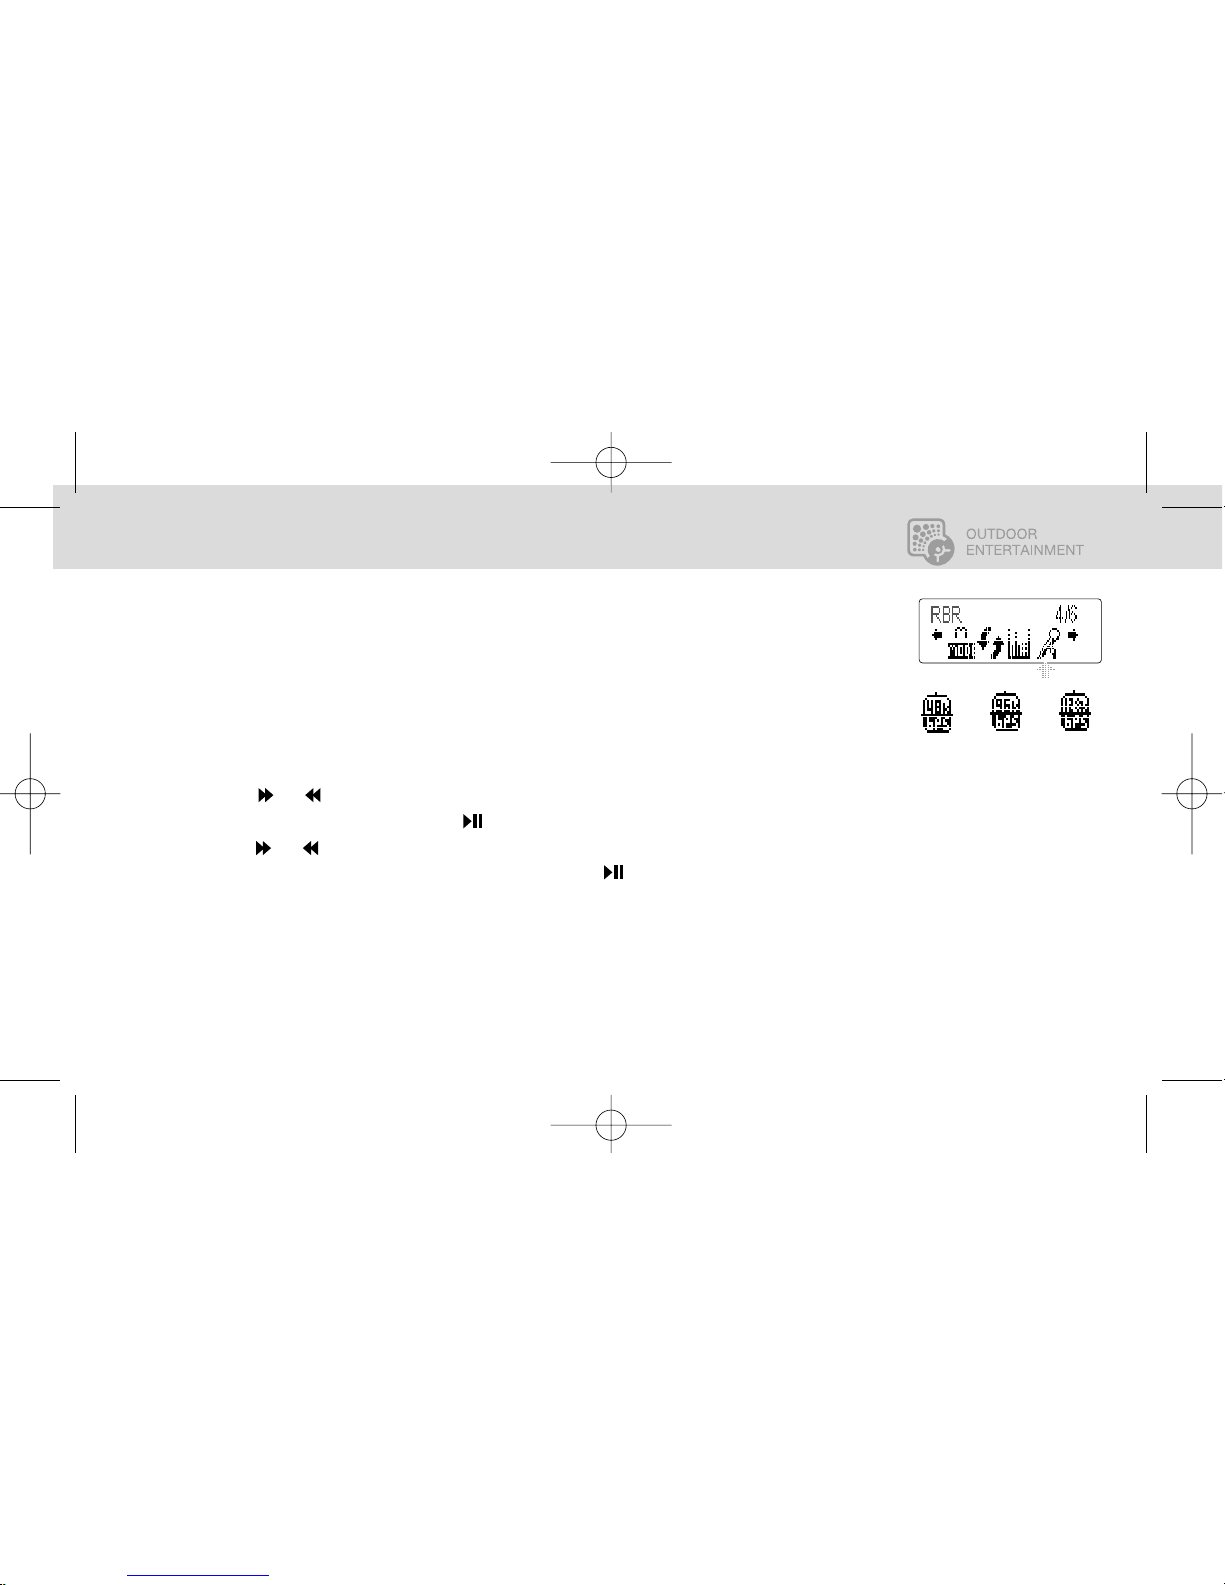
RECORDING BIT RATE (RBR)
This command allows you to set the amount of file compression when recording through the Line-In
port or from the FM radio. There are three Recording Bit Rate compressions of 48kbps, 96kbps and
128kbps.
NOTE The higher the number the better the quality of the sound. However, recording at higher bit
rates also results in larger files
1. Press the MENU key to enter setup menu.
2. Use the or keys to advance to the RBR MODE menu.
3. Select RBR MODE by pressing the key.
4. Use the or keys to advance through the recording rate options.
5. Select the recording rate you want by pressing the key
TRAILAUDIO
Digital Outdoor Audio
MUSIC MODE - MENU OPTIONS17
english français español japan china
48kbps 96kbps 128kbps
HGTrailAudio_man 4/14/05 11:50 AM Page 20
Page 21
MUSIC MODE - MENU OPTIONS 18
english français español japan china
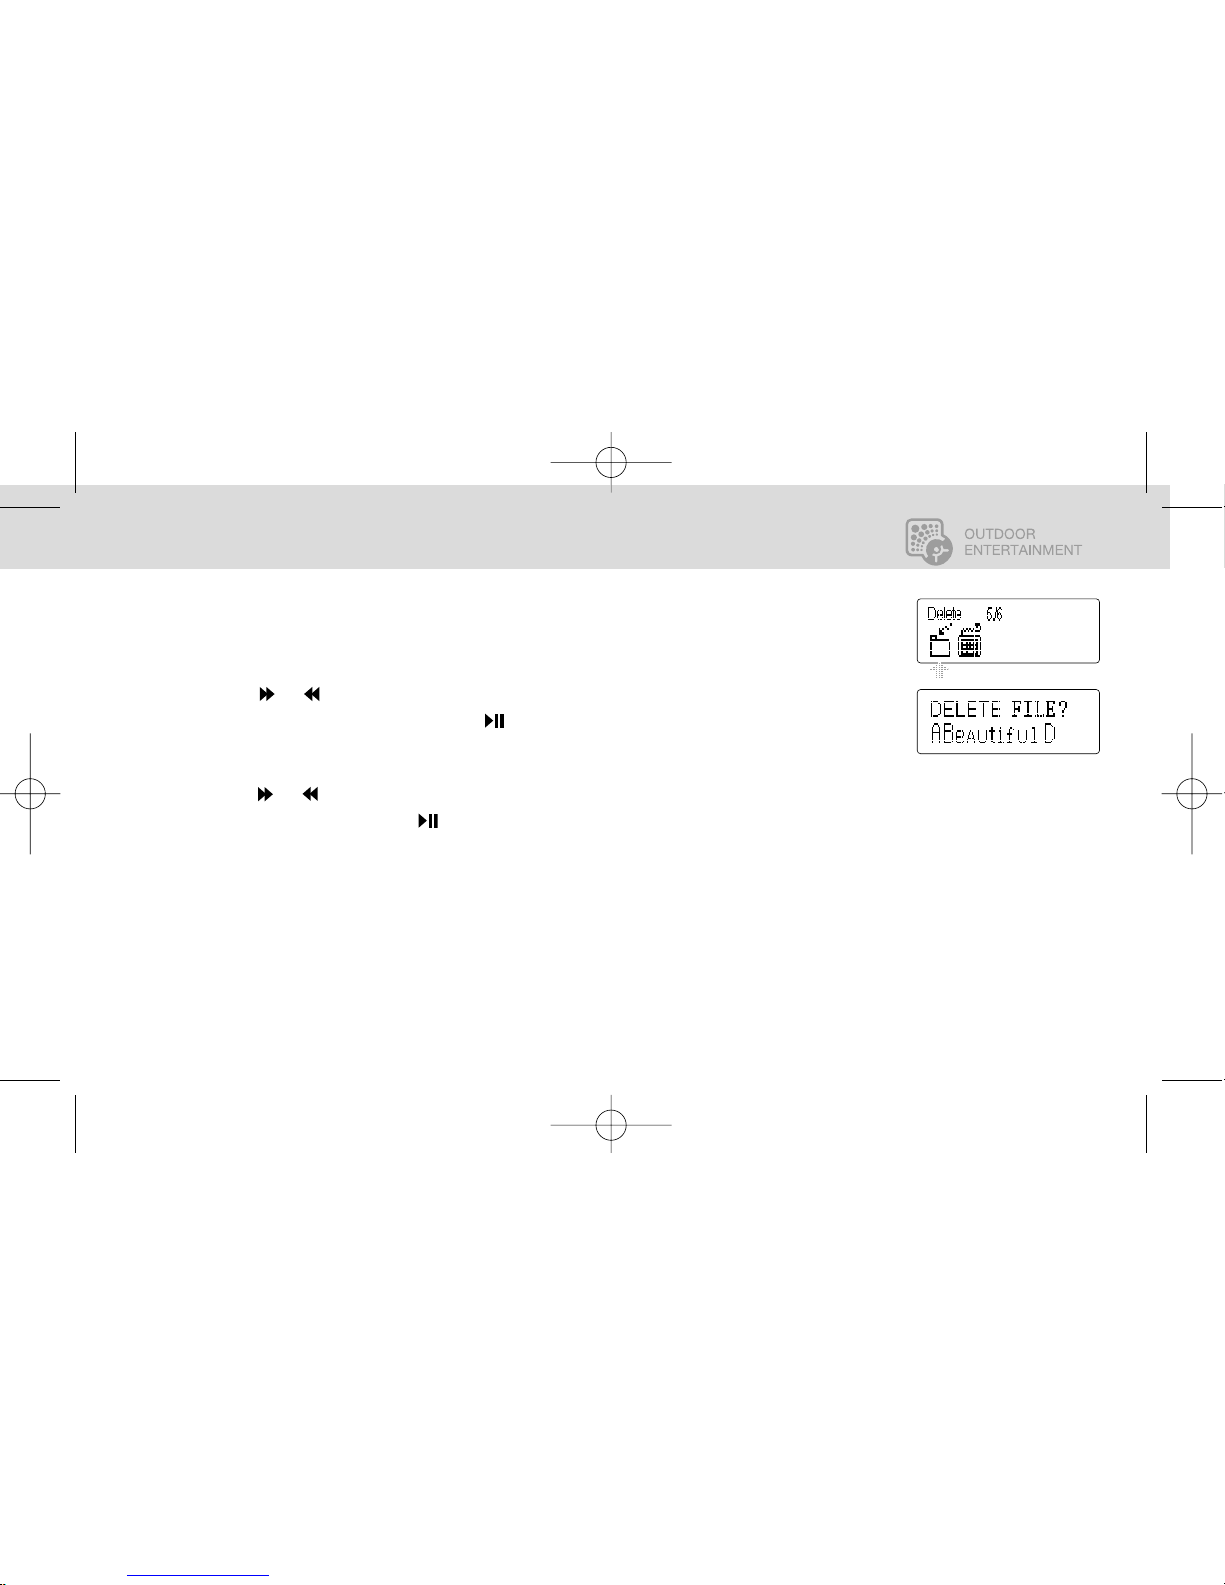
DELETE SONG FILE MENU
This command allows you to manage your music files directly from the player itself.
1. Press the MENU key to enter setup menu.
2. Use the or keys to advance to the DELETE MODE menu.
3. Select DELETE MODE by pressing the key.
4. The display will ask you if you wish to "DELETE FILE?" with the name of the file listed
below.
5. Use the or keys to scroll through all the files stored in the player.
6. Delete a file by pressing the key when the file appears on the display.
7. To escape without deleting a file, press the MENU key.
TRAILAUDIO
Digital Outdoor Audio
HGTrailAudio_man 4/14/05 11:50 AM Page 21
Page 22
TRAILAUDIO
Digital Outdoor Audio
MUSIC MODE - MENU OPTIONS19
english français español japan china
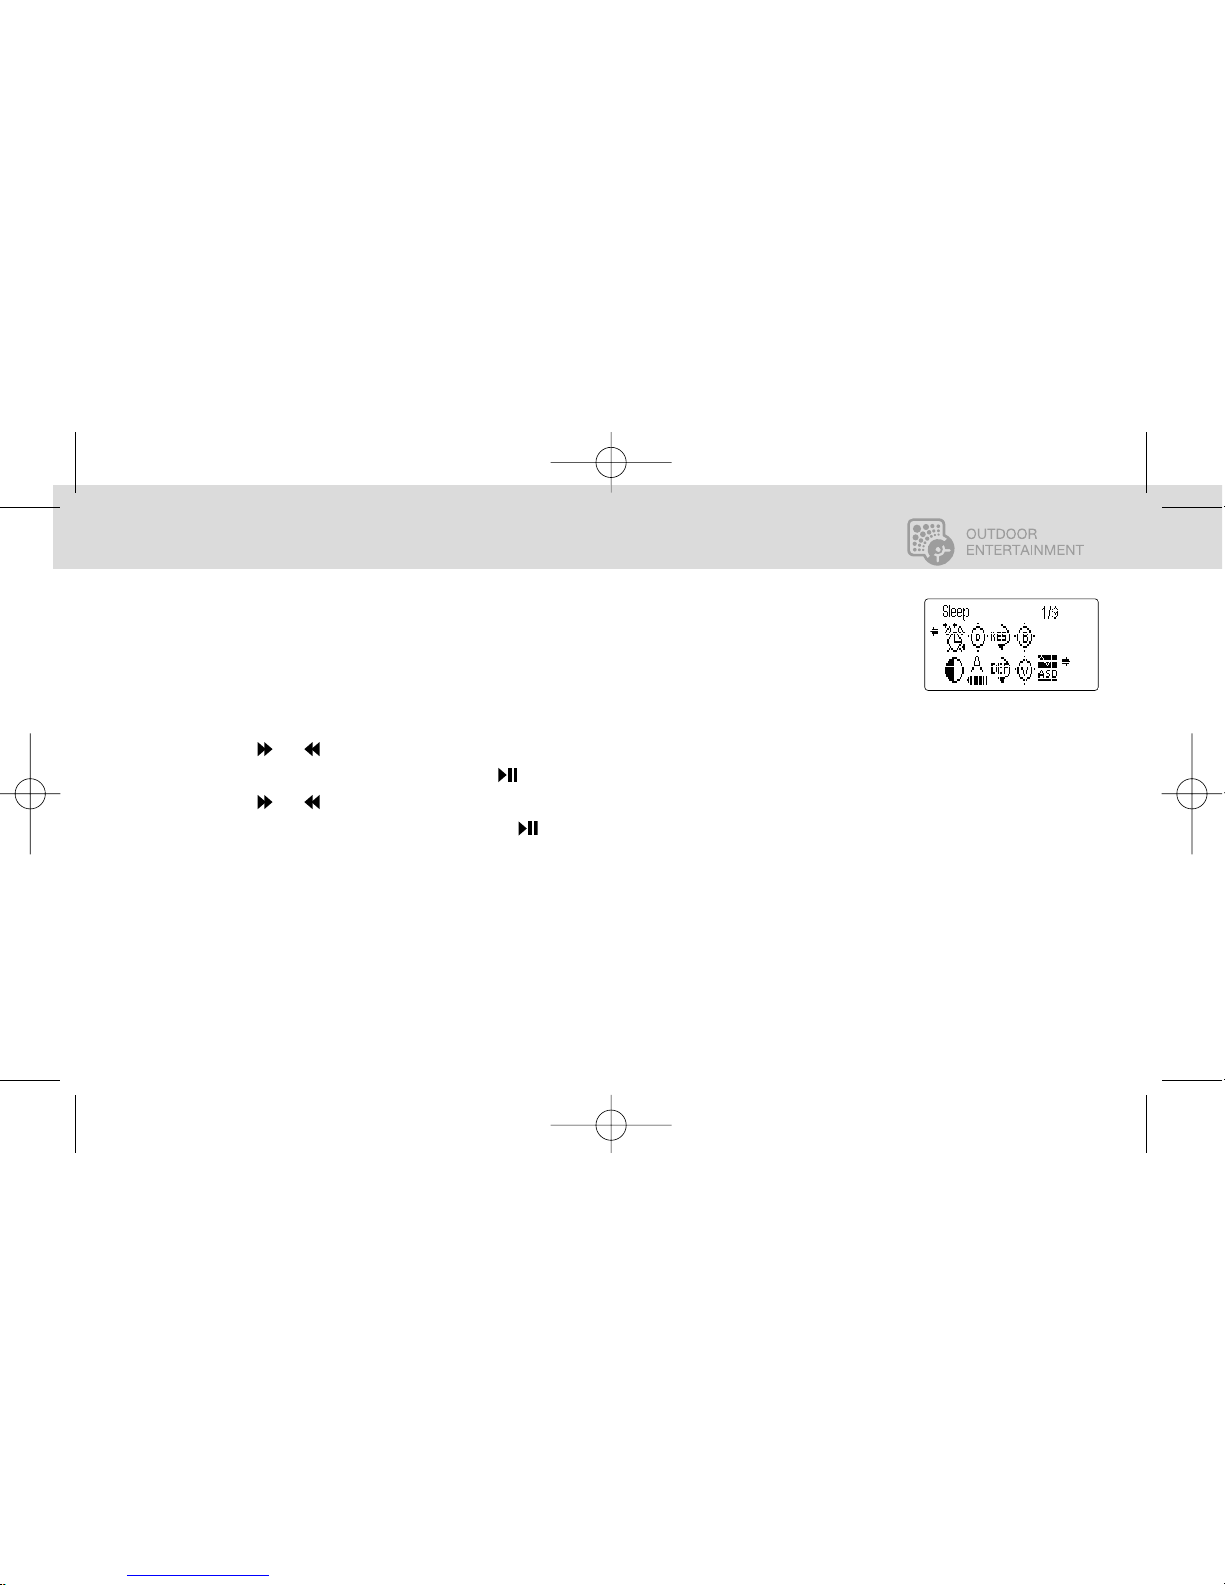
SYSTEM SETTINGS MENU
SYSTEM SETTINGS allow you to program the general operational settings for the Trail Audio unit.
Under the SETTING menu, you will find a range of different programming options shown below.
NOTE: The SETTING menu is accessible from both the MUSIC and RADIO MODES
1.
Press the MENU key.
2. Use the or keys to scroll to the SETTING MODE.
3.
Select SETTING MODE by pressing the key.
4. Use the or keys to scroll through the various setting options shown.
5. Select the desired Mode by pressing the key.
The screen above is
shown in its entirety. On
your player it will appear
as a scrolling line.
HGTrailAudio_man 4/14/05 11:50 AM Page 22
Page 23
TRAILAUDIO
Digital Outdoor Audio
MUSIC AND FM RADIO MODES - SYSTEM SETTINGS 20
english français español japan china
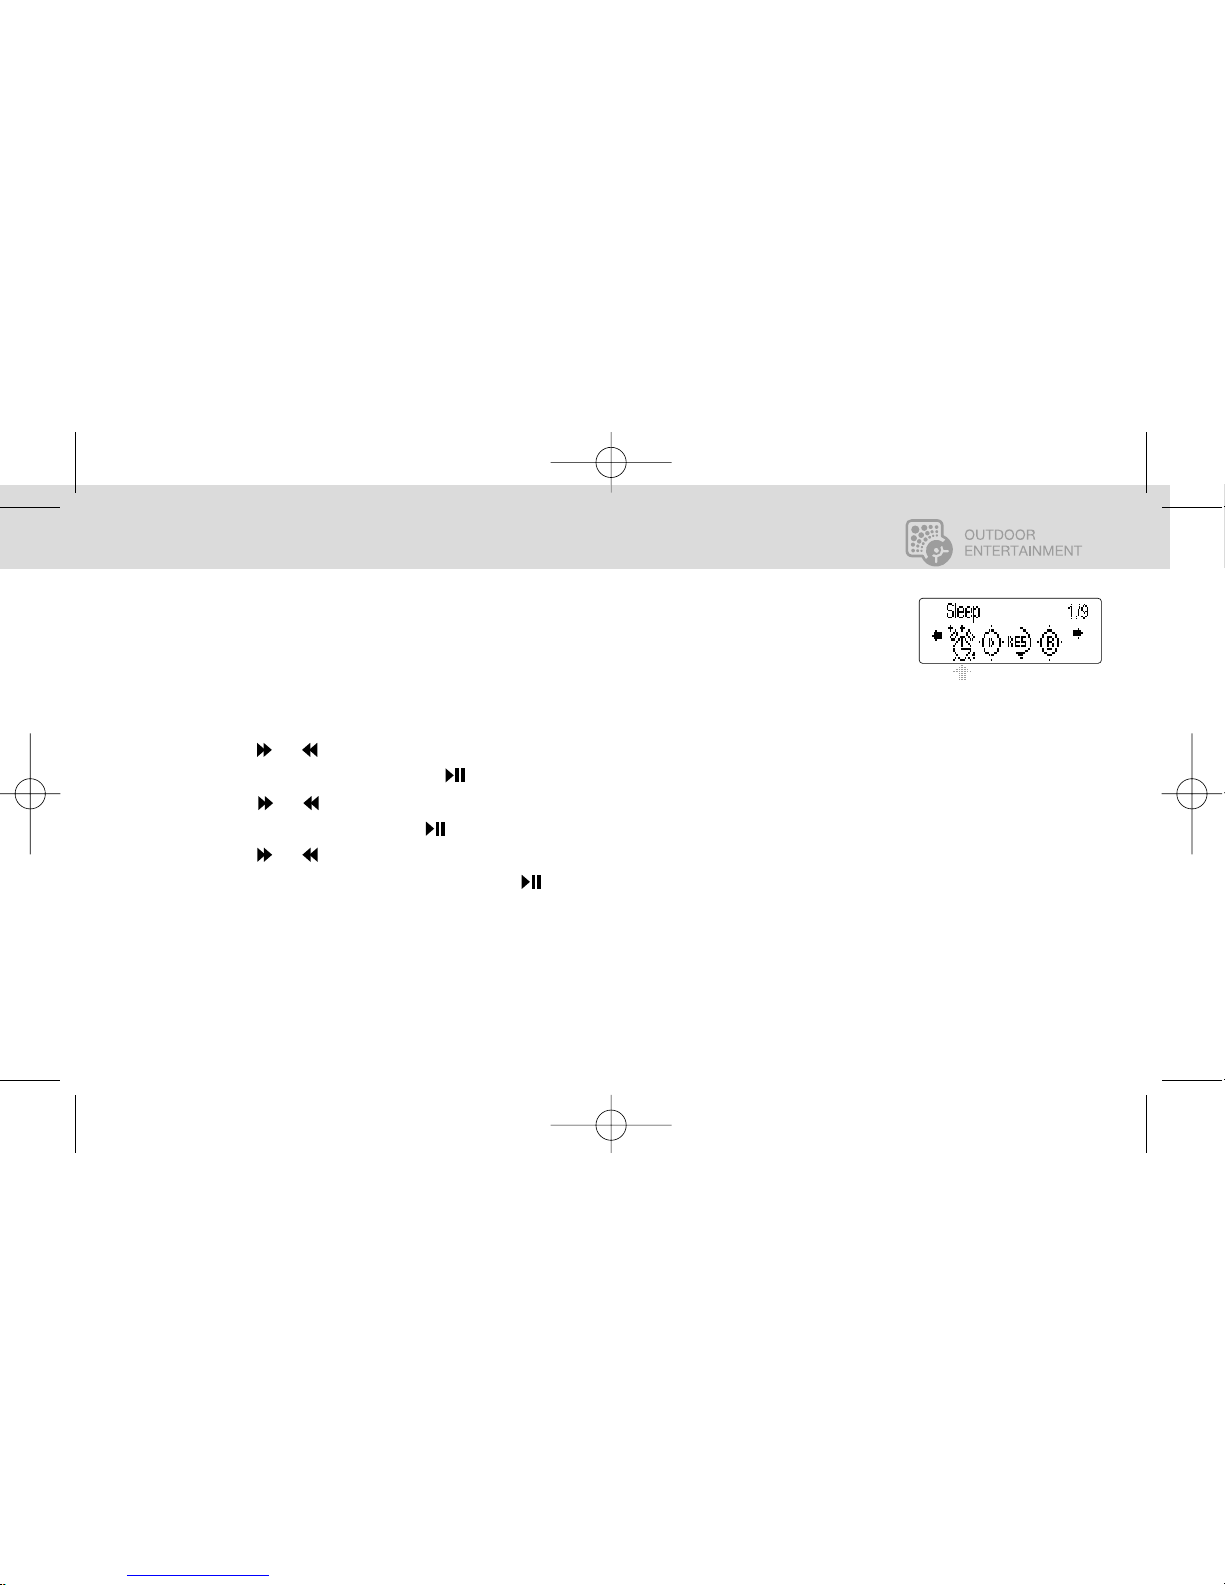
SLEEP TIMER
This feature allows the user to preset an automatic sleep timer. When programmed, the Trail Audio
player will be automatically switched off after the preset period.
The sleep timer options are: OFF, 15, 30, 45 AND 60 MINUTES.
1. Press the MENU Key.
2. Use the or keys to advance to SETTING.
3.
Select SETTING by pressing the key.
4. Use the or keys to scroll to SLEEP timer.
5. Select SLEEP by pressing the key.
6. Use the or keys to scroll through the setting options.
7. Select the desired option by pressing the key.
HGTrailAudio_man 4/14/05 11:50 AM Page 23
Page 24
TRAILAUDIO
Digital Outdoor Audio
MUSIC AND FM RADIO MODES - SYSTEM SETTINGS21
english français español japan china
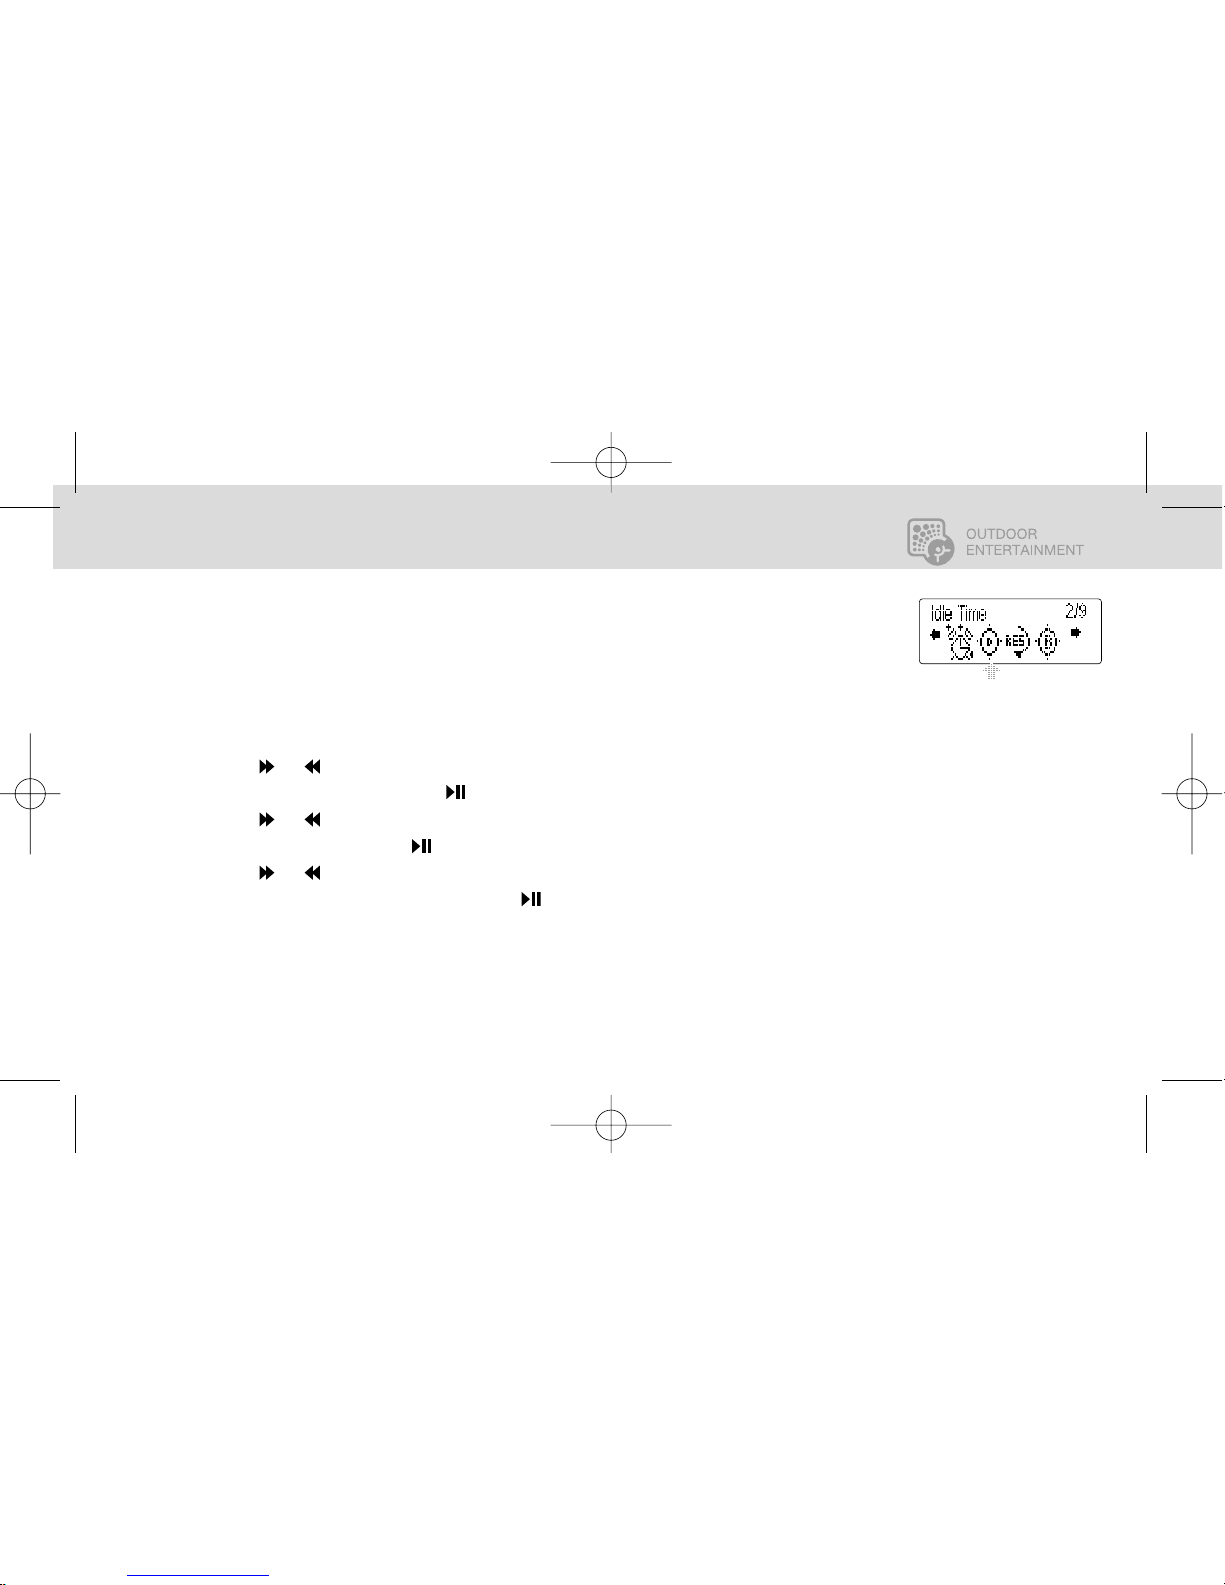
IDLE TIME
This feature sets the IDLE TIME of the Trail Audio player. The device will automatically shutdown
when it has been idled for a preset period so as to save battery. The idle timer options are: OFF, 3, 5,
10 AND 30 MINUTES.
1. Press the MENU Key
2. Use the or keys to advance to SETTING
3.
Select SETTING by pressing the key
4. Use the or keys to scroll to IDLE TIME.
5. Select IDLE by pressing the key
6. Use the or keys to scroll through the setting options.
7. Select the desired option by pressing the key
HGTrailAudio_man 4/14/05 11:50 AM Page 24
Page 25
TRAILAUDIO
Digital Outdoor Audio
MUSIC AND FM RADIO MODES - SYSTEM SETTINGS 22
english français español japan china
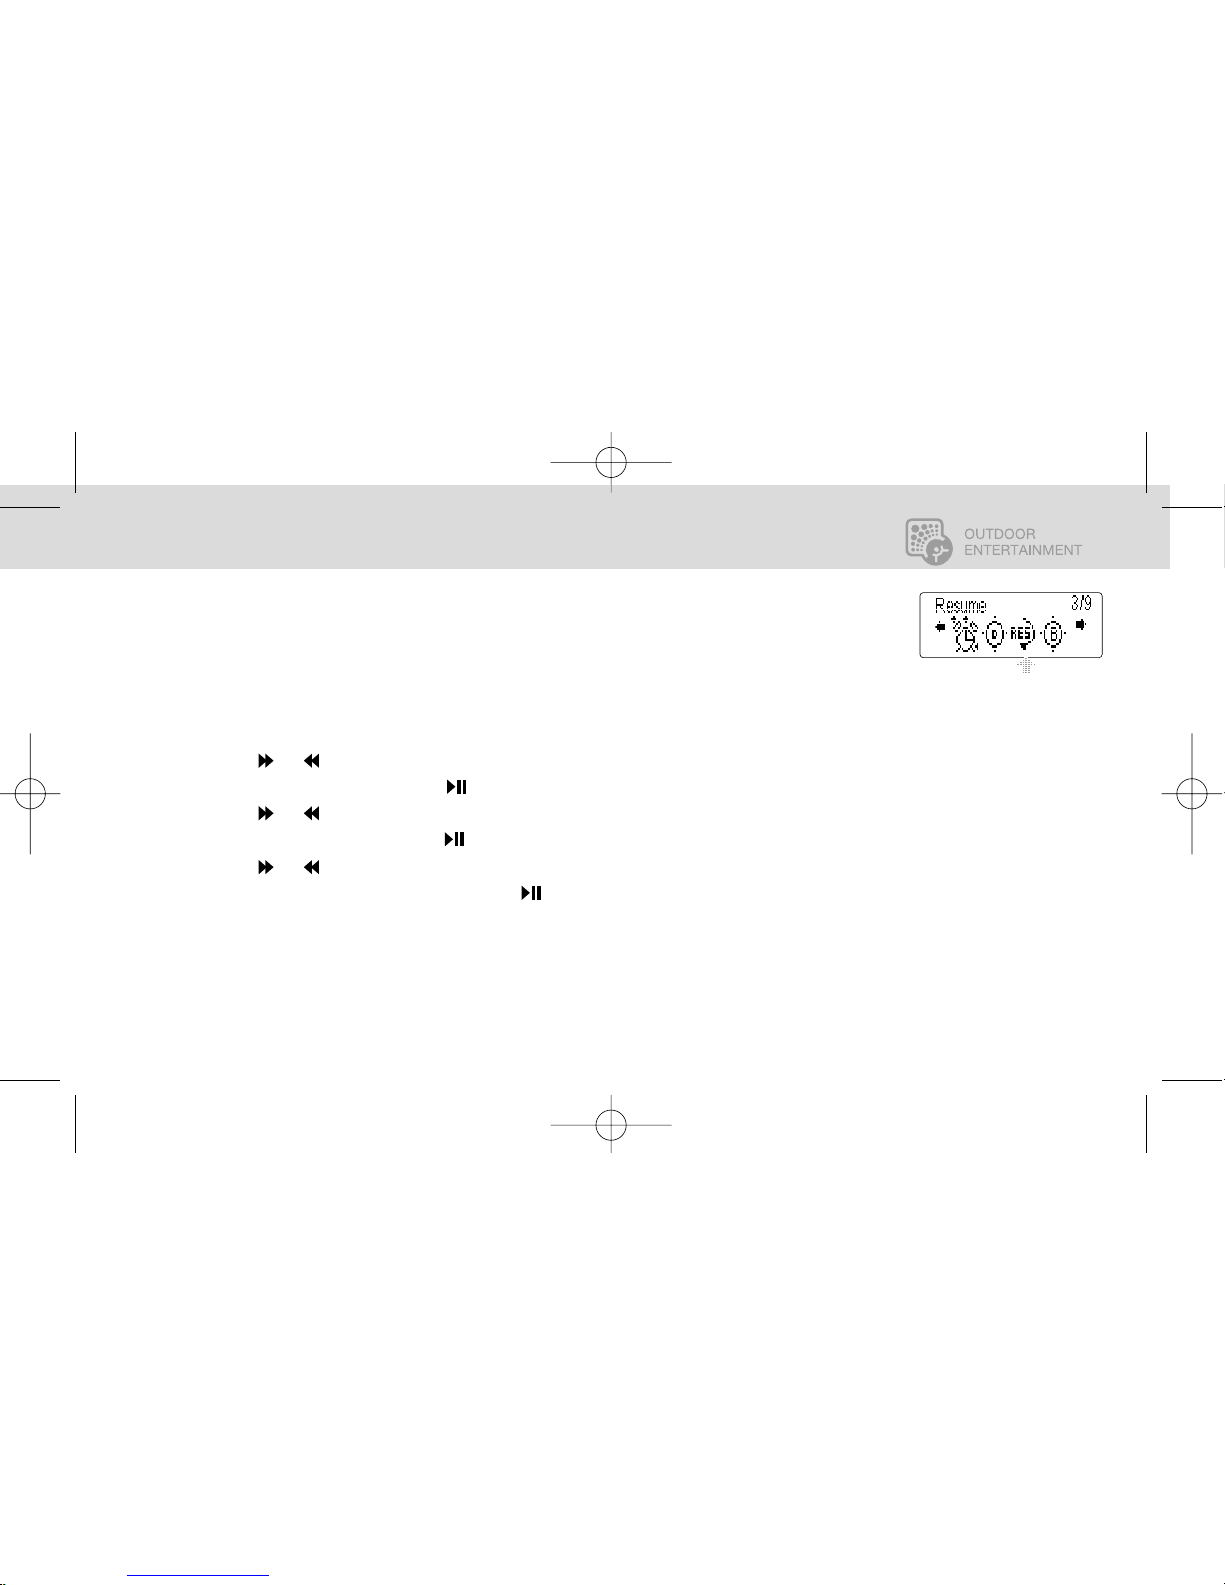
RESUME
When this feature is "ON", the Trail Audio player will navigate to the beginning of the track that
was last playing when the device was powered off. When "OFF", the player will start playing at the
first file.
1. Press the MENU Key.
2. Use the or keys to advance to SETTING.
3.
Select SETTING by pressing the key.
4. Use the or keys to scroll to RESUME.
5. Select RESUME by pressing the key.
6. Use the or keys to scroll through the setting options.
7. Select the desired option by pressing the key.
HGTrailAudio_man 4/14/05 11:50 AM Page 25
Page 26
TRAILAUDIO
Digital Outdoor Audio
MUSIC AND FM RADIO MODES - SYSTEM SETTINGS23
english français español japan china
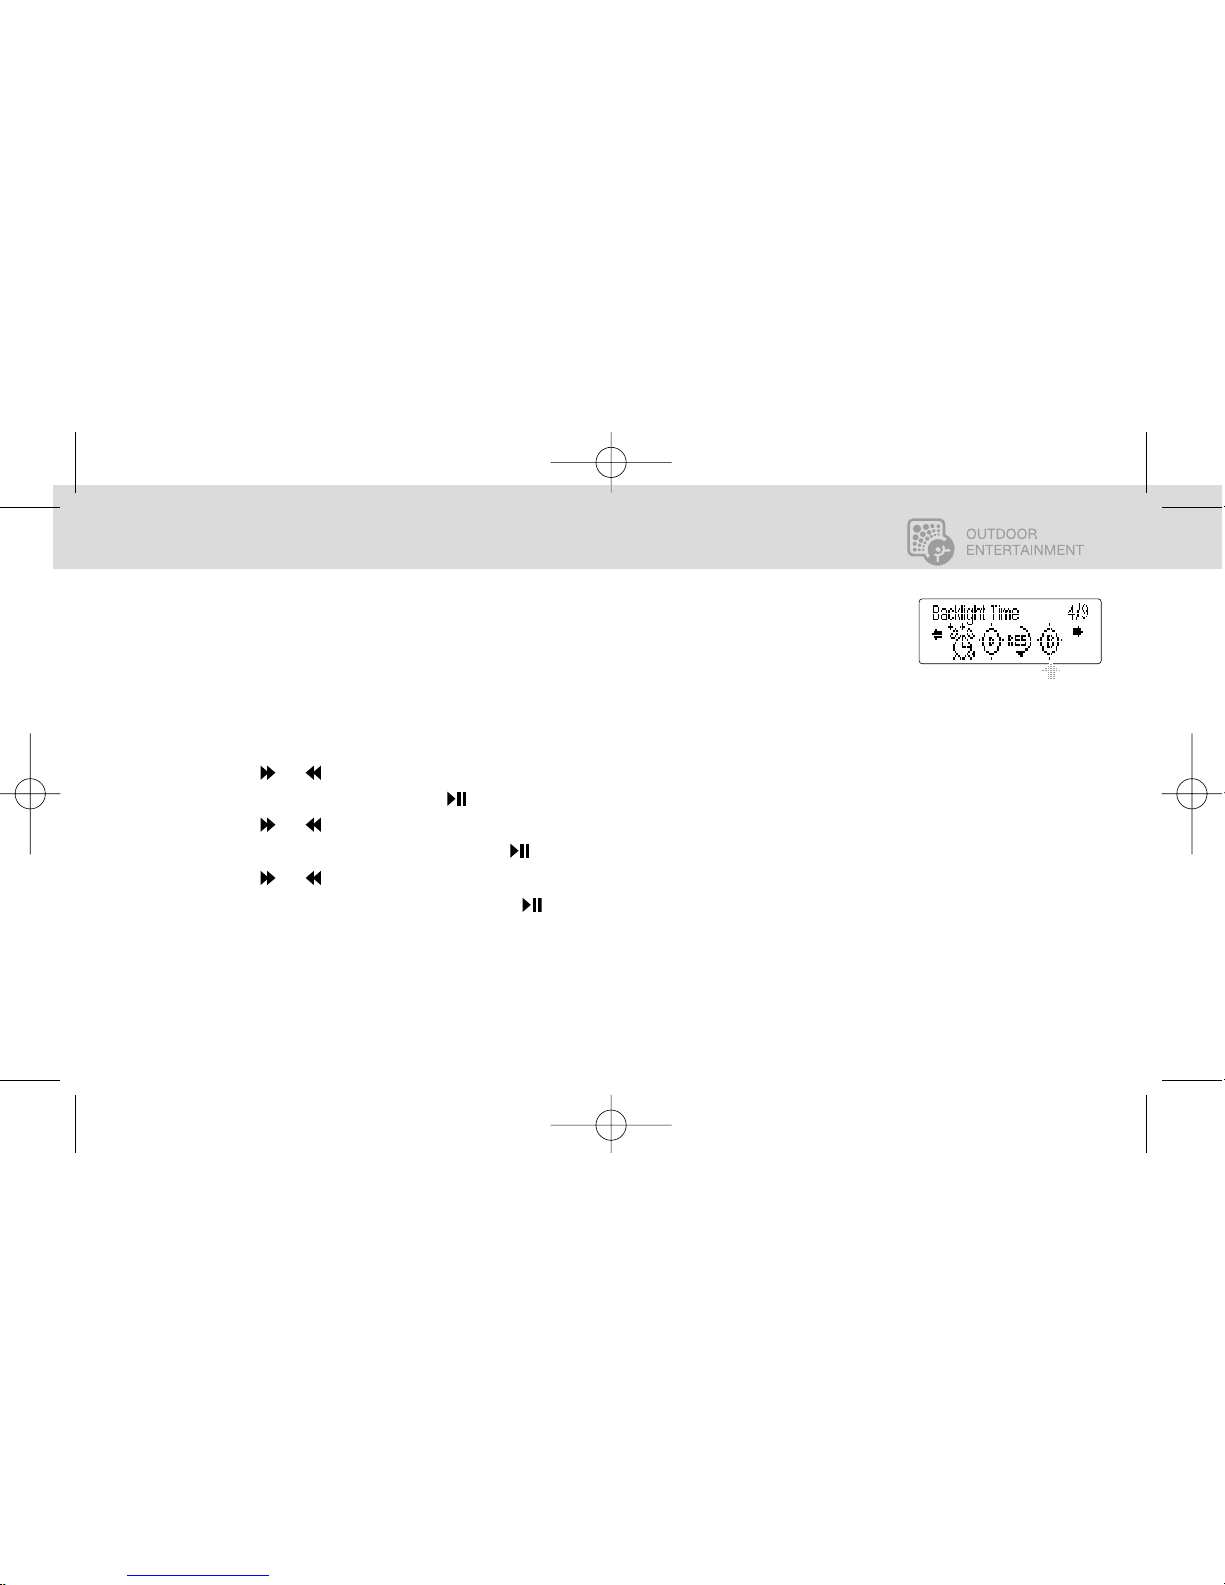
BACKLIGHT TIME
This feature programs the display backlight of the Trail Audio player to remain active for a certain
period of time. The options are:
DISABLE-no backlight, 10, 30 and 60 SECONDS, and PERMANENT.
1. Press the MENU Key.
2. Use the or keys to advance to SETTING.
3.
Select SETTING by pressing the key.
4. Use the or keys to scroll to BACKLIGHT TIME.
5. Select BACKLIGHT TIME by pressing the key.
6. Use the or keys to scroll through the setting options.
7. Select the desired option by pressing the key.
NOTE Excessive use of the BACKLIGHT will reduce battery life.
HGTrailAudio_man 4/14/05 11:50 AM Page 26
Page 27
TRAILAUDIO
Digital Outdoor Audio
MUSIC AND FM RADIO MODES - SYSTEM SETTINGS 24
english français español japan china
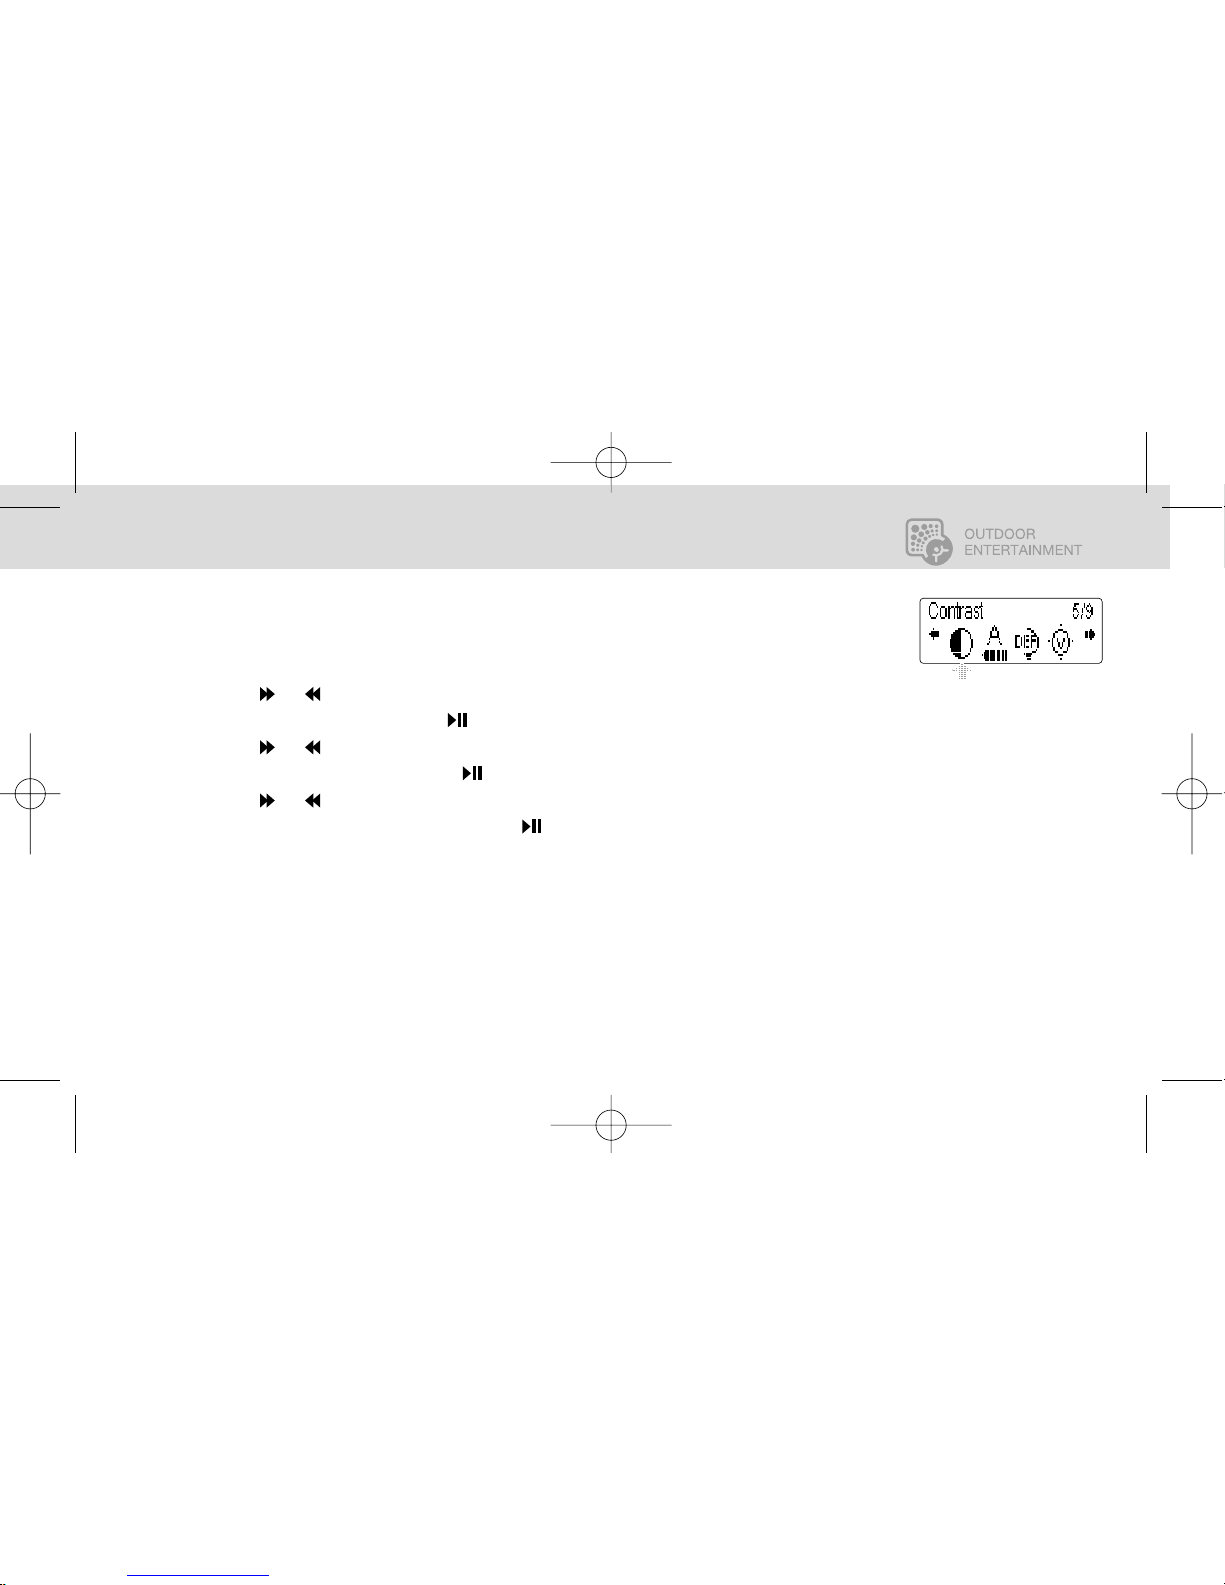
CONTRAST
This feature sets the LCD CONTRAST level ranging from 1 to 10.
1. Press the MENU Key.
2. Use the or keys to advance to SETTING.
3.
Select SETTING by pressing the key.
4. Use the or keys to scroll to CONTRAST.
5. Select CONTRAST by pressing the key.
6. Use the or keys to scroll through the setting options.
7. Select the desired option by pressing the key.
HGTrailAudio_man 4/14/05 11:50 AM Page 27
Page 28
TRAILAUDIO
Digital Outdoor Audio
MUSIC AND FM RADIO MODES - SYSTEM SETTINGS25
english français español japan china
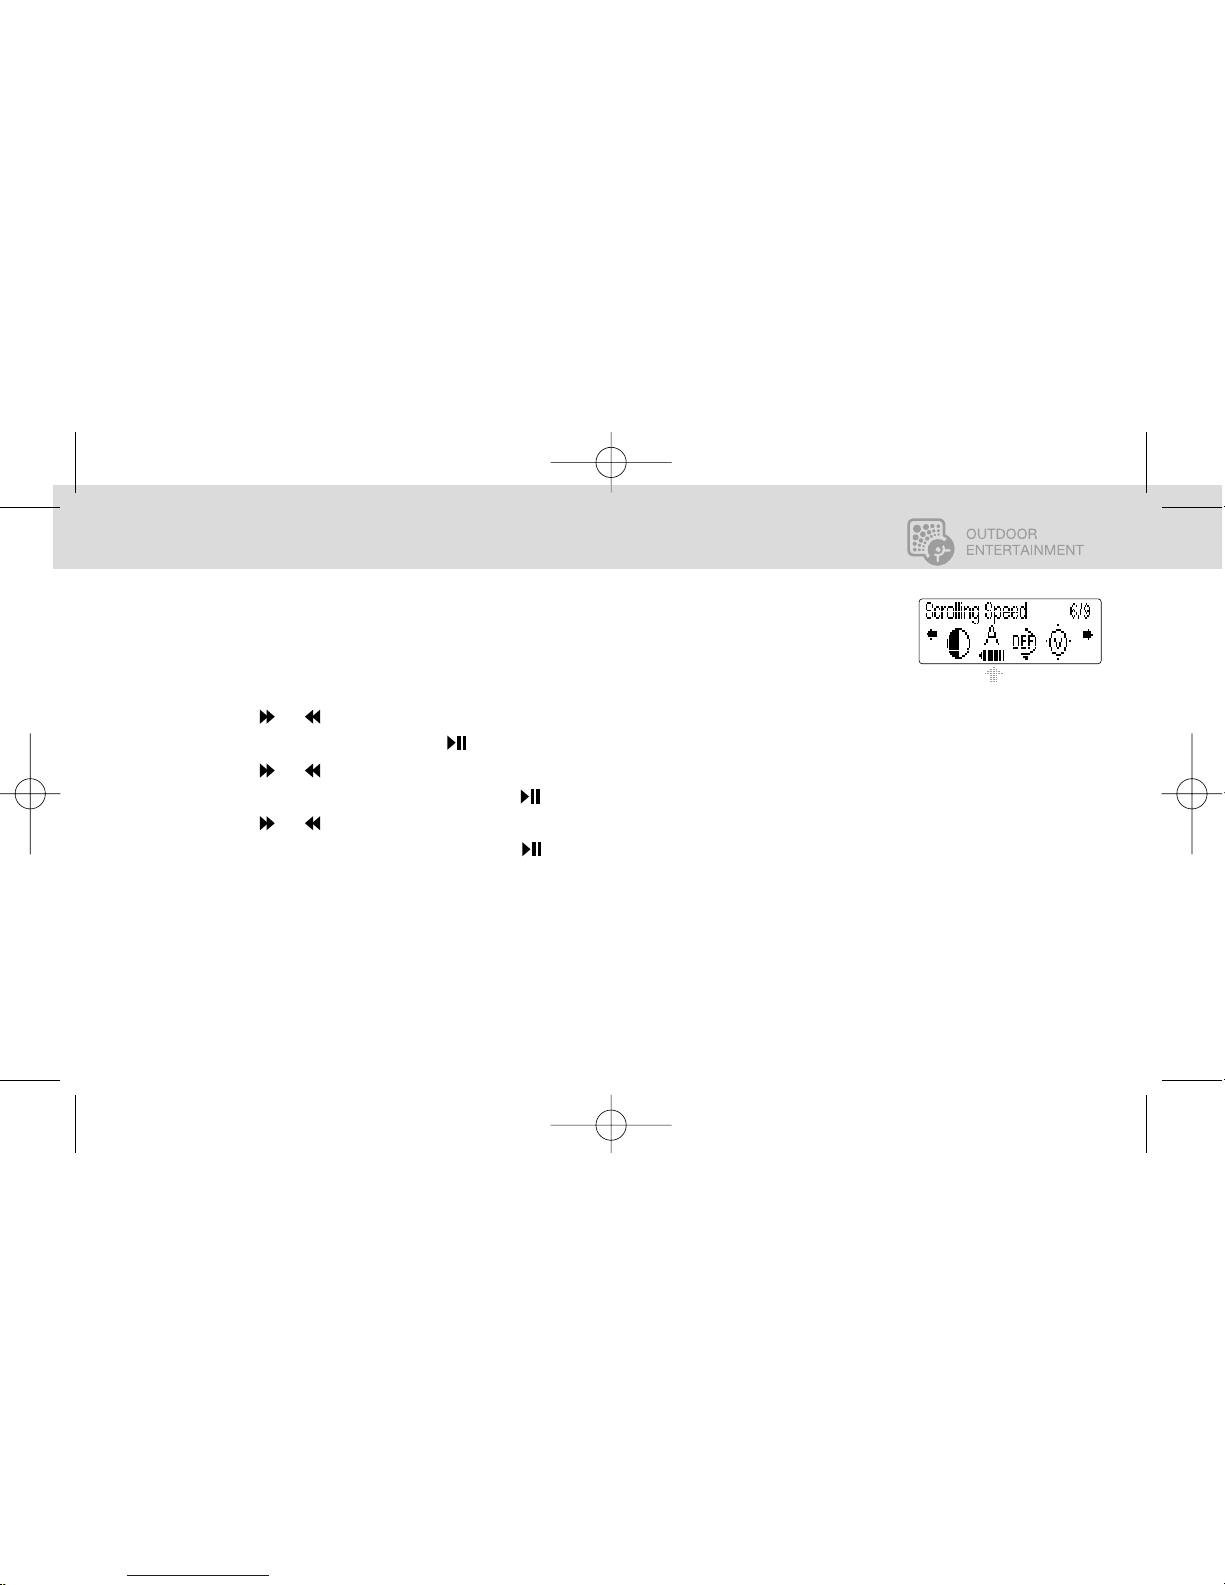
SCROLLING SPEED
This feature controls the SCROLLING SPEED of song's name on the display. You can choose
between 5 levels: OFF, 1 (VERY SLOW), 2 (SLOW), 3 (MEDIUM) and 4 (FAST).
1. Press the MENU Key.
2. Use the or keys to advance to SETTING.
3.
Select SETTING by pressing the key.
4. Use the or keys to scroll to SCROLLING SPEED.
5. Select SCROLLING SPEED by pressing the key.
6. Use the or keys to scroll through the setting options.
7. Select the desired option by pressing the key.
HGTrailAudio_man 4/14/05 11:50 AM Page 28
Page 29
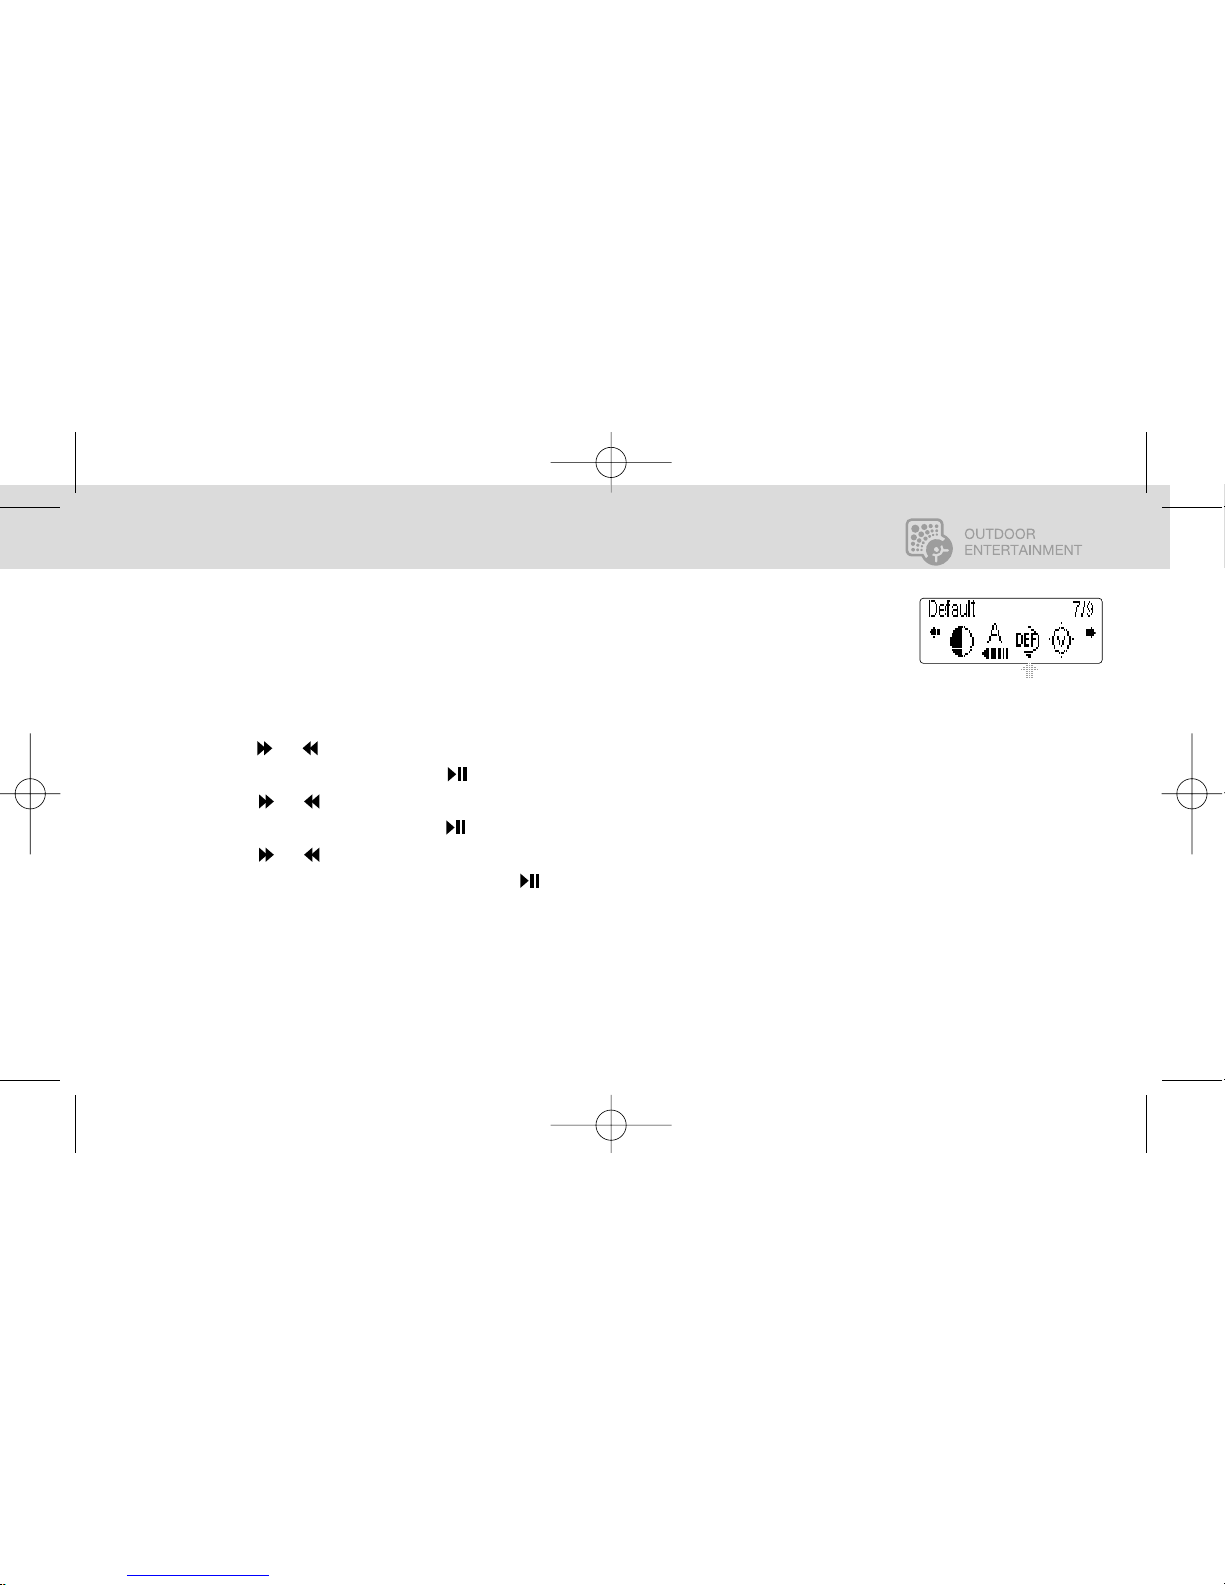
DEFAULT
This feature allows you to return all of the PROGRAMMING OPTIONS of the Trail Audio Player to
their original values.
1. Press the MENU Key.
2. Use the or keys to advance to SETTING.
3.
Select SETTING by pressing the key.
4. Use the or keys to scroll to DEFALT.
5. Select DEFAULT by pressing the key.
6. Use the or keys to scroll through the setting options.
7. Select the desired option by pressing the key.
TRAILAUDIO
Digital Outdoor Audio
MUSIC AND FM RADIO MODES - SYSTEM SETTINGS 26
english français español japan china
HGTrailAudio_man 4/14/05 11:50 AM Page 29
Page 30
TRAILAUDIO
Digital Outdoor Audio
MUSIC AND FM RADIO MODES - SYSTEM SETTINGS27
english français español japan china
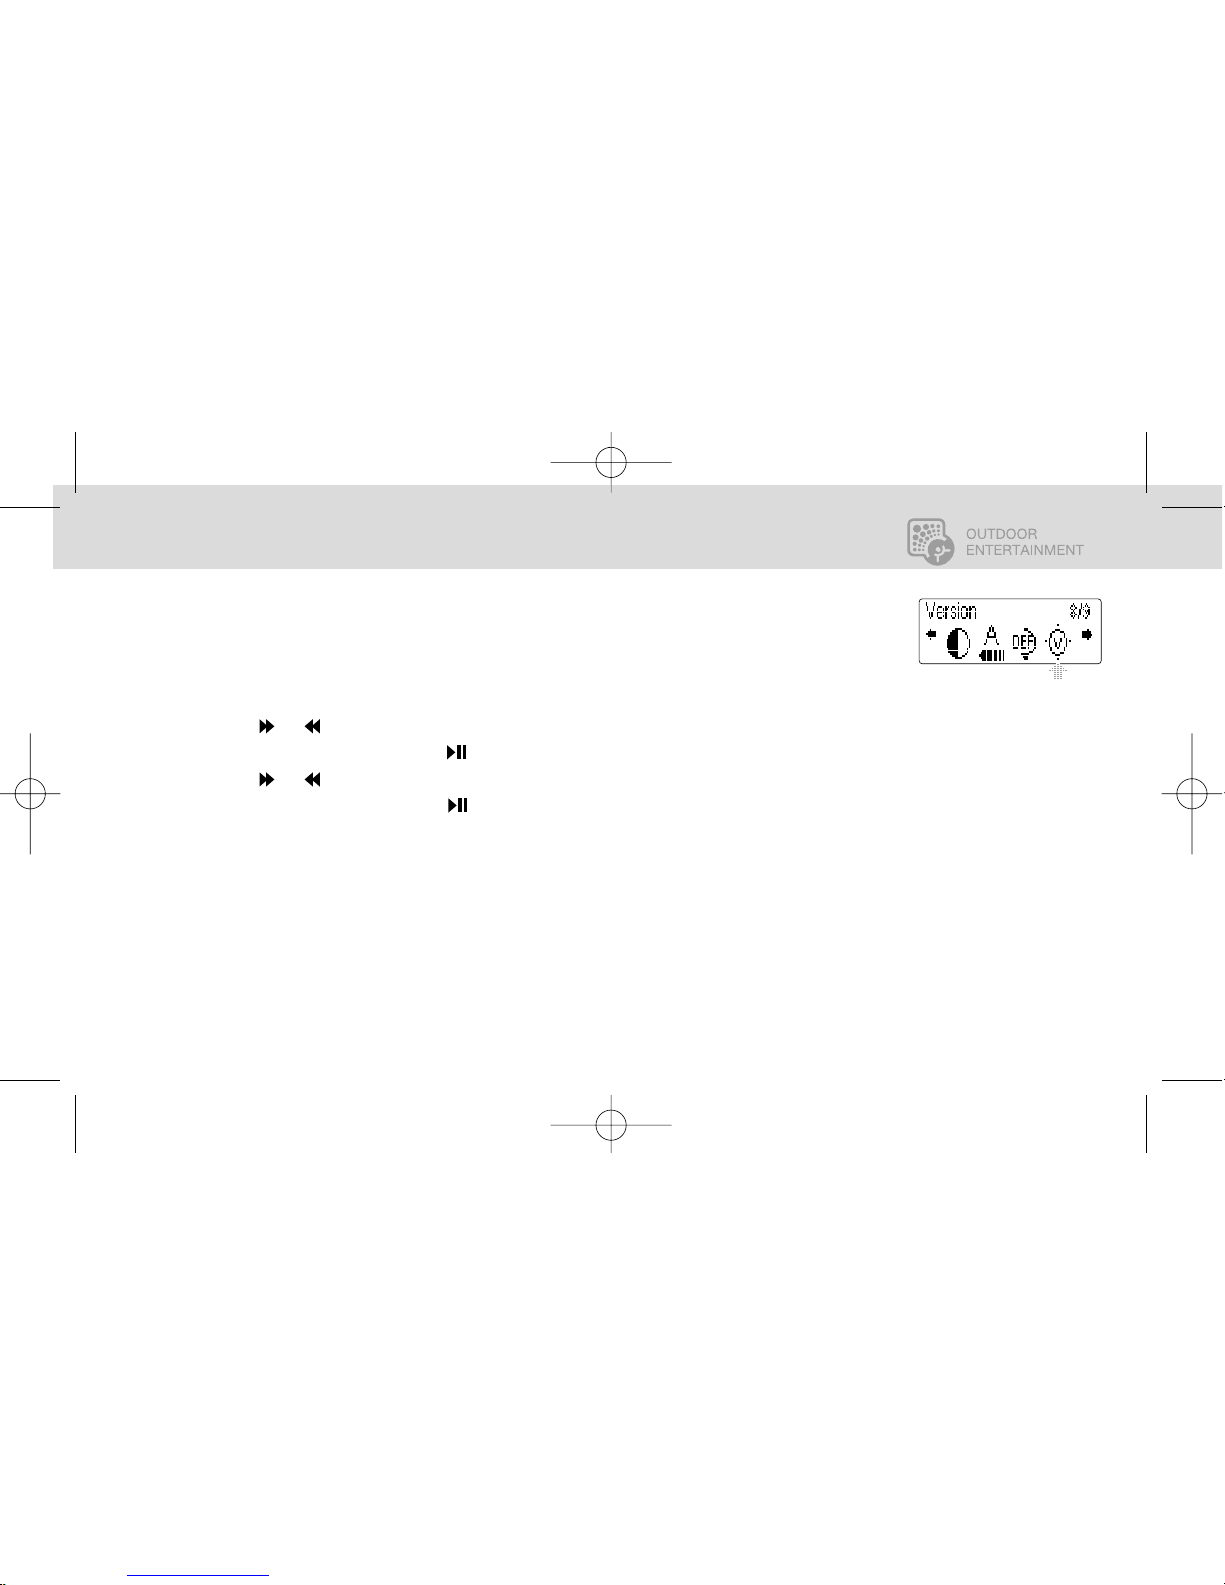
FIRMWARE VERSION
This screen allows you to view the version of software the unit is currently using.
1. Press the MENU Key.
2. Use the or keys to advance to SETTING.
3.
Select SETTING by pressing the key.
4. Use the or keys to scroll to VERSION.
5. Select VERSION by pressing the key.
HGTrailAudio_man 4/14/05 11:50 AM Page 30
Page 31
TRAILAUDIO
Digital Outdoor Audio
MUSIC AND FM RADIO MODES - SYSTEM SETTINGS 28
english français español japan china
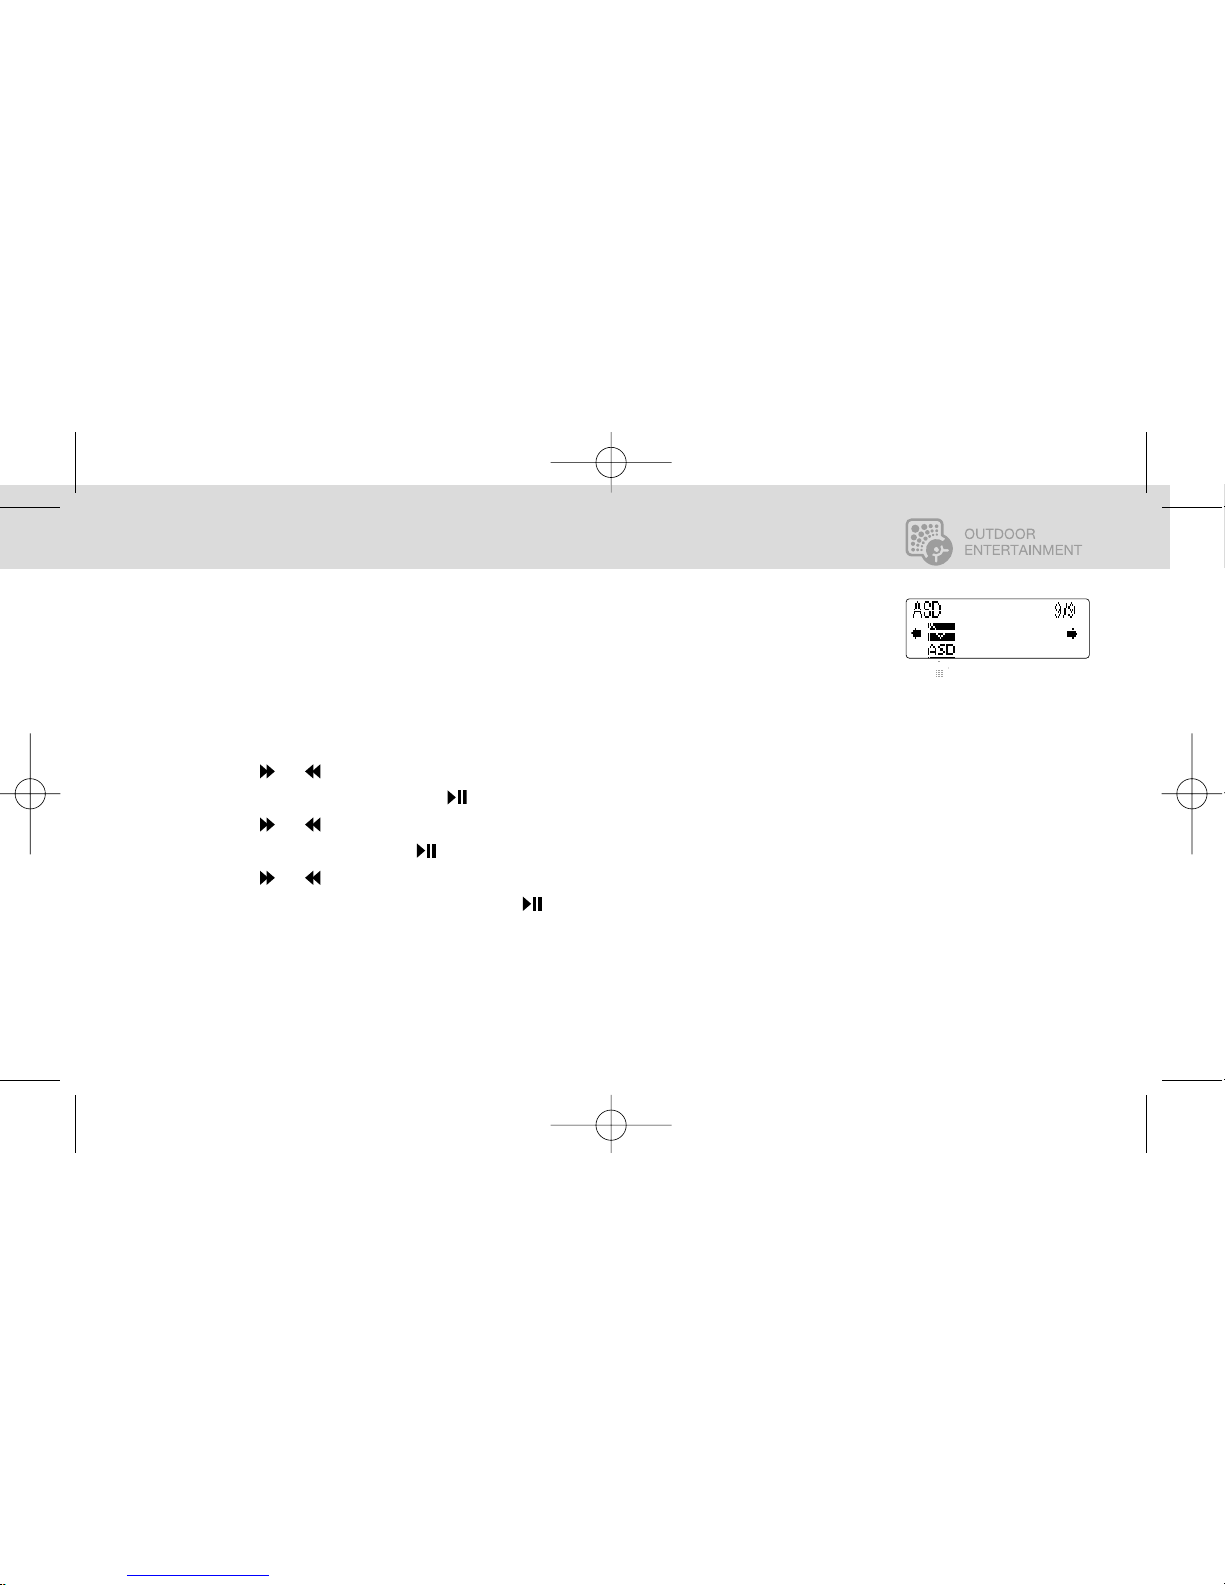
AUTOMATIC SILENCE DETECTION (ASD)
This feature allows you to choose the amount of silence at the end of a recording using the Line-In
feature allowing you to set the time gap between recorded files. The options are: OFF, 1sec, 2sec
or 3sec.
1. Press the MENU Key.
2. Use the or keys to advance to SETTING.
3.
Select SETTING by pressing the key.
4. Use the or keys to scroll to ASD.
5. Select ASD by pressing the key.
6. Use the or keys to scroll through the setting options.
7. Select the desired option by pressing the key.
HGTrailAudio_man 4/14/05 11:50 AM Page 31
Page 32
TRAILAUDIO
Digital Outdoor Audio
FM RADIO MODE - BASIC OPERATION29
english français español japan china
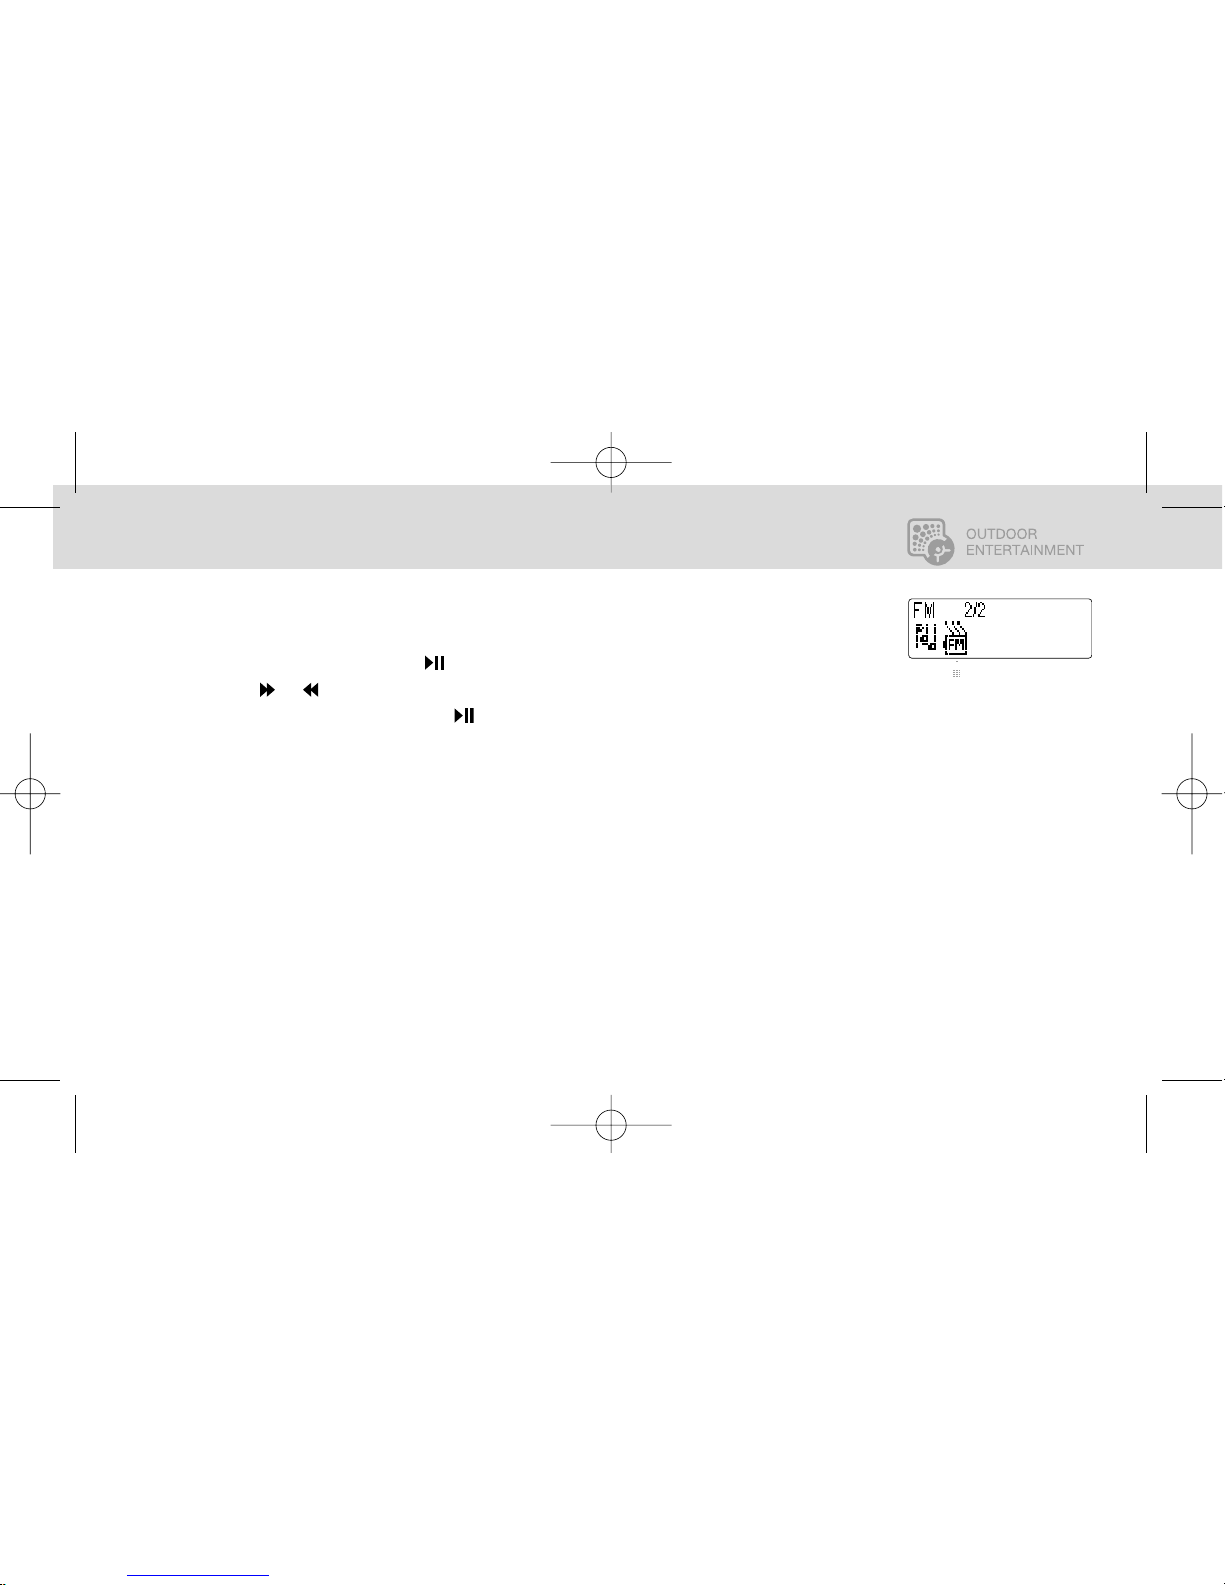
TO ENTER THE FM RADIO MODE:
1. Press the MENU key.
2. Select MODE by pressing the key.
3. Use the or keys to scroll to FM MODE.
4. Select FM MODE by pressing the key.
HGTrailAudio_man 4/14/05 11:50 AM Page 32
Page 33
TRAILAUDIO
Digital Outdoor Audio
FM RADIO MODE - BASIC OPERATION 30
english français español japan china
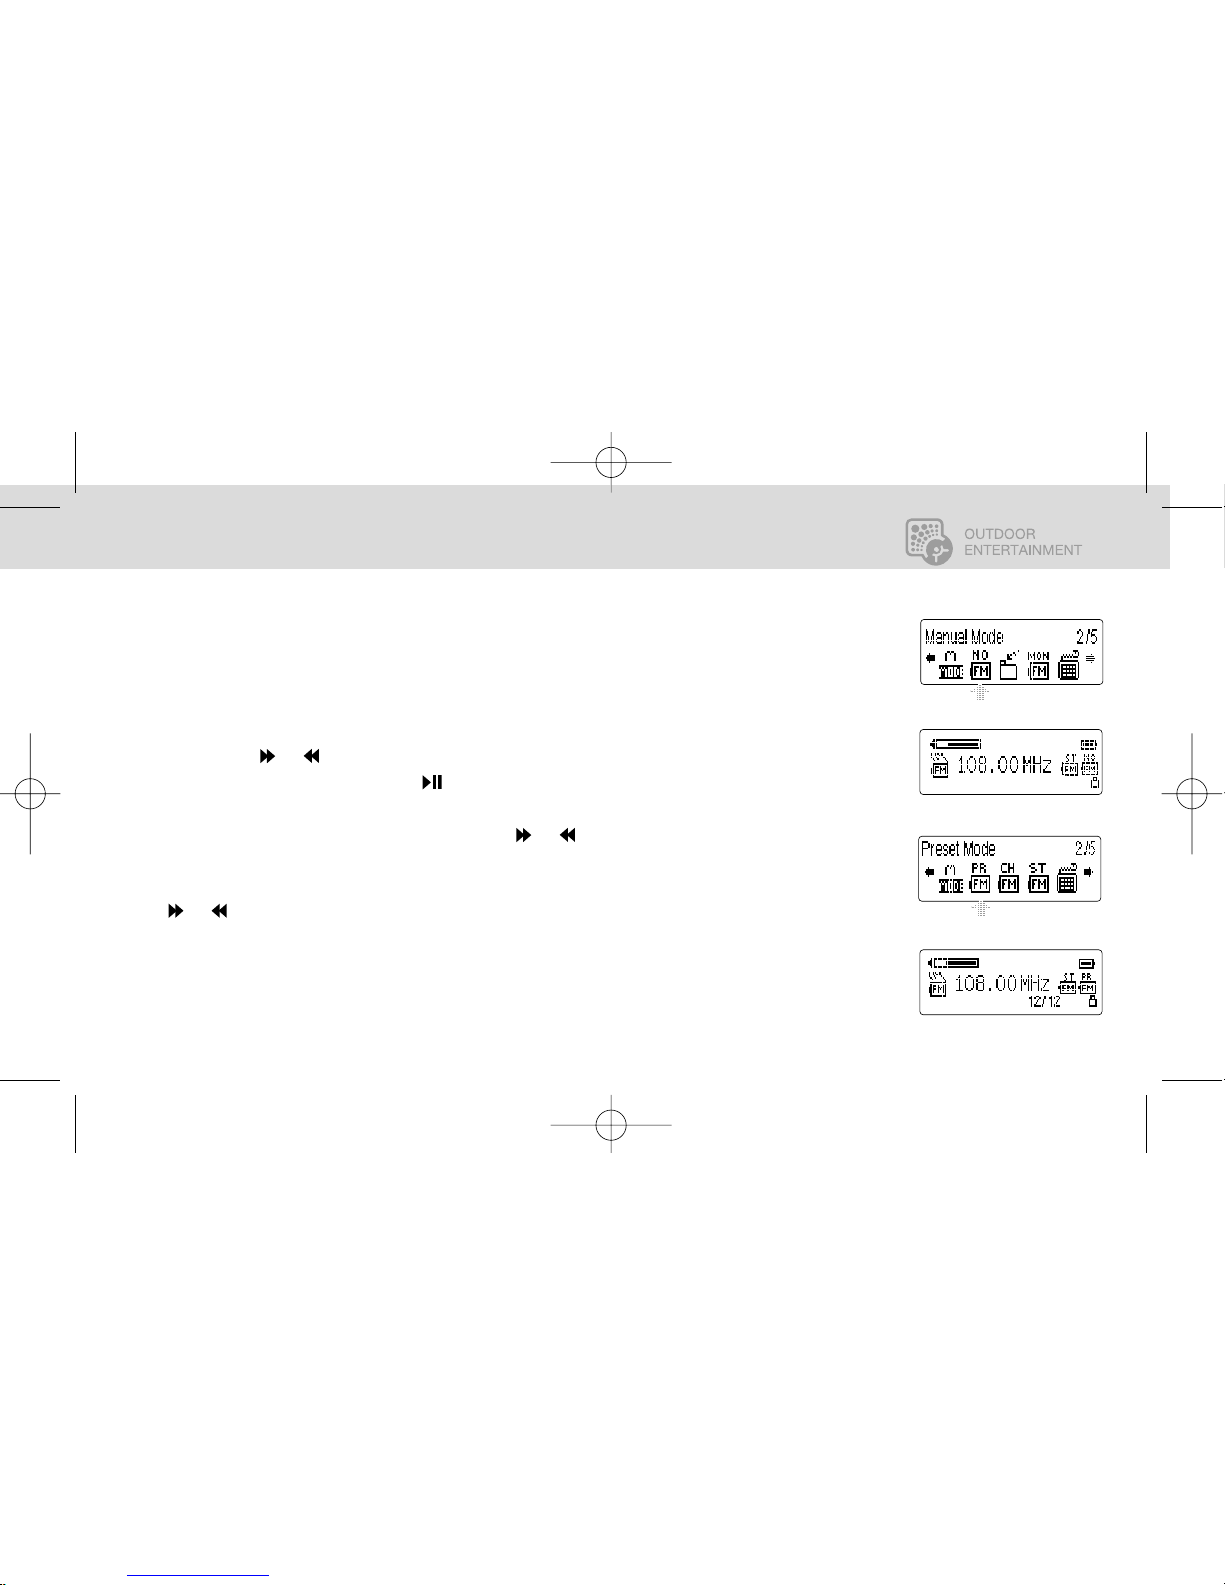
MANUAL MODE/PRESET MODE
There are two FM RADIO modes, MANUAL and PRESET
SELECT MANUAL or PRESET MODE
1. Enter the FM RADIO MODE as described previously.
2. Press the MENU key.
3. Use the or keys to scroll either MANUAL or PRESET Mode.
4. Select MODE by pressing the key.
In MANUAL MODE the radio is tuned using the or keys to scroll through the radio frequency
range from 87.5 to 108.0MHz.
The PRESET MODE allows you to program 12 of your favorite stations into the unit and use the
or keys to scroll through them.
NOTE only the alternate mode option will appear on the display. For example, if you are already in
the PRESET MODE and you enter the MENU, you will only see the option to change the FM Radio
setting to MANUAL MODE.
CHANGE TO MANUAL MODE
CHANGE TO PRESET MODE
FM MANUAL MODE
FM PRESET MODE
HGTrailAudio_man 4/14/05 11:50 AM Page 33
Page 34
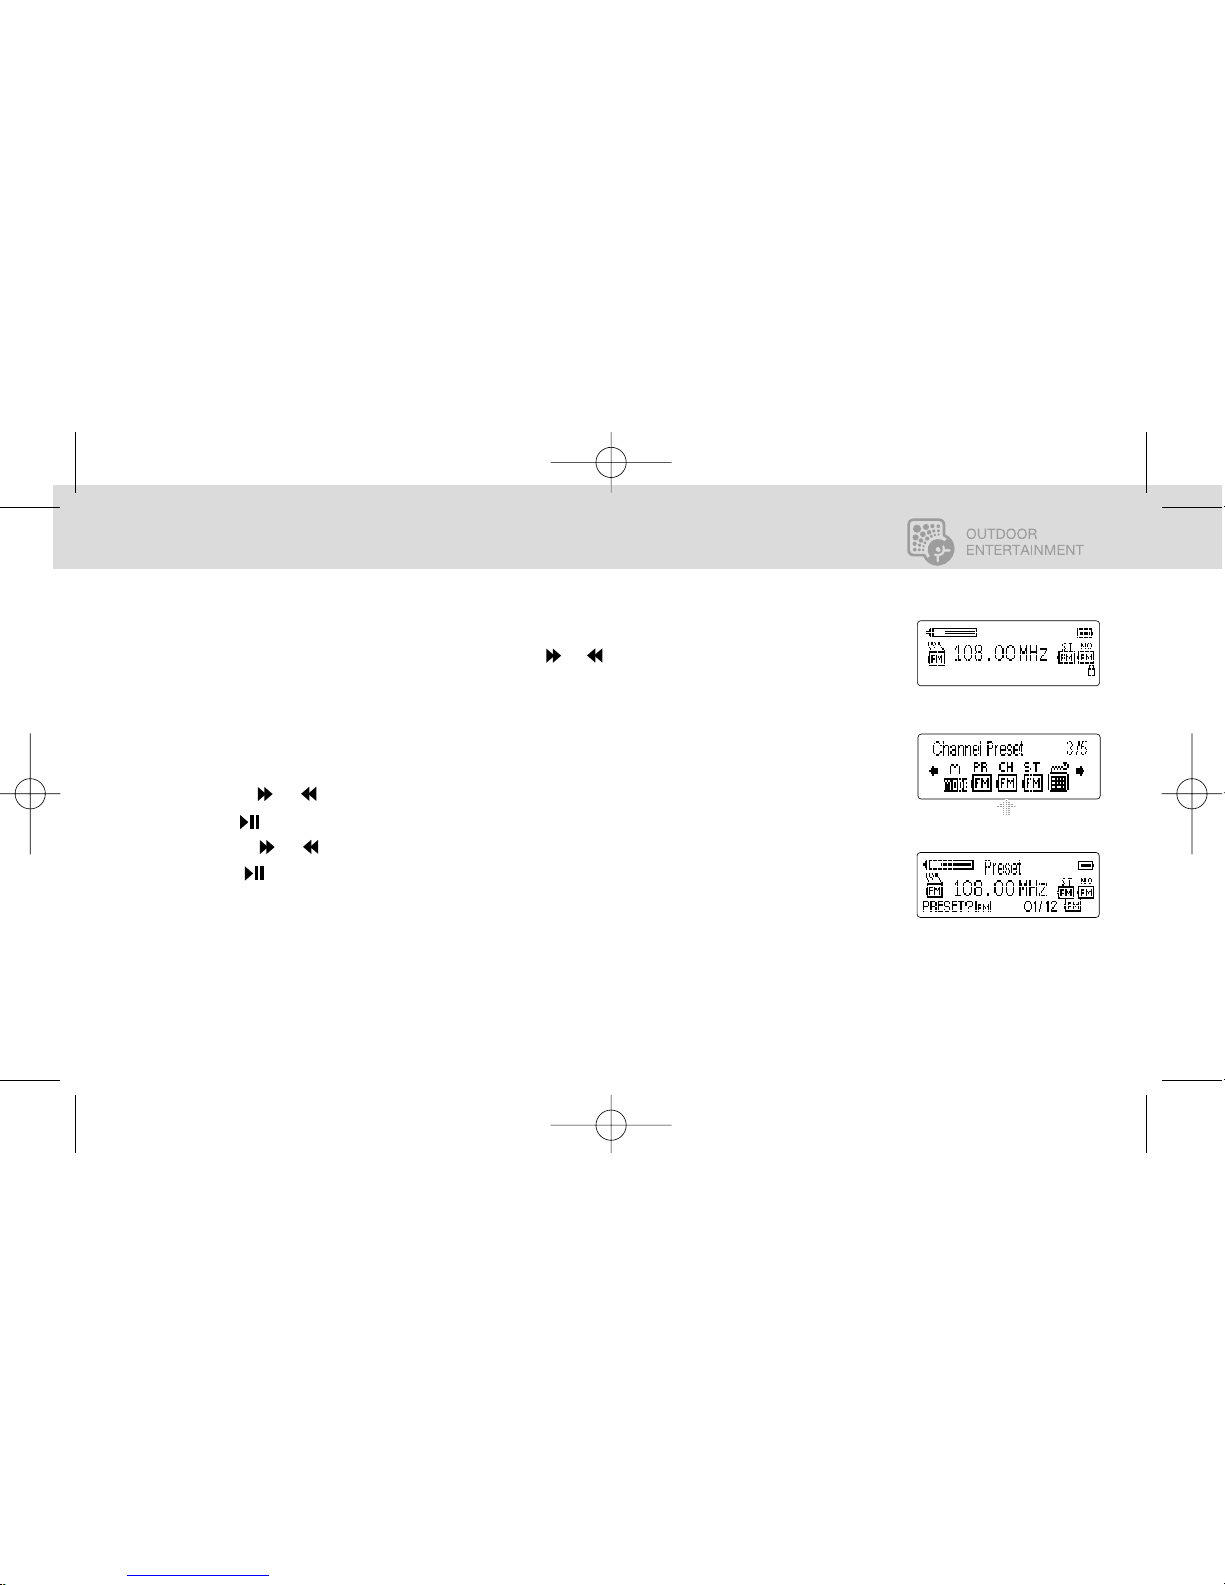
SETTING CHANNEL PRESETS
Your Trail Audio player can store up to 12 preset stations. When the radio is in the PRESET MODE
you can quickly scroll through the stations using the or keys. This section gives instructions
for saving program presets.
1. Enter the RADIO mode as described previously.
2. In MANUAL MODE tune the radio to the frequency you wish to preset.
3. Press the MENU button.
4. Use the or controls to select CHANEL PRESET.
5. Press .
6. Use the or controls to select the PRESET NUMBER.
7. Press to SAVE.
NOTE When battery is not fully charged, this process may need to be repeated to properly program channel
presets.
TRAILAUDIO
Digital Outdoor Audio
FM RADIO MODE - BASIC OPERATION31
english français español japan china
FM MANUAL MODE
SELECT CHANNEL PRESET
SAVE CHANNEL PRESET
HGTrailAudio_man 4/14/05 11:50 AM Page 34
Page 35
FM RADIO MODE - BASIC OPERATION 32
english français español japan china
TRAILAUDIO
Digital Outdoor Audio
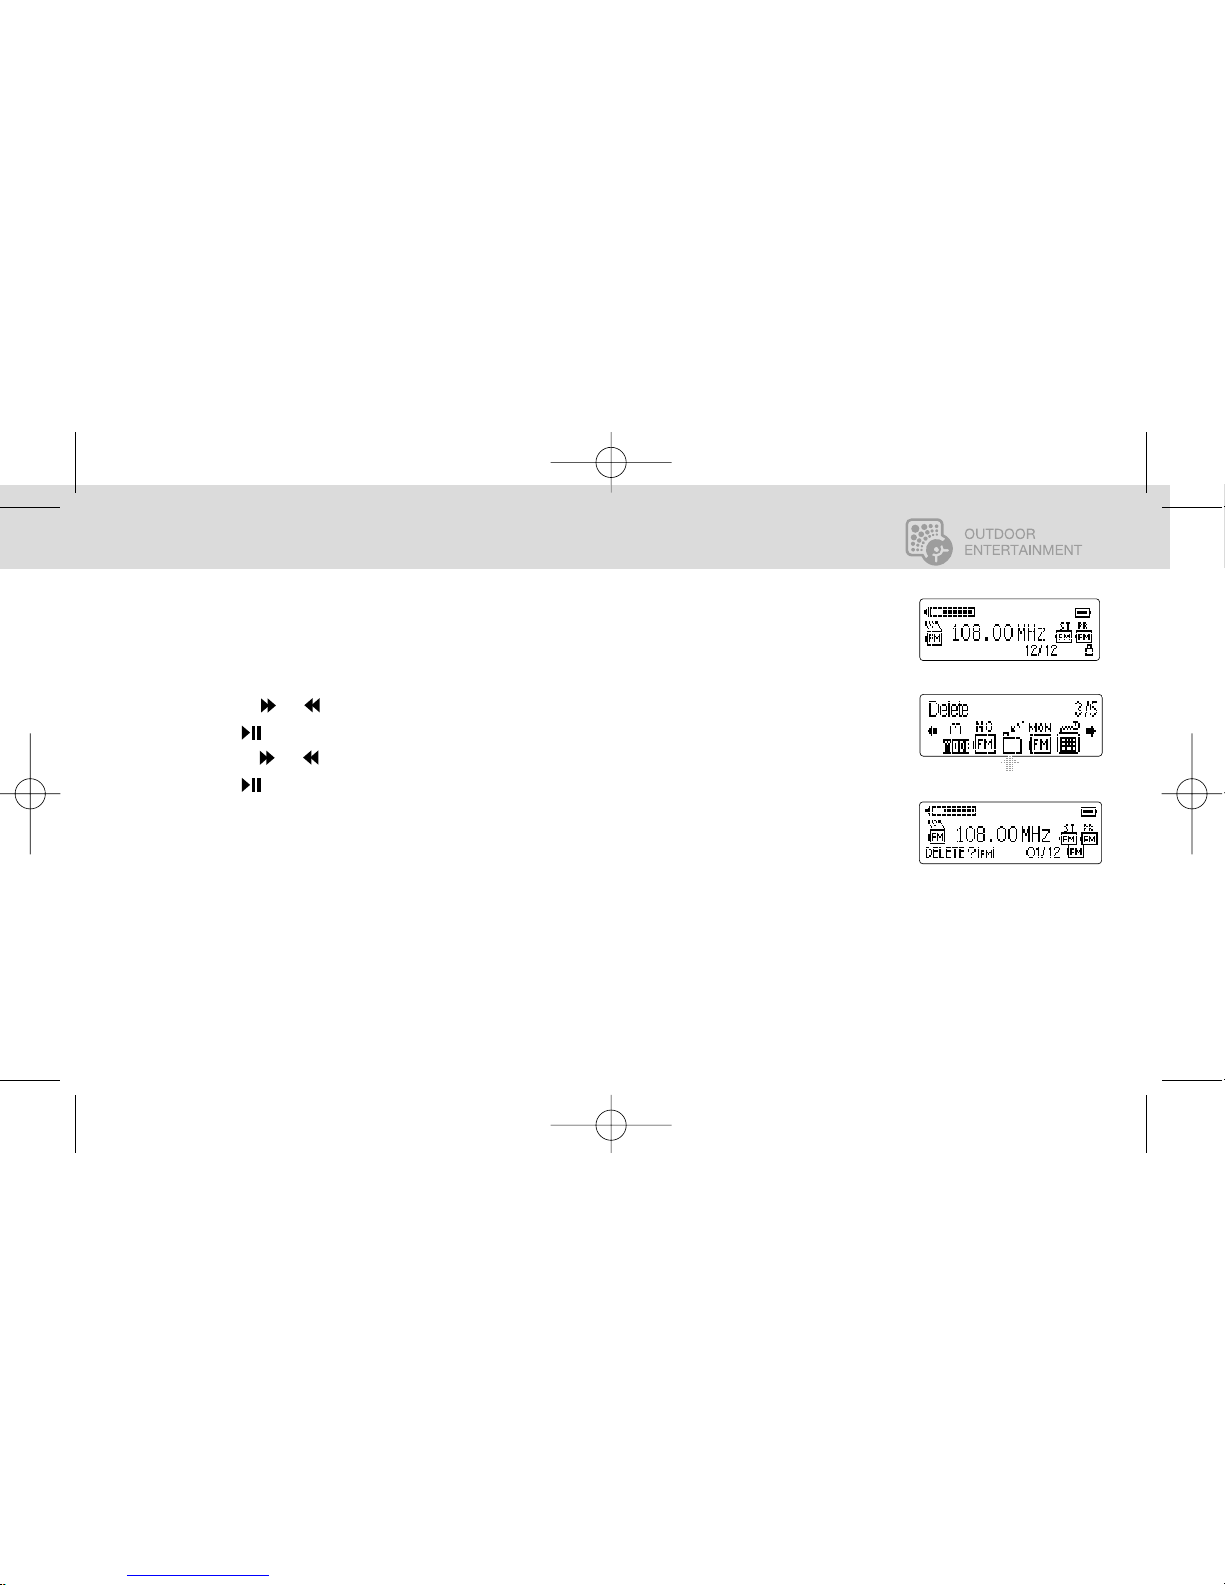
DELETING CHANNEL PRESETS
1. Enter the RADIO PRESET MODE as described previously.
2. Press the MENU button.
3. Use the or controls to select DELETE.
4. Press .
5. Use the or controls to select the preset program you wish to delete.
6. Press to confirm delete channel preset.
DELETE CHANNEL PRESET
CONFIRM DELETE PRESET
HGTrailAudio_man 4/14/05 11:50 AM Page 35
Page 36
TRAILAUDIO
Digital Outdoor Audio
FM RADIO MODE - BASIC OPERATION33
english français español japan china
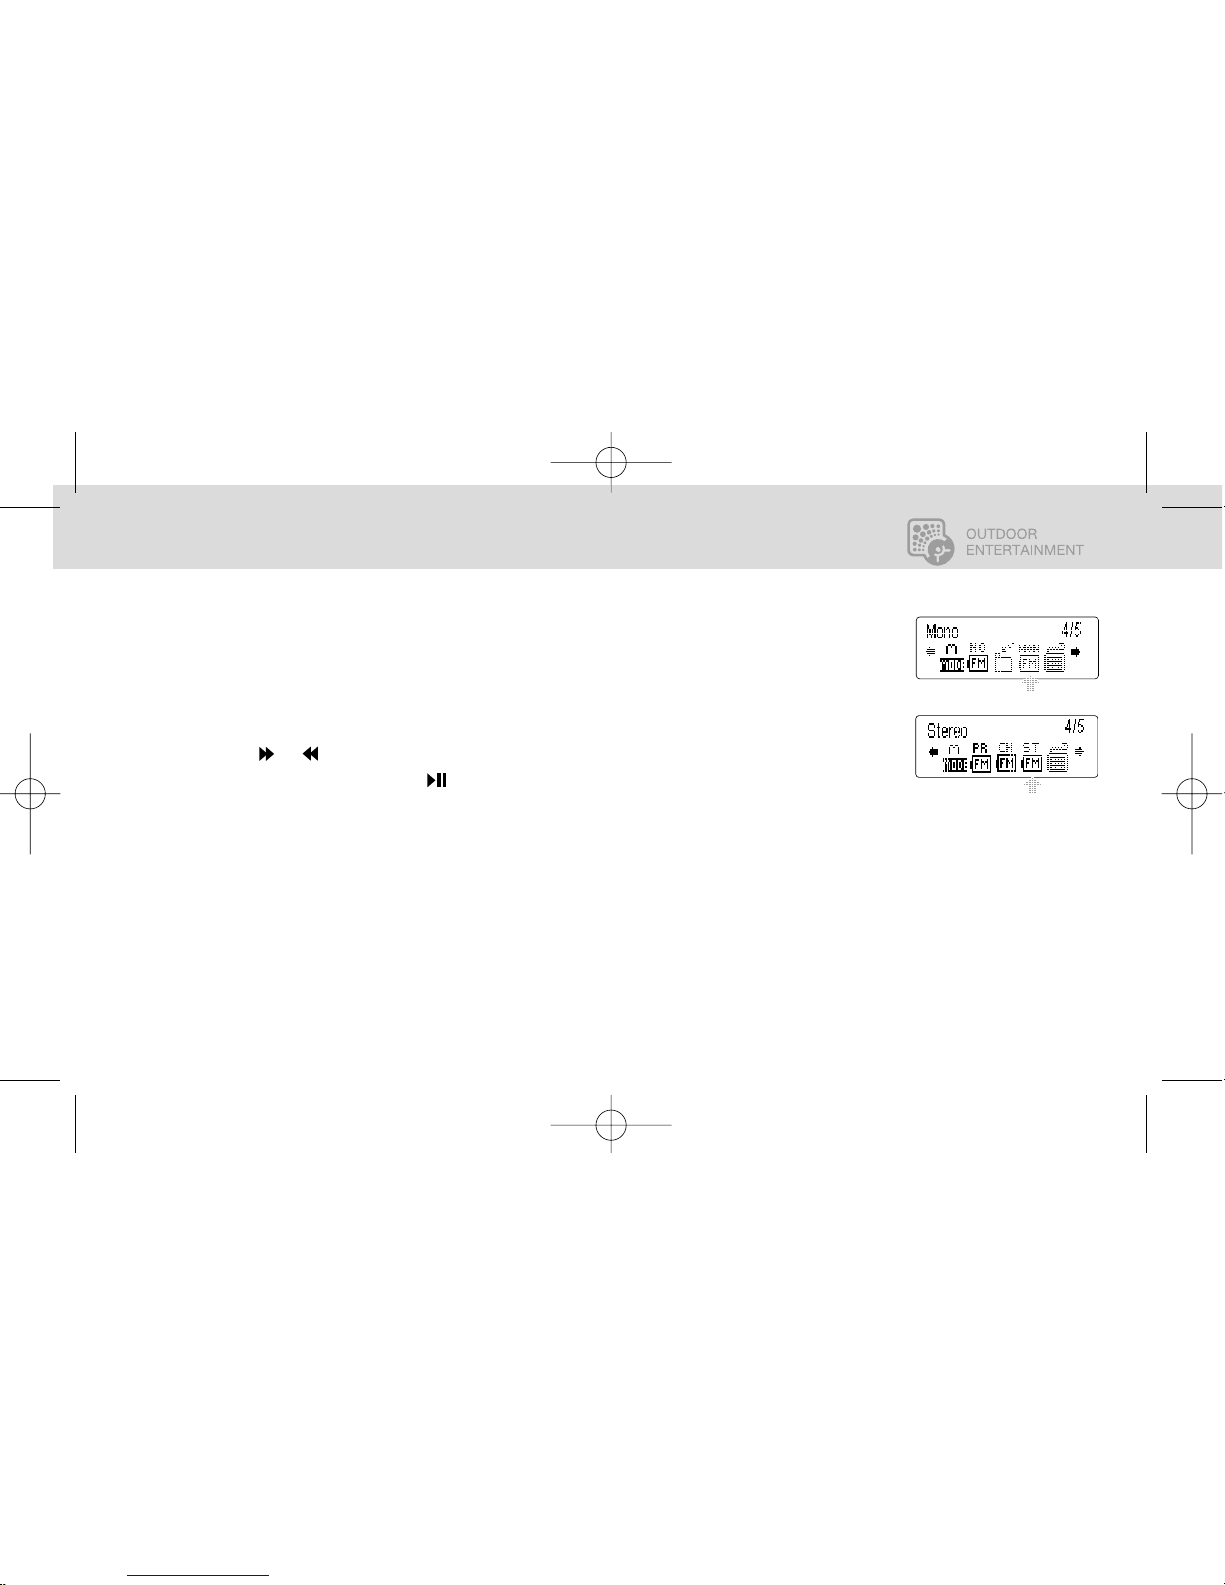
STEREO/MONO OPERATION
Your Trail Audio Player can be programmed to play FM stations in either Monophonic or
Stereophonic sound.
1. Enter either the MANUAL or PRESET radio mode as described previously.
2. Press the MENU key
3. Use the or keys to scroll to either MONO or STEREO Mode
4. Select MODE by pressing the key
NOTE only the alternate mode option will appear on the display. For example, if you are already in the MONO
Mode and you enter the MENU, you will only see the option to change the setting to STEREO Mode.
CHANGE TO MONO OPERATION
CHANGE TO STEREO OPERATION
HGTrailAudio_man 4/14/05 11:50 AM Page 36
Page 37
RECORDING
Your Trail Audio player can record in stereo directly to memory from any FM radio broadcast. The
unit automatically records from the FM radio at a bit rate of 128kbps.
While listening to any radio station, simply press the Rec/A-B button on the face of the unit.
To stop the recording process simply press the Rec/A-B button a second time.
While recording the display will show the amount of time for the recorded song along with the
amount of time remaining in memory.
NOTE:
Radio recording quality depends on the reception quality at the time of recording
HOW TO FORMAT THE
PLAYER
The purpose of re-formatting
the player is to try to restore
the player to normal operation.
This is for when the player is
not able to function properly
or in cases where your player
is unable to power on. Keep in
mind, all information stored
on the player will be deleted
by the formatting process.
1. Connect the player to
the PC.
2. Right click the additional
drive and click Format.
3. Click "Yes" to confirm.
NOTE: The Trail Audio player
supports FAT/FAT16 file
formats. DO NOT format the
unit using a FAT 32 format.
TRAILAUDIO
Digital Outdoor Audio
34
english français español japan china
FM RADIO MODE - BASIC OPERATION
HGTrailAudio_man 4/14/05 11:50 AM Page 37
Page 38
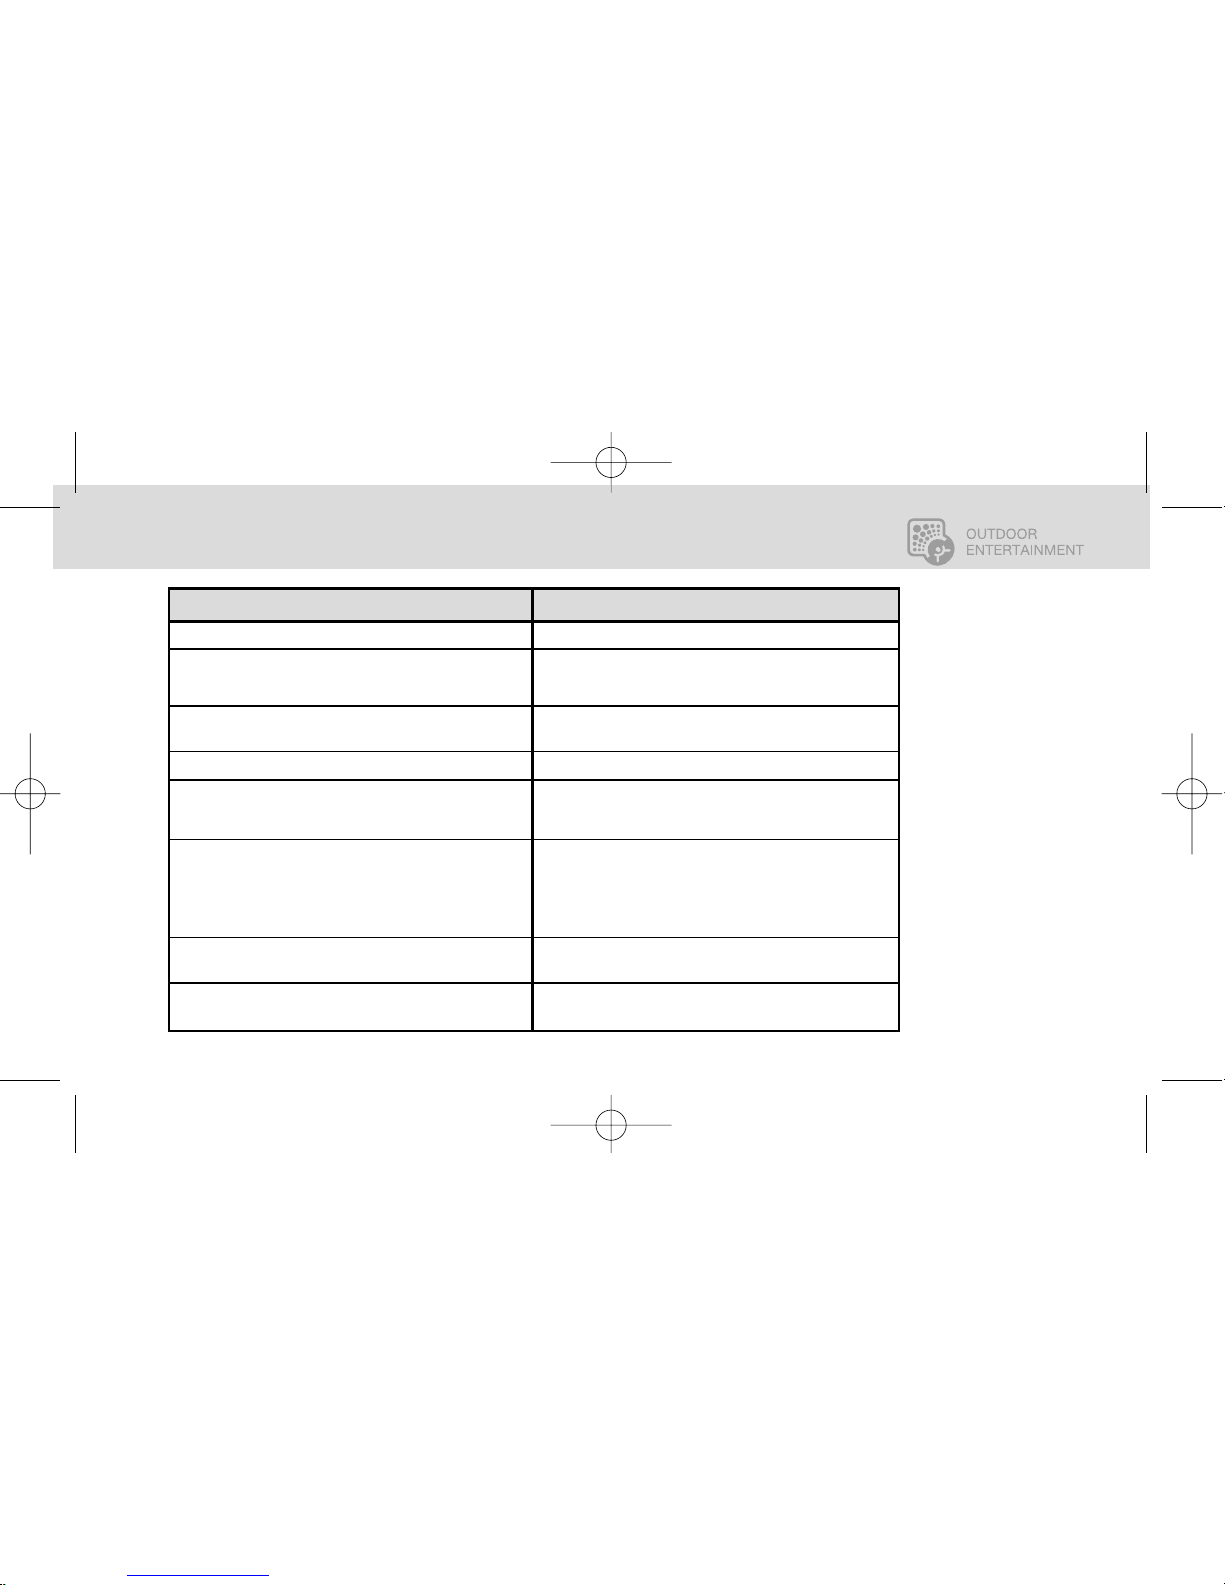
Check to make sure battery is still good.
Be certain the key lock function is not activated. If key
lock is active the key lock icon will appear on the unit's
display.
1) Be sure there are MP3 files stored in memory. 2) Be
sure the device is in Music Mode
This key only works during playback of music.
Our software driver is compatible with Win 98, 2000,
ME, XP, as well as Macintosh OS X. Other systems may
not be supported.
1) Make sure that the correct driver is installed. 2) Make
sure the Trail Audio player is turned on and fully
connected to your computers USB port. 3) Check Device
Manager in your computer to be sure the player is
correctly installed
Choose "Default" in system settings and select "Yes" to
restore the player to its original factory settings.
Check if the backlight is switched "OFF" in the system
setting.
The player does not work or the display is blank.
The keys do not respond.
Unable to play files.
A-B Looping does not function
Unable to install driver or software
Unable to find the mass storage device after
connection to the PC.
How to restore the player to default settings.
No Backlight
PROBLEM SOLUTION
TRAILAUDIO
Digital Outdoor Audio
TROUBLE SHOOTING35
english français español japan china
HGTrailAudio_man 4/14/05 11:50 AM Page 38
Page 39
HGTrailAudio_man 4/14/05 11:50 AM Page 39
Page 40
TrailAudio
Digital Outdoor Audio
HIGHGEAR USA INC.
web: www.highgear.com
email: [email protected]
© 2004 Highgear USA, Inc. All Rights Reserved.
HGTrailAudio_man 4/14/05 11:50 AM Page 40
 Loading...