

AltiTech
INSTRUCTION MANUAL

WELCOME
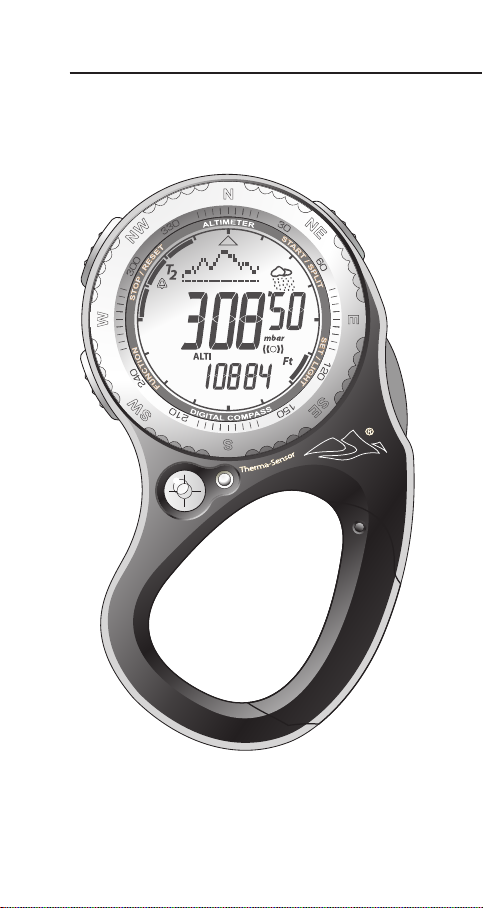
Congratulations on your purchase of the AltiTech, by
Highgear. The AltiTech is packed with features you’ll want to
use in all your outdoor activities. Please take a few minutes to
setup the AltiTech and familiarize yourself with its features.
Features
• Lightweight and easy to carry. Clips on to you or your gear.
• 9 operation modes: Time (T1), Dual Time (T2), Compass,
Barometer, Altimeter, Altimeter Data, Chronograph, Chronograph
Data and Alarm.
• Altimeter of 1 Foot (or 1meter) resolution and with working range
from –2296 feet (-700 meters) to 29,520 feet (9000 meters).
• Altitude displayed in meters or feet selectable by user.
• 20 altimeter data memories with date, time and altitude reading.
• Barometer of 1 mbar resolution and with working range from 300
mbar to 1100 mbar.
• Weather with weather forecast and temperature.
• Thermometer of 0.1 degree resolution and with working range from
-4 F (-20 C) to 158 F (70 C).
• Temperature displayed in F or C selectable by user.
• Electronic compass with digital direction indication in 16 cardinal
positions together with degree.
• Declination angle adjustable for improved navigation.
• 12/24-hour display formats selectable
• Auto calendar from 2000-2049.
• 1/100-second chronograph with working range up to 24 hours,
with lap and split time selectable.
• 100 lap memories stored in a maximum of 30 runs.
• Each run stores the run number, month, day, lap number, lap/split
times, best lap time and average lap time.
• 2 daily alarms (20 seconds) that can be set to refer to T1 or T2.
• Hourly chime signal, chime “on” with button conrmation sound.
• 3 seconds light up EL back light.
1
Getting Started
The AltiTech has 8 basic functions and some of these need to be setup before you
can use them. We recommend that you follow the setup directions rst for each
function, then come back and familiarize yourself with its operation.
Meet the AltiTech
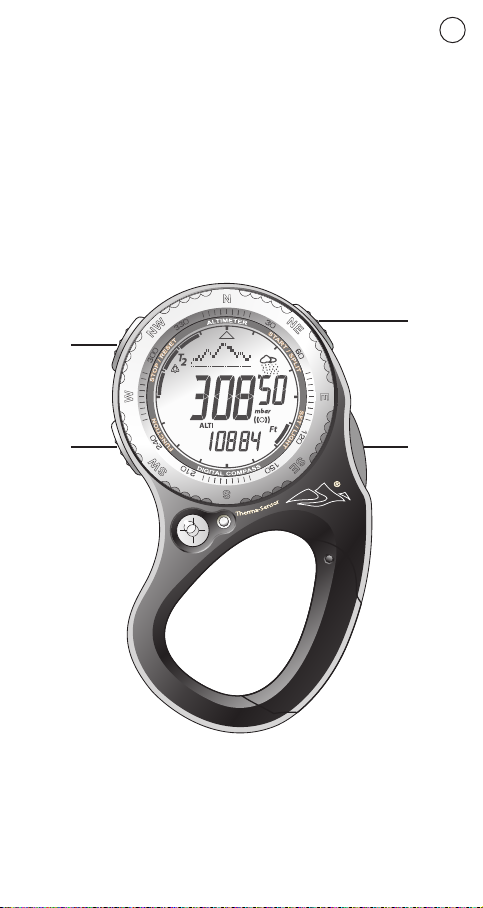
Hold the AltiTech as shown below. You’ll notice the AltiTech has 4 buttons, 3 gray
and 1 orange. Clockwise from the bottom left, we will refer to them as B1, B2, B3,
and B4.
B3
B2
B4B1
2
Changing Modes
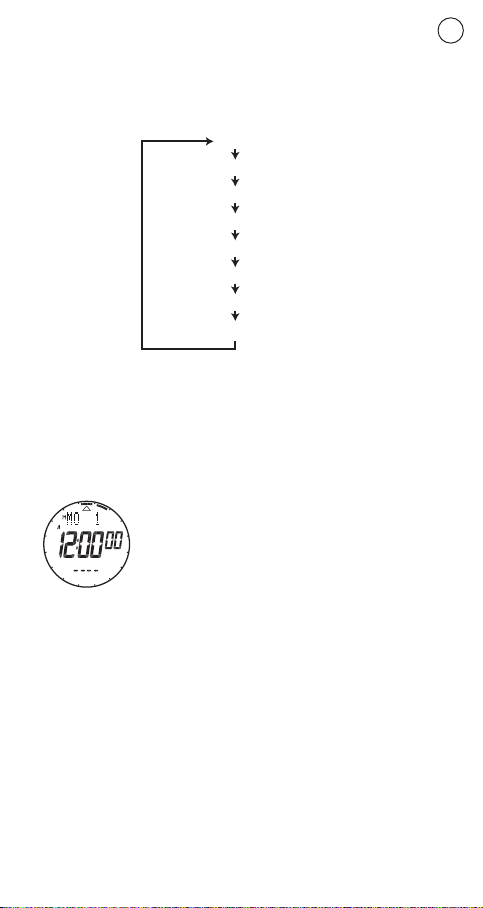
The name of the mode displays for 1 second before entering the mode.
B1, at the bottom left, always changes the mode of the AltiTech. The
AltiTech has 8 modes. When you move through the modes with B1, the
AltiTech shows the name of the mode. In order, they are:
TIME
COMP (Compass)
BARO (Barometer)
B1
ALTI (Altimeter)
ALTI DATA (Altimeter Data)
CHRO (Chronograph)
CHRON DATA (Chronograph Data)
ALRM (Alarm)
Reset
Unless the AltiTech was setup when you purchased it, start by resetting it.
Press and hold all 4 buttons at the same time (B1,B2,B3,B4) the screen will turn
mostly black. Now release all 4 buttons and you will hear a beep. The unit will
display test patterns, and then display 12:00.00. You can reset the AltiTech this way
any time you need to, but remember that all your altimeter and chronograph data
will be erased.
3
Back Light
You can turn on the backlight by pressing B4. The light will turn on for
3 seconds. Be sure not to hold B4 to keep the backlight on as you will enter the
unit’s setup mode.

TIME - Time
Setting Up:
The rst time you use the AltiTech and anytime you change time zones, you’ll need
to set the time. First, make sure the Time is displayed. If you’ve just reset the AltiTech,
time mode will be selected (if not, see Changing Modes above). You can also switch
to TIME mode automatically from any other mode by holding down B1 until the
display shows TIME.
Using Both Times
T1/T2 Dual Time
Day & Date
PM Indicator
The AltiTech can keep track of two dates and times at once, T1 and T2. The primary
time is T1. T1 or T2 is displayed in the upper left corner. To change between T1 and
T2, you can press B2 to display the alternate time or Hold B2 for 2 seconds to change
the display to the alternate time.
Assuming you’re setting up the AltiTech for the rst time, you’ll want to set your
current time for T1. Make sure the T1 icon is displayed and continue with the
directions. The directions are the same for setting T2, just make sure that T2 is
displayed on the screen when you begin.
Weather
Seconds
Alarm
Fahrenheit / Celsius
Setting the Time and Date.
1. Press and Hold B4, the orange button. The display will change to
Adjust Hold. Continue to hold B4 until the time is displayed and the
word Hour appears. Release B4
2. The AltiTech prompts you to set the hour. Use B2 and B3 to change
the hour. Notice that B2 decreases the hour and B3 increases the
hour. Adjusting the hour also changes the AM/PM setting (shown by
an A or P directly above the hour). Be sure to adjust the hour so that
the AM/PM setting is correct.
3. Press B1 to move to the minutes. Now use B2 (-) and B3 (+) as
above, press B1 again to enter the next setting.
4. Repeat for Seconds, Year, Month, Day and Time Format. 12H Time
Format uses AM/PM while 24H (also called Military Time) does not.
Use B1 to move to the next setting each time.
5. When you have made the necessary adjustments, press B4 again to
leave the setting mode.
4

COMP – Compass
Setting Up
To successfully complete the calibration of the compass you will need a at
non-metal surface in an open area, away from computers, magnets, and large
metal structures. Resist the temptation to calibrate the compass inside your
house!
1. Press B1 until COMP is displayed (see Changing Modes).
Once in compass mode, press and hold B4 until “CAL” appears.
Please note: if AltiTech already reads “CAL” then proceed to step 2.
2. Slowly rotate the unit clockwise two complete rotations on a at level
surface. Each rotation should take at least 15 seconds.
3. Now press B4 to end the calibration and enter the declination angle.
Declination Angle
The earth’s magnetic eld doesn’t perfectly line up with what we think of as True
North. A compass points to magnetic North, not to geographic North or True
North. The deference between magnetic North and True North is declination. You
can adjust the declination on the AltiTech so that it points to True North.
4. Find the declination angle on the chart below, or by going online to
http://www.ngdc.noaa.gov/ (Click on geomagnetism).
5. The tens digit of the angle is ashing.
Enter the angle by using B2 (-) and B3 (+). If the angle is a single
digit (for instance, 8 degrees), enter zero. When you have set the
rst digit, press B1 and repeat for the second digit.
6. Press B1 again and now set the declination to East or West
with B2 and B3.
7. Press B1 again. Now press B4.
AltiTech displays END CAL and then the compass.
Using the Compass
Press B3 to display the current bearing. In addition to forward direction displayed
at the top, and the bearing angle displayed in the middle, the AltiTech also
displays three lines together around the outside of the display to show South and
one line to show North.
The compass will display for 10 seconds and then return to displaying ----. This helps
to extend battery life. You can hold B3 to get a continuous display. When you
release B3, the AltiTech continues to display the compass for 10 additional
seconds.
You may choose to use the rotating bezel (silver circle around the display) to align
with the display. You can also use the bezel as an aide for navigation.
5

City Declination Angle
Anchorage 22 E
Atlanta 4 W
Bombay 1 W
Boston 16 W
Calgary 18 E
Chicago 3 W
Denver 10 E
Jerusalem 3 E
London 4 W
Little Rock 3 E
Livingston, MT 14 E
Munich 1 E
New York City 14 W
Orlando 5 W
Oslo 2 W
Paris 2 W
Rio De Janeiro 21 W
San Francisco 15 E
Seattle 19 E
Shanghai 5 W
Toronto 11 W
Vancouver 20 E
Washington DC 10 W
Waterbury, CT 14 W
6

BARO – Barometer
Setting Up
Press B1 until BARO is displayed (see Changing Modes). In BARO mode,
the sea level barometric pressure is displayed in the central text feild. The
units of barometric pressure are mbar, or millibars. The sea level
barometric pressure represents the prsent barometric pressure reading
reduced to sea level.
1. Press and hold B4 until the words SET WEATHER appear on top line.
2. Set current weather condition. You can scroll through Partly Cloudy,
Cloudy, Rainy, and Sunny using B2 (-) and B3 (+). To select current
weather, press B1.
3. Altitech prompts you to SET SEA LEVEL PRESSURE.
If you know the current pressure in millibars, you can calibrate the
Altitech to the exact pressure using B2 (-) and B3 (+).
Press B1 to confirm.
4. Exit setup by pressing B4
Fahrenheit and Celsius
When the temperature is displayed on the bottom line of the Barometer
mode, you can adjust the default temperature reading to Fahrenheit or
Celsius. Hold B2 for 3 seconds to change the setting. You will see the
°f or °c icon change. You can also view the other temporarily by pressing,
but not holding, B2.
Using the Barometer
The Barometer mode displays a graph of the Barometric pressure over the
past 24 hours (each bar represents 1 hour), the weather forecast, the
current barometric pressure, and the temperature at the bottom of the
screen. Pressing B3 will change the bottom display to cycle through
temperature, absolute pressure, and time. Absolute barometric pressure
is the absolute air pressure in the location of the measurement.
The weather forecast displayed with an icon at the upper left can show
Partly Cloudy, Cloudy, Rainy, and Sunny. The forecast is approximately for
the next 6-12 hours. Since the forecast is based primarily on barometric
pressure and temperature, you should use it in conjunction with
professional weather forecasts to help you plan your activities.
Note:
The thermometer takes a reading every 4 minutes, the barometer takes a reading once
an hour. This feature helps preserve battery life.
7

ALTI – Altimeter
Setting Up
First enter ALTI mode by pressing B1 till display shows ALTI.
The Altimeter can be calibrated to improve its accuracy, but this is not
required. If you know your current altitude, you can adjust it as follows.
1. Press and hold B4.
Display shows CAL HOLD, then CAL and the current altitude.
Release B4
2. Press B2 (-) and B3 (+) to adjust the altitude up or down.
3. Press B4 again to exit calibration.
Using the Altimeter
When you enter ALTI mode, you’ll see your maximum (MAX) and
accumulated (ACC) altitude scroll along the top line. The current altitude is
displayed in the middle. And the current time is displayed at the bottom.
You can select feet or meters as the default display, by holding B2 for
3 seconds until the display changes.
The Altitech can store 20 datapoints from your ascent or descent in its
memory. Just press and hold B3. Altitech shows “Store Data” and then
“Stored.” Release B3. The Altitech records the altitude and the date and
time you reached it. This information can be retrieved in the Altimeter
Data mode described below.
You can also press B3 during normal operation to display MAX and ACC
altitude,
MAX altitude shows the highest altitude reading since the unit was last
reset. ACC altitude shows the total vertical rise accumulated since the
unit was last reset. If your hike took you up, down, and up again, the ACC
would be the total of the 2 periods in which your altitude increased.
Your MAX and accumulated (ACC) altitude can be reset. Follow the
instructions under Setting Up above. Instead of pressing B4 to exit, press
B1. The Altitech displays MAX and the maximum altitude. Press B3 to
reset the MAX altitude. Press B1 again to do the same for Accumulated
altitude.
8

ALTI DATA – Altimeter Data Mode
The Altitech stores Altimeter information you decide to save in the ALTI
DATA mode.
Press B1 until ALTI DATA is displayed. Altitech shows the Date and Time of
the first saved datapoint. To see the altitude information, just wait 2
seconds and the Altitech will display the altitude for that data point. To see
another saved point, use B2 (-) and B3 (+) buttons to scroll through the
dates.
Altitude data cannot be erased individually. To erase all the altitude data,
press and hold B4. Altitech displays CLEAR HOLD and then shows DATA
01 with four lines. Release B4.
After clearing and when no data has been stored in the Altitech, it displays
DATA01 with four lines below.
DATA 03
2-4 12:40
440 ft
DATA 01
2-4 12:04
120 ft
DATA 02
2-4 12:2270 ft
DATA 04
2-4 12:55
130 ft
9

CHRO - Chronograph
Setting Up
The Chronograph requires no setup.
Using the Chronograph
The Chronograph is a powerful stopwatch designed to time many different kinds of
activities. The chronograph can time a single race, made up of multiple laps and store
all the important information about both (even the date you ran!)
10
B2 Stop
Save
1. Select Chronograph Mode by pressing B1 (Display shows CHRO).
2. Display should show zeros. If not, see 6 and 7 below.
3. Press B3 to start timing.
Display shows Lap time at top, Split (Total) time at middle, and lap
number at bottom.
4. To take a lap, press B3 again. Display will pause for 6 seconds to
show lap and split time (chronograph is still running) then change to
show current lap and split time.
5. To end the race, press B2. You can retrieve lap information in
CHRONOGRAPH DATA MODE described below. You must end the run
by pressing B2 to allow data to save!
6. To move to another race and save the data, hold B2 for 2 seconds.
7. To clear this race, hold B4 for 3 seconds (display shows CLEAR HOLD).
Note:
• If running, the chronograph continues to time even if you change to another mode on
the AltiTech.
• Chronograph has 1/100 second resolution for the 1st hour, and 1 second resolution
up to 24 hours. Chronograph automatically stops at 24 hours thereafter.
• The AltiTech can store data on 100 laps in 30 runs. AltiTech displays FULL if memory
is exceeded but will continue to time the current race even though no data can be
stored.
B3 Start
Lap

CHRO DATA – Chronograph Data Mode
Setting Up
No setup is necessary. The AltiTech stores data from any completed run.
Using the Chronograph Data Mode
You can retrieve data for up to 30 runs and 100 laps from the Chronograph Data
Mode. Change to the mode, Display will show CHRO DATA.
1. AltiTech displays the run number and date of run. You can scroll
through the available runs by pressing B2.
2. Select the run you desire by pressing B3.
3. Scroll through the laps by pressing B3 repeatedly. You will see all the
laps followed by the Best lap (BEST) and average lap speed (AVG).
4. To clear an entire run, view any lap in the run (as above) and hold B4
for 2 seconds. Display shows Run number, HOLD CLEAR Release B4
when display changes to CLEAR HOLD ALL.
5. To clear all the runs, follow the instruction in 4 above, but continue to
hold B4 while display changes to CLEAR HOLD ALL. Release when
display changes to DATA ----
Note:
• Display Shows DATA ---- As above when no data is in memory.
• You cannot erase run information while the chronometer is running.
If you are having trouble deleting, make sure that the timer is stopped.
11

ALRM - Alarm
Setting Up
The AltiTech has two alarms which can be linked to either of the two Times (T1/T2)
the unit keeps track of.
1. To set the alarm, switch to ALRM mode by pressing B1
(ALRM is shown).
2. Choose the alarm you wish to set Alarm 1 (AL-1) or 2 (AL-2)
with the B2 key.
3. Press and hold B4 until display shows HOUR.
4. Set the time for the alarm in the same way you set the time.
Use B2 (-) and B3 (+) to adjust the hour.
Use B1 to change to the next setting. Set hours and minutes.
5. Now set the time this alarm should use(T1/T2).
Since the AltiTech can keep 2 different times, you’ll need to tell it which
one this alarm should be connected to. If you’re confused, see the Time
section above. Use B2 and B3 to select T1 or T2, then press B1
6. Now select Chime On/Off using B2 and B3. If on, the chime will chirp
at every full hour and to conrm keypresses on the unit. The chime
on/off is not related to the Alarm tone. If the alarm is set, it will sound,
no matter whether you select chime on or off.
Using the Alarm
You can view both alarms by pressing B2. They are displayed as AL-1 and AL-2. The
Time they are associated with (T1/T2) is displayed at the upper left.
You can turn the Alarm on or off using the B3 key. The Alarm icon and the word On or
Off on the bottom line show the current status.
Note:
• Always double check that the Alarm is connected to the Time (T1/T2) that you
intend. Refer to the TIME section if you need additional help.
• Alarm sounds for 20 seconds. Press any button to stop the alarm.
12
 Loading...