

Hi-Flame Alpha III AL910 Instruction Manual

Alpha III AL910
Free-standing Multi Fuel Non-Boiler Stove
Instruction Manual
www.alphastoves.com
You will need to refer to the serial number of your stove
shown above should you ever need to make a claim under
the Alpha Warranty. You will also fi nd the serial number,
beginning with AL, on the CE plate at the rear of the stove
as well as on the lid of the outer packaging.
Write the date the stove was delivered to you below as this
is likely to differ from the purchase date.
- -
Published September 2012
Please note This appliance must, at all times, be operated in
accordance with the instructions to minimise the amount of
smoke produced.
Ref: AL910 / UK-NI-ROI / V1-ND.15-09-12
ALPHA
Collection
The

CONTENTS
3
Page
4
5
6
7
7
8
9
10
12
13
14
15
15
16
20
21
22
23
24
28
28
33
33
34
36
37
38
Back Cover
Standard Features
General Dimensions
Technical Data
Introduction
Packing List
Installation Regulations
Important Safety Advice
Assembling the Stove
Smoke Control Areas
Recommended Fuels
Prohibited Fuels
Understanding Fuel Types
Important: First Fires
Burning Wood Logs
Burning Mineral Fuels
Some Simple Tips
Removing Ash
Installation Check-list
Installation General Guidelines
Commissioning
Trouble-shooting
Routine Checks
Standing Down
Routine Maintenance
Annual Service
Service Record
The Alpha Warranty
Spares Service
Model Alpha III
AL910
Free-standing
Multi Fuel Non-Boiler
Stove
PLEASE NOTE
This instruction manual is also used for
a number of other stove models in the
Hi-Flame product range and therefore
some of the stove photographs and
diagrams used, which are used for
guidance purposes only, may differ
slightly from your new Alpha stove.
However, the principles illustrated here
remain the same.
Hi-Flame Fireplace (UK) Limited
ALPHA
Collection
The
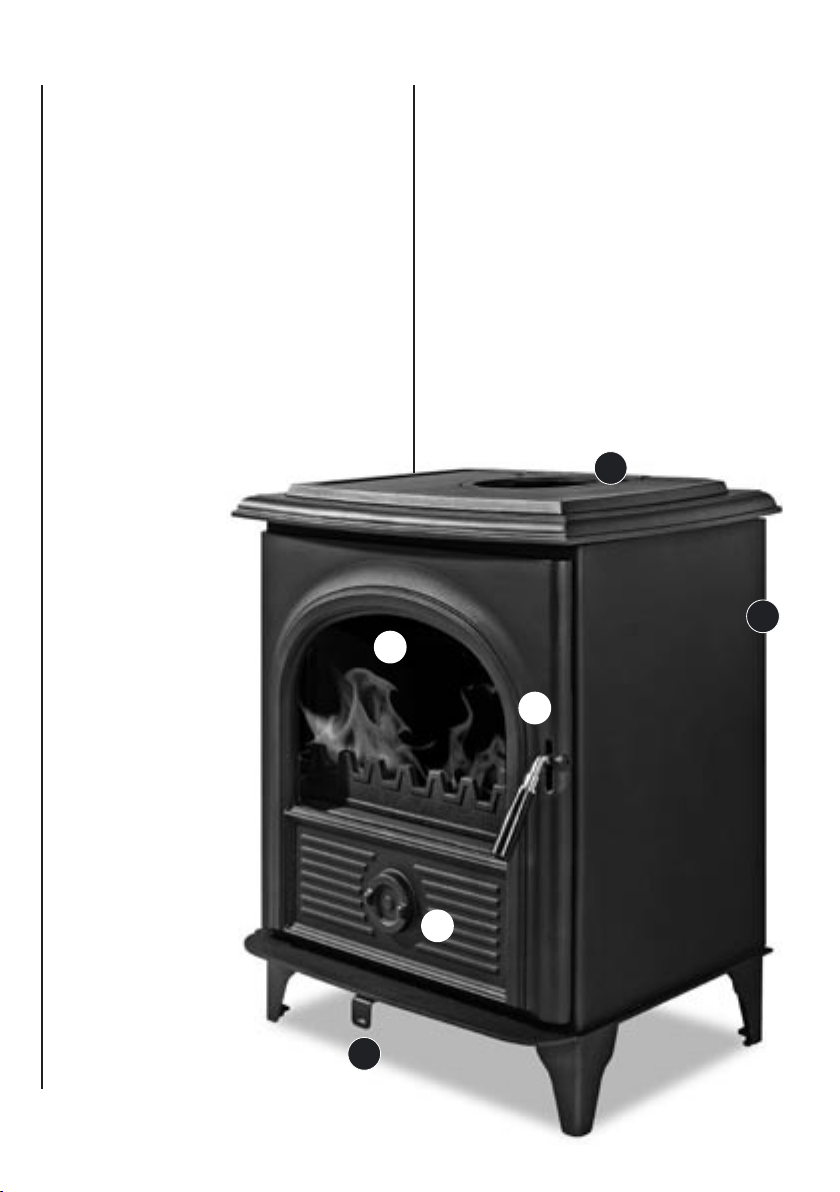
STANDARD FEATURES
1 Primary Air Control Air which enters
under the grate for burning multi fuels,
(other than wood). Also used at the
beginning of wood fires
2 Pre-heated Secondary Air
Control Air enters at the base of the
stove is pre-heated to ensure the firechamber is not cooled down by new
colder air. This ensures a higher firechamber temperature and therefore a
cleaner, more efficient burn. Controls
the air supply when burning wood
3 Pre-heated Tertiary Air
System Pre-heated
air enters the stove
through jets in the
special cast iron heat
sink at the rear of
the firechamber. This
ensures a much
longer, cleaner burn
from the Alpha III,
even in the latter
stages of fire cycle
4 Airwash System
Part of the secondary
air control system
which diverts preheated air down
along the front of
the glass to burn off
unwanted dry sooty
particulates and
help keep it clean
5 Top or Rear
Flue Option Simple
to switch depending
on the type of
installation
4
2
IMPORTANT
In the interests of safety please
read these instructions carefully
before installing or operating
your new stove. Even if you have
installed or operated stoves before,
manufacturers’ requirements can
vary and can also change with
updates to building regulations.
If installed in a UK Smoke Control
Area this stove must be operated
in accordance with the instructions
to minimise the amount of smoke
produced and it will be illegal to
burn wood in it.
5
5
3
1
4

GENERAL DIMENSIONS
All dimensions in millimetres
5

TECHNICAL DATA
GENERAL SPECIFICATION
Model Name Alpha III
Model Number AL910
Overall Height 735 mm
Overall Width 605 mm
Overall Depth 494 mm
Net Weight 140 kg
FLUE
Flue configuration top or rear
Flue pipe diameter (6”) 150 mm
Height to centre of rear flue 560 mm
From centre of top flue to back 168 mm
Minimum flue height
from top of stove 4500 mm
(15’)
Recommended flue draught 12 Pa
FUEL REQUIREMENTS
Wood Logs:
Moisture content <20%
Maximum Log Length 450 mm (18”)
Maximum Fuel Load 3 kg (6 lb 9 oz)
Multi Fuel:
Authorised Smokeless Fuels
Recommended Fuel Load 3.8 kg (8 lb 6 oz)
Maximum Fuel Load 7.7 kg (16 lb 8 oz)
MINIMUM DISTANCES TO
COMBUSTIBLE MATERIALS
Rear 600 mm
Sides 600 mm
PERFORMANCE DATA
FROM CE EN13240 TEST
Wood Logs
(intermittent use):
Nominal Heat Output 10.0 kW
Refuelling Interval 60 minutes
Efficiency (net) 80.3%
Mean CO Emission (at 13%) 0.14%
Mean Flue Gas Temperature 348ºC
Flue Gas Mass Flow 5.7 gs
Smokeless Fuel – Ancit
(intermittent use):
Nominal Heat Output 11.0 kW
Refuelling Interval 2 hrs
Efficiency (net) 71.9%
Mean CO Emission (at 13%) 0.26%
Mean Flue Gas Temperature 418ºC
Flue Gas Mass Flow 6.7gs
Smokeless Fuel – Ancit
(Continuous use):
Nominal Heat Output 11.7 kW
Refuelling Interval 4 hrs
Efficiency (net) 73.6%
Mean CO Emission (at 13%) 0.24%
Mean Flue Gas Temperature 404ºC
Flue Gas Mass Flow 7.6 gs
Tests at nominal output, burning both
wood logs and mineral fuel, were
carried out with a flue draught of 12 Pa.
6
INTRODUCTION
Thank-you for purchasing this
Alpha III stove. We are confi dent
that with its state-of-the-art
combustion technology it will warm
your home even on the coldest
winter days and provide you with
many years of pleasure.
Before you install or operate your
stove however, please read this
booklet which contains important
safety advice as well as instructions
which will help you make the most
of your new stove.
All users of this stove should be
aware of the contents of this
handbook. If other people are going
to operate the stove then please
keep this booklet handy so that it
can always be quickly referred to.
Never let anyone use the stove who
is unfamiliar with its correct
operation.
7
operation.
WATCH OUT
!
CARBON MONOXIDE
KILL
S
PACKING LIST
As soon as you receive your new stove
please check that you have a full set of
components as set out in the list below.
In the unlikely event of a shortage,
please report this immediately to the
dealer you bought the stove from.
Never attempt to operate the stove
with missing or damaged components.
Product Information
1 Instruction Booklet
1 Warranty Card
Stove Components
1 Stove Lid
1 Handle Cover
1 Handle Cover Securing Bolt
1 Log Retaining Bar
1 Flue Collar / Bolts (factory fi tted on
some models)
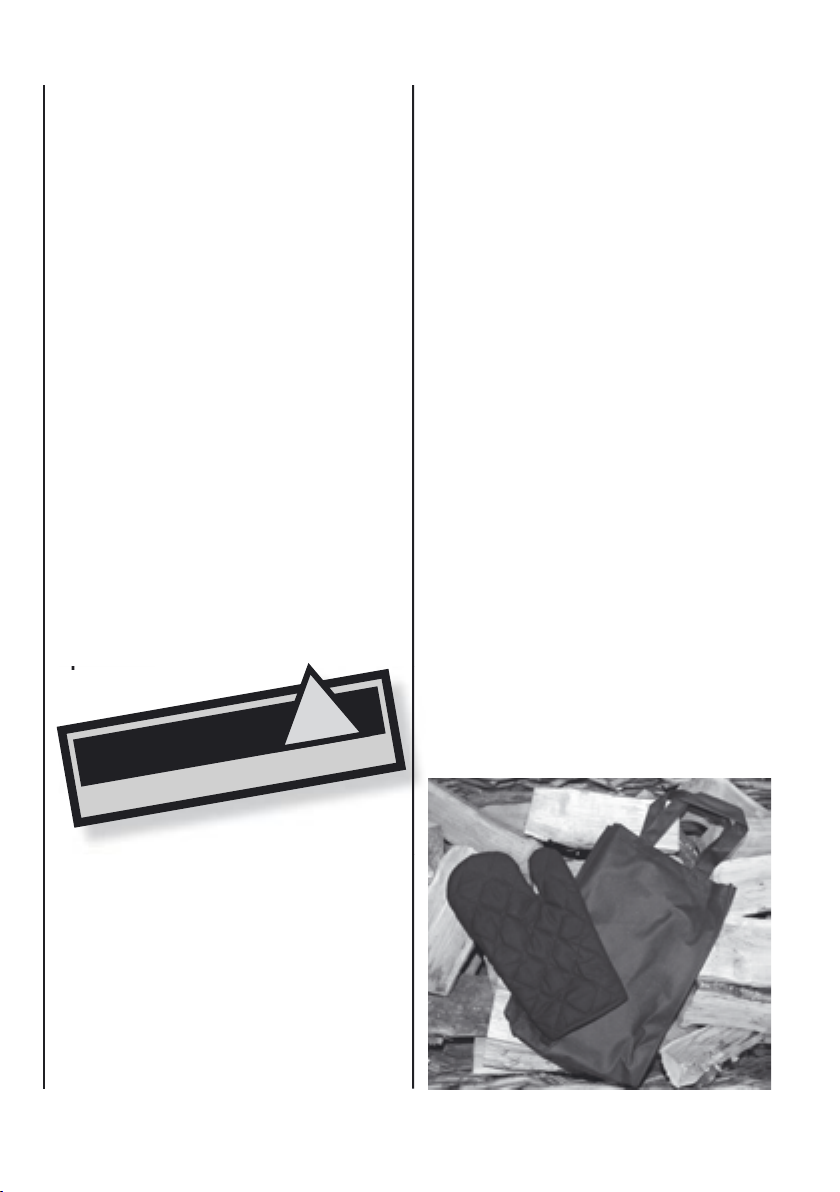
Equipment
1 Ashpan and 1 Operating Tool
Tool Bag
1 Safety Mitten
2 Spare Glass Retaining Clips
2 Spare Glass Retaining Clip Screws
1 Spare Rope Seal (for door)
1 Allen key (for door hinges)

INSTALLATION
REGULATIONS
You must ensure that your stove is
installed by a recognised competent
person who is appropriately qualified
in the installation of stoves and that
the installation complies with all local,
national and European building
regulations.
In the UK we strongly recommend using
a Hetas registered installer (www.hetas.
co.uk) and in Ireland a registered
installer from INFO – the Irish
Nationwide Fireplace Organisation
(www.fireplace.ie). Your authorised
Alpha dealer will also be able to help
and advise you.
For further information on local
Building Regulations please consult:
England & Wales
Building Regulations Document J
(revised October 2010) – Combustion
Appliances and Fuel Storage Systems
www.planningportal.gov.uk
Scotland
Building Standards (2001) Domestic
www.sbsa.gov.uk
Northern Ireland
The Building Regulations (Northern
Ireland) 2000 / Amendment 2006 /
Amendment No 2 2006
www.buildingcontrol-ni.com
Isle of Man
Building Regulations (2007) –
Isle of Man www.gov.im
Republic of Ireland
Approved Document J – Heat Producing
Appliances www.environ.ie
Other Information Points
The Solid Fuel Association website is
a very good source of practical
information www.solidfuel.co.uk.
For additional useful information and
links to the government websites
above, including informative
downloads, visit The Solid Fuel
Technology Institute website
www.soliftec.com.
The British Flue and Chimney
Manufacturers Association website,
accessed through www.feta.co.uk/
bfcma, produces an authoritative and
informative download Yellow Guide to
solid fuel flues and chimneys.
Buildings Insurance
It is a requirement by some building
insurance companies to inform them of
the installation of a new fixed heating
appliance and a relevant certificate of
compliance produced.
Health & Safety
During the installation of this stove and
any related building works you must
comply with any current Health
& Safety at Work regulations.
Particular care should be taken
regarding potential exposure to
Asbestos-based insulating materials
used as part of an existing appliance
installation. Asbestos has not been used
in the construction of this stove.
When using fire cement always read the
manufacturer’s instructions and avoid
contact with skin and eyes.
8

IMPORTANT SAFETY ADVICE
• Ensure that an approved carbon
monoxide detector (BS EN50291:2001)
is fitted in the same room as the stove.
It should be powered by a battery
designed for the working life of the
alarm. Please note that since October
2010 this is now a requirement under
UK Building Regulations.
• External surfaces including the firechamber door and operating handles,
windows, flue pipes and stove
bodywork will become extremely hot.
Always use the tool provided and avoid
touching these parts of the stove
without proper protection, such as heat
resistant gloves or other protective aids.
• Potentially combustible material or
objects such as soft furnishings should
never be left on or near any of the
stove’s hot surfaces. Ensure that wood
supplies and log baskets are kept at a
safe distance from the stove.
• Never leave children unattended in
the room where your stove is being
operated. Ensure that children are
aware of the potential danger and
make sure that they keep clear of the
stove when it is in operation. Where
children, the elderly or the infirm are
present, always use an approved safety
fireguard (BS6539) to prevent
accidental contact with the stove.
• This stove should not be fitted in a
room with an extractor fan (eg kitchen)
as this will adversely affect the air
quality in the room and could be
dangerous for the room’s occupants. It
will also starve the stove of combustion
air and reduce the stove’s efficiency.
• To ensure your safety make sure that
your stove’s installation complies with
all local building regulations’ ventilation
requirements. Low energy houses have
their own particular requirements and
these should be strictly adhered to.
• Do not use flammable liquids to ignite
the fire. In the confined space of the
firechamber there is a real potential to
cause a life-threatening flash flame or
explosion.
• Never over-fire the stove. If any
external parts of your stove glow red
during operation then immediate action
should be taken to reduce the supply
of air to the firechamber through the
Primary and Secondary Air controls
which should quickly limit the intensity
of the fire.
• This stove is CE approved and tested
to EU EN13240 standards in the UK by
Kiwa GasTec. Alterations to its
construction could be potentially
dangerous and will also render your
product warranty void.
• Do not use aerosol products in the
vicinity of the stove when it is in use.
• Check and clean the stove’s flue way
and the top of baffle plate regularly
to help avoid potential blockages (see
page 34).
• Clean your chimney regularly
• This stove does not contain Asbestos.
However, ensure that there is no
possibility of disturbing any asbestosbased materials during its installation.
For more information on stove
safety please visit
www.stovesafetyfirst.com
9
ASSEMBLING THE STOVE
Your new Alpha stove is extremely
heavy. Always handle with care and
make sure that you have additional
strong help when you move it.
The door and door handle, should
not be used to grip the stove as they
could be damaged from supporting the
stove’s weight. Items, such as the lid
fuel retaining bar and baffle plate, can
be removed to help reduce the weight.
Under no circumstances should the
door be removed as this will invalidate
your Alpha Warranty.
• Unpack Remove your new stove from
its recyclable packaging. Retain this
until the stove is installed and is fully
operational. Unfasten retaining wires
and remove any components, including
those inside the ash pan, from inside
the stove
• Inspect Please inspect the stove to
check that it has not been damaged in
transit – never attempt to install a stove
which has been damaged. If damage is
suspected then report this immediately
to your stove dealer
• Check List Study the component
packing list on page 7 and make sure
that you have all of the components
listed before proceeding. Some parts
are contained within the ash pan
• Baffle Plate Check the position of
the baffle plate (sometimes known as
the throat plate) inside the ‘roof’ of the
stove to ensure that it has not moved
during transit. This is a heavy metal
plate which directs flames and helps
retain heat inside the stove. The base of
this plate should sit securely on a small
ledge at the back of the firechamber,
towards the top. The rest of the plate
sits on top of the side firebricks to
maintain it at the correct angle and in
line with the top of these side firebricks.
It is best to fully familiarise yourself
with the baffle plate’s correct location
by practising removing it and re-fitting
it prior to the stove’s installation as you
will need to regularly check the top of
this plate and the access to the flue way
to avoid potential soot build up and
blockages. Once you know how to do
this it is a very easy operation.
See page 34
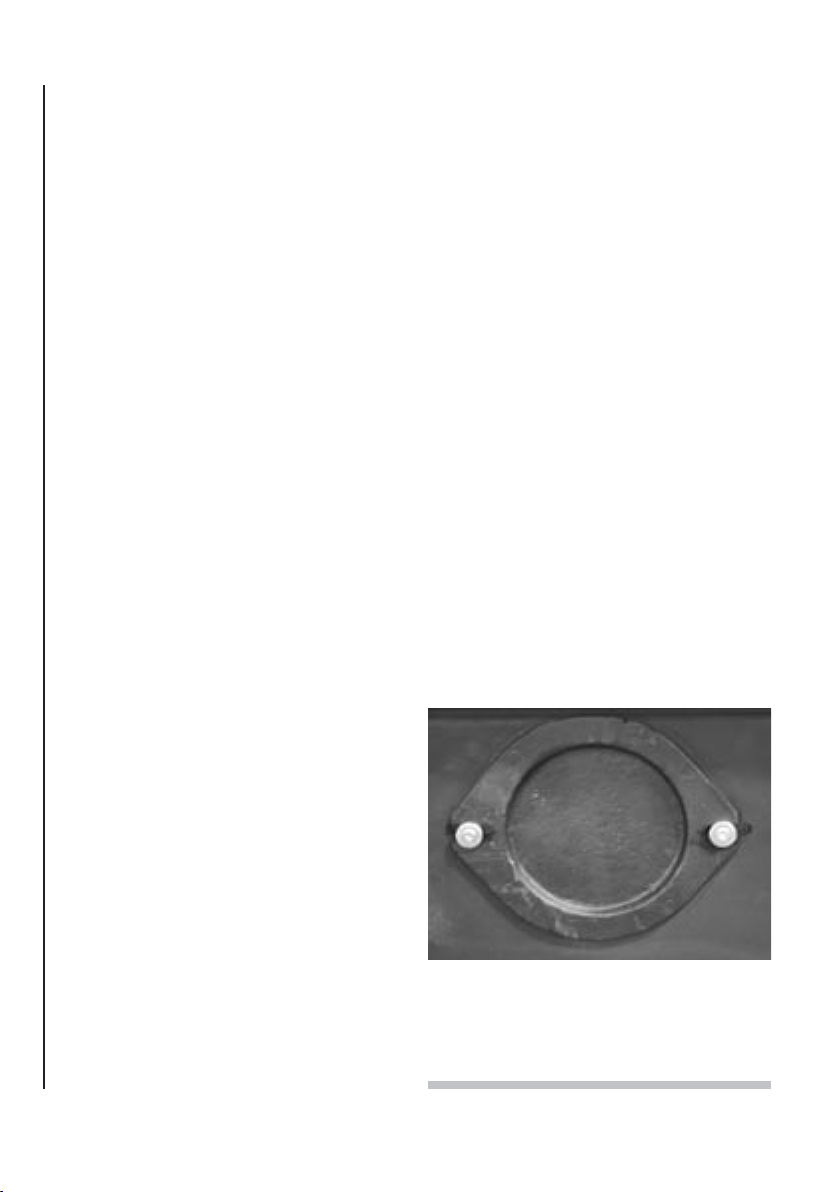
• Flue Options The AL910 stove
can be top or rear flued. Under no
circumstances should the 150mm (6”)
flue outlet diameter be reduced as this
could be extremely dangerous. Your
new stove is configured for a top flue
at the factory as this will always be the
most efficient choice – if it can be
undertaken safely.
The Alpha III has a removable lid with a flue outlet
cover plate. This plate should be removed for top
flues and left in place for rear flues. The rear flue
blanking plate should be re-used to seal off the
open firebox top flue outlet when rear flueing.
10
For a top flue outlet remove the loose
fitted stove lid and unfasten the
blanking plate fixing screws underneath
the lid to reveal the flue pipe opening
(see below left). As you will see the flue
aperture is already open on the top of
the firechamber bodywork. When
using the top flue option the lid
blanking plate is no longer needed.
Attach the flue collar (contained in the
ash pan) to the top outlet on the firechamber using the bolts supplied.
Ensure that a good seal is made
between the firechamber surface and
the collar – use fire cement if necessary.
Re-attach the loose fitted lid to the
stove bodywork. The flue pipe can then
be fitted through the lid into the collar.
Neatly apply a seal of fire cement and /
or fire rope to ensure there is no
possibility of a gas or smoke leak.
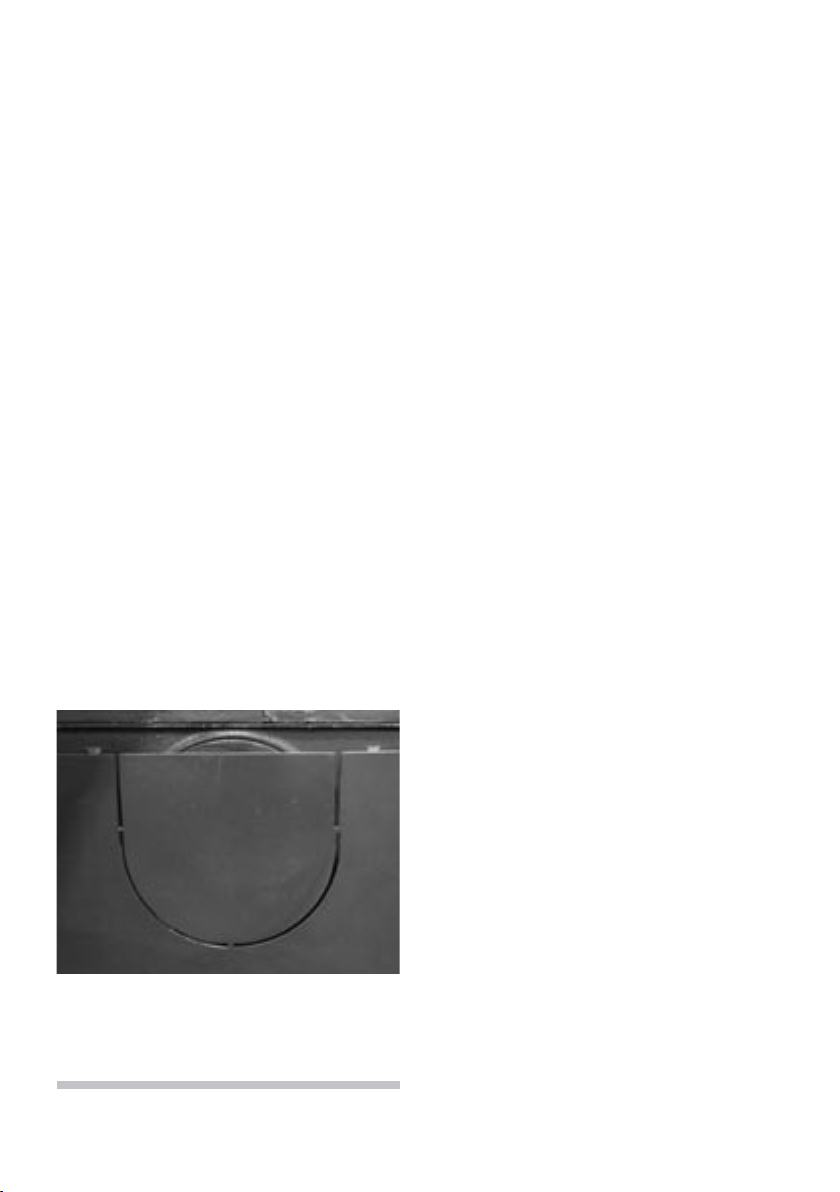
For a rear fitted flue, remove the
pre-cut shape (see below) on the rear
heat shield which will provide access to
the rear flue outlet sealing plate.
The Alpha III pre-cut rear heat shield. When using
the rear flue outlet option the cut out can be
easily removed by using a junior hacksaw blade to
cut through the 3 small retaining links.
Always use the correct sized Phillips
crosshead screwdriver and be careful
not to damage the bolt heads as these
will be re-used. Remove this plate,
making sure that the fire-resistant
gasket does not get damaged as this
plate and gasket will be re-used to
close off the open top flue outlet. Next,
remove the loose fitted stove lid to
access the top flue outlet and close this
off with the rear plate you have
just removed, ensuring that the fireresistant gasket on the base of the plate
makes a good seal. Attach the flue
collar (contained in the ash pan) to the
rear outlet on the firechamber using the
bolts supplied, again ensuring a good
seal is made.
You must ensure that rope gaskets are
positioned correctly to make a good
all-round seal between the collar and
plate. Lubricate the new bolt holes with
machine oil to avoid damaging the
screw threads.
• Handle Assembly Thread the split
washer along the handle bolt. Feed the
bolt and washer through the handle
grip. Use a Phillips crosshead
screwdriver to attach the assembled
grip to the door handle clamp
mechanism on the door, being careful
not to over-tighten.
Your stove is now ready for installation.
• Moving Always lift the stove to finally
position it. Alternatively place the stove
on heavy duty plastic sheeting or thick
floor covering to slide the stove into
position, being careful not to damage
any finished floor surfaces with trapped
grit or building debris.
11

YOUR LEGAL OBLIGATIONS
IF YOU LIVE IN A UK
SMOKE CONTROL AREA
The Clean Air Act 1993
and Smoke Control Areas
Under the Clean Air Act local
authorities may declare the whole or
part of the district of the authority to be
a Smoke Control Area.
It is an offence to emit smoke from a
chimney of a building, from a furnace
or from any fixed boiler if located in
a designated Smoke Control Area.
It is also an offence to acquire an
‘unauthorised fuel’ for use within a
Smoke Control Area unless it is used in
an ‘exempt’ appliance (‘exempted’ from
the controls which generally apply in
the Smoke Control Area).
The Secretary of State for Environment,
Food and Rural Affairs has powers
under the Act to authorise smokeless
fuels or exempt appliances for use
in Smoke Control Areas in England.
In Scotland and Wales this power
rests with Ministers in the devolved
administrations for those countries.
Separate legislation, the Clean Air
(Northern Ireland) Order 1981, applies
in Northern Ireland. Therefore it is
a requirement that fuels burnt or
obtained for use in smoke control areas
have been ‘authorised’ in Regulations
and that appliances used to burn
solid fuel in those areas (other than
‘authorised’ fuels) have been exempted
by an Order made and signed by the
Secretary of State or Minister in the
devolved administrations.
Further information on the
requirements of the Clean Air Act can
be found at the following website:
www.smokecontrol.defra.gov.uk.
Your local authority is responsible for
implementing the Clean Air Act 1993
including designation and supervision
of Smoke Control Areas and you can
contact them for details of Clean Air
Act requirements.
The AL910 Alpha III is not
recognised as a Smoke Exempt
Appliance and therefore if you
use this stove in a Smoke Control
Area you must only use approved
smokeless fuels. It will be illegal to
burn wood in it.
12

RECOMMENDED FUELS
The Alpha III AL910 stove allows the
burning of wood in non-Smoke Control
Areas and approved smokeless multi
fuels only, in Smoke Control Areas. It
must, at all times, be operated in
accordance with the instructions to
minimise the amount of smoke
produced.
The following fuels are approved by
Alpha Stoves for use in the AL910:
• Wood Logs Only ever use dried, fully
seasoned chopped wood logs with a
moisture content of less than 20%.
Wood which is well seasoned makes
a distinctive ‘clack’ rather than a dull
‘thud’ when knocked together. It will
also feel much lighter than an
unseasoned log. Other indicators
include bark peeling away and cracking
and splitting around the outside.
Ideally wood should be seasoned
outdoors for between 18 to 24 months
– the harder the wood then the longer
the seasoning. It should be stacked off
the ground with plenty of space
between the logs to allow air
movement and with the top covered
to keep rain and snow out. Seasoned
wood will give you approximately 50%
more heat output than the equivalent
unseasoned log.
Most types of hardwood, for instance
Ash (generally regarded as the best),
Birch, Beech, Oak and Elm can be used.
However, avoid woods with a high
resin content. As a rule of thumb, the
heavier the wood, then the greater the
heat output and the longer burn time
– the time between refills. All of this is
providing it is fully seasoned wood.
Never use wet or unseasoned (green)
wood as this will cause nuisance smoke
and a very disappointing fire.
It could quickly result in the build up of
soot and creosote which, because of
the higher temperatures of stove flue
gases, could easily cause a flue or
chimney fire. In addition, burning wet
wood creates other environmental
problems, a less efficient fuel economy
and can eventually clog your flue
system and cowl. It will also reduce the
effectiveness of the stove’s Airwash
system thus causing staining and
blackening of the glass.
Wet or unseasoned would produces the
following poor performance:
• Hard to light fires
• Fires that are difficult to keep going
or to keep burning well
• Smoky fires with fewer flames which
are also of a dull orange colour
• Increased dense grey / blue smoke
from the chimney
• Shorter burn times
• Low heat output
• Dirty glass and firebricks
• Excessive and rapid creosote build-up
in the flue system and chimney
• Unpleasant smoky smells both inside
and sometimes outside the house
Manufactured or finished wood
products, such as plywood and
chipboard, must also be strictly avoided
because of the high chemical adhesive
13
 Loading...