

Page 1
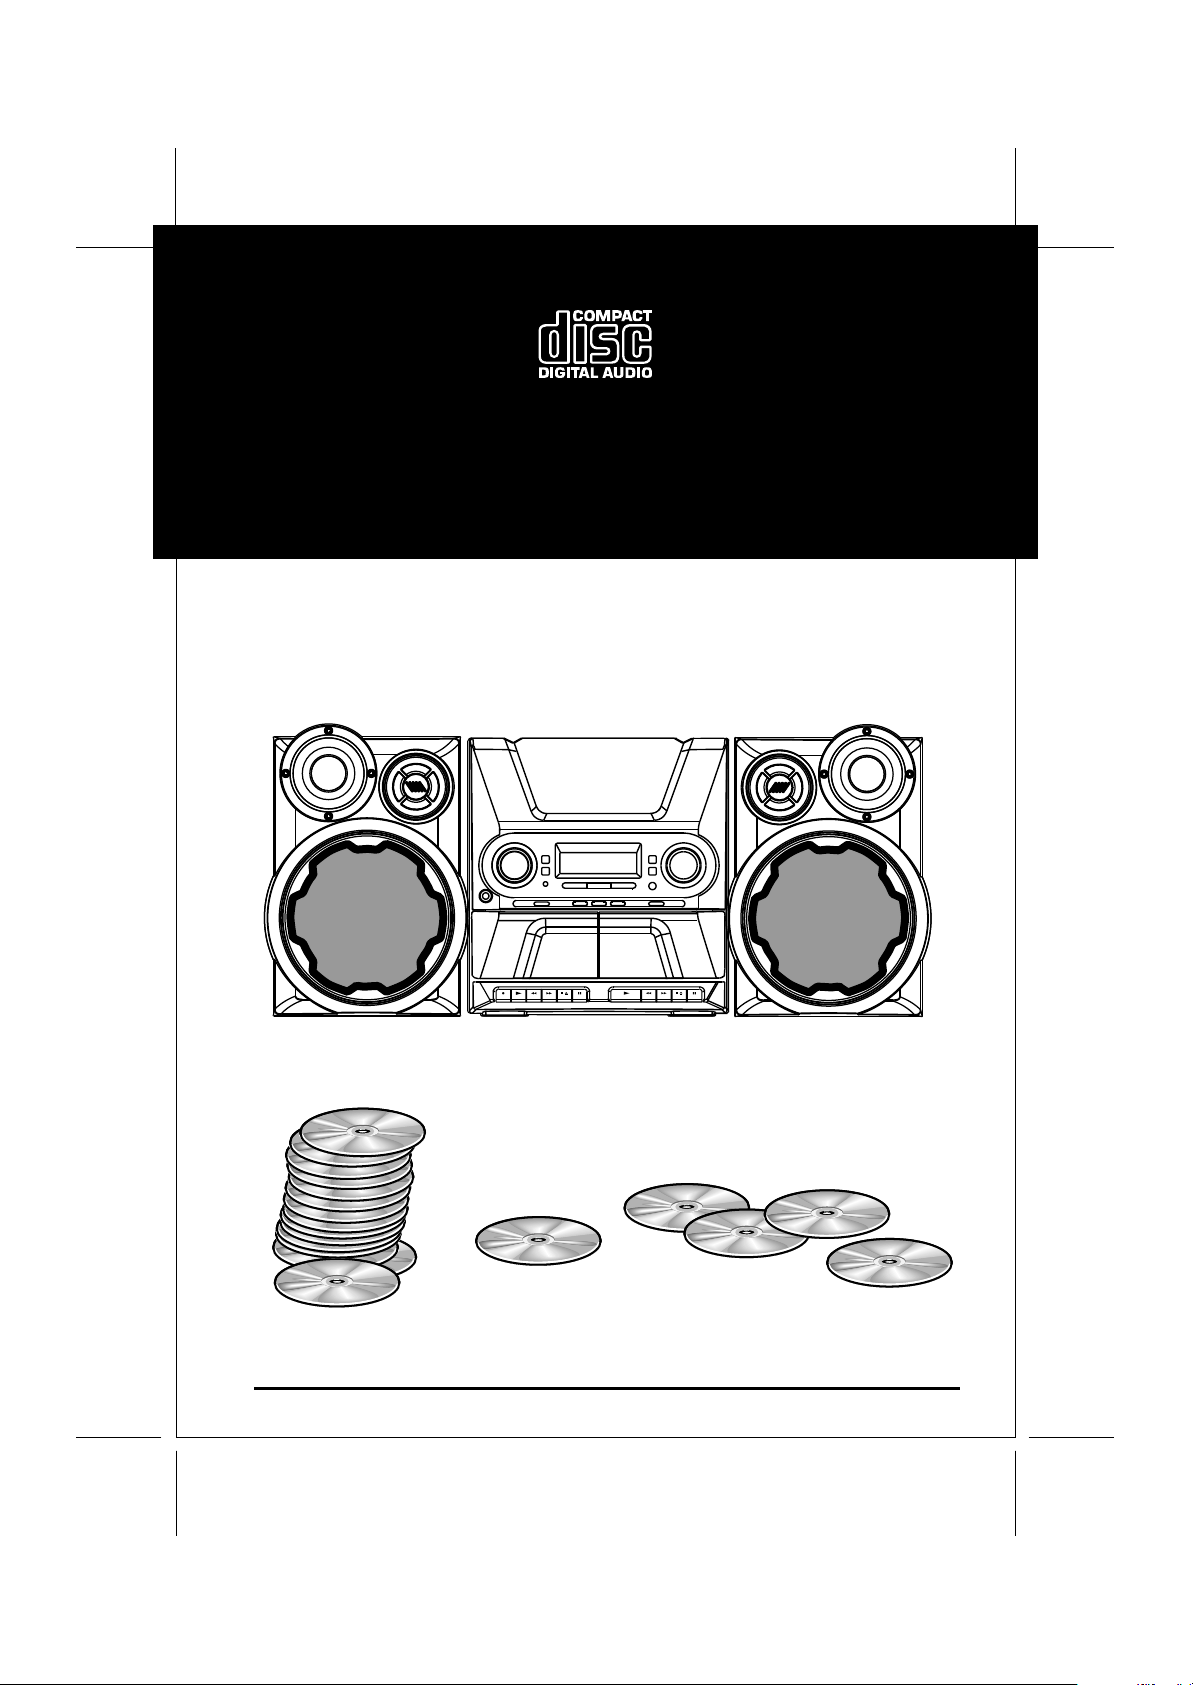
20 CD HOME STEREO SYSTEM
INSTRUCTION MANUAL
SIZE: 148 x 210mm
811-TK5M91-031
Page 2
PRECAUTIONS
Follow the advice below for safe and appropriate operations.
Placement
• Do not use the unit in places which are extremely hot, cold, dusty, or humid.
• Place the unit on a flat and even surface.
• Do not restrict the air flow of the unit by placing it in a place with poor air flow, by covering it with a
cloth, or by placing it on a carpet.
On AC Voltage
• Before use, check that the rated voltage of your unit matches your local voltage.
FCC Information
This device complies with P art 15 of FCC Rules
Operations are subject to the following two conditions:
(1) This device ma y not cause harmful interference, and
(2) This de vice must accept any interference receiv ed, including interference that ma y cause undesirable
operations.
Safety
• When connecting or disconnecting the AC cord, grip the plug and not the cord itself. Pulling the cord
may damage it and create a hazard.
• When you are not going to use the unit for a long period of time, disconnect the AC power cord.
Condensation
• When left in a heated room where it is warm and damp, water droplets or condensation may form inside
the CD player .
• When there is condensation inside the unit, the unit may not function normally. .
• Let it stand for 1 to 2 hours before turning the power on, or gradually heat the room up and dry the unit
before use.
Should any trouble occur, disconnect the AC power cord and refer servicing to qualified personnel.
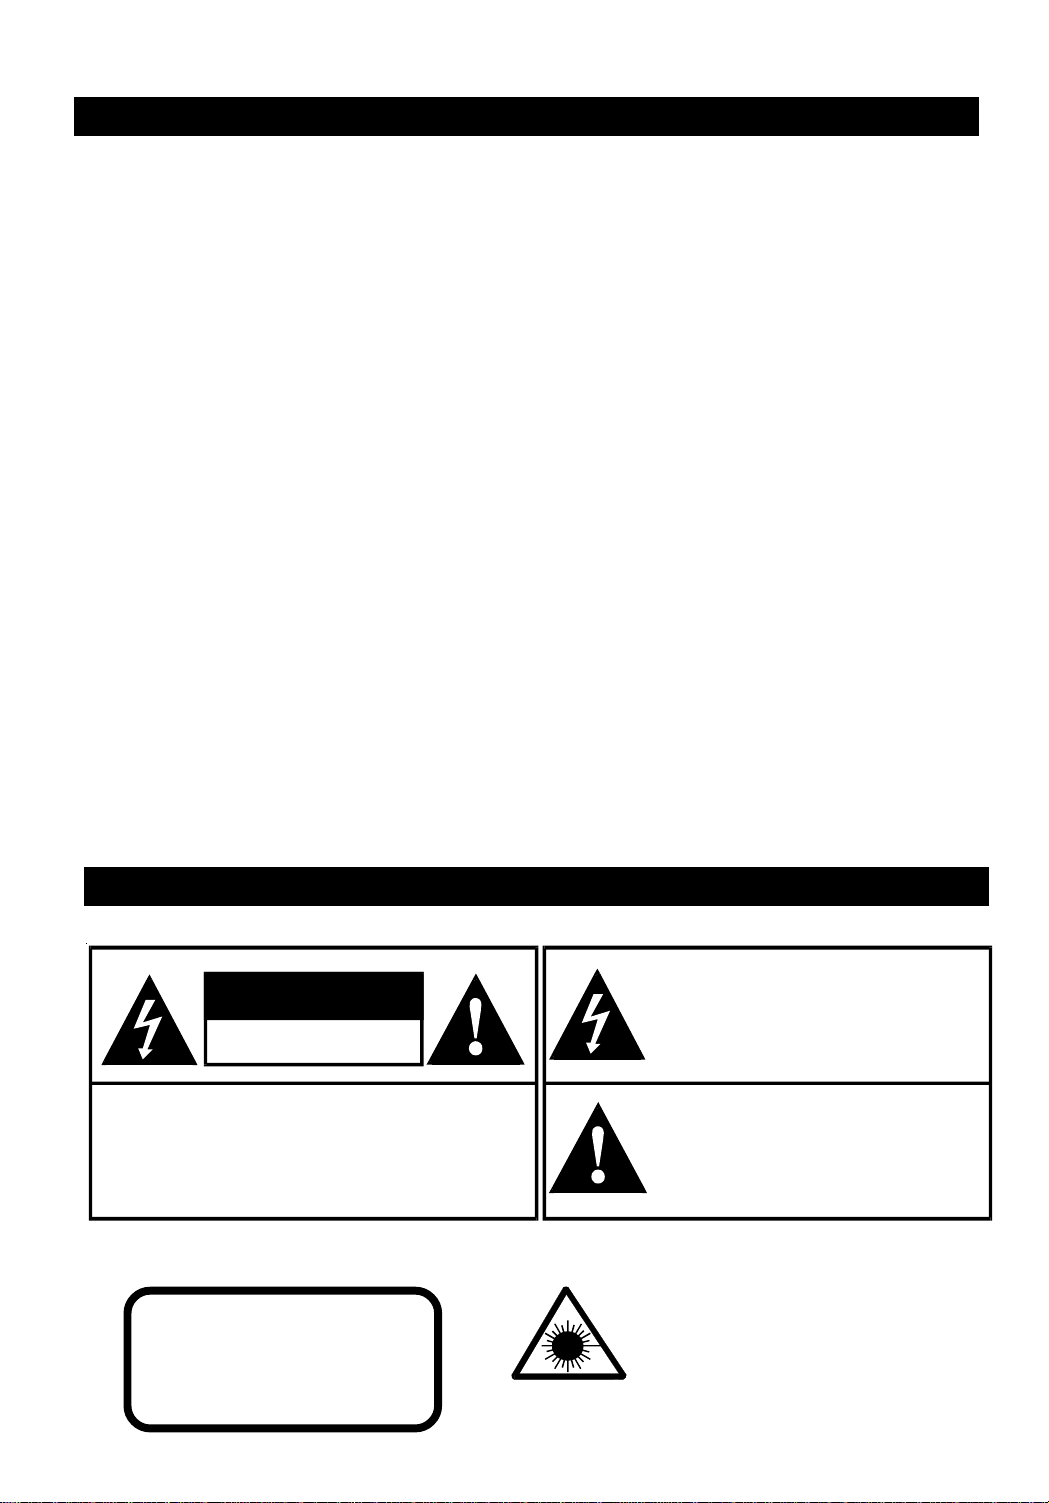
WARNING
Explanation of graphical symbols:
CAUTION
RISK OF ELECTRIC SHOCK
DO NOT OPEN
"WARNING: TO REDUCE THE RISK OF
ELECTRIC SHOCK, DO NOT REMO VE COVER
(OR BACK). NO USER-SERVICEABLE PARTS
INSIDE. REFER SER VICING T O QU ALIFIED
SERVICE PERSONNEL."
WARNING:
RAIN OR MOISTURE.
INVISIBLE LASER RADIATION
WHEN OPEN AND INTERLOCKS
TO PREVENT FIRE OR SHOCK HAZARD, DO NOT EXPOSE THIS APPLIANCE TO
CAUTION
DEFEATED.
AVOID EXPOSURE TO BEAM
The lightning flash with an arrowhead symbol,
within the equilateral triangle, is intended to alert
the user to the presence of uninsulated
"dangerous voltage" within the product's
enclosure that may be of sufficient magnitude to
constitute an electric shock to persons.
The exclamation point within the equilateral
triangle is intended to alert the user to the
presence of important operating and
maintenance (servicing) instructions in the
literature accompanying the appliance.
This product contains a
low power laser device.
- 1 -
CAUTION:
DO NOT CONNECT FM
ANTENNA TO EXTERNAL
ANTENNA
Page 3

Important Safety Instructions (FImportant Safety Instructions (F
Important Safety Instructions (F
Important Safety Instructions (FImportant Safety Instructions (F
1. Read Instructions - All the safety and operating instructions should be read before the appliance is
operated.
2. Retain Instructions - The safety and operating instructions should be retained for future reference.
3. Heed Warnings - All warnings on the appliance and in the operating instructions should be adhered to.
4. Follow Instructions - All operating and use instructions should be followed.
5. Water and Moisture - The appliance should not be used near water - for example, near a bathtub,
washbowl, kitchen sink, laundry tub, in a wet basement, or near a swimming pool, and the like.
6. Carts and Stands - The appliance should be used only with a cart or stand that is
recommended by the manufacturer.
6A.An appliance and cart combination should be moved with care. Quick stops, excessive
force, and uneven surfaces may cause the appliance and cart combination to overturn.
7. Wall or Ceiling Mounting - The appliance should be mounted to a wall or ceiling only
as recommended by the manufacturer.
8. Ventilation - The appliance should be situated so that its location or position does not interfere with
its proper ventilation. For example, the appliance should not be situated on a bed, sofa, rug, or similar
surface that may block the ventilation openings; or, placed in a built-in installation, such as a book case
or cabinet, that may impede the flow of air through the ventilation openings.
9. Heat - The appliance should be situated away from heat sources such as radiators, heat registers,
stoves, or other appliances (including amplifiers) that produce heat.
10. Power Sources - The appliance should be connected to a power supply only of the type described in
the operating instructions or as marked on the appliance.
11. Grounding or Polarization - Precautions should be taken so that the grounding or polarization means
of an appliance are not defeated.
12. Power-Cord Protection - Power-supply cords
should be routed so that they are not likely to be
walked on or pinched by items placed upon or
against them, paying particular attention to cords
at plugs, convenience receptacles, and the point
where they exit from the appliance.
13. Cleaning - The appliance should be cleaned only
as recommended by the manufacturer.
14. Power Lines - An outdoor antenna should be
located away from power lines.
15. Outdoor Antenna Grounding - If an outside
antenna is connected to the receiver, be sure the
antenna system is grounded so as to provide
some protection against voltage surges and built
up static charges. Section 810 of the National
Electrical Code, ANSI/NFPA No. 70, provides information with respect to proper grounding of the mast
and supporting structure, grounding of the lead-in wire to an antenna discharge unit, size of grounding
conductors, location of antenna-discharge unit, connection to grounding electrodes, and requirements
for the grounding electrode. See Figure 1.
16. Nonuse Periods - The power cord of the appliance should be unplugged from the outlet when left
unused for a long period of time.
17. Object and Liquid Entry - Care should be taken so that objects do not fall, and liquids are not spilled,
into the enclosure through openings.
18. Damage Requiring Service - The appliance should be serviced by qualified service personnel when:
A. The power-supply cord or the plug has been damaged; or
B. Objects have fallen, or liquid has been spilled, into the appliance; or
C. The appliance has been exposed to rain; or
D. The appliance does not appear to operate normally or exhibits a marked change in performance; or
E. The appliance has been dropped, or the enclosure damaged.
19. Servicing - The user should not attempt to service the appliance beyond that described in the operating
instructions. All other servicing should be referred to qualified service personnel.
or USA)or USA)
or USA)
or USA)or USA)
- 2 -
Page 4
SYSTEM CONNECTIONS
S
W
S
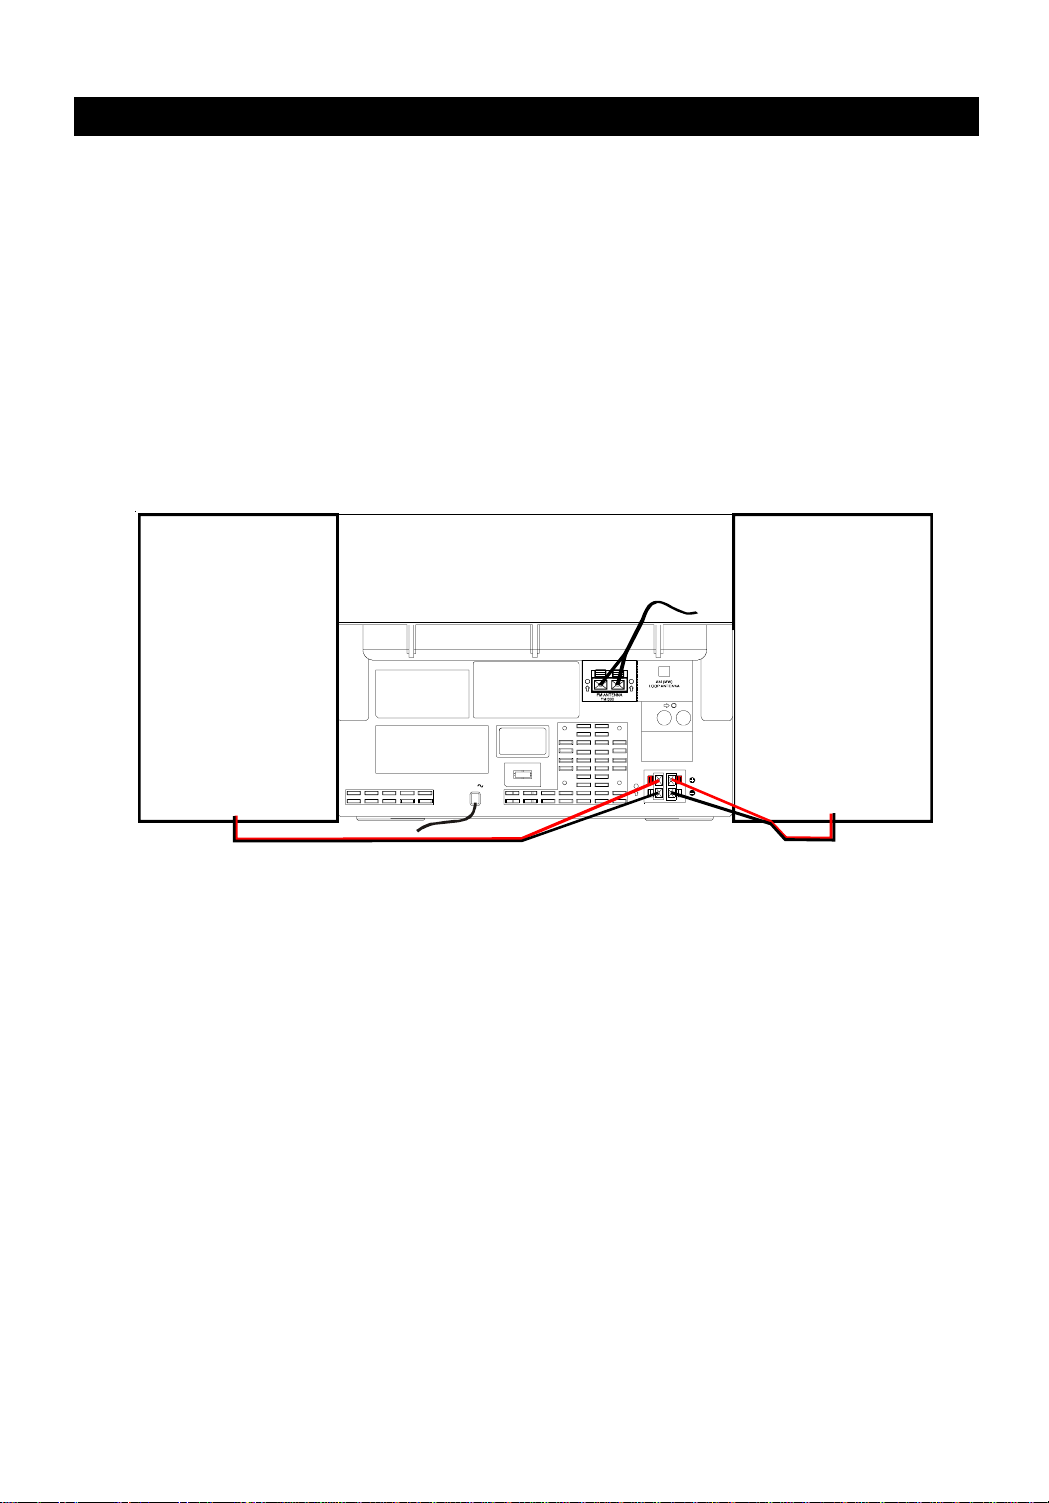
Important
Switch off the power before connecting speakers and other equipment.
Speaker Cord Connections
Connect the Red wires to the Red (+) terminals and the Black wires to the Black (-) terminals
Note:
Connecting speakers other than the speakers supplied with the unit, may damage the unit.
RIGHT
SPEAKER
BOX
LEFT
SPEAKER
BOX
AUX
IN
R L
RL
SPEAKER TERMINAL
IMPEDANCE : 6 OHM (
Ω
AC
SPEAKER TERMINAL
IMPEDANCE : 6 OHM (
)
Ω
)
- 3 -
Page 5
SYSTEM CONNECTIONS
W
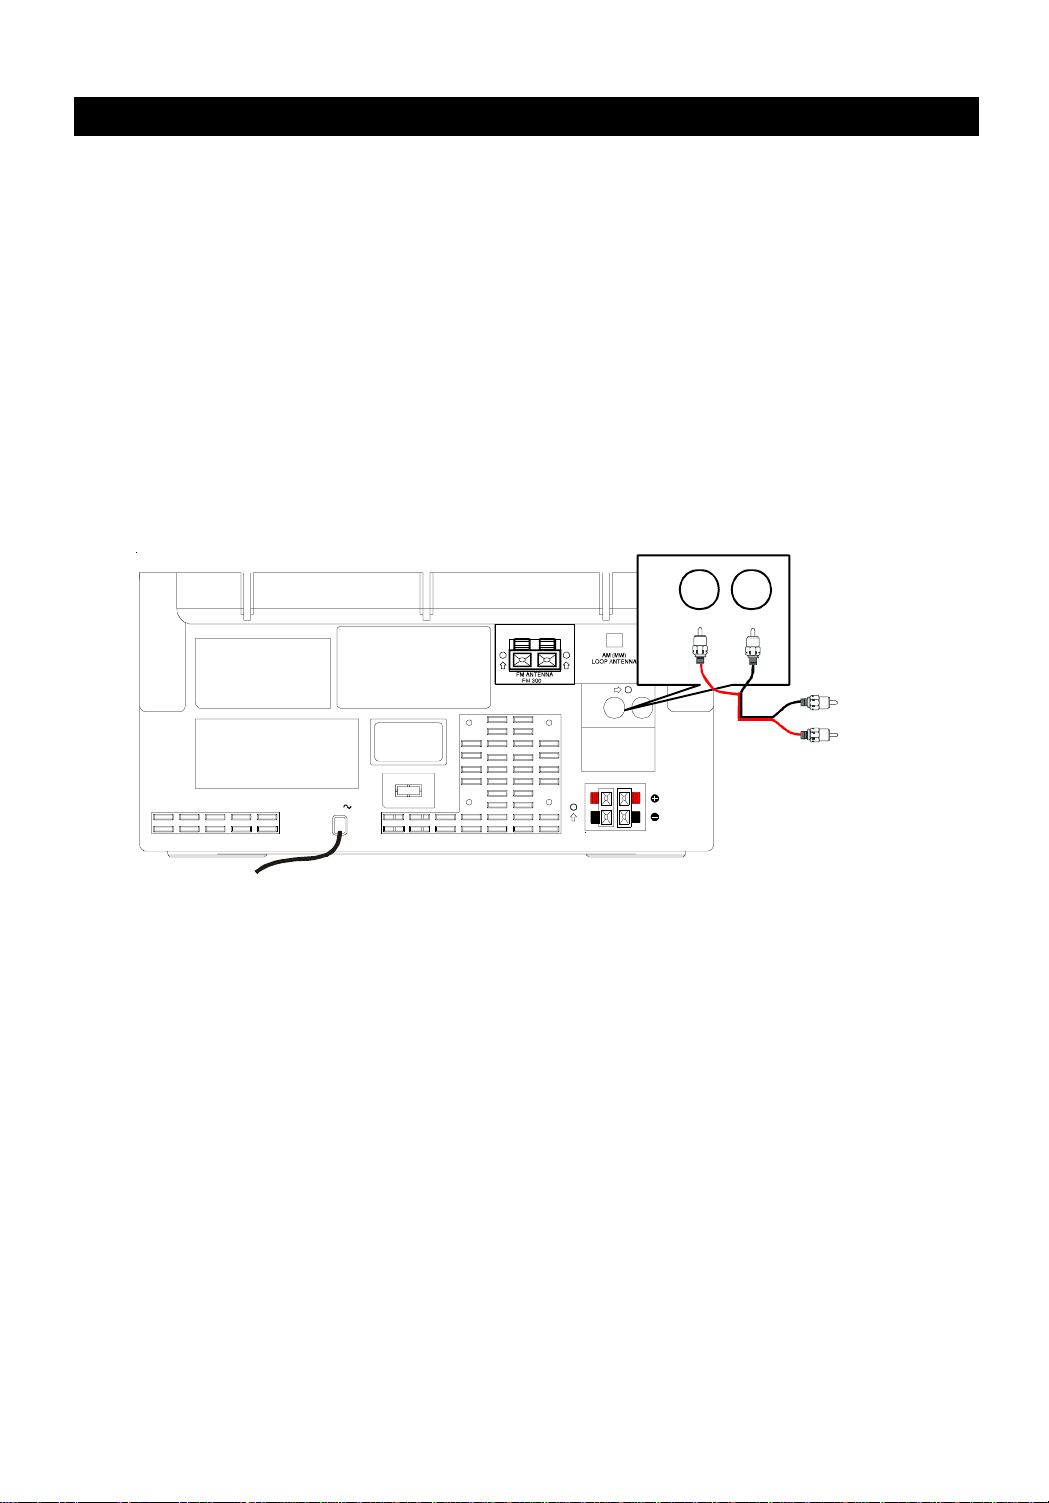
Power cord Connection
1. Make sure that all the components and speakers are connected correctly.
Caution
• Be sure the AC power cord is disconnected and all functions are off before making connections.
• When you are not going to use the unit for a long period of time, disconnect the AC power cord.
To turn on the unit
Press the STANDBY/ON button. The display will light up. Select the desired function and the corresponding
function indicator will light up.
After use
Press the STANDBY/ON button. The display will fade and only the clock display will be shown.
AUX
IN
R
L
AUX
IN
R L
RL
AC
SPEAKER TERMINAL S
SPEAKER TERMINALS
W
IMPEDANCE : 8 OHM ( )
IMPEDANCE : 6 OHM (
Ω
)
To external
Source
AC cord to an AC outlet
Connection with other optional equipment
To listen to or record audio signals from external units through this unit:
Connect the white plug to the white (L) socket, and the red plug to the red (R) socket of the AUX IN connector.
Listening to the connected equipment
1. Press the FUNCTION button to until AUX is selected.
2. Play the external source.
Note : If the external equipment is a television and this audio system is close to the television, you may
experience interference if the tuner function is selected while the television is working.
- 4 -
Page 6
PP
ARTS IDENTIFICAARTS IDENTIFICA
P
ARTS IDENTIFICA
PP
ARTS IDENTIFICAARTS IDENTIFICA
1
TIONSTIONS
TIONS
TIONSTIONS
10
11
2
3
4
5
6
7
8
9
12
13
14
15
16
17
18
19
20
21
22
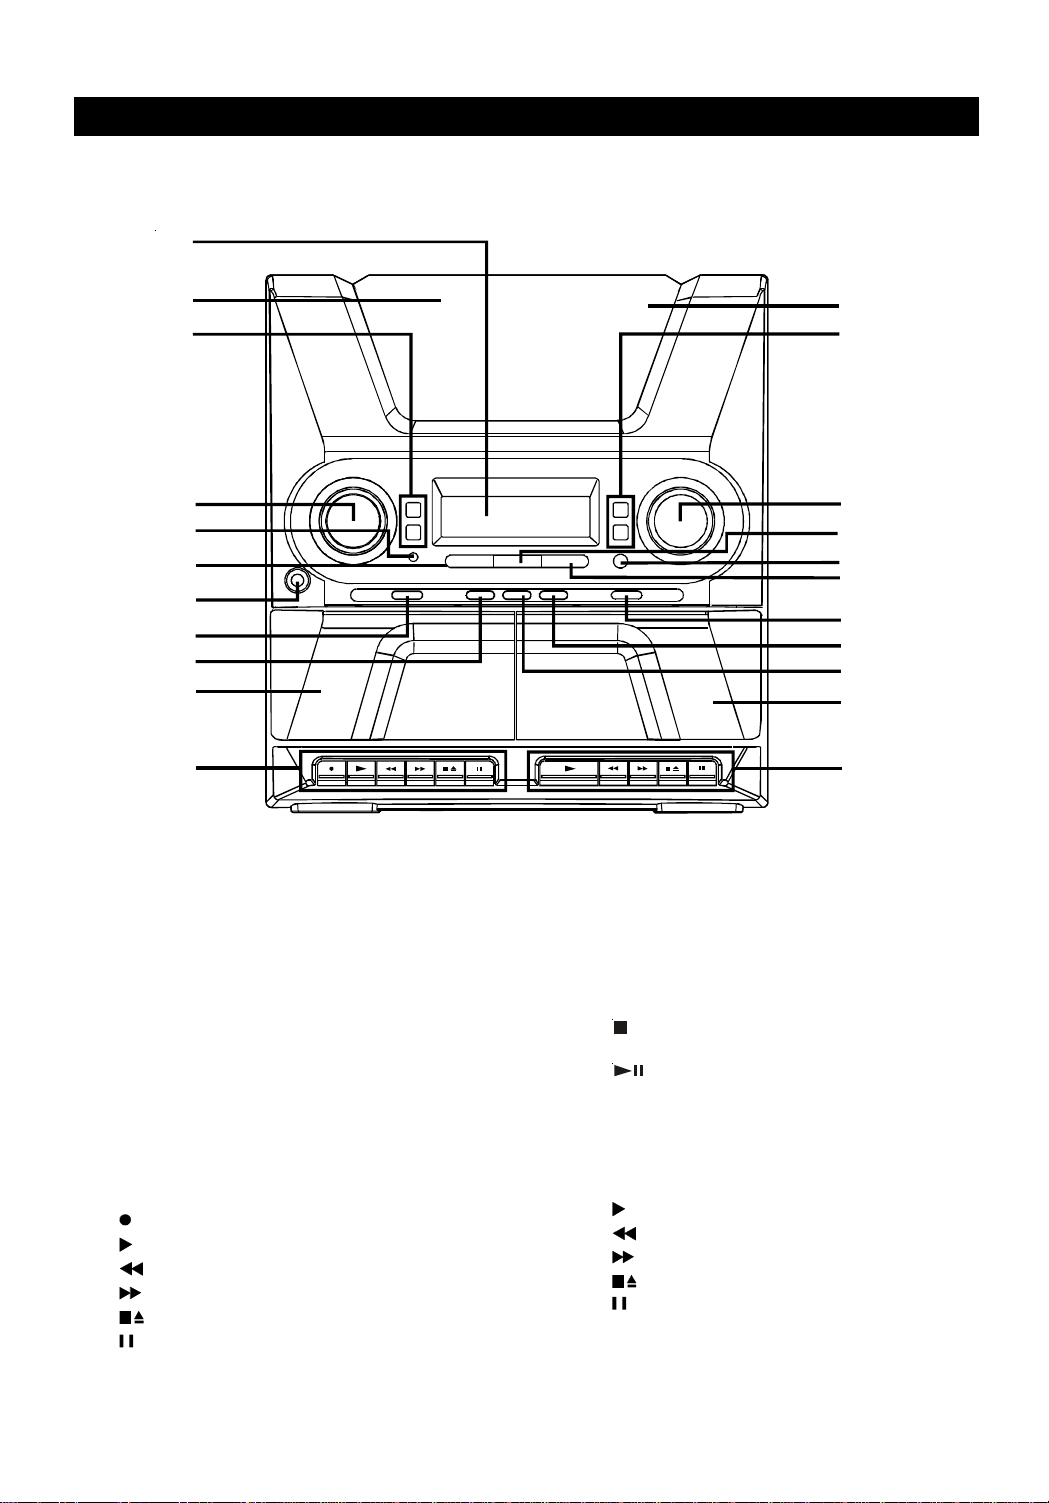
1) DISPLAY
2 ) CD DOOR
3 ) SKIP/SEARCH buttons
4 ) MULTI-JOG/DISC SKIP control
5 ) STANDBY indicator
6 ) FUNCTION button
7) PHONES socket
8 ) STANDBY/ON button
9 ) HIGH SPEED DUBBING button
10) Cassette holder ( Deck A)
11) Cassette deck A operation controls
RECORD button
PLAY button
REWIND button
F.FWD (fast forward) button
STOP/EJECT button
PAUSE button
12) OPEN/CLOSE CD DOOR
13) TUNING/REPEAT/RANDOM buttons
14) VOLUME control
15) STOP/BAND
16) REMOTE SENSOR
17) PLAY/PAUSE button
18) MEMORY button
19) TIMER/SLEEP button
20) SOUND mode button
21) Cassette holder (Deck B)
22) Cassette deck B operation controls
PLAY button
REWIND button
F.FWD (fast forward) button
STOP/EJECT button
PAUSE button
- 5 -
Page 7

REMOTE CONTROL
1) FUNCTION button
1
2
3
4
5
6
7
8
9
10
11
12
2)
13
3)
14
4) RANDOM button
15
5) REPEAT button
16
6)
7) DIMMER
17
8) VOL
9)
18
10 ) Number (0-9) and (+10)
19
buttons
20
11) MEMORY button
21
22
PLAY/PAUSE button
STOP button
SKIP button
– button
SKIP button
12) FM MODE button
13 ) STANDBY/ON button
14 ) SOUND button
15) SLEEP button
16) TIMER button
17) VOL + button
18) TUNE UP/SEARCH button
19) TUNE DOWN/SEARCH button
20 ) DISC UP button
21) DISC DOWN button
22 ) BAND button
Using the Remote Control
• Point the Remote Control at the REMOTE SENSOR "IR" located on the unit.
• When there is a strong ambient light source, the performance of the infrared REMOTE SENSOR "IR"
may be degraded, causing unreliable operation.
• The recommended effective distance for remote operation is about 16 feet (5 meters).
ATTENTION
Take out the PVC sheet before operating the remote control.
To Change Remote BatteryTo Change Remote Battery
To Change Remote Battery
To Change Remote BatteryTo Change Remote Battery
1. Open the battery door.
Battery ReplacementBattery Replacement
Battery Replacement
Battery ReplacementBattery Replacement
2. Insert new one CR2025 (3V) size battery.
When battery become weak, the operating distance of the Remote Control is greatly reduced and you
will need to replace the battery.
Notes:
• If the Remote Control is not going to be used for a long time, remove the battery to avoid damage
caused by battery leakage corrosion.
• WARNING: Do not dispose of battery in fire, battery may explode or leak.
- 6 -
Page 8

ADJUSTING THE SOUND
TO ADJUST THE VOLUME
Rotate the VOLUME knob to adjust the sound.
TO USE THE X-BASS
Press the SOUND mode button repeatedly, so
that "X-BASS" appears on the display window.
Rotate the MULTI-JOG the control to select the
level 1, 2 or off.
SOUND
X-BASS is designed specifically to boost the
low frequency sound to obtain a more powerful
bass.
TO CHANGE THE PRESET EQUALIZER
Press the SOUND mode button repeatedly, so that "EQ OFF" appears on the display window, then rotate
the MULTI-JOG control to select an equalization mode (POP, ROCK, JAZZ). Rotate the MULTI-JOG control
repeatedly until the desired equalization indicator is illuminated.
POP: More presence of vocals and mid range.
ROCK: Emphasizes the mid range and bass sounds.
JAZZ: Emphasizes the mid range sounds.
FOR PERSONAL LISTENING
Connect headphones (ø 3.5mm stereo mini
plug) to the PHONES socket.
Adjust the VOLUME and SOUND mode controls
for the desired listening level.
When headphones are connected, the speakers
are switched off automatically.
WHEN RECORDING
During tape recording, adjustments to the
VOLUME and SOUND mode controls will not
effect the recorded signal.
- 7 -
Page 9

SETTING THE CLOCK
1. In standby mode press the PLAY/PAUSE
button.
2. Use the MULTI JOG knob to adjust day
MON, TUE, WED, THU, FRI, SAT or SUN.
3. Press the PLAY/PAUSE button and use the
MULTI-JOG to adjust the hour.
4. Press the PLAY/PAUSE button and use the
MULTI-JOG to adjust the minute.
5. Press the PLAY/PAUSE button use the MULTI-
JOG. Select either 24 hour/12 hour format.
Notes:
• The clock starts operating from “0” seconds.
(Seconds are not displayed.)
• In the event of a power failure or when the AC
power lead is disconnected, the clock display
will go out.
When the AC power supply is restored, the
clock display will flash on and off to indicate the
time when the power failure occurred or when
the AC power lead was disconnected.
• You can only set the clock in standby mode.
6. Press the PLAY/PAUSE button and use the
MULTI-JOG to adjust the clock on and off.
- 8 -
Page 10

HOW TO SET THE TIMER
SLEEP OPERATION
The tuner, CD, tape and AUX can all be turned off
automatically.
1. Select the desired sound source.
2. Press the TIMER/SLEEP button, so that
“SLEEP” is displayed.
3. To change the sleep time:
Sleep time will initially be 90 minutes.
Sleep selection (Rotate MULTI-JOG) control to
change minutes 240, 210, 180, 150, 120, 90, 60,
30, 10, 5, 4, 3, or 2.
The unit will turn off automatically after the preset
sleep time has elapsed.
To cancel the sleep operation:
Press the TIMER/SLEEP button repeatedly until
“NO SLEEP” appears on the display.
TIMER PLAYBACK
Before setting the timer, make sure that the clock
setting is correct.
1. In standby mode, press the TIMER button.
7. Rotate the MULTI JOG to adjust the time for
playback.
8. Press the PLAY/PAUSE button
To cancel the timer playback operation
Press the TIMER buttons repeatedly until
“NO TIMER” appears on the display.
Note
You can only set the timer playback in standby
mode.
2. Press the PLAY/PAUSE button.
3. Rotate the MULTI JOG to adjust the hour.
4. Press the PLAY/PAUSE button.
5. Rotate the MULTI JOG to adjust the minute.
6. Press the PLAY/PAUSE button.
- 9 -
Page 11

FOR BETTER RECEPTION
FM
Fully unwind the wire aerial. Then extend the wire
aerial and place it in the position that receives
best reception.
AM
Connect the loop aerial (provided) to the 'AM
LOOP aerial' snap terminals at the back of the
unit.
NOTE: Do not connect to an outside aerial.
TUNING INTO A STATION MANUALLY
The system can store a total of 60 stations. (30 FM and 30 AM ). Presetting allows you to tune in to a station
directly.
1. Press the FUNCTION button
to select TUNER, function
“TUNER” will appear in the
display.
FUNCTIONFUNCTION
2. Press the STOP/BAND
button to select the desired
band.
STOP/BAND
3. Tune into a station using the
tuning buttons. “STEREO” will
appear when an FM broadcast
is in stereo.
REPEAT
TUNING
RANDOM
If the FM stereo broadcast signal weak and there is hiss when you listen
Press the PLAY/PAUSE button, so that the “STEREO” disappear on the display. Press the PLAY/PAUSE
button again, so that the "MONO" disappear on the display.
To search for a station quickly
Hold the TUNING buttons and tuning will automatically stop when a station is found.
However, if the signal is weak the automatic search may not find any stations. In this case, search for
the station manually.
After use:
Press the STANDBY/ON button to turn the power off.
Note
The last station tuned in will be recalled, even after changing the tuning band or the function, or after turning
the power off.
- 10 -
Page 12

PRESETTING STATIONS
1. Press the FUNCTION button
to TUNER.
FUNCTIONFUNCTION
4. Press / SKIP/SEARCH
button to select the required
preset number.
SKIP / SEARCH
2. Press the STOP/BAND button
to select the desired band and
tune to the required station.
REPEAT
STOP/BAND
TUNING
RANDOM
5. Press the MEMORY button to store
the station.
MEMORY
3. Press the MEMORY button.
MEMORY
Repeat steps 2-5
to set other preset station.
Notes:
• When the total memory of current band is full and try to store the current station into memory.
TUNING INTO A PRESET STATION
1. Press the FUNCTION button to select TUNER.
FUNCTIONFUNCTION
2. Press the STOP/BAND button to select the
required band.
STOP/BAND
When an FM stereo broadcast contains noise
Press the PLAY/PAUSE button so that “STEREO” disappears from the display. Noise is reduced,
although reception is monaural.
3. Press the numbered buttons on the remote
control to select a preset number.
NUMBERED
BUTTONS
Example:
To select preset number 15,
press the +10 button and then 5 button.
To select preset number 10,
press the +10 button and then 0 button.
- 11 -
Page 13

COMPACT DISC OPERATION
1. Press STANDBY /ON to turn on the player.
2. Press FUNCTION repeatedly until " 20 CD"
appears.
3. Open the CD door
PUSH OPEN
by pushing the top right
edge of the cover.
G
D
I
S
O
J
C
-
I
S
T
K
4. Rotate the DISC SKIP
control to turn the tray .
L
U
M
N
W
O
D
I
P
Place other disc(s) in the
disc holder(s). And turn to
select disc number.
5. Insert a disc with the label side facing right.
Disc number
Disc slot at the
loadin g p o si ti on
U
P
6. Repeat steps 4 and 5 to insert more discs.
7. Close the CD door by pushing the right edge of the cover until it clicks
8. Turn the MULTI-JOG • DISC SKIP until the desired disc number or the disc title appears
Press either one of the SKIP / buttons to select the desired track.
9. Press the PLAY button
to start playback.
To pause playback
Press the PLAY/PAUSE button and ' ' will be
displayed. Press this button again to resume
playing.
Notes
• Playback will begin from first track on the disc
you have selected to play.
10. To stop playing:
Press the STOP button.
Notes
1. The SKIP / buttons can only be used to
choose a track of the current disc. To choose
a track of another disc, the DISC SKIP button
should be used to get to the desired disc first.
2. Press PLAY-PAUSE button to continue
playback.
• After the disc finishes playing, the next disc will
automatically play.
• When there is no CD in one of the 20-disc
position, that position will be skipped and the
next CD will be played.
• When the last track on the last disc has finished
playing, the unit will stop automatically. (e.g.
first disc is disc 3, then last disc is disc 2)
• When the DISC SKIP button is pressed, playback
will begin automatically from the next disc. (It is
not necessary to press the PLAY button)
- 12 -
Page 14

COMPACT DISC OPERATION
LOCATING A PARTICULAR POINT IN A TRACK
Searching for the beginning of
a track
To find a later track
Press the SKIP button
repeatedly until you find the
track.
To find a previous track
Press the SKIP button
repeatedly until you find the
track.
SKIP / SEARCH
Locating a particular point in
a track
To move backward at high
speed
Keep the SKIP button
pressed during play and release
at the desired point.
To move forward at high speed
Keep the SKIP pressed
during play and release at the
desired point.
SKIP / SEARCH
A specific track directly
Press the numbered buttons to
enter the track number.
Example:
To select the 25th track, press the
+10, +10 and 5 buttons.
To select the 10th track, press the
+10 and 0 buttons.
The selected track starts to play
and play continues to the end of
that disc.
NUMBERED
BUTTONS
Keep it pressed
Note : Searching and skipping can be done during playback or pause stage but are effective for the
currently selected disc only.
Use DISC SKIP button to choose another disc.
RANDOM PLAY
Shuffle play - playing in a random order
Random play all disc:
1. Press the RANDOM button, the word “RAND” and will appear on the display and "RANDOM" will appear
about 5 sec.
2. Press the PLAY button .
To cancel random play
Press the RANDOM button until the “RAND” disappears and "NO RAND" will appear about 5 sec.
Note: Random only works for the currently selected disc.
Note
• You can set or cancel the random play in playback mode or stop mode.
• Total 60 songs selected for RANDOM no matter number of discs inside.
- 13 -
Page 15

COMPACT DISC OPERATION
PROGRAMME PLAYBACK --- in the stop mode
You can play back the tracks on the CDs in the disc 1-20 positions in any order desired. By specifying the
disc numbers from 1 to 20 and the tracks numbers from 1 to 99. A program of up to 20 tracks from all
the available discs in the disc tray can be played in a preset order.
In stop mode
1. Press MEMORY button (in stop
mode).
3. Press the numbered buttons and the +10 button or SKIP/SEARCH
button to program a track.
Example:
To select the 12th track, press the +10 and 2
buttons.
To select the 20th track, press the +10 and +10
and 0 buttons.
2. Press the numbered buttons 1-
4. Repeat steps 2 and 3 to program other tracks.
20 or SKIP/SEARCH button to
select which disc for playback.
5. Press the PLAY button to start play.
To check the program
Rotate the MULTI-JOG in program mode, a track number and program number will be displayed.
To clear the program
Press the STOP/BAND button twice or open CD door.
To change the programmed tracks
Clear the program and repeat all the steps again.
NUMBERED
BUTTONS
REPEAT PLAY
A single track, a disc or all discs can be played back repeatedly
Repeating the current track
While a track you want to repeat is playing in normal
play, press the REPEAT button until “ ”
appears on the display window.
Repeating all discs
Press the REPEAT button repeatedly until
“ ” appears on the display window.
Repeating all tracks of a disc
While the disc you want to repeat is playing in
normal play, press the REPEAT button until
“ ” appears on the display window.
To cancel repeat play
Press the REPEAT button several times until
“ ” “ ” or “ ” disappears on
the display window.
- 14 -
Page 16

TAPE PLAYBACK
Usable tapes - use only normal (type I) tapes for playback.
You can playback only the front sides of the tapes in Decks A and B.
1. Press the FUNCTION
button to TAPE.
2. Press the STOP/EJECT button
and load a cassette into the cassette compartment of Deck A or
Deck B.
FUNCTIONFUNCTION
DECK A DECK B
To stop playback
Press the STOP/EJECT button.
To pause playback
Press the PAUSE button.
To resume play, press the PAUSE button again.
To fast wind or Rewind
Press the REWIND or F.FWD button. Press the
STOP/EJECT button to stop winding at the desired
position.
3. Press the PLAY button to
begin playback.
DECK A
PRERECORDED
TAPE
OR
DECK B
If you press play on both deck A and deck B
sound will only come from the tape in deck B.
CONTINUOUS PLAYBACK ---- FROM DECK B TO DECK A
1. Press the FUNCTION button to TAPE.
FUNCTIONFUNCTION
3. Press the PLAY button of deck B.
4. Press the PAUSE button.
DECK B
• As soon as the tape in Deck B reaches its end and stops, the pause mode for Deck A is released and
playback starts automatically.
2. Insert a cassette in each deck.
Played
next
DECK A DECK B
5. Press the PLAY button.
DECK A
Played
first
DECK A
- 15 -
Page 17

TAPE CARE TIPS
Preventing accidental erasure
1. Cassette tapes have two erase-protection
tabs - one for each side. To protect a recording from being accidentally recorded over or
erased, use a screwdriver to remove one or
both of the cassette tape's erase-protection
tabs.
Side A Tab
Side B Tab
2. If you want to record on a tape side after you have
removed the erase protection
tab, place a piece of strong
plastic tape over that side's
erase-protection hole.
Notes:
1) Be sure you cover only the hole originally covered by
the erase-protection tab.
2) Removing the erase-protection tabs does not prevent
a bulk eraser from erasing a cassette tape.
DUBBING ---- FROM DECK B TO DECK A
Use only normal (type I) tapes for recording and playback.
1. Press the FUNCTION button
to TAPE.
FUNCTIONFUNCTION
2. Insert the recorded tape into Deck
B and the blank tape into Deck A.
DECK A DECK B
4. Press the RECORD button
which also engages the PLAY
button.
5. Press the HIGH SPEED DUBBING
button to select the desired dubbing
speed:
NORMAL or
HIGH SPEED DUBBING
HIGH (display
TAPE 2X).
DECK A
To stop dubbing
Press the STOP/EJECT buttons of Deck A and Deck B.
Note : Do not change the dubbing speed when dubbing is in progress.
RECORDING ---- DECK A ONLY
Use only normal (type I) tapes for recording.
RECORDING FROM THE BUILT-IN TUNER
3. Press the PAUSE button.
DECK A
6. Press the PLAY button.
DECK B
1. Press the FUNCTION button to select TUNER and
tune into the required sta-
2. Insert a tape into the cassette
compartment.
3. Press the RECORD button
which also engages the PLAY
button.
tion. (see page 10)
FUNCTIONFUNCTION
DECK A
Note: If a whistling noise is heard whilst recording from an AM station, move the AM loop antenna to a position where
noise is no longer heard from the unit.
If a whistle is heard (beat) it may be reduced by selecting Beat cut. The Beat cut function can be activated by pressing
the HIGH SPEED DUBBING button in AM tuner mode.
- 16 -
DECK A
Page 18

RECORDING ---- DECK A ONLY
RECORDING FROM THE CD PLAYER
1. Press the FUNCTION button to CD.
FUNCTIONFUNCTION
3. Press the RECORD
button which also
engages the PLAY
button.
DECK A
TO STOP RECORDING
Press the STOP/EJECT button of Deck A.
TO INTERRUPT RECORDING
Press the PAUSE button of Deck A.
To resume recording, press the PAUSE button again.
2. Insert a tape into the
cassette compartment.
DECK A
4. Press the PLAY/PAUSE
button of the CD player.
TO ERASE A RECORDED TAPE
1. Press the FUNCTION button to TAPE.
2. Insert a tape with the side you want to erase
facing you.
3. Press the RECORD button to start erasing.
- 17 -
Page 19

MAINTENANCEMAINTENANCE
MAINTENANCE
MAINTENANCEMAINTENANCE
CLEANING CD
If the CD skips or will not play, the disc may need cleaning.
Before playing, wipe the disc from the center out with a clean cloth. After
playing, store the disc in its case.
CLEANING THE TAPE HEADS
To clean the tape heads use a tape cleaner available from all hifi stores
DECK A
DECK B
CLEANING THE UNIT
Before cleaning the unit ensure that it is unplugged from the mains.
Do not use volatile chemicals on this unit. Clean by lightly wiping with a
soft cloth.
IMPORTANT NOTE
Before transporting the unit, take out all discs from the CD tray.
TROUBLESHOOTING GUIDE
SYMPTOM
GENERAL
No sound.
No sound from one channel or unbalanced left
and right volume.
Reversed left and right sound.
Lack of bass sound or apparently imprecise
physical location of musical instruments.
Severe hum or noise.
RADIO RECEPTION
The FM STEREO indicator flashes.
Severe hum or noise.
The stereo FM program cannot be received in
stereo.
CD PLAYER OPERATION
Play does not start.
Distorted playback or sound loss during CD
playback.
CASSETTE DECK OPERATION
Recording cannot be made.
Recording or playback cannot be made or there
is a decrease in sound level.
Excessive wow or flutter, or sound dropout.
CAUSE (AND REMEDY)
• Press the VOLUME UP button.
• The headphones are connected. Disconnect them.
• Reset the unit by pressing the Power/Standby switch.
• Suddenly OFF when playing, the SLEEP function is activated.
• Make sure you have inserted the disc into each slot at facing
right angle to the rotary table.
• Check the speaker connections of the inoperative channel.
• Check the speaker cord connection and speaker location.
• Check that the speakers are connected the correct way round.
• The TV or VCR is too close to the stereo system. Separate the
stereo system from the TV or VCR.
• Adjust the antenna wire.
• Set the MODE switch to FM MONO, the FM STEREO light will
go out.
• The discs are not placed correctly.
• Dirty disc.
• The disc is inserted upside down.
• The player is in the pause mode.
• Moisture condensation
• CD disc is dirty or scratched.
• No cassette in the cassette holder.
• The tab is removed from the cassette.
• The tape is wound completely.
• Dirty head.
• Magnetic build up on the record/playback head.
• Contamination of the capstans or pinch rollers.
- 18 -
Page 20

SPECIFICATIONS
Power consumption 86 W
Power requirements AC ~ 100V 50/60Hz (Japan)
AC ~ 110V/120 - 220/240 50/60Hz (Other countries)
AC ~ 120V 60Hz (USA and Canada)
AC ~ 220V 50Hz (Hong Kong and China)
AC ~ 230-240V 50Hz (Europe)
AC ~ 240V 50Hz (Australia)
Specifications and external appearance are subject to change without advance notice due to
continuous product improvement.
- 19 -
 Loading...