

Hidrotermal Hidro-GB80H, Hidro-GB190H, Hidro-GB210H, Hidro-GB120H, Hidro-GB160H User Manual
...
Hidro-GB80H Hidro-GB160H Hidro-GB210H
Hidro-GB120H Hidro-GB190H Hidro-GB230H
Hidro-GB140H
Stainless Steel Fountain Light
USER MANUAL
Please read this operation manual carefully and keep it for future reference.
WARNING
RGB R G B
Pure
White
Warm
White
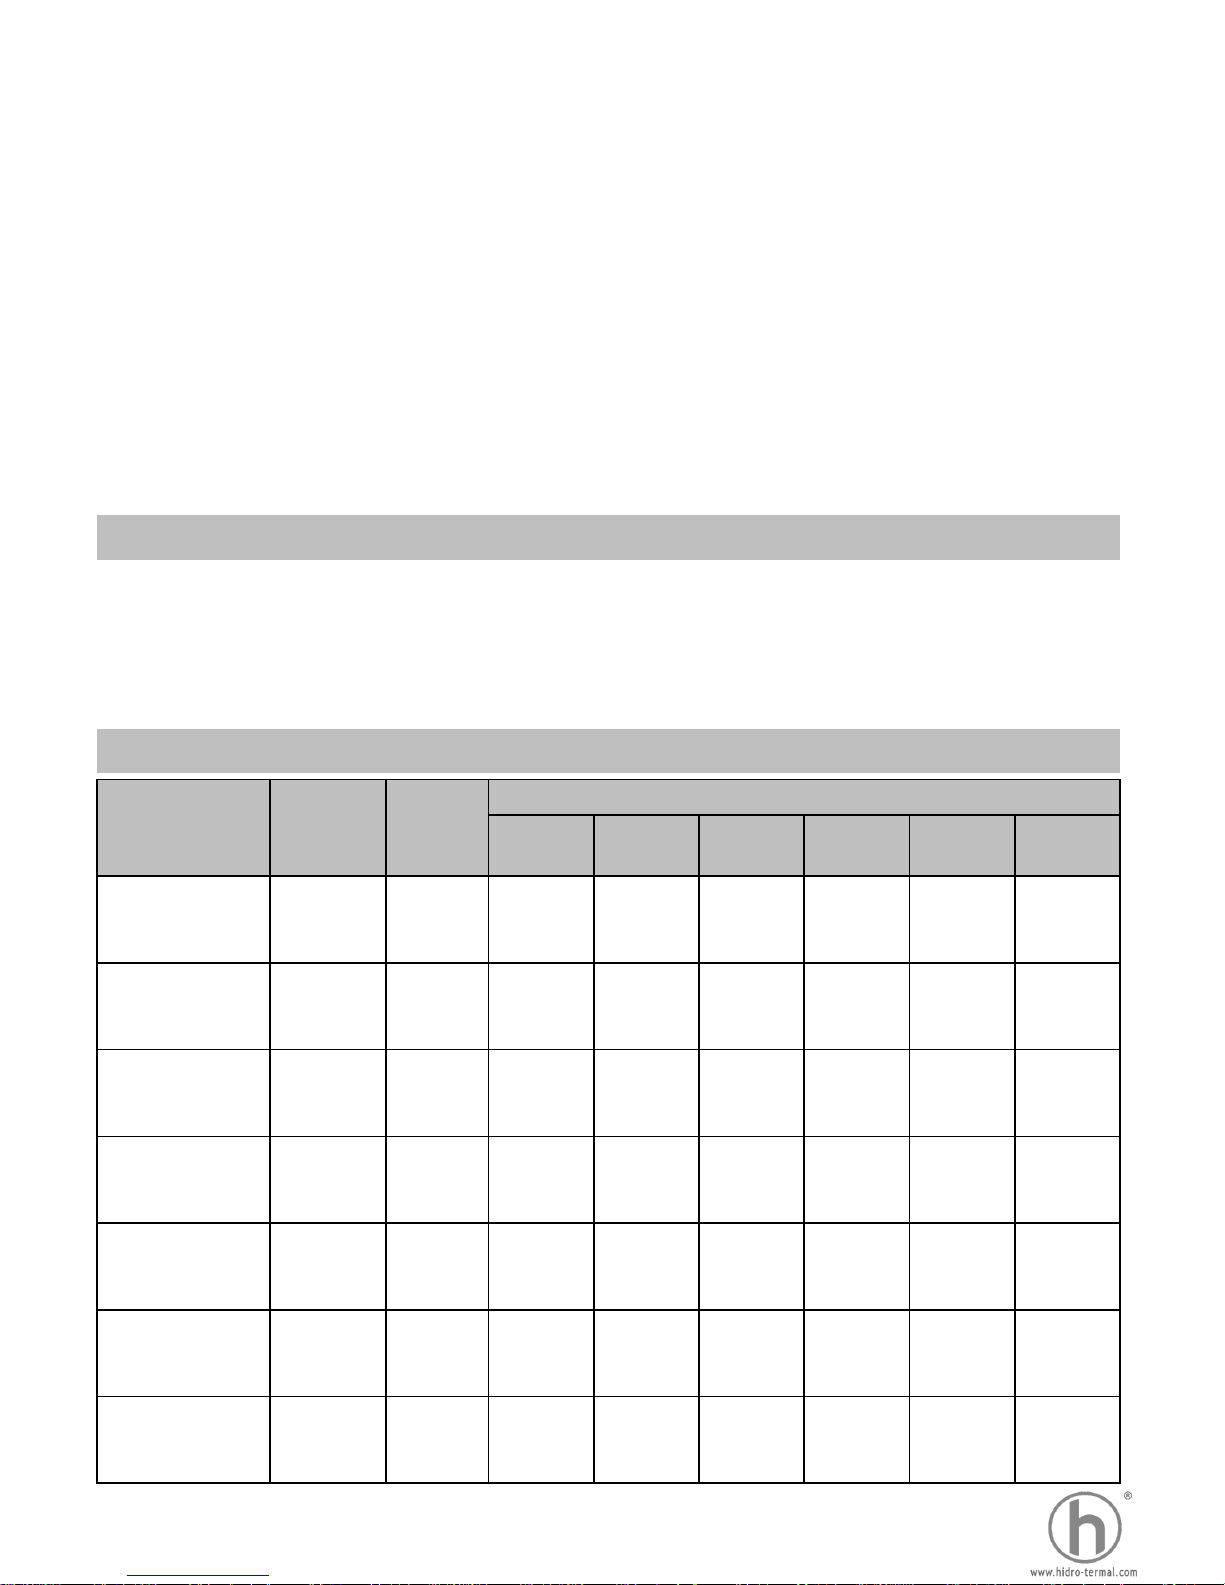
Hidro-GB80H 3x1W 3W/12V
R: 50
G: 70
B: 30
150 210 90 300 270
Hidro-GB120H 6x1W 6W/12V
R: 100
G: 140
B: 60
300 420 180 600 540
Hidro-GB140H 9x1W 9W/12V
R: 150
G: 210
B: 90
450 630 270 900 810
Hidro-GB160H 12x1W 12W/12V
R: 200
G: 280
B: 120
600 840 360 1200 1080
Hidro-GB190H 18x1W 18W/12V
R: 300
G: 420
B: 180
900 1260 540 1800 1620
Hidro-GB210H 24x1W 24W/12V
R: 400
G: 560
B: 240
1200 1680 720 2400 2160
Hidro-GB230H 36x1W 36W/12V
R: 600
G: 840
B: 360
1800 2520 1080 3600 3240
1. Only a licensed or certificated electrician or a qualified serviceman is allowed to install
or maintain this product.
2. Must be installed in accordance to the requirements of your government standard or
local authorities.
3. Before servicing the light, disconnect the power supply from the circuit breaker. Failure
to do so could result in serious injury, death and or damage to the property.
4. Never handle it with wet hands and feet.
5. This light is design for use only when fully submerged in water.
6. Never operate this light for more than 1 minute unless it is totally submerged in water.
7. All lights are required to be disconnected from the main electricity before any operation
of maintenance.
8. Ensure that the fountain has enough water depth for the entire fixture to be completely
submerged at least 2 inches below the minimum operating water level.
1. Product Description
1) These LED lights are designed to provide 50,000 hours of powerful illumination.
2) Single-color fixtures use 1W High power LEDs to produce natural white or warm white light,
and the RGB fixture cycles through 9 color-changing patterns.
3) The waterproof LED light has12V DC/AC operation and is constructed of aluminum with a
stainless steel front bezel. Use this LED fixture with fountain tubing up to 1-1/4" in diameter.
2. Specifications
MODEL
High
Power
LEDs
POWER
Flux (LM)

3. Installation for LED Light:
1. Bolt fountain base securely to flooring using 1/4” screws. NOTE: Fountain base can be
installed as a freestanding base not required to be bolted down.
2. Check Local Codes for Junction Box installation requirements. Ensure that the length of
exposed cord in the fountain is no more than 10 feet (3 m.), see Fig 1.
3. Cut the cord at the Junction Box, leaving at least 6 inches of cord to make connections.
4. Strip 6 inches of the outer cord jacket to expose the three insulated wires – be careful not to
damage the insulation on the three inner wires.
5. Position the Fountain Fixture as desired in the fountain.
6. If required by Local Ordinances, use the supplied bonding lug kit with the Fountain Fixture to
ensure proper bonding of light.
7. Fill the fountain until the light is completely submerged in water before operating it. Entire
fixture must be at least 2 inches below minimum operating water level.
8. Turn on main switch or circuit breaker, as well as the switch that operates the light itself, to
check for proper operation. Refer to Operating Instructions.
Fig. 1
WARNING!
Never operate this underwater light for more than 2 minutes
unless it is totally submerged in water. Without total
submersion, the light assembly will get extremely hot, which
may result in serious burns or in breakage of the lens. This
may result in serious injury to installers, bystanders, or in
damage to property.
 Loading...