

Page 1
Hideaway® Soft Close Range
Installation Instructions
60L Laundry Hamper
Important Installation Information:
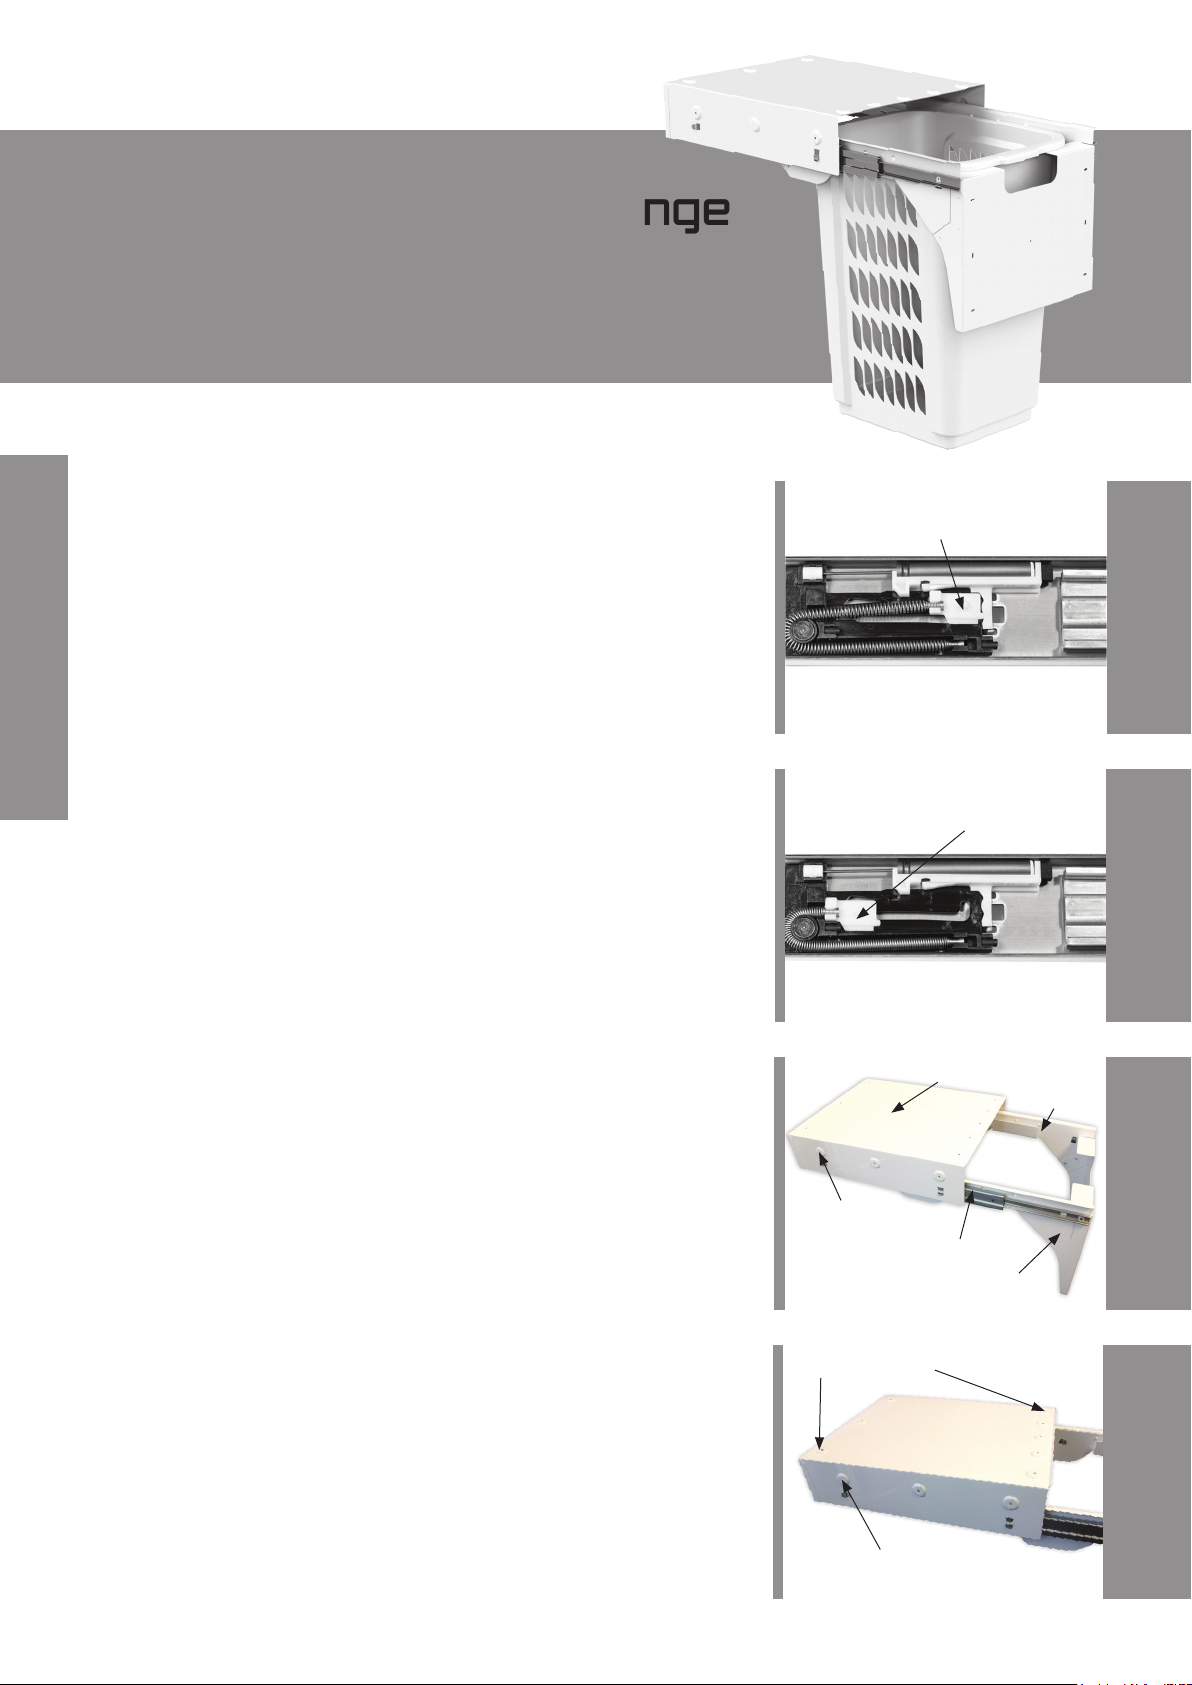
AT ALL STAGES OF THE INSTALLATION ENSURE THE SPRING CARRIER ON THE
RUNNER IS ENGAGED!
Before you close the unit ensure the spring carrier is loaded on your soft close runner.
Failure to do so may cause damage to your runners.
Figure 1a - Demonstrates the spring carrier in the engaged position. This is the correct
positioning and the laundry hamper is ready to be closed and used.
Figure 1b - Demonstrates the spring carrier in an disengaged position. To move into
engaged position, move the white spring carrier along its runner until it clicks into location
demonstrated by arrow in Fig 1b. Alternatively, if discovered after installation is complete
then you may also try the following: push the drawer to the rmly closed position. Push the
disengaged side of the door rmly until you hear a click from the runner re-engaging. The
runner should now close fully under normal operation and be positioned as shown in Fig 1a.
PLEASE READ BEFORE YOU BEGIN
Runner engaged - correct
FIG 1a - Runner Engaged
Runner disengaged - incorrect
Step 1 - Unpack Hideaway Bin
• Remove all polystyrene.
• Remove the hamper.
Step 2 - Remove the door bracket
• Remove door bracket from the brown box found inside the hamper and set aside
until step 5.
• NOTE: VERY IMPORTANT - Do not remove the runners from the top mounting panel.
• See (g 2) to identify unit parts.
Step 3 - Install your bin within your cupboard / carcass (top mounting)
• Position the top mounting panel inside, beneath your carcass / shelf.
• NOTE: VERY IMPORTANT - Set the top mounting panel back 2mm from front of carcass.
• Position in the centre of the carcass. Mounting holes are located in the top mounting
panel for xing. Secure the top mounting panel into place with the Surex screws
and washers provided. Any additional mounting holes added by the installer will null and
void warranty.
Step 4 - Install your bin within your cupboard / carcass (side mounting)
• Your unit has side mounting dimples, as shown in g 2 & 3. If side mounting, the internal
space of the cabinet must be within the advertised width.
• The side mounting dimples are to be secured with the Surex screws and washers provided.
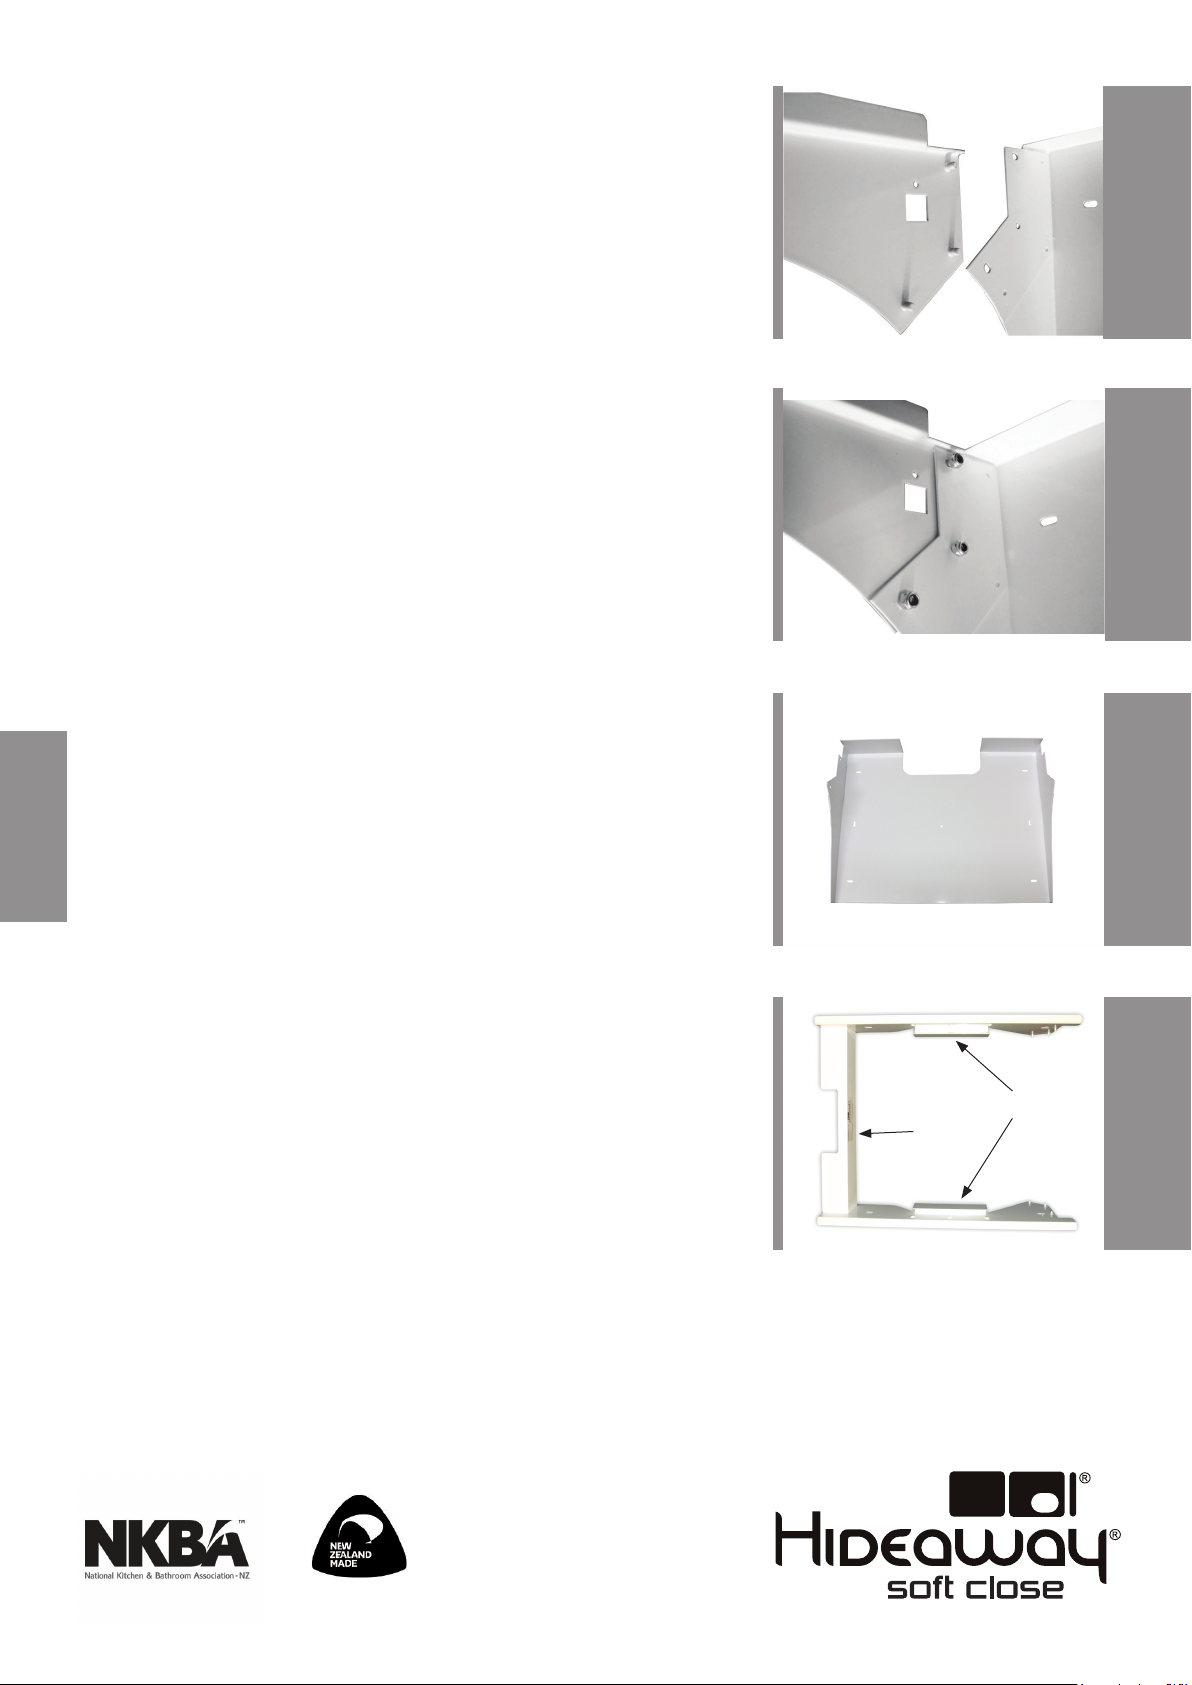
Step 5 - Door bracket (g 4, 5)
• Align the door bracket (g 6) to the collar (g 7) and lightly tighten in place using the
nuts provided.
• NOTE: Lightly tighten nuts to allow xing of door front. (Refer g 4 & 5)
Side mounting
dimples
Top mounting holes
Side mounting holes
Top mounting panel
Runners
Door bracket
FIG 1b - Runner Disengaged
Collar
FIG 2 - Unit Parts
FIG 3 - Mounting
Page 2
Step 6 - Fix cabinet fascia to door bracket of laundry hamper
• Place a 12mm self tapping screw into the centre hole of the door bracket - ensure the point
of the screw is only protruding approx 3mm.
• With the laundry hamper closed fully, align the front fascia of the cupboard against the
door bracket. A small hit with your hand to the location of the screw will help provide a
drilling indication.
• Lie the cabinet fascia on a at surface with the internal part of the door facing upwards.
Using the drilling mark made to the centre point on the cabinet fascia, drill a guide hole to
hold the centre screw. (If required for ease of installation, remove the door bracket from the
unit once again. Attach the door bracket with the centre screw to the cabinet fascia using the
drilling mark and then reattach the door bracket to the collar of the unit once again.)
• Place the cabinet fascia against the door bracket and tighten the centre screw. Check the
positioning and align.
• Proceed to marking, screwing and tightening the remaining screws on the door bracket.
Vertical and horizontal adjustment is provided on the door bracket.
• To adjust the angle of your kitchen fascia: loosen or tighten the nuts on the door bracket
until desired angle is achieved. The centre nut provides pivot. Once the desired angle is
achieved, rmly tighten all nuts on the door bracket.
Step 7 - Place hamper into hangers on collar
• Fully extend the runners.
• Place hamper onto the hangers provided on the collar.
Installation complete!
Collar
Door Bracket
Collar Detached
FIG 4 - Door Bracket and
Collar Attached
FIG 5 - Door Bracket and
Need more info?
NEW ZEALAND
Phone 09 426 7456 [email protected] www.hideawaybins.co.nz
CONTACT
AUSTRALIA
Freephone 1800 042 642 [email protected] www.hideawaybins.com.au
FIG 6 - Door Bracket
Hangers
Back lip
FIG 7 - Collar
NZ Patent No. 585372
AUS Patent Application No. 2011100557
 Loading...