

M22&M20
All-IN-ONE PC
USER MANUAL

Important Safety Instruction
1. Please read these instructions completely before using the equipment.
2. Keep these instructions in a safe place. Avoiding the wet place or in high temperature.
3. Heed all warnings appeared in this book and follow all instructions.
4. Do not use this equipment near water. Warning: To reduce the risk of fire or electric shock, do
not expose this apparatus to rain or moisture.
5. Clean the equipment with a soft, dry cloth.
6. Do not block any ventilation openings. Install the equipment in accordance with the
manufacturer’s instructions.
7. Do not install it near any heat sources such as radiators, heat registers, stoves, or other devices
(including amplifiers) that produce heat.
8. Do not attempt to circumvent the safety provisions of the polarized or grounding-type plug. A
polarized plug has two blades with one wider than the other. A grounding type plug has two
blades and a third grounding prong. The wide blade and the third prong are provided for your
safety. If the plug does not fit into your outlet, consult an electrician for replacement of the
outlet.
9. Protect the power cord from being tread upon or pinched, particularly at the plug, and the
point where if emerges from the equipment. Be sure that the power outlet is located near the
equipment so that it is easily accessible.
10. Only use attachments/accessories specified by the manufacturer.
11. Use only with the cart, stand, tripod, bracket, or table specified by the manufacturer, or sold
with the equipment. When a cart is used, use carefully when moving the cart/equipment
combination to avoid injury from tipping over.
12. Unplug this equipment when it will be unused for long periods of time.
13. Refer all servicing to qualified service personnel. Service is required when the unit has been
damaged in any way, such as: if the power-supply cord or plug is damaged, if liquid is spilled
onto or objects fall into the unit, if the unit is exposed to rain or moisture, or if the unit does not
operate normally or has been dropped.
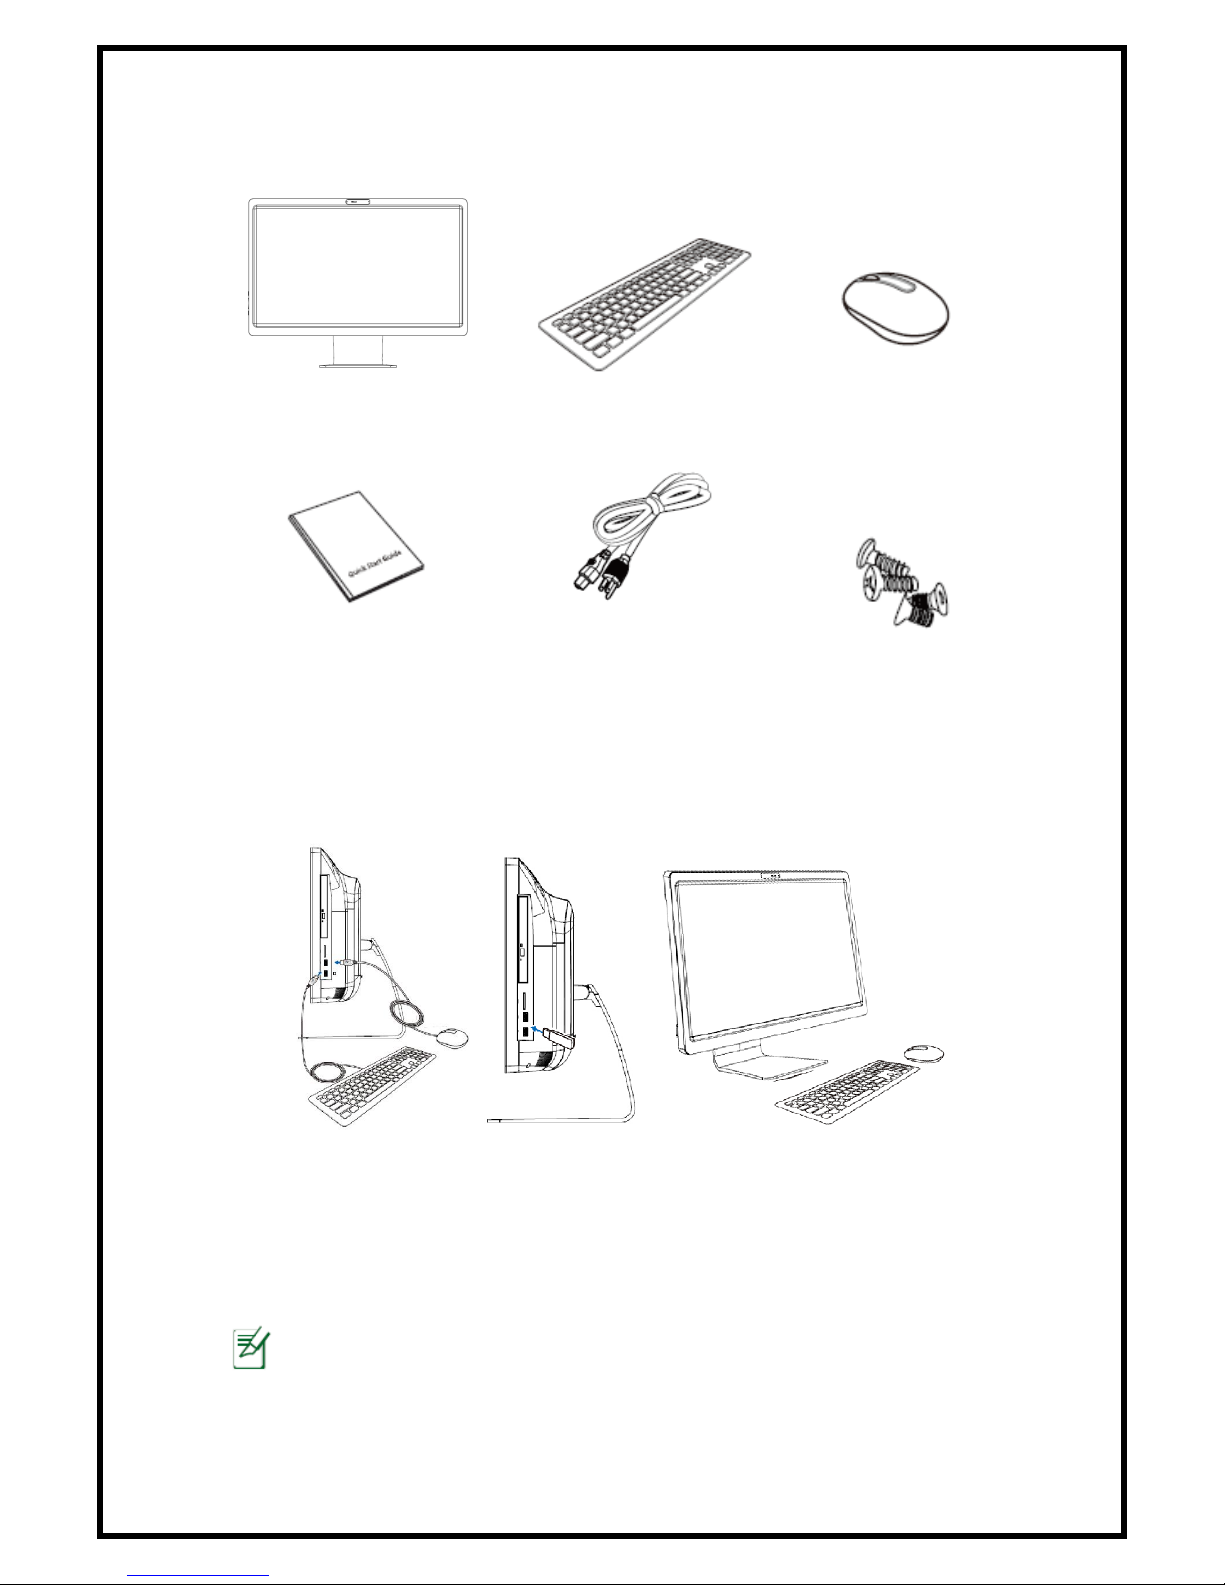
Package contents
All-in-One PC
Wireless/Wired Keyboard
(Optional)
Wireless/Wired
Mouse (Optional)
User manual
Power cord
Screws
Setting Up your All-In-One PC
Connecting the wired keyboard and mouse (Optional)
Connect the keyboard and mouse to the USB port as shown.
Connecting the wireless keyboard and mouse (Optional)
1. Install batteries to the wireless keyboard and mouse.
2. Insert the wireless keyboard and mouse receiver to the USB port on
the All-in-one PC.
3. You can begin using the wireless keyboard and mouse.
The illustrations are for reference only. Actual appearances of your wired or wireless
keyboard and mouse may vary based on the actual package.

Getting to know your All-in-One PC
Front View
Refer to the following diagram to identify the components on this side
of the system. The front view may differ depending on the model you
purchased.
① Webcam
The built-in webcam with the
built-in microphone allows you
to start video chats
online.
② Microphone (Built-in)
The built-in microphone can
be used for video
conferencing, voice narrations,
audio recordings, and
multimedia applications.
Rear View
① Back I/O ports
The back I/O interfaces depends on the specification of the motherboard.
Actual features and configurations vary by model.
② Stand
Allows you to position the system upright.
③ Kensington Lock
The Kensington lock is designed to lock the whole system to keep it safe.

Side View
Refer to the following diagrams to identify the components on both
sides of the system.
Monitor switch
Press to turn off / turn on the screen.
Brightness up
Press to increase the brightness.
Brightness down
Press to decrease the brightness.
④ Power Switch
Switch the system ON/OFF.
Side View
① Optical Drive
The built-in optical drive can support CD、DVD、DVD-R or DVD-RW capabilities.
Refer to the marketing specifications for details on each model.
② Memory card reader
Build in card reader supports MMC/SD/SDHC/MS pro cards used in devices like
digital cameras, MP3 players, mobile phones, and PDAs.
USB 2.0 Ports
Compatible with USB devices like keyboards, mouse, and hard disk drivers.

Positioning your All-in-one PC
Place your All-in-one PC on a flat surface such as a table or desk, keep it
stable. Then, tilt the display panel to an angle best for your field of vision. The
maximum angle of inclination is 30 degrees from an upright position.
Connect the Power
Connect the power cord to the power port of AIO. Plug the power cord into
an electrical outlet.
Do not connect the AC power cord to an AC outlet prior to connecting the DC Plug to
the system.
Connect the Audio Components
Connecting the Microphone /Headphone/Speakers
1. Plug the microphone cable into the Microphone port (Pink) of your AIO.
2. Insert the speaker cable into the green Line-out jack. Plug the
earphone cable into it instead of speaker cable if you listen by
earphone.
-15°
30°

Using the card Reader
The built-in card reader supports various type of memory cards, such as
MMC/SD/SDHC/MS pro. Insert the card with metallic connectors facing
towards you. Push gently until the card clicks into plate.
Using the Optical Disc Drive
Inserting a Disc
Press the eject button on the disc tray. Pull the tray out with the disc
label side up, place the disc on the center of the tray and snap into
place. Gently push the tray back into the drive.
Removing a Disc
Press the eject button on the disc tray. Pull the tray out with your
thumb on the center of the tray; pull the disc by its side with your
index finger to release.
Do not remove the disc while the computer is still reading or playing it.

Troubleshooting
My All-in-one PC does not start
Check that the All-in-one PC is connected to an electrical outlet
and it is turned on.
Check that the power cord and all cables are connected firmly.
When I turn on my computer, the message “Operating
system not found” appears or Windows does not start
Check if there is a non-bootable CD inside the optical disk drive. If
there is a non-bootable CD in the drive, remove the CD then
restart the computer.
Check boot setting is the BIOS Setup Utility.
My LCD does not display anything
Check that the All-in-one PC is connected to an electrical outlet
and it is turned on.
The All-in-one PC may be in Standby mode. Press any key to
activate the display
My computer “locks up”
Try restarting the All-in-one PC. On the Windows taskbar, click Start >
Turn off Computer > Restart.
Press the power switch.
If your computer locks up while playing a DVD-ROW/CD-ROM, stop
the DVD ROM/CD-ROM, and restart the computer by pressing
Ctrl+Alt+Delete.
My DVD-ROM drive tray does not open
Make sure the computer is turned on.
Press the eject button on the DVD-ROM/CD-ROM drive.
If the eject button does not work, open the tray by inserting a
sharp, pointed object into the hole next to the eject button.
My computer does not shut down
It is the best to shut down your computer using the Shut Down
command. Using other methods, may result in loss of unsaved data. If
the Shut Down command does not work properly, follow these steps:
Restart the computer by pressing Ctrl+Alt+Delete.
Press the power switch to turn off the power.
Unplug the All-in-one PC from the power adapter.
 Loading...