

Page 1
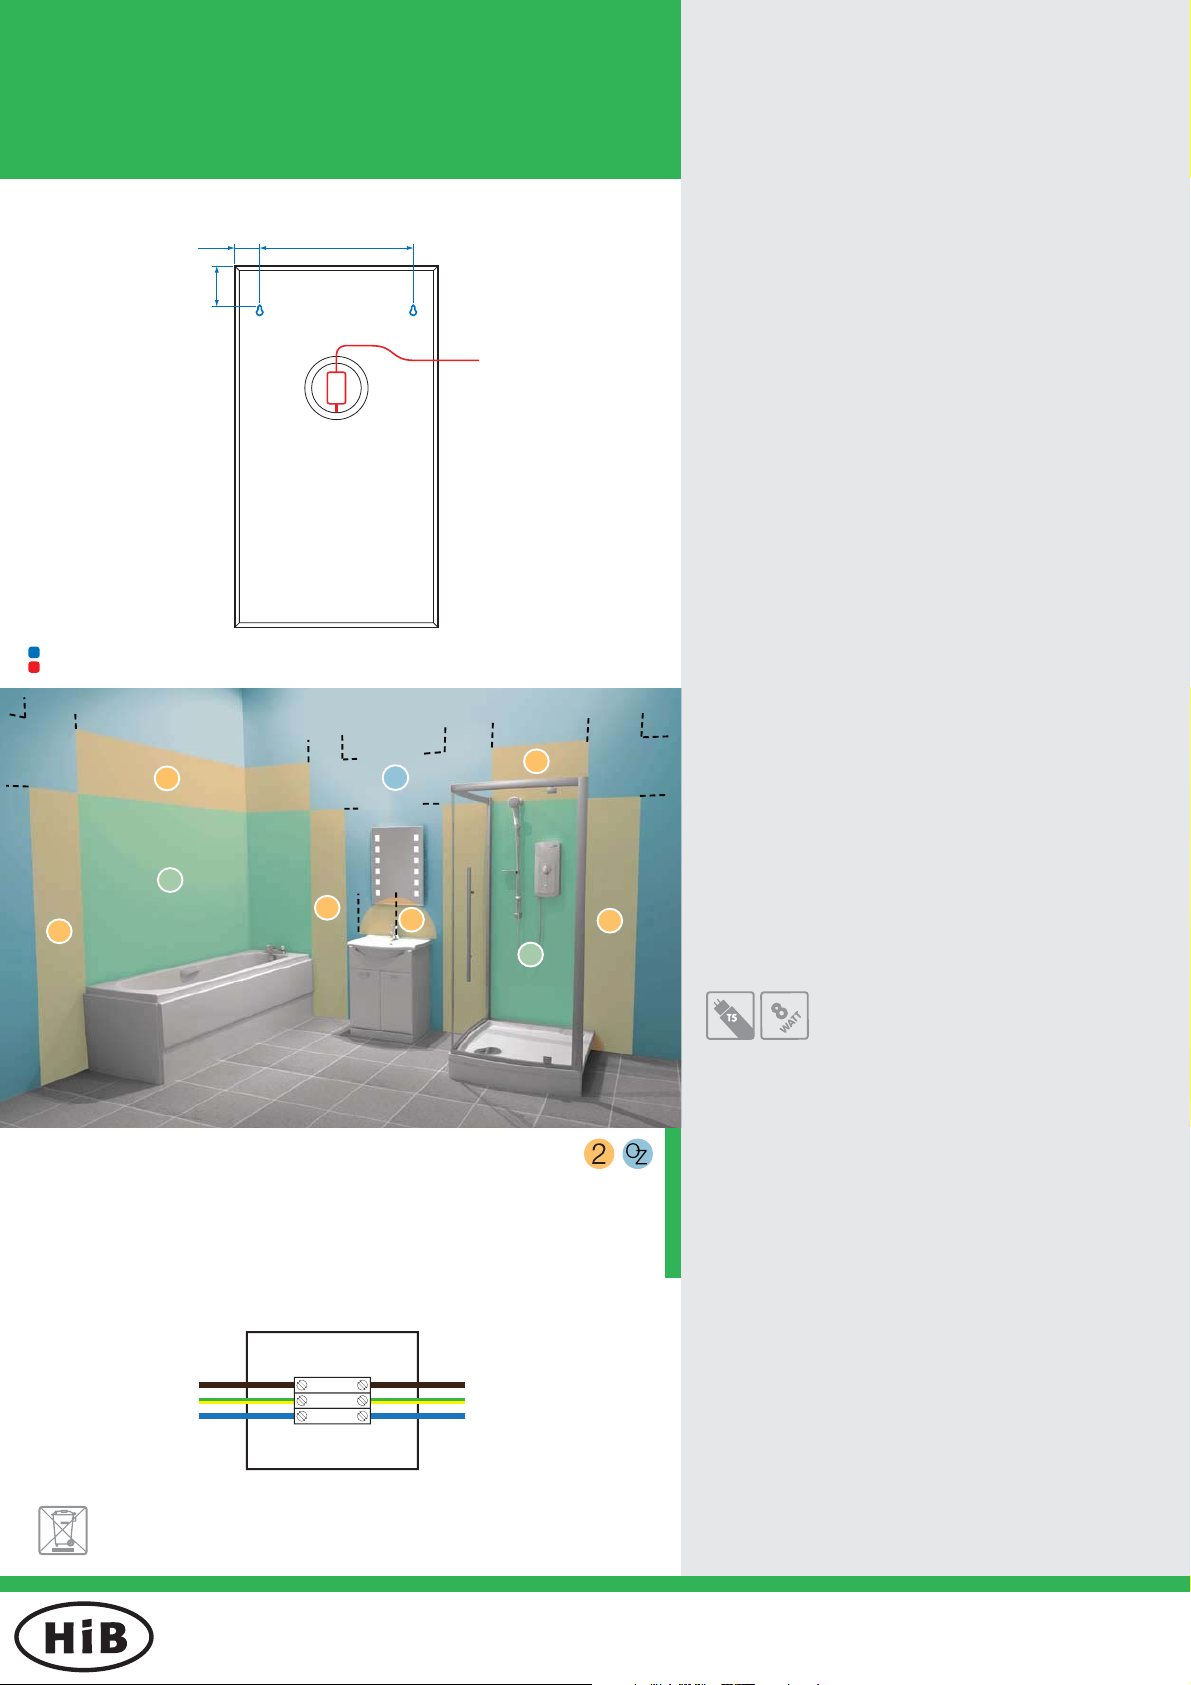
Fixing Instructions
ZENITH
REAR VIEW
mounting points
electrical input
60cm
75cm
2
225cm
December 2010
Art No. 73105500
Version 1
Fixing Instructions:
Position the mirror in a suitable location (according to the
5.5cm
8.5cm
2
60cm
34cm
75cm
to mains
60cm
O
Z
75cm
2
60cm
1
2
60cm
radius
2
2
1
1)
zonal diagram below-left), ensuring that the domestic
electrical mains supply is within reach of the electrical
entry point of the product.
Carefully mark the position of the mirror using a soft
2)
pencil.
Remove the mirror and mark the mounting points
3)
according to the diagram on the left.
Before drilling, ensure there are no hidden cables or pipes
4)
behind the mounting points. Using an 8mm masonry drill,
drill holes in the marked positions to a depth of 40mm. If
drilling through tile, use a ceramic drill bit.
Insert the wall plugs level with the surface of the
5)
wall. If fi tting to a tiled surface, wall plugs should be
inserted below the tile surface to avoid cracking. NB.
For plasterboard walls, specialist fi xings should be
purchased, available from any DIY or hardware store.
Screw hook screws into wall plugs.
6)
Ensure the domestic electrical mains supply to which
7)
the mirror is being connected is turned off. Connect
the domestic mains supply to the terminal box according
to the wiring diagram below-left.
75cm
Shaver socket is suitable for recharging toothbrushes.
9)
Hang the mirror in position.
8)
NB. On fi rst use of the shaver socket, inserting the
shaver plug may prove to be stiff. Reasonable force
may be required to fully insert the plug. Make sure
that the mirror is held fi rmly so that it is not pushed
off the wall. After a few uses, stiffness will ease and
the socket will function as normal.
Bulb Replacement:
This product is suitable for installation in zones:
All installations must comply with guidelines which are based on a zonal concept. The diagram above
illustrates this concept and must be followed to ensure the safe installation of bathroom lighting. These
regulations apply to domestic installations only. Installations must be made in accordance with the
current IEE wiring regulations and relevant building regulations. HiB recommends that all electrical
bathroom products should only be fi tted by a suitably qualifi ed, Part P registered electrician.
Wiring Diagram
Live supply is Brown
Earth supply is Green and Yellow
Neutral supply is Blue
live
earth
neutral
Live supply can be Red or Brown
Earth supply is Green and Yellow
Neutral supply can be Blue or Black
MAINS SUPPLYLUMINAIRE
WEEE compliance - must not be mixed with general household waste
The surface of the bulb may become extremely hot.
Allow at least 30 minutes after bulb failure before
attempting to replace the bulb.
2x T5 bulbs required, max 8 watts
1)
Remove the back plate on the reverse of the mirror.
2)
Carefully grasp the failed bulb and gently rotate 90° anticlockwise and remove the bulb from the bulb holder.
Carefully push the replacement bulb into the bulb holder,
3)
and gently rotate 90° clockwise to secure.
Replace the back plate on the reverse of the mirror.
4)
Operating Instructions:
--To turn illumination on or off, operate the sensor switch
located at the bottom of the mirror.
Heated pad is only on when mirror is illuminated.
Product Care:
- -Please do not use abrasives or solvents when cleaning.
Wipe off all water spillages as soon as possible using a
soft, damp cloth.
HiB Ltd, Castle House, 21-23 Station Road, New Barnet, Herts, EN5 1PH
t. 020 8441 0352 f. 020 8441 0219 e. [email protected] w. www.hib.co.uk
©HiB Copyright: No part of this document may be reprinted or
duplicated without HiB consent. All sizes and measurements are
approximate, but we do try and make sure they are as accurate as
possible. In the interest of continuous product development, HiB
reserves the right to alter specifi cations as necessary. E & OE.
Page 2

Pdf Supplied By http://www.plumbworld.co.uk/
 Loading...