

Page 1
Rear Mount:
2007 – 2012 Chevrolet Tahoe
2007 – 2012 GMC Yukon
Mounting
1. Open rear hatch/doors.
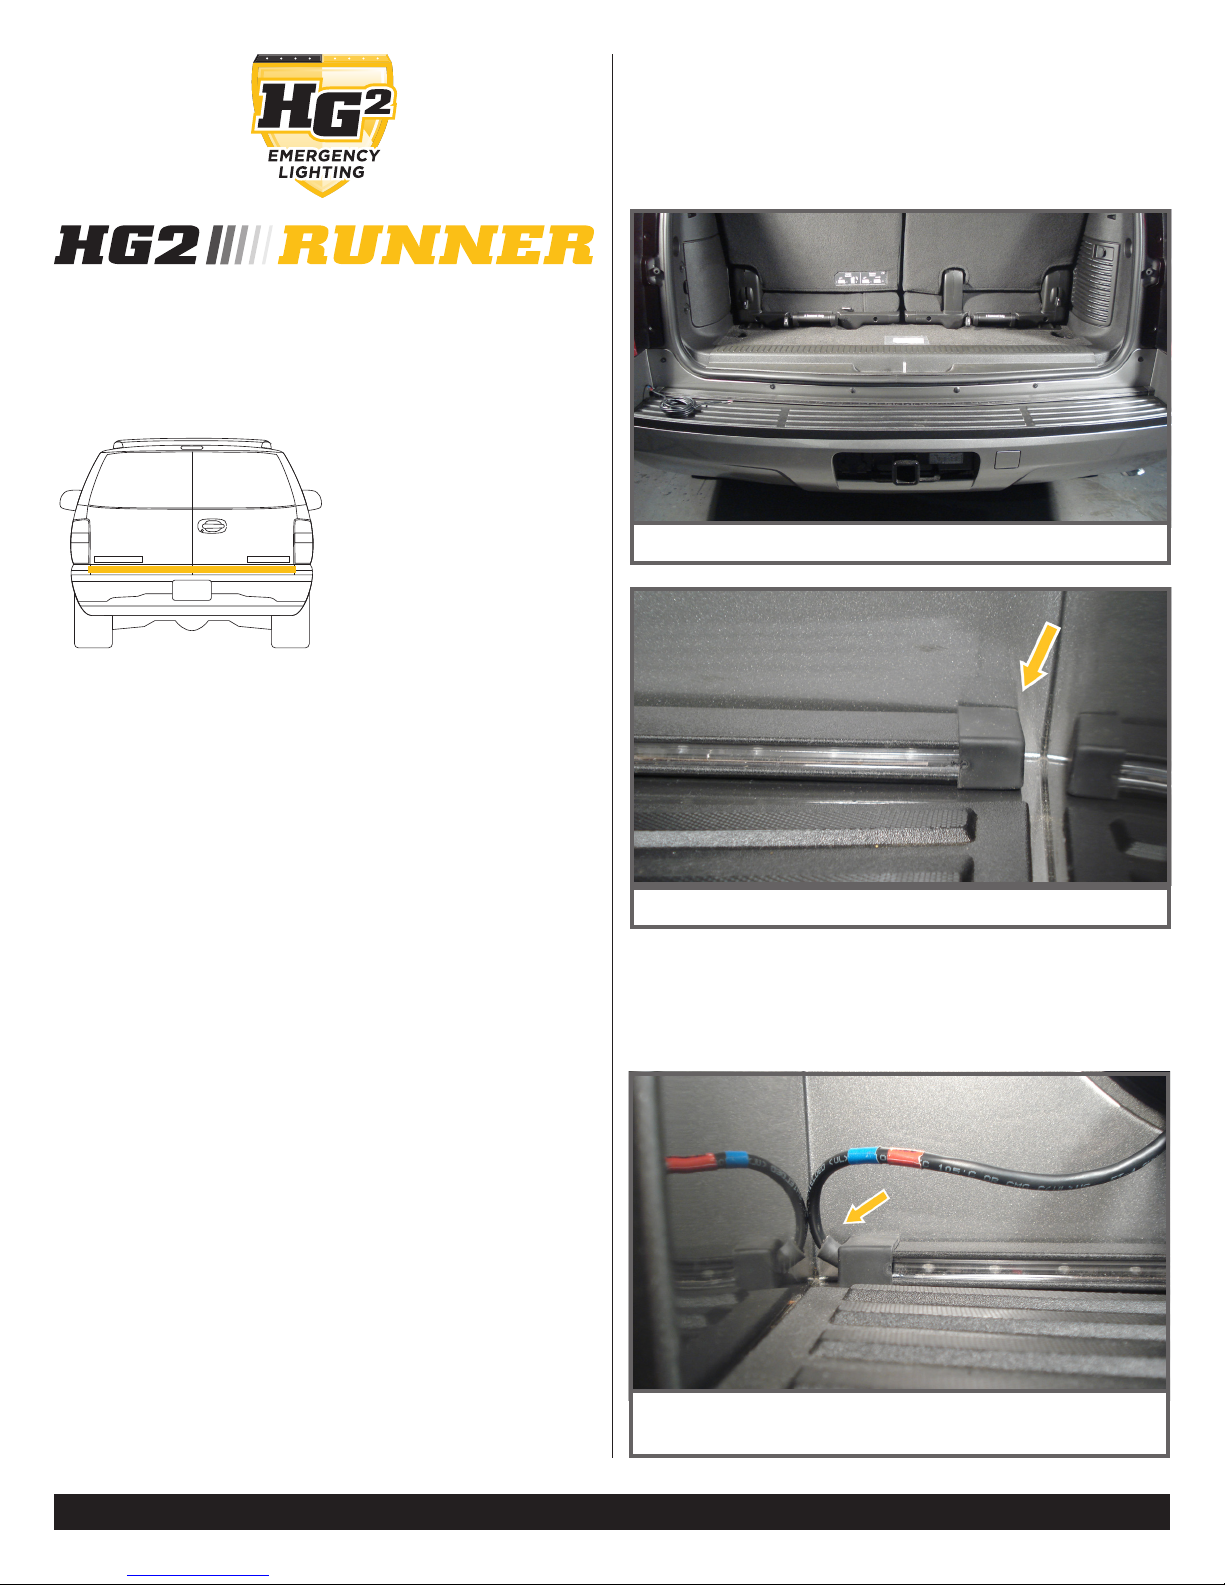
2. Test fit rear HG2 Runner assembly in opening.
Assembly should lay on top of bumper with end
caps butting against front sill of bumper.
HG2 Runner assembly centered in opening.
PARTS LIST
1 – XX” HG2 Runner – Rear of Vehicle
1 – RPM12 Runner Platform Module
1 – Pattern Selector Button
1 – 7A Fuse
1 – 1/4” Grommet
1 – Installation Guide and Warranty Info Packet
REQUIRED TOOLS
• Drill
• 9/32” and 5/16” Drill Bits
• Phillips-head Screwdriver/bit
• Wire Strippers
• Wire Crimping Tool
• Electrical tape
• Wire/Cable Ties
• 5/16” or 10mm Wrench (for battery connections)
Additional tools may be required to complete
installation.
INSTALLATION
Preparation
1. Read the installation guide for this product in its
entirety.
2. Unpack product components and review parts list.
3. Bench test control module and runner using 12v
power supply to ensure components are in working
order.
4. Remove rear hatch sill panel.
5. Place vehicle on vehicle lift or jack stands.
End caps butt to front sill of bumper.
3. Take note of location to drill for wire routing.
Perform visual inspection under vehicle, behind
bumper, to ensure drilling and wire routing will not
interfere with existing systems or heat sources.
Location to drill for wire routing. Inspect to ensure drilling
or wiring will not interfere with vehicle systems.
FOR TECHNICAL ASSISTANCE, VISIT www.hg2lighting.com/help
1
Page 2
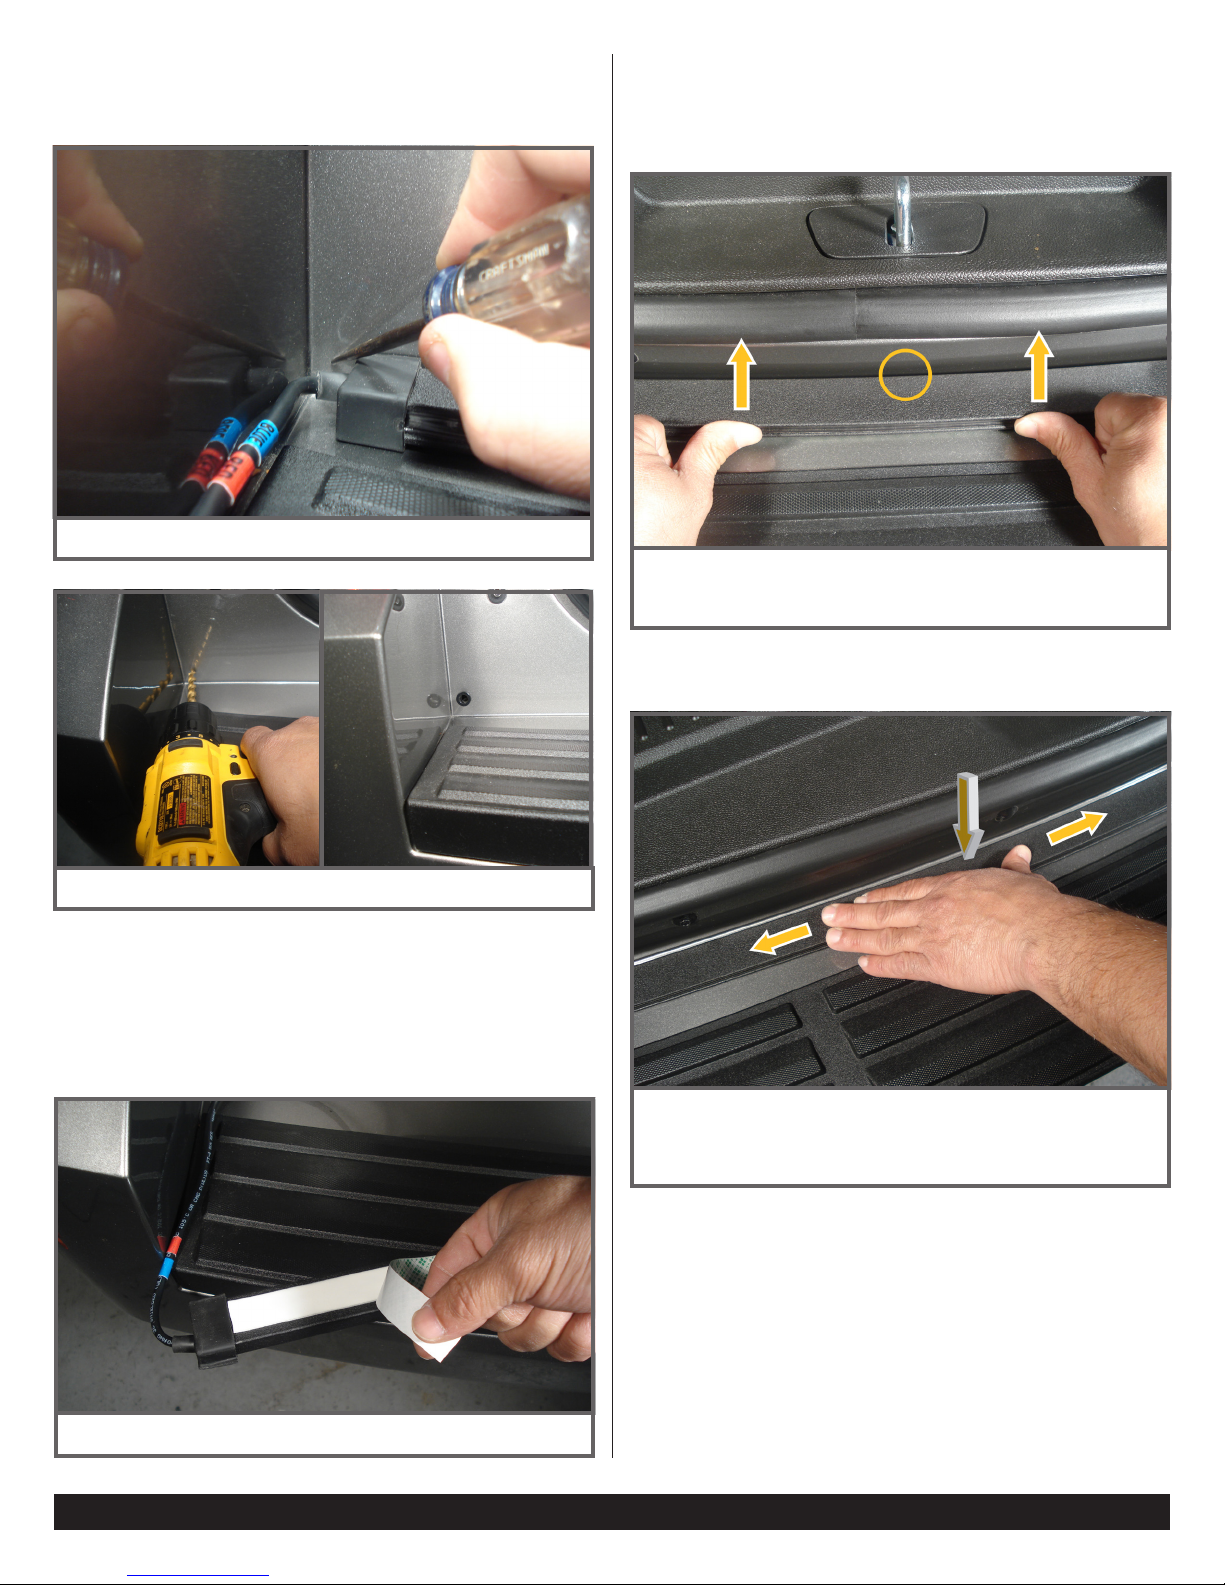
5. Mark location on right side of bumper front sill
using centerpunch and drill using 5/16” drill bit.
Insert 1/4” grommet (supplied).
Detail photo illustrates hole location for wiring.
9. Center HG2 Runner assembly on bumper front sill
without adhering mounting tape.
10. Push Rear Runner assembly towards front of
vehicle, then push down to seat mounting tape.
Push center of HG2 Runner assembly forward, closing
any gap that may exist along the front sill of the bumper
(noted by circle).
Drill hole using 5/16” bit. Insert supplied 1/4” grommet.
6. Clean bumper mounting location first with soap
and water solution (or equivalent) then again using
supplied alcohol wipe.
7. Feed Rear Runner wiring through grommet
8. Remove protective covering from mounting tape.
11. Apply firm pressure along entire length of
assembly to completely seat mounting tape.
Push down to seat mounting tape, while holding
assembly against the front sill of the bumper. Apply
pressure against length of assembly to seat mounting
tape.
Wiring
12. Route wiring to Runner Platform Module [RPM12]
taking caution to avoid moving parts, heat sources
and interference with normal operation of existing
vehicle systems.
Wiring through grommet and removal of mounting tape.
FOR TECHNICAL ASSISTANCE, VISIT www.hg2lighting.com/help
2
 Loading...