

Page 1
USER MANUAL
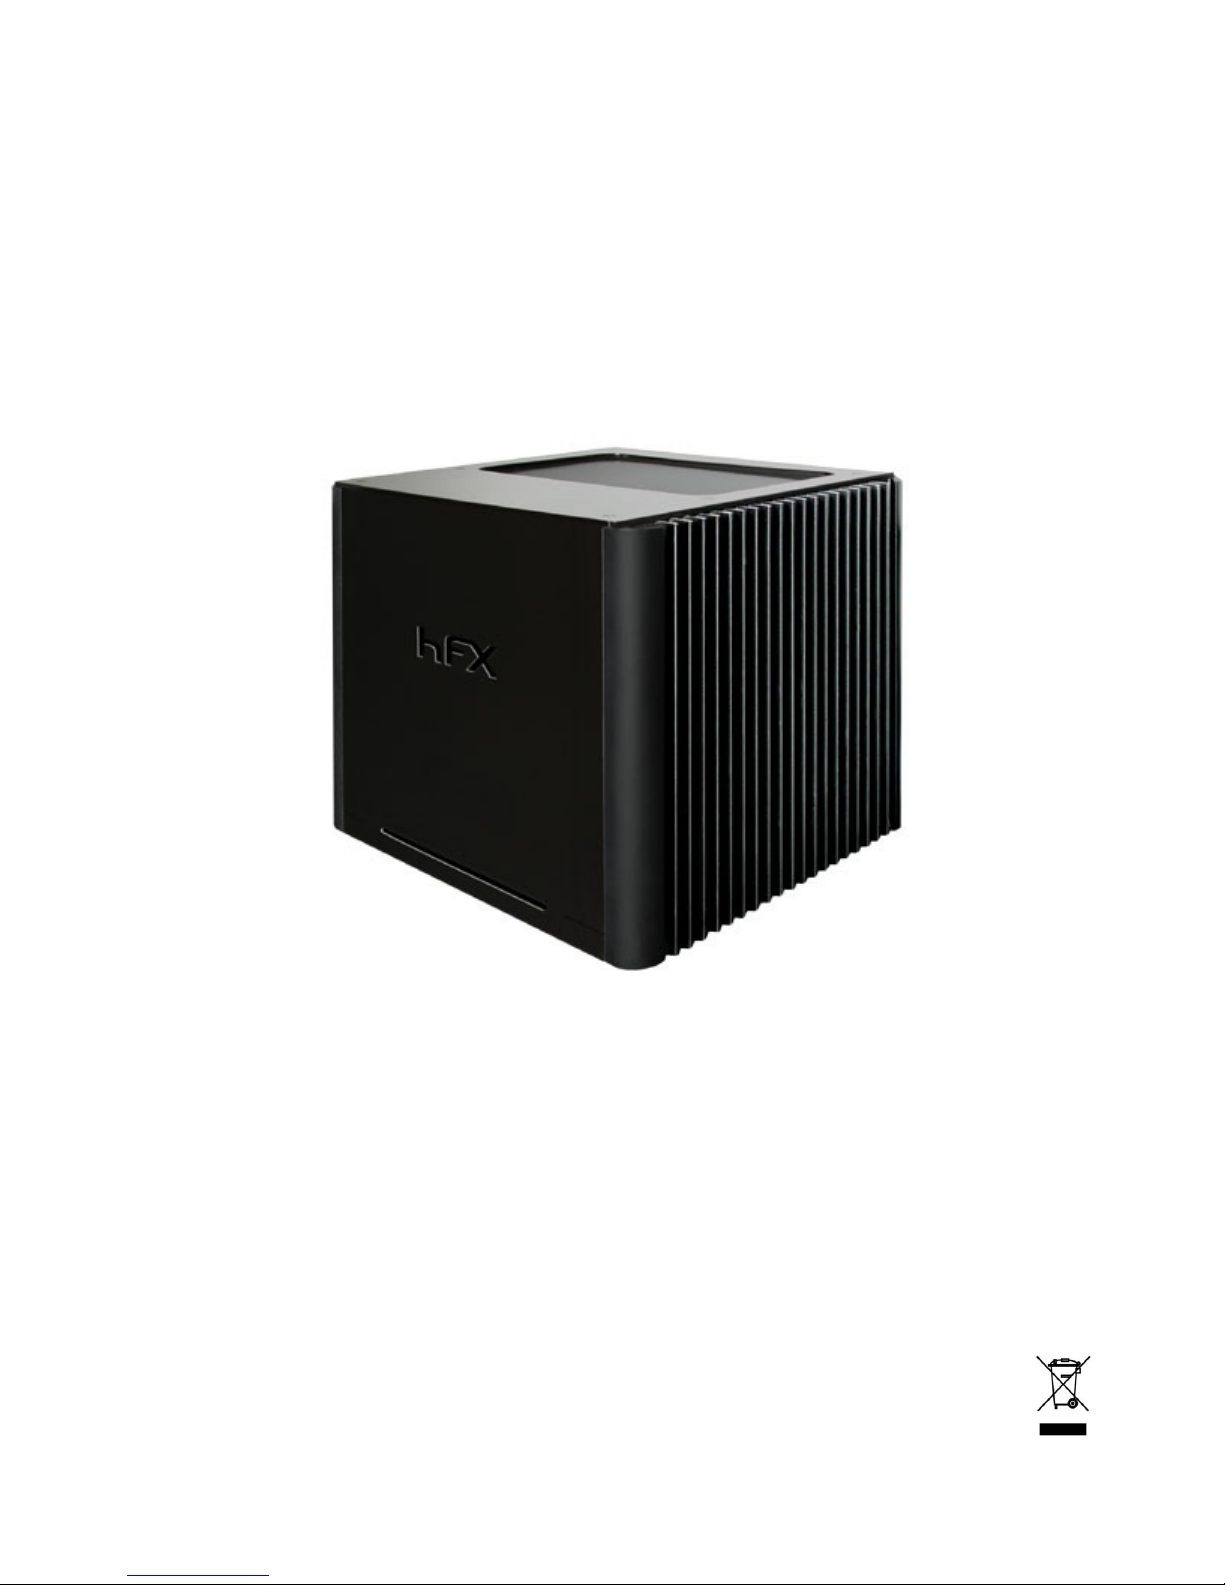
PowerNAS 2011
V1.2
Delivery Content:
• Windows Installation CD and Driver CD
• External Power Supply
PowerNAS is a trademark of HFX Austria, Windows Home Server a trademark of Microsoft.
PowerNAS is marked with the above symbol to indicate at the end of the equipments life time, you must
dispose of it separately at an appropriate collection point (local recycling center) and not place with
normal domestic unsorted waste. This will benefit the environment for all. [EU Directive 2002/96/EC
and EN50419]
V1.2 [1]
Page 2

1. PowerNAS - Quick Start
PowerNAS is configured ready to work right out of the box:
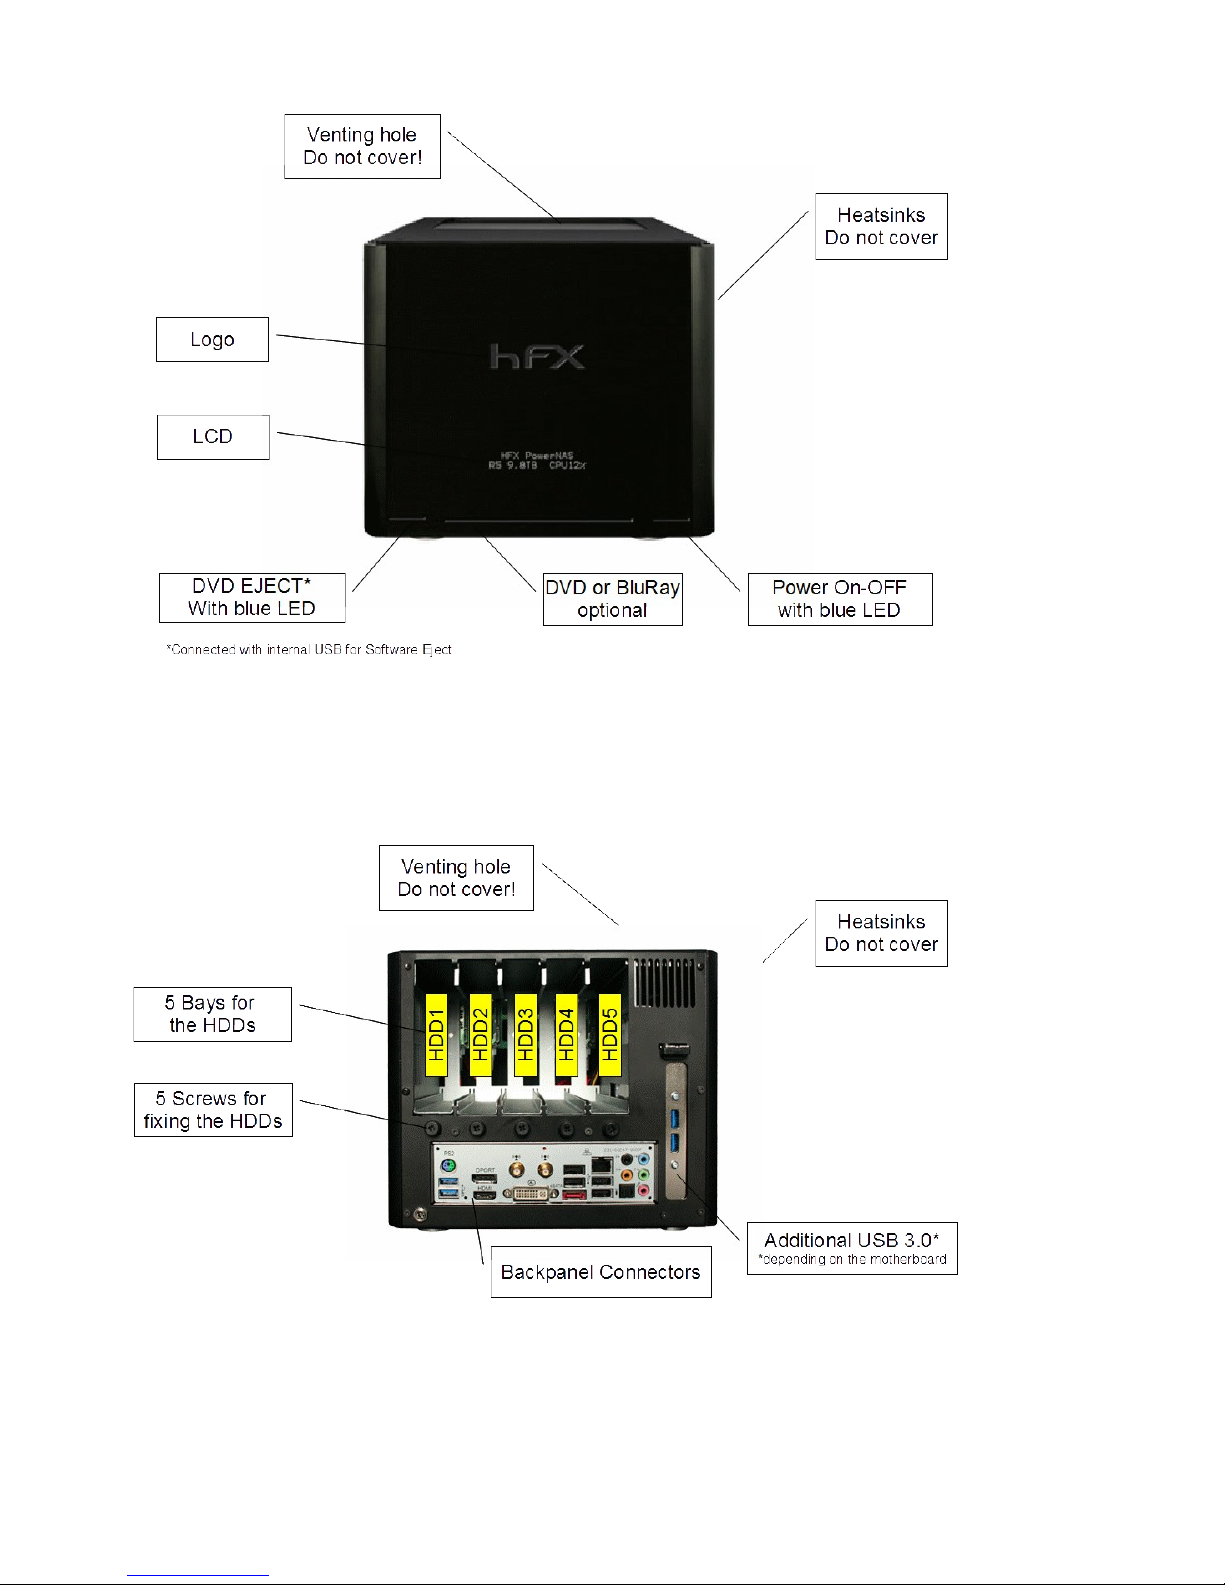
• Unpack PowerNAS: consider where PowerNAS will be placed. Being a passive
cooled system (no fans) ideally do not place PowerNAS in an enclosed cabinet, in
direct sunlight and never near sources of water. Ensure the vents on the top are left
uncovered, it is normal for the sides of PowerNAS to get warm to the touch when
PowerNAS is working hard.
• Connecting PowerNAS to your Network: PowerNAS requires a wired connection to
your wireless or broadband router, Gigabit LAN preferred.
• Plug PowerNAS into the mains: connect the mains power ‘brick’ to PowerNAS
before switching on at the mains. PowerNAS only requires a mains & network
connection, no keyboard, mouse or screen required. Tap the PowerNAS On / Off
switch at the front lower right side to power on,
• Check PowerNAS is operating: after switching on the blue power light should
illuminate on the front, occasionally the hard drive activity light will flash, also the
network lights on the back (yellow) should illuminate to show a good Ethernet
connection. PowerNAS takes approximately 60 seconds to startup.
Should you wish to switch off PowerNAS, tap the On / Off button and wait for the power
lights to extinguish. PowerNAS is designed as a server for 24 / 7 operation with low power
usage.
Warnings:
• Do not cover the venting holes
• Do not touch when running hot (heatsinks can get up to 60°C)
• Do not open the PowerNAS, this might lead to a loss of warrenty
V1.2 [2]
Page 3
V1.2 [3]
Page 4
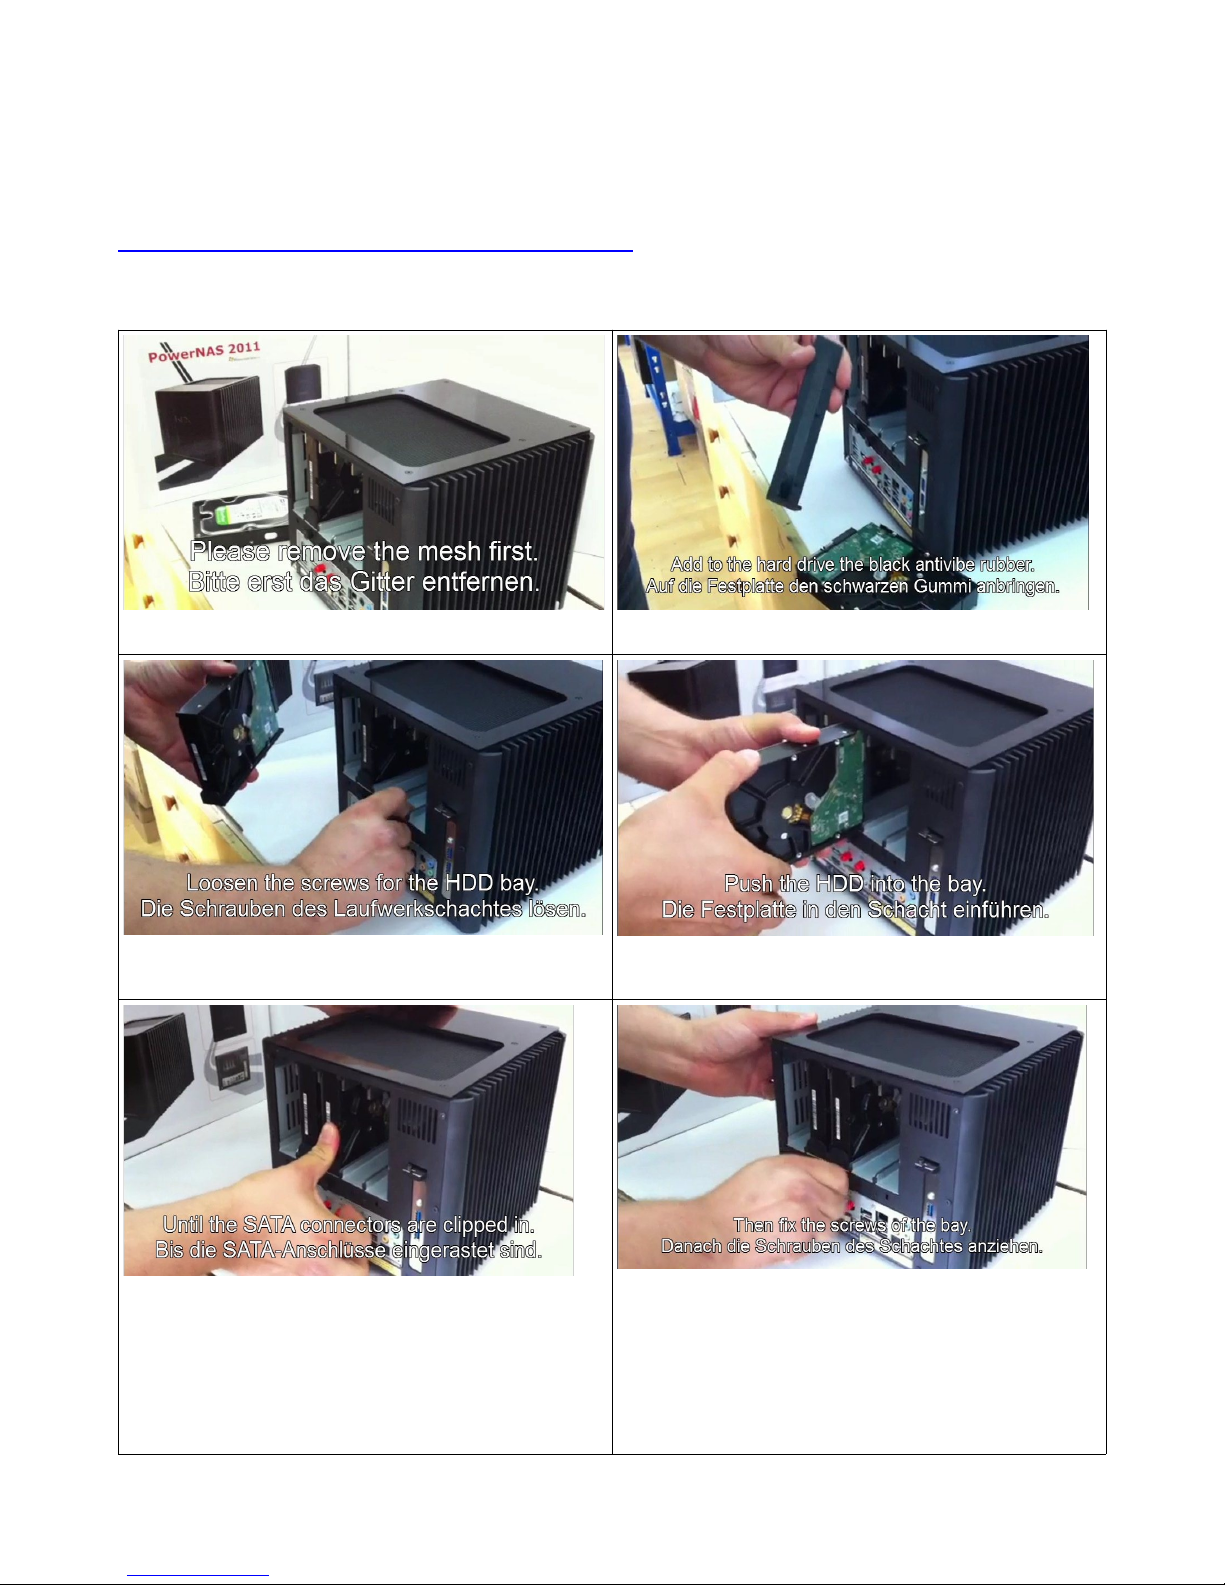
System Disk is HDD0. As internal System Disk you can use only 2.5” disks.
As standard removable disks you can use 3.5” disks only.
Please watch this video of how to add or remove the hard drives.
http://www.youtube.com/watch?v=160uWqnnY9I
V1.2 [4]
Page 5
2. Remote-Access to the PowerNAS
You have 5 different methods to access the PowerNAS from another PC:
1. with WHS Console: the WHS console needs to be installed on your PC.
2. Access with remote desktop: this works only with VISTA, WIN7 or XP Professional
PCs (username: Administrator pw: hfx=[serial])
3. Accessing Files / Folders on PowerNAS (username: sonos pw: sonos)
4. Access via Web Browser: this is the quickest method to access to the PowerNAS. All
devices (Windows PC, Apple, iPhone) who have network access and an internet
explorer can do that. (username: Administrator pw: powernas)
5. Access via VNC (username: Administrator pw: powernas)
To access the PowerNAS with Webbrowser or Remote Desktop should be done only by
professional users, because you can easily destroy WHS and then you need to reinstall
WHS.
To access the PowerNAS with WHS console is recommended, since you can see only
settings, which you are allowed to change. WHS console also takes over the backup of your
PC.
V1.2 [5]
Page 6
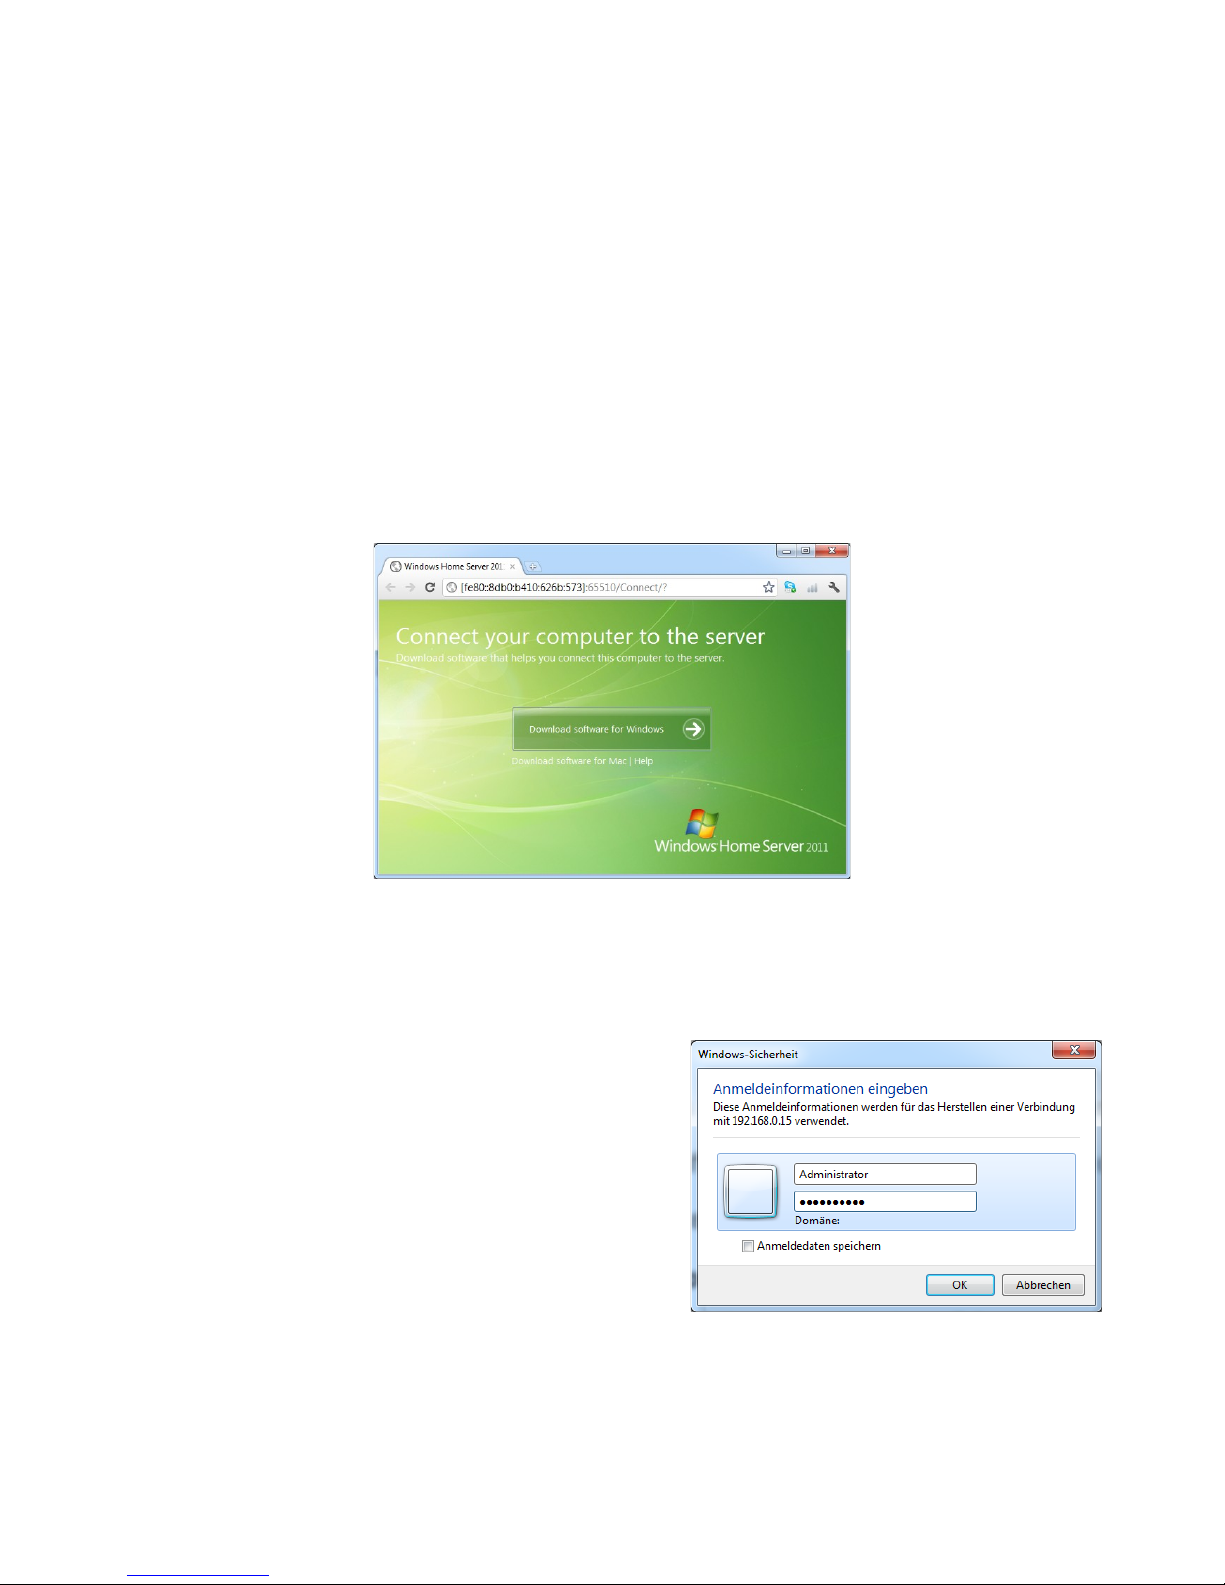
2.1. Connecting through WHS Connector
Windows based PCs connect to PowerNAS through Connector to:
• Windows PC backups nightly to PowerNAS,
• Report any issues facing the PowerNAS system (such as a failing hard disk drive),
WHS Connector is installed on a PC by double-click on the PowerNAS in the network
environment. Also for Apple users. After installing WHS onto a PC an icon is placed in the
tray area of Windows:
Right clicking on this icon allows access to the connector.
On connection specify password as: hfx=[serial] (ie hfx=123456)
After restore the password is by standard hfx=000000
Download the WHS connector for Windows or MAC directly from the PowerNAS (network
neihbourhood, double-click).
2.2. Connecting by Remote Desktop
Remote desktop is preinstalled on most Windows
PCs (start >> Programs >> Accessories >> Remote
Desktop Connection), Apple users install remote
desktop using the Connector Disc (detailed later).
Type the computer name as powernas (mac users:
powernas.local or powernas.localdomain), if
presented with a domain entry box type: powernas
On connection specify the username: Administrator
pass: hfx=[serial] (ie hfx=123456), after restore it is hfx=000000
V1.2 [6]
Page 7
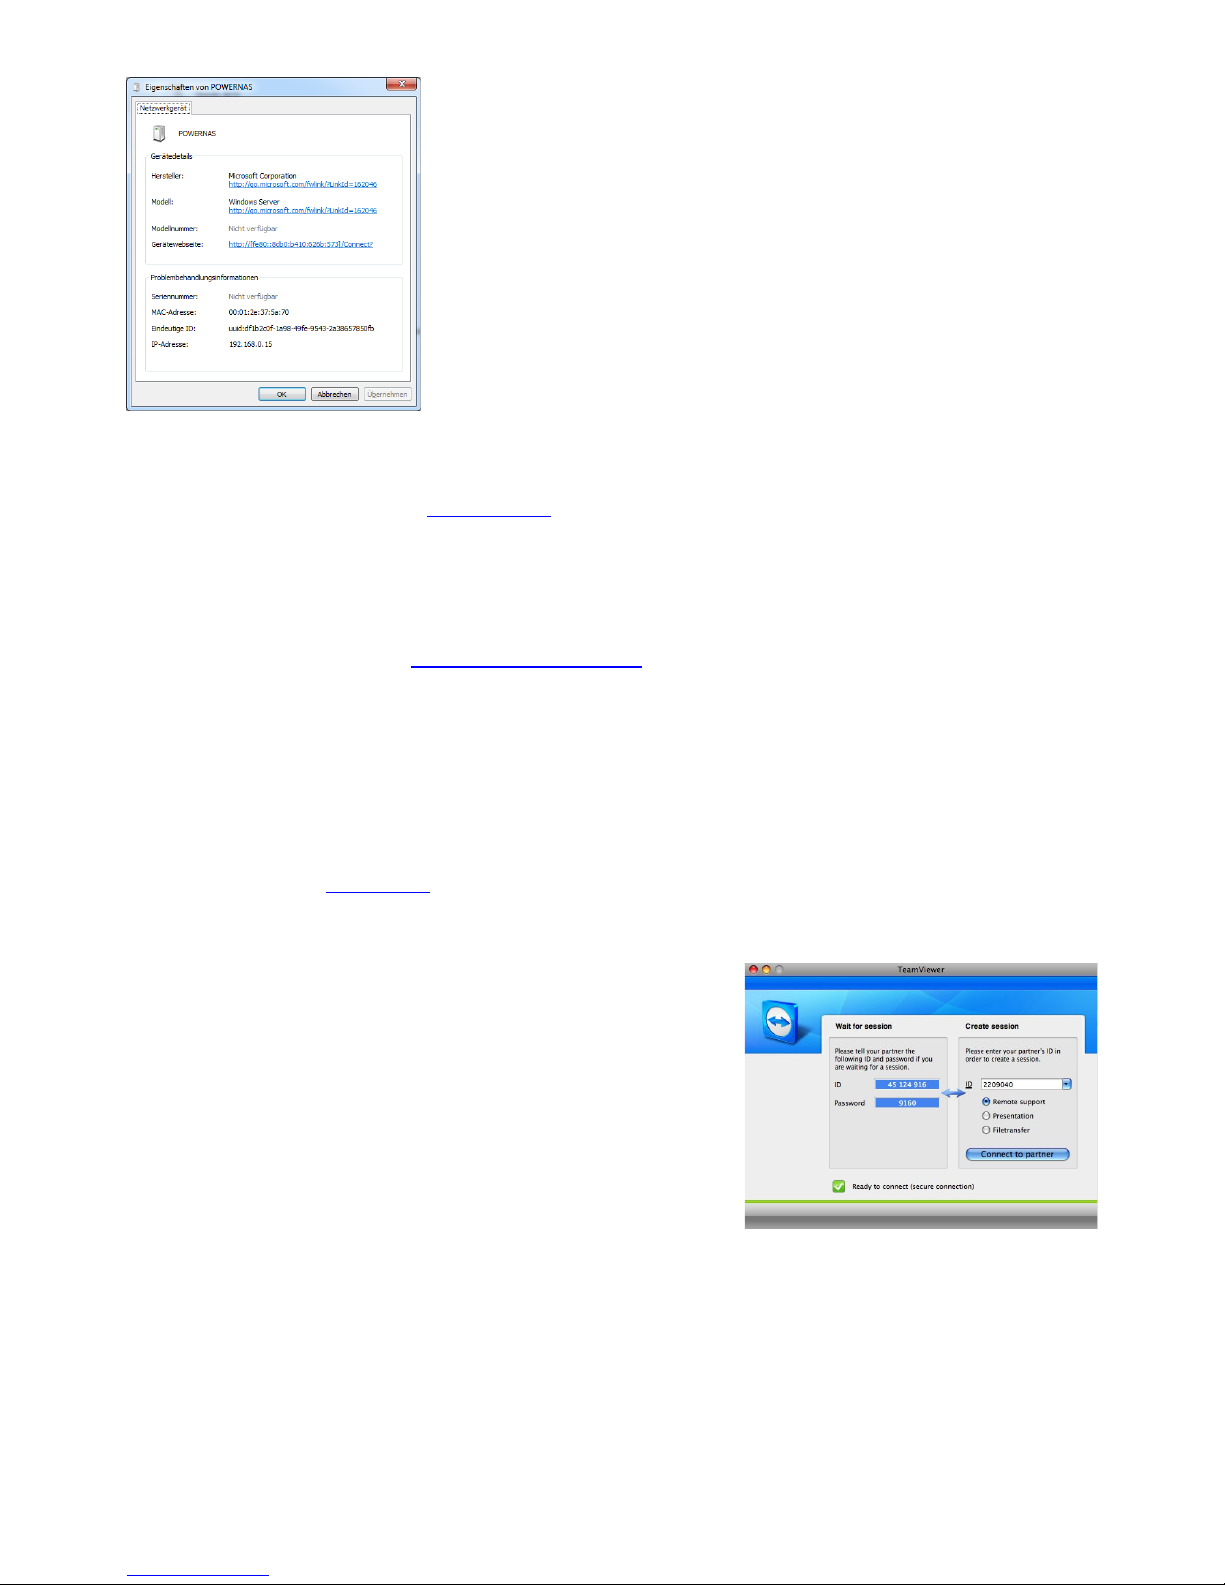
If you cannot access the PowerNAS with “Powernas”, you can
also directly use the IP address. You find the IP address of the
PowerNAS:
→ go to network neighbourhood
→ right click on the PowerNAS symbol
2.3. Accessing Files / Folders on PowerNAS
PowerNAS shares the folder \\powernas\ it is possible to access audio tracks on PowerNAS
directly through this folder, delete, edit or copying files from your PC to PowerNAS. This
folder is password protected, it can be accessed through user: sonos password: sonos
2.4. Web Browser access
Type into the web browser: http://powernas:5800/ note that your firewall must have port
5800 allowed for the web browser and Java script be enabled. On connection type the
password as PowerNas and click the Send Ctl+Alt+Del button to log into PowerNAS as
username: Administrator pw: powernas, once connected the PowerNAS desktop is
shown, open Windows Home Server Console to access settings and view PowerNAS status.
2.5. VNC access
Type into the VNC: powernas
username: Administrator pw: powernas
3. Remote help and support
With Team Viewer you can ask any friend to logon over the
internet into the PowerNAS and help you to configure.
4. WHS Preconfigured Accounts
PowerNAS is supplied with the account preconfigured:
User: Administrator Pass: ripnas=[serial] (example ripnas=123456)
Where [serial] is replaced with the serial number of your machine. The full password is
shown on a label on the backpanel the PowerNAS below the WHS COA sticker. The
username and password are required when performing various actions with WHS (such as
installing Connector onto a PC, etc).
V1.2 [7]
Page 8
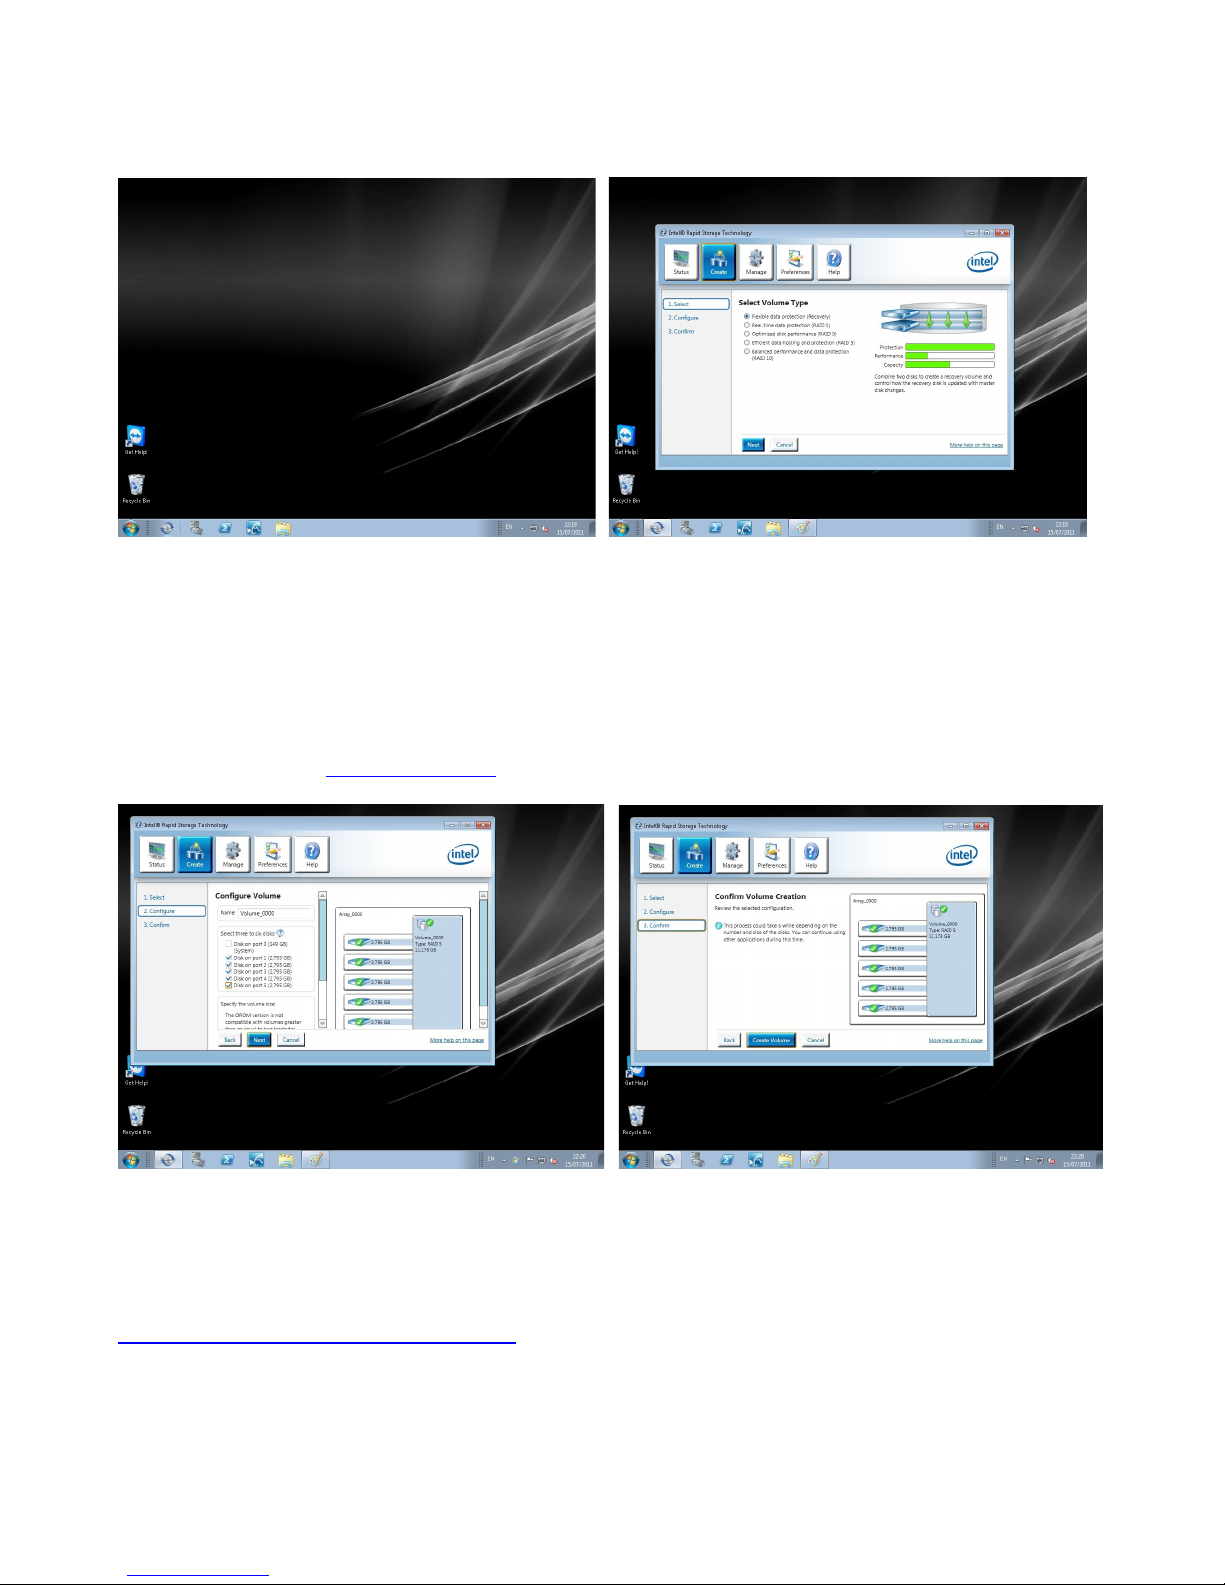
5. How to set up RAID
Please login and double-click on the Intel RAID Storage Manager Icon:
Select your RAID mode. Please note, that in RAID mode the HDDs will never sleep. You
need to use Server HDDs, which are designed for 24/7 use.
For RAID 1 and RAID 0 you need at leats 2 HDDs, for RAID 5 you need at least 3 HDDs.
Please consider also NOT to use RAID mode and to install all HDDs without RAID and to use
Software RAID like Stablebit DrivePool
After creating the RAID, you still need to partition the new RAID drive using the Windows Disk Management.
Mehr Infos zum Intel RAID Storage Manager in der Intel RAID Doku.
http://www.hfx.at/ftp/manuals/intel-raid.pd
V1.2 [8]
Page 9
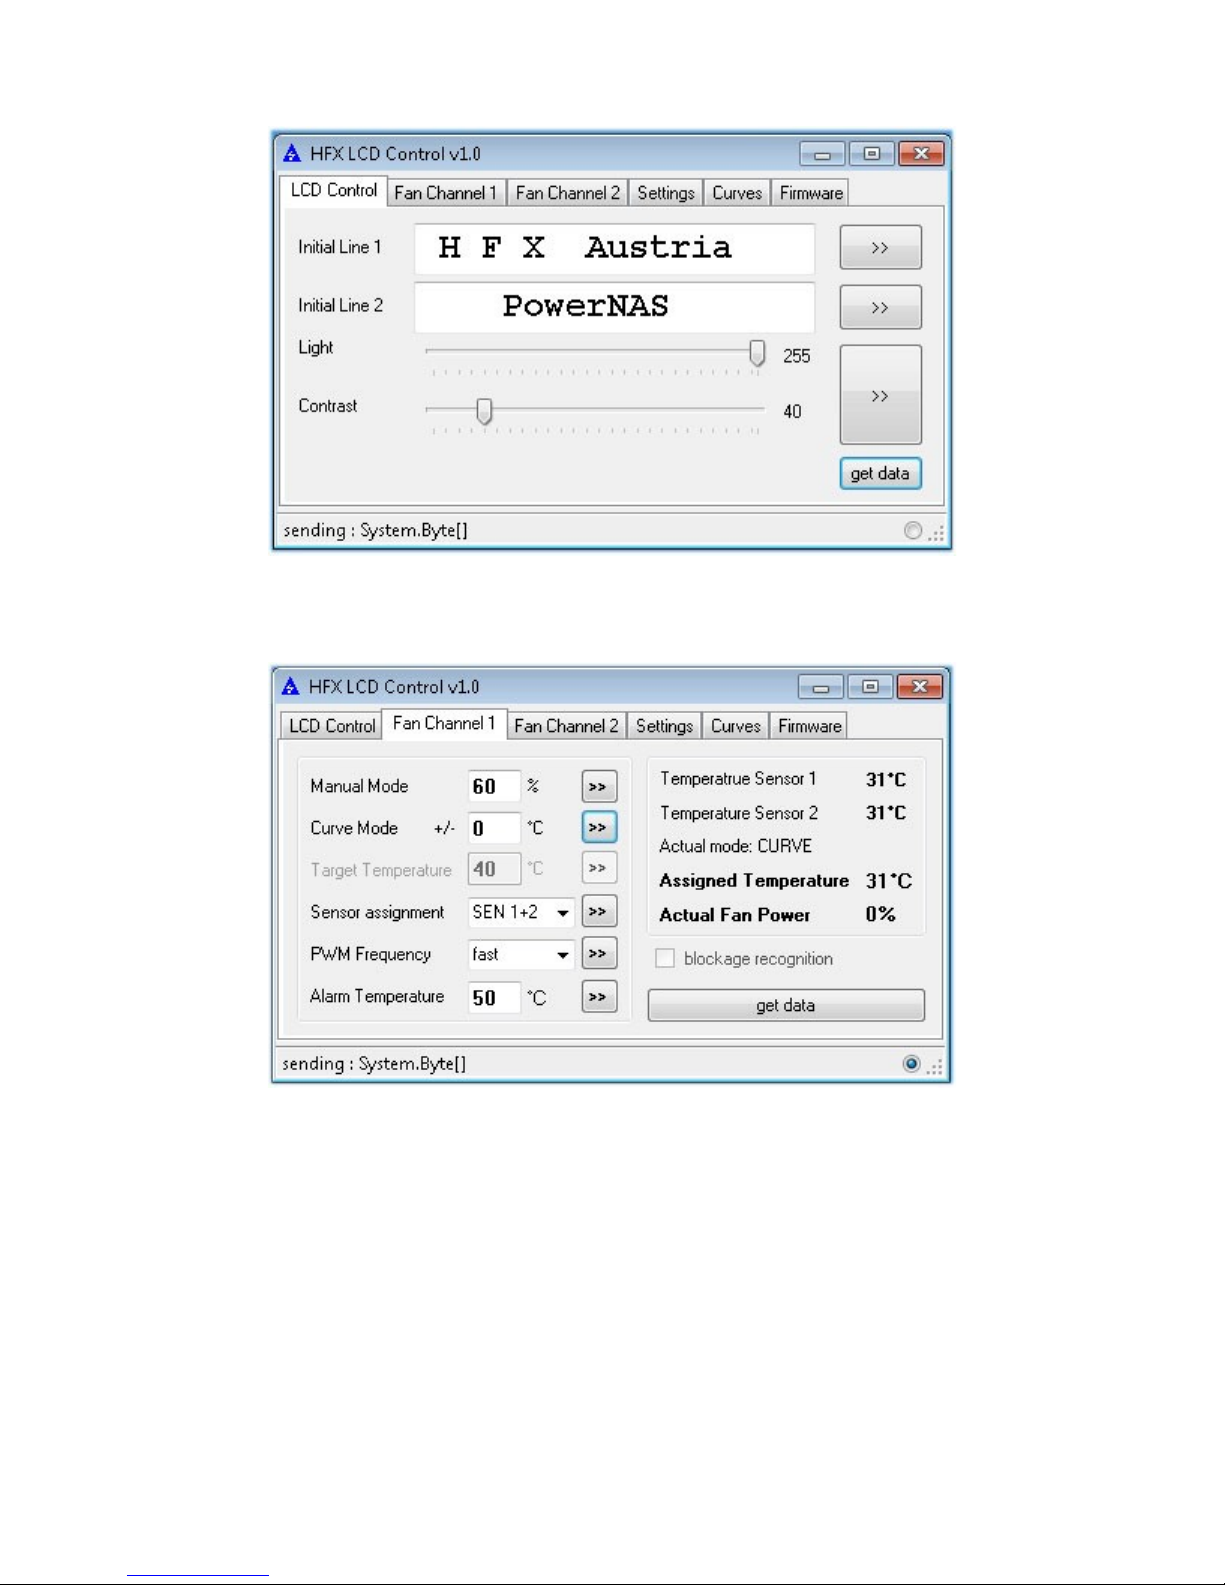
6. LCD Configuration
To configure the LCD you need to close first other connections on the COM-Port (close LCD
Smarti). You can change the welcome message of the display.
You can change the settings of the fan controller. If you add or substract a value in the curve
mode, you can make the temperature curve earlier or later (starting to activate the fan at
lower or higher temperatures)
V1.2 [9]
Page 10
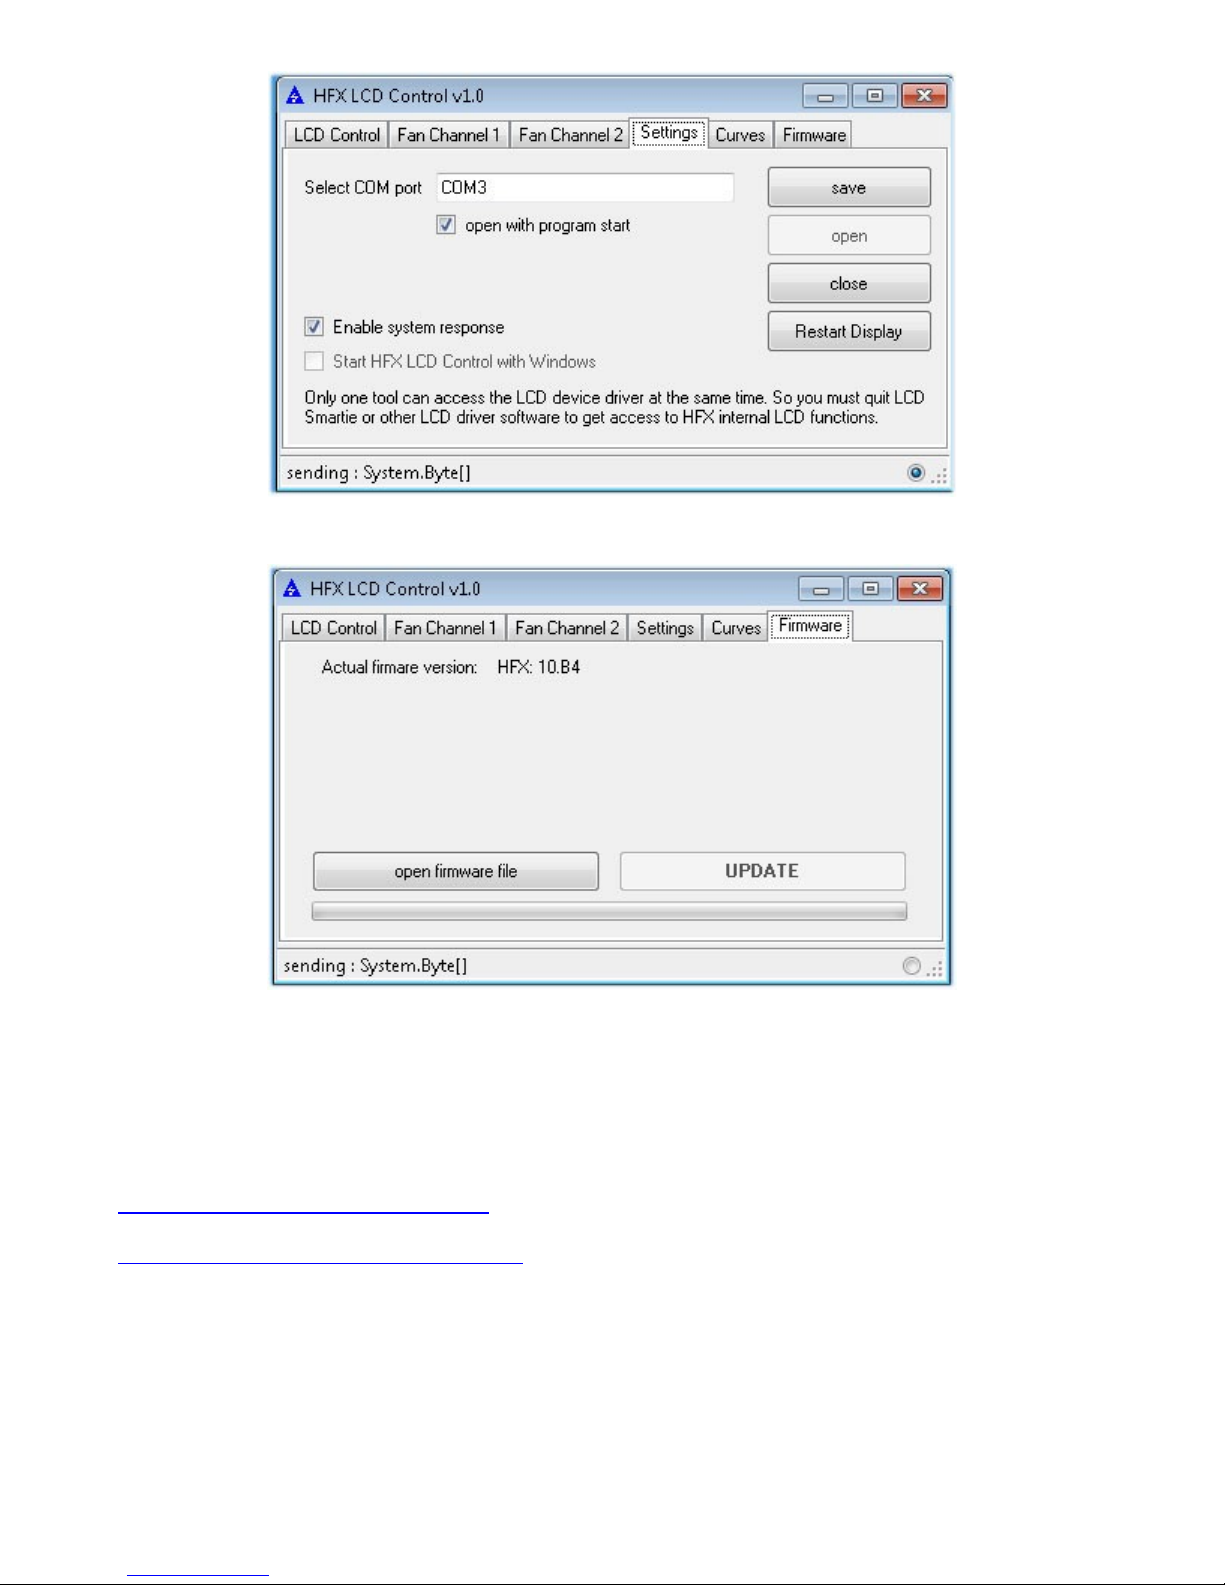
You have to select the right Com-Port.
You can update the firmware.
7. More Information
http://www.mswhs.com/documentation/ WHS Documentation
http://www.hfx.at/ftp/manuals/intel-raid.pdf Intel RAID Storage Manager Documentation
V1.2 [10]
 Loading...