

Page 1

MICRO 200 BW TURBIDIMETER
RANGE OPTION 0 - 1000 NTU
CATALOG NO. 21640 (5/05)
Rev. 3.1
HF scientific, inc.
3170 Metro Parkway
Ft. Myers, FL 33916-7597
Phone: (239) 337-2116
Fax: (239) 332-7643
Page 2

Page 3
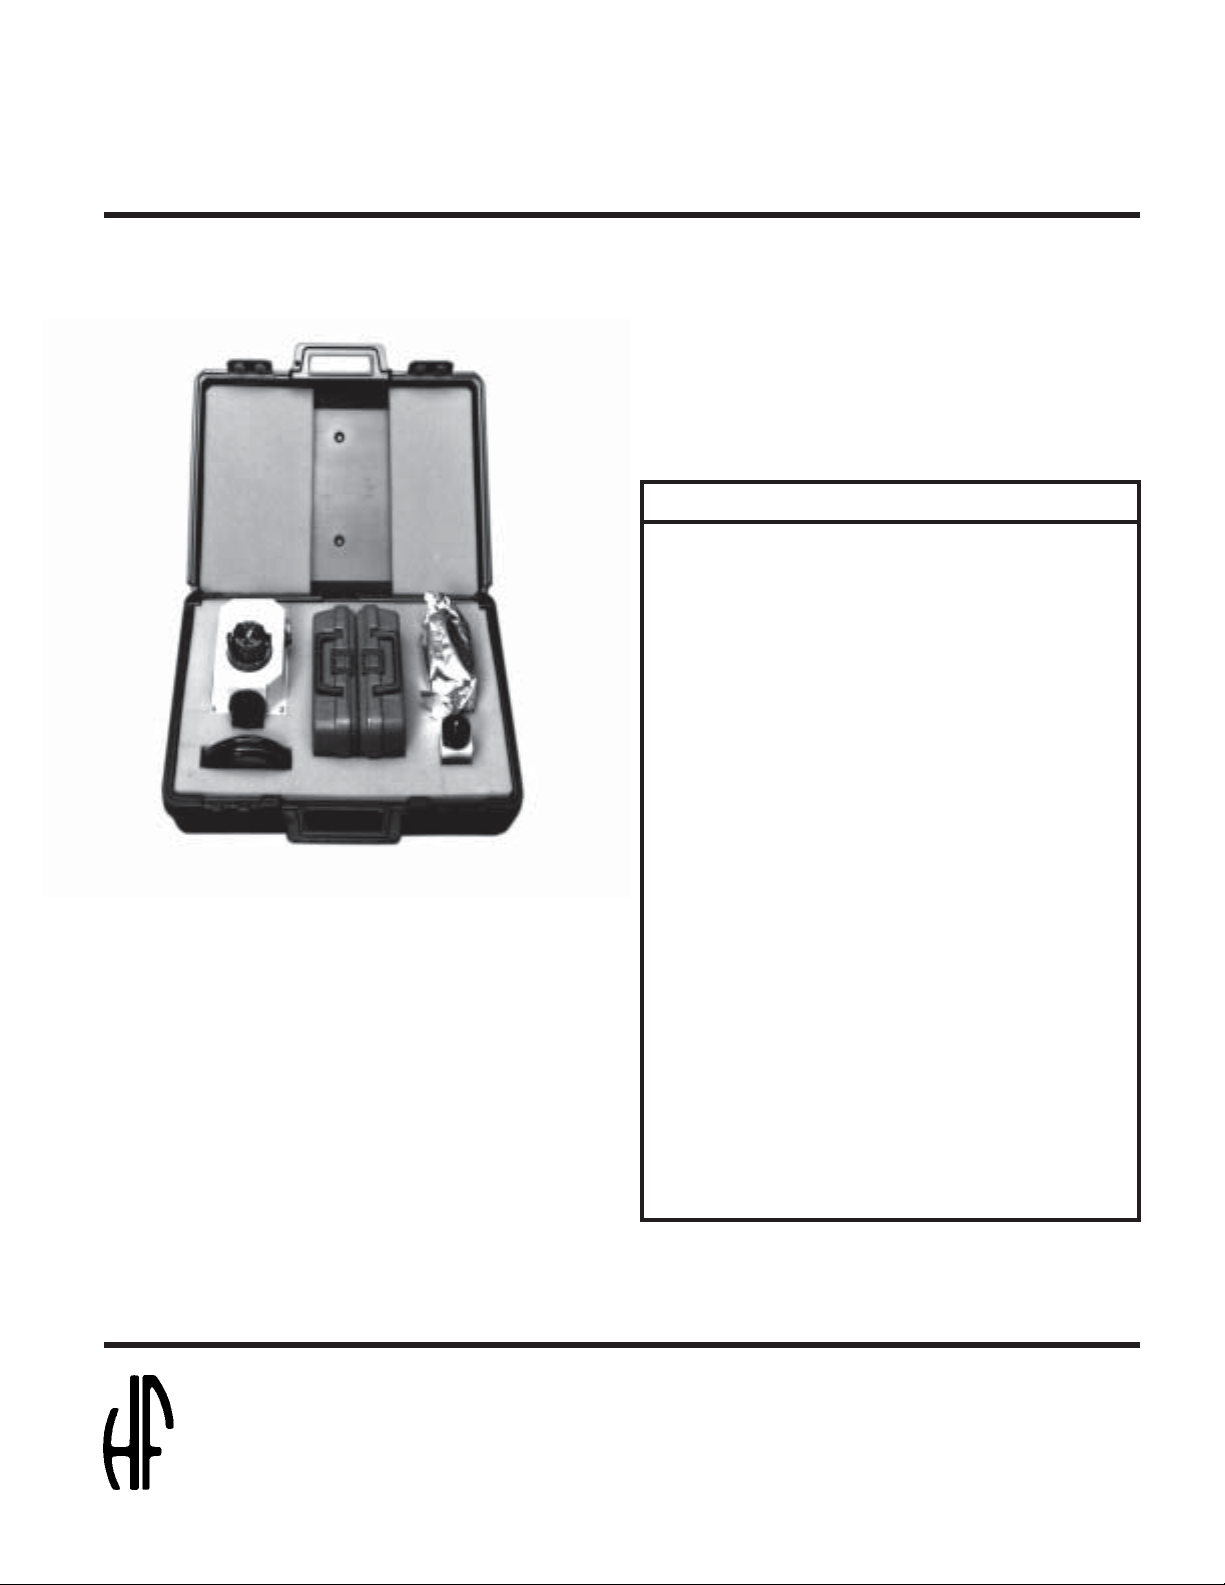
Field Service Kit
For the Micro 200 Series Turbidimeter
Field Service Kit Contents:
Qty. Description Cat. No.
1 Sensor (Electronics Portion Only) 19807
1 Desiccant Tray Assembly 21555
1 Lamp Module 21541
Field Service Kit, Catalog No. 19834
• Clean, Calibrate and Repair Your
Instrument in the Field
• Avoid Rush Orders for Spare Parts
• Virtually No Downtime
The HF Micro 200 Series Field
Service Kit contains the recommended
spare parts needed for standard
maintenance, repair, and calibration.
This kit is designed to allow the operator
or technician to service the instrument
without a costly service call.
1 Flow Head Assembly 50125
1 3 pk. cuvettes 50036
1 Secondary Standard Kit 19820
(0.02, 4, 10, 40, 100 NTU)
1 O-ring Kit 50136
12 ft. Tygon Tubing 21201
1 Bulkhead Assembly, 2 pk. 21148
1 Fuse, ½A 5 x 20 mm 20955
1 Fuse, 1A 5 x 20 mm 20956
1 O-ring 50144
1 O-ring 50140
1 Case 13520
scientific, inc.
MICRO 200 BW 0 - 1000 NTU (5/05)
Rev. 3.1
3170 Metro Parkway
Ft. Myers, FL 33916-7597
Phone: (239) 337-2116
Fax: (239) 332-7643
www.hfscientific.com
Page 4

Page 5

FOREWORD
HF TURBIDIMETERS
HF turbidimeters are manufactured to meet design criteria for nephelometers as described in Standard Methods For
Examination of Water and Wastewater. HF turbidimeters are approved by the U.S. EPA* as a means to measure the
turbidity of potable water, waste water, and other liquids.
HF turbidimeters provide a linear display of turbidity, throughout all ranges, in Nephelometric Turbidity Units (NTU).
HF turbidimeters use solid state electronic components because they resist thermal variation and are not affected by
normal line voltage fluctuations.
HF turbidimeters can be calibrated using HF scientific factory certified Secondary Standards or Formazin. Factory
calibration is accomplished using HF scientific Secondary Standards, which are factory certified traceable to
Formazin, therefore, this instruction manual describes the proper procedures for calibration of HF turbidimeters using
Secondary Standards.
HF turbidimeter manuals are designed to assist the user in taking full advantage of the instrument in a majority of its
applications. However, in the event that unusual circumstances or problems, not covered by this manual, arise please
feel free to contact our local distributor or the manufacturer.
HF scientific, inc.
3170 Metro Parkway
Fort Myers, Florida 33916-7597
Phone: (239) 337-2116
Fax: (239) 332-7643
Our engineering staff is available to help you with your specific needs.
CERTIFICATION
Congratulations! We at HF scientific are proud to present you with the MICRO 200 BW turbidimeter. This instrument
represents the very latest in integrated circuit and display technology. As a result, the product is a rugged and reliable
instrument whose performance was tested thoroughly and found to meet its published specifications when it left the
factory.
*EPA approved means the instrument meets or exceeds the design and performance criteria as specified in the United
States Environmental Protection Agency method 180.1.
MICRO 200 BW 0 - 1000 NTU (5/05)
Rev. 3.1
Page 6

Page 7

DECLARATION OF CONFORMITY
Application of Council Directive: 73/23/EEC
Standard to which Conformity is Declared:
Product Safety Immunity EMI
UL3111-1 EN50082-1 EN55011 Group 1 Class A
CSA-C22.2 No.1010-1-92 IEC801-2 FCC Part 15 Class A
CE EN61010-1 IEC801-3
IEC901-4
Manufacture’s Name: HF scientific, inc.
Manufacture’s Address: 3170 Metro Parkway, Fort Myers, Florida 33916-7597
Importer’s Name:
Importer’s Address:
Type of Equipment: Turbidimeter
Model No.: Micro 200/200BW
I, the undersigned, hereby declare that the equipment specified above conforms
to the above Directive and Standard.
Place: Fort Myers, Florida USA
(Signature)
Robert J. Maley, President
(Full Name)
MICRO 200 BW 0 - 1000 NTU (5/05)
Rev. 3.1
Page 8

Page 9

DECLARATION OF CONFORMITY
Application of Council Directive: 73/23/EEC
Standard to which Conformity is Declared:
Product Safety Immunity EMI
UL3111-1 EN50082-1 EN55011 Group 1 Class A
CSA-C22.2 No.1010-1-92 IEC801-2 FCC Part 15 Class A
CE EN61010-1 IEC801-3
IEC901-4
Manufacture’s Name: HF scientific, inc.
Manufacture’s Address: 3170 Metro Parkway, Fort Myers, Florida 33916-7597
Importer’s Name:
Importer’s Address:
Type of Equipment: Backwash Sensor and Interface Kit
Model No.: 19276
I, the undersigned, hereby declare that the equipment specified above conforms
to the above Directive and Standard.
Place: Fort Myers, Florida USA
(Signature)
Robert J. Maley, President
(Full Name)
MICRO 200 BW 0 - 1000 NTU (5/05)
Rev. 3.1
Page 10

Page 11

MICRO 200 BW
TABLE OF CONTENTS
I. IMPORTANT INFORMATION ............................................................................................................................ 1
A. HOW TO USE THIS MANUAL ....................................................................................................................... 1
B. SPECIAL ENVIRONMENTAL CONSIDERATIONS .....................................................................................1
C. SPECIFICATIONS ............................................................................................................................................. 2
D. OPTIONS............................................................................................................................................................ 3
E. FIGURES ............................................................................................................................................................ 4
F. COMPLIANCE TESTING CERTIFICATION ................................................................................................. 5
II. INSTALLATION ..................................................................................................................................................... 6
A. PACKING LIST OF CONTENTS ..................................................................................................................... 6
B. UNPACKING AND INSPECTION ................................................................................................................... 6
C. MOUNTING ....................................................................................................................................................... 6
1. Analyzer....................................................................................................................................................... 6
2. Sensor - Turbidity........................................................................................................................................ 6
a. Installing Desiccant Tray ..................................................................................................................... 6
D. ANALYZER CONNECTIONS.......................................................................................................................... 8
1. Cable & Cord............................................................................................................................................... 8
2. Analyzer Power ........................................................................................................................................... 8
3. D/A Outputs - Voltage & Current............................................................................................................... 9
4. Recorder - Voltage ...................................................................................................................................... 9
5. Recorder - Current ....................................................................................................................................... 9
6. 4 - 20 mA Isolation...................................................................................................................................... 9
7. Alarm Contacts ............................................................................................................................................ 10
8. Cable Mount Ferrites................................................................................................................................... 10
E. TURBIDITY SENSOR....................................................................................................................................... 10
1. Interconnect Cable ....................................................................................................................................... 10
2. Inserts for Sample and Drain lines .............................................................................................................. 10
III. STEP-BY-STEP OPERATION .............................................................................................................................. 10
A. THEORY & HOW IT WORKS ......................................................................................................................... 10
1. Menu Guide to the MICRO 200 BW .......................................................................................................... 11
2. Turbidity Display ........................................................................................................................................ 12
3. Main Menu .................................................................................................................................................. 13
4. Alarm Menu................................................................................................................................................. 14
a. Alarm #1............................................................................................................................................... 14
5. Display Parameters ........................................................................................................... ........................... 15
a. Set Upper Limit .................................................................................................................................... 15
b. Set Average .......................................................................................................................................... 16
6. Utility Menu ................................................................................................................................................ 16
a. Screen Brightness/History .................................................................................................................... 17
b. Set Time ............................................................................................................................................... 17
c. Calibrate 0-1000 NTU ........................................................................................................................ 18
d. Comm Port ........................................................................................................................................... 19
e. Access Code Menu............................................................................................................................... 19
f. Security Access Code ........................................................................................................................... 20
g. Set Access Code ................................................................................................................................... 20
h. Self Test (4 - 20 mA Cal.).................................................................................................................... 21
i. Self Test (0 - 10 V Cal.)....................................................................................................................... 21
7. Wait Messages............................................................................................................................................. 22
8. Backwash Display ....................................................................................................................................... 23
a. Backwash Calibration .......................................................................................................................... 24
B. START UP .......................................................................................................................................................... 25
1. Indexing ....................................................................................................................................................... 25
2. Standardizing............................................................................................................................................... 25
MICRO 200 BW 0 - 1000 NTU (5/05)
Rev. 3.1
Page 12

Page 13

MICRO 200 BW
TABLE OF CONTENTS CONT.
IV. ROUTINE OPERATION........................................................................................................................................ 25
A. CONTINUOUS MONITORING FLOW THROUGH UNIT ............................................................................ 25
B. VAPORPURGE .................................................................................................................................................. 26
C. GRAB SAMPLES .............................................................................................................................................. 26
V. ROUTINE MAINTENANCE ................................................................................................................................. 26
A. CUVETTE CLEANING & CARE..................................................................................................................... 26
B. LAMP REPLACEMENT ................................................................................................................................... 28
C. CALIBRATION PROCEDURES ...................................................................................................................... 28
1. Calibration Standards .................................................................................................................................. 28
a. Secondary Standard Set (Optional) Cat. No. 19830............................................................................ 28
b. Standard Formazin Solutions ............................................................................................................... 29
2. Calibration Steps for 0-1000 NTU Range .................................................................................................. 29
VI. SECURITY ACCESS CODE.................................................................................................................................. 30
VII. TROUBLESHOOTING ......................................................................................................................................... 31
A. GENERAL NOTES............................................................................................................................................ 31
B. SPARE PARTS LIST FOR MICRO 200 BW ................................................................................................... 32
VIII. OPTIONS .............................................................................................................................................................. 33
BACKWASH ............................................................................................................................................................ 33
A. INSTALLATION ............................................................................................................................................... 33
1. Backwash Interface ..................................................................................................................................... 33
2. Junction Box ................................................................................................................................................ 33
3. Backwash Sensor ......................................................................................................................................... 33
a. Channel Mounting ................................................................................................................................ 33
b. Extension Handle Mounting ................................................................................................................ 33
B. BACKWASH SENSOR CONNECTIONS ........................................................................................................ 33
C. BACKWASH SENSOR MAINTENANCE ....................................................................................................... 34
1. Backwash Calibration ................................................................................................................................. 34
D. BACKWASH ALARMS .................................................................................................................................... 34
E. BACKWASH REMOTE SWITCHING ............................................................................................................ 34
1. Electrical Connections ................................................................................................................................ 34
a. Remote Switch ..................................................................................................................................... 34
b. Alarms .................................................................................................................................................. 34
c. Analog Outputs..................................................................................................................................... 35
d. Serial Port (optional) ............................................................................................................................ 35
2. Operation ..................................................................................................................................................... 35
SERIAL INTERFACES .......................................................................................................................................... 35
1. RS-232 Voltage Mode Interface ................................................................................................................. 36
2. RS-232 Current Loop Mode Interface ........................................................................................................ 36
3. RS-485 Interface.......................................................................................................................................... 36
4. Serial Printer ............................................................................................................................................... 36
WARRANTY .............................................................................................................................................................. 42
GLOSSARY .............................................................................................................................................................. 43
MICRO 200 BW 0 - 1000 NTU (5/05)
Rev. 3.1
Page 14

Page 15

I. IMPORTANT INFORMATION
A. HOW TO USE THIS MANUAL
The equipment has been designed for simple and easy operation. In keeping with that philosophy, this MICRO 200
BW User’s Manual has been written to simplify all steps in the procedures that follow.
THE MOST IMPORTANT ASPECT OF THIS MANUAL IS THAT YOU, THE USER, READ IT IN ITS
ENTIRETY AND REFER TO IT OFTEN. Figures and drawings have been used throughout the manual to show
you how and text has been used to enhance and clarify what you have been shown.
Again, please read the manual before attempting to install or operate the MICRO 200 BW. Pay particular attention
to the “warning” and “caution” messages throughout. Although the MICRO 200 BW is simple and easy to use, all
electrical and safety precautions must be followed. “Notes” have also been added to give further clarification or
reminders in certain instances.
B. SPECIAL ENVIRONMENTAL CONSIDERATIONS
The Liquid Crystal Display (LCD) is not recommended for outdoor installation. UV rays are damaging to the display.
For more details, see the Installation Section regarding Mounting of the MICRO 200 BW.
MICRO 200 BW 0 - 1000 NTU (5/05)
Rev. 3.1
Page 1
Page 16

C. SPECIFICATIONS FOR THE MICRO 200 BW
Specification MICRO 200 BW
Ranges: 0 - 1000.0 NTU
Method: EPA approved* Nephelometric
Accuracy: 10% 0-1000.0 NTU
Repeatability: 1%
Linearity:
+1%
Resolution:
0 to 10 NTU 0.0001
1 to 100 NTU 0.01
Digital Display: LCD 6 digits
Analyzer Graphics: Built in LCD, Graphics recorder
Clock Graphics: Date and Time
Response Time: 1 to 8 seconds
Averaging Time (Electronic): 1, 16, 48 & 96 seconds, sliding average
Microprocessor: Motorola MC68HC11
Keyboard data entry system: 8 interacting membrane switches with tactile feedback
Security Code: Prevents unauthorized access to analyzer
Built in diagnostics: Yes
Analog Output, Isolated: Bracketed to .01 NTU, 4 - 20 mA & .1, 1 & 10 VDC 12 bit resolution D/A
Alarms: 1 system alarm, 2 (NTU or % T) alarms (Hi, Lo and Off)
Alarm Contact rating: Max. 250 VAC @ 5.0 A
Operating Temperature: 32° to 122°F (0°C to 50°C)
Storage Temperature: -4°F to 140°F (-20° to 60°C)
Optical Cleaning for NTU Sensor: Removable cuvette
Flow rate: 0.5 - 1.5 gpm (2000 ml/min - 6.0 L/m)
Positive System Pressure: 60 psi maximum (414 kPa or 4.22 kg/cm
3
)
Wetted surfaces: Nylon, C.A.B., PVC, Delrin-500, Borosilicate glass, Silicone
Lamp: External, pre-focused module
Standard Cable Length: 6 feet (1.83 m)
Sensor to analyzer distance: 250 feet (76.25 m) max. Over 50' lengths contact factory.
Dimensions
Analyzer: 13" x 11½” x 8" (330 x 290 x 200 mm)
NTU Sensor: 8¾” x 9¾” x 8" (225 x 250 x 200 mm)
NTU Sensor Case: NEMA 4X
CE Rating: Pollution Degree 2, Overvoltage Category III
Supply Voltage: 120 VAC
240 VAC
+ 10% 50/60 Hz
+ 10% 50/60 Hz
Power Consumption: 40 VA
*EPA approved means that the instrument meets or exceeds the design and performance criteria as specified in the
United States Environmental Protection Agency Method 180.1.
MICRO 200 BW 0 - 1000 NTU (5/05)
Rev. 3.1
Page 2
Page 17

C. SPECIFICATIONS FOR THE MICRO 200 BW CONTINUED
Specifications Micro 200 BW
Shipping Weight: Approximately 15 lbs. (6.8 kg)
Warranty: One year from date of shipment
Backwash Sensor - Optional:
Backwash Sensor: IR sensor measures 0 - 100% Transmittance
Sensor operating depth: 16 psi (32 ft.: 9.8 m) maximum depth
Standard cable length
Sensor to Analyzer/Interface: 30 feet (9.2 m)
Sensor to Analyzer distance: 1000 feet (305 m) max.
Backwash Sensor Dimensions: 3" Dia. x 7" H (75 x 175 mm)
Backwash Sensor Case: NEMA 4X
Repeatability: ± 1% Transmittance
Sensitivity: ± 1% Transmittance
Linearity: ± 1% Transmittance
Response time: Less than 10 seconds for a full scale change
Sensor operating temperature: 32 to 86°F (0°C to 30°C)
D. OPTIONS:
Specifications Micro 200 BW
Printer: 120/240V, 32 column, provides a 4 or 24 hour data printout of station, date,
time, high, low, average NEMA 4X enclosure. Includes 10 feet of
interconnect cable, paper printer roll, operating manual.
Computer Interface Serial Port: RS-232 or RS-485/RS-422 or current loop
Display Languages: English, French, German, Spanish, Italian or Swedish
MICRO 200 BW 0 - 1000 NTU (5/05)
Rev. 3.1
Page 3
Page 18

E. FIGURES
Figure No. Title Page No.
1 Desiccant Tray Installation......................................................................................... 6
2 Analyzer Outline Dimensions ....................................................................................7
3 Turbidity Sensor Outline Dimensions ........................................................................ 7
4 Access Cover Removal...............................................................................................8
5 Cable Routing .............................................................................................................8
6 Changing Analyzer Voltage/Fuse...............................................................................9
7 Analyzer Rear Cover Removal................................................................................... 9
8 4 - 20 mA Isolation Jumper (Removal) ...................................................................... 9
9 Reference Standard Indexing ...................................................................................25
10 Flow Through Cuvette Indexing...............................................................................26
11 Vaporpurge ............................................................................................................... 27
12 Critical Measurement Area.......................................................................................28
13 Lamp Replacement ................................................................................................... 28
14 Analyzer BNC Connection .......................................................................................33
15 Serial Interface Installation ....................................................................................... 35
16 Backwash Interface Outline Dimensions ................................................................. 37
17 Backwash Interface Voltage Selection..................................................................... 37
18 Junction Box Outline Dimensions ............................................................................ 38
19 Junction Box Wiring Diagram.................................................................................. 38
20 Backwash Sensor Outline Dimensions .....................................................................39
21 Backwash Channel Mounting................................................................................... 39
22 Backwash Extension Handle Mounting....................................................................40
23 RS-232 Voltage Connection ..................................................................................... 41
24 RS-232 Current Connection ...................................................................................... 41
25 RS-485 Connection ................................................................................................... 41
MICRO 200 BW 0 - 1000 NTU (5/05)
Rev. 3.1
Page 4
Page 19

F. COMPLIANCE TESTING CERTIFICATION
The Micro 200 BW has undergone extensive testing,
therefore, HF scientific, inc certifies that this instrument has met the following standards.
Product Safety
US standard tested by ETL testing labs to UL 3111
Canadian Standard tested by ETL to CSA 1010.
CE tested by ETL testing labs to EN61010-1
Pollution Degree 2, Installation Category (Overvoltage
Category) III
Immunity
Immunity testing by ETL testing labs to EN50082-1
including:
ESD Immunity to IEC 801-2
RF Immunity to IEC 801-3
Transient Burst Immunity to IEC 801-4
EMI
EMI tested by ETL testing labs to EN55011 Group 1
Class A.
RF Emissions to FCC Part 15 Class A by ETL testing
labs
MICRO 200 BW 0 - 1000 NTU (5/05)
Rev. 3.1
Page 5
Page 20

II. INSTALLATION
A. PACKING LIST FOR THE MICRO 200 BW
CONTENTS QUANTITY
Instruction Manual 1
MICRO 200 BW 1
must be mounted where it can be viewed at the backwash control station. In this example, for convenience
of maintenance, the turbidity sensor should be mounted
at the backwash station and have the water plumbed to
it. The analyzer must be mounted in a location that
avoids direct water contact. Refer to figure 2 on page 7
for outline dimensions. Allow enough room for the
analyzer to pivot on the mounting bracket upside down,
to make connections.
Desiccant Tray Assembly 1
Accessory kit - includes:
0.02 NTU reference standard 1
Flow control clamp (stainless steel) 1
Spare flow through cuvette 1
Light Shield Cap 1
A listing of recommended spare parts appears on page
32 of this manual.
B. UNPACKING AND INSPECTION
Use extreme care when unpacking your MICRO 200
BW and note that all of the contents are included. Check
for any damage that may have occurred during shipping. If there are any omissions, report this immediately to the your local distributor or the Quality Assurance Dept. at HF scientific, inc. If there is any shipping
damage; notify the shipping company immediately and
arrange for a prompt inspection.
C. MOUNTING
CAUTION: Instrument is not designed for outdoor
installation. The LCD screen will be damaged by UV rays. Contact factory for
available enclosures.
The maximum allowable ambient temperature is 122°F
(50°C).
NOTE: Be careful during installation not to violate the
moisture integrity of the sensor, interface or
analyzer housings. The analyzer requires approximately two hours to reach it’s final operating temperature. Further adjustment of the
LCD brightness may be required during this
period.
1. Analyzer
The location of the analyzer should be given careful
consideration. As an example, if the MICRO 200 BW
is to be used for performing backwash, the analyzer
MICRO 200 BW 0 - 1000 NTU (5/05)
Rev. 3.1
Page 6
After mounting, the angle of analyzer may be adjusted
for best visibility.
2. Sensor - Turbidity
For the outline drawing of the turbidity sensor refer to
figure 3 on page 7. Allow enough room for easy access
to both the flow through unit and the lamp module.
Avoid mounting the sensor in a location that will put
the sensor housing in contact with dripping water, as
this will present problems when performing periodic
maintenance.
The sensor is equipped with a foot valve, that opens in
case the flow through cuvette ruptures, to prevent
damage to the sensor. The foot valve drain tube can be
connected to a 5/8" (15.9 mm) tube (not supplied) to
direct the flow of water to a convenient drain. Keep the
length of this external tube to a minimum.
a. Installing & Replacing Pack Desiccant Tray
Before operating the
Micro 200BW for the
first time the replaceable desiccant pouch
must be installed.
Please refer to Figure
1 while installing fo r
the first time. To initially install unscrew
the four thumbscrews
and remove the electronics half of the sensor. Open the foil bag
and remove the
dessicant pouch and
the indicator card. Install these items and
replace the top portion
of the sensor.
Proper use of the
supplied desiccant is
essential in maintaining
the performance of the
Figure 1
Desiccant Tray Installation
Page 21

Figure 2
Analyzer Outline Dimensions
XX.XX=INCHES
(XX)=mm
8.780
(225)
9.802
(249)
Figure 3
Turbidity Sensor Outline Dimensions
8.062
(205)
Lamp
LAMP
MODULE
Module
HF #
21541
21541
5.820
(148)
HF #
2.000
(51)
1.000
(25)
MICRO 200 BW 0 - 1000 NTU (5/05)
Rev. 3.1
Page 7
Page 22

instrument. The desiccant pouch is designed to have a
long life; however, replacement of the desiccant pack
will be required from time to time. To determine the
condition of the desiccant, check the included humidity
indicator card. If required, a new foil sealed desiccant
pouch and indicator card are available from HF scientific inc. part #21555R.
It is essential that all enclosure seals be maintained. The
emergency drain and o-rings that are supplied with each
new instrument form part of the instrument humidity
seal. Inspect these items each time the desiccant pouch
is replaced. Replace any parts found to be defective.
D. ANALYZER CONNECTIONS
All connections are reached by removing the access
cover. Heed all warnings and precautions prior to
removal.
WARNING: Before removing access cover disconnect
all power from the MICRO 200 BW analyzer.
1) Unplug the instrument or
2) Turn off the power at the circuit breaker.
3) Remove power to alarm contacts if greater than 30
VAC is connected for external operations.
To remove the access cover (refer to figure 4):
1) Loosen the two analyzer clamping knobs.
2) Swivel the analyzer top forward, such that the back
is now facing you.
3) Re-tighten the two analyzer clamping knobs.
4) Loosen the 4 captive screws.
5) Remove access cover.
Figure 4
Access Cover Removal
WARNING: Do not restore power until the access
cover has been replaced and secured.
When routing the cabling for the following
sections, allow enough excess cable length
to swivel the analyzer upside down. Note
that a cable strap is provided on the mounting bracket. Refer to figure 5 for suggested
cable routing. Do not overtighten the four
captive screws when replacing cover.
→→
→→
→
Extra Cable
1. Cable & Cord
Interconnecting Cable: The standard interconnecting
cable between the analyzer and the turbidity sensor is
6 feet (1.83 meters) in length (Catalog No. 20853). This
length may be decreased without affecting instrument
performance. For longer cable lengths consult HF
scientific, inc.
WARNING: Ensure that power to the analyzer is
removed prior to connecting or disconnecting the sensor.
2. Analyzer Power
The power cord (120V) provided is 6 feet (1.83 meters)
long. The analyzer power requirement is 40 VA at
either 120 VAC or 240 VAC. The voltage setting of the
analyzer can be determined by removing the access
cover and looking at the fuse cartridge, just to the left
of the power cord receptacle. The voltage printed next
to the two triangles that point toward each other indicate
the selected voltage. To change the input voltage first
remove the power cord. The fuse cartridge can be
removed by prying upwards using a flat blade screwdriver in the slot provided. Pull the cartridge out, invert
and then reinsert. Refer to figure 6 on page 9. To replace
a blown fuse remove the fuse cartridge as in figure 6 on
page 9. Replace only the fuse for your selected voltage.
The triangle on the fuse cartridge points to the fuse for
Figure 5
Cable Routing
MICRO 200 BW 0 - 1000 NTU (5/05)
Rev. 3.1
Page 8
Page 23

the voltage. The correct fuse ratings are 5 x 20 mm 1A
fast acting for 120 VAC and 5 x 20 mm ½A fast acting
for 240 VAC.
A power switch is located to the right of the power cord.
WARNING: If power connection is to be hardwired,
place each analyzer on a separate circuit
breaker or switch to allow for service.
Observe all local wiring codes.
▲
▲▲
▲▲
▲
▲▲
▲▲
▲▲
▲▲
▲
▲▲
▲▲
220-240V
220-240V
▲
BW analyzer).
5. Recorder - Current
A 4-20 mA current output is available. The connections
are made at the terminal block labeled Analog 4-20 mA
(J5). Use twisted pair shielded cable, 22 AWG - 14
AWG, with the shield tied to earth ground at the
recorder end. (Do not tie shield to ground at the
analyzer). The recorder load may be rated from 0-1000
ohms maximum. Terminal #1 is positive, terminal #2
is negative.
6. 4 - 20 mA Isolation
Isolation of the 4-20 mA recorder output may be
achieved by removing the jumper at J13. This procedure requires removal of the rear cover assembly. Refer
to figure 7 to remove the rear cover and figure 8 for
location of jumper.
▲▲
▲▲
▲
USE ONLY WITH 250V
110-120V
FUSES / EMPLOYER
UNIQUEMENT AVEC
DES FUSIBLES DE 250V
Figure 6
Changing Analyzer Voltage/Fuse
3. D/A Outputs - Voltage & Current
The full scale range of the recorder outputs, both
voltage and 4 - 20 mA, is determined by the upper and
lower limits selected by the user in the display parameters menu. Please note that either 4- 20 mA OR voltage
may be selected in the DISPLAY PARAMETERS
menu, but not both.
4. Recorder - Voltage
Recorder output voltage is selected at the terminal block
labeled ANALOG VOLTAGE (J6). Only one of these
voltages is to be selected at any time.
Recorder load for each voltage:
Figure 7
Analyzer Rear Cover Removal
Terminal 1 0 - 10V 50000 ohms or greater
Terminal 2 0 - 1V 5000 ohms or greater
Terminal 3 0 - 100mV 500 ohms or greater
Terminal 4 Common
Twisted pair shielded cable, 22 AWG - 14 AWG, is
recommended. Tie the shield to the ground terminal the
recorder end (Do not connect shield to MICRO 200
MICRO 200 BW 0 - 1000 NTU (5/05)
Rev. 3.1
Figure 8
Remove jumper J-13 to establish isolation
of the 4-20mA signal.
Page 9
Page 24

WARNING: While the chance is slight, there are fault
conditions under which a hazardous voltage could be exposed on the analog output
wires when the jumper J13 is
removed. To preclude this possibility HF
scientific strongly recommends, for personal protection, that a Ground Fault
Circuit Interrupter (GFCI), such as
LEVITON part number 6599 or 5299, be
used at the power connection.
7. Alarm Contacts
Connections are provided to the alarm relay contacts on
the terminal block labeled ALARMS.
NOTE: These are “fail safe” and will revert to an “alarm”
condition should the power be disconnected, for
any reason.
Refer to the Specifications to ensure that alarm contact
ratings are not exceeded.
NOTE: ALARM 1: Terminal Block J1
ALARM 2: Terminal Block J2
SENSOR ALARM: Terminal Block J3
The following are the connections for each of the relay
contacts:
Terminal 1: Normally Closed (N.C.) (open on alarm)
Terminal 2: Normally Open (N.O.) (closed on alarm)
Terminal 3: Common (C)
WARNING: Ensure that all external voltages in excess
of 30 volts are disconnected before attempting to make connections or disconnections from alarm terminal blocks.
The SENSOR ALARM contacts are provided to
indicate that the source lamp in the sensor module has
failed or that the MICRO 200 BW requires routine
standardization.
NOTE: For external analyzer connection, other than
power, #14 AWG is the largest wire the connecting terminals will accept.
8. Cable Mounted Ferrites
The interconnect cable has a cable mounted ferrite on
it, located near the analyzer. To maintain the CE rating
for EMI this ferrite HF #21140 must bein place when
operating the instrument.
Some input/output connections that are made to the
Micro 200BW will also require the addition of a ferrite
to maintain the CE rating for EMI. The following
connections require the addition of HF# 21138: Serial
Ports, Recorder Output - Current (4-20mA), Recorder
Output - Voltage.
E. TURBIDITY SENSOR
1. Interconnect Cable
The interconnecting cable from the analyzer is plug
connected at the sensor. If the interconnecting cable is
removed at the analyzer end, it should be reconnected
to terminal block labeled SENSOR INTERFACE (J8).
The cable wire colors are labeled in front of this
terminal block.
2. Inserts for Sample & Drain Lines
Plastic inserts (not needed with rigid tubing) are provided with the turbidity sensor and are intended for use
with 5/16" OD x 3/16" ID (7.94 mm OD x 4.76 mm ID)
flexible plastic tubing as sample and drain lines.
III. STEP-BY-STEP OPERATION
A. THEORY & HOW IT WORKS
The HF scientific, inc., MICRO 200 BW Turbidimeter
is specifically designed to monitor turbidity and backwash water in water filtration plants. This is done by
providing a linear display of turbidity in Nephelometric
Turbidity Units (NTU). The units, FTU and NTU, are
compatible. Optional backwash function is displayed
in Percent Transmission (% T).
The MICRO 200 BW is a continuous reading Nephelometric instrument that measures scattered light from
particles in suspension (turbidity). The optical signal
from the photodiodes is amplified and then converted
to a frequency. This frequency is dependent upon the
NTU level of the sample in the sample well. The
resultant signal is sent to the analyzer where it is
linearized for presentation on the display.
All operator controls are located on the front panel of
the MICRO 200 BW. Complete displays include LCD
indicators which blink in the event of an alarm of the
two user set alarms and a sensor alarm.
Each feature is clearly labeled and you will be taken,
step-by-step, through each one later in this section.
This approach ensures EASY use of the HF scientific,
inc., MICRO 200 BW.
MICRO 200 BW 0 - 1000 NTU (5/05)
Rev. 3.1
Page 10
Page 25

One of the most important features of the MICRO 200
BW is the ease of operation. You simply press the
Function Key, <F1-F5> for the selection you want to
access on the LCD screen.
The information contained in this manual will help
users take full advantage of the MICRO 200 BW’s
capabilities. In the event that unusual circumstances
arise that are not addressed in the manual, contact your
local distributor. Our engineering staff is also available
to help you with your specific needs.
The ROM program used in the MICRO 200 BW
contains confidential information which is the property
of HF scientific, inc. Unauthorized disclosure, distribution or copying is prohibited. COPYRIGHT © HF
SCIENTIFIC, INC. All rights reserved.
1. Menu Guide to the MICRO 200 BW
The following pages guide you through the menus in
MICRO 200 BW and provide insight on how to use
each of them. Probably the best way to learn the system
is by “hands on training”. After reading this section in
its entirety the user should follow through each of the
menus on the MICRO 200 BW. The user will find that
each of the menus is arranged in a logical manner. After
going through each of the menus once he will gain a
familiarity with the structure. Each function is clearly
labeled. A menu flow chart figure 26 is provided on
page 44 for further clarity.
before the alarm contacts can again close.
MENU: Display will change to the next highest
level or previous menu. If this button is
pushed several times you will always return to the MAIN MENU. This button is
also used to return to the turbidity display
once the range has been selected.
NOTE: There are places of selection, for instance, alarm
limits, graphic limits and time set where it is
possible to set a parameter which is not viable.
An example is the 13th month of the year in
Time Set, or the Hi Alarm limit set lower than
the Low Alarm limit. When this happens you
will be disallowed from leaving that menu and
the effect will be that the menu button will not
work. Examine and correct the parameters to
proceed.
The functions of F1-F5 will vary according to the
menu. The function will be shown beside each button.
The absence of a function beside a button indicates that
the button is not used in that menu.
The following buttons always retain the function described below:
ALARM: Turns alarm contacts to “OFF”. Once an
alarm condition is met, the display will
continue to flash until the alarm condition
is removed. Once the alarm level has been
exceeded, either Hi or Lo, the alarms will
reset when the alarm condition has returned to non-alarm value, including the
dead band value.
Once the alarm button is pushed the alarm
relay is inactive until the reading has once
again reached a non-alarm value (keep in
mind the dead band value). After this the
alarm level must be once again exceeded
MICRO 200 BW 0 - 1000 NTU (5/05)
Rev. 3.1
Page 11
Page 26

2. Turbidity Display
9
5
6
1
F1
F2
7
8
3
ALARM
MENU
F3
F4
2
4
F5
This is the turbidity display. The display shown above is fairly typical. The display has the following parameters:
1 - CURRENT TURBIDITY READING: 477.5 NTU
2 - GRAPH TIME BASE: 24 HOURS
3 - GRAPH UPPER LIMIT: 600 NTU
4 - GRAPH LOWER LIMIT: 400 NTU
5 - ALARM 1 SETTING: ALARM ON HIGHER THAN 550 NTU
6 - ALARM 2 SETTING: ALARM ON LOWER THAN 100 NTU
7 - TIME: 1:28 PM (SHOWN IN 24 HOUR CLOCK MODE)
8 - DATE: MAY 12 1992
9 - GRAPH OF TURBIDITY HISTORY (High, Ave. & Low)
To leave the turbidity display and get to the Main Menu push MENU. F1 - F5 are nonfunctional in this display. Please note
that the graph history shows the highest readings, the lowest readings and the average readings taken within the sample period.
MICRO 200 BW 0 - 1000 NTU (5/05)
Rev. 3.1
Page 12
Page 27

3. Main Menu
Main Menu
F1
F2
F3
F4
This is the main menu. It is the starting point for all sub-menu selections. Shown below are all function key selections and their
purpose.
Selection Options:
F1: Changes screen to ALARM MENU
Select this option to set the value at which the alarm contacts will change for Alarm #1 & Alarm #2.
Alarms
Display Parameters
Utility
Turbidity Backwash
Ver: M200BW-7B210ME6
ALARM
MENU
F5
F2: Changes screen to DISPLAY PARAMETERS MENU
Select this option to: Set upper limit
Set lower limit
Select time base
Set average
Select D to A
Set digit suppression
F3: Changes screen to UTILITY MENU
Select this option to: Set screen brightness
Clear graph history
Set time & date
Calibrate & Adjust offset
Set up serial port parameters
Disable/Enable & Set access code
Run self test diagnostics
F4: Changes screen to TURBIDITY DISPLAY
Select this option to display current turbidity and graph turbidity history.
F5: Changes screen to BACKWASH DISPLAY
Select this option to display and graph a backwash cycle if backwash option is connected.
MICRO 200 BW 0 - 1000 NTU (5/05)
Rev. 3.1
Page 13
Page 28

4. Alarm Menu
Alarm Menu
F1
F2
F3
F4
This is the ALARM MENU. The left side of the screen shows the selections as described below. The right side shows the current
settings. In the example above:
Alarm 1 is set to 1000 NTU and is off
Alarm 2 is set to 200 NTU and will alarm below 200 NTU
The Dead Band is set to 10%
Selection Options:
F1: Not Used
F2: Selects ALARM 1 setpoint MENU
F3: Selects ALARM 2 setpoint MENU
F4: Selects the DEAD BAND for the alarms to 2.5%, 5%, or 10%
F5: Not Used
Alarm 1 1ØØØ. Off
Alarm 2 Ø2ØØ. Lo
Dead Band 1Ø%
ALARM
MENU
F5
a. Alarm #1
F1
F2
F3
F4
This is the Alarm #1 Menu. In this menu you can set the value at which the alarm contacts for Alarm #1 will change. The purpose
of the function buttons are shown below. The current setting is displayed in the center top of the screen. Alarm #2 is displayed
and used exactly the same as this menu.
Selection Options:
F1: Not Used
F2: Selects the digit to change as indicated by the flashing cursor
F3: Increments the selected digit (increases it)
F4: Decrements the selected digit (decreases it)
F5: Selects Alarm #1 to High, Low or Off
MICRO 200 BW 0 - 1000 NTU (5/05)
Rev. 3.1
Digit
Up
Down Select Hi;Lo;Off
Flashing cursor
Alarm #1
1ØØØ. OFF
Page 14
ALARM
MENU
F5
Page 29

5. Display Parameters
Display Parameters
F1
F2
F3
F4
This is the Display parameters Menu. The sub-menu selections are described below. In the example above:
Upper Limit is set to 999 NTU Lower Limit is set to zero NTU
Time Base is set to 60 minutes D to A is set for 4 to 20 mA
Note: The D to A automatically calibrates to upper & lower (for our example you will get 4mA at 0 NTU & 20 mA @ 999
NTU)
Selection Options:
F1: Selects UPPER LIMIT MENU
F2: Selects LOWER LIMIT MENU
F3: Selects Time Base between 60 minutes and 24 hours
F4: Selects Set Average Menu
F5: Selects D to A between 4-20 mA or 0 to10 volts
Upper Limit 999.
Lower Limit ØØØ.
Select Time Base 6Ø Min.
Set Average Select D to A
4 to 2Ø mA
ALARM
MENU
F5
Flashing cursor
a. Set Upper Limit
Set Upper Limit
F1
F2
F3
F4
This is the Set Upper Limit Menu. This is where you can change the upper limit for both the graphical display and the high setting
to which the D to A output is calibrated. The set lower limit menu is identical to this and is not shown.
Selection Options:
F1: Not Used
F2: Selects the Digit to change as indicated by a flashing cursor
F3: Increments the selected Digit (increases it)
F4: Decrements the selected digit (decreases it)
F5: Not Used
Digit
Up
Down
999.
ALARM
MENU
F5
MICRO 200 BW 0 - 1000 NTU (5/05)
Rev. 3.1
Page 15
Page 30

b. Set Average
Set Average
F1
F2
F3
F4
This is the Set Average Menu. This is where you can make changes to the averaging period. Readings are updated at a rate of one
per second. A higher averaging time will give smoother curves to the graphical display and to recording devices and helps “wash
out” anomalies. Always use the X1 setting when taking grab sample readings. Suppression or “Holding” the least significant digits
to zero may be set here. The X1 setting is automatically selected while in the calibration menu.
Selection Options:
F1: Selects each reading (one second)
F2: Selects Averaging of the last sixteen readings (16 seconds)
F3: Selects Averaging of the last forty-eight readings (48 seconds)
F4: Selects Averaging of the last ninety-six readings (96 seconds)
F5: Selects between 1 digit, 2 digits & none of the least significant digit suppression
X1
XØ1
X16
X48
X 9 6 Digit Suppress
Ø
ALARM
MENU
F5
6. Utility Menu
Utility
F1
F2
F3
F4
This is the Utility Menu. The available sub-menu selections are listed below.
Selection Options:
F1: Selects Screen Brightness & Clear History Menu (from graphs)
F2: Selects Set Time & Date Menu
F3: Selects Calibration Menu
F4: Selects serial port & Access code set-up menu
F5: Performs a check of internal critical voltages
Screen Brightness/History
Set Time
Calibrate
Comm Port Self Test
ALARM
MENU
F5
MICRO 200 BW 0 - 1000 NTU (5/05)
Rev. 3.1
Page 16
Page 31

a. Screen Brightness/History
Screen Brightness/History
F1
F2
F3
F4
This is the screen brightness and clear history menu. In this menu you can adjust the screen intensity in increments by
successively pressing F2 or F3. The intensity level will be stored when you leave this menu. Variations in ambient temperature
will cause shifts in the brightness level.
F4 allows you to clear the graph history from both the turbidity and backwash screens.
Selection Options:
F1: Not Used
F2: Adjusts the screen intensity brighter a step each time pushed
F3: Adjusts the screen intensity dimmer a step each time pushed
F4: Clears the graph history from screens
F5: Not Used
Dimmer
Brighter
Clear History
ALARM
MENU
F5
b. Set Time
F1
F2
F3
F4
This is the set time and date menu. From this menu you can set the time and date to local time. Time and date are presented
on the turbidity and backwash displays and printer reports.. The clock accepts the new time and date when you push MENU.
Invalid statements will disallow leaving this menu (see Section VII. Troubleshooting).
Selection Options:
F1: Not Used
F2: Selects digit to change as indicated by flashing cursor.
F3: Increments the selected digit (increases digit)
F4: Decrements the selected digit (decreases digit)
F5: Not used
MICRO 200 BW 0 - 1000 NTU (5/05)
Rev. 3.1
Flashing cursor
22:Ø6
Ø7-23-92
Digit
Up
Down
Set Time
ALARM
MENU
F5
Page 17
Page 32

c. Calibrate 0 - 1000 NTU
F1
Calibrate
Ø4Ø26 Hz
(Current Frequency)
Ø.Ø2NTU Ø.Ø227
○○○○○○○○○○○○○○○○
ALARM
F2
F3
1ØØ.ØNTU 18Ø.6
4ØØ.ØNTU 4Ø2.5
○○○○○○○○○○○○○○○○
○○○○○○○○○○○○○○○○
MENU
4Ø2.6 NTU
(Current Reading)
F4
1ØØØ.ØNTU 1ØØØ.Ø
○○○○○○○○○○○○○○
F5
This is the turbidity calibration menu.
Sensor Calibrate is provided to adjust the sensor output for variations in lamp intensity. WHEN YOU PERFORM A SENSOR
CALIBRATE YOU MUST HAVE A 1000 NTU STANDARD IN THE WELL OR YOU MAY GET A SENSOR FAIL
MESSAGE.
F1, F2, F3 & F4 are selected calibration points which are used to calibrate the analyzer to the sensor. Any combination may
be used, however, the stated accuracy will not be achieved without using all four points. The analyzer uses the calibration values
to linearize the readings in this range. The recommended step-by-step procedure is on page 29.
Caution: Do not press F1-F4 unless the indicated standard is in the optical well.
The calibration points are shown on the left side of the screen and are selection options. The right side of the screen shows the
stored real frequency for each calibration point.
In the center of the screen are two numbers. The top number shows the current real frequency reading (decimal adjusted). The
lower number shows the corrected or linearized frequency. In most instances the numbers on this screen can be ignored. They
do, however, serve as a useful diagnostic tool.
See page 28 for complete step-by-step instructions.
Selection Options:
F1: Stores the standardize frequency
F2: Stores the 100 NTU frequency
F3: Stores the 400 NTU frequency
F4: Stores the 1000 NTU frequency
F5: Performs a sensor calibration with 1000 NTU in well
MICRO 200 BW 0 - 1000 NTU (5/05)
Rev. 3.1
Page 18
Page 33

d. Comm Port
Comm Port Menu
F1
F2
F3
F4
This is the communications or serial port menu. This menu will have no purpose unless you have one of the optional serial ports
installed. See page 35 for more details.
Selection Options:
F1: Selects the baud rate between 300, 600, 1200, 2400, 4800 & 9600
F2: Selects the address from 0 to F, HEXADECIMAL
F3: Selects serial printer mode on & serial printer mode off
F4: Used to change access code
F5: Not Used
e. Access Code Menu
Set Baud 9600
Set Address 0
Select Printer
Printer Off
Access Code Reporting
Menu 4 Hour
ALARM
MENU
F5
Access Code Menu
F1
F2
F3
Access Code
Off
Change Code
F4
To enter to this menu, you first need to enter an access code. If no previous code has been entered, the master code F1, F4, F3,
F5 may be used.
Selection Options:
F1: Not Used
F2: Toggles between Access code off and Access code on
F3: Used to select a new Access Code
F4: Not Used
F5: Not Used
ALARM
MENU
F5
MICRO 200 BW 0 - 1000 NTU (5/05)
Rev. 3.1
Page 19
Page 34

f. Security Access Code
Please enter Access Code
F1
F2
ALARM
MENU
F3
F4
This screen is encountered when leaving the turbidity or backwash displays and when changing the Access Code. Use only
the F1, F2, F3, F4 or F5 buttons to enter the Access Code. Refer to page 30 for complete instructions.
F5
g. Set Access Code
Set Access Code
F1
F2
F1 F2 F3
Accept; press Menu===>
ALARM
MENU
F3
F4
This screen is encountered after the previous screen when changing the Access Code. Enter the new Access Code using the
F1, F2, F3, F4 or F5 buttons. Refer to page 30 for complete instructions.
MICRO 200 BW 0 - 1000 NTU (5/05)
Rev. 3.1
Page 20
F5
Page 35

h. Self Test (4 - 20 mA Cal.)
SELF TEST
F1
F2
F3
F4
This is the self test menu. Upon entering this menu all internal critical power supplies are checked and displayed. You may also
calibrate the 4-20 mA D to A output while in this menu. NOTE: You should have some load (up to 1000 Ohms) connected
to the 4 - 20 mA terminals when it is calibrated or it will give you a message indicating a defective 4 - 20 mA line. The display
shows only 0 - 10V Cal or 4 - 20 mA Cal as previously selected in the display parameters menu.
Selection Options:
F1: Not Used
F2: Not Used
F3: Not Used
F4: Not Used
F5: Performs a 4-20 mA calibration
i. Self Test (0 - 10 V Cal.)
GND .ØØØ1
+5 Ref. 5.ØØ6
-5 Ref. -4.99Ø
5V 4.978
+15 14.99
+15 Sen. 15.Ø4
-15 -14.79
-21 -21.24
+24 24.47
4 - 2Ø mA Cal.
ALARM
MENU
F5
SELF TEST
F1
F2
F3
F4
This is the self test menu. Upon entering this menu all internal critical power supplies are checked and displayed. You may also
calibrate the 0-10 volt output while in this menu. The display shows only 0 - 10V Cal or 4 - 20 mA Cal as previously selected
in the display parameters menu.
Selection Options:
F1: Not Used
F2: Not Used
F3: Not Used
F4: Performs a 0-10 volt calibration
F5: Not Used
GND .ØØØ1
+5 Ref. 5.ØØ6
-5 Ref. -4.99Ø
5V 4.978
+15 14.99
+15 Sen. 15.Ø4
-15 -14.79
-21 -21.24
+24 24.47
Ø - 1Ø V Cal.
ALARM
MENU
F5
MICRO 200 BW 0 - 1000 NTU (5/05)
Rev. 3.1
Page 21
Page 36

7. Wait Messages
F1
F4
F1
F2
F3
F2
Please Wait
Working . . . . . . .
4 - 2Ø mA Cal.
ALARM
MENU
F5
ALARM
MENU
F4
F1
F4
F3
F2
F3
Working . . . . . . .
F5
Ø - 1ØV Cal.
ALARM
MENU
Working . . . . . .
F5
These screens indicate that the analyzer is performing some calculations or storing information. This typically occurs when the
analyzer is powered up or when a change in display parameters has been made.
MICRO 200 BW 0 - 1000 NTU (5/05)
Rev. 3.1
Page 22
Page 37

8. Backwash Display
F1
F4
F2
F3
9
65
1
OFF
Ø9Ø.Ø
Ø1Ø.Ø
7
8
3
ALARM
MENU
F5
2
4
This is the backwash display. It is only meaningful if Backwash option is connected. The screen above shows a typical backwash
cycle. In this mode, updates are made to the screen every 6 seconds. The reading is updated every second. The display shows
the following parameters:
1 - CURRENT %T READING: 97.1 %T
2 - GRAPH TIME BASE: 12 MINUTES
3 - GRAPH UPPER LIMIT: 0 %T
4 - GRAPH LOWER LIMIT: 100 %T
5- ALARM 1 SETTING: ALARM TURNED OFF
6- ALARM 2 SETTING: ALARM ON LOWER THAN 10.0 % T
7 - TIME: 1:28 PM (SHOWN IN 24 HOUR CLOCK MODE)
8 - DATE: MAY 12 1992
9 - GRAPH OF BACKWASH HISTORY (with optional Backwash connected)
To leave the backwash display and get to the Main Menu push MENU. F1 - F5 are nonfictional in this display.
MICRO 200 BW 0 - 1000 NTU (5/05)
Rev. 3.1
Page 23
Page 38

a. Backwash Calibration
Calibrate
F1
Ø9984 Hz
ALARM
Ø99.8Ø% T
F2
1ØØ.Ø%T 1ØØØ5.Hz
○○○○○○○○○○○○○○
MENU
F3
F4
This is the backwash calibration menu and usable only with Backwash Sensor connected. To get to it you must first enter
backwash from the main menu. You will be asked if you wish to calibrate. If you respond with yes (F2) you will reach the
calibration screen above. If you respond with no (F3) you will go directly to the backwash display menu. After the calibration
procedures have been completed, press the menu button to reach the backwash display screen.
There is only one point of calibration for backwash, 100% T. The sensor must be placed in what is to be considered 100% T
water (preferably the same water as used in the backwash process). Pressing F2 will then calibrate the analyzer to the 100%
T frequency of the sensor. The right hand side of the screen shows the stored real frequency number.
In the center of the screen are two numbers. The top number shows the current real frequency reading (decimal adjusted). The
lower number shows the corrected or linearized frequency. In most instances the numbers on this screen can be ignored. They
do, however, serve as a useful diagnostic tool.
F5
The function keys F1, F3, F4 & F5 are not used in this menu.
See page 34 for complete maintenance procedures.
MICRO 200 BW 0 - 1000 NTU (5/05)
Rev. 3.1
Page 24
Page 39

B . START UP
Before placing the MICRO 200 BW on line we recommend that you standardize the instrument. The following sections describe the required procedures.
2. Standardizing
The reference standard (cuvette) supplied with the
MICRO 200 BW is a pure liquid sealed in glass. It has
a value of 0.02 NTU.
1. Indexing
The United States Environmental Protection Agency
(U.S. EPA) recommends that cuvettes used for instrument calibration or sample measurement be indexed.
To comply with U.S. EPA standards, the MICRO 200
BW includes an Indexing Ring for quick and repeatable
indexing of the refernce standard.
To index the calibration standard you must be in the
calibration menu. Observe the top center (current
frequency) reading while performing the following steps:
a. Slowly rotate the standard, inside the optical well,
one complete revolution (360°). While rotating the
standard slowly, observe the measured turbidity
and locate the position of the cuvette having the
lowest reading.
b. With the calibration standard positioned at the
location having the lowest turbidity reading, install the
Indexing Ring over the cap on the standard so that the
pointer of the Indexing Ring faces directly forward.
Standardization is performed in the calibration menu
see page 18 for more details. While in the calibration
menu perform the following operations:
a. Place the Reference Standard in the Optical Well.
b. Index the Reference Standard as previously de-
scribed.
c. Allow a few seconds for the standard to stabilize.
d. Press the F1 button to accept the frequency.
NOTE: This operation “calibrates” the .02 NTU refer-
ence standard in the range of interest. If both
ranges maybe used this operation should be
performed on both ranges.
CAUTION: Avoid scratching the surface of the cu-
vette. Keep the cuvette surface clean and
free of dust. A scratched or dirty and
dusty cuvette will cause analysis error.
For instructions (See: V. ROUTINE
MAINTENANCE).
When using the standards in the future, always insert the
standard so that the pointer of the indexing ring faces
forward. Slowly rotate the standard back and forth
about 5° to find the lowest point. The standard is now
indexed and ready for use.
Figure 9 shows a calibration standard being indexed.
NOTE: This Calibration Standard is only Indexed to
the Turbidimeter for which it was aligned.
Figure 9
Reference Standard Indexing
IV. ROUTINE OPERATION
A. CONTINUOUS MONITORING FLOW
THROUGH UNIT
The standard flow through unit supplied with the instrument is designed to operate at pressures up to a
maximum of 60 p.s.i. (414 kPa or 4.22 kg/cm3) and
temperatures to a maximum of 122° F (50° C) fluid
temperature. Flow rates through the unit can be adjusted from 0.5 gpm (200 ml/min) to a maximum of
approximately 1.5 gpm (5.7 liters/minute). The speed
of sensing turbidity changes will depend on the length
of the take-off line, the diameter of the take-off line,
and the flow rate or velocity through the take-off line.
By using a high flow rate and keeping the lines small,
approximately 3/16 inch (4.8 mm) I.D. and relatively
short length, the response time is kept to a minimum.
Consult HF scientific, inc. when unusually long connections are required.
Depending on the type of fluid being monitored, a
pressure drop through the line can cause gas or air to
come out of solution and form bubbles which will
create errors in the turbidity measurements. This can be
prevented by creating a slight back pressure on the
MICRO 200 BW 0 - 1000 NTU (5/05)
Rev. 3.1
Page 25
Page 40

discharge side of the flow through unit using the
stainless steel flow control valve (Catalog #50004)
supplied. Increasing the size of the incoming line will
also help this condition.
NOTE: Since each application is different, the amount
of back pressure required to eliminate bubbles
must be determined and modified on site during
operation by the customer.
A plastic shut-off clamp is provided on the inlet side of
the flow through unit in order to completely stop flow
to facilitate changing the cuvette. See the section on
cuvette cleaning and care for more information.
The U.S. EPA recommends that cuvettes used for
instrument calibration, standardization, or sample measurement be indexed. For quick indexing of the flow
through cuvette, a rotational flow through assembly
with locking collar is supplied.
To index your flow through cuvette, slowly rotate the
flow through at least one revolution, while observing
the reading, to locate the position of the lowest reading.
Without moving the flow through, press down on it and
turn the locking collar until the flow through assembly
is securely locked in place. See figure 10.
The desiccant beads are dark blue when dry and turn to
a light pink when expended. Check the desiccant on a
quarterly basis or if after cleaning the cuvette readings
appear erroneously high to ensure proper operation of
the vaporpurge feature. It is important to keep a cover
on the sample well if the flow through head is out for
more than a few minutes, to avoid saturating the
desiccant uselessly. A replacement desiccant tray com-
plete with foot valve is available from HF scientific or
your local representative HF part# 21555. See figure 1
on page 6 when replacing the desiccant.
Remember to dry the flow through cuvette of excess
moisture before inserting it into the optical well.
This will speed up the evaporation time.
NOTE: If it should become necessary to return the
sensor to the factory, you need only return the
upper sensor assembly and not the base. IF
RETURNING THE BASE, THE DESICCANT
TRAY MUST BE REMOVED BEFORE SHIP-
PING.
C. GRAB SAMPLES
Take extreme care when handling any sample cuvettes.
Surface scratches, dust or finger smudges will cause
analysis error. Examine each cuvette carefully before
the sample is drawn and placed in the Optical Well. We
recommend that the cuvette be wiped clean with a lintfree laboratory tissue before the sample is drawn.
Handle Reference Standard and cuvettes by the top
portion only.
Figure 10
Flow Through Cuvette Indexing
B. VAPORPURGE
The MICRO 200 BW is equipped with a continuous
vaporpurge system. A fan inside the sensor continuously circulates heated, dry air around the optical well
and the flow through cuvette. This feature eliminates
the need for connection of a dry purge line. See Figure
11.
MICRO 200 BW 0 - 1000 NTU (5/05)
Rev. 3.1
To take a reading of a grab sample:
1. Set Averaging to 1 second (see page 16).
2. Remove the flow through unit and insert grab
sample cuvette in Optical Well.
3. The turbidity value of the grab sample will now be
displayed on the readout. Allow at least two up
dates (five to ten seconds) for best accuracy before
noting the reading.
NOTE: Settling particles or air in the sample may cause
the digital reading to “hunt”. For best results
take readings before turbid particles settle but
after air bubbles have been allowed to escape.
V. ROUTINE MAINTENANCE
A. CUVETTE CLEANING & CARE
Cuvettes must be clean and free of marks or scratches
in the critical area (see figure 12 on page 28). Cleaning
Page 26
Page 41

Figure 11
Vaporpurge
MICRO 200 BW 0 - 1000 NTU (5/05)
Rev. 3.1
Page 27
Page 42

is accomplished by washing the interior and exterior of
the cuvette in a detergent solution, then rinsing thoroughly 8 to 10 rinses in clean, distilled water, to remove
all streaks.
Flow shut-off clamp!
" Flow
Control Valve
Figure 13
Lamp Replacement
C. CALIBRATION PROCEDURES
1. Calibration Standards
Figure 12
Critical Measurement Area
The sample flow must be shut off, with the flow shutoff clamp on the inlet flexible tubing, when the cuvette
in the flow through unit is to be cleaned or changed (see
figure 13).
Replace the cuvette if scratches or marks in the critical
area affect readings.
Store reusable cuvettes (Catalog No. 50036, pkg of 3)
in a clean dust-free environment.
B. LAMP REPLACEMENT
Periodically the LAMP MODULE, Cat. #21541, in the
sensor will require replacement. It is recommended that
one spare lamp for each MICRO 200 BW be kept on
hand at all times. A burned out lamp is indicated by a
flashing SENSOR AL indicator on the analyzer display. TO CHANGE THE LAMP MODULE SIM-
PLY TURN THE OUTSIDE LOCKING RING
COUNTER CLOCKWISE, AND PULL THE
MODULE STRAIGHT OUT. Reverse the procedure
to install the replacement module. For accurate operation a complete calibration is recommended after a
lamp module replacement. See page 29 for calibration
instructions. Refer to figure 13.
a. Secondary Standard Set (optional) Catalog No.
19830
HF Secondary Standards are recommended and certified by HF scientific. They are traceable to freshly
prepared formazin primary standards. These standards
are very easy to use off the shelf anytime without
preparation making them an ideal turbidity standard. A
Certificate of Traceability is available on request to HF
scientific Customer Service Department. HF Secondary Standards may be used for calibration of HF turbidimeters. Order from HF scientific, inc.
NOTE: Do not freeze standards. Do not leave standards
in the measuring well for extended periods. Do
not shake standards.
Specific instructions for using certified Secondary
Standards are included with the kit.
Each Secondary Standard Kit contains:
-- Instructions
-- 0.02 Reference Standard
-- Certified Secondary Standards 100.0, 400.0,
1000 NTU Standards are contained in preselected
cuvettes with light shield caps.
-- A sturdy storage case
MICRO 200 BW 0 - 1000 NTU (5/05)
Rev. 3.1
Page 28
Page 43

b. Standard Formazin Solutions
Calibration of this instrument is based on Formazin, a
material which is made by polymerization.
Calibration samples may be obtained by diluting Formazin stock suspension using “Turbidity-Free” water.
Formazin stock suspension can be prepared by the user
(Reference Standard Methods For Examination of Water
and Wastewater) or a kit can be purchased from, HF
scientific, inc., Catalog No. 50040.
Each kit contains:
-- Instruction manual
-- 1 liter of 4000 NTU Stock Suspension
-- 1 Gallon (3.79 liters) turbidity-free water
-- 4 Sample cuvettes (28 mm)
-- 4 Light Shield Caps
-- Graduated Pipettes 1 ea. in 1 ml, 10 ml, &
25 ml
-- 1 Reference Standard
NOTE: When the prepared samples start to flocculate,
they are unreliable and fresh ones must be
made. This will occur more rapidly for the
lower value diluted suspensions.
2. Calibration Steps 0-1000 NTU Range (Also See
Section IV)
To meet stated accuracy it is advisable to allow both the
analyzer and sensor to come to its optimum operating
temperature, which can take approximately two hours.
After this point you can proceed with the following
procedure.
4. A sensor calibration is first performed which adjusts the sensor for lamp variations. Then the
frequency at the time of this selection is saved as the
calibration frequency for the 1000 NTU standard.
The frequency is displayed in the right hand column.
5. Insert the 400 NTU standard.
6. Rotate the standard while observing the frequency
until the lowest reading is noted.
7. Press the F3 key.
8. The frequency at the time of this selection is saved
as the calibration frequency for the 400 NTU
standard. This frequency is displayed in the right
hand column.
9. Insert the 100 NTU standard.
10. Rotate the standard while observing the frequency
until the lowest reading is noted.
11. Press the F2 key.
12. The frequency at the time of this selection is saved
as the calibration frequency for the 100 NTU
standard. This frequency is displayed in the right
hand column.
13. Insert the Reference Standard.
14. Rotate the Reference Standard to its index point.
15. Press the F1 key.
16. The frequency for the 0.02 NTU standard is saved.
This frequency is displayed in the right hand column.
Standardization should be performed after after 1000
NTU (Full Scale) Calibration, although it is possible to
standardize at any time without performing a complete
calibration.
Although it is possible to calibrate at any combination
of the calibration points, to achieve the stated accuracy
use the following procedure.
Read these instructions in entirety prior to calibration.
Select calibration menu then:
1. Insert 1000 NTU Standard
2. Rotate the standard while observing the frequency
until the lowest reading is noted.
NOTE: Be prepared for the two least significant digits
to move about, this is normal.
3. Calibrate the analyzer with the 1000 NTU Standard by pressing the F4 key.
MICRO 200 BW 0 - 1000 NTU (5/05)
Rev. 3.1
Page 29
Page 44

VI. SECURITY ACCESS CODE
The security access code for the MICRO 200 BW
provides a degree of protection against an unauthorized
change to the instrument’s settings or parameters. The
security code feature may be turned off if desired.
The first requirement for the security access code after
“power-up” is when you wish to exit the current display
screen (turbidity or backwash). Upon pushing the
MENU button to leave the display screen, a request will
be made for the security access code. If the wrong code
is entered, the screen will indicate this and the screen
will return to the previous display. About ten seconds
are allowed to enter the correct security access code.
After this time the screen will return to the previous
display. Security access codes may be entered using
the F1, F2, F3, F4 or F5 keys, only.
The master security access code of 1435 must be used
for initial use. This master security access code may
always be used. Another code may be recorded and
used for general maintenance. This code may be changed
at any time. To record another code, go to the COMM
PORT MENU. Select F4 button to change the access
code. The MICRO 200 BW will now ask for the security
access code. This may be the master security access code
or the previous code (if any). The next menu will allow
turning the access code off or for entering a new
security access code. To use the access code feature,
toggle the access code to on. Push F3 "Change code"
to enter a new code. Note that the security access code
must be any combination of three function buttons, F1
through F5. See page 20. Push the menu button to
accept this code.
MICRO 200 BW 0 - 1000 NTU (5/05)
Rev. 3.1
Page 30
Page 45

VII. TROUBLESHOOTING
A. GENERAL NOTES
Service and technical support are available from the manufacturer, HF scientific inc. from 8:00 AM to 4:00 PM Eastern
Standard Time.
The following Table will supply fundamental troubleshooting information. The Guide assumes that the controls and
functions of the instrument are used correctly. The intention of the guide is to eliminate common faults, not to
troubleshoot down to component level.
GUIDE TO FUNDAMENTAL TROUBLESHOOTING
SYMPTOM SOLUTION
Display not lit. 1. Make sure that the unit is plugged in and turned on. Make certain that your power
source is providing the correct voltage.
2. Check analyzer fuse. Refer to page 8 for correct fuse size and instructions for
changing.
3. Shut off power for about five seconds and then turn it back on. This will initiate
a power on reset.
4. If none of the above steps correct the problem, contact HF scientific, inc. service
dept. for additional support.
Instrument not functioning 1. If sensor cable was removed from the analyzer, check wiring connections.
correctly.
Cannot leave. menu. 1. Invalid parameters may have been inadvertently set. Examples of this are a bad
time or date or the lower limit set higher than the upper limit. Check the screen
and change any invalid numbers.
Display response slow. 1. Select a lower averaging time.
Sensor alarm on. 1. Replace the lamp module.
2. Check the connection at the sensor.
3. The turbidity may be too high.
4. Replace the sensor. If you have a spare sensor or another MICRO 200 BW you
may use the alternate sensor to determine if the sensor in question is defective.
Readings lower than 1. Recalibrate with known good standards.
expected.
Readings higher than 1. Check the flow through cuvette. If it has dirt on either the inside or outside
expected. or is scratched, clean the cuvette or replace it.
2. Check for condensation on the outside of the cuvette. If condensation is present
either the desiccant tray needs replacement or the vaporpurge system of the
sensor is defective. Replace the desiccant or the sensor.
3. Recalibrate the sensor with known good standards.
Readings erratic. To check if the erratic readings are due to sample measurement or a problem with the
instrument, remove the flow through unit and place a light shield over the sample
well. This may be left for a period of time and the graphic history observed later. If
the graph shows instability the MICRO 200 BW has a problem. Call HF scientific
service dept. If the graph is stable there is a problem with the sample being measured.
See the following for suggested corrections.
1. Check for debris in flow through cuvette. Clean out as required.
2. Increase back pressure with flow control valve. This will keep air in solution.
Analyzer Displays 1. Reset by turning analyzer power off and then on again. "0-1000 range 1000 NTU
"Sensor Fail"
MICRO 200 BW 0 - 1000 NTU (5/05)
Rev. 3.1
calibrate" should only be performed with a 1000 NTUstandard in sensor well.
Page 31
Page 46

B. SPARE PARTS LIST FOR MICRO 200 BW
CATALOG NO. DESCRIPTION
20892 BNC Connector
50036 Cuvette (3 pk) 28 mm x 70 mm (pressure checked)
21555 Desiccant Tray Assembly
50004 Flow control valve
50125 Flow through assembly
21512 Foot Valve Assembly
50040 Formazin Stock Solution Kit (4000 NTU)
21541 Lamp Module
50092 Light Shield Cap
20853 NTU Sensor Cable (per foot)
19808 NTU Sensor Module, 0 - 1000 NTU, Electronics portion only
21148 Nylon Bulkhead Assembly
50136 O-ring kit for flow through unit.
21640 Operating & Maintenance Manual
21870 PC Board Micro 200 BW Analyzer (Universal)
60002 Standard 0.02 NTU
20106 Stilling Chamber
OPTIONS - BACKWASH
19275 Backwash Interface
20849 Backwash Interface to Analyzer Cable
50321 Backwash Sensor
20853 Backwash Sensor to Interface Cable
HF scientific, inc.
3170 Metro Parkway
Fort Myers, Florida 33916-7597
Phone: (239) 337-2116
Fax: 239-332-7643
MICRO 200 BW 0 - 1000 NTU (5/05)
Rev. 3.1
Page 32
Page 47

VIII. OPTIONS
BACKWASH
A. INSTALLATION
1. Backwash Interface
To monitor backwash using the MICRO 200 BW, one
backwash interface and one backwash sensor is required for each analyzer. Refer to figure 16 for the
outline of the backwash interface. Power requirements
are 12 VA at 110 - 120 VAC or 220 - 240 VAC. The
voltage may be changed using the selector switch
located inside the interface housing. See figure 17 for
details. The interface may be mounted up to 320 feet
(91.4 m) away from the backwash sensor. The signal
is sent to the MICRO 200 BW analyzer via BNC
connectors through up to 1000 feet (304.8 meters) of
coaxial cable (Catalog No. 20849). Refer to figure 14
for the analyzer BNC cable connection.
chosen that best averages the backwash water over the
cycle. The sensor should also be located as close to the
backwash filter as possible to reduce the time delay of
the water sample. This will give the operator a correct
picture as to how the backwash is proceeding and when
it is complete. Refer to figure 20 for sensor outline
dimensions.
a. Channel Mounting
This method can be used when the area above the end
of the channel is easily accessible. This allows cleaning
of the sensor or calibrating by lifting the sensor up by
its cable and lowering it back into place when you are
finished. Since the sensor is not affected by sunlight, a
lightshield is not required. An installation kit is available from HF scientific, HF Catalog No. 50345 which
includes the sensor chamber, a stainless steel bracket,
and mounting clamps. The user must supply PVC
piping, bolts and anchors. Refer to Figure 21.
b. Extension Handle Mounting
This method allows the user to adjust the sensor positioning to optimize the sampled water. An installation
kit is available from HF scientific, HF Catalog No.
50356 which includes sensor end baffles, hose clamps,
and a pipe adapter. The user must supply the extension
pipe such as galvanized steel ½” to 1½” in diameter
(12.7 mm - 38.1 mm) and any additional mounting
deemed necessary for upper end.
Figure 14
Analyzer BNC Connection
2. Junction Box
This option, HF Catalog No. 19805, may be used to
extend the backwash sensor cable to a total length of
350 feet (106.7 meters), as measured from the sensor to
the backwash interface. The junction box is weather
tight and may be mounted outside. Refer to figure 18 for
outline dimensions. For wire connections refer to figure 19. Extension cable may be ordered using HF
Catalog No. 20848.
3. Backwash Sensor
There are two standard methods of installing this sensor, channel mounting and extension handle mount-
ing. Both of these will be described below. If alternate
methods of mounting are required, please consult HF
scientific inc.
When choosing an installation site for the sensor there
are several things to consider. Since filters rarely will
backwash consistently or uniformly, a site should be
1. The slot for the outlet baffle must be positioned in
a vertical axis at the top.
2. Remove all rough edges from the pipe to prevent
cable damage.
3. Attach the sensor to the pipe adapter with hose
clamps.
4. Sensor cable can be wrapped around the pipe. If
the pipe diameter permits, the cable can be threaded
through the pipe.
5. Don’t pull the cable too sharply through the pipe,
use a large radius bend instead.
In operation, some experimentation will be needed
during backwash to achieve optimal results. Note that
the adapter has a pivot to allow the sensor to lay parallel
to the bottom. Refer to figure 22.
B. BACKWASH SENSOR CONNECTIONS
The Backwash sensor is supplied with a 30 foot (9.1
meters) cable. This cable connects at TB2 of the Backwash Interface. The cable should first be inserted
through the strain relief fitting of the case. At this point
the outer jacket of the cable should be stripped back
MICRO 200 BW 0 - 1000 NTU (5/05)
Rev. 3.1
Page 33
Page 48

about three inches. Care must be used to not nick the
wires under the jacket. Note that the sensor cable is
composed of two pairs of wires. Each pair consists of
two insulated wires and an uninsulated shield wire,
wrapped individually in a foil shield. The wire pairs are
RED & BLACK and WHITE & BLACK. The foil can
be unwrapped and removed, while keeping the pairs
together. The two shield wires should be wrapped
together. The remaining wires need to have the insulation stripped back about ¼”. The sensor cable can now
be wired to the appropriate terminal block, using care
not to transpose the black wires in opposite pairs. Make
the following connections:
Terminal 1 White wire - white/black pair
Terminal 2 Black wire
Terminal 3 Uninsulated shields
Terminal 4 Red wire
Terminal 5 Black wire - red/black pair
C. BACKWASH SENSOR MAINTENANCE
3. Press the 100% selection. (This is the only operation necessary for backwash calibration.)
D. BACKWASH ALARMS
To use the backwash alarms you must first enter the
backwash display, and then exit to the main menu.
Select F1 for alarms. The alarms may be set as shown
on page 14. Note that the alarms are set in percent
transmittance and that these alarm settings are unique
to the backwash function. These settings do not affect
previous turbidity alarm settings.
CAUTION: If either of these alarm contacts are wired
to a turbidity control function, set that alarm to
“off” to prevent accidental operation during a backwash. Likewise, if alarm contacts are wired to a
backwash control function, set that alarm to “off” to
prevent accidental operation during turbidity measurement.
Over a period of time contaminants may build up on the
flow through glass surface of the sensor. This may
affect the operation of the sensor. The sensor should be
cleaned periodically. A soft bottle brush can be used
with a mild solution of water and detergent followed by
a thorough rinsing with water. For optimal results,
clean the sensor each time before calibrating.
An indicating type desiccant can be seen through the
glass of the sensor. If no leaks are present, these beads
will be blue. If the beads are not blue, the sensor must
be returned to HF scientific for service.
1. Backwash Calibration
This procedure takes place through the Calibration
selection from the Utilities Menu. Numbers will be
displayed on the LCD (screen). These numbers represent frequencies adjusted so that 10KHz is represented
as 100%T. The numbers in the top center of the screen
show real time frequency and percent transmittance as
it is output from the sensor. The number to the right of
the 100%T is the frequency that was saved from the
previous backwash calibration. See page 24.
E. BACKWASH REMOTE SWITCHING
NOTE: This feature adds two attributes to the MICRO
200 analyzer:
1) The addition of an analog output either 4-
20mA or 0-10V while operating in the backwash mode.
2) The ability to switch, at a remote location,
between turbidity and backwash.
1. ELECTRICAL CONNECTIONS
a. Remote Switch
Connections are made at the analyzer terminal block J7
labeled MISC. INPUTS (SIGNAL). A dry (not powered) “A” contact connection between terminals 1 & 2
is required. With an open circuit between these contacts, the MICRO 200 will operate normally. Closing
this circuit, while in the turbidity display, will cause the
instrument to change to the backwash mode.
b. Alarms
Follow this procedure:
1. Inspect the glass tube in the backwash sensor.
Clean the sensor in mild detergent and a soft bottle
brush, if required.
2. Insert the backwash sensor in a container of 100%
T water, preferably the same water which will be
used for backwash.
MICRO 200 BW 0 - 1000 NTU (5/05)
Rev. 3.1
Two sets of user settable alarm contacts are provided
plus an additional sensor alarm. Separate Alarm set
points may be made in either turbidity and backwash
modes. Keep in mind that when you change modes
these contacts are still connected and active unless set
to OFF in either of the modes.
Page 34
Page 49

c. Analog Outputs
Analog outputs of either 4-20 mA or voltage are
available. If you select voltage you may choose 0-10V,
0-1V or 0-100mV. This analog output will be shared by
both modes and will automatically recalibrate to the
selected mode.
d. Serial Port (Optional)
These options may be used to connect to a serial printer,
a data logger or as a direct interface to a computer. The
serial port will report each reading that is seen on the
analyzer digital display. The report is in ASCII format
and is concluded with a carriage return and line feed.
As an example, if the display of the MICRO 200 BW
reads 0.1234 NTU, the serial port decimal string would
be:
If a serial port is connected the readings will report in
NTU while in the turbidity mode and will report in %T
while in the backwash mode.
2. OPERATION
With the remote switch set to the normal position
(open), the instrument should be calibrated in both
turbidity and backwash. All parameters such as alarm
set points and display limits should be set as described
in the O&M Manual. From the main menu, press F4 to
enter turbidity, and select the range. At any time, from
this point on, you may set the remote switch to the
backwash position (closed) and change over to the
backwash display.
While in either mode any operating parameter may be
changed by pressing MENU and entering the access
code. Keep in mind that even while in the menus, all
outputs are still active in which ever mode you were last
in.
CAUTION: Keep in mind that when changing modes,
the alarms, the analog output and the serial port
(if connected) will also change modes.
SERIAL INTERFACES
Each of these options maybe installed by removing the
rear cover of the analyzer as shown in figure 4 on page
8 and plugging in the interface as shown in figure 21.
Decimal
48 46 49 50 51 52 78 84 85 13 12
0 . 1 2 3 4 N T U (CR) (LF)
ASCII
(SP) = Space; (CR) = Carriage Return; (LF) = Line
Feed
If the display reads 098.7 % T, the serial port decimal
string would be:
Decimal
48 57 56 46 55 0 37 84 13 12
0 9 8 . 7 (SP) % T (CR) (LF)
ASCII
By selecting “Printer on” via the Main Menu, Utility
Menu and the COMM Port menu, the MICRO 200 BW
will transmit each reading, in real time. This mode is
used to drive a printer for raw data collection.
By selecting “Printer Off” the MICRO 200 BW will
only transmit its reading by command. Up to 16
MICRO 200 BW units may be simultaneously connected to one serial port of a host computer. An address
may be assigned to a particular unit by operating F2 in
the Comm Port Menu. It will serially cycle through
addresses Ø through F (Hexadecimal). Obviously, no
two units, which are on the same host computer port,
should have the same address.
If the host computer transmits the ASCII character “@”
(decimal 64) followed by the ASCII character address,
for instance, 64, F, only the unit assigned address “F”
will respond with its reading. This allows data logging
for a non-dedicated host computer for up to 16 MICRO
200 BW units on only one of its serial ports. Both the
MICRO 200 BW and the host computer must be set at
the same baud rate. The host computer requires
software to handle the data storage.
Figure 15
Serial Interface Installation
MICRO 200 BW 0 - 1000 NTU (5/05)
Rev. 3.1
1. RS-232C Standard Voltage Mode Interface
(Catalog # 19861)
This configuration is the standard serial port format
(RS-232C). It is suitable where the cable length
Page 35
Page 50

between the most remote MICRO 200 BW analyzer and
the host computer does not exceed 50 feet (16.4 m.).
Due to it’s “tri-state transmitter” design, the companion
MICRO 200 BW units, which are on the same serial
port at the host computer, may be “hubbed” or connected each one to the next as long as the total cable
length from each MICRO 200 BW to the host computer
does no exceed 50 feet (16.4 m.). See figure 23 on page
41.
TXD = Pin #1; Transmitted data out; Data to computer
or printer
GRD = Pin #5; ground; digital common
RXD = Pin #8; received data in; data from computer to
MICRO 200 BW
SHIELD = PIN #4
Please consult HF scientific, inc. for more detailed
instructions.
2. RS-232 Current Mode Interface
(Catalog # 19862)
This configuration is used where the cable length
between the most remote MICRO 200 BW analyzer
and the host computer exceeds 50 feet (16.4 m.).
Because it is sensitive to the resistance of the interconnecting cable, and because each interface used causes
the total loop resistance to increase, it’s use is limited to
only a few stations. It is difficult to determine how
many stations may be used until all of the geographic
site locations are determined. Please consult HF scientific, inc. if this option is under consideration. A more
prudent choice might be the RS-485 option, the description of which follows this. See figure 24 on page
41.
4 . Serial Printer (Catalog # 19860)
This options provides a printout every 4 hours, or every
24 hours at midnight, of: date, time of period, minimum NTU, average NTU, and maximum NTU readings during the selected period. The printer option is
supplied in a NEMA 4x enclosure intended for wall
mounting. This option is shipped with an instruction
manual addendum giving more detailed information on
installation and operation. Please consult HF scientific,
inc.. for more specific information.
3. RS-485 Half Duplex Interface
(Catalog # 19851)
This option may be used where the distance from the
host computer to the most remote MICRO 200 BW
analyzer is, in extreme cases, up to 10,000 feet (3.28
km), depending on the site noise conditions. It is
similar to the RS-232 Standard Voltage Mode Interface
except that it transmits in a “Balanced” mode, in one
direction, at one time (half-duplex). This balanced
mode makes it less susceptible to noise. It also maybe
“hubbed” or connected each one to the next. It is
important the most remote interface, and only it, should
have it’s switch “closed” to properly terminate the
network. Please consult HF scientific, inc. for more
specific information. See figure 25 on page 41.
MICRO 200 BW 0 - 1000 NTU (5/05)
Rev. 3.1
Page 36
Page 51

8-13/16
(224)
7-3/32
(180)
Figure 16
Backwash Interface Outline Dimensions
4-21/64
(110)
3-35/64
(90)
MICRO 200 BW 0 - 1000 NTU (5/05)
Rev. 3.1
Figure 17
Backwash Interface Voltage Selection
Page 37
Page 52

8-13/64
(224)
7-3/32
(180)
Figure 18
Junction Box Outline
4-21/64
3-35/64
(110)
(90)
MICRO 200 BW 0 - 1000 NTU (5/05)
Rev. 3.1
Figure 19
Junction Box Wiring Diagram
Page 38
Page 53

5-7/16
(138)
5-1/8
(130)
XXXX=INCHES
(xx)=mm
7-21/32
(194)
5-21/32
(144)
3.0 DIA.
(76)
SENSOR
CHAMBER
SST HOSE
CLAMPS
Figure 20
Backwash Sensor Outline Dimensions
TAKES 1-1/2 IN.
PVC PIPE
MOUNTING
BRACKET
SENSOR CABLE TO ANALYZER
SENSOR CABLE TO ANALYZER
MICRO 200 BW 0 - 1000 NTU (5/05)
Rev. 3.1
Figure 21
Backwash Channel Mounting
Page 39
Page 54

OUTLET BAFFLE
SENSOR CABLE
TO ANALYZER
PIPE(NOT SUPPLIED
IN KIT)
EXTENSION HANDLE
MOUNTING KIT
SENSOR
INLET BAFFLE
TO CONTROL
UNIT
OUTLET BAFFLE
FILTER BED
Figure 22
Backwash Extension Handle Mounting
INLET BAFFLE
BACKWASH TROUGH
MICRO 200 BW 0 - 1000 NTU (5/05)
Rev. 3.1
Page 40
Page 55

RS232
VOLTAGE
1ST OR HUB
OR STAR
INTERVENING
UNITS
ADDRESS #NADDRESS #1
RS232
VOLTAGE
LAST
HOST
CPU
RXD
GRD
TXD
HOST
CPU
"IN"
GRD
"OUT"
1845
TXD
S
H
I
E
GRD RXDRXDGRD
L
D
TXD
5481
S
H
I
E
L
D
"BUS" OR "BACKBONE"
Figure 23
RS-232 Voltage Connection
ADDRESS #1 ADDRESS #N
RS232
CURRENT CURRENT
"OUT" "IN"
+ - - + +--+
23
+
-
-
+
GRD
7
5481
6
S
H
I
E
L
D
RS232
INTERVENING
UNITS
318452
"DAISYCHAIN"
7
6
1845
++
-
+
RS232
CURRENT
"OUT" "IN"
32
S
H
I
E
L
D
GRD
7
6
HOST
CPU
A
B
GRD
(SHIELD)
MICRO 200 BW 0 - 1000 NTU (5/05)
Rev. 3.1
Figure 24
RS-232 Current Connection
ADDRESS #1
RS485
1ST OF HUB
OR STAR
D
R
A
G
B
B
A
RS485
INTERVENING
UNITS
Figure 25
RS-485 Connection
Page 41
ADDRESS #N
RS485
LAST
D
RD
B
A
G
R
B
A
G
A
B
Page 56

WARRANTY
HF scientific, inc., as vendor, warrants to the original purchaser of the instruments to be free of defects in material
and workmanship, in normal use and service, for a period of one year from date of delivery to the original purchaser.
HF scientific, inc.’s, obligation under this warranty is limited to replacing, at its factory, the instrument or any part
thereof. Parts which by their nature are normally required to be replaced periodically, consistent with normal
maintenance, specifically lamps including fluorescent backlight, reagent, desiccant, sensors, electrodes and fuses are
excluded. Also excluded are accessories and supply type items.
Original purchaser is responsible for return of the instruments, or parts thereof, to HF scientific, inc.’s factory.
This includes all freight charges incurred in shipping to and from HF scientific, inc.’s factory.
HF scientific, inc. is not responsible for damage to the instrument, or parts thereof, resulting from misuse,
negligence or accident, or defects resulting from repairs, alterations or installation made by any person or company
not authorized by HF scientific, inc.
HF scientific, inc. assumes no liability for consequential damage of any kind, and the original purchaser, by
placement of any order for the instrument, or parts thereof, shall be deemed liable for any and all damages incurred
by the use or misuse of the instruments, or parts thereof, by the purchaser, its employees, or others, following receipt
thereof.
Carefully inspect this product for shipping damage, if damaged, immediately notify the shipping company and
arrange an on-site inspection. HF scientific, inc. cannot be responsible for damage in shipment and cannot assist with
claims without an on-site inspection of the damage.
This warranty is given expressly and in lieu of all other warranties, expressed or implied. Purchaser agrees that
there is no warranty on merchantability and that there are no other warranties, expressed or implied. No agent is
authorized to assume for HF scientific, inc. any liability except as above set forth.
HF scientific, inc.
3170 Metro Parkway
Fort Myers, Florida 33916-7597
Phone: (239) 337-2116
Fax: (239) 332-7643
MICRO 200 BW 0 - 1000 NTU (5/05)
Rev. 3.1
Page 42
Page 57

GLOSSARY
Alarms: Relay outputs that change when an
alarm setpoint has been exceeded.
Backwash: A method of measuring the transmis-
sion of filter backwash water.
Baud: Rate of transfer of serial information.
Calibrate: Electronic adjustment of the instru-
ment to known standards.
Cursor: The LCD pointer indicating which
digit or figure will change.
Cuvette: Glass container used to hold the
sample to be measured. It is placed in
the optical well of the turbidimeter.
Comm Port: Serial RS-232 or RS-485 communi-
cations port used for connecting a
serial printer to generate hard copies
of measurements or to datalogging
equipment.
D to A: Digital to analog conversion. Used to
provide 4-20 mA and 0 - 10 V output
signals.
JTU: Jackson Turbidity Units
LCD Liquid Crystal Display (screen) used
Display: to view the information available on
the MICRO 200 BW.
Main Menu: The major options for each of the
functions accessed by the “FUNCTION” keys.
NTU: Nephelometric Turbidity Units
Self Test: A function that the MICRO 200 BW
performs to check the internal analyzer voltages.
Set Alarm Setting the value at which an alarm
Point: will occur.
Set Selection of the time period used to
Average: average the display. Used to mitigate
rapidly changing readings.
Set Time: Function used to Set the internal clock
of the MICRO 200 BW
Digit Up: Command indicating an increment or
increase of the digit selection.
Digit Down: Command indicating a decrement or
decrease of the digit selection.
Display The set up of information to be
Parameters displayed on the LCD display.
Display: LCD display screen on the Analyzer.
Frequency: The number of cycles per second
(hertz), of an alternating current signal.
FTU: Formazin Turbidity Units (see NTU)
Host A computer that is used to acquire and
Computer: collect information from the serial port
of one or more MICRO 200 BW
analyzers (up to 16, Ø through F,
Hexametadecimal).
Set Baud Set the RS-232 information transfer
Rate: rate.
Standardize: Calibration of the lowest value of
water.
Sub Menu: Menu selections offered after select-
ing an option from the main menu.
Select: A function that alternates among fea-
tures or selections.
Turbidity: The measurement of light reflected
by particles suspended in a fluid.
MICRO 200 BW 0 - 1000 NTU (5/05)
Rev. 3.1
Page 43
Page 58

MICRO 200 BW 0 - 1000 NTU (5/05)
Rev. 3.1
Page 44
Page 59

Date: August 3, 2004 Revision: 10
V
V
HF scientific, inc. 24 Hour Emergency
3170 Metro Parkway Telephone Number
Fort Myers, FL 33916-7597 CHEMTREC
(239) 337-2116 1-800-424-9300
Mon-Fri 8:00 am - 4:30 pm
MATERIAL SAFETY DATA SHEET
SECTION 1 PR ODUCT IDEN TIFICATION
PRODUCT NAME:
TIME STANDARD, REFERENCE STANDARD, 0.02 NTU 250 ML
PRIMARY STANDARD, and 0.02 NTU 1GALLON PRIMARY
STANDARD, WATER - INC L UD ING H2 O PR IME TIME STANDARD.
CATALOG NUM BER:
HF scientific, inc.
14246/19199/19323/50047/60002/70908
U. S. Filter/Wallace & Tiernan:
AAC1556/AAC6608
CHEMICAL FAMILY: Not applicable
SYNONYMS:
FORMULA: Turbidity free water (CAS # 7732-18-5), Preservative
SECTION 2 HAZARDOUS INGREDIENTS
No hazardous ingredients greater than or equal to 1%
No carcinogen greater than or equal to 0.1%
SECTION 3 PH Y S ICAL DATA
Boiling Point(F): Approximately 212 deg F (100 deg C)
Solubility in Water:
apor Pressure (mm Hg):
Appearance and Odor:
pH : 1.1 - 2.0 at 25 deg C
apor Density
Specific Gravity (H
Melting Point: Approximately 32 deg C (0 deg C)
Evaporation Rate: Not determined
Percent Volatile by Volume: Not determined
SECTION 4 FIRE AND EXPLOSION HAZARD DATA
Flash Point: Not Flammable
Flammable Limits:
Fire Extingui s hing Media: Suitable to cause of fire
Fire Fighting Procedures: Suitable to cause of fire
Unusual Fire And Explosive Hazards:
100 %T STANDARD SOLUTION, 0.02 NTU PRIME
None
Miscible
Not determined
Clear and colorless; no odor.
(AIR=1): Not determined
O=1): Approximately 1
2
Not determined
None
Conditions to Avoid: Organic matter, chlorates, active metals
Incompatibilities (Materials to Avoid): Organic matter, chlorates, active
metals
Hazardous Decom p os i ti on Products: Toxic SOx fumes
Hazardous Polymerizat ion: Will not occur
SECTION 7 SAFE HANDLING AND USE
Steps to be Taken in Case Material is Released or Spilled: Neutralize
with soda ash. Absorb with paper.
Waste Disposal Method: DISPOSE OF IN ACCORDANCE WITH AL L
APPLICABLE FEDERAL, STATE AND LOCAL ENVIRONMENTAL
REGULATIONS.
Precautions to be Taken in Handling and Storage: Avoid contact with
skin, eyes and clothing. Store tightly closed in a cool, dry place.
Other Precautions:
standard.
SECTION 8 CONTROL M EASURES
Respiratory Protection: None required in normal use.
Ventilation: General mechanical ventilation s at is factory in normal use.
Skin Protection: Rubber gloves
Eye Protection:
Other Protective Measures:
Work/Hygenic Practices:
NO GUARANTEE IS MADE AS TO THE ACCURACY OF ANY DATA
OR STATEMENT CONTAINED HEREIN. WHILE THIS MATERIAL IS
FURNISHED IN GOOD FAITH, NO WA RRANTY EXPRESS OR
IMPLIED, OR MERCHANTABILITY, FITNESS OR OTHERWISE IS
MADE. THIS MATERIAL IS OFFERED ONLY FOR YOUR
CONSIDERAT ION, INVEST I G ATION AND VERIFICATION AND HF
SCIENTIFIC INC., INCLUDING ITS DIVISIONS, AFFILIATES AND
SUBSIDIARIES, SHALL NOT IN ANY EVENT BE LIABLE FOR
SPECIAL, INCIDENTAL, OR CONSEQUENTIAL DAMAGES IN
CONNECTION WITH ITS PUBLICATION. LIKEWISE, NO STATEMENT
MADE HEREIN SHALL BE CONSTRUED AS A PERMIS SI ON OR
RECOMMENDATION FOR THE USE OF ANY PRODUCTION IN A
MANNER THA T MIGHT INFRINGE EXISTING PATEN T.
Do not open vial to preserve low turbidity of
Safety goggles
None
Wash well if contact occurs
SECTION 5 HE ALT H E F F E CT S AND FIRST AID
Route(s) of Entry: Inhalation? No Skin? Yes Ingestion? Yes
Effects of Overexposure:
skin could occur.
Carcinogenicity: NTP? IARC MONOGRAPHS? OSHA REGULATED?
Not a carcinogen.
Signs and Symptoms of Exposure:
area.
Medical Conditions Generally Aggravated by Exposure: None found
Emergency First Aid Procedures:
Wash with plenty of water f or 15 minu tes. Call physician if irritation
Skin:
occurs.
Eyes: Flush eyes with plenty of water for 15 minutes. Call physician.
Ingestion: Give large quantities of water. Do not induce vomiting. Never
give anything by mouth to an unconscious person. Call physician.
Inhalation: Remove to fresh air. If breathing has stopped, give artificial
respiration. Call physician immediately.
Irritation of the eyes, mucous membranes and
Burning or irritation of the exposed
SECTION 6 REACTIVITY DATA
Stability: Stable
MICRO 200 BW 0 - 1000 NTU (5/05) Rev. 3.1
 Loading...