

Page 1
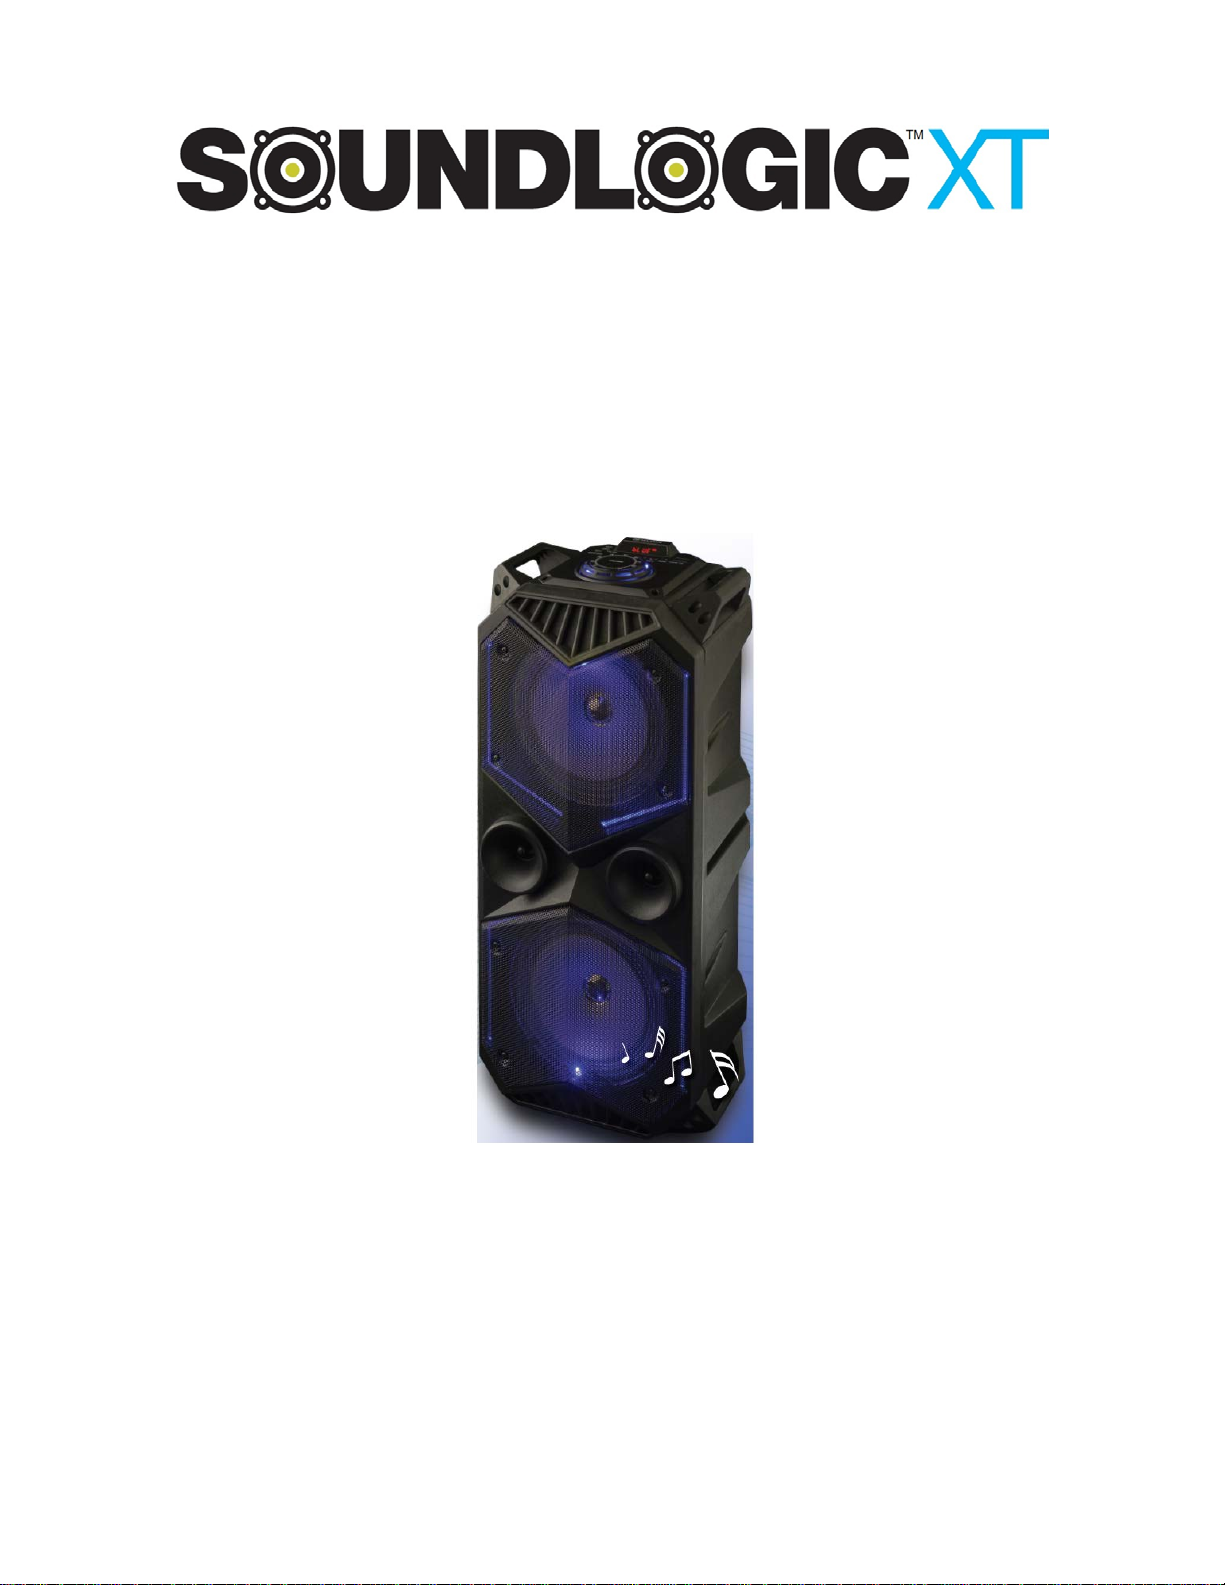
Powerhouse
Wireless Speaker
YTK-356
INSTRUCTION MANUAL
PLEASE READ ALL INSTRUCTIONS CAREFULLY AND
RETAIN FOR FUTURE USE
1
Page 2

Getting Started
Remove the speaker from the box.
Remove any packaging from the speaker.
Please retain all packaging until you have checked and counted all the parts and the contents
against the Package Contents list.
Package Contents
Powerhouse Bluetooth Wireless Speaker
USB charging cable
Aux-in cable
Instruction Manual
Product Features
Powerhouse Bluetooth Wireless Speaker
Built-in Bluetooth
Built-in 2 x 6.5” loud speakers that deliver up to 100W PMPO
Multi-function speaker – supports USB flash drive, Micro SD card, Bluetooth, FM radio, Aux jack
& Microphone input
LED display
Colour changing LED speaker
Built-in rechargeable battery
USB recharge cable included
SAFETY INSTRUCTIONS
Keep the unit away from heat sources, direct sunlight, humidity, water and any other liquids.
Do not use the unit if it has been dropped or damaged in any way.
Repairs to electrical equipment should only be performed by a qualified electrician. Improper
repairs may place the user at serious risk.
Do not use the unit with wet hands.
Do not put objects into any of the openings.
Keep the unit free from dust, lint etc.
Do not use this unit for anything other than its intended use.
Keep the unit out of reach of children.
This unit is not a toy.
2
Page 3
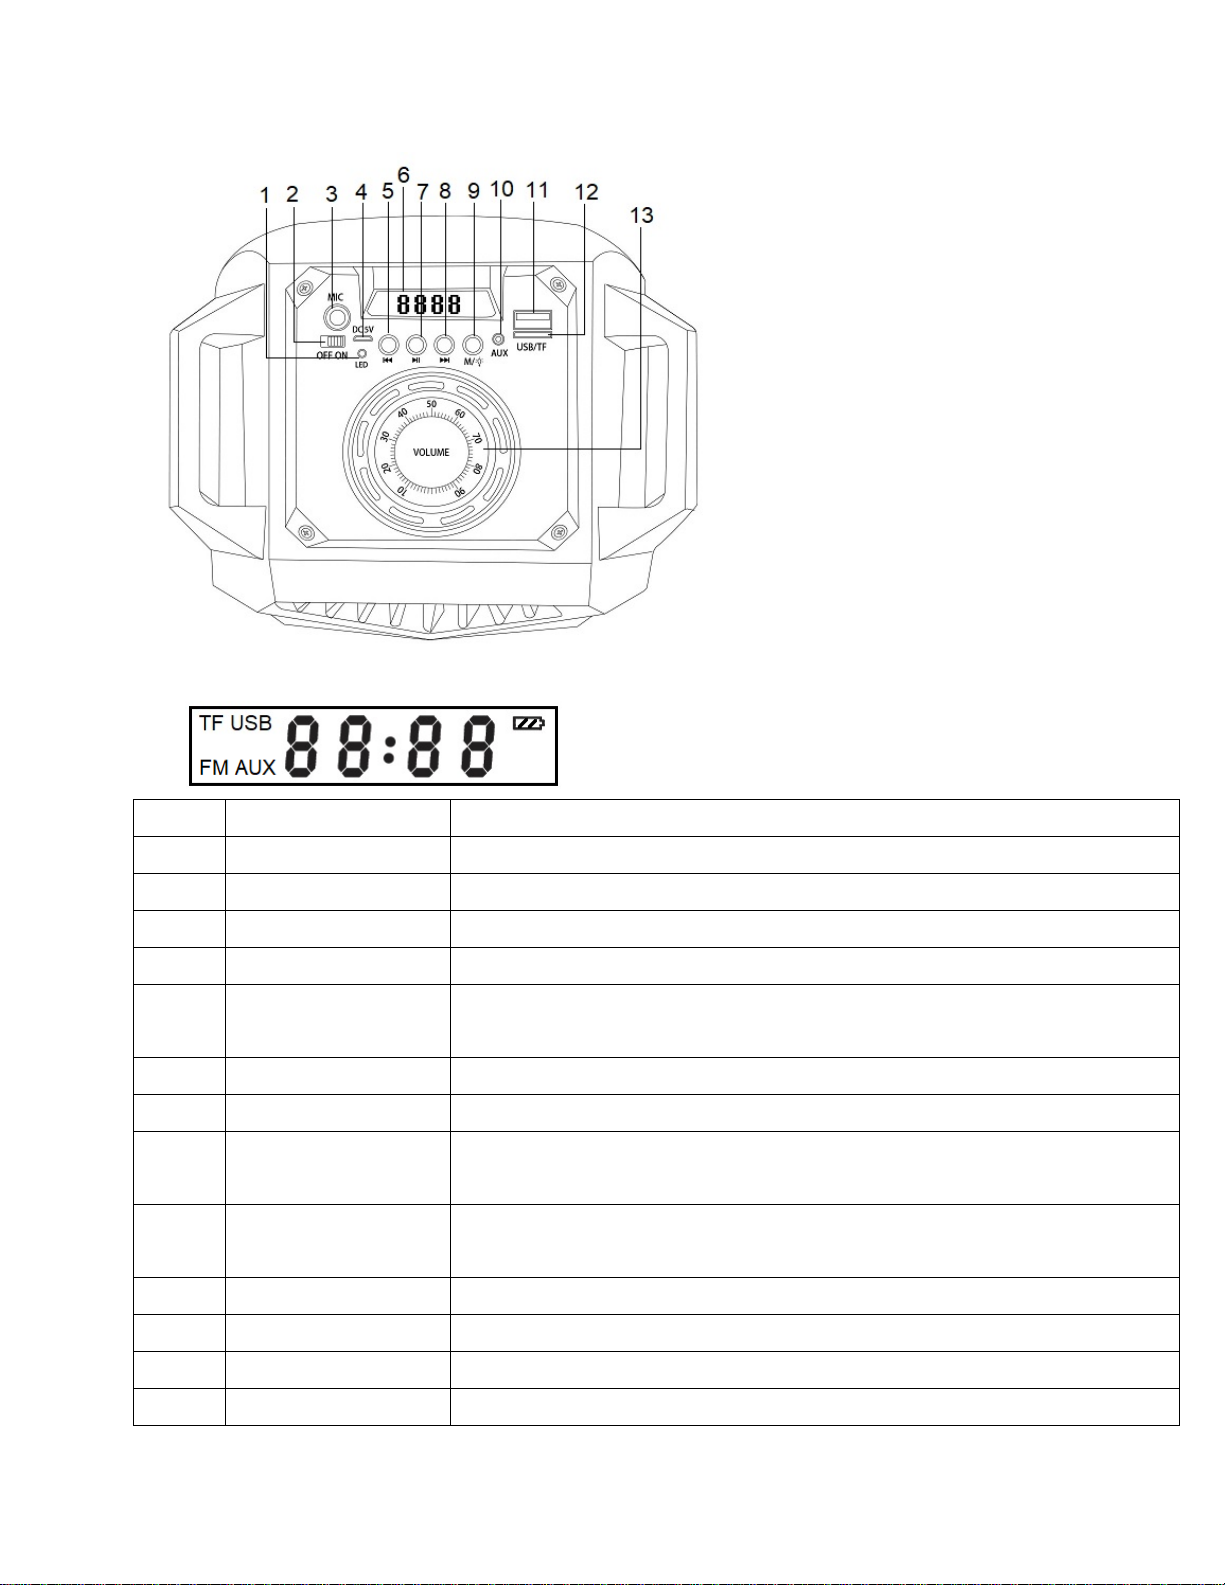
Description of Parts
LED Display
Number Item Function
1 CHARGING INDICATOR Turns RED while charging. Turns off when fully charged
2 POWER SWITCH Turn the speaker On or Off
3 MIC INPUT Microphone input
4 DC 5V IN Charging port
5
PREVIOUS
TRACK/STATION
6 LED DISPLAY Display the operation
7 PLAY/PAUSE/SCAN PLAY/PAUSE, Scan FM radio stations (only in FM radio mode)
8 NEXT TRACK/STATION
9 MODE/LIGHT BUTTON
10 AUX IN External audio input
11 USB slot USB input (Flash Drive)
USB/SD card mode: Skip to previous track
FM radio mode: Skip to the previous radio station
Skip to the next track in USD/SD card mode/Skip to the next radio station in FM radio
mode
Short press to changes the mode between Bluetooth / USB / SD / AUX / FM radio, long
press to turn on/off the colour changing LED light
12 Micro SD (TF) slot Micro SD (TF) card input
13 VOLUME KNOB Increases/Decreases the speaker volume
3
Page 4

INSTRUCTIONS FOR USE
Charging the Powerhouse Bluetooth Wireless Speaker
For best results, fully charge the unit before use.
1.
Connect the USB cord (included) to the charging port of the speaker and insert the other end into a
port on your computer or similar power source.
2. Charging Indicator turns RED while charging, and turns off when fully charged.
Note: Before using the unit for the first time, please charge it for around 6-8 hours or until the Charging
Indicator turns off.
Turn On/Off the Speaker
Slide the POWER SWITCH to ON position to turn on the unit with colour changing LED lights, or OFF
position to turn off the unit.
Pairing your device with the Speaker –
Your Powerhouse Bluetooth Wireless Speaker can stream wireless audio from any Bluetooth enabled
device within the range of 27-33 Feet. Simply follow the below steps.
1. Rotate the volume knob to your favorite sound level.
2. Turn ON the spe ake r.
3. LED display will show ‘bLUE’, and indication tone would be heard. The speaker is now in pairing
mode.
4. Turn on the Bluetooth on your Mobile Phone or Tablet or Computer.
5. It will search for available Bluetooth devices.
6. Powerhouse Bluetooth Wireless Speaker would appear as “SL POWERHOUSE”, in the list of
searched devices. Select it from the available list of devices.
7. If required, enter the password ‘0000’ to confirm pairing.
8. Once paired successfully, another indication tone would be heard.
9. If you fail to pair it within a few seconds or you want to pair it with a new device, please repeat
above steps.
Play your favorite song on the Bluetooth source device and music would now stream through the
sp ea k e r.
Listening to Wireless Music
Please ensure that your device (iPhone, Tablet or Other Smart Phone) is paired with the speaker to
stream wireless music. Once it is paired, play music from your device.
4
Page 5
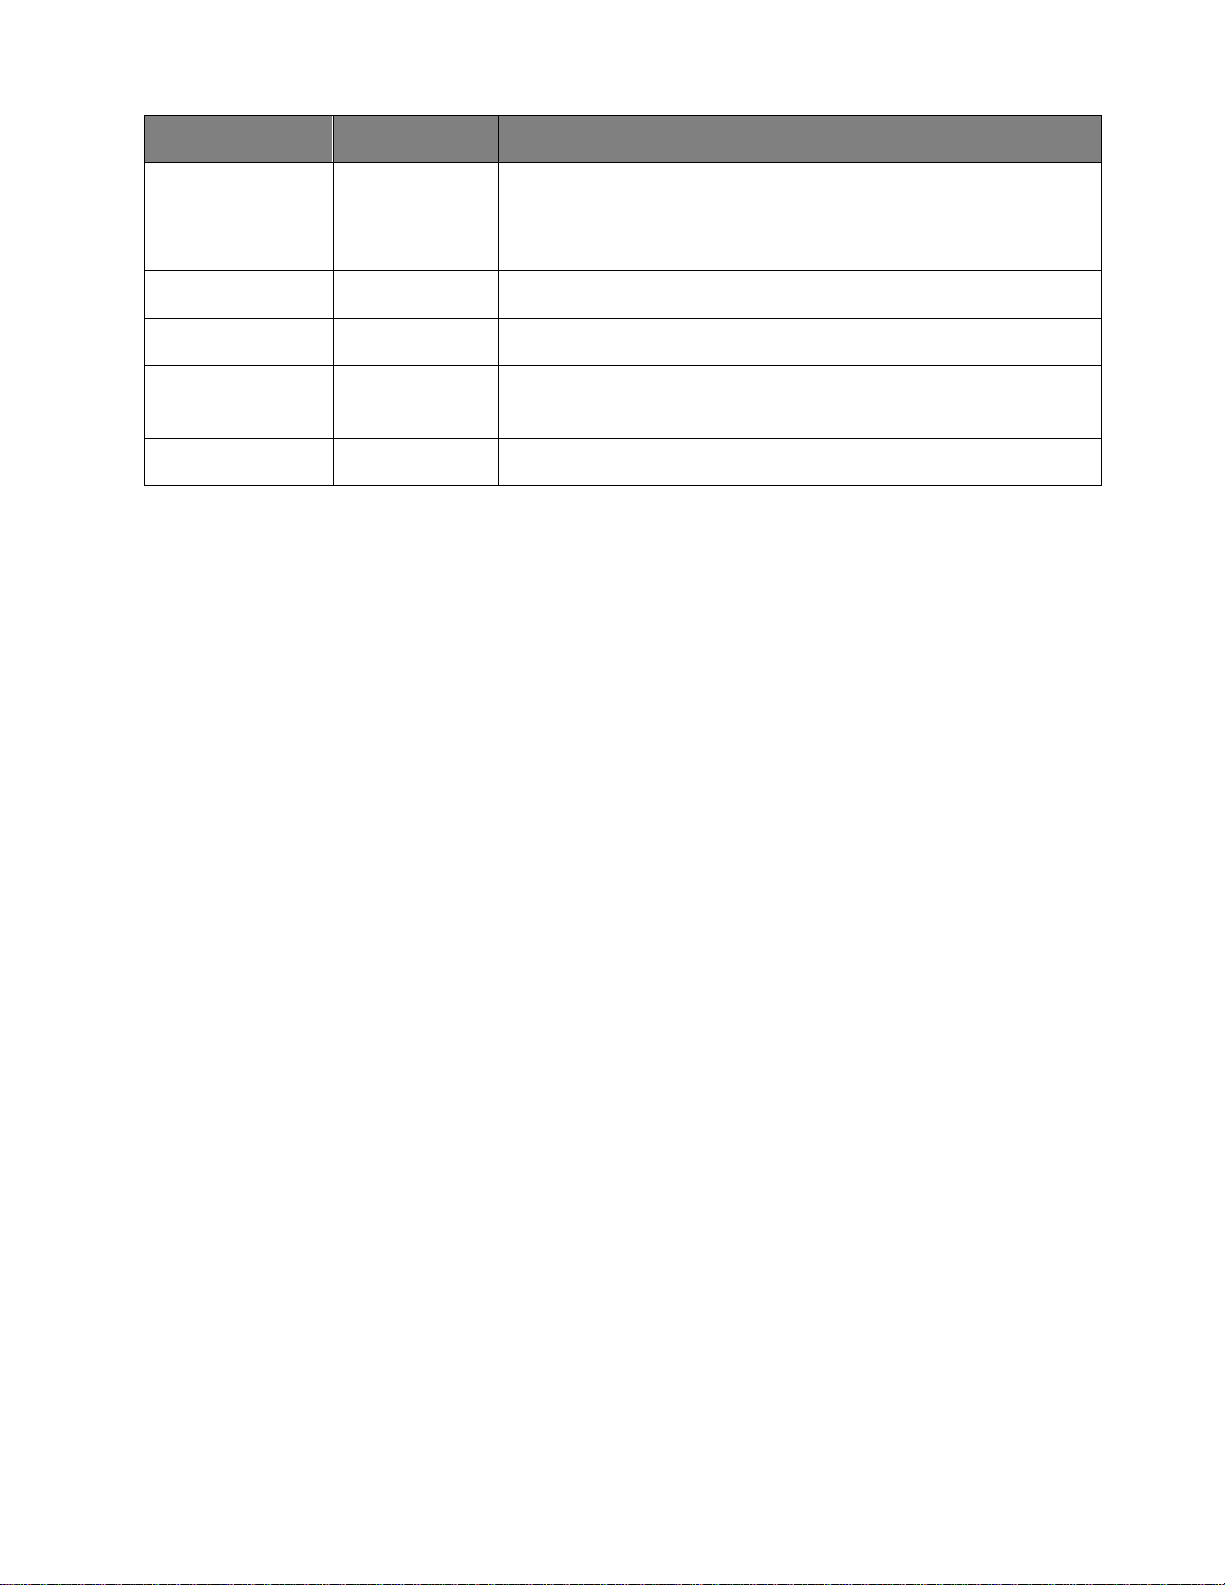
Function Operation Button
Increase /
button to the
Playing music Tur n VOLUME KNOB to adjust the volume to your desired level,
Decrease Volume
Pause Playing music Short press PL AY/PAUSE/SCAN button once to pause music
Play Pause Short press PL AY/PA U SE/ SCAN button once to resume music
Previous track Playing music Short press the PREVIOUS TRACK/STATION
Next track Playing music Short press the NEXT TRACK/STATION button to the next track
Listening to Music using USB / Micro SD (TF) Card Slot
or
Adjust volume from the source device (in Bluetooth mode only).
previous track
1. Turn on the speaker.
2. Insert USB flash drive into the USB slot or Micro SD (TF) card into the Micro SD (TF) card slot
accordingly. LED display will show ‘Lod’ first, voice message “Play by USB drive” or “Play by TF
card” would be heard, and music would play automatically with LED display showing ‘USB/TF’,
track number & music time.
3. Short press the NEXT TRACK/STATION button or PREVIOUS TRACK/STATION button to move
forward or backward on your playlist.
4. Short press PL AY/ PA U SE/ SCAN button to Play or Pause a track.
Listening to Music using AUX-In
1. Turn on the speaker.
2. Plug the 3.5 mm Aux-in cable (included) into the AUX-In port of the speaker, LED display will
show ‘Lod’ first, voice message ‘Aux mode’ would be heard, and then LED display will show ‘AUX,
LINE’.
3. Plug the other end of the cable to the audio device (such as computer / tablet / MP3 Player etc.).
4. Select your favorite song at the source device to play.
(Note: While using AUX-In function, all functions such as playing next/previous track can be controlled
only through your source device).
Listening FM radio
1. Turn on the speaker.
2. Short press the MODE button repeatedly, until it reaches FM radio mode, LED display will show
‘Lod’ first, voice message ‘FM mode’ would be heard, and then LED display will show ‘FM’ with a
radio frequency with sound.
3. Press and hold the PLAY/PA U SE/ SCAN button 2-3 seconds for searching and recording all radio
5
Page 6

stations within frequency range 87.5-108MHz.
4. Short press the NEXT TRACK/STATION button or PREVIOUS TRACK/STATION button for listening
next or previous already saved radio station.
Tips!!
1. Short press the MODE button to switch different functions of the speaker. The functions are –
Bluetooth / FM radio / AUX / USB-Micro SD (TF).
2. When the speaker is not in use, turn OFF the device to save the battery power.
3. Do not overcharge the speaker.
Colour changing LED lights in front of speaker
1. Turn on the speaker.
2. Long press the “LIGHT” button can turn on/off the colour changing LED lights.
Using the Microphone
1. Insert the plug of the Microphone (not included) into the MIC INPUT of the speaker.
2. Turn on the Microphone, and speak for microphone operation or sing for Karaoke operation.
Do’s and Don’ts
• Do not play music at excessive levels as damage to hearing and/or equipment may result.
• Do not use outdoors in wet or in damp surroundings.
Care and maintenance
Clean the unit with a soft, dry cloth. Never use chemicals or hard abrasives.
Keep this unit away from wet or damp surroundings.
Product Specifications:
Bluetooth version : 4.2
Speaker size : 6.5" x 2
Unit size : 9.13”
(L) x 8.50” (W) x 20.24” (H)
Unit weight : ~6.6 lb
Power input : DC 5V
Charging Time : 6-8 hours
Bluetooth range : 27 - 33 Feet
FM frequency range : 87.5-108MHz
Built-In Rechargeable Lithium Battery: 3.7V 3000mAh
6
Page 7
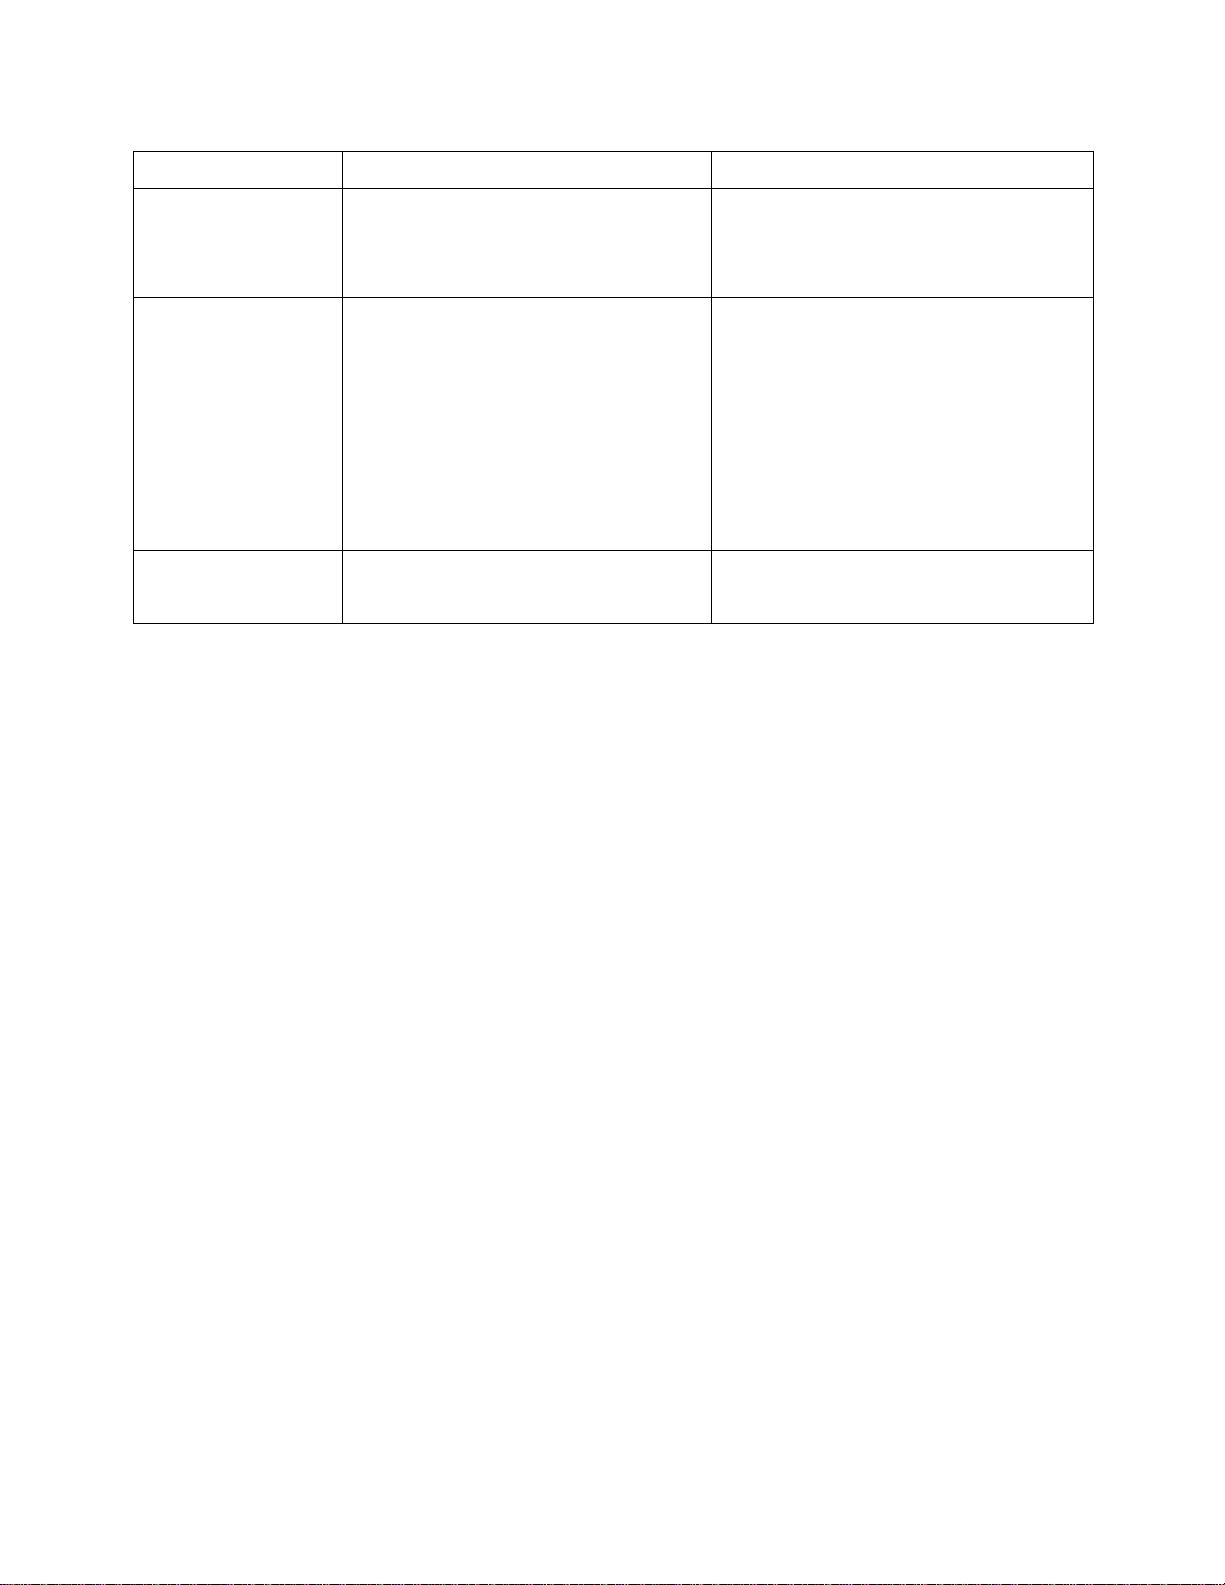
TROUBLESHOOTING
The connected device is not in play
Turn VOLUME knob to increase the
and make sure the volume level is in
Problem Possible Cause Solution
Low sound level Source (Tablet, Mobile Phone, Laptop,
etc.) volume too low.
Battery dead
Adjust source volume.
Charge Battery.
No sound Volume in minimum position.
volume.
Play the music in the connected device
mode.
Input source incorrect.
high level.
Press the MODE button to set the input
source to the desired function.
Sound distortion Volume level too high Turn VOLUME knob to decrease the
volume.
FCC Instructions
Changes or modifications not expressly approved by the party responsible for compliance could void the
user’s authority to operate the product.
NOTE: This product has been tested and found to comply with the limits for a Class B digital device,
pursuant to Part 15 of the FCC Rules. These limits are designed to provide reasonable protection against
harmful interference in a residential installation. This product generates, uses and can radiate radio
frequency energy and, if not installed and used in accordance with the instructions, may cause harmful
interference to radio communications. However, there is no guarantee that interference will not occur in
a particular installation. If the product does cause harmful interference to radio or television reception,
which can be determined by turning the equipment off and on, the user is encouraged to try to correct
the interference by one or more of the following measures:
- Reorient or relocate the receiving antenna.
- Increase the separation between the product and receiver.
- Connect the product into an outlet on a circuit different from that to which the receiver is connected.
- Consult the dealer or an experienced radio/TV technician for help.
The device complies with Part 15 of the FCC Rules. Operation is subject to the following two conditions:
(1) this device may not cause harmful interference, and (2) this device must accept any interference
received, including interference that may cause undesired operation.
7
Page 8

Limited Warranty
This manufacturer's product warranty extends to the original consumer purchaser of the product. Neither the
retailer nor any other company involved in the sale or promotion of this product is a co-warrantor of this
manufacturer warranty.
WARRANTY DURATION: All materials and workmanship are warranted to the original consumer purchaser
for a period of ninety (90) days from the original purchase date.
WARRANTY COVERAGE: This product is warranted against defective materials or workmanship. This warranty
is void if the product has been damaged by accident, in shipment, unreasonable use, misuse, neglect,
improper service, commercial use, repairs by unauthorized personnel or other causes not arising out of
defects in materials or workmanship. This warranty doesn’t cover the following which may be supplied
with this product, including but not limited to; LCD Screens, glass parts, lenses, bulbs etc. This warranty is
effective only if the product is purchased and operated in USA and Canada, and does not extend to any
units which have been used in violation of written instructions furnished by manufacturer or to units which have
been altered or modified or, to damaged products or parts thereof which have had the serial number removed,
altered, defaced or rendered illegible.
WARRANTY DISCLAIMERS: This warranty is in lieu of all warranties expressed or implied and no representative or
person is authorized to assume for manufacturer any other liability in connection with the sale of our products.
There shall be no claims for defects or failure under any theory of tort, contractor commercial law including but
not limited to, negligence, gross negligence, strict liability, breach of warranty and breach of contract. Under no
circumstances will Manufacturer’s / Distributor’s maximum liability exceed the retail value of the product.
WARRANTY PERFORMANCE: During the above 90 day warranty period, a product with a defect will be either
repaired or replaced with a reconditioned comparable model (at manufacturer's option). The repaired or
replacement product will be in warranty for the balance of the 90 day warranty period and an additional
one-month period. No charge will be applicable for such repair or replacement.
SERVICE AND REPAIR: If service is required for this product, you should first contact Midwest Trading Group
Customer Service at
[email protected] or by calling 1 (866) 815-4714, Monday to Friday 10am to 6pm
EST.
NOTE: Manufacturer cannot assume responsibility for loss or damage during incoming shipment. As a
precautionary measure, carefully package the product for shipment, and insure it with the carrier. Be sure to
enclose the following details with the product: your full name, return address and daytime phone number, a
note describing the problem you experienced, a copy of your sales receipt or other proof of purchase to
determine warranty status. C.O.D. shipments cannot be accepted.
8
 Loading...