

Page 1

Battery Warning
Never dismantle, crush, or pierce the battery, or allow the battery to
short-circuit. Do not expose battery being placed in high
temperature environment, if battery leaks or bulges, stop continue
to use.
Always charge using the system. Risk of explosion if battery is
replaced by an incorrect type.
Keep the battery out of reach of children.
Batteries may explode if exposed to open fire. Never dispose of
batteries in a fire.
Never replace the battery on your own; have the dealer do it for
you.
Disposed of used batteries observing local regulations.
Notes on Installation
1. Please measure the front windshield viewing area, make sure not to
block driver's front view, install the camcorder below the rearview
mirror (the central, higher right position of the front windshield). And
we recommend that the sky and the land occupied by the screen
50%, fix the car holder and then adjust the camcorder so that the
lane is aligned with the screen. Proper installation enables the
camcorder to maximize the efficiency also can enhance the accuracy
of LDWS.
2. Make sure that the lens is within the wiping range of the windscreen
wiper to ensure a clear view even when it rains.
3. Do not touch the lens with your fingers. Finger grease may be left on
the lens and will result in unclear videos or pictures. Clean the lens
on a regular basis.
4. Do not install the camcorder on a tinted window. Doing so may
damage the tint film.
5. Make sure that the installation position is not hindered by the tinted
window.
6. This product is suitable for light windshield or light color
heat-resistant film windows , it will affect video quality if install it on
the dark windows or dark heat-resistant film windows.
7. Use the products of the attached power charger only, please do not
use other brand power charger, in order to avoid equipment burn or
cause the battery explosion.
For more operation details, please refer to CD-ROM.
1
Page 2
1 Introduction
Thank you for purchasing this advanced Car Camcorder. This product is
specifically designed for real time video recording when driving. It also
supports a HP rear camera. You might ask distributor for further
information.
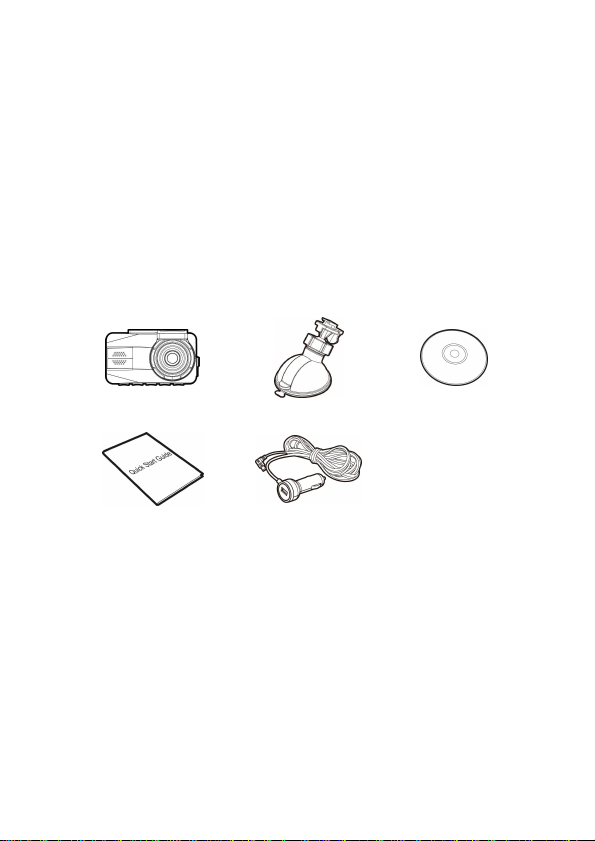
1.1 Package Contents
The package contains the following items. In case there is any missing or
damaged item, contact your dealer immediately.
Car Camcorder Bracket CD-ROM
Quick Start Guide Car Adapter
2
Page 3
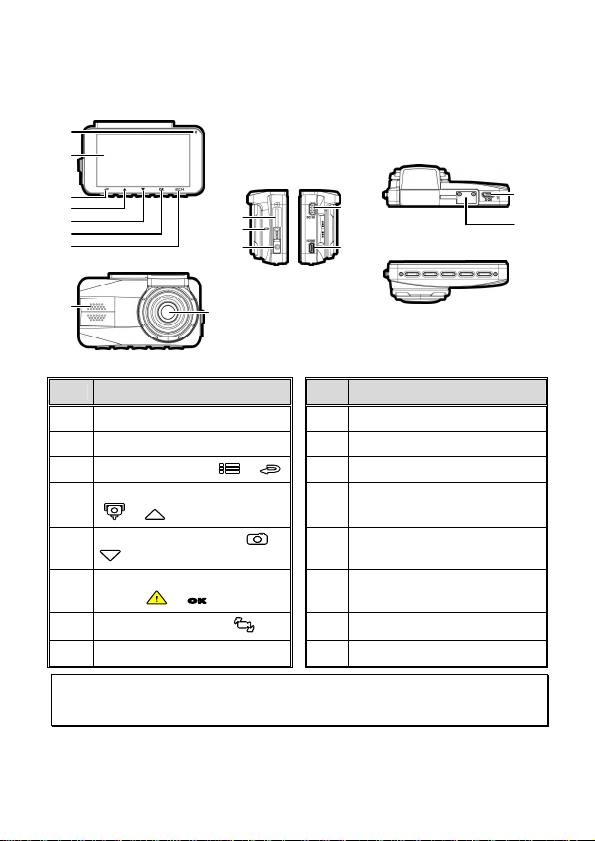
1.2 Product Overview
12
10
11
1
2
3
4
5
6
7
8
9
13
14
No. Item
1 LED Indicator
2 LCD Color Screen
3 Menu / Back Button ( / )
Add Speed Point / Up Button
4
( / )
Snapshot / Down Button ( /
5
)
Emergency Recording / Confirm
6
Button ( / OK)
7
Switch Camera Button ( )
8 Speaker
Note:
Please press the button (3~7) according to the diagram notice shown on screen.
No. Item
9 Wide Angle Lens
10 Memory Card Slot
11 Microphone
12 Power Switch
13 Power Connector Port
14 HDMI Connector Port
15 Micro USB Connector Port
16 Bracket Socket
15
16
3
Page 4
2 Getting Started
2.1 Storage Media
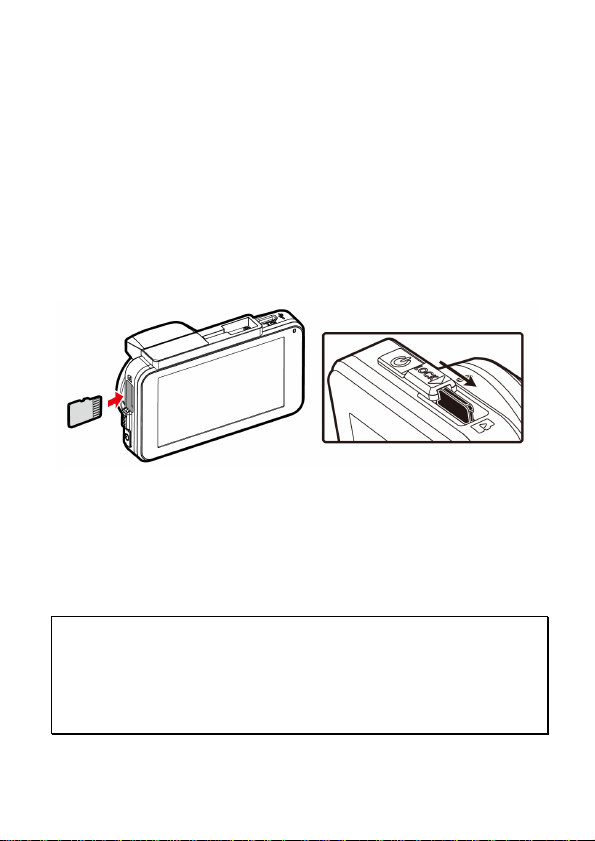
2.1.1 Insert the Memory Card
Insert memory card with the pins facing forward and the screen of the
camcorder facing forward too, see the picture as below:
Also, insert the SD card into the camcorder until the lock can be smoothly
slid. Card will be protruding in normal use, and damage may occur if
pressed too hard. Please read the instructions carefully on the screen
layer.
2.1.2 Remove the Memory Card
If the camcorder is power on, please power off first and wait for the
procedure of switching off the camcorder completed before removing
the memory card.
Note:
1. Do not remove or insert the memory card when the camcorder is turned on. This
may damage the memory card.
2. Support SDHC class 10 and memory storage 16GB or above (support up to 32GB).
3. Please format the microSD cards before the initial use. The formatted file type for
this camcorder is FAT32 file.
4
Page 5

2.2 Installing in Vehicles
Knob
1
2
2.2.1 Mount the Camcorder to
Windshield
1. Push the bracket into bracket slot on top of
camcorder until a click sound is heard.
2. Connect the power cable then power on to enter
preview screen and confirm the field of view.
Then clean the surface of the windshield with
alcohol to ensure that the adhesion surface is
clean.
3. Remove the protective layer on the bottom of
the bracket.
4. Release the lever of the bracket, install the
bracket onto the windshield, then lock the
lever to complete the installation.
5. Make sure the bracket is firmly installed onto
the windshield.
Note:
1. Do not install the camcorder on a tinted window. Doing so may damage the tint film.
2. This product is suitable for light windshield or light color heat-resistant film
windows, it will affect video quality if install it on the dark windows or dark
heat-resistant film windows.
3. Remove the protective layer on the bottom of the bracket.
2.2.2 Adjust the Camcorder
1. Loosen the knob to swivel the camcorder
vertically or horizontally.
2. Then tighten the knob to make sure the
camcorder is securely locked in place.
5
Page 6

2.3 Connecting to Power
Use only the attached power connector for activating the camcorder and
charging the built-in battery.
1. Connect one end of power connector to power connector port on the
camcorder. USB port input: DC 5V / 1.0A.
2. Plug the other end of the car adapter to the cigarette lighter socket of
your vehicle. Once the vehicle engine is started, the camcorder
automatically turns on. Car charger input: DC 12 / 24V.
Note:
Please measure front windshield viewing area, so as not to block the driver's field of
view, and install the camcorder under the driving mirror (upper central of the front
windshield). And we recommend that the sky and the land occupied by 50% in the
recording screen, please adjust the camcorder so that the alignment icon is aligning
the driving lane. Proper installation enables the camcorder to maximize the efficiency
and improve the accuracy of LDWS.
2.4 Initial Settings
Before using the camcorder, we recommend you setup the correct Time
zone, Date and Time.
Note:
Please note that if you press the button during recording, the system will stop
recording and enter OSD menu. Make sure the recording is already stopped then
continue operating the menu.
6
Page 7

2.4.1 Set Time zone
To set the time zone, do the following:
1. Press the button to enter
the OSD menu.
2. Press the / button to
select Set Time zone, and then
press the
entering function menu.
3. Press the / button to
set the current time zone, and
then press the
complete setting.
4. Press the button to return
to recording screen.
OK
button for
OK
button to
Note:
1. If Time Sync. is on, camcorder clock will be calibrated via satellite clock signal based
on Set Time zone.
2. If satellite positioning is not successful, camcorder clock will run based on user
defined time.
7
Page 8

3 Using the Car Camcorder
3.1 Automatic Record
If the camcorder is connected to the vehicle power supply and slide the
power switch, once start the car engine, the camcorder will automatically
power on and start recording.
Recording will automatically stop when the engine is switched off.
Note:
1. Some vehicle power supply would not turn on / off automatically with the car engine
start, if the camcorder cannot automatically power on/off with the car engine,
please manually connect the power supply with the vehicle power, and then power
on, or manually power off the camcorder and then release the connector with the
car power supply.
2. It can be configured to save a video file for every 1 or 3 minutes of recording.
3. All the videos and photos are saved in the memory card, if memory card is full, loop
recording will be generally overwrite the oldest video file.
3.1.1 Emergency Recording
To start the Emergency Recording, do the following:
1. During Video Recording, press the
OK
button to enter emergency
recording mode, the “Emergency”
message will be shown
immediately on the upper left
corner of the screen, and the
recorded file will be protected.
2. The emergency video recording length is same as the recording
interval setting. When the emergency recording length reaches the
setting, the system will return to the general recording mode.
Note:
1. The emergency recording file is created as a new file, which will be protected to
avoid being overwritten by normal cycling recording. A memory card can save up to
20 emergency video files if record interval time is 1 minute, and save up to 10
emergency video files if record interval time is set as 3 minutes.
2. The notice message of “Emergency files are full” will pop up on the screen when
the emergency recording folder is full, and the later emergency files will be saved in
the Normal Video folder which will be over written if memory is full. Thus, if you
want to keep newest emergency video file, please manually delete the oldest files
in the emergency video folder to release more capacity.
8
Page 9

3.2 Picture in Video
You can also use this camcorder to take snapshots of the current scene.
1. In recording status, press to
capture recording screen shots
from the front lens.
2. When the icon shows in the
central of screen, it means the
screenshots is completed.
Note:
1. The screen shots image resolution quality is depending on the photo resolution
setting.
2. The definition of picture in video by this product, the picture resolution is limited by
the speed of the target object and changes in ambient lighting. The photograph
function is better used for taking still pictures in accident scenes or when the car is
stopped to wait for a traffic light.
3. It is available only for the front camera if user wants to take pictures during
recording.
9
Page 10

3.3 Driving Safety
The following driving safety function is for reference only.
Drivers are advised to exercise discretion based on actual road
Menu option Description
If the Speed Cam Alert function is enabled, once your car’s
location is determined by GPS and approaches a speed
cam, this product produces audible alert and screen
message.
Speed Cam Alert
Parking Mode
Note: The speed cam alert function must have the speed
cam datum from the country y ou use. The function will be
void if the product is used in any others countries. Please
consult with the shop you purchased if the function is void.
There is no guarantee the speed ca m datum will be
included for the worldwide countries.
To monitor the vehicle when it is parked, you can activate
Vibration D etection, or Motion and Collision Detection.
Collision
Detection
LDWS
FCWS
FCMD
If Collision Detection is activated, this camcorder starts
emergency recording once it detects any collision.
Once your car’s location is determined by GPS and the
LDWS function is enabled, this camcorder produces
audible alert and screen message when you drive off of or
change lanes at speeds over 70 km/h (43 mph).
When FCWS is activated after satellite positioning,
camcorder will issue audible alert and screen message
when vehicle speed is above 60 km/h (37 mph) and the
distance with the front vehicle is less than 15m.
If FCMD function is enabled, the camcorder will determine
it from front car about 0.3 ~ 4 meters. When the front
object moves about 3 ~ 5 seconds and the car did not start
to drive forward, the camcorder will issue audible alert
and screen message.
10
Page 11

3.4 File Playback
3.4.1 Playing Videos
Playback video record files as follows:
1. Press the button to enter
the OSD menu.
2. Press the / button to
select File Playback, and then
press the
entering function menu.
3. Press the / button to
select Video / Parking Mode /
Emergency, and then press the
OK
4. Press / button to browse video files, select the video file
and then press
thumbnail shows D icon, it indicates that the file is dual-lens
recording. In the recording mode, you can use
switch the front and rear lens recording file. (Rear Camera is not
included in standard package. Please contact distributor for further
information.)
OK
button for
button for entering menu.
OK
button to enter Playback Mode. If
button to
5. Press the repetitively to return recording screen.
11
Page 12

3.5 Deleting Files
To delete file(s), do the following:
1. Press the button to enter
the OSD menu.
2. Press the / button to
select File Deletion, and then
press the
entering function menu.
3. Press the / button to
select Video / Parking Mode /
Emergency / Picture, and then
press the
entering menu.
• Delete One:
• Delete All:
4. Press the repetitively to return recording screen.
Note:
1. Only front camera thumbnails will be display in Menu, if you choose to delete the file
has the D icon, and then the files records with rear lens will be deleted. (Rear
Camera is not included in standard package. Please contact distributor for further
information.)
2. Deleted files cannot be recovered. Ensure the files have already backup before
deletion.
OK
button for
OK
button for
- Press the /
button to select Delete
One, and then press the
OK
button to enter
the menu.
- Press / button
to browse files , select the
files you want to delete
and then press
- Press the / button to select item, and then press
the
OK
- Press the / button to select Delete All, and then
press the
- Press the / button to select item, and then press
the
OK
OK
button to enter the menu.
/ button to confirm or cancel the selection.
OK
button to enter the menu.
/ button to confirm or cancel the selection.
12
 Loading...