

Page 1

INDOOR COOKING
Warming Drawer
KWD
Use and Care Manual
Installation Instructions
Page 2
IF THE INFORMATION IN THIS MANUAL IS NOT FOLLOWED
CAUTION
NOTICE
EXACTLY, A FIRE OR EXPLOSION MAY RESULT CAUSING
PROPERTY DAMAGE, PERSONAL INJURY, OR DEATH.
Do not store or use gasoline or other flammable vapors and liquids in the vicinity of
this or any other appliance.
Installation and service must be performed by a qualified installer or service agency.
DO NOT REPAIR, REPLACE OR REMOVE ANY PART OF THE APPLIANCE UNLESS
SPECIFICALLY RECOMMENDED IN THE MANUALS. IMPROPER INSTALLATION,
SERVICE OR MAINTENANCE CAN CAUSE INJURY OR PROPERTY DAMAGE. REFER
TO THIS MANUAL FOR GUIDANCE. ALL OTHER SERVICING SHOULD BE DONE BY A
HESTAN AUTHORIZED SERVICE TECHNICIAN.
READ THESE INSTRUCTIONS CAREFULLY AND COMPLETELY
BEFORE INSTALLING OR USING YOUR APPLIANCE TO REDUCE
THE RISK OF FIRE, BURN HAZARD, OR OTHER INJURY. KEEP
THIS MANUAL FOR FUTURE REFERENCE.
SAFETY DEFINITIONS
THIS INDICATES THAT DEATH OR SERIOUS INJURY MAY OCCUR
AS A RESULT OF NOT OBSERVING THIS WARNING
THIS INDICATES THAT MINOR OR MODERATE INJURY MAY
OCCUR AS A RESULT OF NOT OBSERVING THIS WARNING.
THIS INDICATES THAT DAMAGE TO THE APPLIANCE OR
PROPERTY MAY OCCUR AS A RESULT OF NOT OBSERVING THIS
WARNING.
INSTALLER: LEAVE THIS MANUAL WITH THE OWNER OF THE APPLIANCE.
HOMEOWNER: RETAIN THIS MANUAL FOR FUTURE REFERENCE.
Page 3
Message from Hestan:
Hestan’s award-winning culinary innovations and purpose-built features
reinvented the restaurant kitchen and redefined culinary experience in
some of America’s most acclaimed restaurants. Hestan now takes this
performance from the back of the house and puts it front and center in
yours. Thoughtfully designed and meticulously built, Hestan will serve you
beautifully for years to come.
Hestan is the only residential brand born from the dreams and demands of
professional chefs. From ranges to refrigeration, every detail is designed
to deliver the performance and reliability expected in a restaurant – now
available for you.
EN
We appreciate you choosing Hestan, and we promise to deliver the very best
to you.
Welcome to Hestan
©2018 Hestan Commercial Corporation
1
Page 4

Page 5
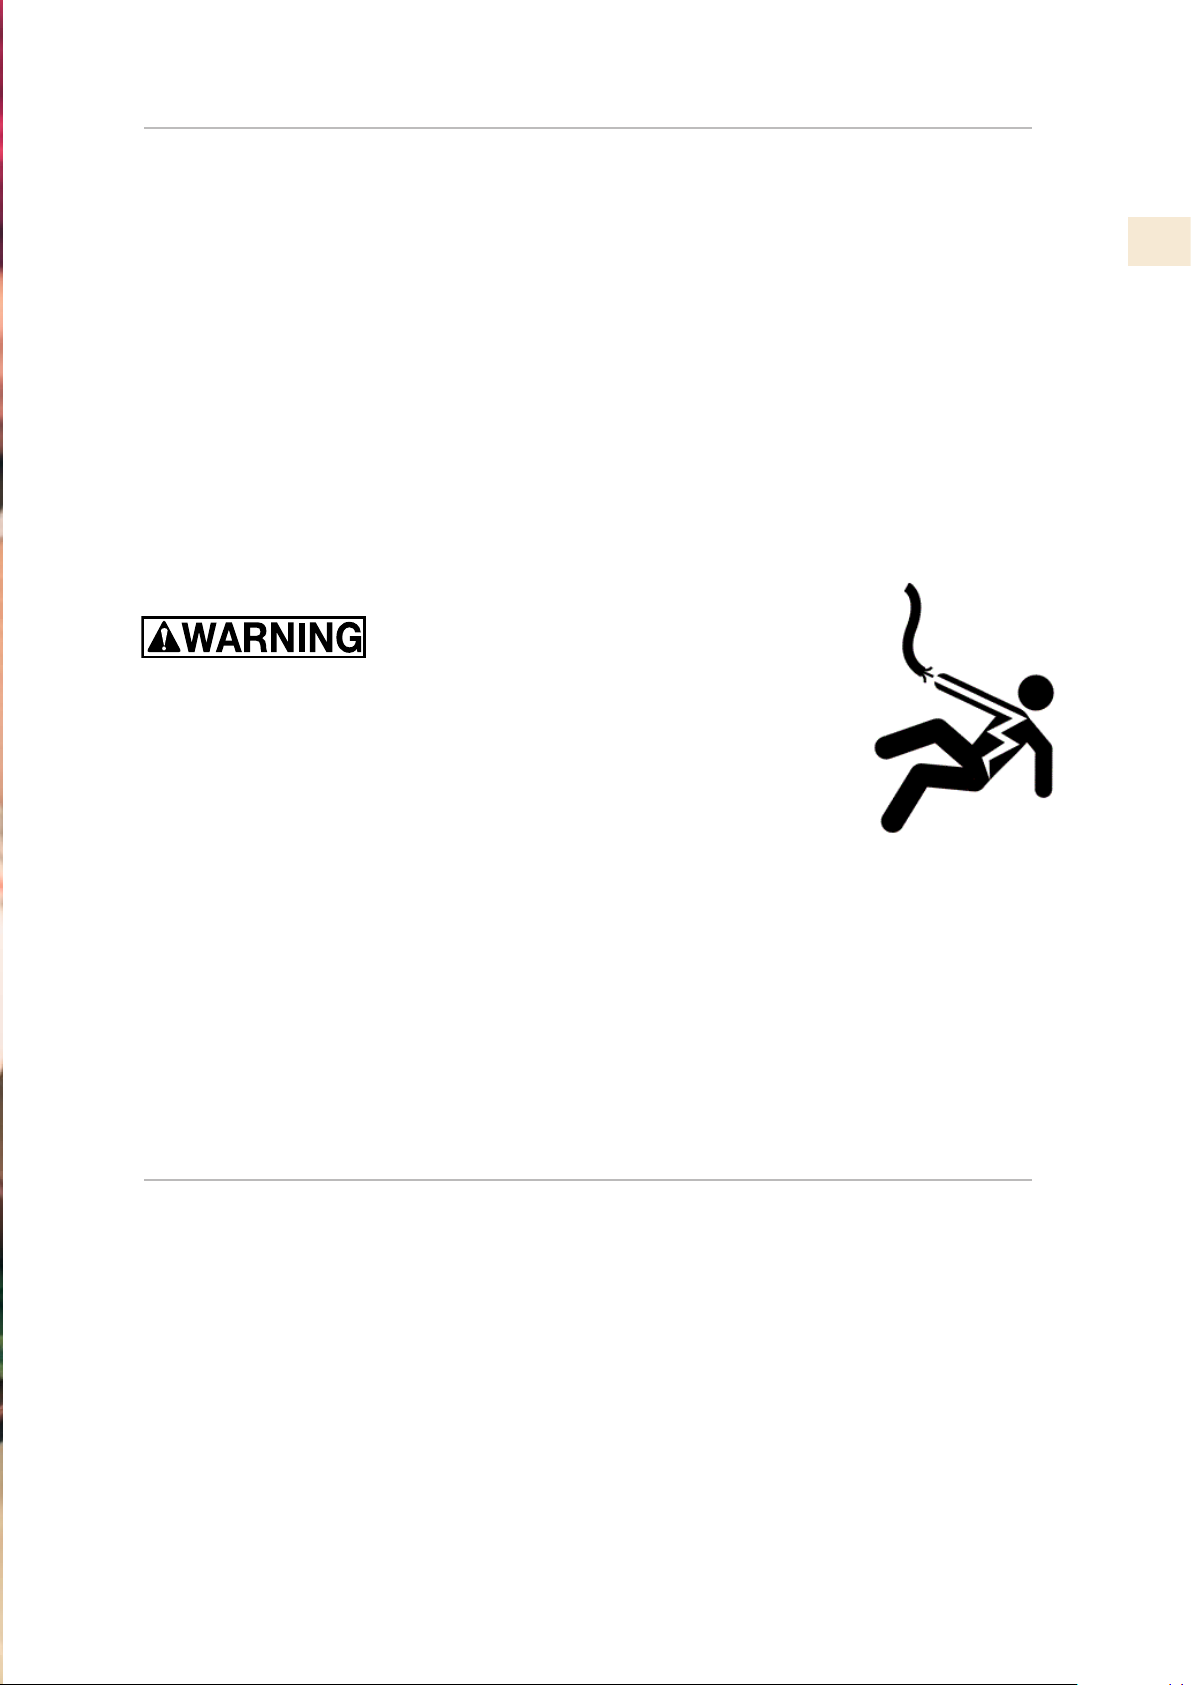
TABLE OF CONTENTS
3 SAFETY PRECAUTIONS - BEFORE YOU BEGIN
6 MODEL NUMBERS
6 RATING LABEL
6 REGULATORY / CODE REQUIREMENTS
7 USING THE WARMING DRAWER
11 CLEANING AND MAINTENANCE
14 TROUBLESHOOTING
15 INSTALLATION
20 PARTS / SERVICE
20 LIMITED WARRANTY
ELECTRICAL SHOCK HAZARD
EN
Disconnect power before installing or servicing appliance. Be sure the
knob is in the OFF position before plugging the appliance in.
Failure to do so can result in death or electrical shock.
ELECTRICAL GROUNDING
• This appliance must be grounded. Grounding reduces the risk of
electric shock in the event of a short circuit.
ELECTRICAL SUPPLY
This appliance is designed to use a grounded receptacle, 120 VAC Single Phase, 60 Hz, with a
current rating as shown in the model number listing on page 6.
Have the installer show you where the electric circuit breaker is located so you know how to
shut off the power to this appliance.
SAFETY PRECAUTIONS - BEFORE YOU BEGIN
When properly cared for, your Hestan appliance will provide safe, reliable service for many years.
When using this appliance, basic safety practices must be followed as outlined below.
IMPORTANT: Save these instructions for the local Utility Inspector’s use.
INSTALLER: Please leave these Installation Instructions with the owner.
OWNER: Please retain these Installation Instructions for future reference.
This oven is NOT designed for installation in manufactured (mobile) homes or recreational park
trailers. Do NOT install this oven outdoors.
©2018 Hestan Commercial Corporation
3
Page 6
CAUTION
SAFETY PRECAUTIONS - BEFORE YOU BEGIN
GENERAL APPLIANCE SAFETY PRECAUTIONS
(CONT.)
EN
Please read all instructions before using this appliance.
When properly cared for, your new Warming Drawer has been designed to be a safe, reliable
appliance. Read all instructions carefully before using this it. These precautions will reduce the
risk of burns, electric shock, fire, and injury to persons. When using kitchen appliances, basic
safety precautions must be followed, including the following:
TECHNICAL SAFETY
Do not repair or replace any part of the warming drawer unless specifically recommended. Refer
service to an authorized servicer.
Do not operate this appliance if it is not working properly or if it has been damaged, until an
authorized servicer has examined it.
Install or locate this appliance only in accordance with the Installation Instructions. Do not
cover or block any openings on this appliance.
Use this warming drawer only as described in this manual. If you have any questions, contact
Hestan Customer care.
Use this appliance only for its intended use as described in this manual. Do not use corrosive
chemicals, vapors, or nonfood products in this appliance. This type of warming drawer is
specifically designed to heat or cook. It is not designed for industrial or laboratory use. The use
of corrosive chemicals in heating or cleaning will damage the appliance.
CHILD SAFETY
IT IS THE RESPONSIBILITY OF THE PARENTS OR GUARDIANS TO ENSURE CHILDREN
ARE INSTRUCTED IN THE SAFE USE OF THIS APPLIANCE. Do not allow children to use this
appliance without adult supervision. Do not allow children to play in or around the appliance,
even when not in use. Items of interest to children should not be stored in or on the appliance
or in cabinets above the appliance. Children climbing on the appliance could be seriously
injured.
FOOD SAFETY
If food will be held for more than one hour, it must be held at 140°F [60°C] or above. (MED)
GENERAL SAFETY
When using electrical appliances, basic safety precautions should always be followed including
the following:
• Do not touch hot surfaces. Use handles or knobs.
• To protect against electrical shock do not immerse cord or plug in water or other liquid.
• Close supervision is necessary when any appliance is used by or near children.
• Unplug from outlet or turn breaker off before cleaning. Allow to cool before removing or
replacing parts.
• Do not operate any appliance with a damaged cord or plug or after the appliance
malfunctions or has been damaged in any manner. Return appliance to the nearest
authorized service facility for examination, repair, or adjustment.
• The use of accessory attachments not recommended by Hestan may cause injuries.
• Do not use outdoors.
©2018 Hestan Commercial Corporation
4
Page 7

SAFETY PRECAUTIONS - BEFORE YOU BEGIN
• Do not let cord hang over edge of table or counter, or touch hot surfaces.
• Extreme caution must be used when moving anything containing hot oil or other hot
liquids.
• Always turn the knob to OFF, then plug cord into the wall outlet. To disconnect, turn the
knob to OFF, then remove plug from wall outlet.
• Do not use appliance for other than intended use.
• The inside of the appliance can reach temperatures of 195°F [90°C] depending on the
selected temperature and the time of operation. If necessary use gloves to remove things
from the drawer.
• Do not lean or sit on the warming drawer when opened, this could cause damage to the
telescopic guide. The maximum carrying weight of the warming drawer is 80 lbs. (36 kg).
• Do not keep plastic containers or any flammable objects in the appliance. Such objects pose
a risk of catching fire once the warming drawer is turned on.
• In the event that personal clothing or hair catches fire, DROP AND ROLL IMMEDIATELY to
extinguish flames.
Save these Instructions.
(CONT.)
SAFETY DURING CLEANING
Never use a vacuum cleaner. The vacuum could create pressure on the components causing a
short circuit. The vacuum may also damage the surface and the components of the appliance:
damages for which Hestan will not be liable.
EN
Follow suggestions listed under “Cleaning and Maintenance” in this manual.
Never use sharp metal objects or abrasive scrubbing pads, as they can damage the surface of the
appliance. If necessary, use standard non-abrasive utensils made of wood or plastic.
REPAIRS:
Maintenance work and/or repairs must be performed exclusively by qualified personnel.
Incorrect installation and maintenance can cause personal injury to the consumer for which
Hestan will not be liable.
During the warranty period, the appliance may only be serviced by technicians authorized by
Hestan or the warranty will be void.
Before beginning maintenance, installation, or repair work disconnect the appliance from the
electrical outlet. The appliance is disconnected only if either:
1. The circuit is turned off (Breaker OFF or the electrical fuse is removed), OR
2. The cord of the appliance is removed from the electrical outlet.
Hestan will not be liable for damage caused by a failure to follow current regulations or the use
of non-original replacement parts.
©2018 Hestan Commercial Corporation
5
Page 8
SAFETY PRECAUTIONS - BEFORE YOU BEGIN
MODEL NUMBERS
(CONT.)
EN
MODEL NO. DESCRIPTION
KWD 30 30” Warming Drawer 15 Amp
REQ’D
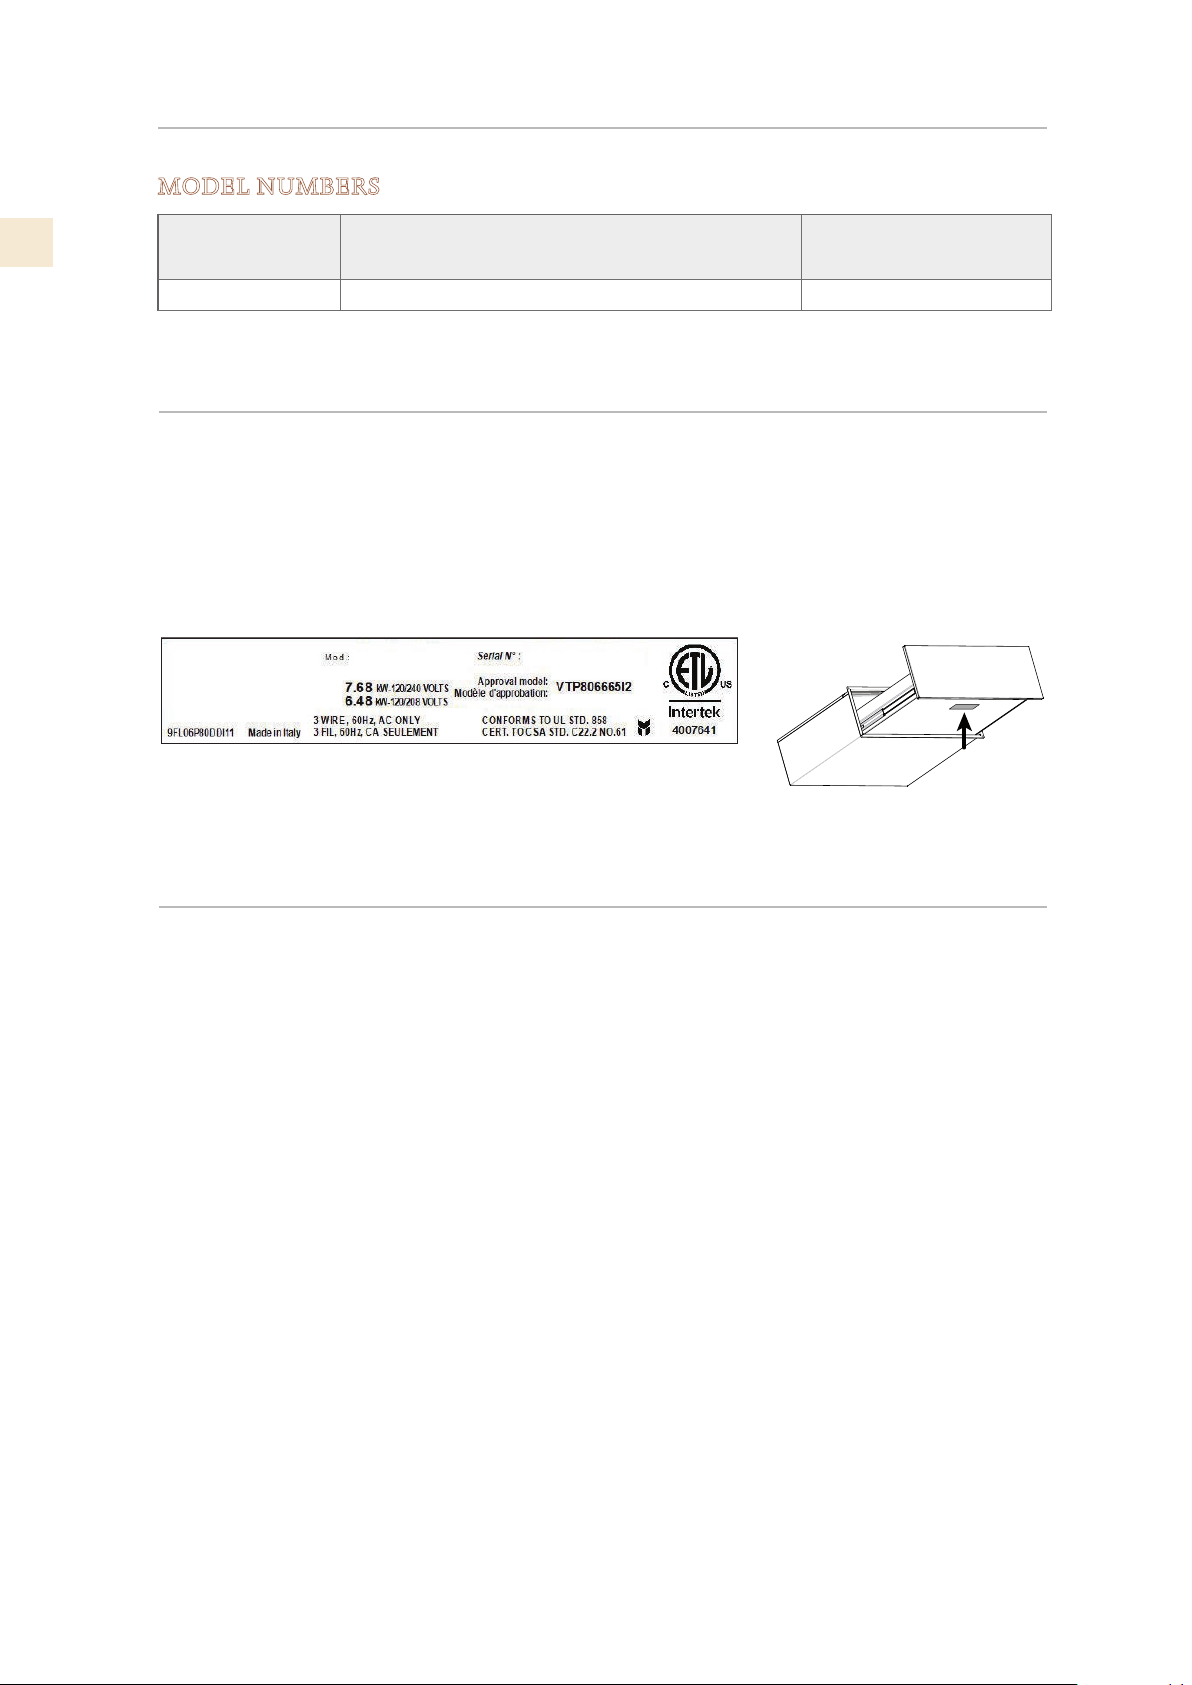
RATING LABEL
The rating label contains important information about your Hestan appliance such as the
model and serial number, electrical rating and the minimum installation clearances.
The rating label is located on the bottom of the drawer.
If service is necessary, contact Hestan Customer Care with the model and serial number
information shown on the label.
CIRCUIT BREAKER
HESTAN COMMERCIAL CORP.
ANAHEIM, CA - USA
KDO30
TYPICAL RATING LABEL
REGULATORY / CODE REQUIREMENTS
Installation of this cooking appliance must be made in accordance with local codes. In the
absence of local codes, this unit should be installed in accordance with the National Electrical
Code and local codes.
This appliance must be electrically grounded in accordance with local codes or in the absence
of local codes with the National Electrical Code
CSA C22.1
.
ANSI/NFPA 70
, or Canadian Electrical code
©2018 Hestan Commercial Corporation
6
Page 9
USING THE WARMING DRAWER
OPENING THE PUSH-TO-OPEN DRAWER
To open the drawer, press the front of the drawer and release it.
It will open a short distance. Grasp the drawer pull it towards you until it is opened completely.
CLOSING THE DRAWER
To close the drawer, gently push the drawer back, pushing the front until it has completely gone
back.
OPENING THE SOFT CLOSING DRAWER
To open the drawer grasp the handle and pull the drawer.
CLOSING THE DRAWER
To close the drawer, gently push the drawer back, until the soft closing system engage.
BEFORE YOU BEGIN
Before using the appliance for the first time:
1. Gently clean it with a moist cloth and dry it completely as described under “Cleaning and
Maintenance”.
2. Set the control knob to MAX, and let the warming drawer warm for at least two hours. Be
sure that the kitchen is kept well ventilated during the heating period.
• The metal parts have been specially treated with a protective coating that can sometimes
cause odors the first time the drawer is heated. These odors will quickly dissipate and
should not be considered a defect of the appliance.
EN
HEATING SYSTEM
The appliance is equipped with a hot air ventilating system. A fan distributes heat in the
warming drawer to obtain a uniform temperature.
• The thermostat allows the user to control and set the appliance at the desired temperature.
• The circulation of the air heats the drawer in a rapid and uniform way.
• With the protective measures in place it is not possible to accidentally touch the heating
element or the fan.
©2018 Hestan Commercial Corporation
7
Page 10
USING THE WARMING DRAWER
CONTROLS AND INDICATORS
(CONT.)
EN
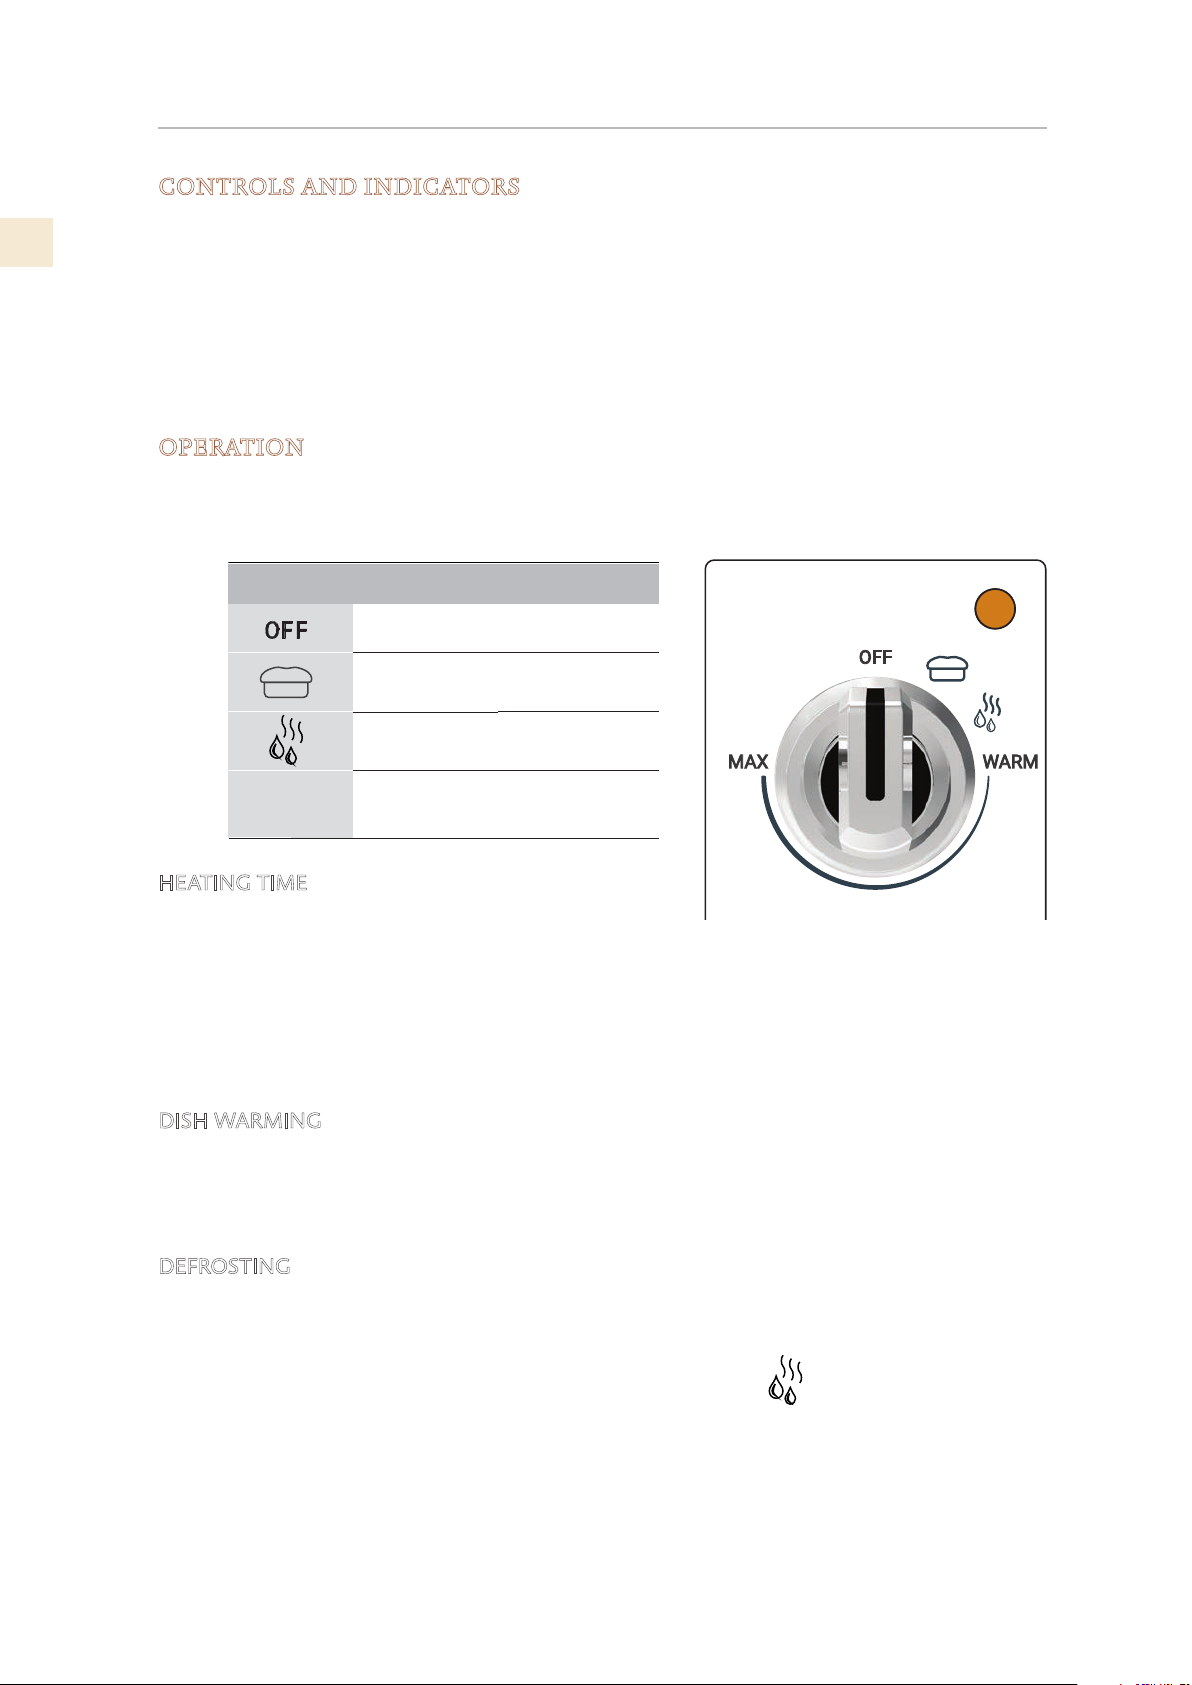
A single knob (Mode Selector) controls the warming drawer.
It has positions for OFF, Proofing, and Defrost, plus a continuous range from WARM to MAX.
This manual will use MED to designate a setting halfway between WARM and MAX.
The interior lights come on when the drawer is opened.
The panel indicator light comes on when the knob is in warming mode. (From WARM to MAX.)
OPERATION
Open the drawer. Turn the knob to set the desired function or temperature.
To turn off the appliance, turn the knob to the OFF position.
Mode Selector Function
Off
Proofing
Defrost
None
77-95°F [25-35°C]
Fan, no heat
WARM > MAX
HEATING TIME
The warming time is influenced by:
• Amount of dishes or food in the drawer
• The arrangement of items in the drawer
• The temperate set.
In general, the more dishes or items in the drawer and the higher the set temperature, the longer
it will take to reach the set temperature.
DISH WARMING
• Dishes for 6 persons, set temperature to MIN or greater.
• Warming time 30-35 minutes
With experience you will learn the optimal temperature setting for your needs.
DEFROSTING
The defrosting function only uses forced ventilation without any active heating element.
Procedure
• Place items to defrosted, turn the knob to the defrost setting.
Warming
105 - 195°F [40-90°C]
©2018 Hestan Commercial Corporation
8
Page 11
USING THE WARMING DRAWER
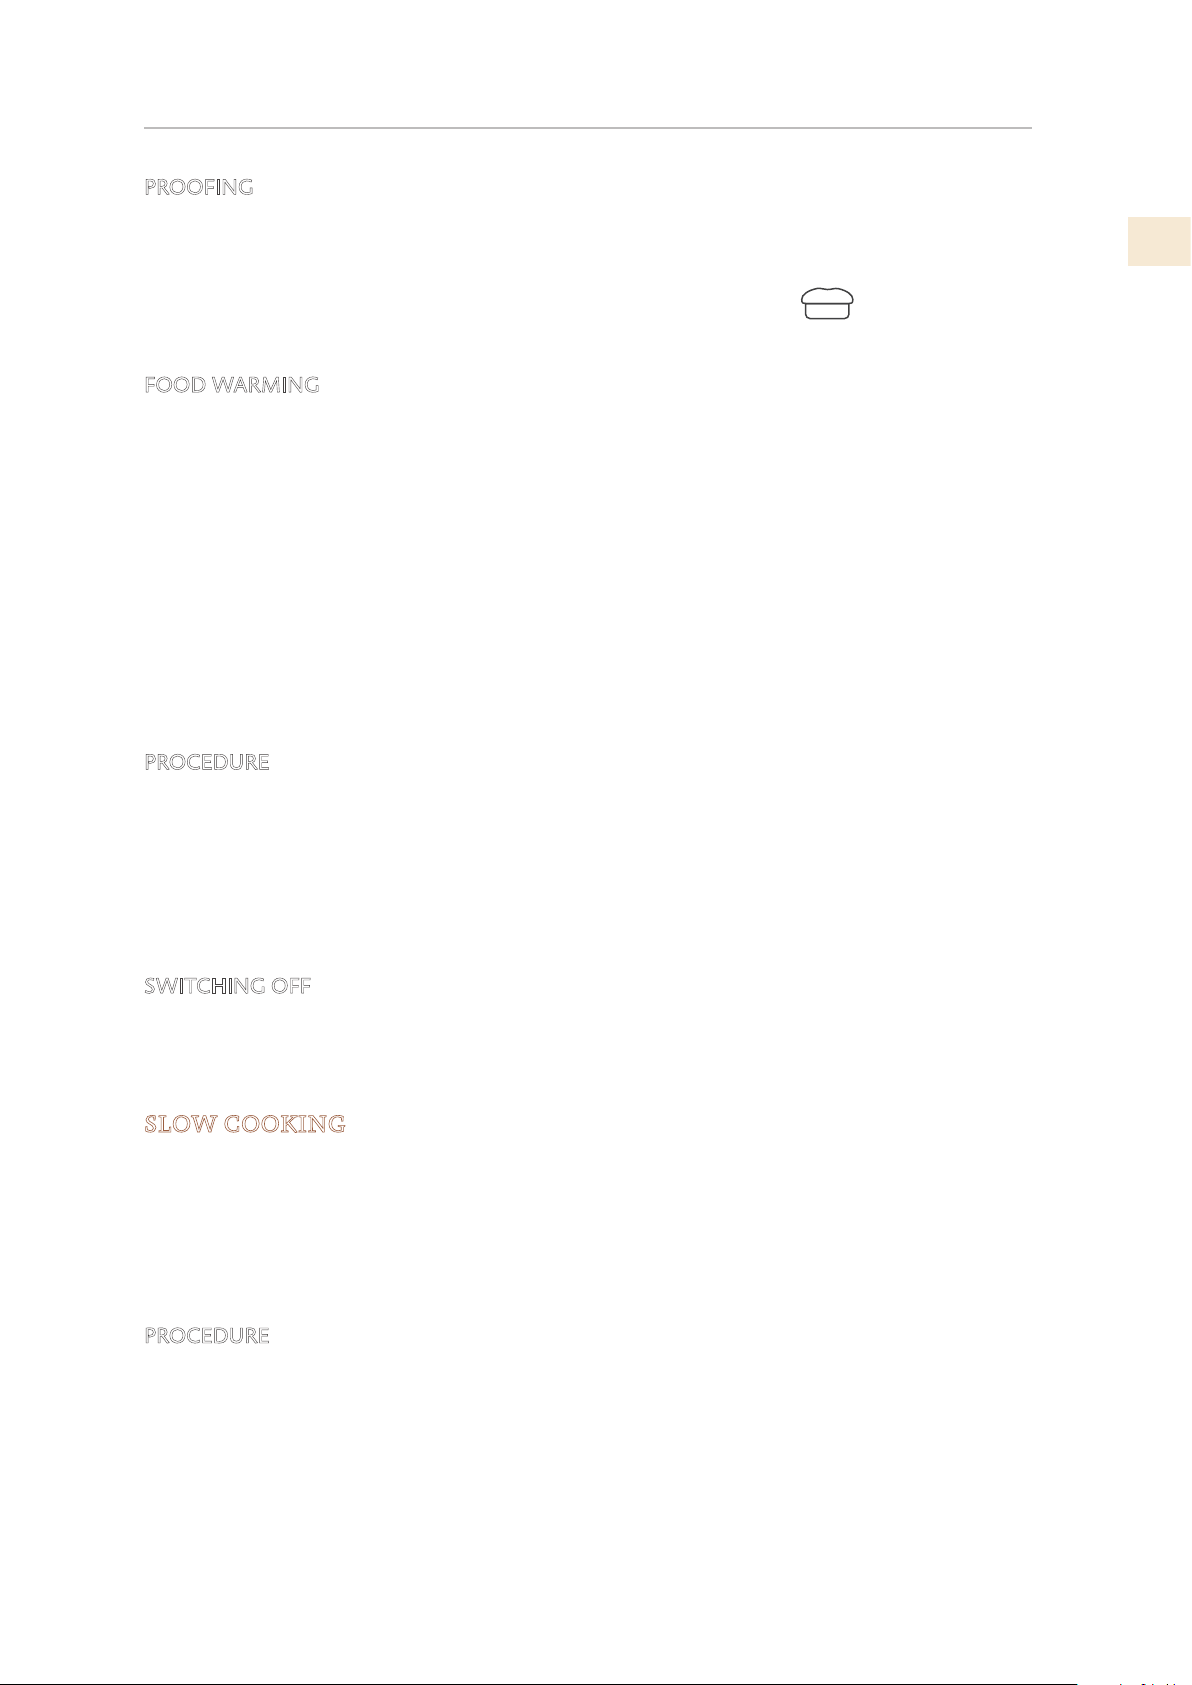
PROOFING
(CONT.)
The proofing function maintains the drawer temperature between 77 and 95°F [25-35°C].
Procedure
1. Preheat the drawer for 5 minutes by turning the knob to proofing.
2. Place the dough, wrapped in a slightly damp cloth, in the middle of the drawer.
FOOD WARMING
Food recommended for warming: meat, chicken, fish, sauces, vegetables, side dishes and soups.
• To avoid spills, do not overfill the dishes.
• Arrange the dishes in the drawer and close it carefully so that any liquids do not spill.
• It is advisable not to warm food for more than an hour to prevent it from losing nutritional
value.
• If food will be held for more than one hour, it must be held at 140°F [60°C] or above. (MED)
Cover moist food and liquids with a lid or heat-resistant cling film. This will prevent the
moisture from escaping, condensation from forming and moisture settling on the outside the
dishes.
Do not cover roast or fried dishes which need to stay crisp. Keep these dishes hot at high
temperatures.
PROCEDURE
1. Place the dishes in the drawer.
EN
2. Switch the drawer turning the thermostat knob to between MIN/MED (105/140°F 40/60°C), depending on the temperature required, and preheat the drawer for 10 minutes.
3. Put the food in the preheated dishes.
4. Close the drawer again.
SWITCHING OFF
Turn the knob to OFF. Take the dishes out of the drawer using a cloth or oven gloves.
NOTE: Never transfer hot dishes directly from the hot stove top to the glass base of the heating
drawer. This could damage the glass drawer base.
SLOW COOKING
Slow cooking is ideal for cooking tender meat which needs to be medium rare or rare. This
cooking method means the meat will always be pink inside. This does not, however, mean that
the meat is raw or undercooked.
• This cooking method not only keeps the juices inside, but it also makes it easy to keep the
meat hot.
• Suitable dishes to use: glass, porcelain or ceramic with a lid.
PROCEDURE
1. Preheat the warming drawer with the chosen dish to the maximum temperature for 15
minutes.
2. Heat some butter or oil in a pan. Brown the meat well for the time indicated in the table,
then place it immediately in the preheated pan and cover with the lid.
3. Set the thermostat between MED/MAX (140/195°F ) [60/90°C] for the time required to
finish the cooking.
©2018 Hestan Commercial Corporation
9
Page 12
USING THE WARMING DRAWER
WARNINGS FOR SLOW COOKING
(CONT.)
EN
Only use fresh meat in perfect condition.
Trim off any excess fat.
The pieces of meat do not necessarily have to be turned.
Once cooked, the meat can be carved immediately; it does not have to rest.
Meat that is slow cooked is not as hot as meat cooked in the traditional way, so it is advisable to
put the plates in the warming drawer on the left-hand side for the last 20-30 minutes as well.
Serve the meat with piping hot sauces.
If you want to keep the meat hot after cooking, turn the knob to between WARM and MED
(105-140°F / 40-60°C). Smaller pieces of meat can be kept hot for 45 minutes and larger pieces
for two hours.
APPLICATIONS
Slow cooking is suitable for all tender cuts of beef, pork, veal, lamb, game and poultry. The
initial browning times and the subsequent cooking times depend on the size of the slices of
meat.
The browning time is for meat placed in a preheated pan with butter or oil.
DISH EXAMPLE INITIAL BROWNING LEVEL
Small slices of meat
Strips about 1 - 2 minutes MED
Small steaks or medallions about 1 - 2 minutes per side MED
Medium size slices of meat
Tenderloin about 4 - 5 minutes per side MAX
Lean roast about 10 - 15 minutes per side MAX
Large slices of meat
Tenderloin (from 2 Lb [900g]) about 6 - 8 minutes per side MAX
Roast beef about 8 - 10 minutes per side MAX
Vegetables about 30 minutes per side MED
10
NOTE: There are 2 settings: MAX and MED. Guidelines for cooking times are 4 to 5 hours for
MAX and 8 to 10 hours for MED. Smaller quantities of food may require less time, while larger
quantities may require more time.
©2018 Hestan Commercial Corporation
Page 13
CLEANING AND MAINTENANCE
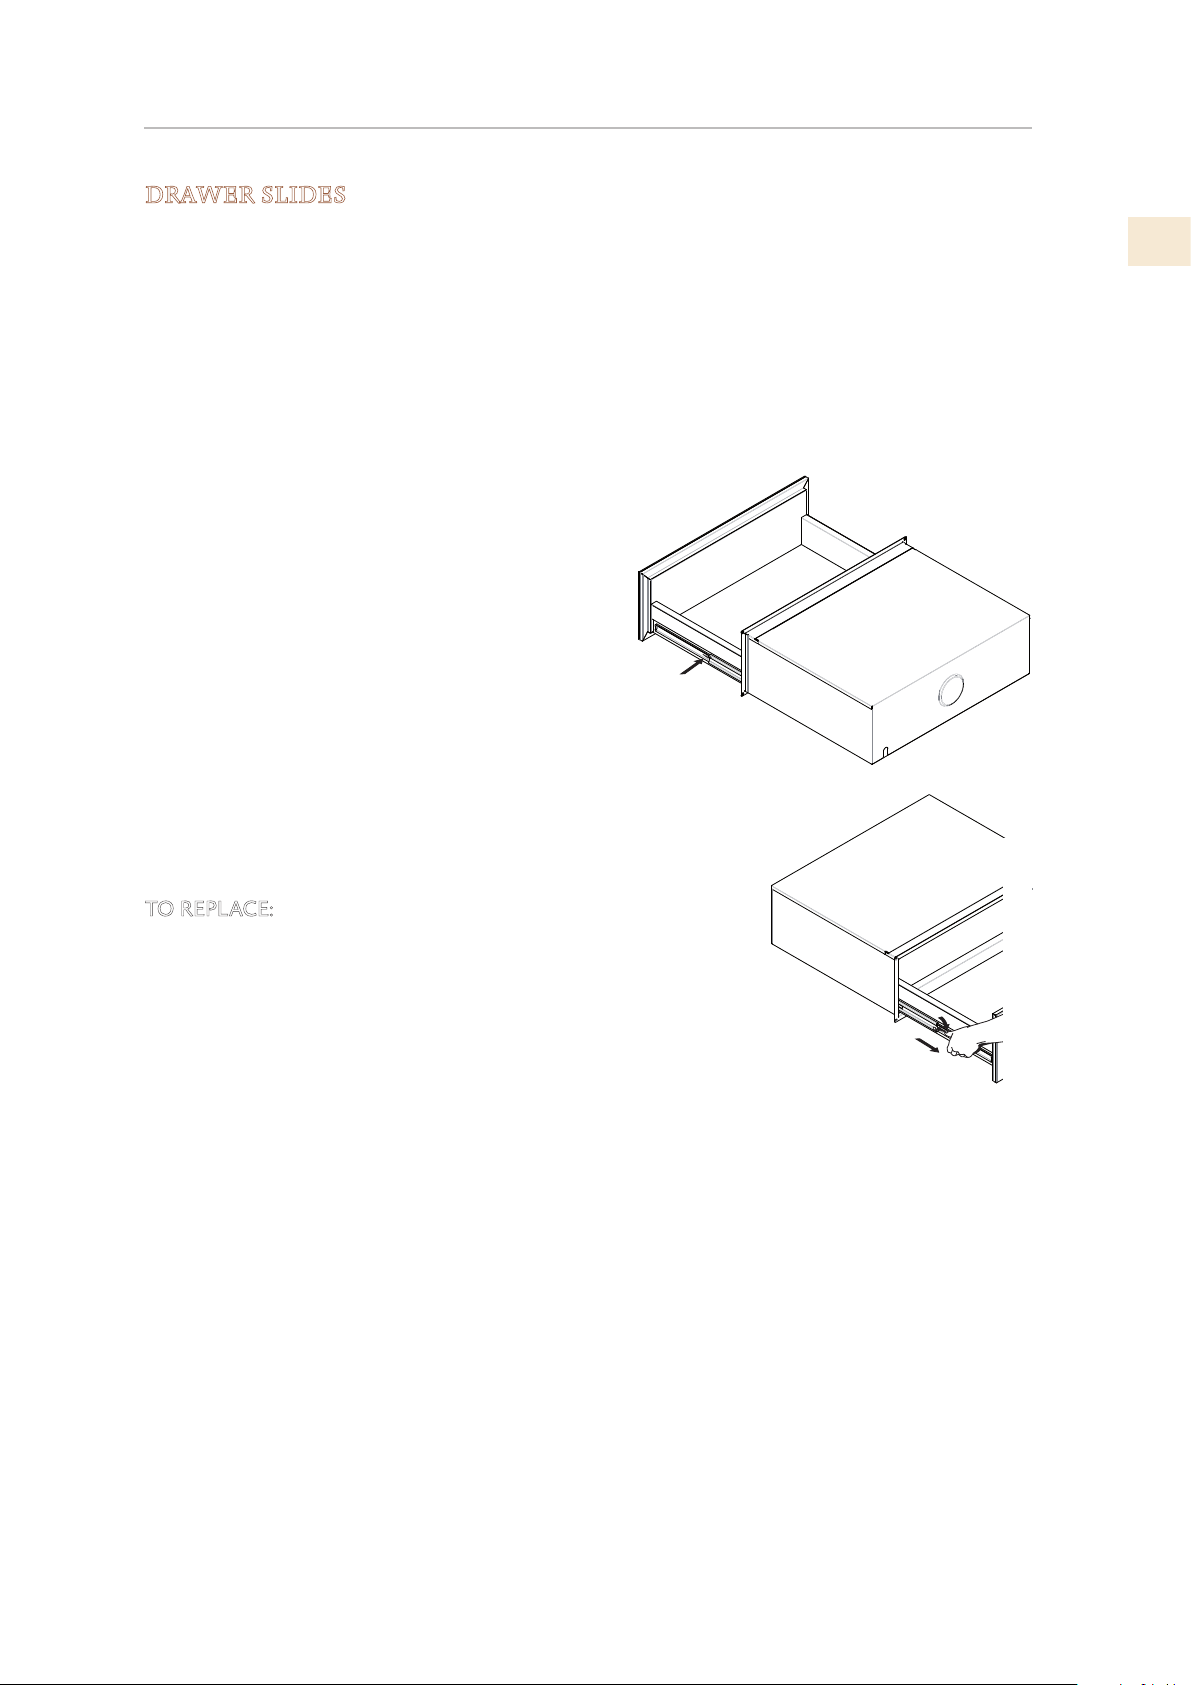
DRAWER SLIDES
The drawer slides allow you to fully extend the drawer for cleaning. The drawer can be
removed for cleaning or to replace the interior lights.
NOTE: Load capacity for the drawer is 80 lbs (36 kg).
Remove all items from inside the warming drawer, and allow the warming drawer to cool
completely before attempting to remove the drawer.
To Remove:
1. Open drawer to its fully open position.
2. Locate the black tabs on both sides of the drawer.
3. Press the tab down on the right side of the
drawer and lift tab up on the left side of the
drawer at the same time. Then pull drawer out
another inch to disengage latch.
4. Hold the drawer by the sides (not by the front).
Pull it slowly all the way out.
EN
TO REPLACE:
1. Align the drawer rails with the receiving slides.
2. Push drawer in all the way.
3. Gently open and close the drawer to ensure it is seated
properly on the slides.
©2018 Hestan Commercial Corporation
11
Page 14
CLEANING AND MAINTENANCE
NOTICE
CLEANING
(CONT.)
EN
The only recommended maintenance for the Warming Drawer is cleaning.
Before you begin cleaning, turn the appliance OFF and disconnect the appliance from the outlet.
Allow the appliance to cool before cleaning it.
Do not use harsh detergents or abrasive products and/or scrubbing pads and sponges and sharp
objects as they can stain and damage the appearance of the appliance.
Never use a vacuum cleaner on the internal parts of the appliance.
FRONT SURFACE AND CONTROL PANEL
The use of a moist cloth is often sufficient when cleaning the appliance. If needed, add a few
drops of detergent in the water. Dry the appliance with a dry cloth. The steel front of the
appliance can be cleaned with products specifically designed for steel.
Such products prevent the formation of dirt on the surface of the drawer. Apply a minimal
amount of the product on a soft and apply it to the surface of the appliance.
INSIDE SPACE
To clean the inside space use a moist cloth. In the event the appliance requires further cleaning
add drops of detergent to the water. Dry the surface with a dry cloth. Make sure to avoid water
draining into the ventilation holes. Only use the appliance after the drawer is completely dry.
REPLACING A WARMING DRAWER LIGHT BULB
The Warming Drawer is equipped with two halogen lights, located on the right side of the unit.
ELECTRICAL SHOCK HAZARD - Make sure the power has been shut off to the Warming
Drawer. The light socket is energized when the door is open. Failure to shut off the power when
replacing a light bulb could result in electric shock or burns.
Make sure the glass lens is cool to the touch. Use care when handling the lens, it is fragile and
can break if dropped.
Use only 20 watt, 12 Volt, halogen “Bi-Pin” bulbs suitable for appliance use. This type of bulb
may be available at hardware stores & home centers, or specialty lighting stores. Call Hestan
Customer Care for more information.
12
©2018 Hestan Commercial Corporation
Page 15
CLEANING AND MAINTENANCE
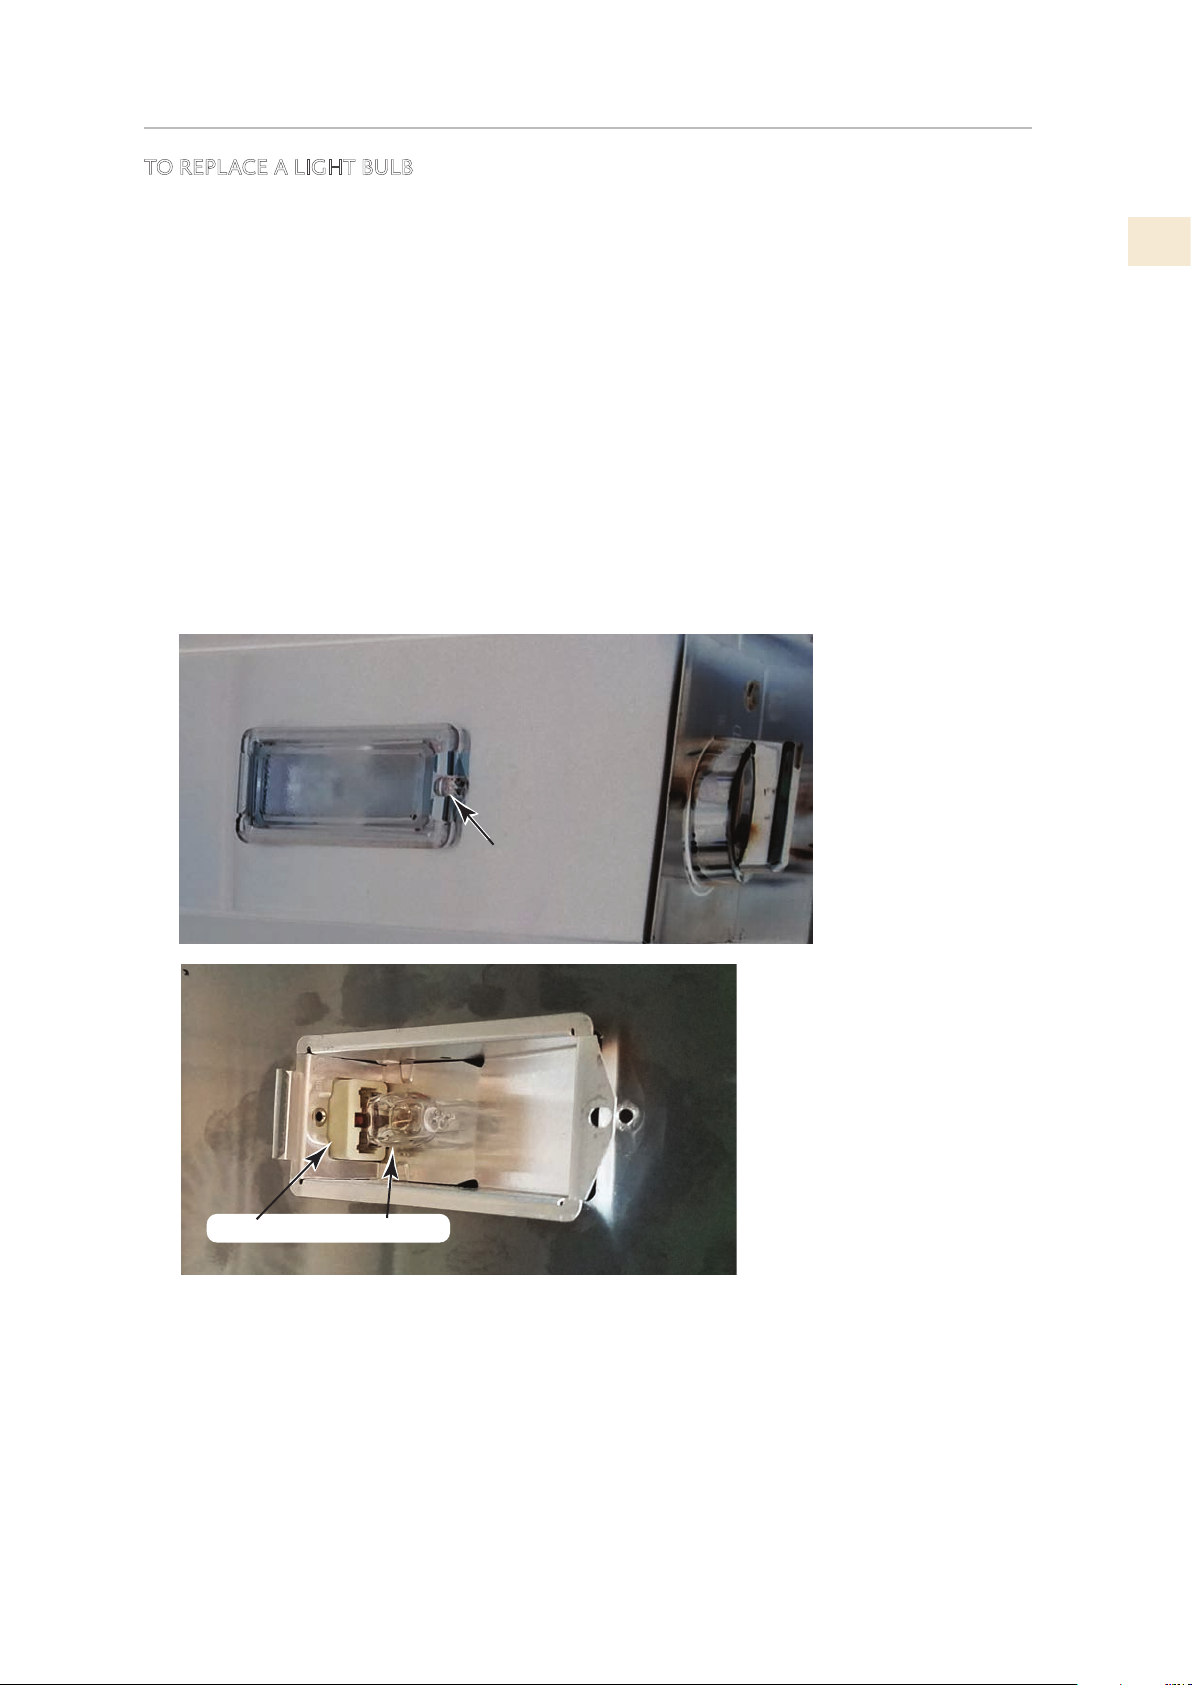
TO REPLACE A LIGHT BULB
1. MAKE SURE POWER IS OFF! Unplug the unit or turn off power at the breaker.
(CONT.)
2. Remove the lens retaining screw. Use a small flat-blade screwdriver to carefully pry off
the glass lens and set aside. Reach into the lamp housing and pull out the old light bulb as
shown in the image below.
3. Before installation, it is very important to clean the new bulb carefully with a clean, soft
cloth or tissue paper. Grease, fingerprints, or oils in your skin can leave a residue on the
glass surface of the bulb which will create a hot-spot. The bulb will eventually crack at this
hot-spot.
4. While still using a cloth or tissue paper, insert the new bulb in the lamp housing. Push the
bulb fully into the socket.
5. Re-install the glass lens taking note of the cutaway in the glass which aligns with the bulb
socket.
6. Restore the power and check if the new bulb is working. If the drawer was removed,
re-install it.
EN
Retaining
screw
LIGHT BULBSOCKET
©2018 Hestan Commercial Corporation
13
Page 16

EN
TROUBLESHOOTING
Repairs must only be performed by specialized and qualified personnel. Any repair work not
performed by professional personnel may cause damage to the appliance for which Hestan will
not be liable.
The following problems can be checked by the consumer without the assistance of the Service
Department.
THE DRAWER IS NOT HOT ENOUGH
Make sure that:
• The appliance is turned on;
• The correct temperature has been set;
• The opening of the ventilation fan is not blocked by plates or other large obstructions;
• The drawers have had sufficient time to heat up.
THE DRAWER DOES NOT GET WARM
Is it turned on? Is it turned on to DEFROST by mistake?
Can you hear the fan running?
• If the fan is running then the heating system should be working, except in DEFROST mode.
If the fan does not run, open the drawer and see if the interior lights come on. If neither light
comes on, check that the unit is plugged in and the breaker hasn’t tripped.
• If the light comes on but the fan doesn’t run, call Hestan Customer Care.
14
©2018 Hestan Commercial Corporation
Page 17

INSTALLATION
APPLIANCE INSTALLATION
IMPORTANT: Save these instructions for the local electrical inspector use.
INSTALLER: Please leave this manual with owner for future reference.
OWNER: Please keep this manual for future reference.
If the information in this manual is not followed exactly, a fire or explosion may result causing
property damage, personal injury or death.
Please read these instructions COMPLETELY AND CAREFULLY. They will save you time and
effort and help to ensure optimum drawer performance.
Be sure to observe all CAUTIONS and WARNINGS. These installation instructions are intended
for use by a qualified installer.
• Assure that electrical installation is adequate and in conformance with National Electrical
Code, ANSI/ NFPA 70 - latest edition**, or Canadian Electrical Code, part 1 C22.1 (latest
edition)*** and all local codes and ordinances.
These shall be carefully followed at all times.
TOOLS YOU WILL NEED
• The following tools are needed to install your new warming drawer:
• Tape measure and straightedge or ruler
• Pencil
• Phillips screwdriver
• Level
• Wire cutters and wire stripper
• Hand or saber saw
• 1” (2,5cm) Hole saw
• Drill and drill bit
• Safety gloves and goggles
• Volt meter (0-250VAC)
EN
PACKAGING
Remove all tape and packaging before using the warming drawer.
Destroy the packaging after unpacking the drawer following the rules in force in your locale.
Never allow children to play with packaging material.
POWER REQUIREMENTS
The warming drawer must be supplied with the proper voltage and frequency. The drawer
is manufactured to be connected to a three-wire, single phase, 120 Volt, 60 Hz AC electrical
supply.
POWER REQUIREMENT
Voltage 120 Volts, 60 Hz
Current 9.2 Amperes
Consumption 1100 Watts
©2018 Hestan Commercial Corporation
15
Page 18

INSTALLATION
CAUTION
NOTICE
CHOOSING DRAWER LOCATION
(CONT.)
EN
Carefully select the location where the warming drawer will be placed.
• It should be located for convenient use in the kitchen.
• Make sure that electrical power can be provided to the location selected. The receptacle
should be accessible after the drawer is installed, so that the drawer can be unplugged and
plugged in after installation. The cord is about 47” [120 cm] long.
PREPARATION
1. See drawings on following page for clearance and cutout dimensions
2. The warming drawer support surface must be a minimum 3/4” (2cm) thick plywood
platform. It must support 100 pounds.
3. The platform must be solid, level and flush with the bottom of the cabinet cut out.
4. The cabinet must be secure against tipping when the drawer is opened. Install anti-tip
brackets as needed.
5. For best performance results make sure the platform is level before placing the warming
drawer. There is no way to level the warming drawer after it has been installed.
• If the installation is not level, the door may slide open or not seal tightly, allowing heat to
escape.
• Use extreme caution when moving or installing the drawer. It is very heavy.
• DO NOT LIFT THE WARMING DRAWER BY THE DRAWER HANDLE.
• Be very careful when moving or installing the warming drawer to avoid damage to the frame
or damage to the cabinets.
• If installing the warming drawer below another product, refer to that product’s literature
for any installation requirements.
16
©2018 Hestan Commercial Corporation
Page 19

INSTALLATION
(CONT.)
PLACING THE DRAWER
• Unit is heavy and requires at least two people or
proper equipment to move.
Verify there is room to run the cord before placing the
drawer without pinching it.
1. If the plug will not be accessible after placing the
unit, turn power OFF at the service panel. Lock
service panel to prevent power from being turned
ON accidentally.
2. Run the cord through to the socket.
• If the plug will be accessible after placing the unit,
then run the cord through but don’t plug it in yet.
• If the plug will not be accessible after placing the
drawer, then plug it in.
EN
CABINET CUTOUT DIMENSIONS
Electrical
Location
9-1/16"
[ 230 cm]
27-7/8"
[ 707 cm]
23-3/4"
[ 601 cm]
23"
[ 583 cm]
29-1/2"
[ 750 cm]
29-5/8"
[ 754 cm]
24"
[ 610 cm]
OVERALL DIMENSIONS
10-3/8"
[ 264 cm]
9-1/16"
[ 230 cm]
27-7/8"
[ 707 cm]
23"
[ 583 cm]
9-1/4"
[ 235 cm]
29-1/2"
[ 750 cm]
28-7/16"
[ 722 cm]
10-3/8"
[ 264 cm]
9-1/16"
[ 230 cm]
27-7/8"
[ 707 cm]
23"
[ 583 cm]
23"
[ 581 cm]
29-1/2"
[ 750 cm]
8-1/4"
[ 208,5 cm]
29-5/8” to 29-7/8"
24-3/4"
[ 631 cm]
[ 754 to 758 cm]
29-7/8"
[ 758 cm]
10-3/8"
[ 264 cm]
©2018 Hestan Commercial Corporation
17
Page 20

EN
INSTALLATION
(CONT.)
3. Position the drawer so that it is directly centered and slide the warming drawer assembly
into cutout until it is flush with cabinet.
4. Securely fasten drawer to cabinet using the screws provided.
• Failure to secure the warming drawer could result in the drawer moving or tipping during
use and causing damage to the drawer or cabinets or personal injury.
5. Turn the power back on or plug the drawer in.
6. Turn the warming drawer to MAX. Observe that the light comes on. Close the drawer for
approximately 1 minute, then check for warmth.
7. Verify that the drawer is warming up, then turn the knob OFF.
• Make sure that the customer knows how to disconnect the power to the warming drawer
at the circuit breaker or fuse box in case of an emergency.
INSTALLATION
18
©2018 Hestan Commercial Corporation
Page 21

PARTS / SERVICE
SERVICE DATA RECORD
The location of the serial tag on the product can be seen when the oven door is opened. It is
located on the left side, just inside the oven cavity. See page 6.
Now is a good time to write this information in the space below provided. Keep your invoice
for warranty validation.
Model Number _________________________________
Serial Number __________________________________
Date of Installation or Occupancy __________________
PARTS LIST
Please visit the Hestan website to access the parts list for your Hestan Indoor product:
www.hestanhome.com.
SERVICE
All warranty and non-warranty repairs should be performed by qualified service personnel.
To locate an authorized service agent in your area, contact your Hestan dealer, local
representative, or Hestan Customer Care. Before you call, please have the model number and
serial number information ready.
Hestan Commercial Corporation
3375 E. La Palma Avenue
Anaheim, CA 92806
(888) 905-7463
EN
LIMITED WARRANTY
WHAT THIS LIMITED WARRANTY COVERS
Hestan Commercial Corporation (“HCC”) warrants to the original consumer purchaser of
a Hestan Indoor Cooking product (the “Product”) from an HCC authorized dealer that the
Product is free from defective materials or workmanship for a period of two (2) years from
the date of original retail purchase or closing date for new construction, whichever period is
longer (“Limited Warranty Period”). HCC agrees to repair or replace, at HCC’s sole option,
any part or component of the Product that fails due to defective materials or workmanship
during the Limited Warranty Period. This Limited Warranty is not transferable and does
not extend to anyone beyond the original consumer purchaser (“Purchaser”). This Limited
Warranty is valid only on Products purchased and received from an HCC authorized dealer in
the fifty United States, the District of Columbia and Canada. This Limited Warranty applies
only to Products in non-commercial use and does not extend to Products used in commercial
applications.
HOW TO OBTAIN WARRANTY SERVICE
If the Product fails during the Limited Warranty Period for reasons covered by this Limited
Warranty, the Purchaser must immediately contact the dealer from whom the Product was
purchased or HCC at 888.905.7463.
Purchaser is responsible for making the Product reasonably accessible for service or for paying
the cost to make the Product reasonably accessible for service. Service is to be provided
during normal business hours of the authorized Hestan Commercial Service Provider. To the
extent Purchaser requests service outside of the normal business hours of the authorized
Hestan Commercial Service Provider, Purchaser will pay the difference between regular rates
and overtime or premium rates. Purchaser is required to pay all travel costs for travel beyond
50 miles (one way) from the nearest authorized Hestan Commercial Service Provider.
©2018 Hestan Commercial Corporation
19
Page 22

EN
LIMITED WARRANTY
EXTENSIONS TO TWO YEAR LIMITED WARRANTY PERIOD:
IN ADDITION TO THE TWO-YEAR LIMITED WARRANTY, THE FOLLOWING
COMPONENTS HAVE EXTENDED WARRANTY COVERAGE AS SPECIFICALLY SET FORTH
BELOW:
1. The Product’s gas burners (excludes appearance), electric heating elements, blower
motors (ventilation hoods), electronic control boards, magnetron tubes and induction
generators (where applicable) are warranted to be free from defects in material and
workmanship under normal non-commercial use and service for a period of five (5) years
of the original Purchaser. This excludes surface corrosion, scratches, and discoloration
which may occur during normal use and is limited to replacement of the defective part(s),
with the Purchaser paying all other costs, including labor, shipping and handling, as
applicable.
WHAT THIS LIMITED WARRANTY DOES NOT COVER:
This Limited Warranty does not cover and HCC will not be responsible for and will not pay
for: damage to or defects in any Product not purchased from an HCC authorized dealer; color
variations in color finishes or other cosmetic damage; failure or damage from abuse, misuse,
accident, fire, natural disaster, commercial use of the Product, or loss of electrical power or gas
supply to the Product; damage from alteration, improper installation, or improper operation
of the Product; damage from improper or unauthorized repair or replacement of any part or
component of the Product; damage from service by someone other than an authorized agent or
representative of the Hestan Commercial Service Network; normal wear and tear; damage from
exposure of the Product to a corrosive atmosphere containing chlorine, fluorine, or any other
damaging chemicals; damage resulting from the failure to provide normal care and maintenance
to the Product; damage HCC was not notified of within the Limited Warranty Period; and
incidental and consequential damages caused by any defective material or workmanship.
(CONT.)
ARBITRATION:
This Limited Warranty is governed by the Federal Arbitration Act. Any dispute between
Purchaser and HCC regarding or related to the Product or to this Limited Warranty shall be
resolved by binding arbitration only on an individual basis with Purchaser. Arbitration will be
conducted by the American Arbitration Association (“AAA”) in accordance with its Consumer
Arbitration Rules or by JAMS. The arbitration hearing shall be before one arbitrator appointed
by the AAA or JAMS. The arbitrator shall not conduct class arbitration and Purchaser shall not
bring any claims against HCC in a representative capacity on behalf of others.
LIMITATION OF LIABILITY:
This Limited Warranty is the final, complete and exclusive agreement between HCC and
Purchaser regarding the Product.
THERE ARE NO EXPRESS WARRANTIES OTHER THAN THOSE LISTED AND DESCRIBED
ABOVE. NO WARRANTIES WHETHER EXPRESS OR IMPLIED, INCLUDING, BUT NOT
LIMITED TO, ANY IMPLIED WARRANTIES OF MERCHANTABILITY OR FITNESS FOR A
PARTICULAR PURPOSE SHALL APPLY AFTER THE LIMITED WARRANTY PERIOD STATED
ABOVE. NO OTHER EXPRESS WARRANTY OR GUARANTY GIVEN BY ANY PERSON,
FIRM OR CORPORATION WITH RESPECT TO THIS PRODUCT SHALL BE BINDING ON
HCC. HCC ASSUMES NO RESPONSIBILITY THAT THE PRODUCT WILL BE FIT FOR ANY
PARTICULAR PURPOSE, EXCEPT AS OTHERWISE PROVIDED BY APPLICABLE LAW.
HCC SHALL NOT BE LIABLE FOR LOSS OF REVENUE OR PROFITS, FAILURE TO
REALIZE SAVINGS OR OTHER BENEFITS, OR ANY OTHER SPECIAL, INCIDENTAL OR
CONSEQUENTIAL DAMAGES CAUSED BY THE USE, MISUSE OR INABILITY TO USE THE
PRODUCT, REGARDLESS OF THE LEGAL THEORY ON WHICH THE CLAIM IS BASED,
AND EVEN IF HCC HAS BEEN ADVISED OF THE POSSIBILITY OF SUCH DAMAGES. NO
RECOVERY OF ANY KIND AGAINST HCC SHALL BE GREATER IN AMOUNT THAN THE
PURCHASE PRICE OF THE PRODUCT.
20
©2018 Hestan Commercial Corporation
Page 23

LIMITED WARRANTY
WITHOUT LIMITING THE FOREGOING, YOU ASSUME ALL RISK AND LIABILITY FOR
LOSS, DAMAGE OR INJURY TO YOU AND YOUR PROPERTY AND TO OTHERS AND
THEIR PROPERTY ARISING OUT OF THE USE, MISUSE OR INABILITY TO USE THE
PRODUCT NOT CAUSED DIRECTLY BY THE NEGLIGENCE OF HCC. THIS LIMITED
WARRANTY STATES YOUR EXCLUSIVE REMEDY.
No oral or written representation or commitment given by anyone, including but not limited
to, an employee, representative or agent of HCC will create a warranty or in any way increase
the scope of this express Limited Two Year Warranty. If there is any inconsistency between
this Limited Warranty and any other agreement or statement included with or relating to
the Product, this Limited Warranty shall govern. If any provision of this Limited Warranty is
found invalid or unenforceable, it shall be deemed modified to the minimum extent necessary
to make it enforceable and the remainder of the Limited Warranty shall remain valid and
enforceable according to its terms.
INTERACTION OF LAWS WITH THIS LIMITED WARRANTY:
Some states, provinces or territories may not allow limitations on how long an implied
warranty lasts or the exclusion or limitation of incidental or consequential damages, so the
above limitations or exclusions may not apply to you. Some states, provinces or territories
may provide for additional warranty rights and remedies, and the provisions contained in
this Limited Warranty are not intended to limit, modify, take away from, disclaim or exclude
any mandatory warranty requirements provided by states, provinces or territories, including
certain implied warranties. This warranty gives you specific legal rights, and you may also
have other rights which vary depending on location.
(CONT.)
EN
Any questions about this Limited Warranty may be directed to
Hestan Commercial Corporation at (888) 905-7463
©2018 Hestan Commercial Corporation
21
Page 24

AVIS
LE NON-RESPECT À LA LETTRE DE CES INSTRUCTIONS PEUT
CAUSER UN INCENDIE OU UNE EXPLOSION, QUI POURRAIT
ENTRAÎNER DES DOMMAGES MATÉRIELS, DES BLESSURES
OU LA MORT.
Ne pas entreposer ou utiliser d’essence ou tout autre liquide ou gaz
inflammable à proximité de cet appareil ou de tout autre appareil.
L’installation et le service doivent être effectués par un installateur qualifié
ou une agence de service.
NE PAS RÉPARER, REMPLACER OU ENLEVER TOUTE PIÈCE DE
L’APPAREIL, SAUF SI SPÉCIFIQUEMENT RECOMMANDÉ DANS
LES MANUELS. UNE INSTALLATION, UN ENTRETIEN OU UNE
MAINTENANCE INCORRECTS PEUT ENTRAÎNER DES BLESSURES
OU DES DOMMAGES MATÉRIELS. CONSULTEZ CE MANUEL DE
L’ORIENTATION. TOUS LES AUTRES SERVICES DEVRAIENT ÊTRE
EFFECTUÉS PAR UN TECHNICIEN DE SERVICE HESTAN AUTORISÉ.
LISEZ ATTENTIVEMENT ET COMPLÈTEMENT CES INSTRUCTIONS
AVANT D’INSTALLER OU D’UTILISER VOTRE APPAREIL AFIN DE
RÉDUIRE LES RISQUES D’INCENDIE, DE BRÛLURE OU D’AUTRES
BLESSURES. CONSERVER CE MANUEL POUR RÉFÉRENCE FUTURE.
DÉFINITIONS DE SÉCURITÉ
CECI INDIQUE QUE L’INOBSERVATION DE CET
AVERTISSEMENT PEUT ENTRAÎNER DES BLESSURES GRAVES
VOIRE MORTELLES.
CECI INDIQUE QUE L’INOBSERVATION DE CET
PRÉCAUTION
INSTALLATEUR: LAISSER CE MANUEL AVEC LE PROPRIÉTAIRE
DE L’APPAREIL.
PROPRIÉTAIRE: CONSERVEZ CE MANUEL POUR RÉFÉRENCE
FUTURE.
AVERTISSEMENT PEUT ENTRAÎNER DES BLESSURES
MINEURES OU MODÉRÉES.
CECI INDIQUE QUE L’INOBSERVATION DE CET
AVERTISSEMENT PEUT ENTRAÎNER DES DOMMAGES DE
L’APPAREIL OU DES DÉGÂTS MATÉRIELS.
Page 25

Un message de Hestan
Les innovations culinaires primées de Hestan et les caractéristiques spéciales ont
réinventé la cuisine du restaurant et redéfini l’expérience culinaire dans certains
des restaurants les plus acclamés de l’Amérique. Hestan prend maintenant cette
performance à l’arrière de la maison et la met au centre de la vôtre. Pensé et
méticuleusement conçu, Hestan vous servira magnifiquement pour les années à
venir.
Hestan est la seule marque résidentielle née des rêves et des exigences des chefs
professionnels. De la cuisinière à la réfrigération, chaque détail est conçu pour
offrir la performance et la fiabilité attendues dans un restaurant - maintenant
disponible pour vous.
Nous apprécions que vous ayez choisi Hestan, et nous nous engageons à vous
FR
offrir le meilleur.
Bienvenue à Hestan
©2018 Hestan Commercial Corporation
1
Page 26

FR
©2018 Hestan Commercial Corporation
2
Page 27

TABLE DES MATIÈRES
3 PRÉCAUTIONS DE SÉCURITÉ - AVANT DE COMMENCER
6 NUMÉROS DE MODÈLE
6 PLAQUE SIGNALÉTIQUE
6 RESPECT DE LA RÉGLEMENTATION ET DES CODES EN VIGUEUR
7 INSTRUCTIONS POUR L’UTILISATEUR:
11 NETTOYAGE ET ENTRETIEN
13 DÉPANNAGE
14 INSTALLATION
19 LISTE DES PIÈCES
19 SERVICE
19 GARANTIE LIMITÉE
RISQUE DE CHOC ÉLECTRIQUE
FR
Débranchez l’alimentation électrique avant d’installer ou d’entretenir l’unité. Avant de mettre
l’appareil sous tension, assurez-vous que la commande est en position «OFF». Ne pas le faire
peut entraîner la mort ou un choc électrique.
MISE À LA TERRE ÉLECTRIQUE
Cet appareil doit être mis à la terre. La mise à la terre réduit le risque de choc électrique en
cas de court-circuit. Lisez la section BRANCHEMENTS ÉLECTRIQUES de ce manuel pour des
instructions complètes.
PRÉCAUTIONS DE SÉCURITÉ - AVANT DE COMMENCER
S’il est bien entretenu, cet appariel Hestan procurera un service sûr et fiable pendant de
nombreuses années. Lorsqu’on se sert de cet appareil, les pratiques élémentaires suivantes en
matière de sécurité doivent être adoptées.
IMPORTANT: Conservez ces instructions pour l’utilisation locale des services publics.
INSTALLATEUR: Veuillez laisser ces instructions d’installation avec le propriétaire.
PROPRIÉTAIRE: Veuillez conserver ces instructions d’installation pour référence future.
Cette four est conçue pour un usage domestique uniquement. Elle ne l’est PAS pour être
installée dans des maisons préfabriquées (mobiles) ou dans des véhicules récréatifs. N’installez
PAS cette four à l’extérieur.
©2018 Hestan Commercial Corporation
3
Page 28

PRÉCAUTION
FR
PRÉCAUTIONS DE SÉCURITÉ - AVANT DE COMMENCER
(SUITE)
MESURES GÉNÉRALES DE SÉCURITÉ DE L’APPAREILUR
Veuillez lire toutes les instructions avant d’utiliser cet appareil.
LA SÉCURITÉ ALIMENTAIRE
Si les aliments sont conservés plus d’une heure, ils doivent être conservés à 60 ° C (140 ° F) ou
plus. (MED)
CONSIGNES IMPORTANTES
Quand on utilise des appareils électriques, il convient de toujours respecter des consignes de
sécurité de base, y compris les suivantes :
Lire toutes les instructions.
Ne pas toucher les surfaces chaudes. Utiliser les poignées et les boutons.
Pour protéger contre les chocs électriques, ne pas mettre de cordon ou de bouchons dans l’eau
ou tout autre liquide.
Une étroite surveillance est nécessaire quant un appareil est utilisé par des enfants ou à
proximité de ces derniers.
Débrancher la fiche de la prise quand l’appareil avant le nettoyage. Le laisser refroidir avant de
monter ou retirer des pièces.
Ne pas utiliser un appareil dont la fiche, le cordon est endommagé ou après des dysfonctions de
l’appareil ou après que ce dernier a été endommagé de quelque manière que ce soit. Retourner
l’appareil au centre de service agréé le plus proche pour l’examiner, des réparations ou des
réglages.
Le fabricant de l’appareil déconseille l’utilisation de fixations accessoires qui pourraient causer des
blessures.
Ne pas utiliser les appareils à l’extérieur.
Ne pas laisser le cordon dépasser du bord de la table ou d’un plan de travail et ne pas le laisser
toucher des surfaces chaudes.
Toujours éteindre toutes les commandes, puis brancher le cordon dans la prise murale. Pour
débrancher, éteignez toutes les commandes et retirez la fiche de la prise murale.
Ne pas utiliser l’appareil pour un usage autre que celui pour lequel il a été conçu.
L’intérieur de l’appareil peut atteindre des températures de 90°C en fonction de la température
sélectionnée et du temps de fonctionnement. Si nécessaire, utiliser des gants pour retirer ce qui
se trouve dans le tiroir.
Ne pas s’appuyer ni s’asseoir sur le tiroir chaud quand il est ouvert, cela pourrait endommager le
rail télescopique. Le poids maximal de charge du tiroir chauffant est de 80 lbs. (36 kg).
Ne pas ranger des récipients en plastique ou des objets inflammables dans l’appareil. Ces objets
représentent un risque d’incendie si le tiroir est mis en marche.
Ne bloquez pas les ouvertures de ventilation.
Conserver ces instructions.
Si vos vêtements personnels ou vos cheveux prennent feu, laissez-vous tomber et roulez-vous
immédiatement pour étouffer les flammes. Consulter un médecin si nécessaire.
©2018 Hestan Commercial Corporation
4
Page 29

PRÉCAUTION
PRÉCAUTIONS DE SÉCURITÉ - AVANT DE COMMENCER
(SUITE)
LA SÉCURITÉ DES ENFANTS
IL EST DE LA RESPONSABILITÉ DES PARENTS OU DES TUTEURS DE S’ASSURER QUE
LES ENFANTS SONT INFORMÉS DE L’UTILISATION SÉCURITAIRE DE CET APPAREIL. Ne
laissez pas les enfants utiliser cet appareil sans la surveillance d’un adulte. Ne laissez pas les
enfants jouer dans ou autour de l’appareil, même lorsqu’ils ne sont pas utilisés. Les articles qui
intéressent les enfants ne doivent pas être rangés dans ou sur l’appareil ou dans les armoires audessus de l’appareil. Les enfants qui grimpent sur l’appareil pourraient être gravement blessés.
SÉCURITÉ PENDANT LE NETTOYAGE
N’utilisez jamais un aspirateur. Le vide pourrait créer une pression sur les composants
provoquant un court-circuit. Le vide peut également endommager la surface et les composants
de l’appareil: dommages pour lesquels Hestan ne sera pas responsable.
Suivez les suggestions énumérées sous «Nettoyage et maintenance» dans ce manuel.
N’utilisez jamais d’objets métalliques tranchants ou de tampons abrasifs abrasifs, car ils
pourraient endommager la surface de l’appareil. Si nécessaire, utilisez des ustensiles standard
non abrasifs en bois ou en plastique.
FR
RÉPARATIONS:
Les travaux de montage, d’entretien ou de réparation doivent exclusivement être effectués par
du personnel spécialisé. Les travaux d’installation, d’entretien ou de réparation non conformes
peuvent représenter des dangers pour l’utilisateur; dans ce cas, le constructeur décline toute
responsabilité.
Seul le Service d’Assistance autorisé par le constructeur est autorisé à effectuer des réparations
sur l’appareil durant la période de garantie; dans le cas contraire, le droit à la garantie tombet en
cas de dommages successifs.
©2018 Hestan Commercial Corporation
5
Page 30

NUMÉROS DE MODÈLE
MODÈLES DE FOUR
FR
MODEL NO. DESCRIPTION
KWD 30 TIROIR CHAUFFE-PLAT 30 po 15 Ampères
REQUIS
PLAQUE SIGNALÉTIQUE
La plaque signalétique donne des informations importantes sur cet appareil Hestan telles que
les numéros de série et de modèle et les dégagements minima d’installation.
La plaque signalétique se trouve sur le côté gauche de l’ouverture de la cavité du four à
proximité de la charnière de porte.
Si un entretien est nécessaire, contactez le service clientèle de Hestan avec les informations sur
le modèle et le numéro de série figurant sur la plaque.
DISJONCTEUR
HESTAN COMMERCIAL CORP.
ANAHEIM, CA - USA
KDO30
PLAQUE SIGNALÉTIQUE TYPIQUE
PLAQUE
SIGNALÉTIQUE
RESPECT DE LA RÉGLEMENTATION ET DES CODES EN
VIGUEUR
L’installation de cet appareil de cuisson doit être effectuée conformément aux codes locaux. En
l’absence de tels codes, installer cet appareil conformément au National Electrical Code et les
codes locaux.
Tous les composants électriques doivent mis à la terre conformément aux codes locaux ou, en
l’absence de tels codes, au National Electrical Code ANSI/NFPA 70 ou au Code national de
l’électricité du Canada CSA C22.1.
©2018 Hestan Commercial Corporation
6
Page 31

INSTRUCTIONS POUR L’UTILISATEUR:
OUVERTURE DU TIROIR
Pour ouvrir le tiroir, saisissez la poignée et tirez le tiroir.
FERMETURE DU TIROIR
Pour fermer le tiroir, poussez doucement le tiroir vers l’arrière jusqu’à ce que le système de
fermeture en douceur s’enclenche
AVANT L’UTILISATION
N’abandonnez jamais les résidus de l’emballage dans la maison. Séparez le matériel résiduel de
l’emballage
par type et remettez-le au centre d’élimination le plus proche. Avant d’utiliser l’appareil pour
la première fois, nettoyez-le avec un chiffon humide puis séchez-le soigneusement tel qu’on le
décrit au chapitre « Nettoyage et entretien ».
Chauffez le tiroir vide pendant au moins 2 heures. Pour cela, réglez la température à 85° C.
Durant cette période de réchauffage, veillez à ce que la cuisine soit bien aérée. Les éléments en
métal ont été traités avec un produit de protection adéquat.
Ce produit pourrait être la cause de mauvaises odeurs lors du premier réchauffage du tiroir.
Ces odeurs et les éventuelles fumées disparaissent rapidement et elles ne sont pas dues à un
branchement non conforme ou à un défaut de l’appareil.
FR
SYSTÈME DE CHAUFFAGE
L’appareil est muni d’un système de ventilation à air chaud. Un ventilateur distribue de façon
optimale la chaleur de la résistance de réchauffage à l’intérieur du tiroir.
Le thermostat permet de déterminer et de contrôler la température souhaitée pour la vaisselle
introduite. La circulation de l’air réchauffe la vaisselle de manière uniforme et rapide.
Une grille de protection empêche le contact accidentel avec les résistances de réchauffage et le
ventilateur.
©2018 Hestan Commercial Corporation
7
Page 32

FR
INSTRUCTIONS POUR L’UTILISATEUR
(SUITE)
COMMANDES ET INDICATEURS
Un seul bouton (sélecteur de mode) contrôle le tiroir chauffant.
Il a des positions pour OFF, Proofing, et Defrost, plus une gamme continue de WARM à MAX.
Ce manuel utilisera MED pour désigner un réglage à mi-chemin entre WARM et MAX.
Les lumières intérieures s’allument lorsque le tiroir est ouvert.
Le voyant du panneau s’allume lorsque le bouton est en mode de chauffage. (De CHAUD à
MAX.)
OPÉRATION
Ouvrez le tiroir. Tournez le bouton pour régler la fonction ou la température souhaitée.
Pour éteindre l’appareil, tournez le bouton en position OFF.
Position du bouton Fonction
Off
Décongeler
Chauffe-plat
WARM > MAX
TEMPS DE RÉCHAUFFAGE
Différents facteurs influencent les temps de
réchauffage:
• matériel et épaisseur de la vaisselle;
• quantité de vaisselle chargée;
• disposition de la vaisselle chargée;
• sélection de la température.
En général, plus il y a de vaisselle ou d’articles dans le tiroir et plus la température de consigne
est élevée, plus il faut de temps pour atteindre la température de consigne.
DÉCONGÉLATION
La fonction de décongélation utilise uniquement la ventilation forcée sans aucun élément
chauffant actif.
Chauffe-plat
Ancun
77-95°F [25-35°C]
Ventilateur sans
chaleur
105 - 195°F [40-90°C]
PROCÉDURE
- Tourner le bouton sur la position décongélation.
LEVÉE
La fonction de levée maintient la température du tiroir entre 25° et 40°.
PROCÉDURE
Préchauffer le tiroir pendant 5 minutes en tournant le bouton sur la configuration de levage.
Placer la pâte au centre du tiroir après l’avoir enveloppé dans un torchon légèrement humide.
©2018 Hestan Commercial Corporation
8
Page 33

INSTRUCTIONS POUR L’UTILISATEUR
CHAUFFE-PLAT
Aliments conseillés pour être laissés au chaud : viande, poulet, poisson, sauces, légumes,
garnitures et soupes.
• Pour éviter que les aliments ne débordent dans le tiroir, ne pas remplir excessivement les
plats.
• Disposer les plats dans le tiroir et fermer ce dernier avec précaution afin d’éviter que les
éventuels liquides ne sortent.
• Il est conseillé de ne pas réchauffer les aliments pour des intervalles de temps supérieurs à
une heure afin d’éviter que ceux-ci ne perdent leurs substances nutritives.
• Couvrir les aliments humides et liquides avec un couvercle ou une pellicule résistant aux
températures élevées. De cette manière, on évite que l’humidité ne s’échappe, que de la
condensation ne se forme et dépose de l’humidité hors des plats.
• Ne pas couvrir les aliments rôtis ou les frites qui doivent rester croustillants. Tenir ces plats
au chaud avec des températures élevées.
PROCÉDURE
1. Placer les plats dans le tiroir.
2. Activer le tiroir en tournant le bouton de thermostat entre MIN/MED (105/140°F 40/60°C), en fonction de la température requise et préchauffer le tiroir pendant 10 minutes.
(SUITE)
FR
3. Mettre la nourriture dans les plats préchauffés.
4. Refermer le tiroir.
DÉSACTIVATION
Mettre le bouton en position OFF. Extraire les plats du tiroir à l’aide d’un chiffon ou de
maniques.
• Remarque: Ne jamais transférer la vaisselle chaude directement du plan de cuisson chaud à
la base en verre du tiroir thermique. Le fond en verre peut être endommagé.
CUISSON LENTE
La fonction de cuisson lente est idéale pour cuire la viande tendre qui doit s’avérer peu cuite ou
saignant. Grâce à ce mode de cuisson, la viande est encore rose à l’intérieur. Cependant, ceci ne
signifie pas que la viande est crue ou peu cuite.
En plus de retenir les jus dans la viande, cette fonction permet de maintenir la viande chaude
plus facilement.
Vaisselle adaptée à l’utilisation : en verre, porcelaine ou céramique avec couvercle.
PROCÉDURE
1. Préchauffer le tiroir chauffe-plat avec la vaisselle choisie préalablement, au niveau maximum
pendant 15 minutes.
2. Faire chauffer du beurre ou de l’huile dans un plat. Laisser la viande rissoler pendant le
temps indiqué dans le tableau puis remettre le tout immédiatement dans la casserole
préchauffée en recouvrant avec le couvercle.
3. Positionner le thermostat entre MED/MAX (140/195°F -60/90°C) pour la durée nécessaire à
terminer la cuisson.
©2018 Hestan Commercial Corporation
9
Page 34

INSTRUCTIONS POUR L’UTILISATEUR
MISES EN GARDE POUR LA CUISSON LENTE
(SUITE)
FR
• Utiliser uniquement de la viande fraîche et en parfaite condition.
• Eliminer, avec soin, les zones de graisse.
• Les parties charnues ne doivent pas être nécessairement retournées.
• Une fois la cuisson terminée, il est possible de couper la viande ; il n’est pas nécessaire de la
laisser reposer.
• Avec la cuisson lente, la viande n’est pas chaude comme la viande cuite traditionnellement
; il est conseillé, pour les 20-30 dernières minutes de cuisson de remettre aussi les assiettes
dans le tiroir chauffe-plat, dans la partie gauche.
• Servir la viande avec des sauces très chaudes.
• Si on souhaite maintenir la viande chaude une fois que la cuisson est terminée, mettre
le bouton du thermostat entre 40°C et 60°C. Les petites pièces de viande peuvent être
maintenues chaudes pendant 45 minutes et les plus grandes pendant deux heures.
TABLEAU
La fonction de cuisson lente est adaptée à toutes les pièces tendres de bœuf, porc, veau, agneau,
gibier et volaille. Le temps initial pour faire rissoler la viande et la suite de la cuisson dépendent
des dimensions des tranches de viande.
Les paramètres de temps se réfèrent au cas où la viande est reposée dans un plat avec du beurre
et de l’huile déjà chaude.
EXEMPLE DE PLAT Rissolage initial NIVEAU
Petites tranches de viande
Languettes de viande environ 1 - 2 minutes MED
Petits steaks ou médaillons Environ 1 - 2 minutes par
côté
Tranches de viande de
dimensions moyennes
Filet Environ 4 - 5 minutes par
côté
Rôti maigre Environ 10 - 15 minutes par
côté
Grandes tranches de viande
Filet (à partir de 900 g) Environ 6 - 8 minutes par
côté
Roastbeef (1,1-2kg) Environ 8 - 10 minutes par
côté
Légumes Environ 30 minutes par côté MED
REMARQUE : 2 configurations sont disponibles : MAX et MED. Les recommandations pour les
temps de cuisson sont 4 à 5 heures pour MAX et 8 à 10 heures pour MED. Des petites quantités
de nourriture peuvent nécessiter moins de temps alors que des quantités importantes peuvent
nécessiter plus de temps.
MED
MAX
MAX
MAX
MAX
10
©2018 Hestan Commercial Corporation
Page 35

NETTOYAGE ET ENTRETIEN
GLISSIÈRES DU TIROIR
Les glissières du tiroir permettent d’ouvrir complètement le tiroir pour un nettoyage plus facile.
Si nécessaire, il est possible de retirer le tiroir.
REMARQUE : La capacité de charge du tiroir est de 80 lbs (36 kg).
Retirer tous les éléments de l’intérieur du tiroir chauffant et laisser le tiroir chauffant refroidir
complètement avant de tenter de retirer le tiroir.
POUR LE RETIRER :
1. Ouvrir le tiroir dans sa position entièrement
ouverte.
2. Localiser les pattes de fixation des deux côtés du
tiroir.
3. Abaisser la patte sur le côté droit du tiroir et
relever la patte du côté gauche du tiroir, en même
temps. Puis tirer le tiroir sur encore 2,5 cm,
environ, pour désengager le verrou.
FR
4. Tenir le tiroir sur les côté (mais pas devant). Tirer dessus
lentement pour le retirer entièrement.
POUR LE REMETTRE EN PLACE :
1. Aligner les rails du tiroir avec les glissières du meuble.
2. Pousser le tiroir sur toute sa longueur.
3. Ouvrir et fermer le tiroir doucement pour garantir qu’il est
positionné correctement sur les glissières.
ENTRETIEN
Le nettoyage représente généralement le seul
type d’entretien nécessaire.
ATTENTION
Avant de commencer le nettoyage,
débranchez l’appareil du réseau. Retirez
la fiche des prises ou désactivez le circuit
d’alimentation de l’appareil
AVERTISSEMENT
N’utilisez pas détergents agressifs, de produits abrasifs, d’éponges abrasives ni d’objets pointus,
car ils risquent de tacher l’appareil.
N’utilisez jamais de jets de vapeur pour le nettoyage des parties internes de l’appareil.
©2018 Hestan Commercial Corporation
11
Page 36

FR
NETTOYAGE ET ENTRETIEN
(SUITE)
REMPLACEMENT D’UNE AMPOULE
• Les lumières s’allument lorsque la porte est ouverte
• Chaque assemblage d’éclairage comprend une lentille amovible, une lampe à incandescence
ainsi qu’une boîte de douille qui sont fixés. Voyez l’illustration de cette page.
• Le remplacement de l’ampoule est considéré comme un entretien de routine.
RISQUE DE CHOC ÉLECTRIQUE - Assurez-vous que l’alimentation a été coupée à la cuisinière.
La douille de lampe est sous tension lorsque la porte est ouverte. Le fait de ne pas couper
l’alimentation lors du remplacement d’une ampoule pourrait entraîner un choc électrique ou des
brûlures.
Assurez-vous que la lentille en verre est frais au toucher. Soyez prudent lorsque vous manipulez le
verre, il est fragile et peut se briser s’il tombe.
N’utilisez que des ampoules halogènes bipolaires de 12 watts de 20 watts pouvant être
utilisées dans un appareil. Vous pouvez trouver ce type d’ampoule peut être disponible dans les
quincailleries et les magasins de bricolage, ou dans les magasins d’éclairage spécialisés. Pour plus
de détails, adressez-vous au service clientèle de Hestan.
ASSUREZ-VOUS QUE LE COURANT EST COUPÉ! .
1. Vous pouvez retirer le tiroir avant de remplacer l’ampoule.
2. Placez une serviette ou un chiffon épais sur le plancher du four en dessous de la lampe pour
recueillir le verre s’il tombe.
3. Utilisez un petit tournevis à lame plate pour soulever délicatement la lentille en verre et
mettre ce dernier de côté. Plongez la main dans le boîtier de la lampe et retirez l’ancienne
ampoule comme indiqué sur l’image ci-dessous.
4. Avant l’installation, il est très important de nettoyer l’ampoule neuve avec un chiffon doux
propre ou du papier de soie. La graisse, les empreintes digitales ou les sécrétions cutanées
peuvent laisser un résidu sur la surface en verre de l’ampoule, ce qui créera un point chaud.
L’ampoule finira par se fêler à ce point chaud.
5. Tout en continuant à utiliser un chiffon ou un mouchoir en papier, insérez la nouvelle
ampoule dans le boîtier de la lampe. Poussez l’ampoule complètement dans la douille.
6. Remettre la lentille en verre en place en tenant compte de la découpure dans le verre qui
s’aligne sur la douille de l’ampoule.
7. Rétablissez l’alimentation et vérifiez que l’ampoule neuve fonctionne.
8. Si vous retirez le tiroir, installez-le maintenant.
12
Retaining
screw
©2018 Hestan Commercial Corporation
Page 37

NETTOYAGE ET ENTRETIEN
(SUITE)
FR
LIGHT BULBSOCKET
DÉPANNAGE
Les réparations ne doivent être effectuées que par un personnel spécialisé et qualifié. Tout
travail de réparation non effectué par du personnel professionnel peut causer des dommages à
l’appareil pour lesquels Hestan ne sera pas responsable.
Les problèmes suivants peuvent être vérifiés par le consommateur sans l’assistance du service
après-vente. LE TIROIR N’EST PAS ASSEZ HOT
SOIS SÛR QUE:
• L’appareil est allumé.
• La température correcte a été réglée.
• L’ouverture du ventilateur n’est pas bloquée par des plaques ou d’autres obstructions
importantes;
• Les tiroirs ont eu le temps de chauffer.
LE TIROIR NE CHANGE PAS
• Est-il allumé?
• Est-il activé sur DEFROST par erreur?
• Pouvez-vous entendre le ventilateur en marche?
• Si le ventilateur tourne, le système de chauffage devrait fonctionner, sauf en mode
DÉCONGÉLATION.
Si le ventilateur ne fonctionne pas, ouvrez le tiroir et vérifiez si les lumières intérieures
s’allument. Si aucune des lumières ne s’allume, vérifiez que l’appareil est branché et que le
disjoncteur ne s’est pas déclenché.
• Si le voyant s’allume mais que le ventilateur ne fonctionne pas, appelez le service clientèle
de Hestan.
©2018 Hestan Commercial Corporation
13
Page 38

FR
INSTALLATION
INSTALLATION DE L’APPAREIL
IMPORTANT: Conservez ces instructions pour l’utilisation de l’inspecteur électrique local.
INSTALLATEUR: S’il vous plaît laissez ce manuel avec le propriétaire pour référence future.
PROPRIÉTAIRE: S’il vous plaît garder ce manuel pour référence future.
• Si les informations contenues dans ce manuel ne sont pas suivies à la lettre, un incendie ou
une explosion pourrait en résulter, causant des dommages matériels, des blessures corporelles
ou la mort.
Veuillez lire ces instructions ENTIÈREMENT ET ATTENTIVEMENT. Ils vous feront gagner du
temps et des efforts et vous aideront à optimiser les performances du tiroir.
Assurez-vous de respecter toutes les MISES EN GARDE et les AVERTISSEMENTS. Ces
instructions d’installation sont destinées à être utilisées par un installateur qualifié.
• Assurez-vous que l’installation électrique est adéquate et conforme au Code national de
l’électricité, ANSI / NFPA 70 - dernière édition, ou au Code canadien de l’électricité, partie 1
C22.1 (dernière édition) et tous les codes et ordonnances locaux.
Ceux-ci doivent être soigneusement suivis à tout moment.
OUTILS NECESSAIRES
Vous aurez besoin des outils suivants pour installer votre nouveau appareil:
• Mètre enrouleur et règle à tracer ou règle
• Crayon
• Tournevis Philips
• Niveau
• Pince coupante de fils électriques et des dénude - fil
• Scie sauteuse ou scie à main
• Scie - cloche de 1 po [2,5 cm]
• Mèche et perceuse
• Gants et lunettes de sécurité
• Voltmètre [0-250VAC]
EMBALLAGE
Enlevez tout le ruban et l’emballage avant d’utiliser le tiroir chauffant.
Détruisez l’emballage après avoir déballé le tiroir en suivant les règles en vigueur dans votre
région. Ne laissez jamais les enfants jouer avec du matériel d’emballage.
14
PUISSANCE REQUISE
Le tiroir-réchaud doit être alimenté avec la tension et la fréquence appropriées. Le tiroir est
fabriqué pour être connecté à une alimentation électrique monophasé, 120 volts, 60 Hz.
PUISSANCE REQUISE
Tension 120 Volt, 60 Hz
Courant 9.2 Amperes
Consommation 1100 Watts
©2018 Hestan Commercial Corporation
Page 39

INSTALLATION
(SUITE)
REMEQUES D’INSTALLATION
La surface de support du tiroir chauffant doit être une plateforme en contreplaqué d’au moins
3/4” (2cm) d’épaisseur.
Elle doit supporter 100 pounds (45 kg).
La plate-forme doit être solide, plane avec le fond du meuble découpé.
Rester extrêmement attentif quand on déplace ou on installe le tiroir. Celui-ci est
particulièrement lourd. NE PAS SOULEVER LE TIROIR CHAUFFANT PAR LA POIGNEE DU
TIROIR.
CHOIX DE L’EMPLACEMENT DU TIROIR
Sélectionnez soigneusement l’emplacement où le tiroir chauffant sera placé.
Il devrait être situé pour une utilisation pratique dans la cuisine.
Assurez-vous que l’alimentation électrique peut être fournie à l’emplacement sélectionné.
Le réceptacle doit être accessible après l’installation du tiroir, afin que le tiroir puisse être
débranché et branché après l’installation. Le cordon mesure environ 47 «[120 cm] de longueur.
MISE EN GARDE
Soyez extrêmement prudent lorsque vous déplacez ou installez le tiroir. C’est très lourd.
REMARQUER
NE PAS SOULEVER LE TIROIR DE RÉCHAUFFAGE À L’AIDE DE LA POIGNÉE DU TIROIR.
Soyez très prudent lorsque vous déplacez ou installez le tiroir chauffant pour éviter
d’endommager le cadre ou d’endommager les armoires.
FR
Si vous installez le tiroir chauffant sous un autre produit, reportez-vous à la documentation de
ce produit pour connaître les exigences d’installation.
EXIGENCES ÉLECTRIQUES
INFORMATION GÉNÉRAL
Le voltage et la fréquence de cet appareil doivent être conformes à ceux du réseau; en outre,
il doit être correctement relié à la terre et protégé par un disjoncteur général ou un fusible
ayant un ampérage comme spécifié sur la plaque signalétique. Nous vous recommandons de
faire exécuter le branchement électrique de votre appareil par un électricien compétent. Après
l’installation, demandez-lui de vous montrer où se situe l’interrupteur général de la appareil.
Vérifiez auprès des autorités locales les normes d’électricité qui s’appliquent à votre zone
d’habitation. Ne pas câbler le tiroir chauffant conformément aux codes réglementaires pourrait
causer une situation dangereuse.
Dans le cas où il n’y aurait pas de normes spéciales, votre appareil sera branchée et protégée par
des fusibles aux termes des Normes d’Électricité Nationales, ANSI/NFPA N°70-dernière édition.
Au Canada, le branchement électrique de votre appareil et les fusibles doivent être conformes
aux Normes d’Électricité du Canada. Assurez-vous que l’installation de ce produit dans une
autocaravane est conforme aux Normes de Construction et de Sécurité des Habitations, Titre
24CFR, Partie 3280, ou lorsque de telles normes ne sont pas applicables, à la Norme pour les
Installations d’Habitations, ANSI A225.1, à la Norme pour les Installations des Habitations,
Emplacements et Communautés et ANSI/NFPA 501A ou aux réglementations locales.
©2018 Hestan Commercial Corporation
15
Page 40

FR
PRÉCAUTION
PRÉCAUTION
INSTALLATION
(SUITE)
BRANCHEMENT ELECTRIQUE
Vous devez disposer d’une fourniture et d’une sortie électrique adéquate pour que les pièces
électriques de votre tappareil fonctionnent.
RISQUE D’ÉLECTROCHOC
Branchez dans une prise à 3 fils avec mise à la terre.
- Ne pas enlever le conducteur de mise à la terre.
- Ne pas utiliser un adaptateur.
- Ne pas utiliser un câble d’extension.
La non-observation de ces instructions peut entraîner la mort, un incendie ou un électrochoc.
POUR VOTRE SÉCURITÉ PERSONNELLE, CET APPAREIL DOIT NÉCESSAIREMENT ÊTRE
RELIÉ À LA TERRE.
Le câble d’alimentation de cet appareil est équipé d’une fiche à 3 fils (mise à la terre) qui doit
être branchée dans une prise à 3 fils mise à la terre correctement et disposant d’un courant
alternatif standard de 120 Volt et 60 cycles.
Si votre prise n’est pas reliée à la terre, demandez à un électricien de vous la remplacer; et en
attendant, utilisez un adaptateur reliant à la terre pour convertir la vieille prise.
Cette solution ne peut être que temporaire et un électricien compétent devrait la tester pour
être sûr qu’elle correspond aux normes.
Ne jamais en aucun cas couper ou enlever la mise à la terre du câble électrique de la appareil.
Ne réparez ou ne remplacez pas des pièces de l’appareil si ce n’est pas spécifiquement
recommandé dans le manuel.
Tous les autres dépannages doivent être effectués par un technicien qualifié. Ce qui réduirait les
risques de blessures et d’endommagements du apareil.
Ne modifiez jamais ou n’altérez jamais la construction de l’appareil en enlevant des panneaux,
des couvertures de fil, des vis, ou toute autre pièce du produit.
16
©2018 Hestan Commercial Corporation
Page 41

INSTALLATION
(SUITE)
PROCÉDURE D’INSTALLATION
Avant de commencer le montage des tiroirs de l’appareil, s’assurer qu’il y a suffisamment
d’espace pour installer le tiroir et l’appareil.
Les dimensions précises pour l’installation sont indiquées
en pouces et en mm.
Installer un blocage anti-basculement contre le panneau
arrière du meuble. Vérifier que les vis sont fixées
correctement et ne pas pénétrer le câblage électrique ou la
plomberie.
L’unité est lourde et nécessite au moins deux personnes ou
un équipement approprié pour se déplacer. Vérifiez qu’il
y a de la place pour faire fonctionner le cordon avant de
placer le tiroir sans le pincer.
DIMENSIONS DE COUPE
FR
1. Si la fiche ne sera pas accessible après avoir placé
l’unité, éteignez-la sur le panneau de service.
Verrouillez le panneau de service pour empêcher
l’alimentation d’être activée accidentellement.
2. Faites passer le cordon dans la prise.
• Si la prise est accessible après avoir placé l’appareil,
acheminez le cordon mais ne le rebranchez pas.
• Si la fiche ne sera pas accessible après avoir placé le
tiroir, branchez-le.
DIMENSIONS GÉNÉRALES
27-7/8"
[ 707 cm]
9-1/16"
[ 230 cm]
23-3/4"
[ 601 cm]
23"
[ 583 cm]
29-1/2"
[ 750 cm]
29-5/8"
[ 754 cm]
10-3/8"
[ 264 cm]
9-1/16"
[ 230 cm]
27-7/8"
[ 707 cm]
23"
[ 583 cm]
24"
[ 610 cm]
29-1/2"
[ 750 cm]
emplacement
électrique
9-1/4"
[ 235 cm]
28-7/16"
[ 722 cm]
10-3/8"
[ 264 cm]
9-1/16"
[ 230 cm]
27-7/8"
[ 707 cm]
23"
[ 583 cm]
23"
[ 581 cm]
29-1/2"
[ 750 cm]
8-1/4"
[ 208,5 cm]
24-3/4"
[ 631 cm]
29-5/8” to 29-7/8"
[ 754 to 758 cm]
29-7/8"
[ 758 cm]
10-3/8"
[ 264 cm]
©2018 Hestan Commercial Corporation
17
Page 42

FR
INSTALLATION
3. Placez le tiroir de façon à ce qu’il soit directement centré et faites glisser l’assemblage du
tiroir-réchaud dans la découpe jusqu’à ce qu’il affleure l’armoire.
4. Fixez solidement le tiroir à l’armoire à l’aide des vis fournies.
• Si vous ne fixez pas le tiroir-réchaud, le tiroir pourrait bouger ou basculer pendant
l’utilisation et endommager le tiroir ou les armoires ou blesser quelqu’un.
5. Remettez l’appareil sous tension ou branchez le tiroir.
6. Tournez le tiroir chauffant sur MAX. Observez que la lumière s’allume. Fermez le tiroir
pendant environ 1 minute puis vérifiez la chaleur.
7. Vérifiez que le tiroir chauffe, puis éteignez le bouton.
• Assurez-vous que le client sait comment couper l’alimentation du tiroir chauffe-plat au
disjoncteur ou à la boîte à fusibles en cas d’urgence.
(SUITE)
INSTALLATION
18
©2018 Hestan Commercial Corporation
Page 43

LISTE DES PIÈCES
Visiter le site Web Hestan pour consulter la liste des pièces de ce produit
www.hestanhome.com.
:
SERVICE
Toutes les réparations dans le cadre ou en dehors de la garantie doivent être effectuées par du
personnel d’entretien qualifié. Pour localiser un réparateur agréé dans la région, s’adresser au
concessionnaire Hestan, au représentant local ou à l’usine. Avant d’appeler, veiller à avoir les
numéros de modèle et de série à portée de la main.
Hestan Commercial Corporation
3375 E. La Palma Avenue
Anaheim, CA 92806
(888) 905-7463
GARANTIE LIMITÉE
ÉLÉMENTS COUVERTS PAR LA PRÉSENTE GARANTIE LIMITÉE
FR
Hestan Commercial Corporation (« HCC ») garantit à l’acheteur initial d’un appareil à gaz Hestan
(le « Produit ») chez un revendeur agréé HCC que le Produit ne présente aucun vice de matière
ni de fabrication pendant une période de deux (2) ans à compter de la date de l’achat initial au
détail ou de la date de clôture en cas de construction neuve, suivant la période la plus longue («
Période de garantie limitée »). HCC accepte de réparer ou de remplacer, à sa seule discrétion,
tout composant ou pièce du Produit dont la défaillance est due à des vices de matières ou
de fabrication pendant la Période de garantie limitée. La présente Garantie limitée n’est pas
transférable et n’est offerte à personne d’autre que l’acheteur initial au détail (« Acheteur »). La
présente garantie limitée n’est valable que pour les Produits achetés chez et reçus d’un revendeur
agréé HCC dans tous les Etats-Unis, dans le District de Columbia et au Canada. La présente
Garantie limitée ne s’applique qu’aux Produits pour usage non commercial, à l’exclusion de ceux
utilisés à des fins commerciales.
MARCHE À SUIVRE POUR UNE RÉPARATION AU TITRE DE LA GARANTIE
En cas de défaillance du Produit pendant la Période de garantie limitée pour des raisons couvertes
par la présente Garantie limitée, l’Acheteur doit contacter immédiatement le revendeur auquel il a
acheté le Produit ou HCC au 888.905.7463.
Il incombe à l’Acheteur de rendre le Produit raisonnablement accessible pour réparation ou
de régler les frais de mise à disposition raisonnable du Produit pour réparation. La réparation
sera effectuée pendant les heures d’ouverture normales du Centre de réparation agréé par
Hestan. Dans la mesure où l’Acheteur demande une réparation en dehors des heures d’ouverture
normales du Centre de réparation agréé par Hestan, l’Acheteur règlera la différence entre le
tarif normal et celui des heures supplémentaires ou des primes. L’Acheteur doit régler tous les
frais de déplacement si celui-ci dépasse 80 km [50 miles] (dans un sens) par rapport au Centre de
réparation le plus proche agréé par Hestan.
©2018 Hestan Commercial Corporation
19
Page 44

FR
GARANTIE LIMITÉE
ALLONGEMENTS AU-DELÀ DE LA PÉRIODE DE GARANTIE LIMITÉE DE DEUX ANS:
En plus de la garantie limitée de deux ans, les composants qui suivent bénéficient d’un
prolongement de la garantie comme expressément énoncé ci-après :
Les brûleurs à gaz (hormis leur aspect extérieur), les éléments chauffants électriques, les moteurs
de ventilateurs (hottes de ventilation), les tableaux de commande électronique, les magnétrons et
les génératrices asynchrones (le cas échéant) du Produit sont garantis exempts de vices de matières
et de fabrication dans des conditions normales d’utilisation non commerciale et de réparation
pendant une période de cinq (5) ans au profit de l’Acheteur initial. Cela exclut la corrosion
superficielle, les rayures et la décoloration susceptibles de se produire pendant une utilisation
normale et se limite au remplacement de la ou des pièces défectueuses, tous les autres frais, y
compris ceux de main d’œuvre, de transport et de manutention, le cas échéant, étant à la charge de
l’Acheteur.
ÉLÉMENTS NON COUVERTS PAR LA PRÉSENTE GARANTIE LIMITÉE
La présente Garantie limitée ne couvre pas ce qui suit, excluant toute responsabilité financière
de HCC : tous dommages ou vices affectant tout Produit non acheté chez un revendeur agréé
HCC; variations de coloris dans la finition ou autres dommages esthétiques ; panne ou dommages
dus à une utilisation abusive ou erronée, un accident, un incendie, une catastrophe naturelle, un
usage commercial du Produit, une interruption de l’alimentation électrique ou en gaz du Produit
; dommages résultant d’une modification, d’une installation ou utilisation incorrecte du Produit;
dommages résultant de la réparation ou du remplacement incorrect ou sans autorisation de tout
composant ou pièce du Produit; dommages résultant d’un service après vente assuré par quiconque
autre qu’un agent ou représentant agréé du réseau commercial de Hestan; usure normale et
détérioration; dommages résultant de l’exposition du Produit à une atmosphère corrosive
contenant du chlore, du fluor ou toute autre substance chimique nuisible; dommages résultant
de l’absence d’un entretien normal du Produit; dommages dont HCC n’a pas été avisé ou qui se
sont produits après expiration de la Période de garantie limitée; dommages accessoires et indirects
causés par tout vice de matière ou de fabrication.
(SUITE)
ARBITRAGE :
La présente Garantie limitée est régie par la Loi fédérale sur l’arbitrage. Tout litige opposant
l’Acheteur à HCC et relatif au Produit ou à la présente Garantie limitée doit être résolu par voie
d’arbitrage exécutoire exclusivement sur une base individuelle avec l’Acheteur. L’arbitrage sera
effectué par l’Association Américaine d’Arbitrage (American Arbitration Association, « AAA
») conformément à ses règles d’arbitrage pour la protection du consommateur ou par JAMS.
L’audience d’arbitrage se tiendra devant un arbitre nommé par l’AAA ou par JAMS. L’arbitre ne
devra procéder à aucun arbitrage collectif et l’Acheteur devra renoncer à tout recours contre HCC
en qualité de représentant de tiers.
LIMITATION DE RESPONSABILITÉ :
La présente Garantie limitée constitue l’accord définitif, intégral et exclusif entre HCC et
l’Acheteur eu égard au Produit.
IL N’EXISTE AUCUNE GARANTIE EXPRESSE AUTRE QUE CELLES ÉNUMÉRÉES ET DÉCRITES
PLUS HAUT. AUCUNE GARANTIE EXPRESSE OU IMPLICITE, Y COMPRIS SANS S’Y LIMITER,
TOUTE GARANTIE IMPLICITE DE QUALITÉ MARCHANDE OU D’ADAPTATION À UN USAGE
PARTICULIER NE S’APPLIQUERA APRÈS L’EXPIRATION DE LA PÉRIODE DE GARANTIE
LIMITÉE INDIQUÉE PLUS HAUT. AUCUNE GARANTIE EXPRESSE APPLICABLE À CE
PRODUIT OFFERTE PAR UNE PERSONNE OU ENTREPRISE QUELCONQUE N’ENGAGERA
HCC. HCC NE GARANTIT EN AUCUNE FAÇON L’ADAPTATION DU PRODUIT À UN USAGE
PARTICULIER, SAUF DISPOSITION CONTRAIRE DE LA LÉGISLATION APPLICABLE.
HCC N’ASSUME AUCUNE RESPONSABILITÉ POUR TOUT MANQUE À GAGNER,
IMPOSSIBILITÉ DE RÉALISER DES ÉCONOMIES OU AUTRES AVANTAGES NI POUR TOUT
AUTRE DOMMAGE PARTICULIER, DIRECT OU INDIRECT CAUSÉ PAR L’UTILISATION,
L’USAGE ABUSIF OU L’INCAPACITÉ D’UTILISER CE PRODUIT, QUELLE QUE SOIT LA
20
©2018 Hestan Commercial Corporation
Page 45

GARANTIE LIMITÉE
THÉORIE JURIDIQUE SUR LAQUELLE LA DEMANDE SE FONDE, MÊME SI HCC EST
INFORMÉ DE LA POSSIBILITÉ DE TELS DOMMAGES. AUCUN RECOUVREMENT À
L’ENCONTRE DE HCC NE SERA SUPÉRIEUR AU PRIX D’ACHAT DU PRODUIT.
SANS LIMITER LA PORTÉE DE CE QUI PRÉCÈDE, VOUS ASSUMEZ TOUS LES RISQUES ET LA
RESPONSABILITÉ DES PERTES, DOMMAGES OU BLESSURES ET DÉGÂTS MATÉRIELS SUBIS
PAR VOUS-MÊMES ET DES TIERS RÉSULTANT DE L’UTILISATION, DE L’USAGE ABUSIF OU
DE L’INCAPACITÉ D’UTILISER CE PRODUIT, QUI NE SONT PAS CAUSÉS DIRECTEMENT PAR
LA NÉGLIGENCE DE HCC. LA PRÉSENTE GARANTIE LIMITÉE FORMULE VOTRE RECOURS
EXCLUSIF.
Aucune déclaration ni aucun engagement verbal ou écrit de la part de qui que ce soit, y compris
sans s’y limiter un employé, représentant ou agent de HCC, ne créera une garantie ni élargira en
quoi que ce soit la portée de la présente Garantie limitée expresse d’un an. En cas de divergence
entre la présente garantie limitée et tout autre accord ou déclaration lié ou relatif au Produit, ce
sera cette Garantie qui s’applique. Si une disposition quelconque de la présente Garantie limitée
est déclarée invalide ou inapplicable, elle sera réputée modifiée dans la limite nécessaire pour la
rendre applicable et le reste de la Garantie limitée restera valide et applicable selon ses modalités.
INTERACTION ENTRE CERTAINES LOIS ET LA PRÉSENTE GARANTIE LIMITÉE :
Il se peut que certains États, Provinces et Territoires n’autorisent pas la limitation de durée
d’une garantie implicite ni l’exclusion ou la restriction des dommages directs ou indirects. Les
limitations ou exclusions qui précèdent peuvent par conséquent ne pas être applicables. Il se
peut que certains États, Provinces ou Territoires prévoient d’autres droits et recours en matière de
garantie. Les dispositions de la présente Garantie limitée n’ont pas pour but de limiter, modifier,
restreindre, nier ni exclure les conditions obligatoires de garantie prévues par des États, Provinces
ou Territoires, y compris certaines garanties implicites. La présente garantie confère des droits
précis, auxquels peuvent s’en ajouter d’autres qui varient selon le lieu.
Toute question relative à la présente Garantie limitée peut être adressée à
Hestan Commercial Corporation au (888) 905-7463
(SUITE)
FR
©2018 Hestan Commercial Corporation
21
Page 46

Cette page a été intentionnellement laissée vierge
Page 47

Page 48

RETAIN THIS MANUAL FOR FUTURE REFERENCE
CONSERVEZ CE MANUEL POUR UNE RÉFÉRENCE FUTURE
Hestan Commercial Corporation
3375 E. La Palma Ave.
Anaheim, CA 92806
(888) 905-7463
©2018 Hestan Commercial Corporation P/N 021920 REV A
 Loading...