

hestan KRWL24-XX, KRWL24-OV, KRWL24, KRWR24-OV, KWCL24-XX Use And Care Manual
...
INDOOR PRESERVATION
Wine Storage
KWC / KRW
Use and Care Manual
E
HOMEOWNER: RETAIN THIS MANUAL FOR FUTURE REFERENCE.
IF THE INFORMATION IN THIS MANUAL IS NOT FOLLOWED
EXACTLY, A FIRE OR EXPLOSION MAY RESULT CAUSING PROPERTY
DAMAGE, PERSONAL INJURY, OR DEATH.
Do not store or use gasoline or other flammable vapors and liquids in the vicinity of
this or any other appliance.
Installation and service must be performed by a qualified installer or service agency.
DO NOT REPAIR, REPLACE OR REMOVE ANY PART OF THE APPLIANCE UNLESS
SPECIFICALLY RECOMMENDED IN THE MANUAL. IMPROPER INSTALLATION,
SERVICE OR MAINTENANCE CAN CAUSE INJURY OR PROPERTY DAMAGE. REFER
TO THIS MANUAL FOR GUIDANCE. ALL OTHER SERVICING SHOULD BE DONE BY A
QUALIFIED TECHNICIAN.
READ THESE INSTRUCTIONS CAREFULLY AND COMPLETELY
BEFORE INSTALLING OR USING YOUR APPLIANCE TO REDUC
THE RISK OF FIRE, BURN HAZARD, OR OTHER INJURY. KEEP
THIS MANUAL FOR FUTURE REFERENCE.
SAFETY DEFINITIONS
THIS INDICATES THAT DEATH OR SERIOUS INJURY MAY
OCCUR AS A RESULT OF NOT OBSERVING THIS WARNING
THIS INDICATES THAT MINOR OR MODERATE INJURY MAY
OCCUR AS A RESULT OF NOT OBSERVING THIS WARNING.
THIS INDICATES THAT DAMAGE TO THE APPLIANCE OR
PROPERTY MAY OCCUR AS A RESULT OF NOT OBSERVING
THIS WARNING.
INSTALLER: LEAVE THIS MANUAL WITH THE OWNER OF THE APPLIANCE.
Message from Hestan:
Hestan’s award-winning culinary innovations and purpose-built features
reinvented the restaurant kitchen and redefined culinary experience in some
of America’s most acclaimed restaurants. Hestan now takes this performance
from the back of the house and puts it front and center in yours. Thoughtfully
designed and meticulously built, Hestan will serve you beautifully for years to
come.
Hestan is the only residential brand born from the dreams and demands of
professional chefs. From ranges to refrigeration, every detail is designed to
deliver the performance and reliability expected in a restaurant – now available
for you.
We appreciate you choosing Hestan, and we promise to deliver the very best to
EN
you.
Welcome to Hestan
©2019 Hestan Commercial Corporation
1


TABLE OF CONTENTS
3 SAFETY PRECAUTIONS - BEFORE YOU BEGIN
5 MODEL NUMBERS
5 RATING LABEL
5 REGULATORY / CODE REQUIREMENTS
6 GETTING TO KNOW YOUR APPLIANCE
11 CONTROLS AND OPERATION
18 INTERNAL LAYOUT
19 WINE PRESERVATION
22 FOOD PRESERVATION
25 CARE AND CLEANING
26 TROUBLESHOOTING
29 MAP OF FUNCTIONS AND SETTINGS
31 PARTS / SERVICE
31 LIMITED WARRANTY
EN
SAFETY PRECAUTIONS - BEFORE YOU BEGIN
When properly cared for, your Hestan appliance will provide safe, reliable service for many years.
When using this appliance, basic safety practices must be followed as outlined below.
IMPORTANT: Save these instructions for the local Utility Inspector’s use.
INSTALLER: Please leave these instructions with the owner.
OWNER: Please retain these instructions for future reference.
This appliance is NOT designed for installation in manufactured (mobile) homes or recreational park
trailers. Do NOT install this appliance outdoors.
ELECTRICAL SHOCK HAZARD
Disconnect power before installing or servicing appliance. Failure to do
so can result in death or electrical shock.
ELECTRICAL GROUNDING
This appliance must be grounded. Grounding reduces the risk of
electric shock in the event of a short circuit. Read the ELECTRICAL
CONNECTIONS section of the Installation Manual for complete
instructions.
DO NOT ground to a gas pipe.
DO NOT use an extension cord with this appliance.
DO NOT have a fuse in the NEUTRAL or GROUNDING circuit. A fuse in the NEUTRAL or
GROUNDING circuit could result in an electrical shock.
©2019 Hestan Commercial Corporation
3
SAFETY PRECAUTIONS - BEFORE YOU BEGIN
GENERAL SAFETY PRECAUTIONS
(CONT.)
EN
If this appliance is replacing an existing appliance which must be removed or
disposed of, make sure that it does not become a dangerous trap for children
by cutting its power supply cable and rendering it impossible to close the
door. Use the same caution at the end of the lifespan of the new appliance.
This appliance is designed to refrigerate beverages and foods and is intended
for domestic use.
The appliance must be installed by following the instructions in the
Installation Manual, particular care should be taken not to obstruct the vent
openings of the appliance and of the built-in units.
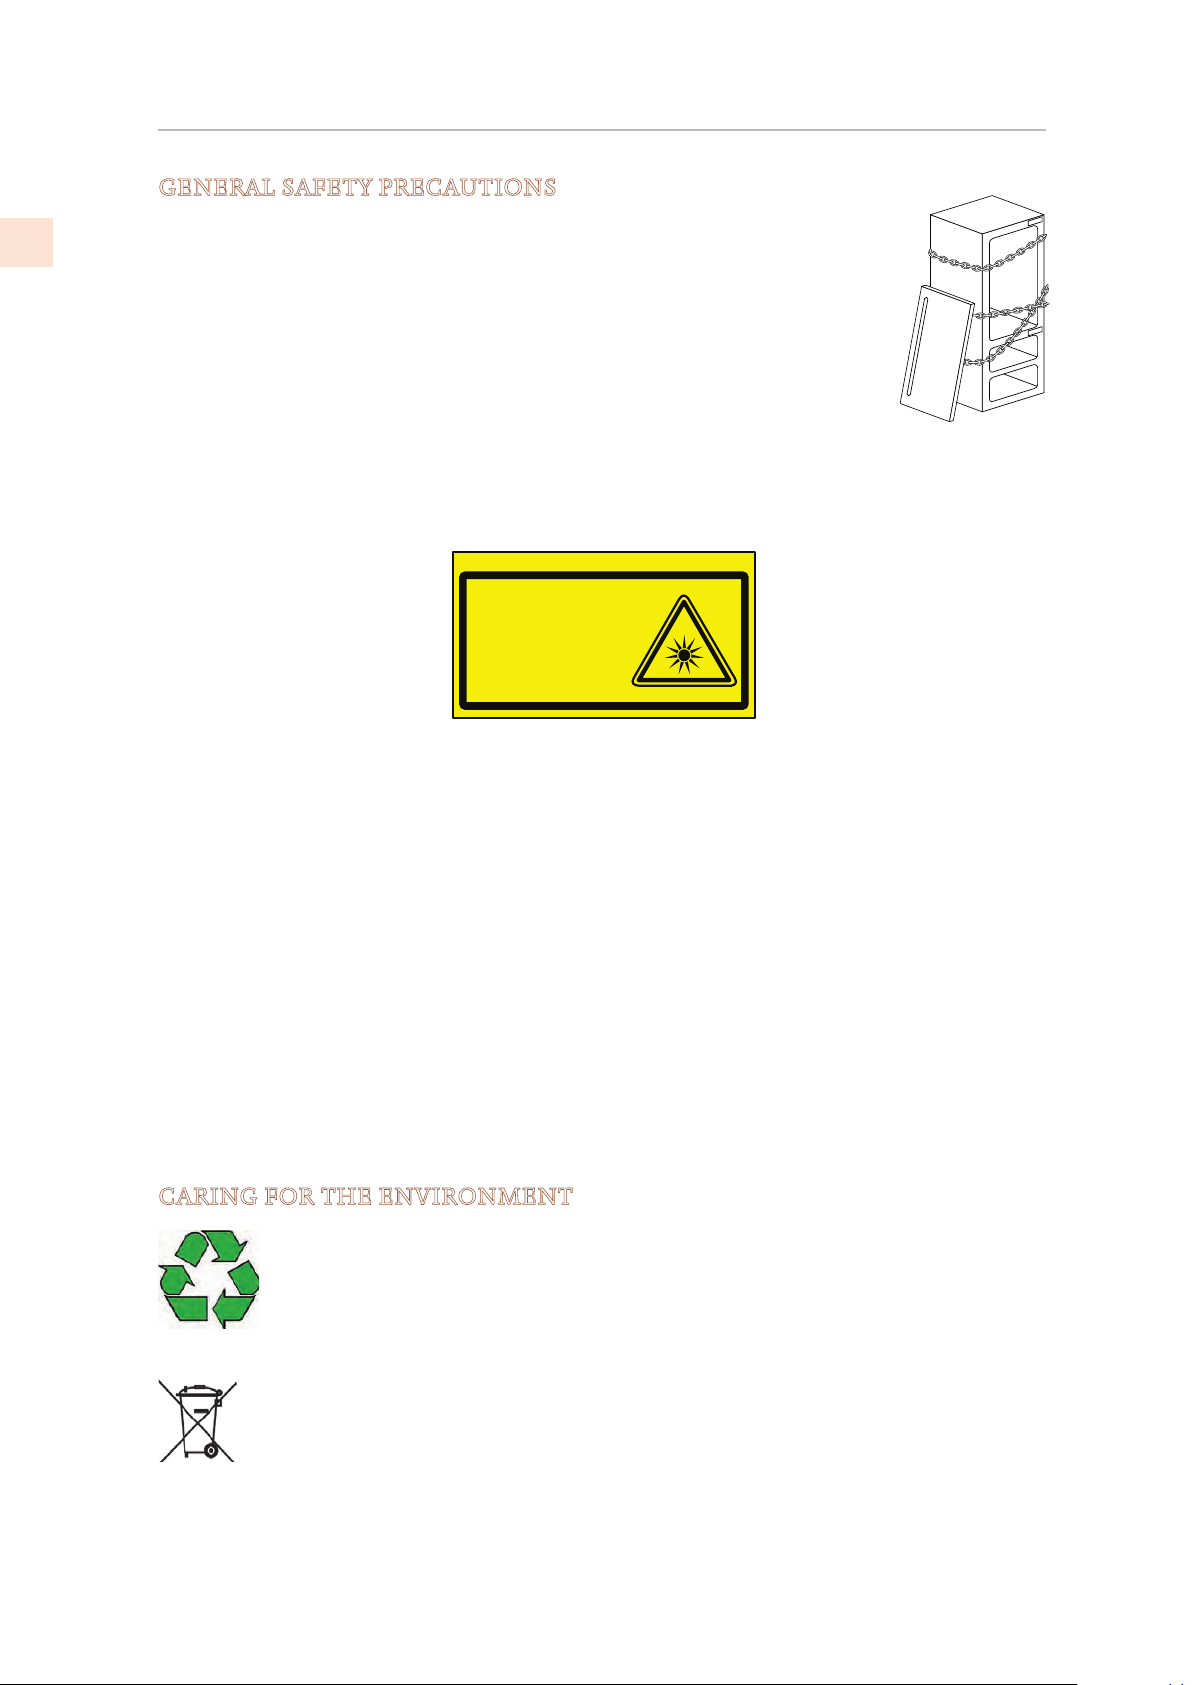
The appliance features a concentrated lighting system with LED lamps. Do not stare into these
lamps when they are on to avoid possible eyesight damage. This warning is also contained on
the label attached to the inside of the refrigerator door.
Risk Group 2
PRUDENZA:
NON FISSARE LA LAMPADA IN FUNZIONE.
PUÒ ESSERE DANNOSO PER GLI OCCHI.
CAUTION:
DO NOT STARE AT OPERATING LAMP.
MAY BE HARMFUL TO THE EYES.
Product tested in accordante with EN62471
B09001301
When the freezer section is functioning, do not touch the inner surfaces in stainless steel with
wet or damp hands, since skin may stick to the very cold surfaces.
Do not use any type of electrical equipment inside of the food conservation compartments.
When positioning the shelves, do not place fingers in the shelf slide guides.
Do not position containers of flammable liquids near the appliance.
Completely switch off the appliance and unplug the power cord or turn its circuit breaker OFF
during cleaning operations.
The packaging parts can be dangerous for children: do not allow children to play with the
plastic bags, plastic film or Styrofoam.
Any repairs must be performed by a qualified Hestan Service technician.
This appliance is not intended for use by persons (including children) with reduced physical,
sensory or lack of experience and knowledge unless they have been given supervision or
instruction concerning use of the appliance by a person responsible for their safety. Children
should be supervised to ensure that they do not play with the appliance.
CARING FOR THE ENVIRONMENT
Pay particular attention to the proper disposal procedure for all packaging
materials.
The appliance must not be disposed of with urban waste. Contact local waste
disposal centers for on how to dispose of recyclable waste.
Prior to disposal, cut the power supply cord and make it impossible to close the
door. During disposal, avoid damage to the electronics.
The appliance does not contain hazardous substances for the atmospheric ozone
layer, neither in the electronics nor in the insulation.
©2019 Hestan Commercial Corporation
4
MODEL NUMBERS
Model No. Description
KWCR24 Wine Column, Right Hinged, 24"
KWCL24 Wine Column, Left Hinged, 24"
KWCR24-OV Wine Column, Overlay, Right Hinged, 24"
KWCL24-OV Wine Column, Overlay, Left Hinged, 24"
KWCR24-XX Wine Column, Color, Right Hinged, 24"
KWCL24-XX Wine Column, Color, Left Hinged, 24"
KRWR24 Refrigerator with Wine, Right Hinged, 24"
KRWL24 Refrigerator with Wine, Left Hinged, 24"
KRWR24-OV Refrigerator with Wine, Overlay, Right Hinged, 24"
KRWL24-OV Refrigerator with Wine, Overlay, Left Hinged, 24"
KRWR24-XX Refrigerator with Wine, Color, Right Hinged, 24"
KRWL24-XX Refrigerator with Wine, Color, Left Hinged, 24"
NOTE: -XX indicates color model.
-BK for Stealth - Black
-YW for Sol - Yellow
-PP for Lush - Purple
-WH for Froth - White
-OR for Citra - Orange
-BU for Prince - Blue
-GG for Pacific Fog - Graphite Gray
EN
-RD for Matador - Red
-BG for Tin Roof - Burgundy
-GR for Grove - Green
-TQ for Bora Bora - Turquoise
RATING LABEL
The rating label contains important information about
your Hestan appliance such as the model and serial
number and electrical rating.
The rating label is located on the inside wall of the
refrigerator.
HESTAN COMMERCIAL CORP.
ANAHEIM, CA - USA
ozFridge Gas Fill Charge
7
Quantité de Gaz Réfrigerateur
Freezer Gas Fill Charge
Quantité de Gaz Congélateur
Total Absorbed Current
Courant Absorbée Totale
Voltage
Tension
Frequency
Frequence
Refrigerant Gas Type
Type de Gaz Rèfrigerant
Made in Italy
MODEL
KRP36
0
CODE
A
1
FI24RC-RO
SER.NO./N° SERIE
V
115
F20160725000001
Hz
60
R134a
TYPICAL RATING LABEL
ETL LISTED
CONFORMS TO
ANSI/UL STD 250
CERTIFIED TO CAN/CSA
STD C22.2 NO.63
REGULATORY / CODE REQUIREMENTS
Installation of this refrigeration appliance must be made in accordance with local codes. In the
absence of local codes, this unit should be installed in accordance with the National Electrical
Code and local codes.
This appliance must be electrically grounded in accordance with local codes or in the absence
of local codes with the National Electrical Code ANSI/NFPA 70, or Canadian Electrical code
CSA C22.1.
©2019 Hestan Commercial Corporation
5
EN
GETTING TO KNOW YOUR APPLIANCE
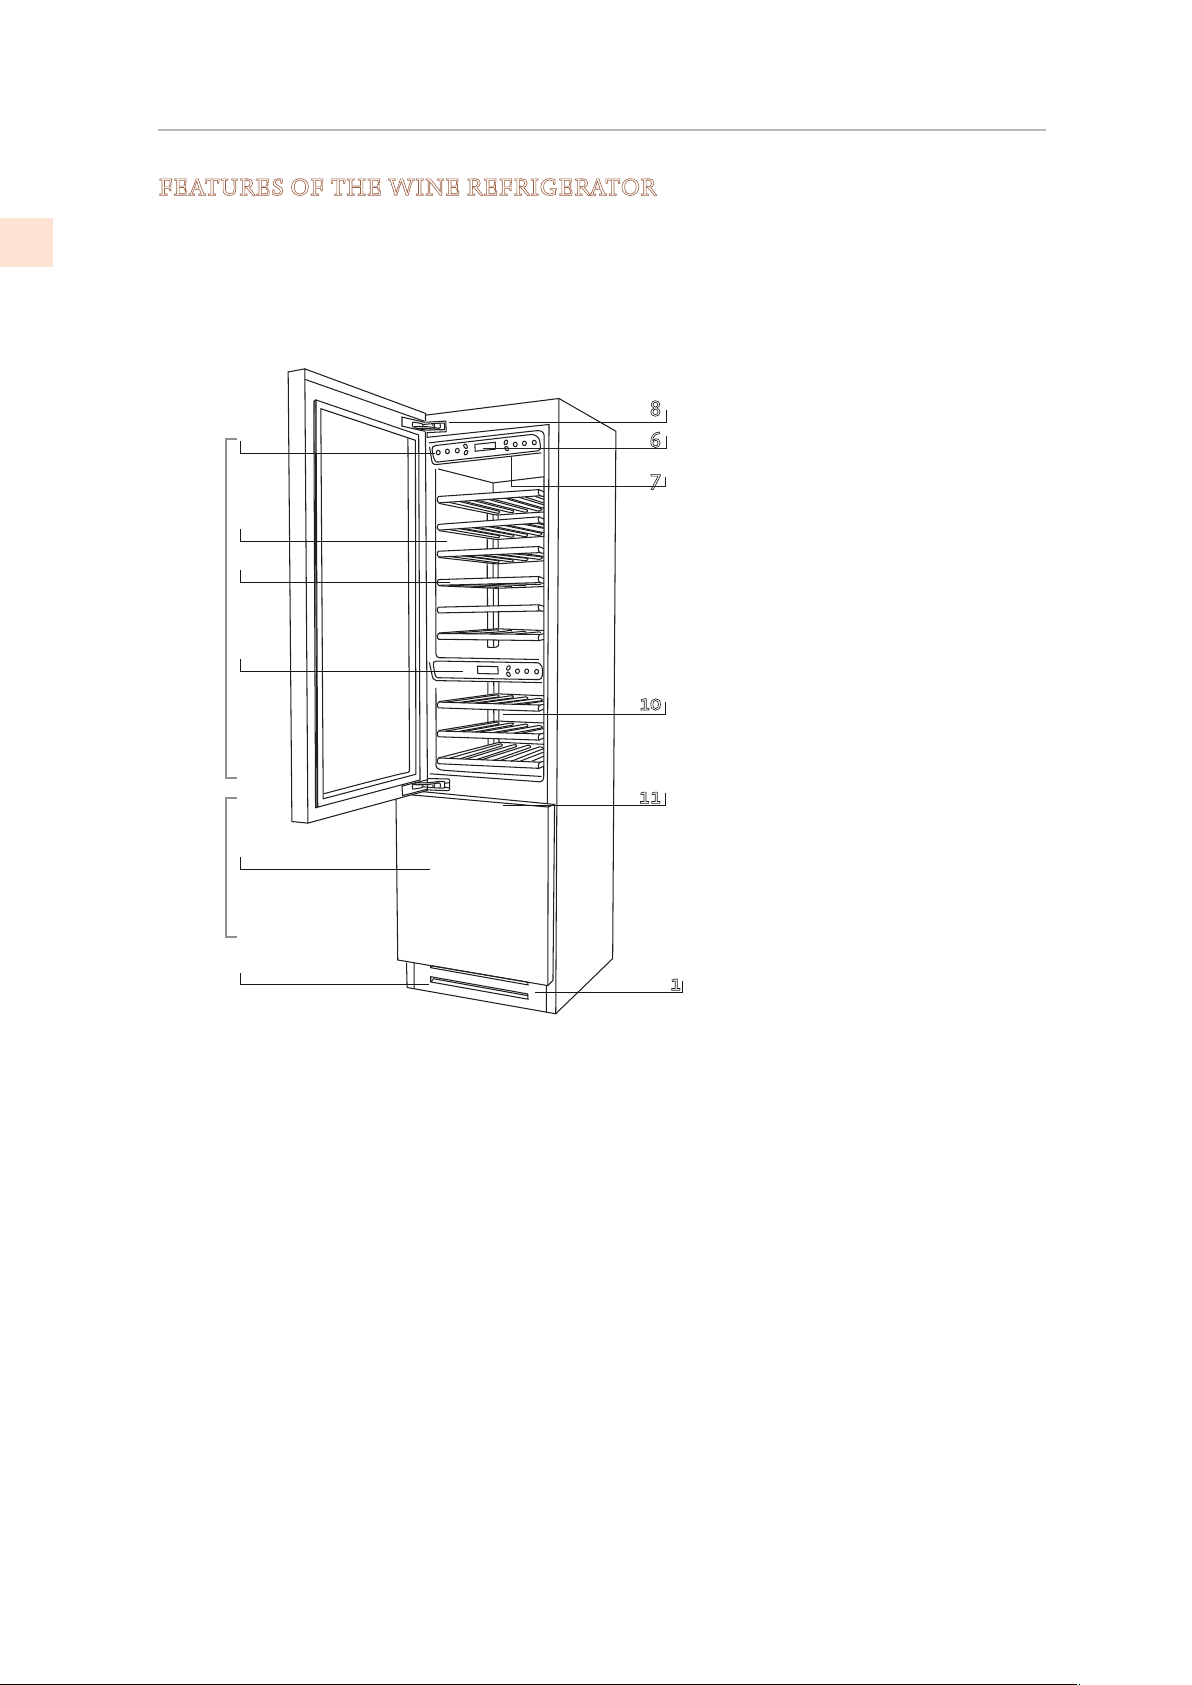
FEATURES OF THE WINE REFRIGERATOR
1
2
Stainless steel grille,
aluminum trim.
Dual zone control panel
with display
2
4
3
Dual Wine Zones
5
12
Fresh Zone
13
KRW Models
10
11
8
6
7
3
Slide out wooden wine
racks
4
Upper wine zone
5
Lower wine zone control
panel
6
Temperature display
7
Sound signals
Automatic door closing
8
system
LED lighting - multiple
9
locations in each
compartment
Lower wine zone
10
Automatic drawer closing
11
system
1
Freezer compartment that
12
can be transformed into a
refrigerator or ExtendFresh
compartment
When the appliance is first
turned on this compartment
is set to the freezer mode
©2019 Hestan Commercial Corporation
6
Dual refrigeration
13
system
GETTING TO KNOW YOUR APPLIANCE
10
1
12
13
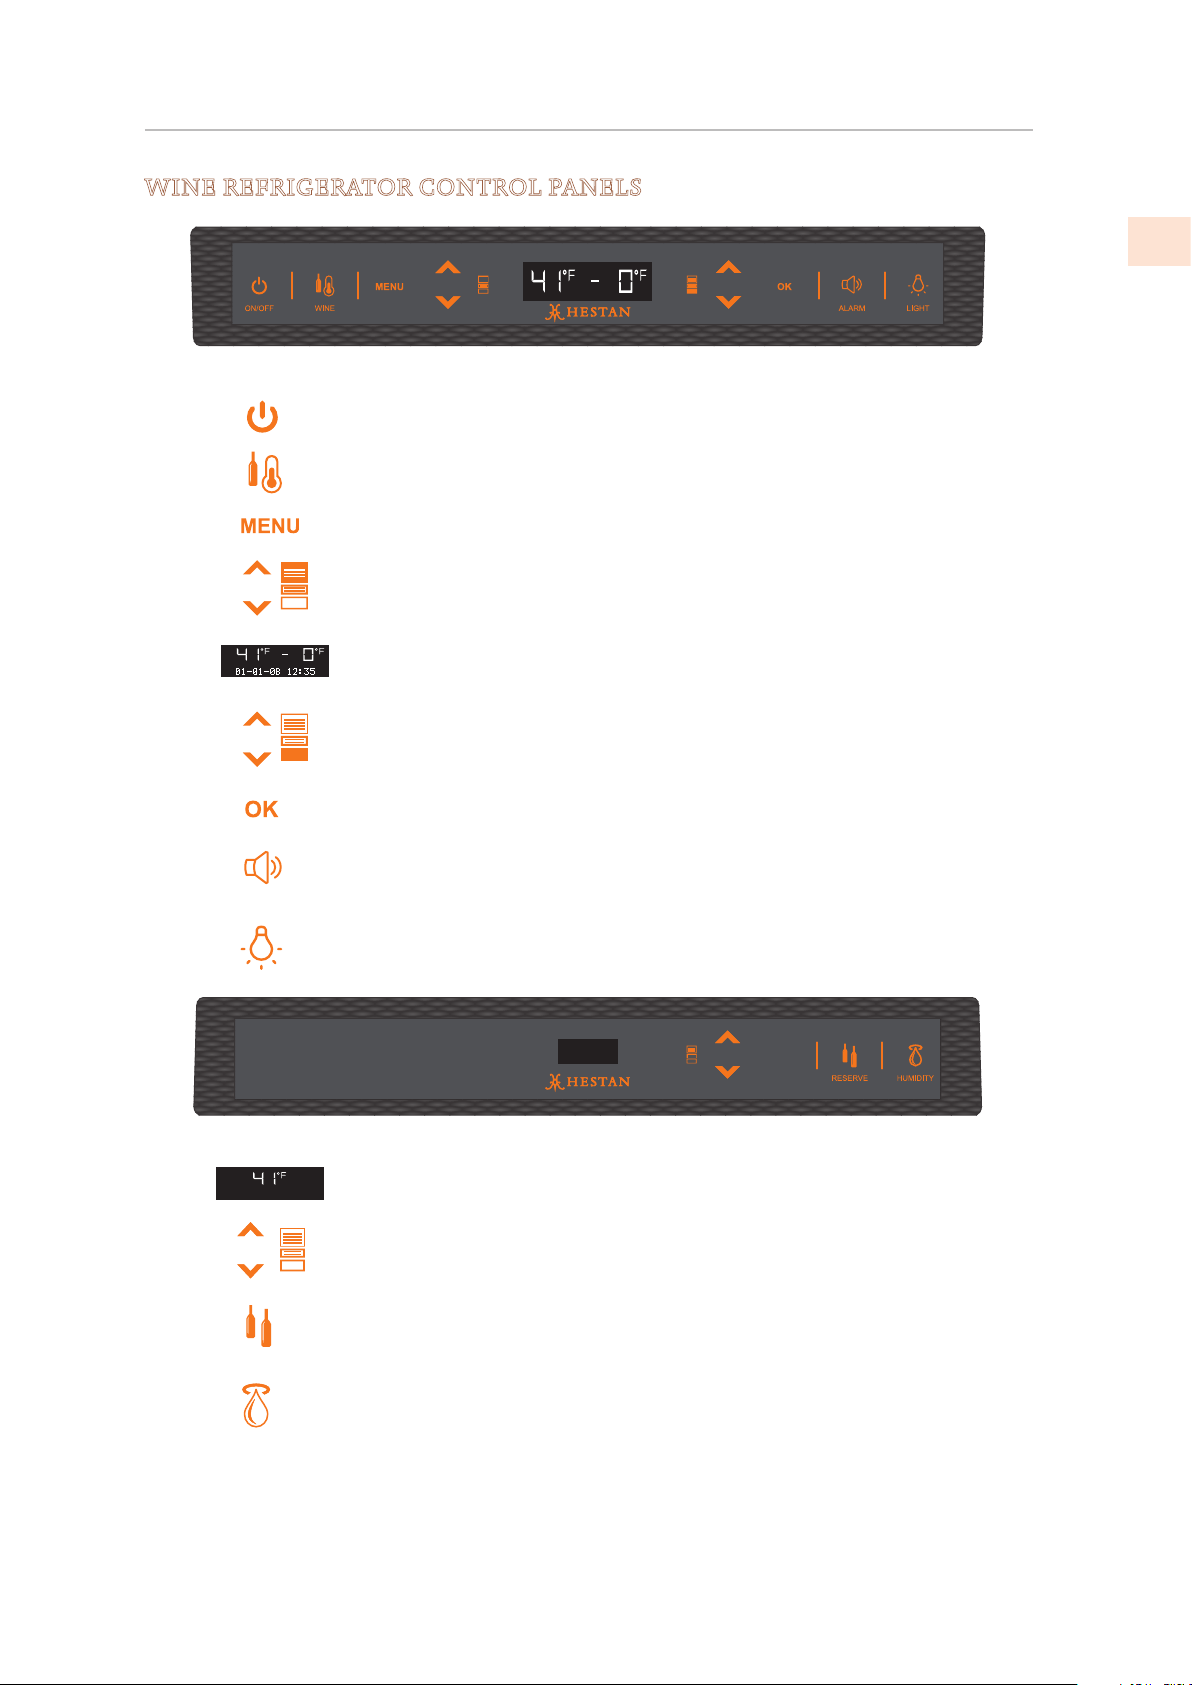
WINE REFRIGERATOR CONTROL PANELS
1 2 3 4 5 6 7 98
(CONT.)
EN
1
2
3
4
On/Off
Upper Wine
Zone
Menu
Up/Down
Upper Wine
Allows complete shutdown and start-up of the
appliance. (Touch for three seconds).
Allows switching the upper wine compartment.
on and off. (Touch the button for 3 seconds.)
Allows access to the appliance settings and functions
menus.
Adjust the set temperature of the upper wine compartment and scroll through the interactive menus.
zone
5
Display
Displays the temperature of the upper wine
compartment and the FreshZone/freezer, the date
and time, menu functions, and visual messages.
Up/Down
6
freezer
Adjust the set temperature of the FreshZone drawer
and scroll through the interactive menus.
(FreshZone)
7
OK
Confirms activation or deactivation of menu
selections.
Blinks to signal possible malfunctioning, also signaled
8
Alarm
through a sound that can be deactivated by
touching the Alarm button.
9
Light
Allows illumination of the Wine Cellar interior when
the door is closed. Once activated, the light remains
on for 6 hours, then automatically shuts off.
10
Display
Up/Down
1
Lower Wine
Displays the temperature of the lower wine
compartment.
Adjust the set temperature of the lower wine zone
and scroll through the interactive menus.
11
12 13
zone
Lower Wine
Zone
Allows switching the lower wine compartment
On/Off. (Touch for 3 seconds)
(On/Off )
Allows adjustment of humidity in the lower wine
Humidity
compartment to three levels. Touch the button to
select between High, Medium or Low.
©2019 Hestan Commercial Corporation
7
GETTING TO KNOW YOUR APPLIANCE
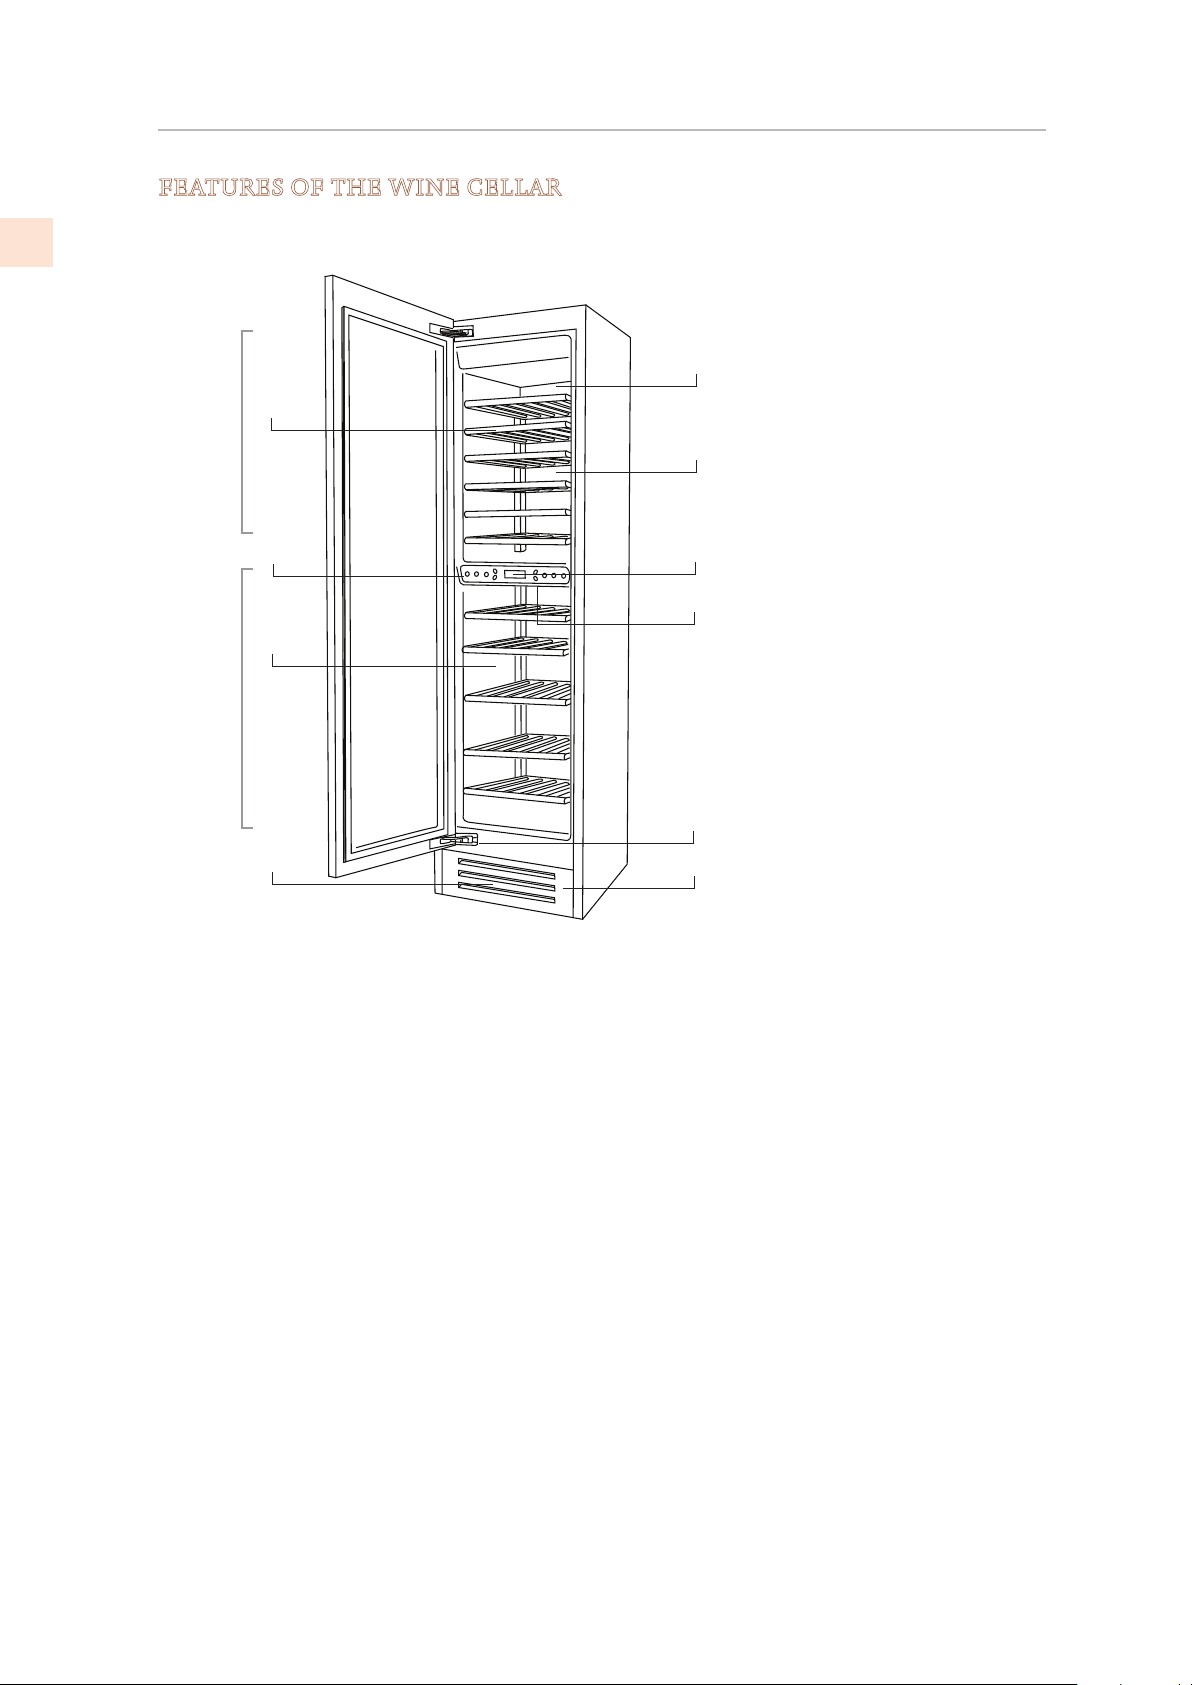
FEATURES OF THE WINE CELLAR
(CONT.)
EN
1
Stainless steel grille,
aluminum trim
3
Upper Wine Zone
2
5
10
4
6
7
2
Dual zone control panel
with display
3
Slide out wooden wine
racks
4
Upper wine zone
5
Lower wine zone
Temperature
6
display
7
Sound signals
Lower Wine Zone
8
Automatic door closing
system
8
9
1
9
Dual refrigeration system
10
LED lights, multiple
locations each
compartment.
KWC Models
©2019 Hestan Commercial Corporation
8
GETTING TO KNOW YOUR APPLIANCE
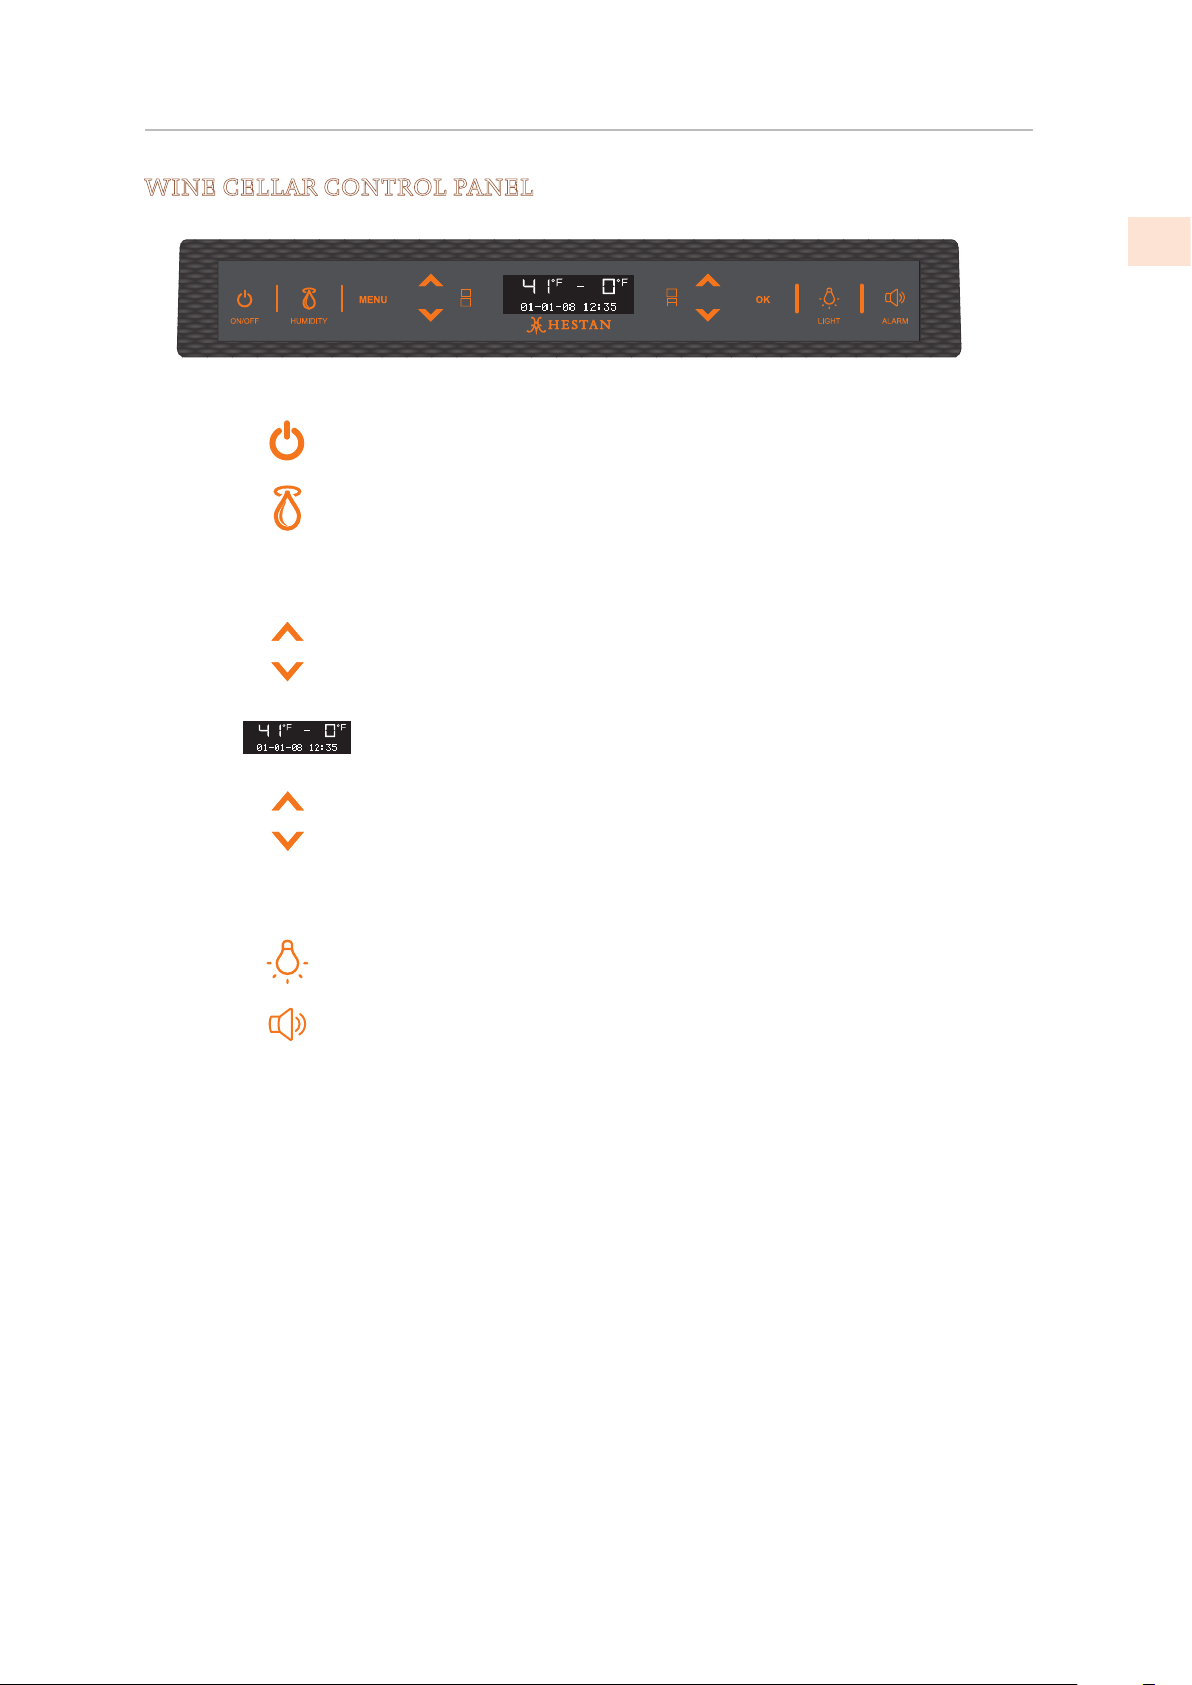
WINE CELLAR CONTROL PANEL
(CONT.)
EN
1234
1
2
3
4
5
6
7
8
MENU
OK
On/Off
Humidity
Menu
Up/Down
Upper wine
zone
Display
Up/Down
Lower wine
zone
Ok
Light
5 6789
Allows complete shutdown and start-up of the
appliance. (Touch for three seconds.)
Allows adjustment of humidity in both wine
zones to three levels: High, Medium and Low.
Allows access to the appliance functions menu.
Adjust the set temperature of the upper wine
zone and scroll through the interactive menus.
Displays the temperature of the upper and
lower wine zones, menu functions, and visual
messages.
Adjust the set temperature of the lower wine
zone and scroll through the interactive menus.
Confirms activation or deactivation of the menu
selection.
Activates illumination of the interior when the
door is closed.
Once activated, the light will shut off after 6 hours.
9
Alarm
Silences an active alarm.
©2019 Hestan Commercial Corporation
9
GETTING TO KNOW YOUR APPLIANCE
USING THE CONTROL MENUS
(CONT.)
EN
Depending on the appliance model, there may be one or two control panels, with various
controls available. Up/Down arrows
various cooling/refrigeration/freezer zones. When two panels are present, only the main panel
has the
Many features and settings are only accessible through the control menus. Here are the basics:
1) Touch the key to activate the interactive menu system.
If the display shows “KEYPAD LOCKED”, touch
“UNLOCKING THE KEYPAD” on page 13)
* Either set of the up/down buttons will move the menu selections. The active selection
is always shown in the display.
2) Use the Up/Down buttons to show a selection, then touch to activate it.
* You may need to use the up/down buttons again to get to a final selection. When
turning selections ON or OFF, you will have to actually follow down to that ON or OFF
and touch
3) To go back out of the menu, touch the button as needed.
See also: “SPECIAL SETTINGS AND FUNCTIONS” on page 13.
and buttons.
to confirm it.
are provided to directly adjust temperatures in the
for several seconds. (See
10
©2019 Hestan Commercial Corporation
CONTROLS AND OPERATION
TURNING THE APPLIANCE ON AND OFF
FIRST STARTUP
When the appliance is connected to the electrical power supply but has not yet been switched
on, the display shows the message
This is a safety message to warn that the appliance is connected to the main power and the
control panel is off.
To switch the appliance on, press On/Off
.
for three seconds.
KRW MODELS ONLY
When the appliance is first turned on the lower compartment is set to the “freezer” mode.
Once the appliance has started up, the freezer remains always on and can be switched off only
by switching off the complete appliance.
To turn off just the wine compartment, press
To power the whole appliance off, press On/Off for three seconds.
for 3 seconds.
RESTARTING
Use the same buttons to restart.
KRW MODELS: The freezer compartment always stays on and cannot be switched off except
by completely switching off the appliance by pressing On/ Off
for three seconds.
EN
SWITCHING OFF FOR LONG PERIODS
Before turning off the appliance for a long period of time:
• Remove all of the items inside
• Clean and dry the interior
• Leave the door and drawer open to prevent the formation of unpleasant odors and mold.
To switch off the appliance, press On/Off
removed by disconnecting the electrical plug or the appropriate circuit breaker.
for three seconds. Then power should be
STARTUP NOTES
If at the first startup the Standby message does not appear, but another message appears, it
means that the appliance has already started the cooling process.
If any alarms are sounding, touch Alarm
set temperature is reached.
During the first startup, it will not be possible to use the Menu to modify the factory settings
until the preset temperature has been reached.
Each time the appliance is switched on it goes through a self diagnosis procedure lasting three
minutes before completely starting up.
If only the wine compartment is turned off, its fan will continue to operate to prevent the
formation of unpleasant odors and mold.
to silence them, and let the appliance run until the
©2019 Hestan Commercial Corporation
11
CONTROLS AND OPERATION
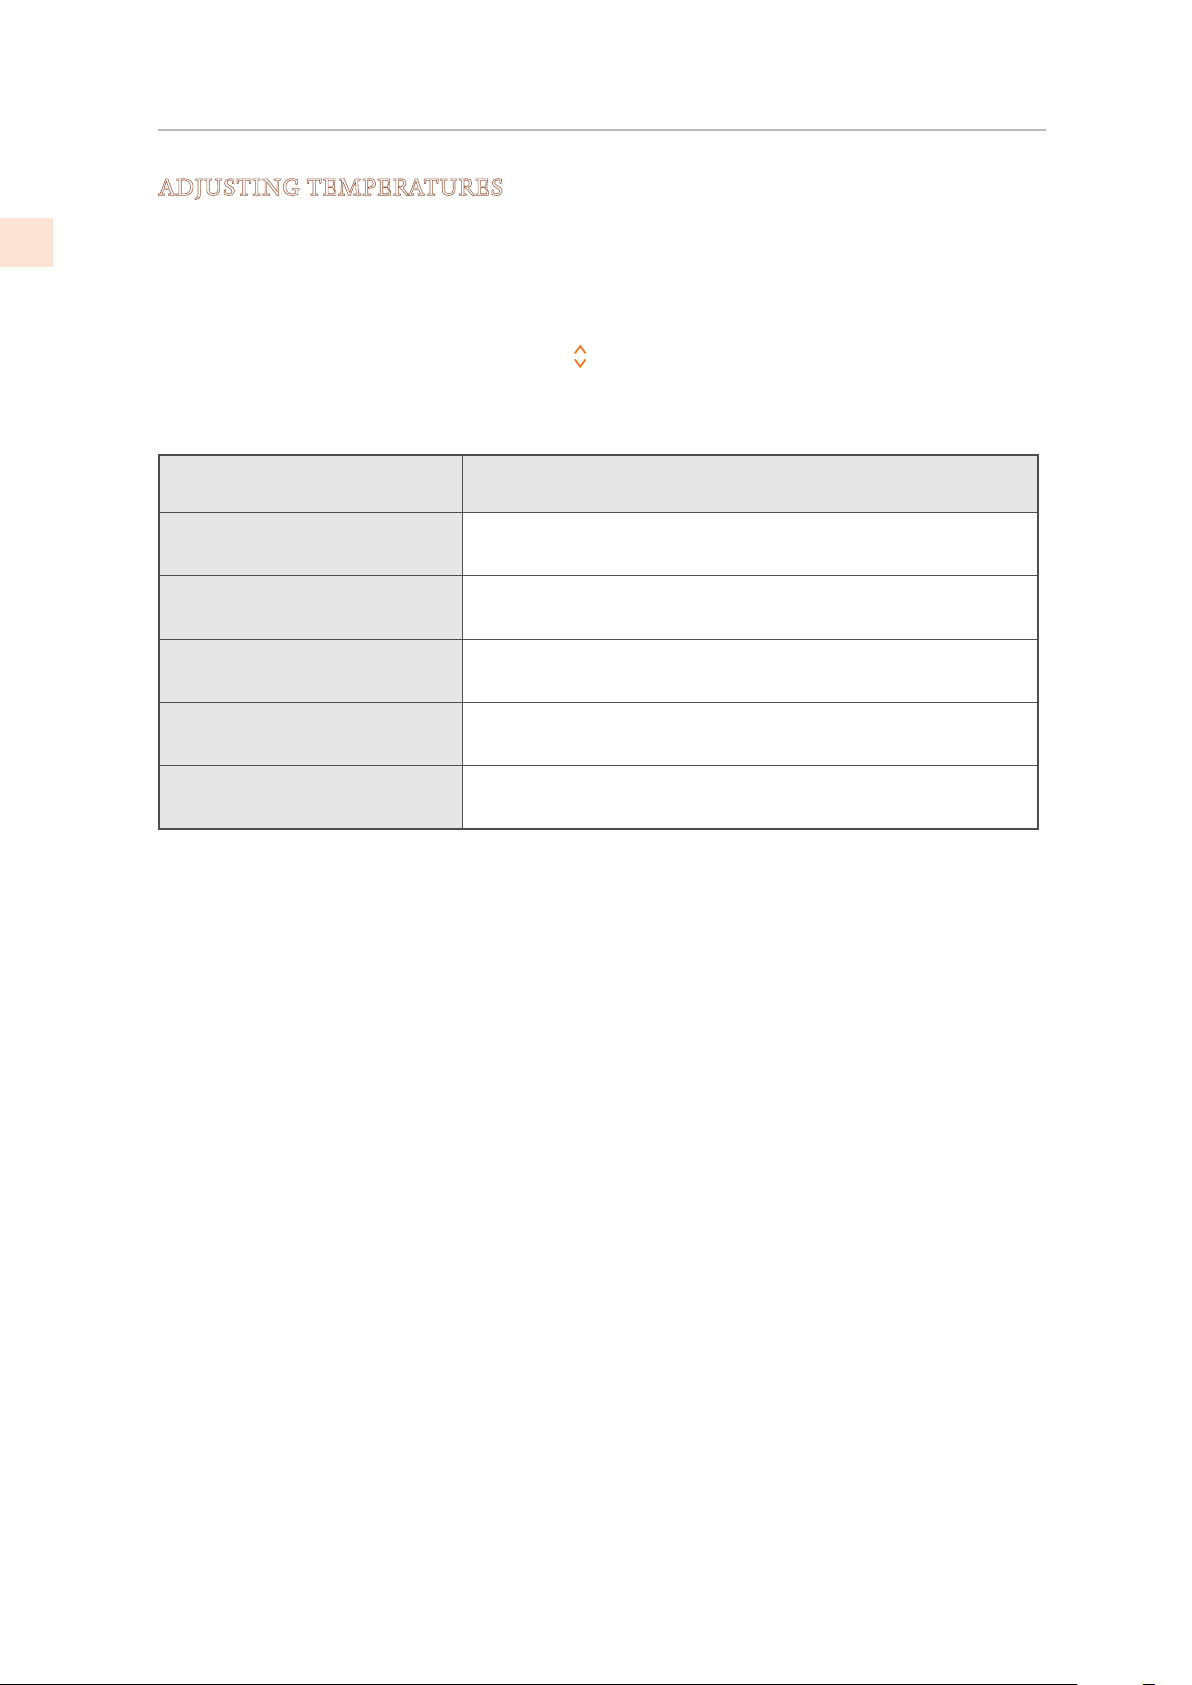
ADJUSTING TEMPERATURES
(CONT.)
EN
Each model has been carefully tested before leaving the factory and is adjusted to ensure high
performance and low consumption. According to your preferences and the specific wines you
store, you can adjust the set temperatures within a certain range. The “recommended” settings
below are also the factory presets for each of the zones and modes. See “Conservation of
wines” on page 20 for temperature suggestions.
To adjust the temperature use the Up/Down
buttons the newly set temperature will appear in the display. To modify this temperature, use
the buttons until reaching the desired temperature. After several seconds of showing the new
set temperature, the display will resume showing actual temperature.
buttons for that zone. Upon touching these
COMPARTMENT/ZONE TEMPERATURE RANGE
Upper wine compartment
Lower wine compartment
FreshZone/Freezer drawer
set as refrigeration
FreshZone/Freezer drawer
set as ExtendFresh
FreshZone/Freezer drawer
set as freezer
39°F to 64°F [+4°C to +18°C]
The default temperature setting is 54°F [+12°C].
39°F to 64°F [+4°C to +18°C]
The default temperature setting is 50°F [+10°C].
34°F to 45°F [+1°C to +7°C]
The default temperature setting is 39°F [+4°C].
28°F to 36°F [−2°C to +2°C]
The default temperature setting is 32°F [0°C]
9°F to −9°F [−13°C to −23°C]
The default temperature setting is 0°F [−18°C].
The actual temperature can vary from the set temperature following frequent openings of the
doors or insertion of room temperature foods or bottles, or large quantities of foods and/or
bottles.
6 to 12 hours may be necessary to reach the selected temperature.
12
©2019 Hestan Commercial Corporation
CONTROLS AND OPERATION
(CONT.)
DISPLAY INFORMATION AND MALFUNCTION MESSAGES
An integrated control system provides information through light signals or text messages
shown on the display.
The information signal is always shown with a steady text message, while a malfunction signal
is shown with blinking text. The sound signal that accompanies some malfunction signals can
be silenced by pressing the Alarm button on the main control panel.
The list of malfunction signals is located at the back of this manual.
SPECIAL SETTINGS AND FUNCTIONS
The appliance can be configured to suit various needs through its settings, such as its operating
modes, display language, and information display. Special functions are provided to meet
various short term needs, such as parties or vacations.
The Settings and Functions are accessed on the main display by pressing the
The Up/Down buttons show the available functions, which can be selected by pressing the
button. The display shows the current function status.
Using the Up/Down buttons
menu if applicable, activating or deactivating by pressing the button.
Once the function is confirmed, the display will automatically step back to the main menu to
allow selection of other functions. At any time it is possible to return to the previous selection
through the
The language of the messages appearing on the display can be changed by operating as follows:
Enter the Menu by pressing the
confirm via . Then select the Language function and the desired language.
button.
, it is also possible to scroll through the selected function’s sub-
button, select Settings via the Up/Down buttons and
button.
EN
See also: “USING THE CONTROL MENUS” on page 10.
UNLOCKING THE KEYPAD
The keypad automatically locks after a while if not being used. When it is locked, any touch of
the keypad will display “KEYPAD LOCKED’.
To unlock, touch the
shows on the display.
key for several seconds, until the message “KEYPAD UNLOCKED”
©2019 Hestan Commercial Corporation
13
OK
OK
HHooww ttoo aaccttiivvaattee
CONTROLS AND OPERATION
FUNCTIONS
(CONT.)
EN
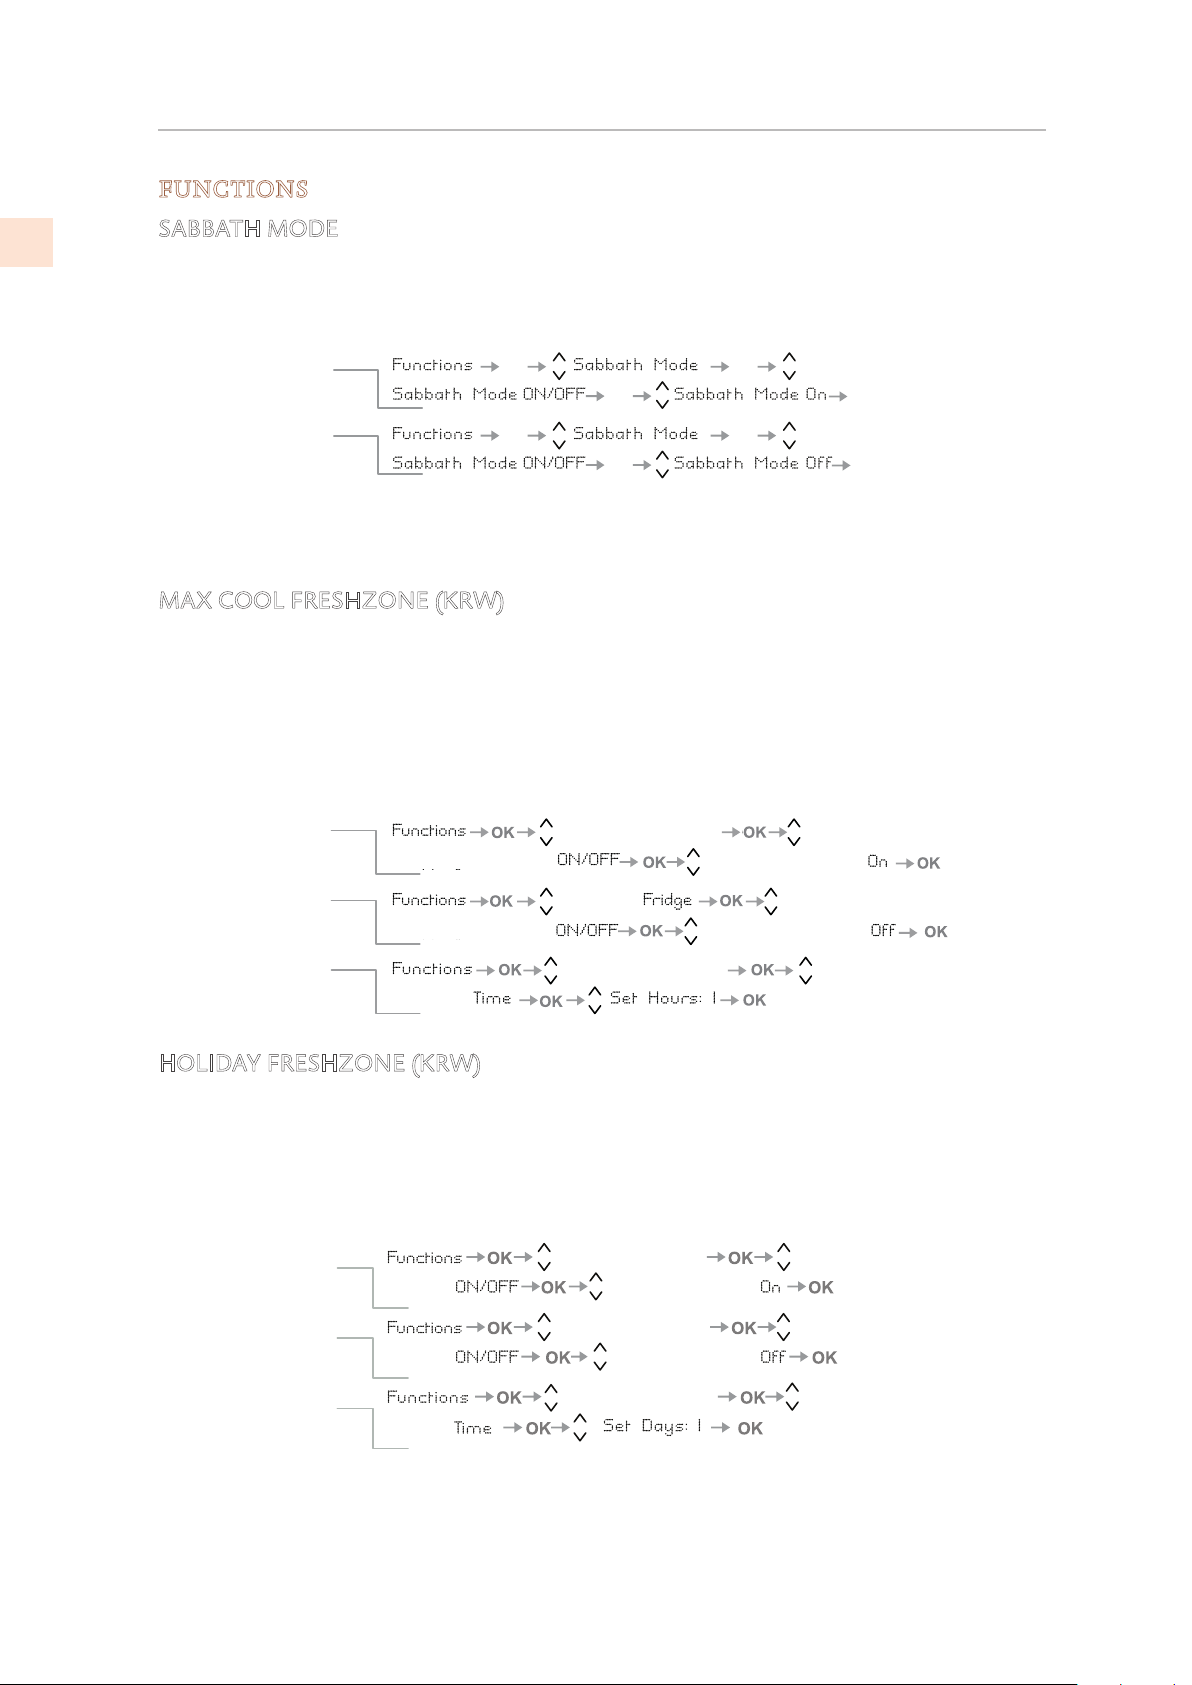
SABBATH MODE
The function makes it possible to comply to certain religious observances requiring that the
operation of the appliance is not affected by the opening or closing of the doors (the
thermostatic control and the inner lighting are deactivated).
HHooww ttoo aaccttiivvaattee
HHooww ttoo ddeeaaccttiivvaattee
OK
OK
OK
OK
OK
OK
OK
OK
When you activate Sabbath Mode, the interior lights will deactivate, and the display will show
“Sabbath Mode ON”. When you turn Sabbath Mode off, the appliance will return to normal
operation, except that menus will not be available for several minutes.
MAX COOL FRESHZONE (KRW)
This function should be activated at least 24 hours before inserting room temperature items
into the freezer, or several hours before placing into the freezer previously frozen items which
have been subject to a slight temperature rise. The start time may be delayed up to 12 hours.
Once started, this function runs for 54 hours then the appliance returns to normal operation.
If interrupted by a prolonged interruption of the electrical power, it is necessary to reactivate
the function.
FreshZone
FreshZone
Max Cool
Max Cool
FreshZone
FreshZone
HHooww ttoo ddeeaaccttiivvaattee
Setting a delayed
start
Max Cool
Max Cool
Max Cool
Max Cool
FreshZone
Max Cool
FreshZone
Max Cool
HOLIDAY FRESHZONE (KRW)
This function (recommended in case of prolonged absences since it allows considerable energy
savings) brings the FreshZone/freezer compartment temperature to 57°F [14°C]. The duration
can be set from 0 to 90 days. If set to zero it will run until manually deactivated.
This function remains active even if during the period of absence there is a prolonged
interruption of electrical power.
HHooww ttoo aaccttiivvaattee
HHooww ttoo ddeeaaccttiivvaattee
uuppoonn rreettuurrnn
HHooww ttoo pprrooggrraamm
tthhee dduurraattiioonn
Holiday
Holiday
Holiday Holiday
Holiday
Holiday
FreshZone
HolidayHoliday
FreshZone
FreshZone
FreshZone
FreshZone
14
©2019 Hestan Commercial Corporation
CONTROLS AND OPERATION
How to activate
OK
OK
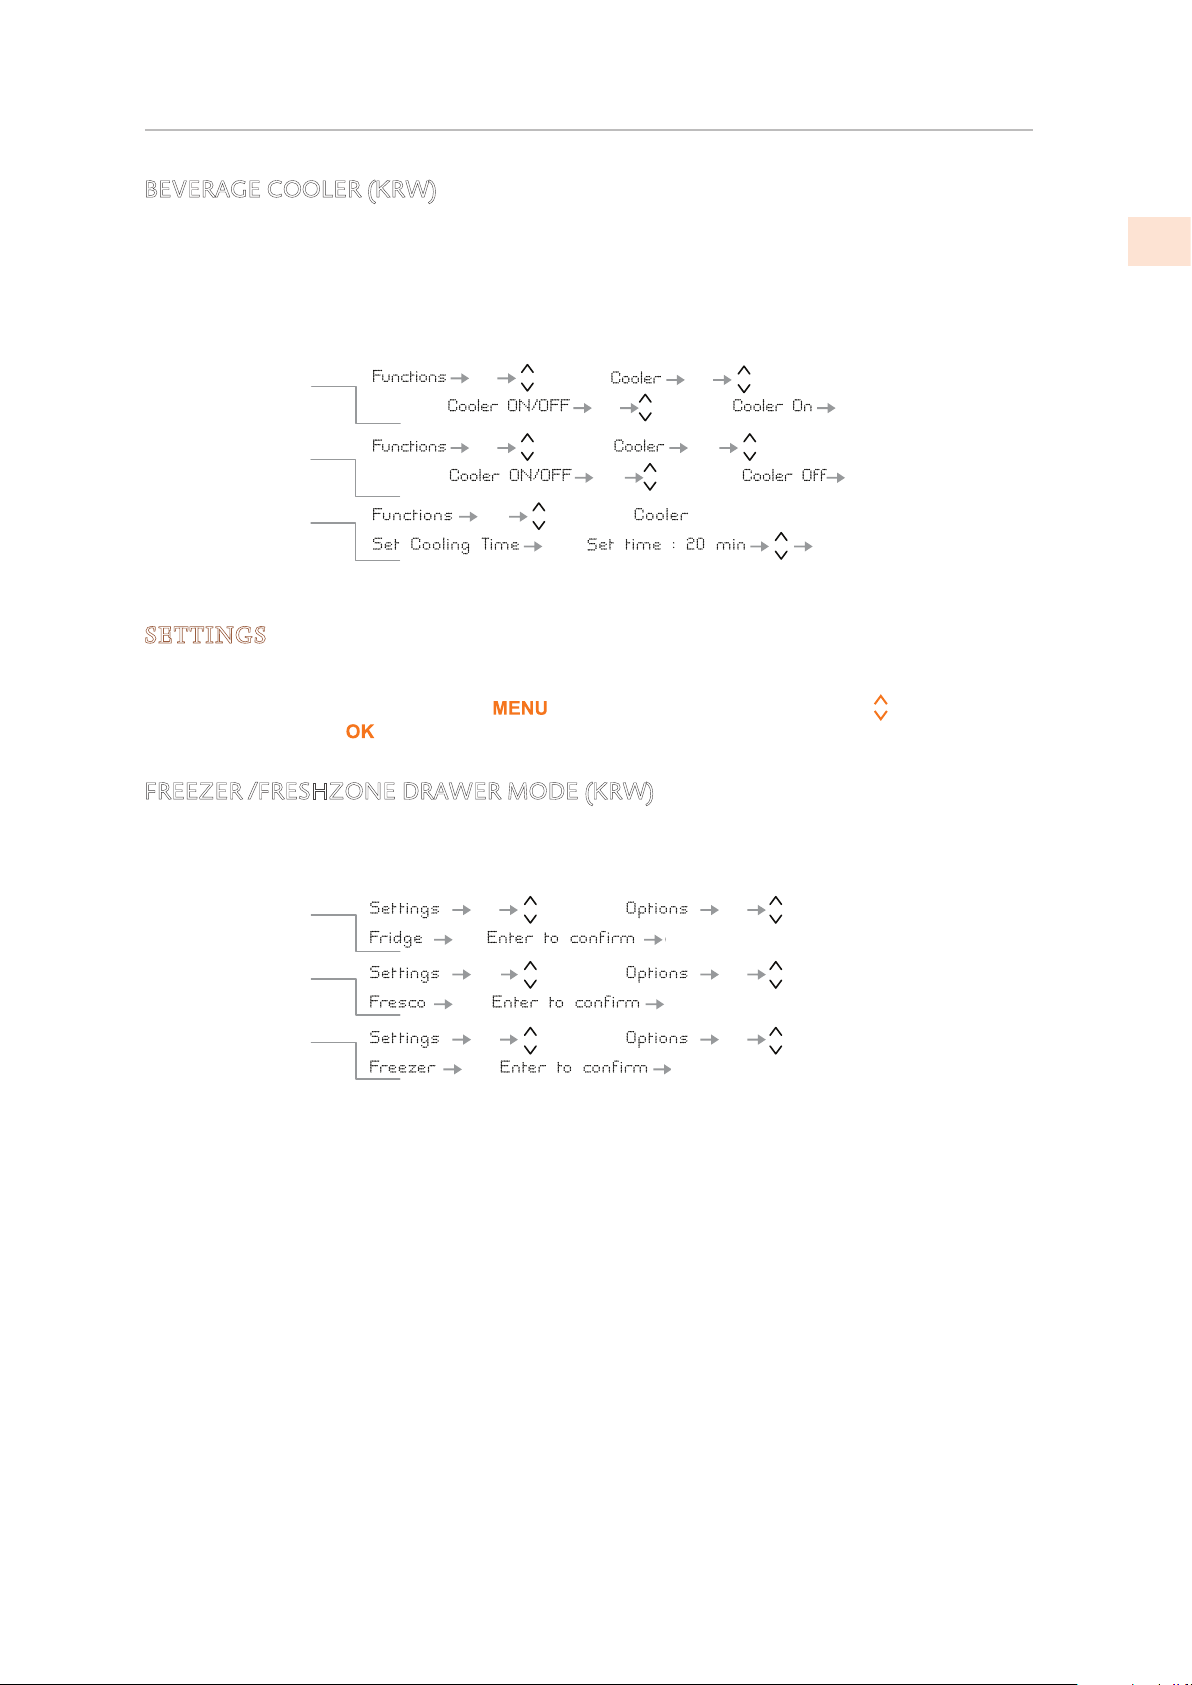
BEVERAGE COOLER (KRW)
(CONT.)
This function can be activated when it is desired to cool off beverages quickly, by placing them
inside the freezer compartment.
It is possible to select a duration of 1 to 45 minutes. A sound signal will indicate when the
optimal temperature has been reached. After removing the beverages, deactivate the sound
signal by pressing the Alarm button.
How to
deactivate
How to program
the duration
OK
OK
Beverage
OK
Beverage
Beverage
Beverage
OK
OK
OK
OK
BeverageBeverage
OK
Beverage
OK
OK
OK
SETTINGS
The following settings control operating modes, information display, and more.
To view or change settings, select the button, use the Up/Down buttons to select
SETTINGS, and press .
FREEZER /FRESHZONE DRAWER MODE (KRW)
EN
Freezer/ExtendFresh
Options
How to set it for
Fridge mode
How to set it for
ExtendFresh mode
How to revert to
Freezer mode
The freezer compartment can, if required, be converted
.edom gnitarepo hserFdnetxE ro noitaregirfer ot
OK
OK
OK
OK
OK OK
FreshZone
FreshZone
FreshZone
OK
OK
OK
OK
OKOK
©2019 Hestan Commercial Corporation
15
CONTROLS AND OPERATION
(CONT.)
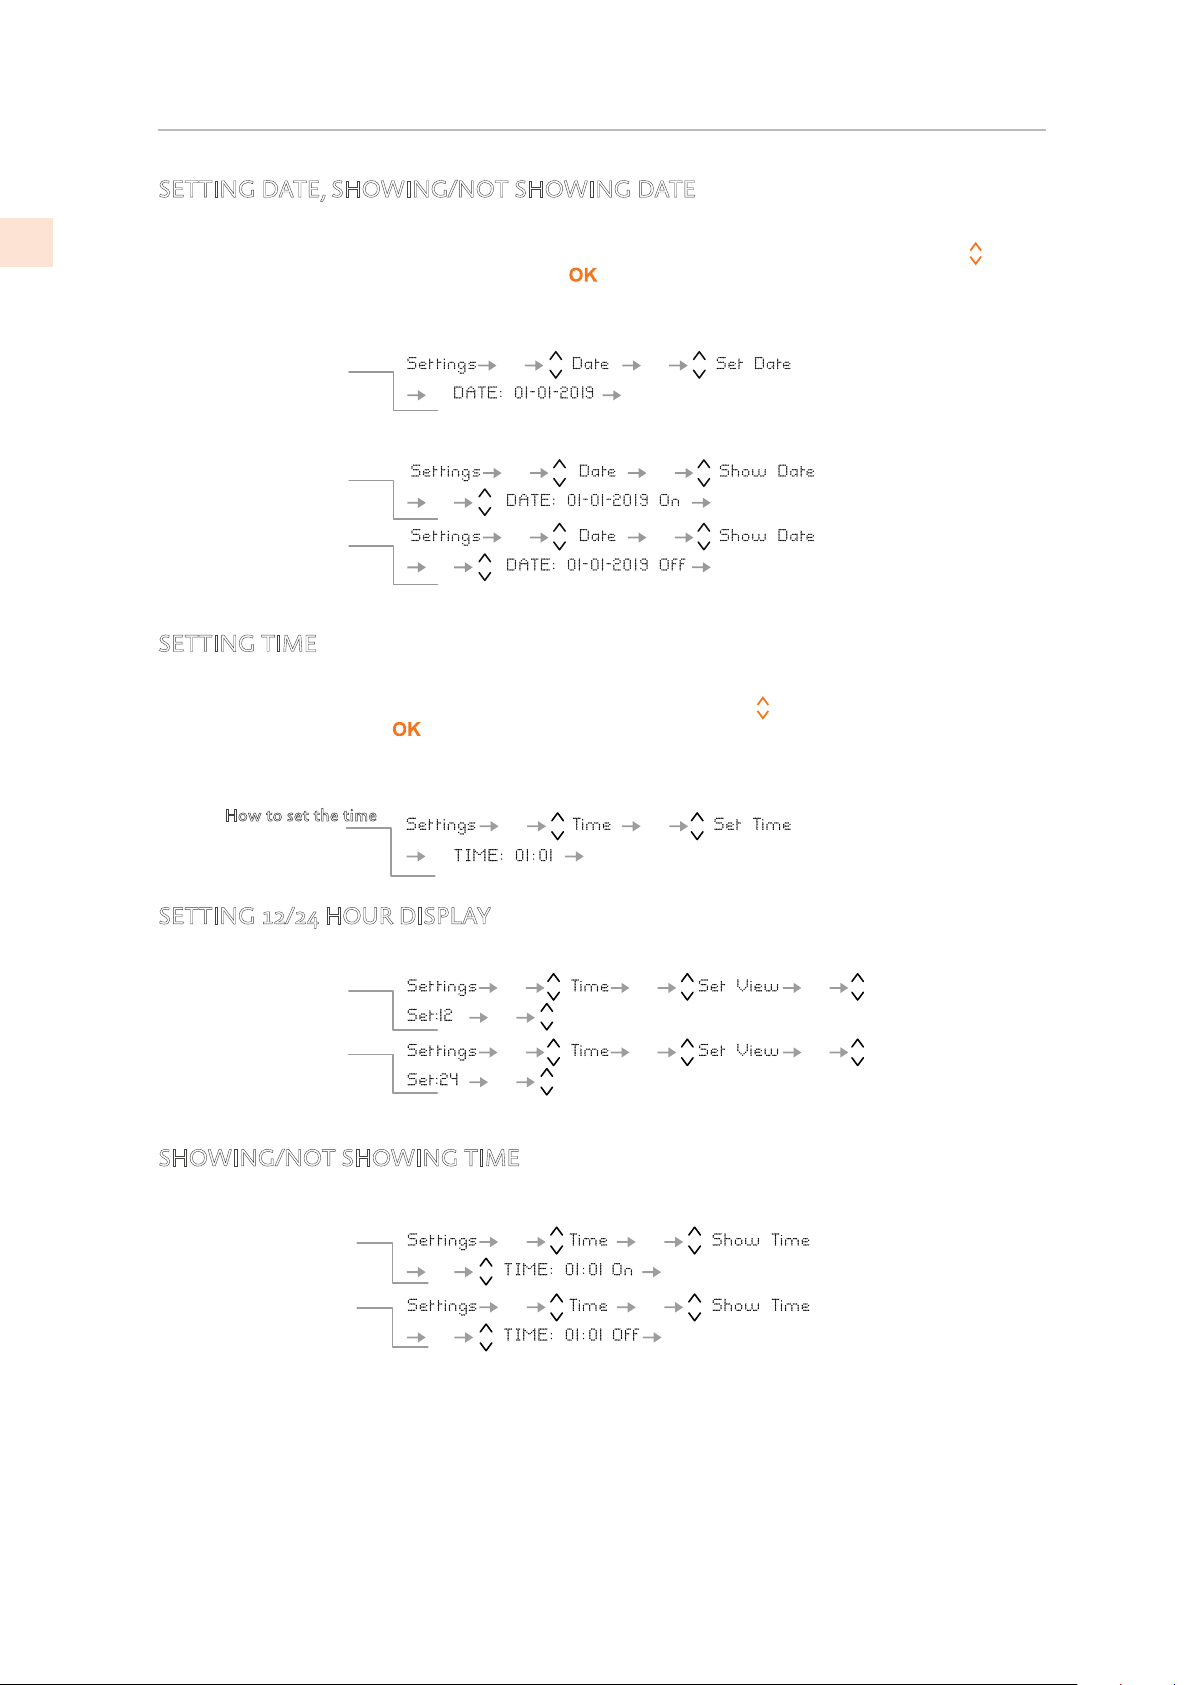
SETTING DATE, SHOWING/NOT SHOWING DATE
EN
Setting the date: Use the menu as below to select Set Date. The display will show the date
in the format dd:mm:yy (day:month:year), the day will blink. Use the Up/Down buttons
to
modify the setting, confirm the setting with to move to the next setting. Once the year is
confirmed, the date will be set.
To set the date
Showing Date
To display date
To not display date
OK
Use this function to have the date show or not show on the display.
OK
OK
OK
OK
OK
OK
OK
OK
OK
OK
OK
SETTING TIME
Uest the menu as below to select Set Time. The display shows the hours and minutes in the
format hh:mm and with hh: blinking. Use the Up/Down buttons
then confirm by pressing to go on to the next setting. Once the minutes are confirmed, the
time will be set.
to modify the setting and
How to set the time
OK
OK
OK
OK
SETTING 12/24 HOUR DISPLAY
How to set the
display for 24 h
How to set the
display for 12 h
OK
OK
OK
OK
OK
OK
SHOWING/NOT SHOWING TIME
This function sets the display to show or not show the time of day.
HHooww ttoo aaccttiivvaattee tthhee
ttiimmee ddiissppllaayy
HHooww ttoo ddeeaaccttiivvaattee
OK
OK
OK
OK
OK
OK
OK
OK
OK
OK
16
©2019 Hestan Commercial Corporation
CONTROLS AND OPERATION
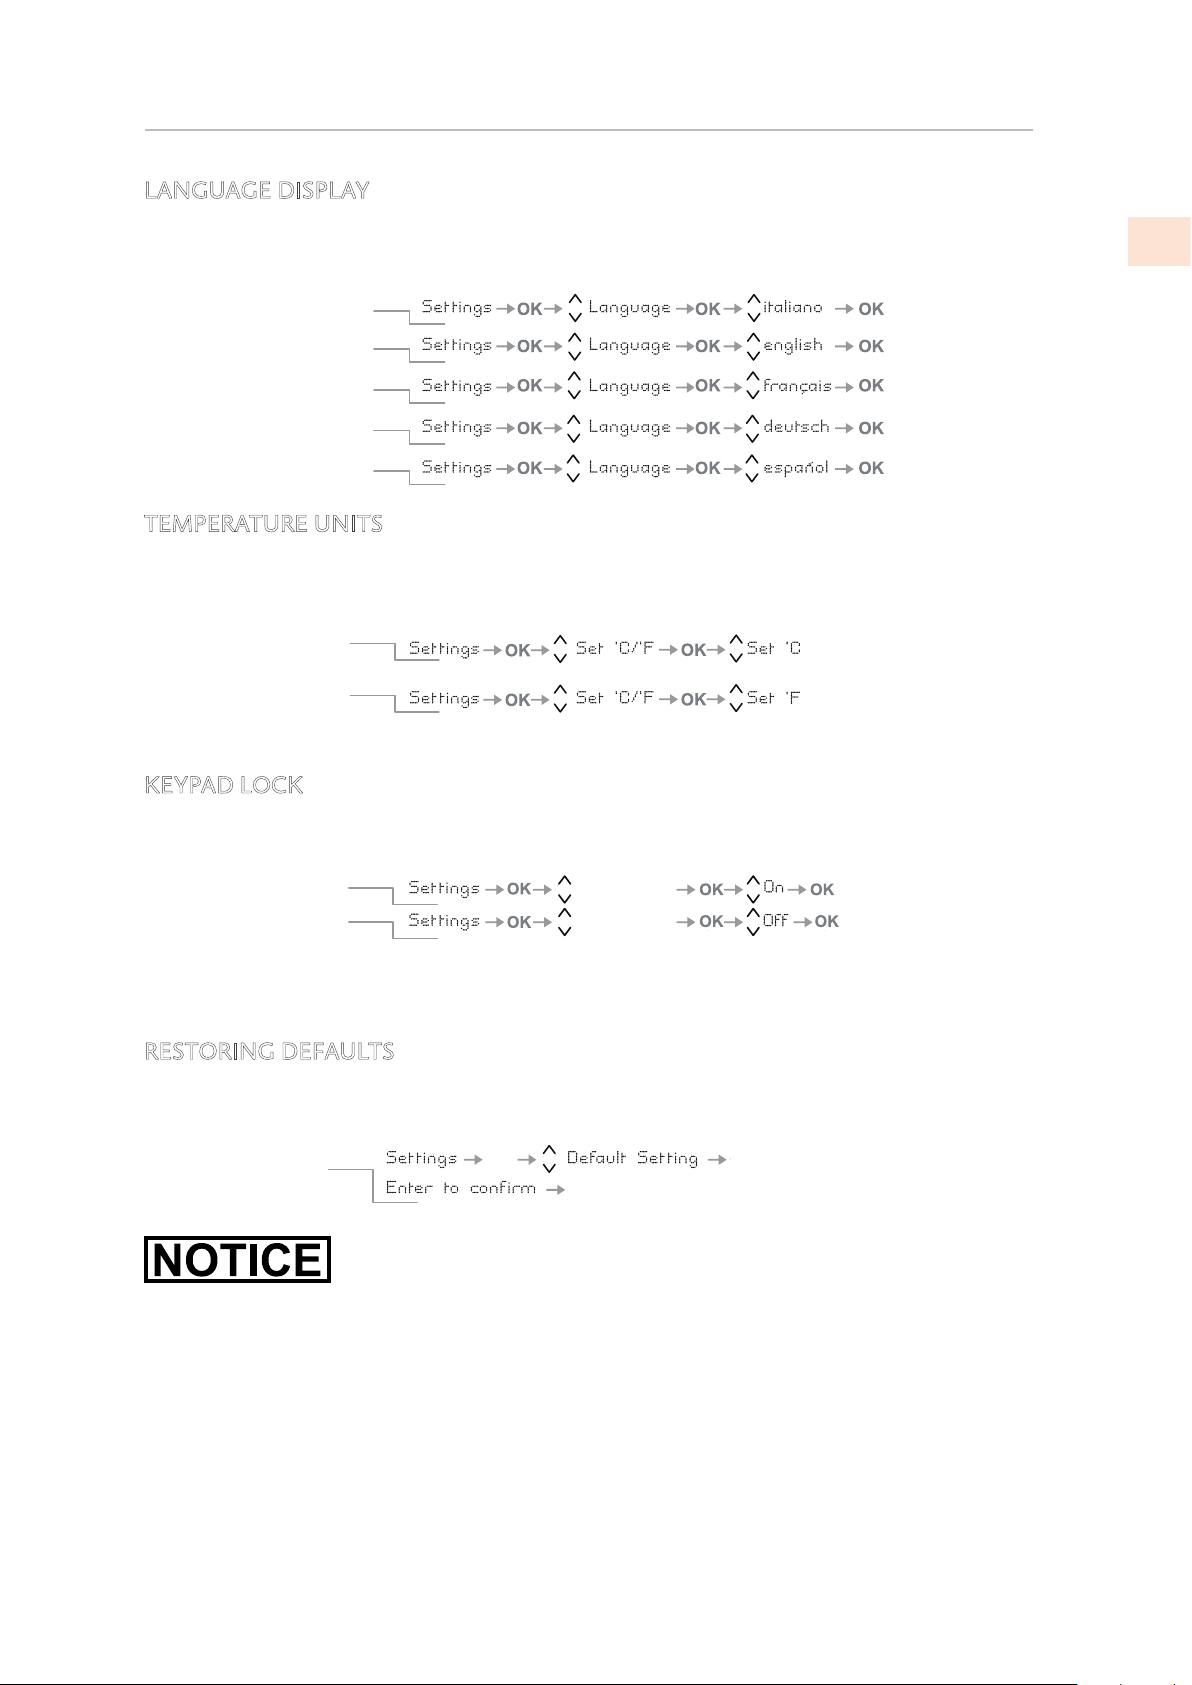
LANGUAGE DISPLAY
(CONT.)
Select the language used for all prompts and messages.
.
IIttaalliiaann
EEnngglliisshh
FFrreenncchh
GGeerrmmaann
SSppaanniisshh
TEMPERATURE UNITS
Select Centigrade or Fahrenheit units for temperature setting values and display.
Set temperature
in Centigrade
Set temperature
in Fahrenheit
KEYPAD LOCK
EN
Enable/disable the keypad self-locking feature.
HHooww ttoo aaccttiivvaattee
HHooww ttoo ddeeaaccttiivvaattee
Keypad lock
Keypad lock
ON: The keypad locks after not being used for several minutes.
OFF: The keypad does not self-lock.
RESTORING DEFAULTS
Restore settings back to factory default.
How to reset
default settings
If the default settings are restored, the default mode of the freezer/FreshZone compartment is
freezer mode.
If it was previously being used in refrigerator or ExtendFresh mode, be sure to set it back to
your desired setting.
OK
OK
OK
©2019 Hestan Commercial Corporation
17
INTERNAL LAYOUT
POSITIONING, ADJUSTMENT, REMOVAL
EN
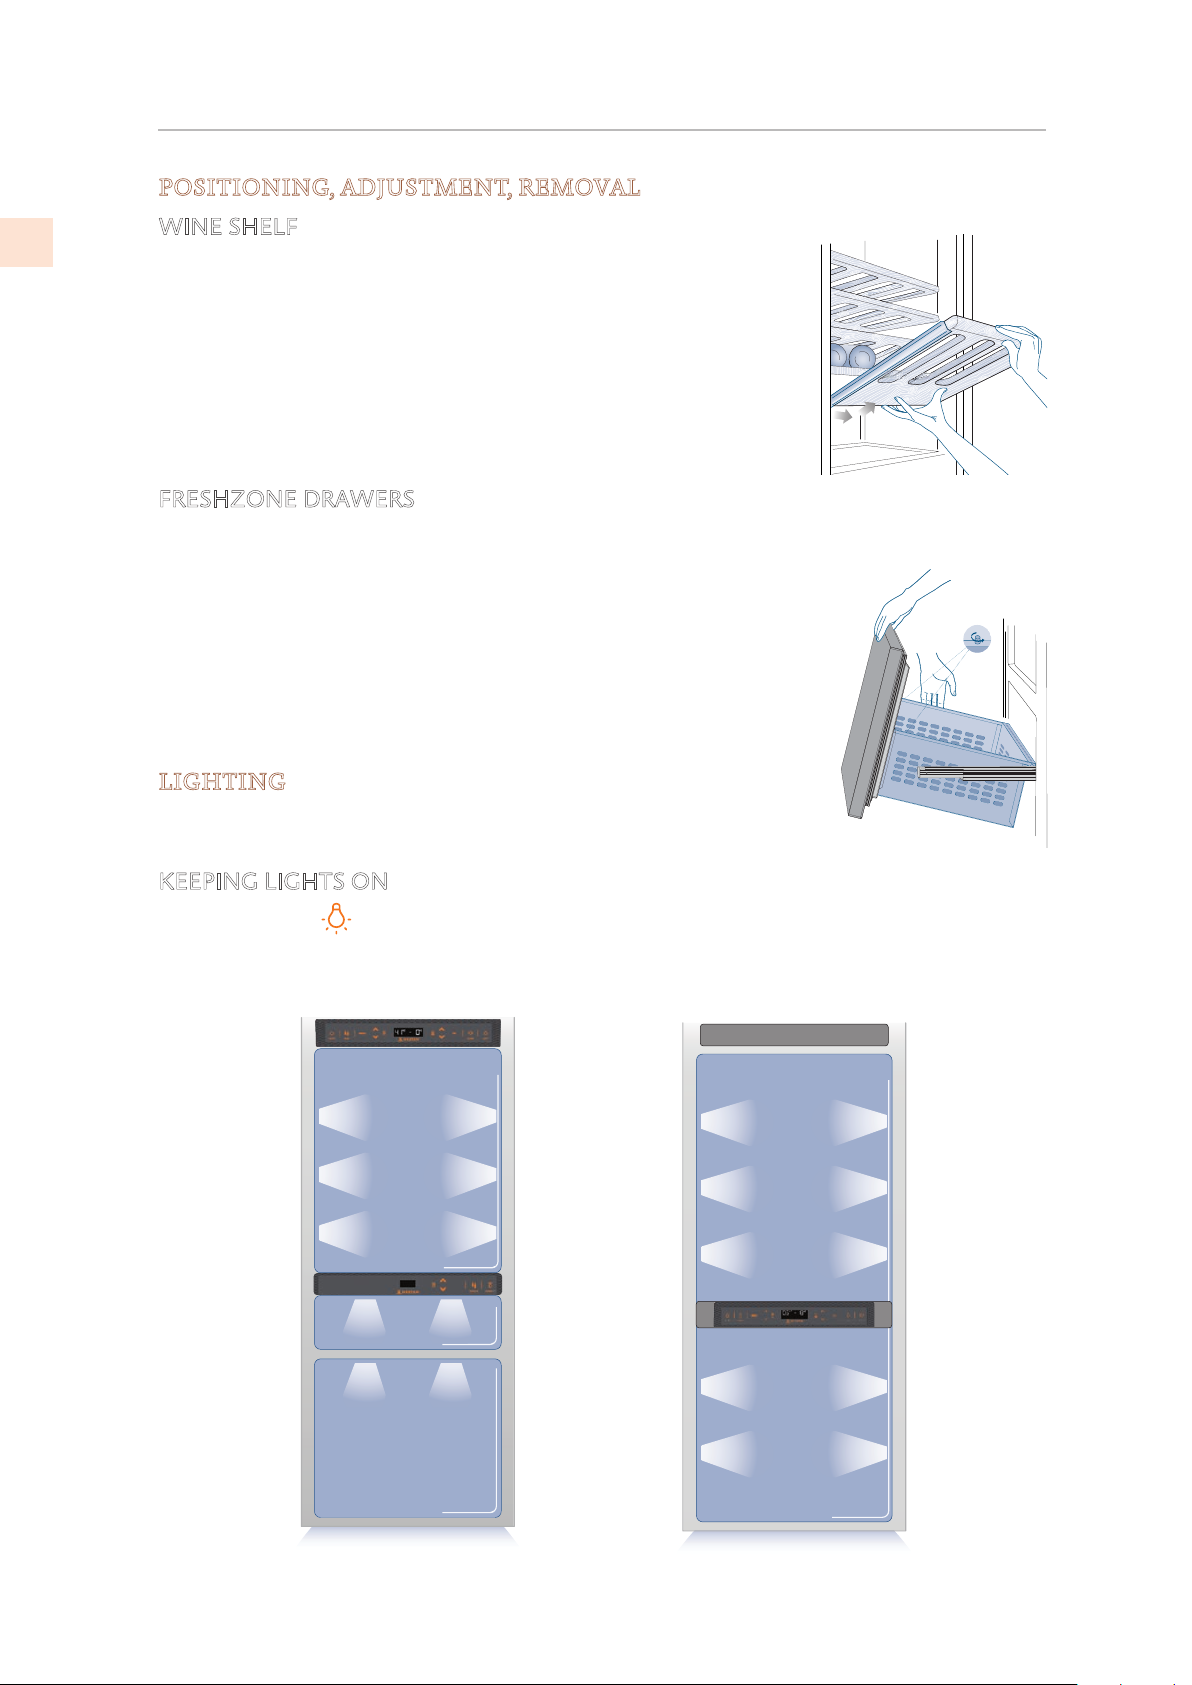
WINE SHELF
The shelves can be easily removed for cleaning.
To completely extract a shelf:
1) Remove the bottles from it,
2) Slide out until it stops,
3) Tilt it upward until the wheels are free of their seat,
4) Lift and remove the shelf.
FRESHZONE DRAWERS
The FreshZone drawer is held to the slide guides by a thumbscrew on each side. Release the
thumbscrews to remove the drawer.
To remove the inner drawer unscrew and remove its thumbscrews.
When replacing the drawer, make certain the back of the drawer engages
under the clips on the slide guides. Once the drawer is properly in
position, reinstall the thumb screws as they are necessary to keep the
drawer in place.
LIGHTING
Lighting is provided using LED strips and spots to completely illuminate
the interior.
KEEPING LIGHTS ON
The Light button on the upper control panel will keep the lights on even when the door is
closed. When activated, the lights can be turned off manually, or they will go off after 6 hours.
In case of malfunction or failure, contact Hestan for service.
U
F
N
I
R
IT
G
D
E
I
E
C
N
E
MA
T
R
E
E
K
R
R
C
IS
E
P
R
18
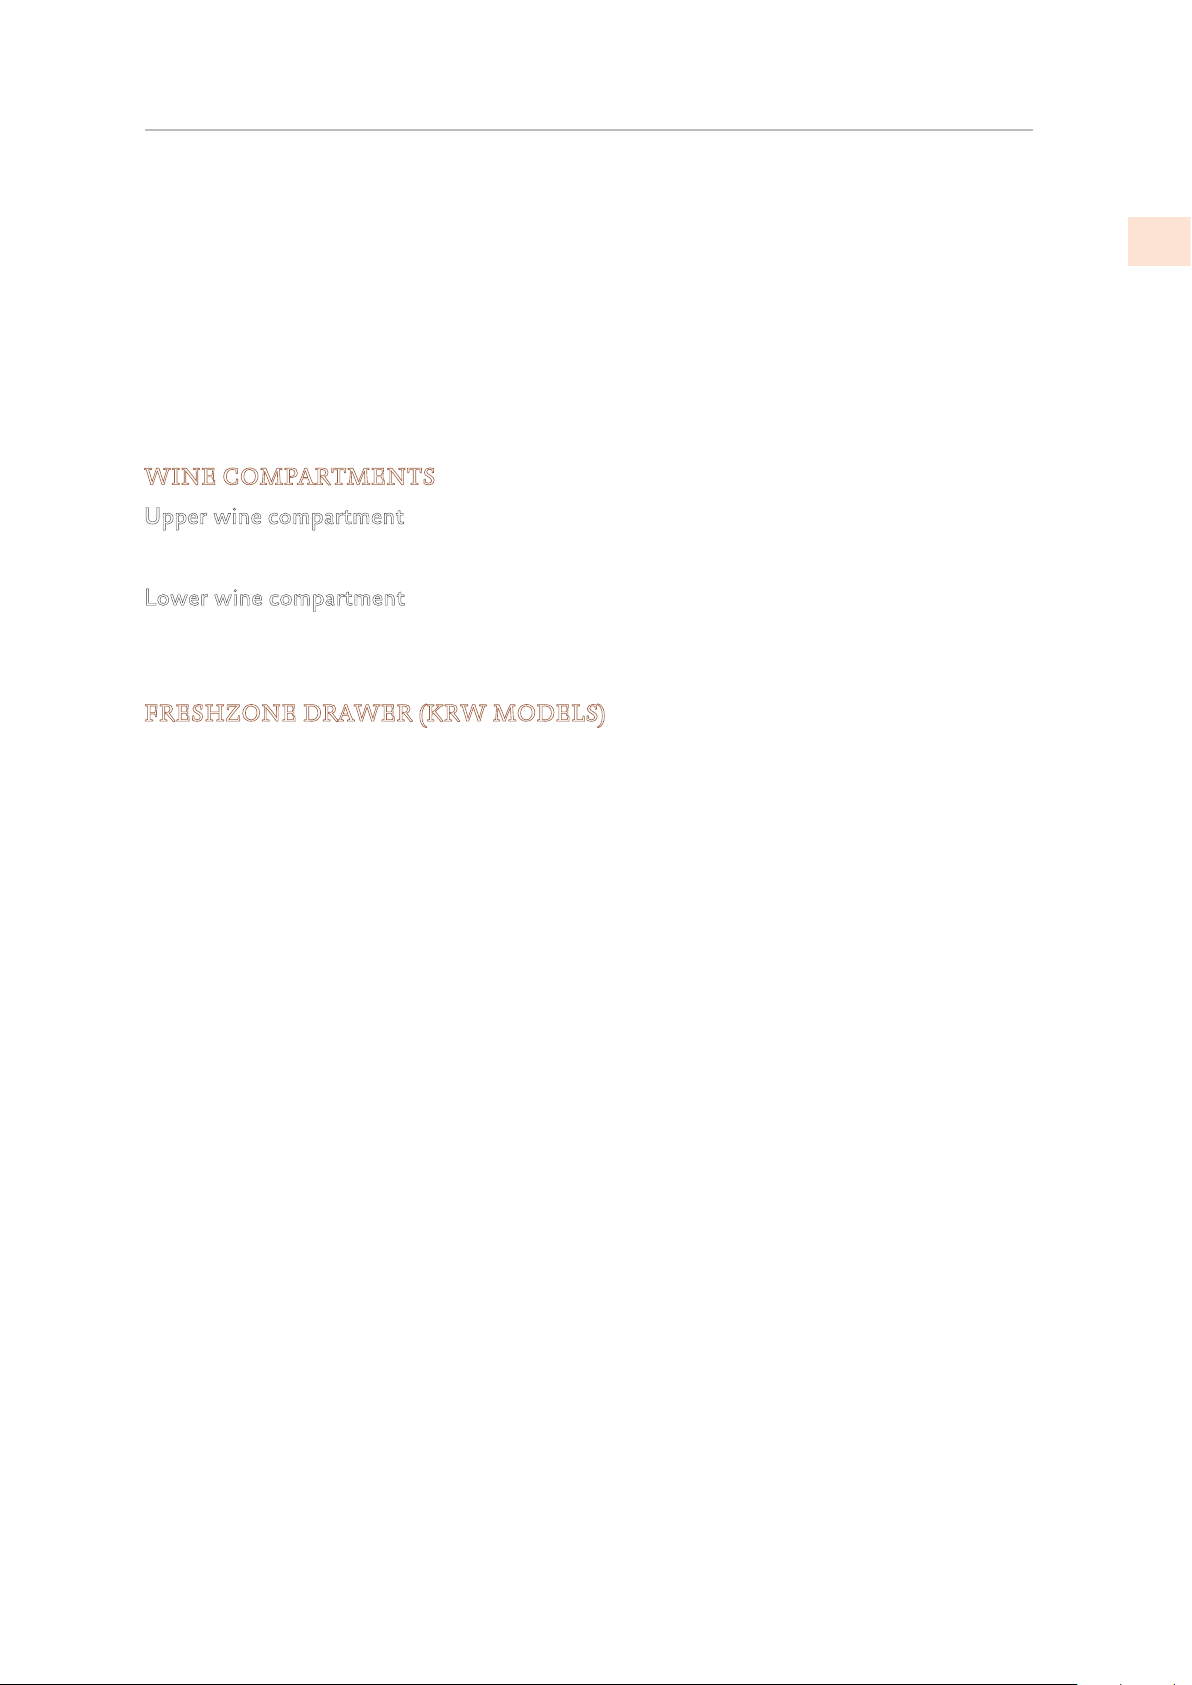
KRW Lighting
©2019 Hestan Commercial Corporation
KWC Lighting
WINE PRESERVATION
As is known, wine can be stored for long periods of time if this is done under the following
conditions:
• Suitable temperature without appreciable variations over time
• Controlled level of humidity
• Protection from light
• Absence of noise and vibrations
• Absence of odors
• Bottle kept horizontal
All of these conditions are fully met in the Hestan Wine Refrigerator and Wine Cellar.
WINE COMPARTMENTS
Upper wine compartment
Defaults to 54°F [+12°C], and is adjustable from 39°F to 64°F [4°C to 18°C]
Lower wine compartment
Defaults to 50°F [10°C] and is adjustable from 39°F to 64°F [4°C to 18°C]
EN
FRESHZONE DRAWER (KRW MODELS)
Defaults to freezer mode, at 0°F [−18°C] and is adjustable from 9°F to −9°F [−13°C to −23°C]
while in freezer mode.
The freezer compartment can also be used as a lower wine compartment by setting it in Fridge
mode and adjusting the temperature appropriately.
To transform the FreshZone/freezer compartment into a wine space, you must use the Menu
and set it as a refrigerator compartment, then adjust it to a temperature between 39°F and
46°F [+4°C to 18°C].
All the temperatures can be modified according to the characteristics of the wines and personal
preferences. However, you should attempt to keep the temperature as constant as possible
over time. Rapid and large-scale temperature variations can in fact cause early aging of the
wine.
You should also avoid very low temperatures (below 34°F [1°C]) which may lead to the
formation of deposits and damage the aesthetic qualities of the wine.
All the compartments offer optimal conditions and take into account all these needs. It
should however be noted that the upper wine compartment, in particular, is thermostatically
controlled in a very precise manner and ensures the utmost care and attention over time of
your most prized bottles. When the upper wine compartment is set below 50°F [+10°C] the
lower wine compartment must not be set above 54°F [+12°C].
©2019 Hestan Commercial Corporation
19
 Loading...