

Page 1
qs
quick steps guide
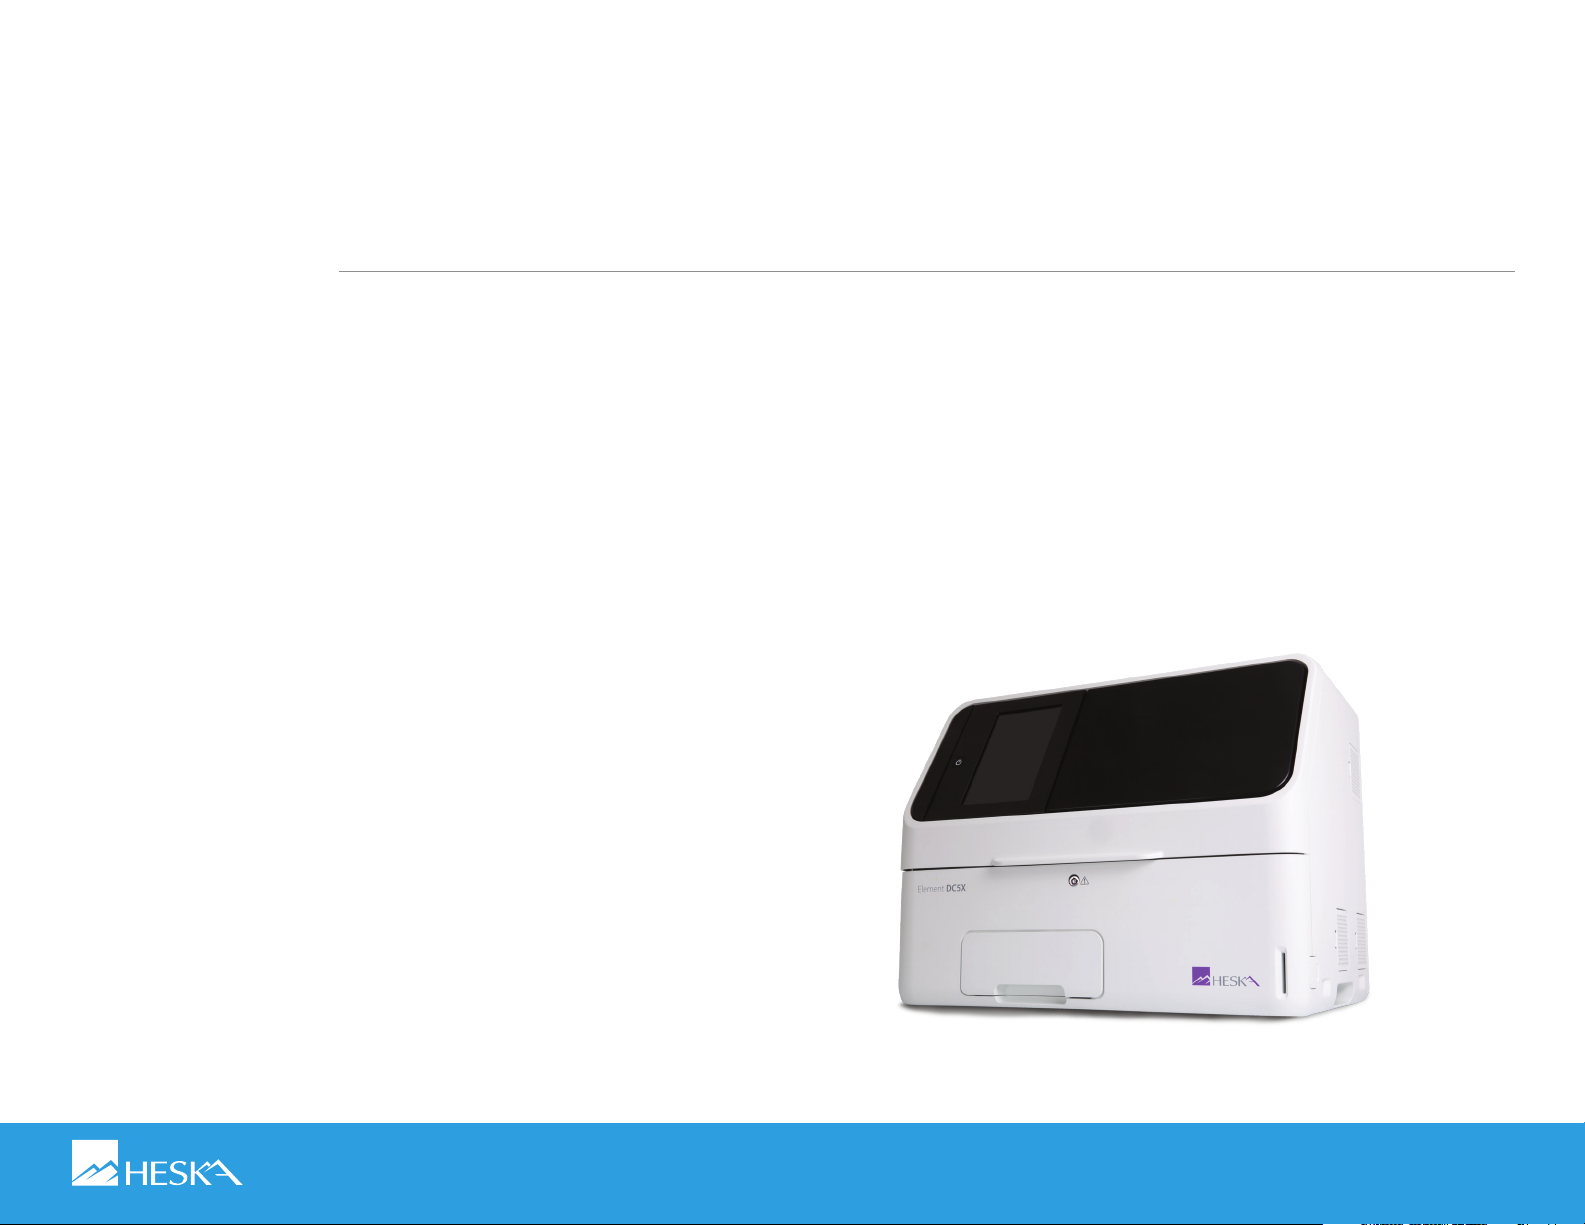
Element DC5X Veterinary Chemistry Analyzer
Page 2

qs
quick steps guide
Element DC5X™ Veterinary Chemistry Analyzer Supplies
NOTE: For access to the full user manual for this product, please visit www.heska.com/productmanuals.
Remove testing supplies from refrigerator and warm to room temperature:
• Slides: 5 minutes in foil pouch.
NOTE: Remove only those needed for ordered tests.
• Reconstituted HESKA® Chemistry Control: 5 minutes.
• Electrolyte Reference Fluid: 5 minutes.
NOTE: Fill 0.5-ml or 1.5-ml Red Top sample tube depending on the reference fluid setting designated in, “Tube
setting for diluent & reference fluid” (Administrator mode), then return remaining RE Fluid to refrigerator.
Replacing Consumables
1. First ensure [Warming Up], [Lamp Warming Up], or [Ready to Test] is displayed on the screen.
2. To stop sampling, touch STOP.
Element DC5X
Veterinary Chemistry Analyzer
Setting Tips
1. Touch the image of the tip racks on the display screen to turn sample carousel.
2. Once carousel stops, remove tip racks.
3. Fill tip racks and replace.
4. Touch RESET, then touch FINISH.
Supplies
Page 3
qs
quick steps guide
Replacing Consumables (Cont’d)
Replacing Mixing Cups
1. Touch the mixing cup image to turn sample carousel.
2. Remove used mixing cups from carousel and replace with new mixing cups.
3. Touch RESET under the mixing cups that were replaced to reset the quantity. Touch FINISH.
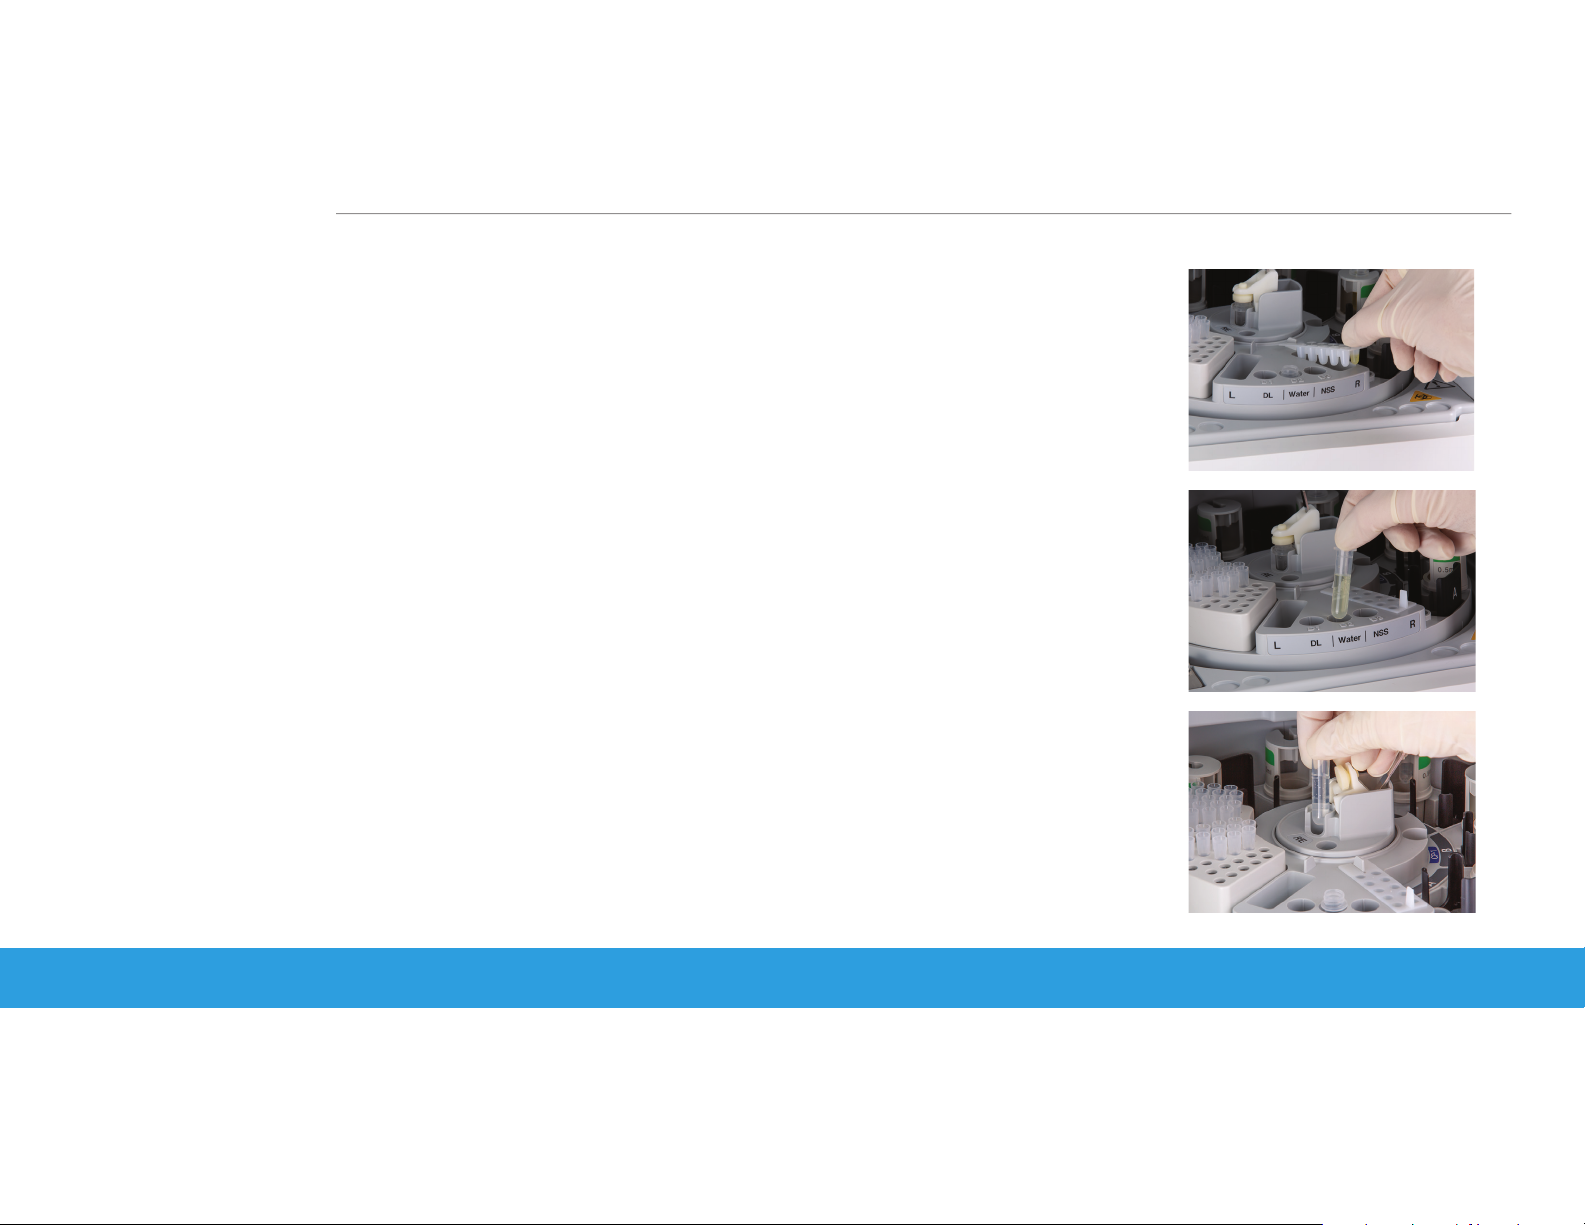
Replacing Diluent
1. Put 1.5-ml of distilled water into a 1.5-ml Red Top non-heparinized sample tube.
2. Touch the diluent image (test tubes) to turn the sample carousel.
3. Place diluent tube in appropriate location (D2) labeled “Water”.
4. Touch FINISH to return carousel to its normal position.
Replacing Reference Fluid
Element DC5X
Veterinary Chemistry Analyzer
Pipette Reference Fluid into a 0.5-ml or 1.5-ml Red Top non-heparinized sample tube depending
on the reference fluid setting. Set the tube in the center of the carousel.
IMPORTANT: Replace RE fluid after 12 hours.
Supplies
Page 4
Element DC5X
qs
quick steps guide
Sample Collection and Handling
NOTE: Handle all samples and used materials as infectious waste. Wear gloves, glasses and other protective gear for your safety.
Heska-Supplied Green Top (lithium heparin) Tubes
NOTE: Use with Heska-provided centrifuge to save a step.
Veterinary Chemistry Analyzer
1. Draw patient sample using a 23-gauge or larger needle.
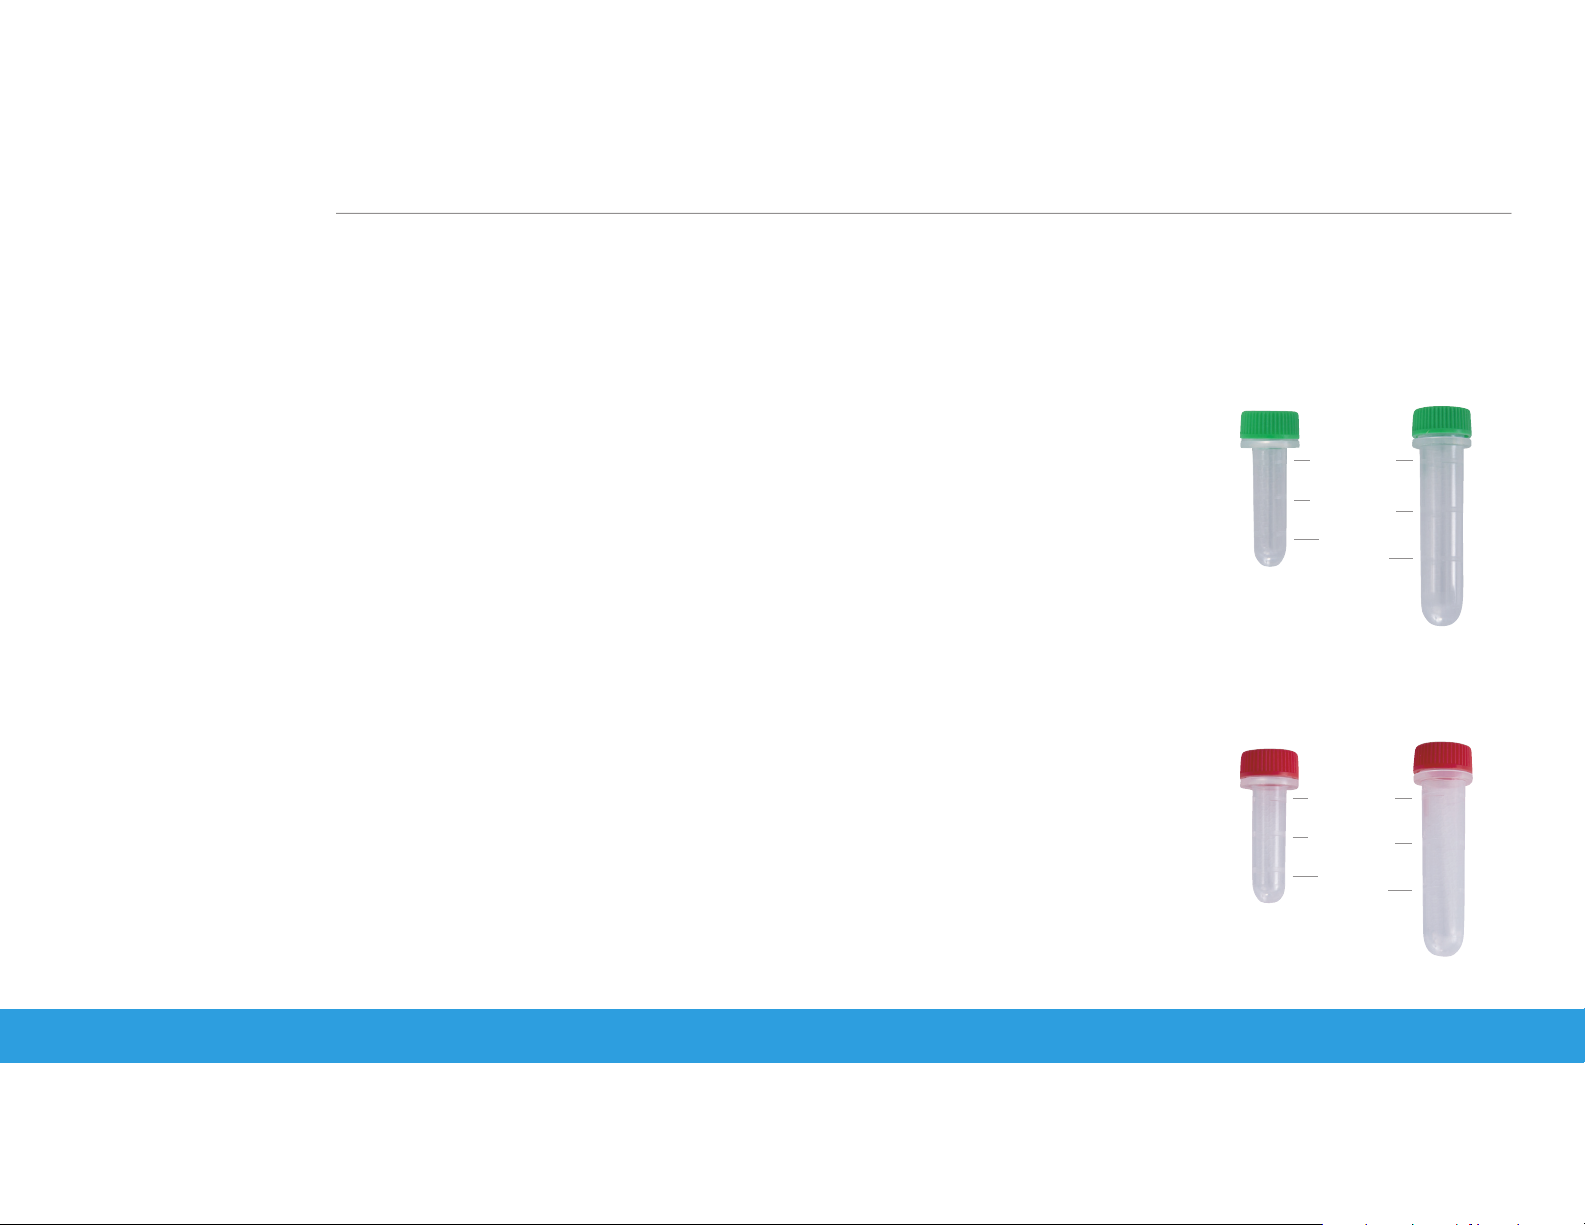
2. Remove needle from syringe to fill a 0.5-ml or 1.5-ml Green Top tube.
NOTE: Full 0.5-ml Green Top tube−6-test profile plus electrolytes.
Full 1.5-ml Green Top tube−Adequate volume for all available tests.
3. Fill sample tube.
• 0.5-ml tube: Fill with at least 0.3 ml of sample (second line); Immediately invert the tube 5 to 6 times
to ensure proper mixing with the lithium heparin.
• 1.5-ml tube: Fill with at least 1 ml of sample (second line); use standard inversion or rolling to mix.
4. Spin sample in Heska-provided centrifuge for 3 to 5 minutes.
Standard Green Top Lithium Heparin or Red Top Plain Tubes for Harvesting Serum or Plasma
1. Collect sample and separate serum or plasma as you normally would.
NOTE: Red Top tube serum samples: Allow 20 minutes to clot prior to centrifugation (45 minutes for equine blood).
2. Transfer plasma or serum to a 0.5-ml Heska Red Top tube for analysis.
NOTE: Full 0.5-ml Red Top tube−adequate volume for all available tests. The 1.5-ml Red Top tube should only be
used if it can be filled to at least the 1-ml mark (second line).
0.3
0.1
.5
0.3
0.1
.5
Upper limit
of sample
Lower limit
of sample
Suction
limit
Upper limit
of sample
Lower limit
of sample
Suction
limit
1.5
1.0
0.5
1.5
1.0
0.5
Sample Collection and Handling
Page 5
qs
quick steps guide
Basic Operation
Make sure that [Ready], [Warming Up], or [Lamp Warming Up] is displayed before loading samples and slides. To
stop sampling, touch STOP.
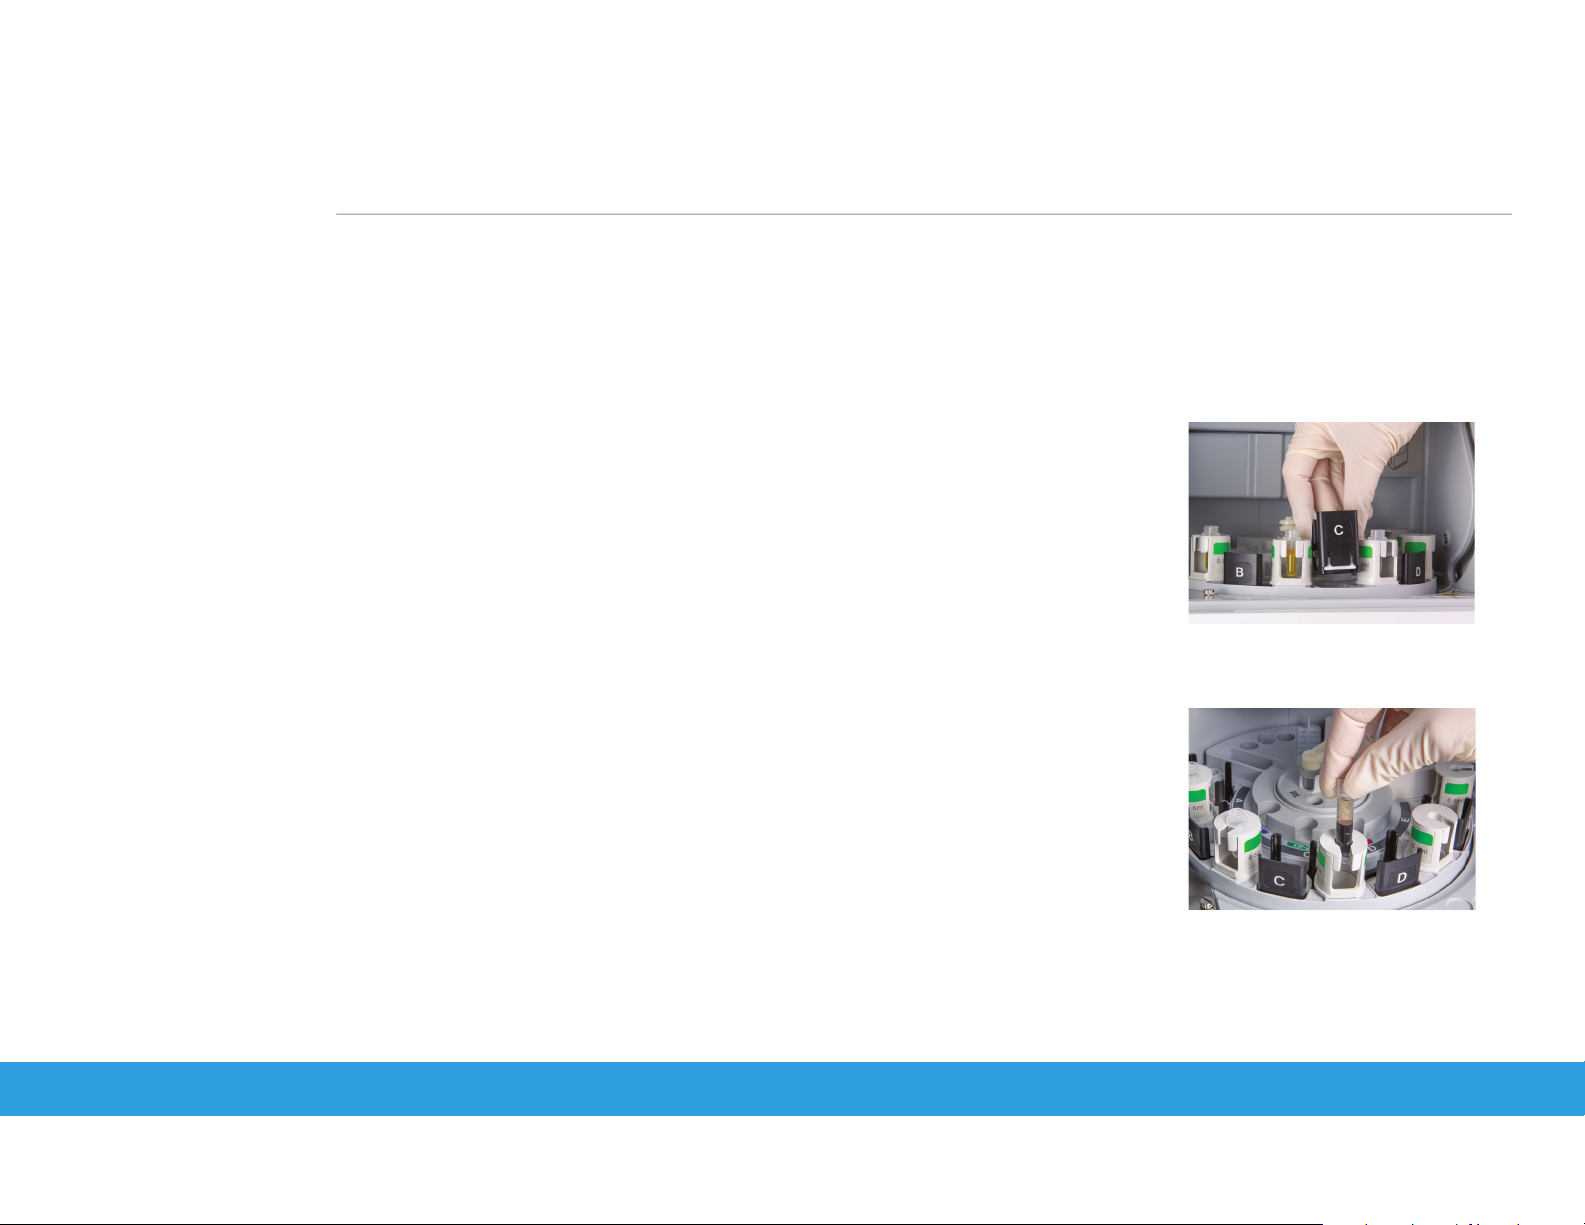
1. Lift front cover.
2. Place slides to be tested, barcode surface down, into slide cartridge and place weight on top.
NOTE: Handle slides by outside edges only and if using an E-Wrap panel, remove the clear plastic wrap.
3. Place slide cartridge properly in appropriate sample position.
4. Remove cap from sample tube and place into appropriate sample rack.
5. Place RE fluid if testing electrolytes. (See replacing RE Fluid section).
6. Close sampler cover.
7. Touch appropriate Sample position (A, B, C, D or E).
8. If using Work List, touch the Work List icon and select the desired patient. Touch OK. Go to Step 12.
Element DC5X
Veterinary Chemistry Analyzer
9. If not using Work List, touch SAMPLE ID.
10. Input sample ID (Example: 100). Touch OK to accept.
11. Touch ANIMAL and select desired species.
12. Make sure sample type is set to Plasma/Serum. Touch OK.
13. Repeat Patient ID entry for samples in additional positions (A–E).
14. Touch START.
Basic Operation
Page 6
qs
quick steps guide
Running Auto-Dilution Samples
Example: To rerun Sample C with 5 times dilution:
1. Replace slides in slide cartridge C and place slide cartridge in position.
Element DC5X
Veterinary Chemistry Analyzer
2. On test results screen, touch (Rerun)
3. Touch position C.
4. Touch DILUTION and select dilution factor.
5. Touch OK to accept.
6. Touch START to begin testing.
Running STAT Samples
Use this feature to prioritize a critical sample if more than one sample is already in progress.
Example: running STAT sample in position D.
1. Touch STAT. LCD screen shows [Please wait a moment].
2. Open cover and place slides and slide weight in position D.
3. Touch position D and input appropriate patient ID and species. Touch OK.
4. Screen will display [Spotting is suspended]. Touch RESTART to begin testing.
NOTE: Original sample that was interrupted will finish first. STAT sample will be processed next, followed by any remaining programmed samples.
Interrupting Samples
.
Touch PAUSE once to interrupt sampling. Touch STOP while sample is paused to cancel the paused test.
NOTE: Do not open waste disposal drawer during sample processing.
Running Samples
Page 7

qs
quick steps guide
Calibration
Ensure that [Warming Up], [Lamp Warming Up], or [Ready to Test] is displayed.
• For new slide lot #, insert the QC card into the slot with the QR code facing to the left.
NOTE: Test name and lot #’s appear on the display and will print out. Analyzer will store 5 lots per analyte or panel.
Controls
NOTE: Always wear gloves when running controls.
1. Run HESKA
2. Select [Control] for your species.
Daily Maintenance
1. Keep cover closed except when loading and unloading slides, samples and consumables.
2. Empty waste disposal drawer.
Chemistry Control solution as you would a patient sample by transferring into a 0.5-ml Red Top tube.
Element DC5X
Veterinary Chemistry Analyzer
3. Change reference fluid every 12 hours.
4. Remove sample tubes when finished testing.
5. Clean any spills on the spotting slide transit area.
Calibration, Controls and Daily Maintenance
Page 8

Element DC5X Veterinary Chemistry Analyzer Slides Quantity Per Box
CAT 6330-ALB Albumin 24/box
CAT 6330-ALP Alkaline Phosphatase 24/box
CAT 6330-ALT ALT (GPT) 24/box
CAT 6330-AMY Amylase 24/box
CAT 6330-AST AST (GOT) 24/box
CAT 6330-BUN BUN 24/box
CAT 6330-CA Calcium 24/box
CAT 6330-CHOL Total Cholesterol 24/box
CAT 6330-CK CK 24/box
CAT 6330-CREA Creatinine 24/box
CAT 6330-GGT GGT 24/box
CAT 6330-GLU Glucose 24/box
CAT 6330-LDH Lactate Dehydrogenase 24/box
CAT 6330-LIP Lipase 24/box
CAT 6330-MG Magnesium 24/box
CAT 6330-NH
3
Ammonia 24/box + NH3 control
CAT 6330-PHOS Phosphorous 24/box
CAT 6330-TBILI Total Bilirubin 24/box
CAT 6330-TP Total Protein 24/box
CAT 6330-TRIG Triglycerides 24/box
CAT 6330-UA Uric Acid 24/box
CAT 6330-LYTES Electrolytes 24/box
CAT 6330-PRESURG/EWRAP Pre-Surgical Panel (ALP, ALT, BUN, CREA, GLU, TP) 72 slides/box (12 panels/box)
CAT 6330-EQ Equine Panel (ALB, AST, BUN, CA, CK, CREA, GGT, GLU, LDH, PHOS, TP, T-BILI) 24 slides/box (2 panels/box)
CAT 6330-KIDNEY Kidney Panel (ALB, BUN, CA, CREA, PHOS, TP) 24 slides/box (4 panels/box)
CAT 6330-LIVER Liver Panel (ALB, ALP, ALT, GGT, GLU, T-BILI) 24 slides/box (4 panels/box)
CAT 6330-COMP/EWRAP Comprehensive Panel (ALP, ALT, BUN, CREA, GLU, TP, T-BILI, ALB, PHOS, CA, CHOL, GGT) 72 slides/box (6 panels/box)
CAT 6330-PLUS Plus Panel (LIP, AMY, MG, TRIG, AST, LYTES) 24 slides/box (4 panels/box)
Page 9

For further assistance, please call Heska’s Technical Support Services at 800.464.3752, option 3.
©2018 Heska Corporation . All Rights Reserved. HESKA is a registered trademark and Element DC5X is a trademark of Heska Corporation in the U.S. and other countries. 18MD0501 CAT6609
 Loading...