

Page 1
Acoustic, Vibration, and
EMI Isolation Specialists
WaveCatcher Quick Guide | How to Setup WC Hardware | www.herzan.com
WaveCatcher Quick Guide
How to Setup WaveCatcher Hardware
Overview
Setting up the WaveCatcher hardware is intentionally designed to be intuitive, reinforcing the
WaveCatcher’s capability as an efficient and effective site survey tool. The following steps
highlight how to correctly setup the WaveCatcher hardware and the various sensors available.
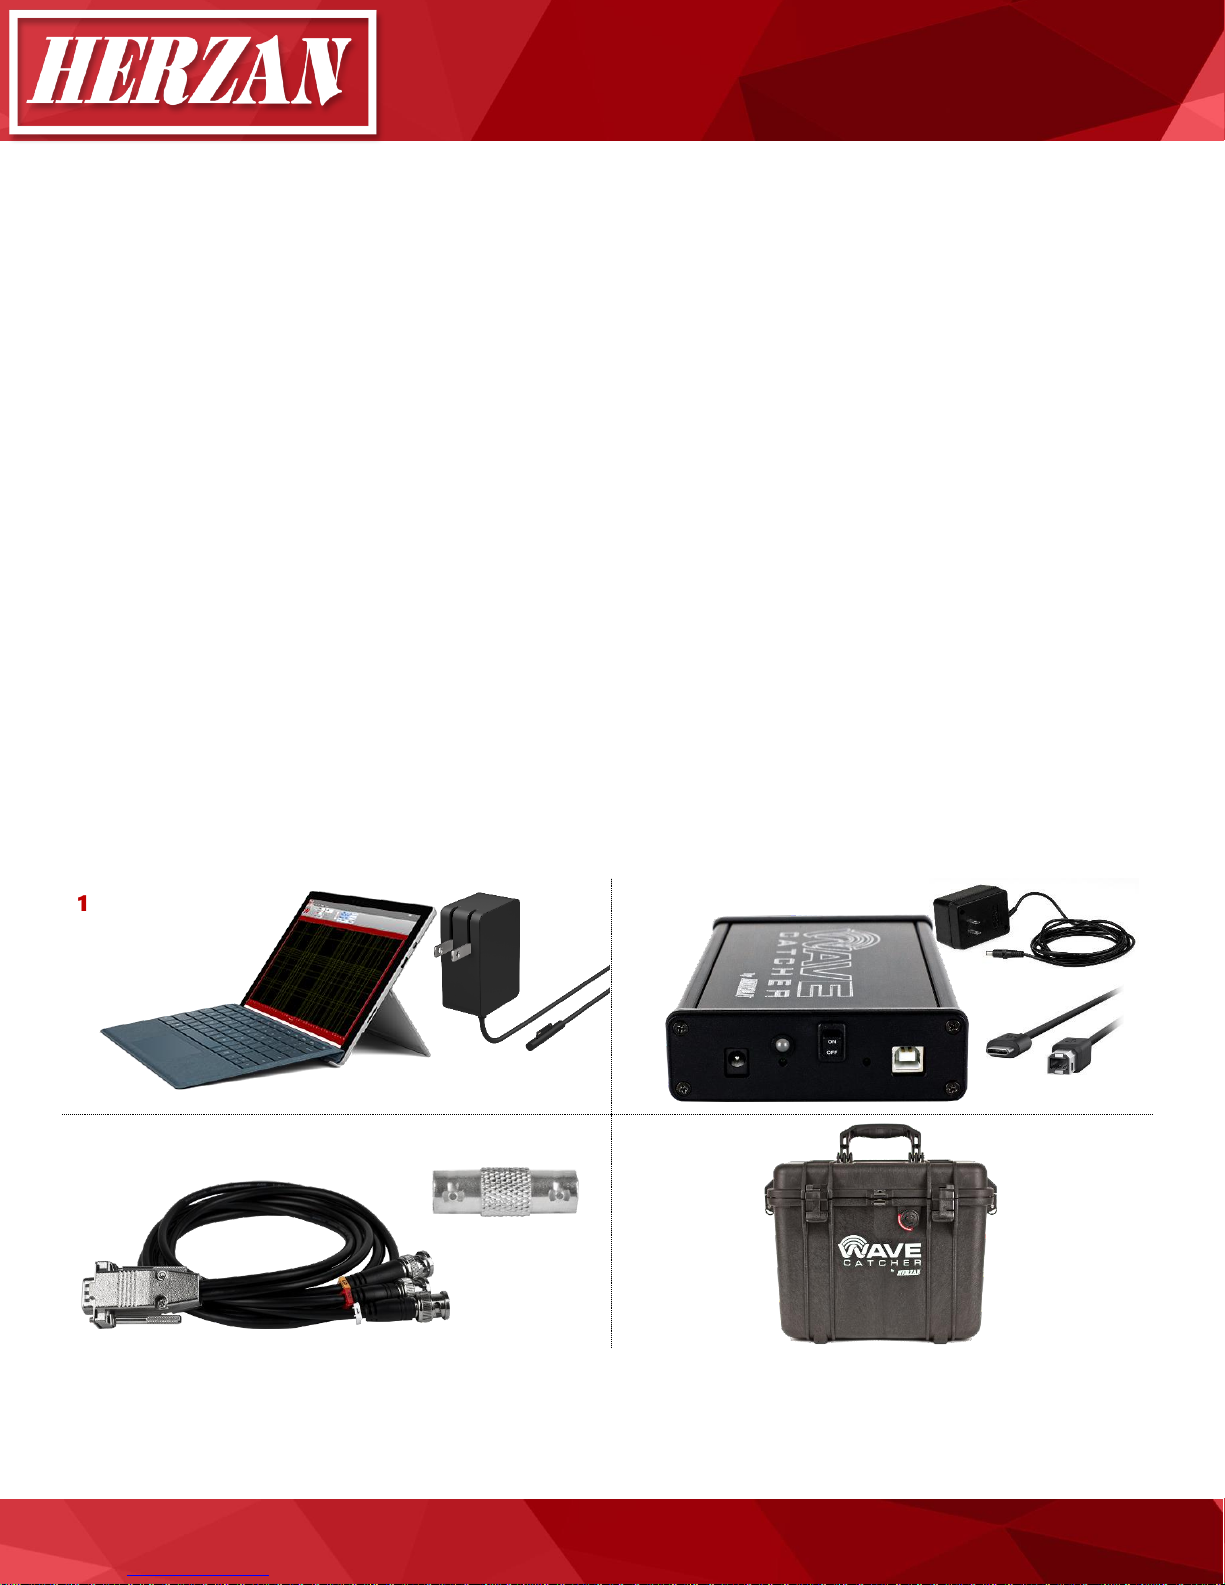
Standard WaveCatcher Hardware
1. QTY 1: Netbook Computer and Power Supply
2. QTY 1: WaveCatcher Analog-to-Digital Converter (ADC), Power Supply, D Sub Extender Nuts,
and Connection Cable (USB Type B to USB Type C Cable)
3. QTY 1: Custom Sensor Cable (D Sub to 3 BNC Cable) and BNC Cable Adapter
4. QTY 1: Carrying Case
1
3
4
Page 2
WaveCatcher Quick Guide | How to Setup WC Hardware | www.herzan.com
Acoustic, Vibration, & EMI Isolation Specialists
Connecting the WaveCatcher Hardware
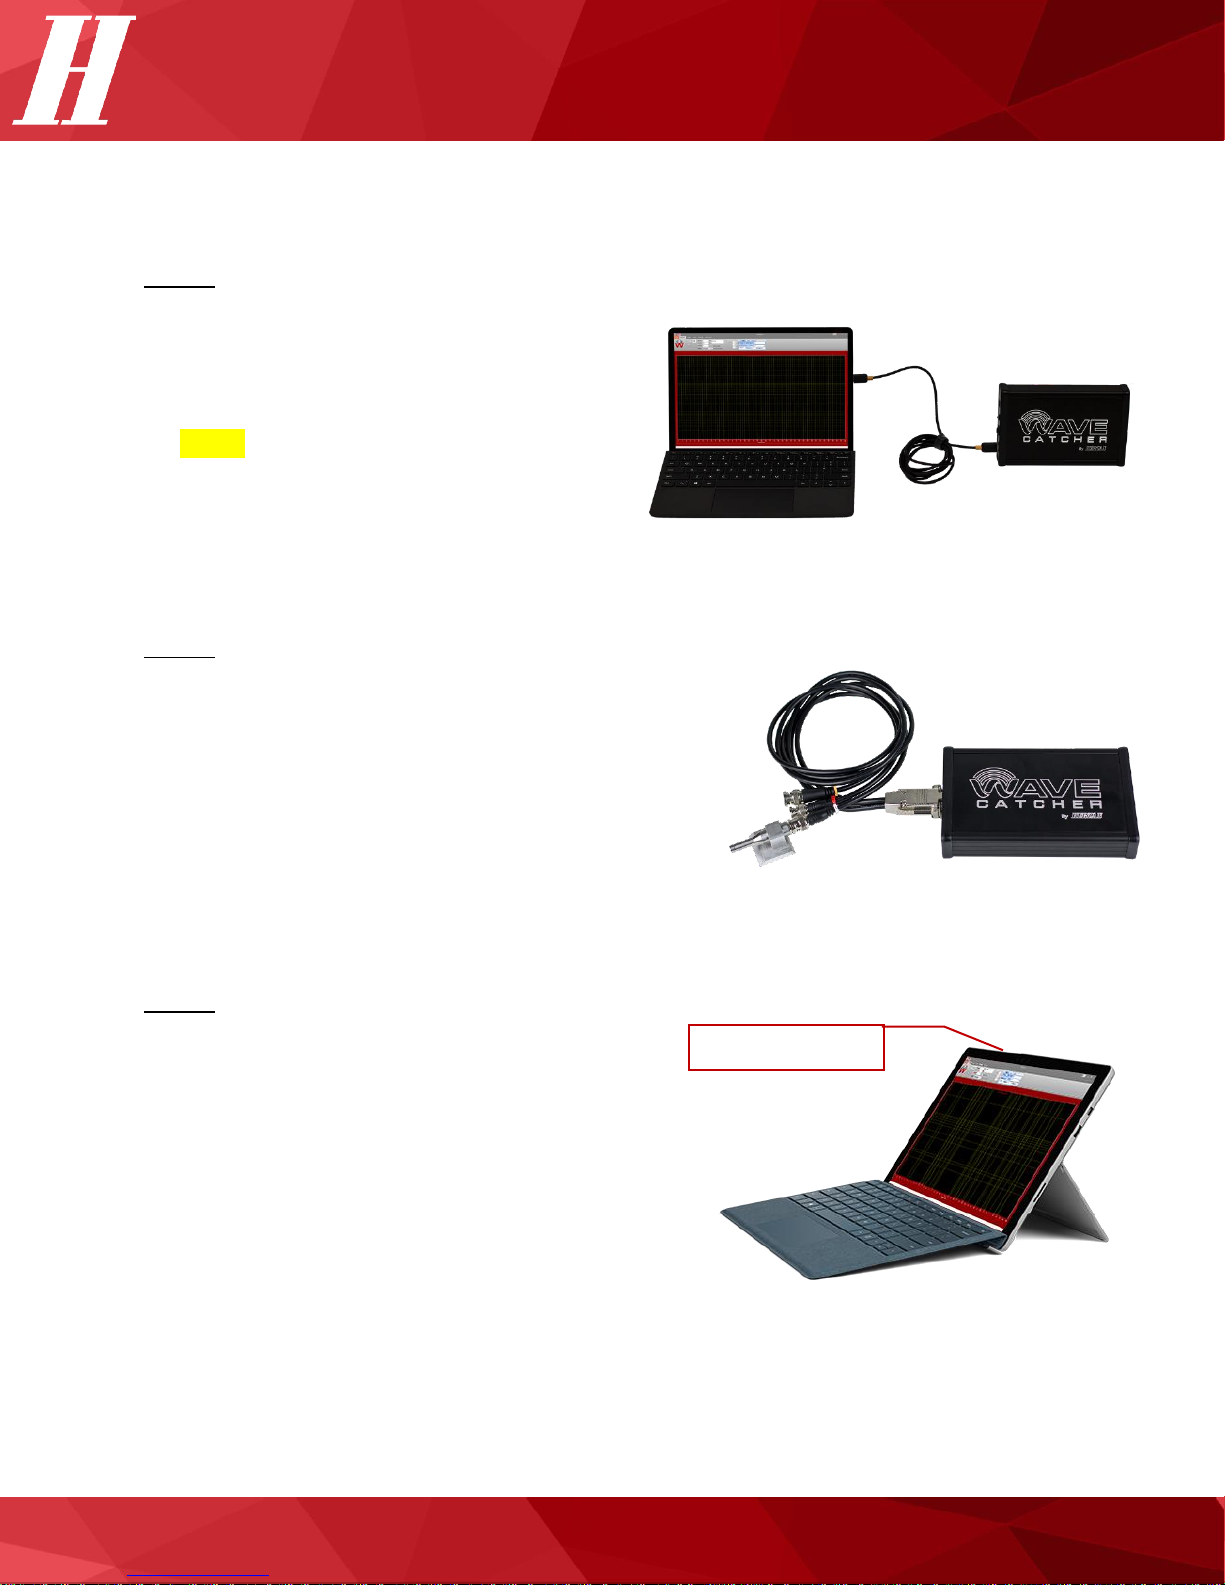
Step 1: Connect the Netbook Computer to the WaveCatcher ADC
- Connect the netbook computer to the
WaveCatcher ADC by inserting the ADC
connection cable into a USB port on the
netbook computer.
- NOTE: both the netbook computer and
ADC should be fully charged and
disconnected from power when
performing a measurement.
Step 2: Connect the Sensor(s) to the WaveCatcher ADC
- Connect the custom sensor cable to the D Sub
input on the ADC.
- Each sensor connects differently to the
WaveCatcher ADC, so please reference the
following Quick Guide for further information: How
to Connect WaveCatcher Sensors.
- Power on the WaveCatcher ADC by using the
on/off switch on the front panel.
Step 3: Turn On The Netbook Computer and Load the WaveCatcher Software
- Once the hardware and measurement sensor(s)
are connected, power on the netbook computer
by pressing the Power button.
- Once powered on, select the WaveCatcher
software icon found on the desktop to load the
WaveCatcher software.
- To setup or perform a measurement, refer to the
following Quick Guide: How to Perform A
Measurement.
Power Button
Figure 1: Netbook Computer Connected to WaveCatcher ADC
Figure 2: Acoustic Microphone Connected to WaveCatcher ADC
Figure 3: Powering On the WaveCatcher Netbook Computer
 Loading...