

Herrmidifier 707-uk, 707u Owner's Manual
Introduction ........................................1
Specifications ......................................1
Capacity Selection Guide ..................2
Operation of Humidifier ....................2
Installation
Selecting a Location ....................3
Physical Installation ......................5
Final Installation ..........................9
Electrical Installation ..................10
Humidistat Installation ..............11
Maintenance......................................12
Unit Diagram and Parts List ............14
Warranty ..............................Back cover
Manual for:
• Installation
• Operation
• Maintenance
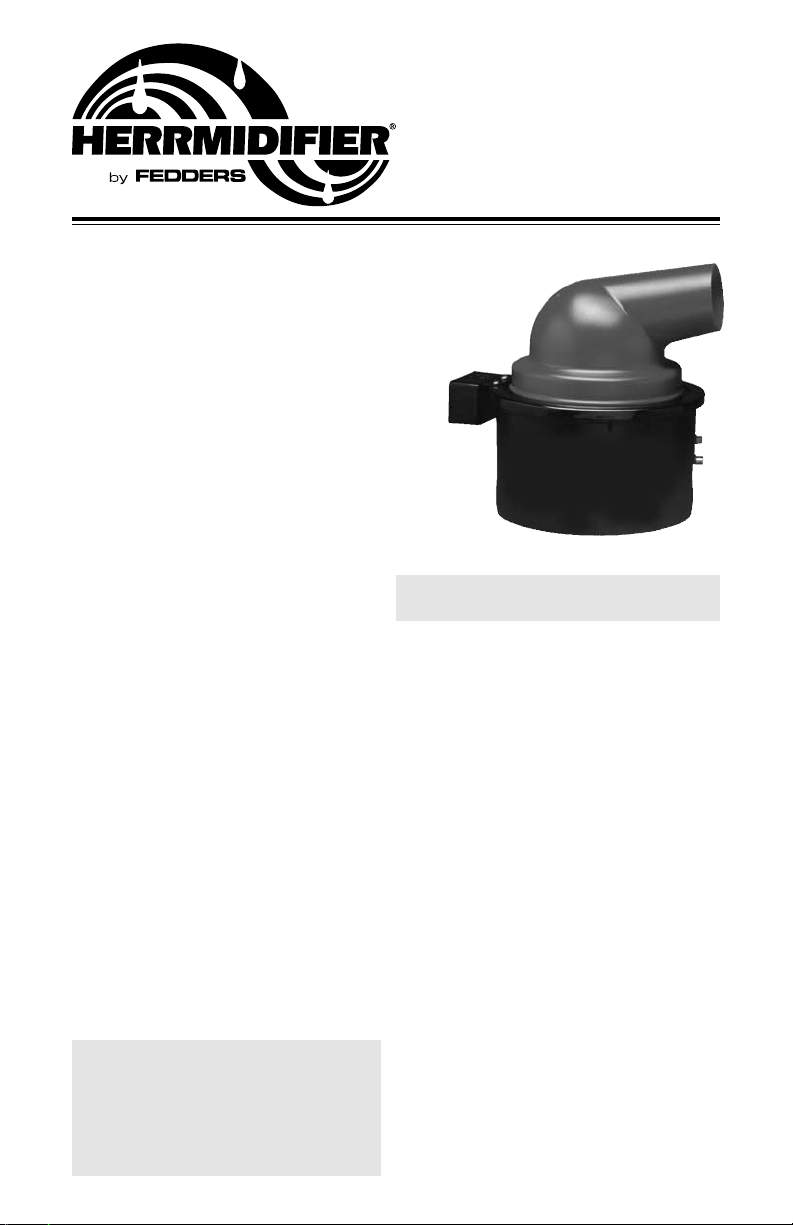
Duct Mount Centrifugal
Atomizer Humidifier
Table of Contents
256703-001 7/04
CAUTION: Read installation,
operation, and maintenance
instructions carefully for safe
operation. Exercise the usual
precautions when working
with electricity.
707U
Model 356686-001C (115/60/1)
707U-UK
Model 356686-002C (220/50-60/1)
1
Dear Owner:
Congratulations on your choice of a Herrmidifier brand humidification system. Your family can
now look forward to breathing more comfortable air, winter after winter. We are committed to
providing advanced products that improve the quality of the air you breathe.
The following information will familiarize you with the operation of your new humidifier and
provide helpful tips on how to obtain maximum performance from your unit.
Introduction
The benefits of a properly humidified environment (35-50% Relative Humidity) are many. They
include both personal comfort as well as the preservation of furniture, draperies, carpets,
wooden floors and cabinets, paintings, pianos, etc.. Your home will be more comfortable at a
lower temperature (i.e.: 68° F) at 30-40% Relative Humidity (RH) than at 71° to 72° F without
controlled humidity. Since every degree of temperature setback represents about 3% of your
heating costs, this can possibly represent a significant annual savings.
During the heating season, cold air is brought into the home and heated. When heated, this air
dries out and greatly increases its capacity to hold more moisture. By using a humidifier, a source
of water is provided to satisfy this increased moisture holding capability, rather than having it
drawn from our body surface and the surrounding furnishings in the home.
A properly maintained and efficiently operating humidifier is a source of improved Indoor Air
Quality and personal comfort. We hope you will enjoy the benefits of your humidifier.
Type of Unit Centrifugal atomizing
Duct Mounting Return
GPD @ 140 ° F 6.0 maximum
GPD @ 120 ° F 6.0 maximum
GPD @ 100 ° F 6.0 maximum
Voltages 120V/ 240V
Unit Dimensions 10 1/2” DIA x 12 1/2” H
Standard Equipment Wall / duct mount humidistat (707U only)
Self piercing saddle valve
Features Centrifugal atomizer
Operates on low current, less than a 100w bulb
All brass valve assembly
Universal mounting options
2 year warranty
Installation Options
Duct Side Mount Mounts on face of vertical or side of horizontal return duct
Includes independent mounting bracket
Free Standing Wall
Mount (707U only) Mounts behind wall
Includes independent mounting bracket
Includes discharge extension to extend through wall
Introduction
Specifications
2
Capacity Selection Guide
Operation
Your centrifugal atomizer type humidifier operates on the principle of breaking down water
droplets into a fine mist and atomizing the moisture into the air.
If applicable, set the humidistat in the recommended range of 30-40% relative humidity for
automatic humidity control during the heating season (a lower setting may be used to control
condensation on single pane windows). During the first heating season, check the mineral
buildup in the humidifier every month to establish the proper cleaning schedule. Clean the unit
at the end of each heating season, or whenever mineral deposits appear to be impeding the
discharge of the water mist.
When shutting the humidifier down for the summer months, start with cleaning any mineral
accumulation from the unit. Leave the water turned off and the unit dry. If the furnace fan is
to be used for cooling purposes, disconnect power to the humidifier or turn the humidistat to
the OFF position.
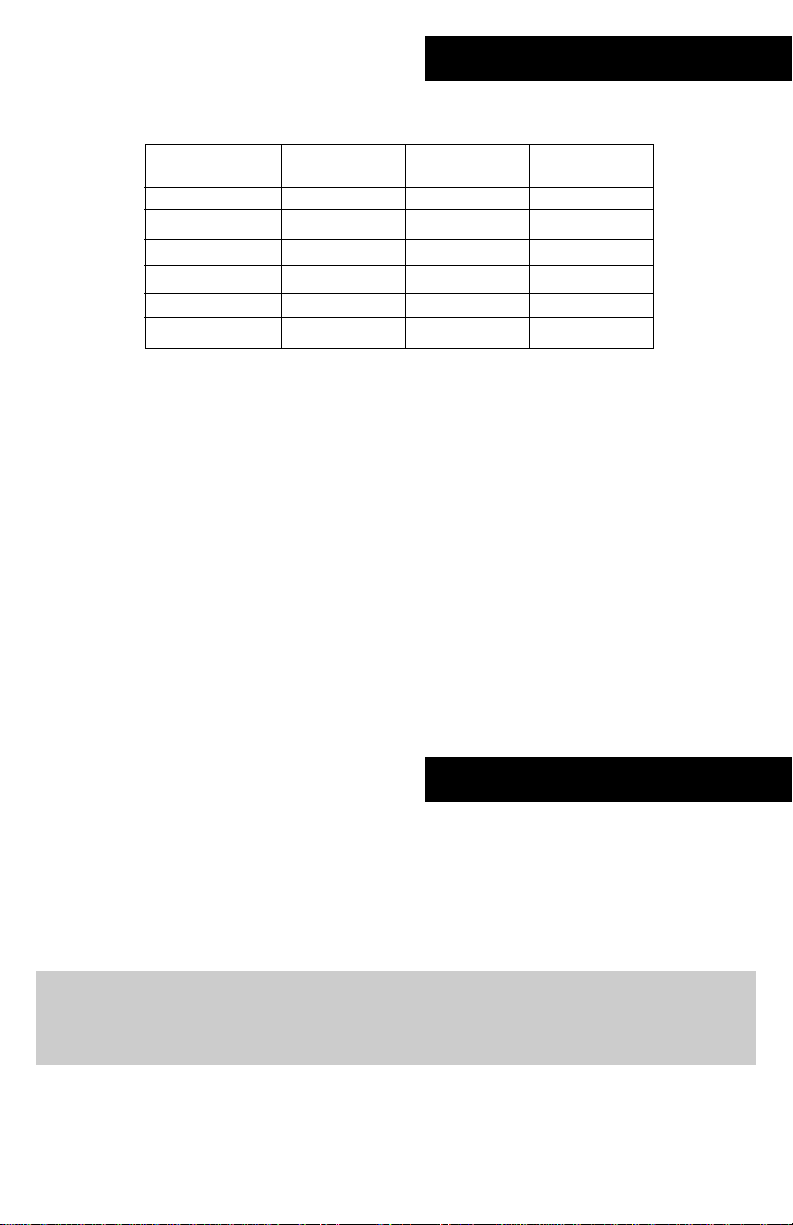
Sq. Footage of
Home
1000
1500
2000
2500
3000
4000
Tight Home
(GPD*)
0.5
3.0
5.0
7.5
10.0
14.5
Average Home
(GPD*)
5.0
10.0
14.0
19.0
23.5
33.0
Loose Home
(GPD*)
10.0
16.5
24.0
30.5
37.5
51.5
The above calculations are for reference only and are based on the following:
• Inside temperature 70° F/35% relative humidity
• Outside Temp 20° F /70% relative humidity
• 8 foot ceiling height
• Internal moisture gain of one pound per hour
• Furnace on-time of 70%
This chart uses A.R.I. standard designations:
A “Tight Home” is assumed to be well insulated with vapor barriers, tight storm windows and
doors, and a dampered fireplace. Air exchange rate of .50 changes per hour.
An “Average Home” is insulated and has a dampered fireplace, but there are no vapor barriers,
storm doors, or storm windows. Air exchange rate of 1.0 change per hour.
A “Loose Home” is generally one constructed before 1930, has little or no insulation, no storm
doors, storm windows, weather stripping or vapor barriers, and often no effective dampering of
fireplaces. Air exchange rate is as high as 1.5 changes per hour.
* GPD= Gallons Per Day (humidifier capacity)

3
Selecting a location for the unit
Mounting on face of vertical return duct or side of
horizontal return duct
When mounting your humidifier on the face of a horizontal
return duct, or on the face of a vertical return duct, certain
conditions must be met for its proper operation:
• Mount the humidifier on the vertical or horizontal cold air
return duct.
• Locate the humidifier at least four (4) linear feet upstream of
either the furnace fan and /or filter and any turn in the duct.
This will ensure that condensation does not collect within the
duct and cause oxidation (rust).
• Mount the humidifier at least six (6) linear feet (preferably 10
feet) upstream from any electronic air cleaner. Failure to
follow this recommendation can cause excessive nuisance
arcing and or power supply failure.
• If the duct seams inside the duct are not flat, locate the
humidifier at least three (3) linear feet upstream from the
seam.
• If the humidification needs of the home require more than
one humidifier, each unit should be installed a minimum of (3)
linear feet apart.
• DO NOT use this humidifier on the discharge or warm air
supply side of a forced air heating system. This will reduce the
efficiency of the humidifier and may cause operational
problems.
• DO NOT mount the humidifier in a furnace jacket.
• DO NOT install the humidifier where freezing conditions could
occur.
• DO NOT install on gravity hot air systems.
4
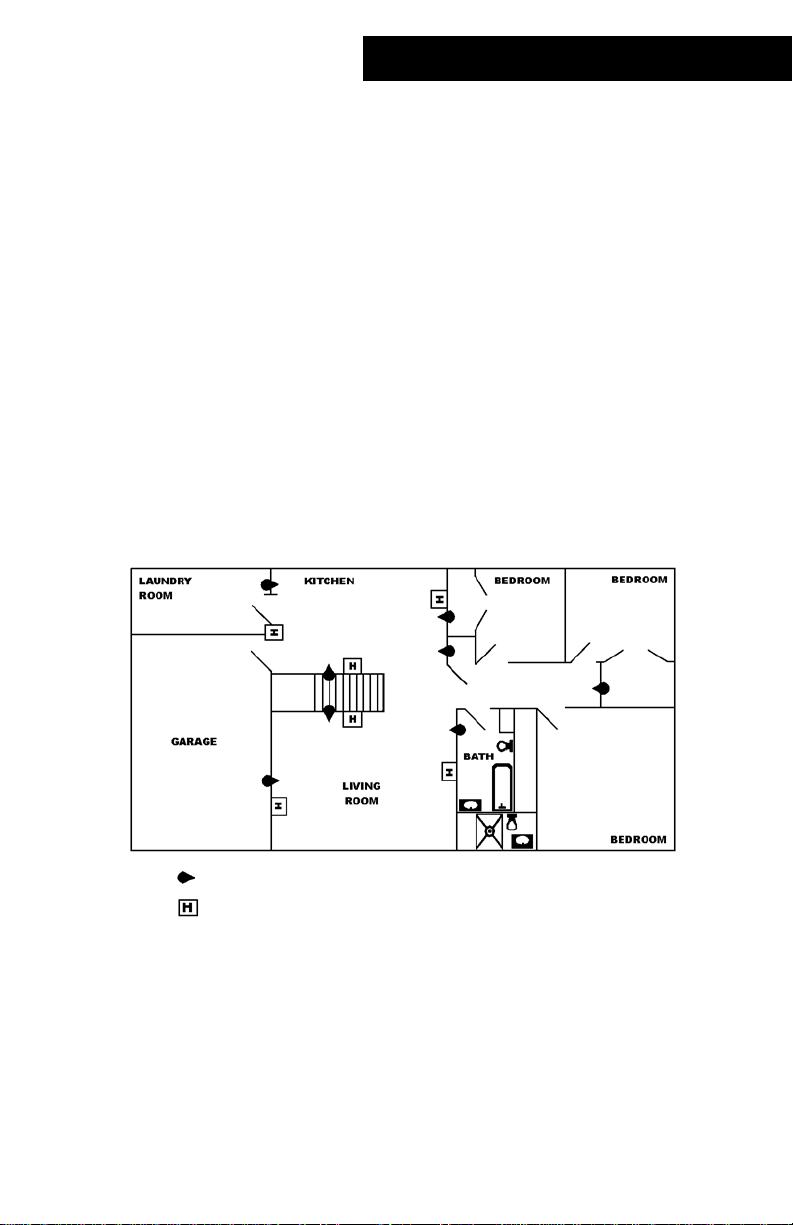
Selecting a location for the unit
Mounting behind a wall using the discharge extension (707U only)
When selecting a location for the installation of your humidifier as a free standing unit, certain
conditions must be met for its proper operation:
Locate the humidifier in a convenient spot where the working part of the humidifier can be
hidden (i.e. closet, stairway, garage, utility room, etc.)
When deciding on the location of the humidifier, please keep in mind the following points:
• The discharge nozzle should be at least two (2) feet below the ceiling and from a vertical wall
along the side.
• The discharge nozzle should be about six and a half (6 1/2) feet from the floor. If this is not
possible, locate the humidifier in the area of least traffic.
• The humidifier should be located between wall studs to facilitate cutting the discharge hole
through the wall.
• No obstructions should be directly in the path of the discharge mist for six (6) feet. This
includes, but is not limited to ceiling lights, light cords and ceiling fans.
• DO NOT install the humidifier where freezing conditions could occur.
Indicates recommended locations for free standing humidifiers
Indicates humidistat locations
 Loading...