

INSTRUCTION MANUAL
FOR
LABORATORY CENTRIFUGE
Berthold Hermie GmbH & Co
industriestrasse 8-12
D-7209
Phone: (0 74 26) 67-0
T!x.:760
Fax: (0 74 26) 67-170
Gosheim / Fed. Rep. of Germany
613bhgd
Z320
,1
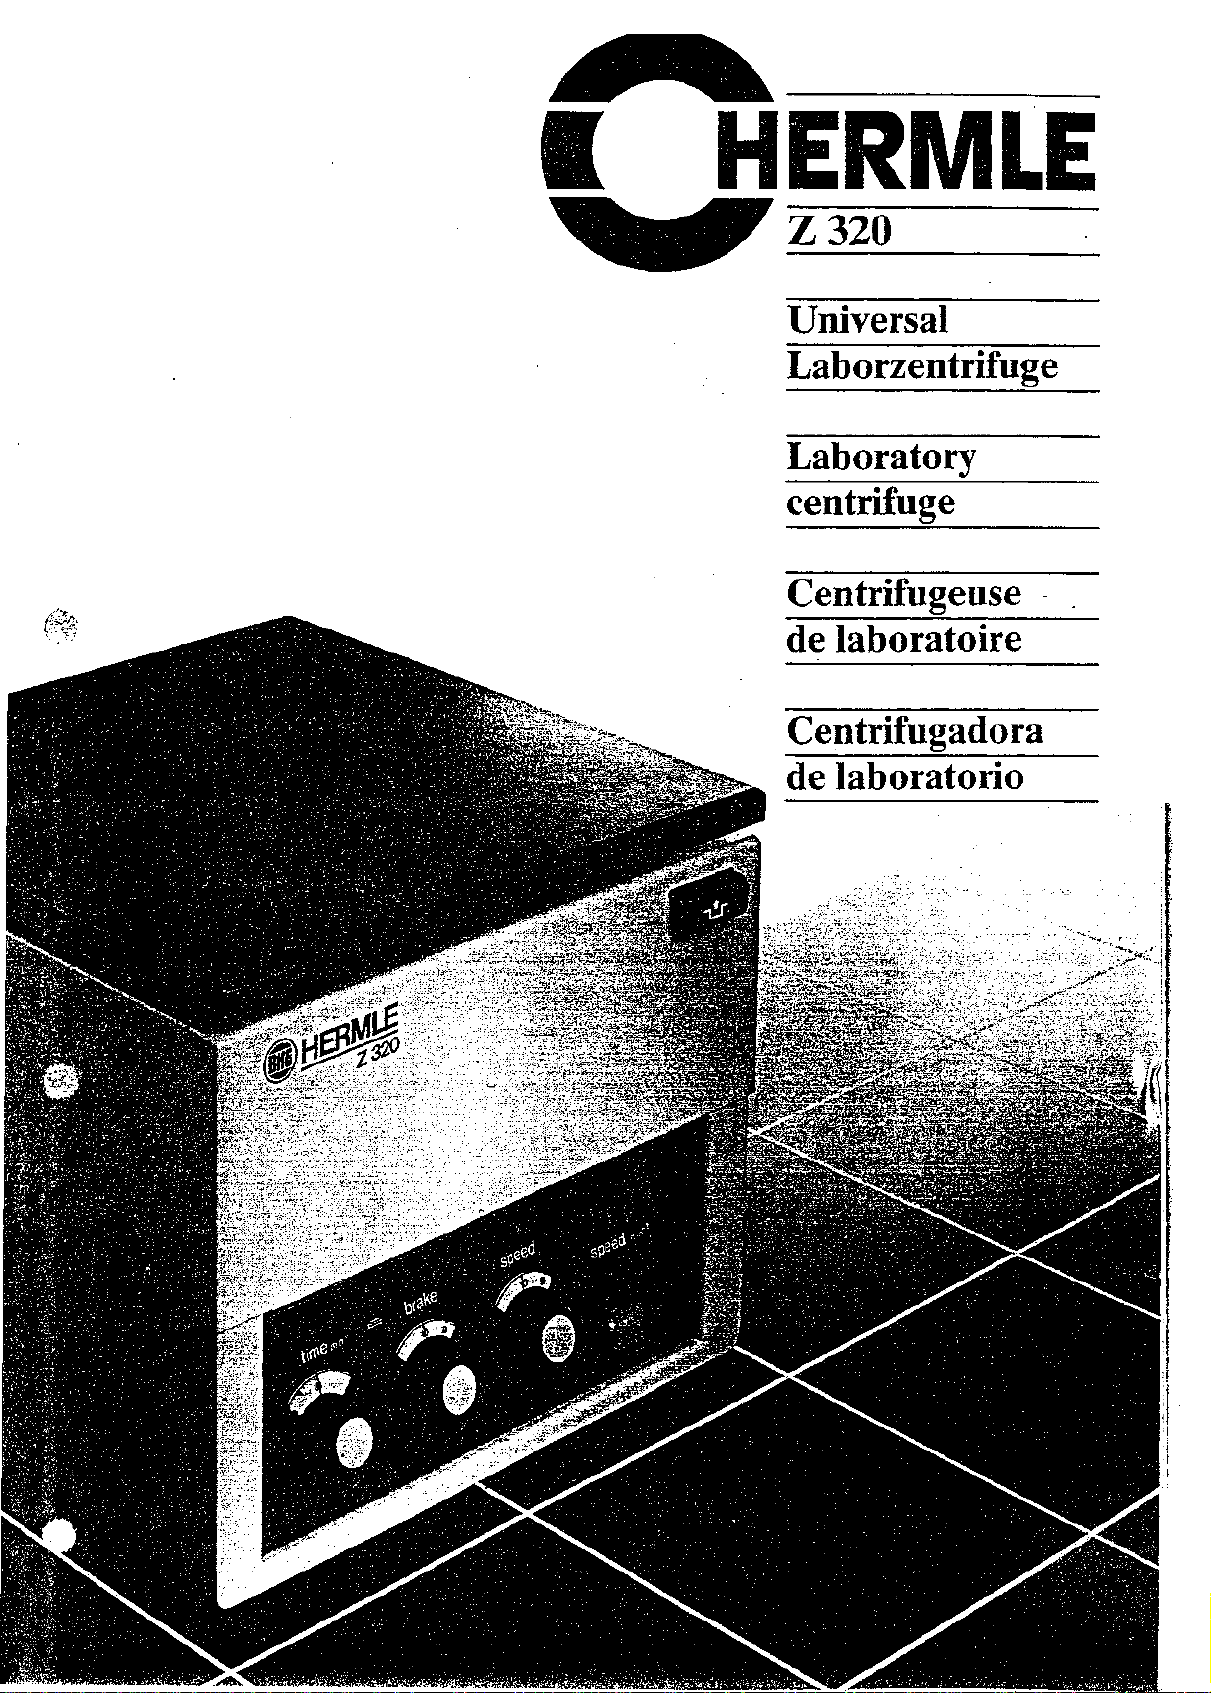
HERMLE
Z320
Universal
Laborzentrifuge
Laboratory
centrifuge
Centrifugeuse
de laboratoire
Centrifugadora
t
de laboratorio
INDEX Page
1.
General Information 2
1.1 Description 2
1.2 Safety precautions to be observed before operating the centrifuge 2
1.3 Safety standards 2
1.4 Technical data 3
1.5 Accessories supplied with each centrifuge unit 4
1.6 Warranty 4
2.
Installation 5
2.1 Unpacking the centrifuge 5
2.2 Required space 5
2.3 Installation 6
3. Howto install and load a rotor 7
3.1 Mounting and securing a swing out rotor 7
3.2 Mounting and securing a microtiter rotor 8
3.3 Mounting and securing an angle rotor 8
3.4 Mounting and securing a hematocrit rotor 11
3.5 Overloading of rotors 13
4.
Operation , 14
4.1 Power switch 14
4.2 Lid release 14
4.3 Rotor installation 15
4.4 Lid lock 15
4.5 Speed preselection 15
4.6 Preselection of operating time 16
4.7 Preselection of brake intensity 16
5. Safety facilities 16
5.1 Imbalance 16
6. Service and Maintenance 17
6.1 Service of centrifuge 17
6.2 Cleaning the centrifuge 17
6.3 Cleaning of centrifuge after breakage of glass tubes/bottles 17
6.4 Disinfection 18
7. Breakdown 19
7.1 Emergency Lid release 19
7.2 Check list / Trouble shooting 20
8. Nomograms 21
8.1 Acceleration and deceleration values of the Z 320 21
8.2 RCF - (g-value) - diagrams 22
9. Appendix 23
9.1 Chart for determining g-values 24
9.2 Circuit diagram 25
1.
General Information
1.1 Description
Model"
application by offering a wide range of accessories. It accomodates swing out
rotors up to a max. capacity of 4 x 100 ml, as well as angle rotors up to 10.000 rpm
(microtiter rotor and hematocrit rotor see brochure).
1.2 Safety precautions to be observed before operating the centrifuge
Do not operate if:
- the centrifuge has not been installed correctly
- the centrifuge is partly dismantled
- service has been attempted by non-authorized or non-qualified
- the rotor has not been installed securely on the motor shaft
Do not operate the centrifuge with rotors and accessories not belonging to the
standard range of accessories of this centrifuge without obtaining the prior
Z 320" is a universal bench top centrifuge which covers many fields of
personnel
permission of the manufacturer. Exception: tubes and bottles made of glass or
plastic normally available in the laboratory.
Do not operate the centrifuge in explosive atmospheres.
1.3 Safety standards
The centrifuge corresponds to the general requirements set by German law for
medical apparatus, "Med GV" group 3.
The following standards have been considered for the production of our
centrifuges:
- Accident prevention rules for centrifuges UW-VBG 7z
- Accident prevention rules for electrical equipment & installations
UW-VBG4
- DIN 58970, part 1,2 and 4 for centrifuges and centrifuge tubes
- Electrical interference suppression according to interference degree
NasperVDE0875
1.4 Technical Data
Manufacturer
BHG HERMLE GmbH & Co.
industriestrasse 8-12
7209 Gosheim/Fed. Rep. of Germany
TIx: 760613 bhgd, Fax: (07426)67 170
Type No.
Z320
Dimensions:
Width
Depth
Height
390 mm
390 mm
340 mm
Weight 29 kg
Noise level
64 dB(A)
max. speed
max. volume
max.RCF
Admiss. density
Admiss. kinetic energy
Electrical connection
Current
Connected load
Interference suppression
Service Dept. at HERMLE:
Address of agent:
10.000 rpm +/-
5%
400,0 ml
6.580
x g
1,2 kg/dm
2.400
220 V/50 Hz
0,71 A
0,155 KVA
3
Nm
115V/60HZ
1,7 A
0,195 KVA
interference degree N as per VDE 0875
074 26 / 67-438
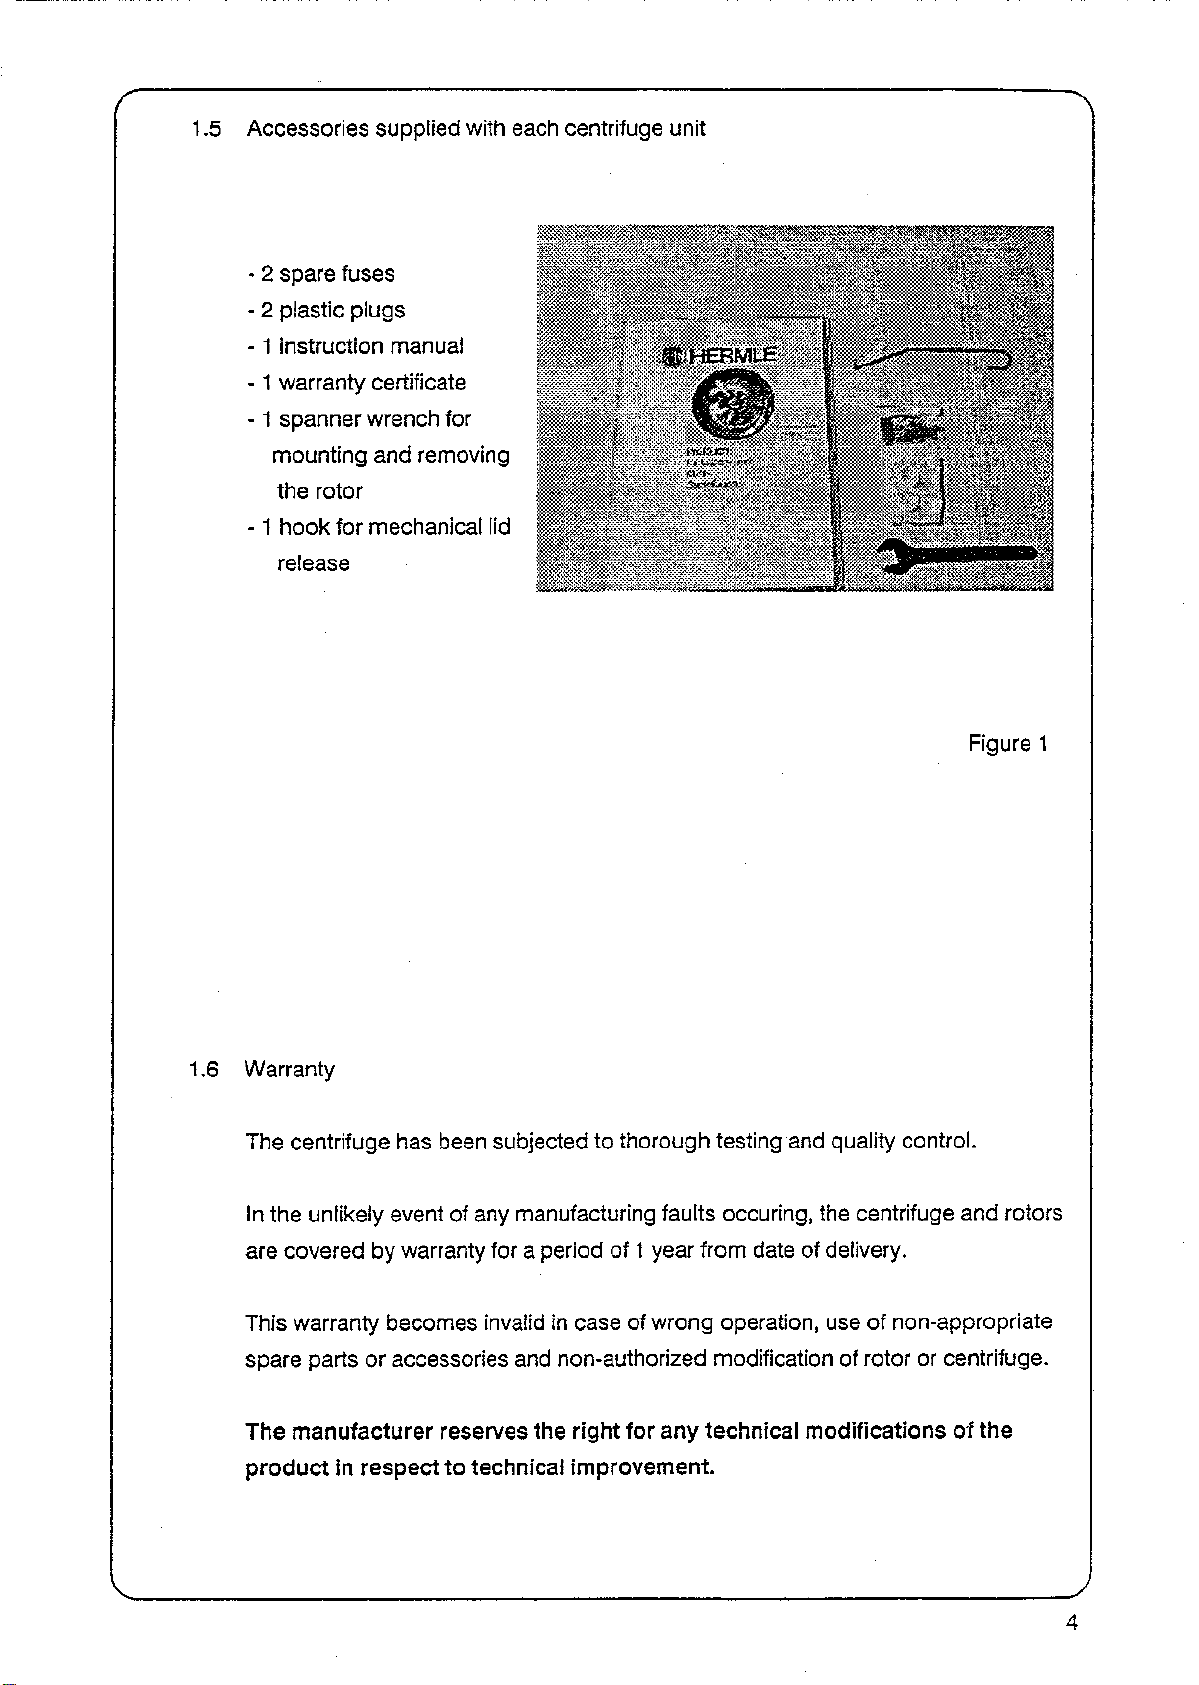
•1.5 Accessories supplied with each centrifuge unit
2 spare fuses
2 plastic plugs
1 instruction manual
1 warranty certificate
1 spanner wrench for
mounting and removing
the rotor
1 hook for mechanical lid
release
1.6 Warranty
The centrifuge has been subjected to thorough testing and quality control.
In the unlikely event of any manufacturing faults occuring, the centrifuge and rotors
are covered by warranty for a period of 1 year from date of delivery.
This warranty becomes invalid in case of wrong operation, use of non-appropriate
Figure 1
spare parts or accessories and non-authorized modification of rotor or centrifuge.
The manufacturer reserves the right for any technical modifications of the
product in respect to technical improvement.
Installation
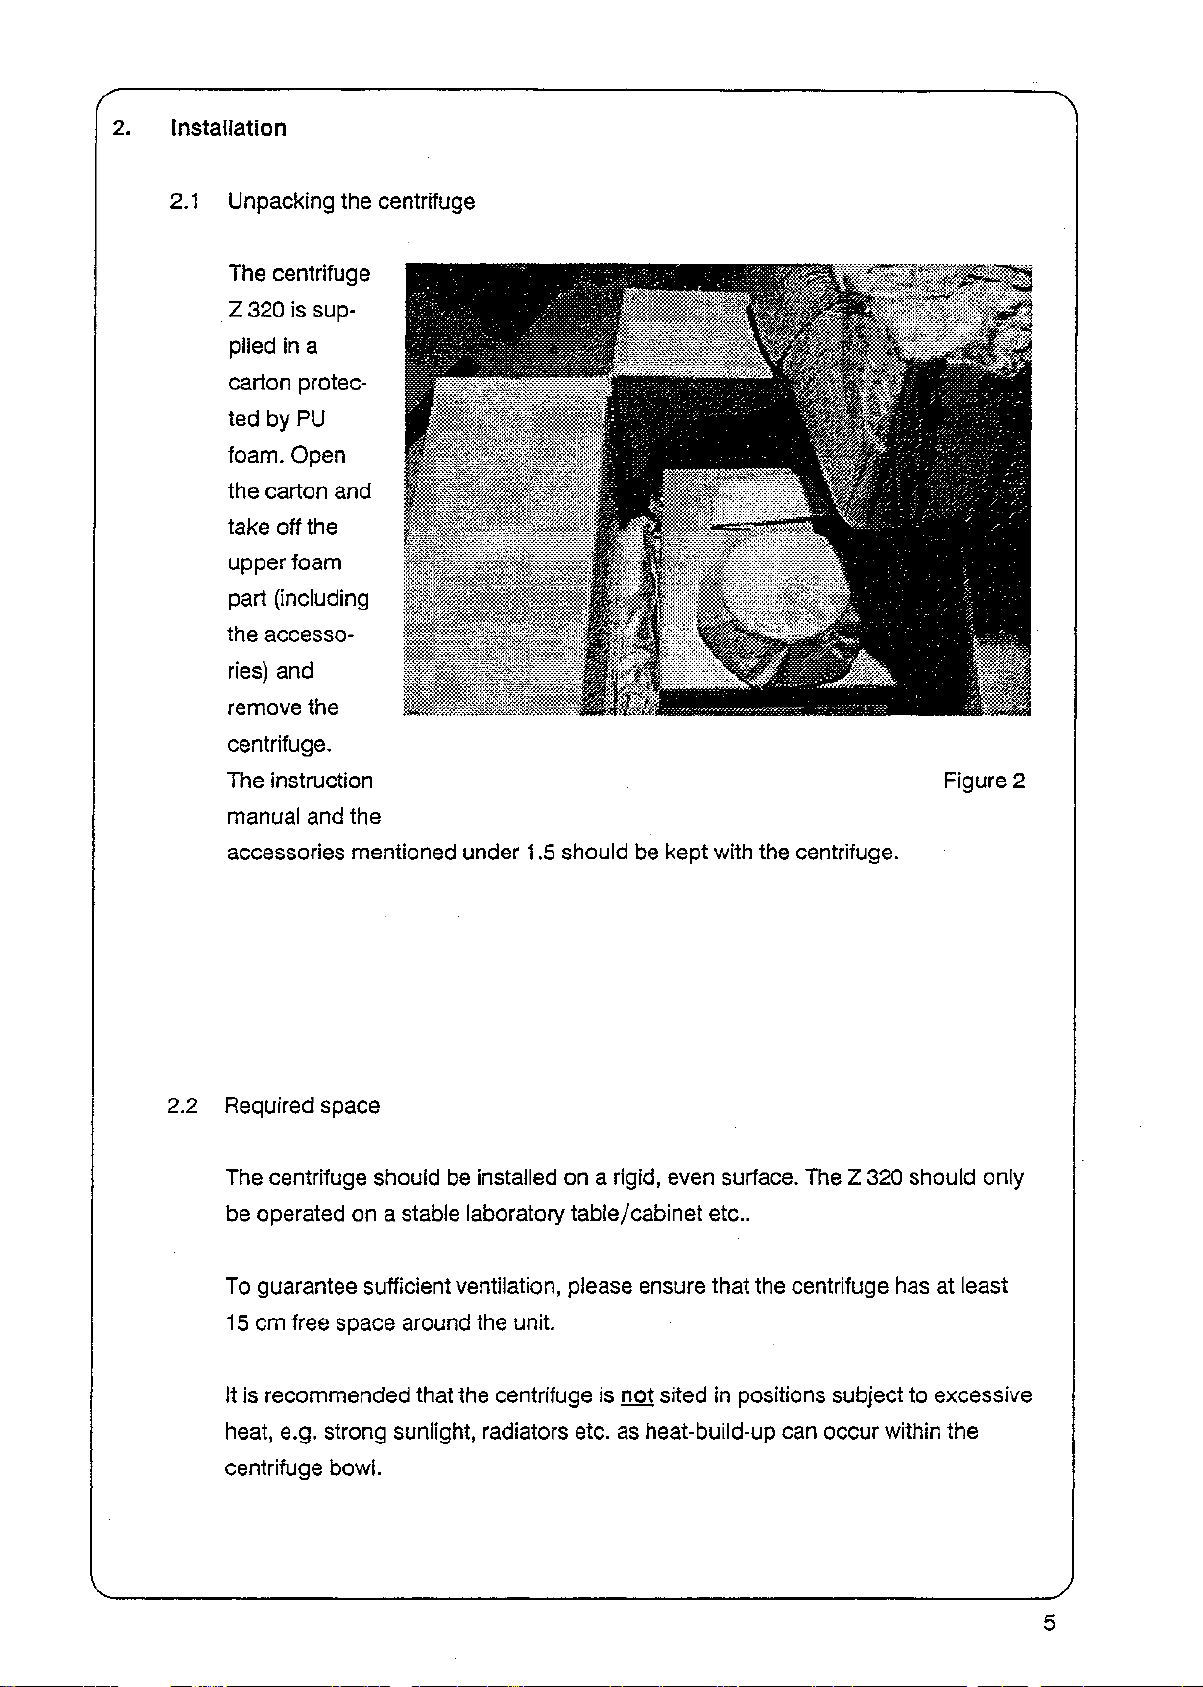
2.1 Unpacking the centrifuge
The centrifuge
Z 320 is sup-
plied in a
carton protected by PU
foam.
Open
the carton and
take off the
upper foam
part (including
the accesso-
ries) and
remove the
centrifuge.
The instruction
manual and the
accessories mentioned under 1.5 should be kept with the centrifuge.
2.2 Required space
The centrifuge should be installed on a
be operated on a stable laboratory table/cabinet etc..
To guarantee sufficient ventilation, please ensure that the centrifuge has at least
rigid,
even surface. The Z 320 should only
Figure 2
15 cm free space around the unit
It is recommended that the centrifuge is not sited in positions subject to excessive
heat, e.g. strong sunlight, radiators etc. as heat-build-up can occur within the
centrifuge bowl.
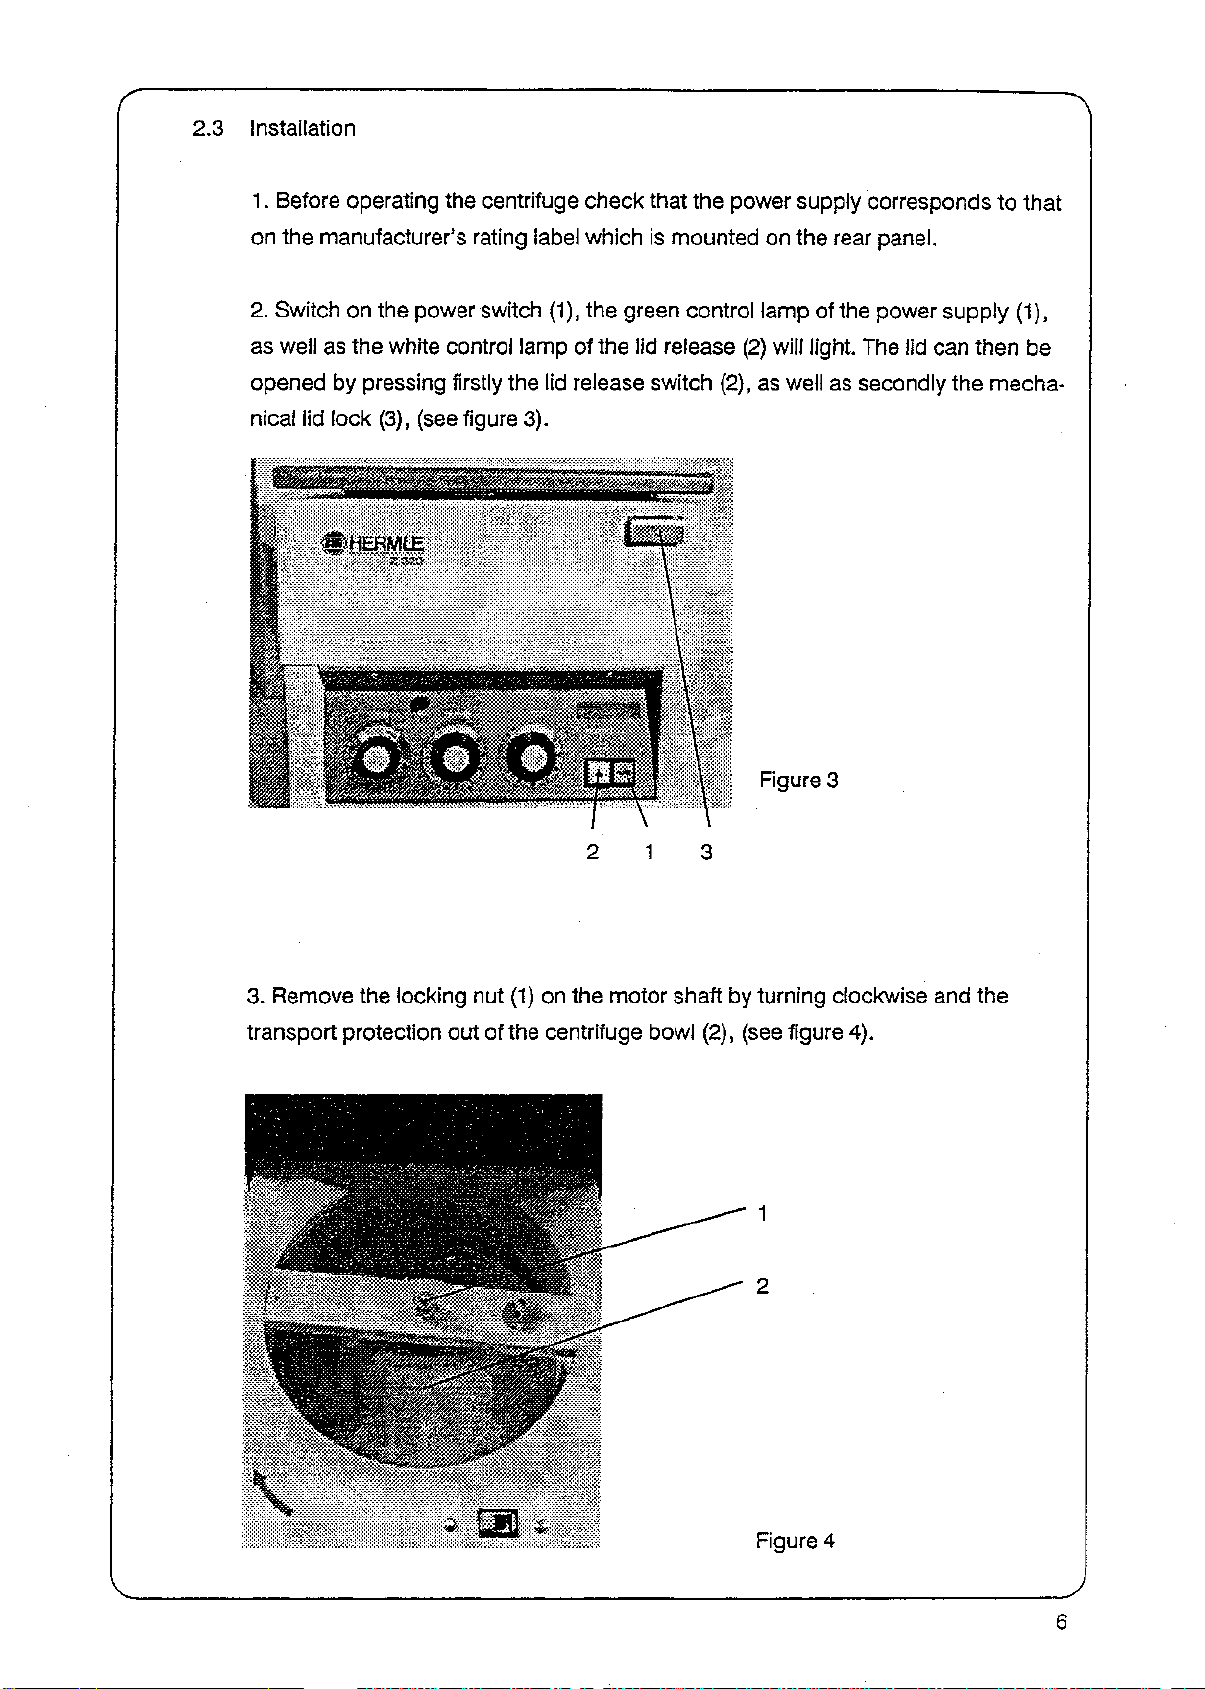
2.3 Installation
1.
Before operating the centrifuge check that the power supply corresponds to that
on the manufacturer's rating label which is mounted on the rear panel.
2.
Switch on the power switch (1), the green control lamp of the power supply (1),
as well as the white control lamp of the lid release (2) will light. The lid can then be
opened by pressing firstly the lid release switch (2), as well as secondly the mechanical lid lock (3), (see figure 3).
Figure 3
3. Remove the locking nut (1) on the motor shaft by turning clockwise and the
transport protection out of the centrifuge bowl (2), (see figure 4).
Figure 4
3. How to install and load a rotor
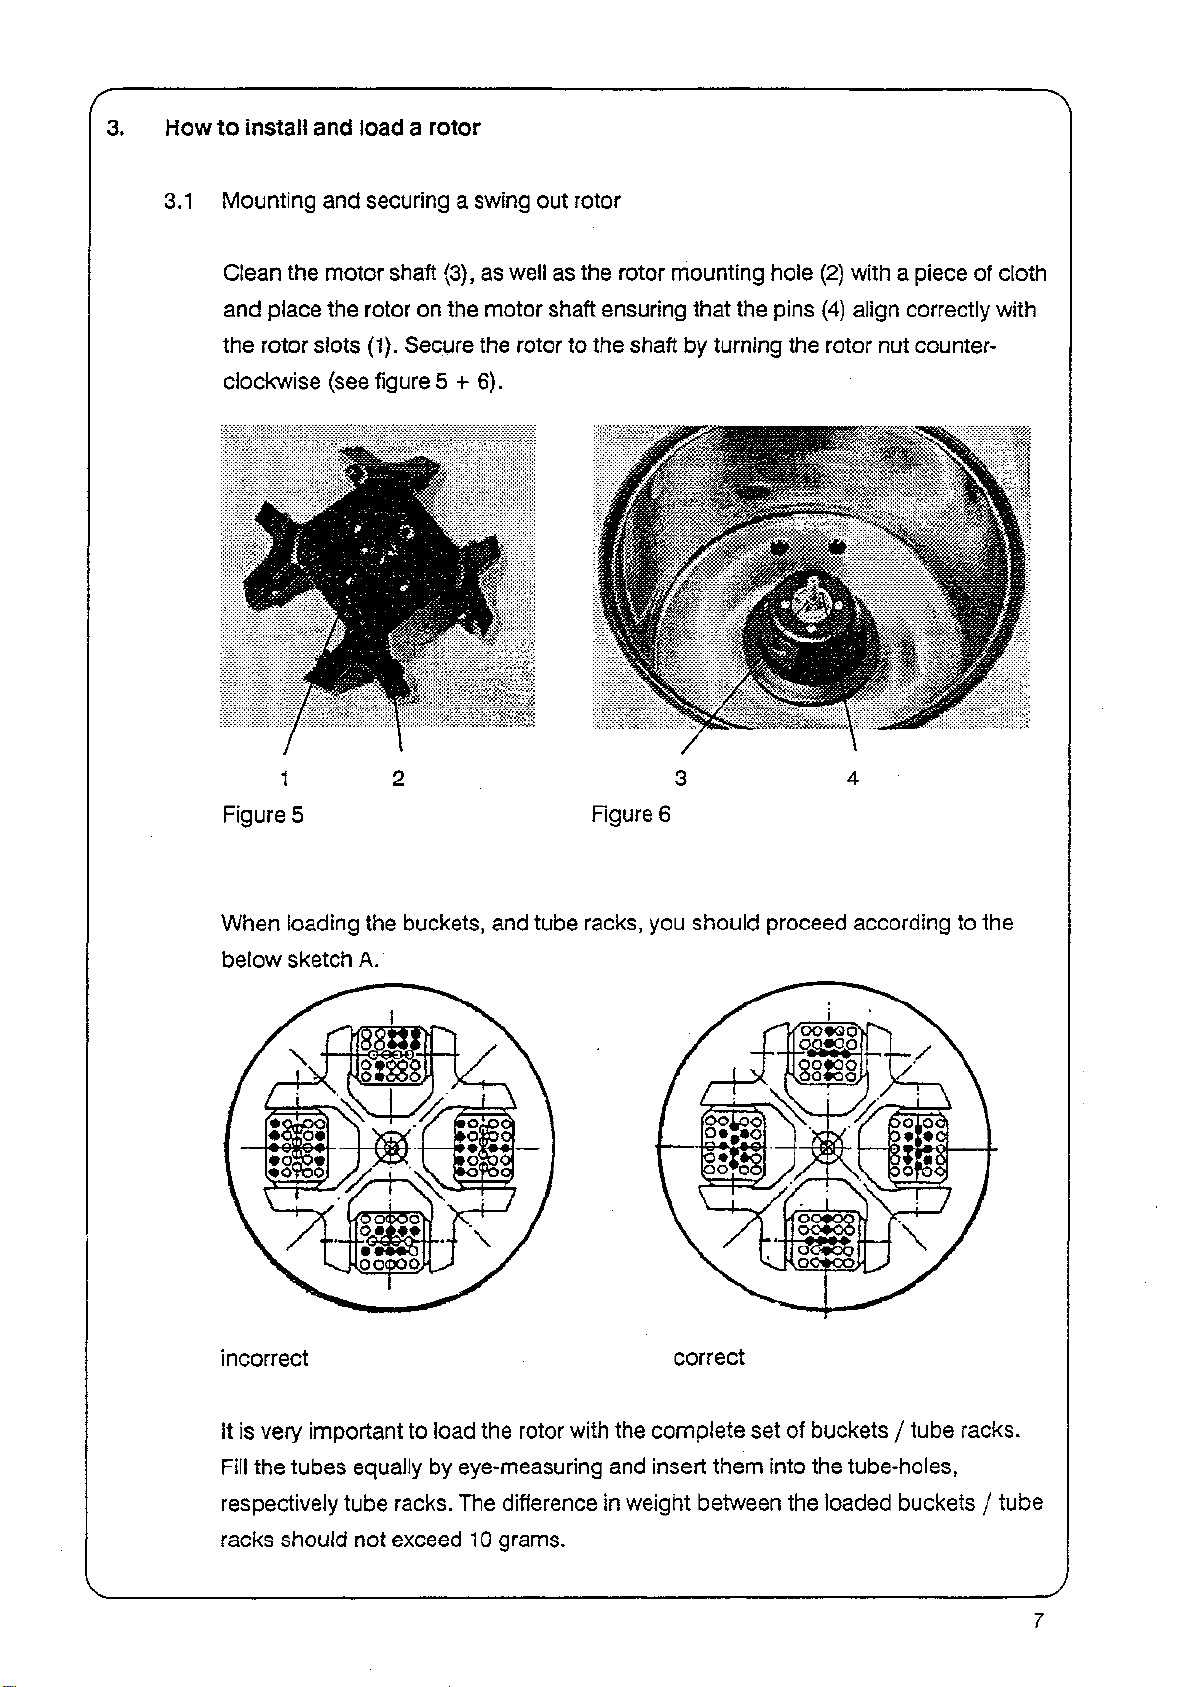
3.1 Mounting and securing a swing out rotor
Clean the motor shaft (3), as well as the rotor mounting hole (2) with a piece of cloth
and place the rotor on the motor shaft ensuring that the pins (4) align correctly with
the rotor slots (1). Secure the rotor to the shaft by turning the rotor nut counter-
clockwise (see figure 5+6).
1
Figure 5
When loading the buckets, and tube racks, you should proceed according to the
below sketch A.
incorrect
Figure 6
correct
it is very important to load the rotor with the complete set of buckets / tube racks.
Fill the tubes equally by eye-measuring and insert them into the tube-holes,
respectively tube racks. The difference in weight between the loaded buckets / tube
racks should not exceed 10 grams.

It is also allowed to operate, (for example) a 4-place swing out rotor with 2 loaded
and 2 unloaded buckets, but it is important that the loaded buckets are then
opposite each other (see sketch A, page 7).
To remove the rotor from the shaft turn the rotor nut clockwise repeatedly until the
rotor nut has lifted the rotor from its former position on the motor shaft,
3.2 Mounting and securing a micro titre plate rotor
Is same as for swing out rotors.
3.3 Mounting and securing an angle rotor
Clean the motor shaft (1) and the rotor mounting hole (2) with a piece of cloth and
place the rotor on the motor shaft ensuring that the pins (3) align correctly with the
rotor slots (4), (see figure 7).
Figure 7
8

Secure the rotor to the shaft by turning the rotor nut (1) counter-clockwise. When
doing this, hold the rotor with the other hand (see figure 8).
Figure 8
ATTENTION:
Before operation, secure the rotor lid to the rotor by pressing the snap
connector onto the rotor nut (see figure 9).
Figure 9
To remove the rotor from the motor shaft, turn the rotor nut clockwise, screw it off
and take the rotor vertically off the shaft.

When loading the rotor you
should proceed according to
sketch B. Fill the tubes equally
by eye-measuring and insert
them into the tube-holes of the
rotor (see sketch B).
The difference in weight between
the tubes should not exceed
2 - 3 grams.
empty tube-holes
loaded tube-holes
Sketch B
It is also allowed to operate, (for example) a 6-piace rotor with 2 or 4 loaded tubes
only, but it is important that the 2 occupied tube-holes are opposite each other
(see sketch B).
To remove the rotor from the motor shaft, turn the rotor nut clockwise, screw it off
and take the rotor vertically off the shaft.
10

3.4 Mounting and securing a hematocrit rotor
Clean the motor shaft (1) and the rotor mounting hoie (2) with a piece of cloth and
place the rotor on the motor shaft ensuring that the pins (3) align correctly with the
rotor slots (4), (see figure 10).
Figure 10
Secure the rotor to the shaft by turning the rotor nut (1) counter-clockwise. When
doing this, hold the rotor with the other hand (see figure 11).
Figure 11
11

ATTENTION:
Before operation, secure the rotor lid to the rotor by pressing the snap connec-
tor onto the rotor nut (see figure 12),
Figure 12
To install or remove the lid, press both locking bolts together (see figure 13).
To remove the rotor from the motor shaft, turn the rotor nut clockwise, screw it
off and take the rotor vertically off the shaft.
Figure 13
12
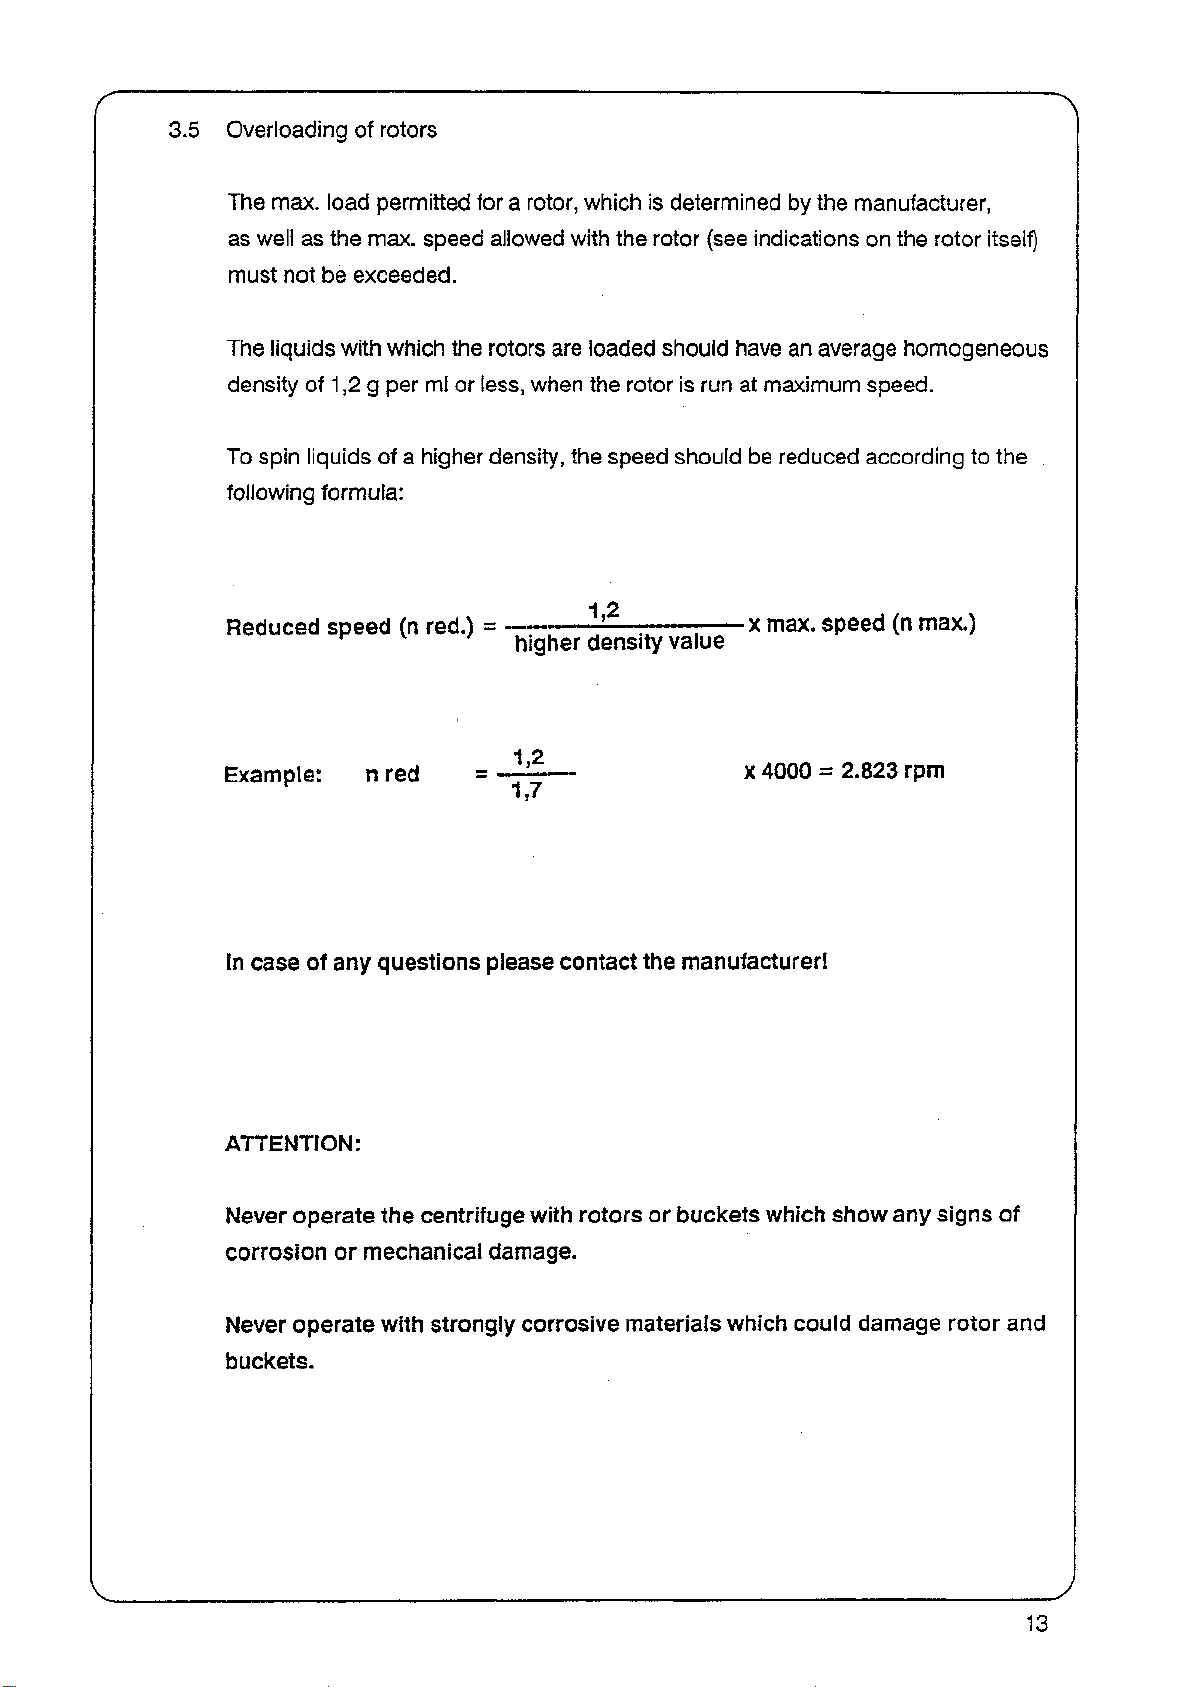
3.5 Overloading of rotors
The max. load permitted for a rotor, which is determined by the manufacturer,
as well as the max. speed allowed with the rotor (see indications on the rotor itself)
must not be exceeded.
The liquids with which the rotors are loaded should have an average homogeneous
density of 1,2 g per ml or less, when the rotor is run at maximum speed.
To spin liquids of a higher density, the speed should be reduced according to the
following formula:
Reduced speed (n red.) = '— x max. speed (n max.)
K
higher density value
1 2
Example: n red = -!£-— x 4000 = 2.823 rpm
In case of any questions please contact the manufacturer!
ATTENTION:
Never operate the centrifuge with rotors or buckets which show any signs of
corrosion or mechanical damage.
Never operate with strongly corrosive materials which could damage rotor and
buckets.
13

4. Operation
4.1 Power switch
The power supply switch (1) (green light), switches the centrifuge on and the
control lamp of the lid release (2), as well as the digital indication of the speed (3)
will light. The power switch (1) should always be the first to be switched on and the
last to be switched off, (see figure 14).
4.2 Lid release
When the lid release lamp (2) is on and the rotor is stationary, the lid can be
opened.
indicator lamp (2) will go out,and then press the lid release button (4) of the
mechanical lid lock.
The lid can only be opened when the rotor is stationary and the white control lamp
(2) lights up (lid lock according to UW-VBG 7z).
To open the lid, press the lid release switch (2) of the electrical lid lock, the
Figure 14
14

4.3 Rotor installation
see part 3. of the manual.
4.4 Lid lock
After correct fitting and loading of the rotor, close the lid. The white control lamp of
the lid release (1) will light, indicating that the rotor is stationary and the lid closed
correctly.
The centrifuge can only be started with the lid closed (lid lock according to
UW-VBG7Z).
When the rotor starts accelerating, the lid release indication (1) switches off and the
lid cannot be opened, (see figure 15). .
4.5 Speed preselection
The speed (rpm) can be steplessly preselected between 100 and 10.000 rpm
(depending on the rotor type) with the knob SPEED (2).
Once set, the speed can be reproduced to within +/- 2%. The actual speed is
indicated in steps of 100 rpm on the digital indication SPEED (3).
Figure 15
15

4.6 Preselection of operating time
Turning the timer switch (1) clockwise, sets the operating time (max. 60 mins.) and
starts the centrifuge. If the required operation time is 5 minutes or less, the timer
should be switched over the 30 minute position and then back to the desired value.
When the set time expires, the centrifuge switches off automatically. For continuous
operation,
4.7 Preselection of brake intensity
To reduce the risk of resuspending samples, during deceleration, it is possible to
steplessly pre-select the brake intensity with the knob BRAKE (2), (see figure 16). In
addition,
point 8.1!
switch the knob TIME (1) to the position HOLD, (see figure 16).
please have a look at the acceleration and deceleration curves under
5. Safety facilities
5.1 Imbalance
In case of unequal loading of opposite buckets / tube racks or tube-holes, the
operation is interrupted during the acceleration phase, and the centrifuge switches
off. To indicate, when the digital LED speed display blinks on and off, an imbalance
cut off has occured.
The centrifuge cannot be re-started until the Imbalance has been corrected and the
lid has been opened and re-closed.
Figure 16
16

r
6. Service and Maintenance
6.1 Service of centrifuge
Centrifuge service and maintenance should be done regularly and only by
authorized and qualified personnel.
6.2 Cleaning the centrifuge
Always keep the centrifuge housing, rotor chamber, rotors and rotor accessories
clean.
Cleaning is not merely for hygenic or aesthic purposes, but also is necessary to
Anodized parts such as rotors, reduction plates etc., should only be cleaned with
neutral cleaning agents (pH value 6 - 8). Never use an alkaline cleaning agent
warm-air-cabinet (max. temp. + 50°C).
It is recommended that all anodized aluminium parts are regularly treated with
anti-corrosion oil, so that their durability will be increased and the corrosion risk
reduced.
6.3 Cleaning of centrifuge after breakage of glass tubes/glass bottles
With high g-values, there is a possibility that tube breakage will occur.
The bucket insert bolts of a swing out rotor should be regularly greased.
prevent corrosion and damage to the centrifuge.
(pH > 8). After cleaning ensure that all parts are dried thoroughly by hand or in a
Should this happen, the centrifuge rotor and rotor chamber must be thoroughly
cleaned and all broken particles must be removed immediately. If this is not done,
they could scratch the protecting coat of the rotor or stick to the bucket insert bolts
and hinder the buckets to swing out properly.
If the rotor chamber has not been properly cleaned, this will produce a fine black
dust which can cause significant damage to the centrifuge.
17

6.4 Disinfection
If, due to tube breakage, infectious material contaminates the centrifuge, rotor, rotor
chamber, buckets etc. should be disinfected ! ! !
Rotor and swing-out buckets must not be autociaved.
Rotor and rotor chamber should then be treated with a neutral disinfection agent.
This would be the best way to achieve a good result upon all surfaces.
18

Breakdown
7.1 Emergency lid release
In case of power failure or any malfunction, the lid can be opened manually by the
following procedure:
1.
Switch off the centrifuge
and unplug the power
2.
Remove the plastic plug
(1) on the left side of the
housing.
3. Insert the lid release
hook (2) (supplied with the
centrifuge) into the hole
and pull out the pin (3) by
hooking the lid release
hook into it before.
The lid can then be opened,
(see figure 17./
sketch C).
cord.
Figure 17
Sketch C
19

7.2 Check list / Trouble shooting
FAULT
Centrifuge will not start - no
indication on front panel.
POSSIBLE REASON
No power supply.
Defective fuse.
SOLUTION
Check mains (power) and
centrifuge fuses. Replace if
necessary.
****************************** ***•****•*•••*****•*•*•**•••** ************•***•*****•**•*••
Lid cannot be released.
1
I
Defective lid lock.
Lid lock is jammed.
Open manually (see 7.1)
Re-adjust lid lock.
No power from PC board. Call service.
****************************** ••*****•••***•*****•****•**•••* ••***•**•******••*•**•***•*•**
Centrifuge cannot be started, Lid not closed correctly (white Close lid correctly,
although power is on. indicator lamp does not light).
No speed or time preselected. Check and set the time.
Fuse on front panel is defecti- Check fuses and replace if
ve.
necessary.
20

8.
Nomograms
8.1 Acceleration and deceleration values of the Z 320
21

8.2 RCF - (g-value) - diagrams
22

9. Appendix
9.1 Chart for determining g-values
23

CHART
For +he Deferminai ion of +he g ~ Value
pie :
£-40
To determine the spinning radius you
measure the distance from the center
of the drive shaft up to the most outer
part of your sample tube when it Is In
spinning position.
Thus,
you will get with a radius
r=16 cm (point A) and with a speed
n = 4000 rpm/mln (point C) a relative
-25
centrifugal force of 2860 x g (point B)
Alternatively, when you know the
nlng radius and the g~value7 you can
determine the
centrifugal
forc» In "g'
30 000-=3
20 000-
10 000-3
spin"
HERMLE
(RPM)
mlnui*
p»r
20
000
fe-15 000
fe=-10 000
•6000
-14
-12
This chart Is based upon the following
m
formula:
-10
=lL18
-9
g = relative centrifugal force (RCF),
1.3 relative to the acceleration
of the earth which has the constant
value g = 9.81 m/s
r = spinning radius in cm
n = revolutions per minute (RPM)
x
r x
(,1000
2
1000
500
400-
300—i
20-=
br~3000
•2000
•1000
-500
•200
24

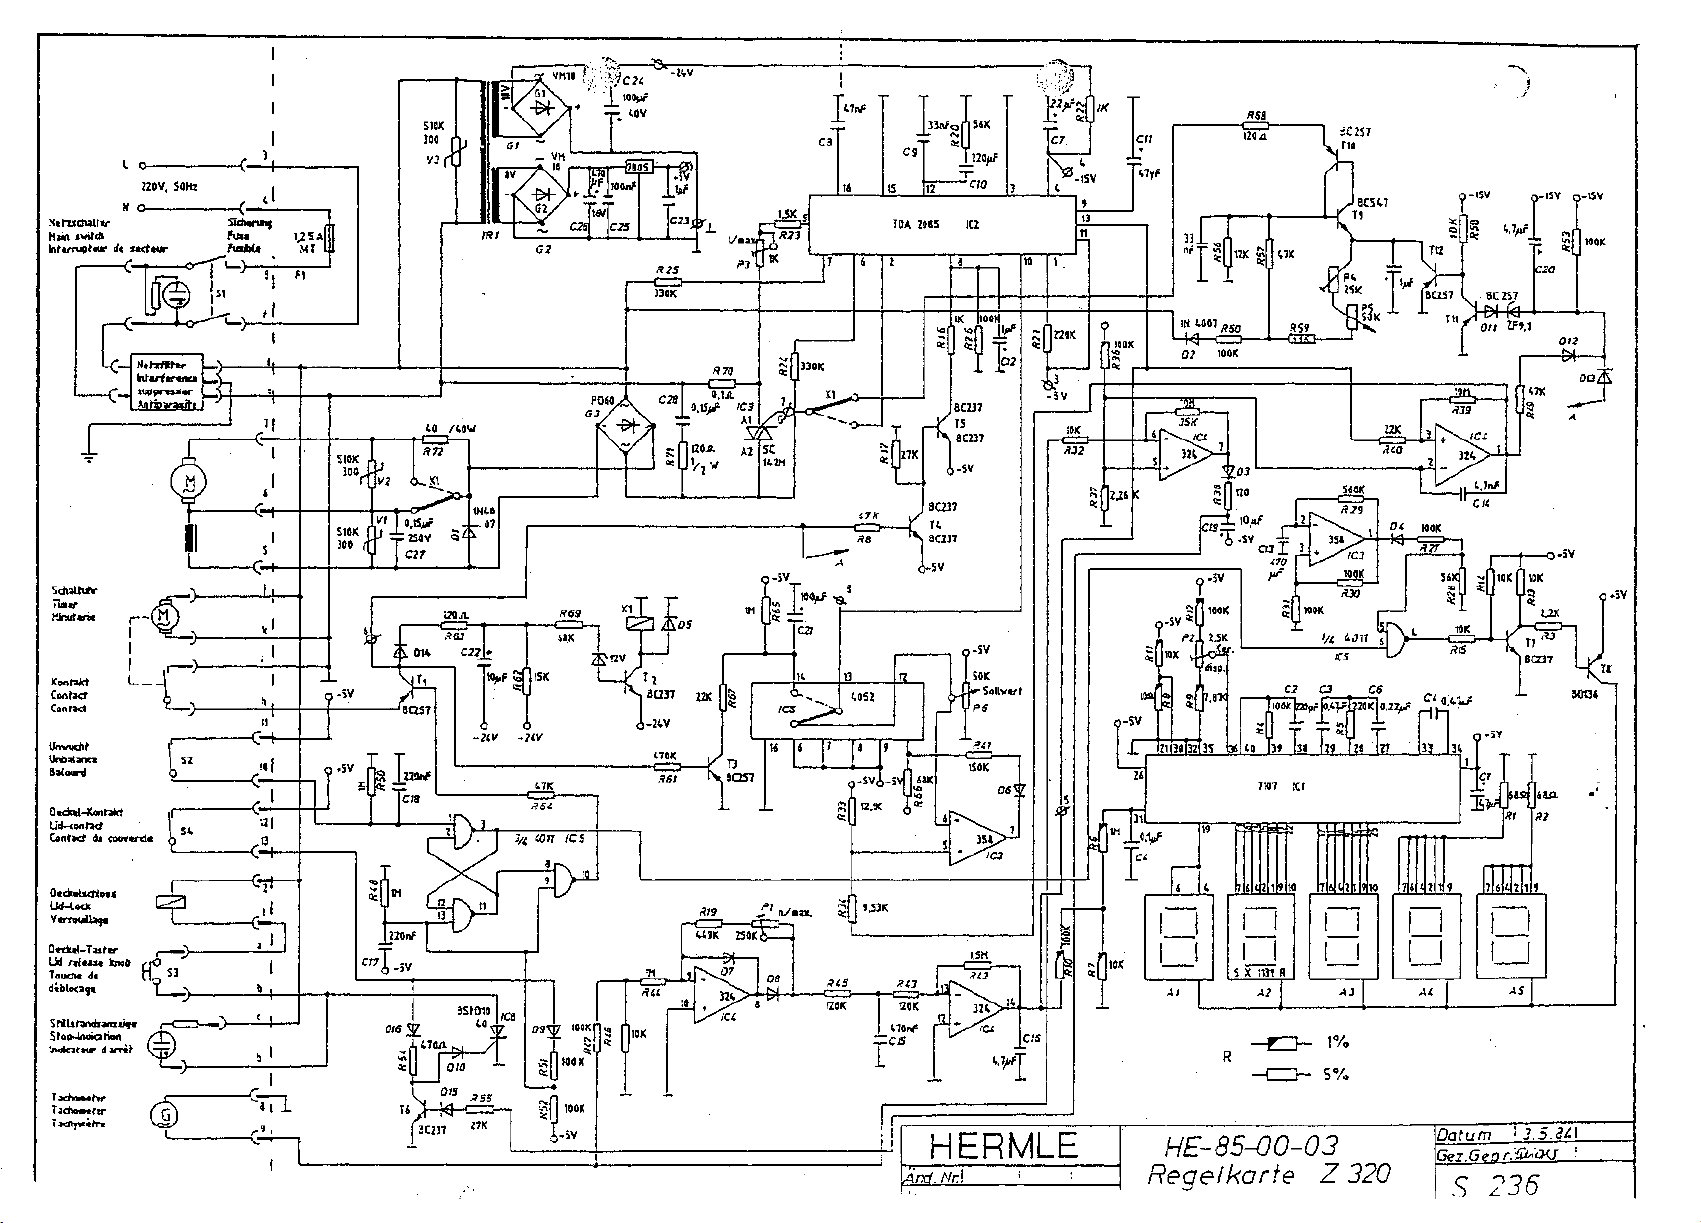
9.2 Circuit diagram
25

HE-85-00-03
\
Netzfilter-UI
Interference
suppressor
Antiparasite
'—!™-"X-—J—
\
T I
lOrehzahl
speed
y Vitesse
—L v
v
\ T '
V ^ ^
U— i «-"c>n>
eeeeeeeeeeeee
brake
frein
Elektr. Zeit
lt ^ I
"*"-)
\ |
schaituhr
schaltuhr
Electronic-
timer
Minuterie
electriqe
Deckelzuhaltung
Ud lock
Fermeture
jautomatique
J
-
L
Bedienschild
/QOperatina
S^ Mnrlp rl omnini
Mode d emploi
Schutzkessel
o
Guard bowl ,Cater
instruction
O Gehause
Housing
Cabinet
HERMLE
Andr.
Nr
Name
de
protection
Schaltplan
Diagram
fur
Zentrifuge
for
centrifuge with
Schema avec syste'me
Bezeichnung •
Schaltplan
Circuit diagram Z 320
Circout pour Z320
mit
de
fur Z
Fremdbeluftung
air
purge facility
ventilation
320
.
Datum
Gez.
26.4.85
Gepr.
S2L2
Hiia swifdt
I
o-
220V. SQrtz
H
O-
i-
:•
^
_i'
fu»«
1,2 5
halbU
MT
-11
sr^^
CJ7
S10K
300
V3
s
tf
;
COiL
-07
5M100K
.—I
i/i ion
IC5
C2
a cs
lOOKfcBpf OAVmOK
I
T r^U
39 ba I29
~N
V-1SY o-'SV
OQ/\
O-5V
0.;
Oeck*i-)G>nfc*t
Lid-coo
r^cf \
Contact
du
couvvrdc
Ud-lodc
O«tlt«<-Tjsfef
Indlcattor
S4
X
<Tt
^
^
^
a 1
1
Datum
'*3.5.3t\
S
236
4/TC/.
Nr.\
HE-
85-00
Regelkarfe
-03
Z
320
 Loading...