

HermanMiller Nelson Daybed Installation Instructions Manual
HermanMiller
Daybed Installation
Instructions
For more information about our products and services or to see a list of dealers, please visit us at
www.hermanmiller.com/product-instructions or call 888 - 443 - 4357.
© 2016 Herman Miller, Inc., Zeeland, Michigan Printed in U.S.A. Part No. 1BFR4C - B.
How to assemble
your Daybed.
Safety Instructions & Warning
• Read all instructions before using products
• Failure to fully tighten screws may cause injury
• Periodically check fasteners to ensure tightness
• The right is reserved to make changes at any time without notice
• Will require at least 2 people
• Extra bolts have been included
Tools Required
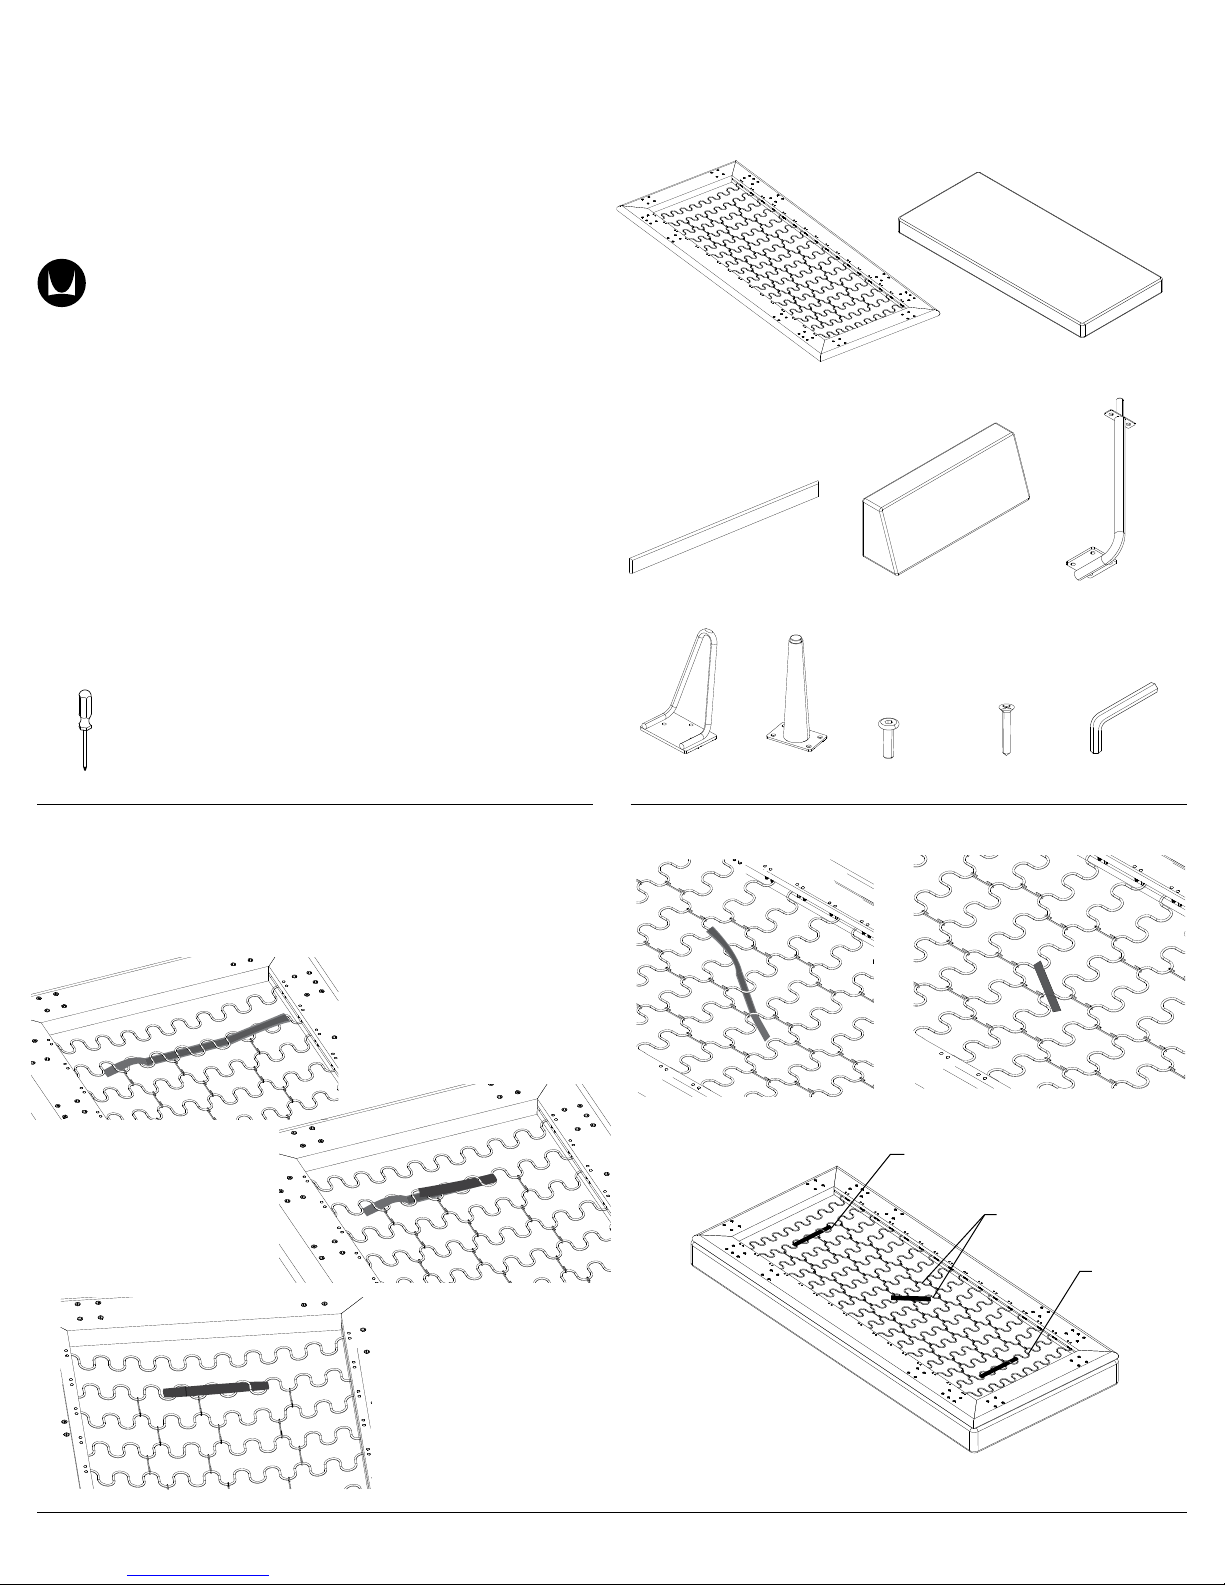
Parts Included
Optional: Wood Bolster (1)
OR
Daybed Frame (1)
Optional: Back Cushions (2)
or Side Cushion (1)
Seat Cushion (1)
Optional: Bolster
Support
Phillips Driver
Step 1
With seat cushion facing upside down, lower frame onto cushion. Ensure cushion is centered
on frame then attach using three velcro straps. Straps should be secured in the positions
shown below. Weave one end of the strap in/out of the spring to limit movement.
Ends
Hairpin Leg (4)
Middle
Wood Leg (4)
15th Spring
Tapping Screw (4)Short Bolt (24)
8th & 9th
Springs
4mm Allen Wrench (1)
2nd Spring
HermanMiller Assembly Instructions1
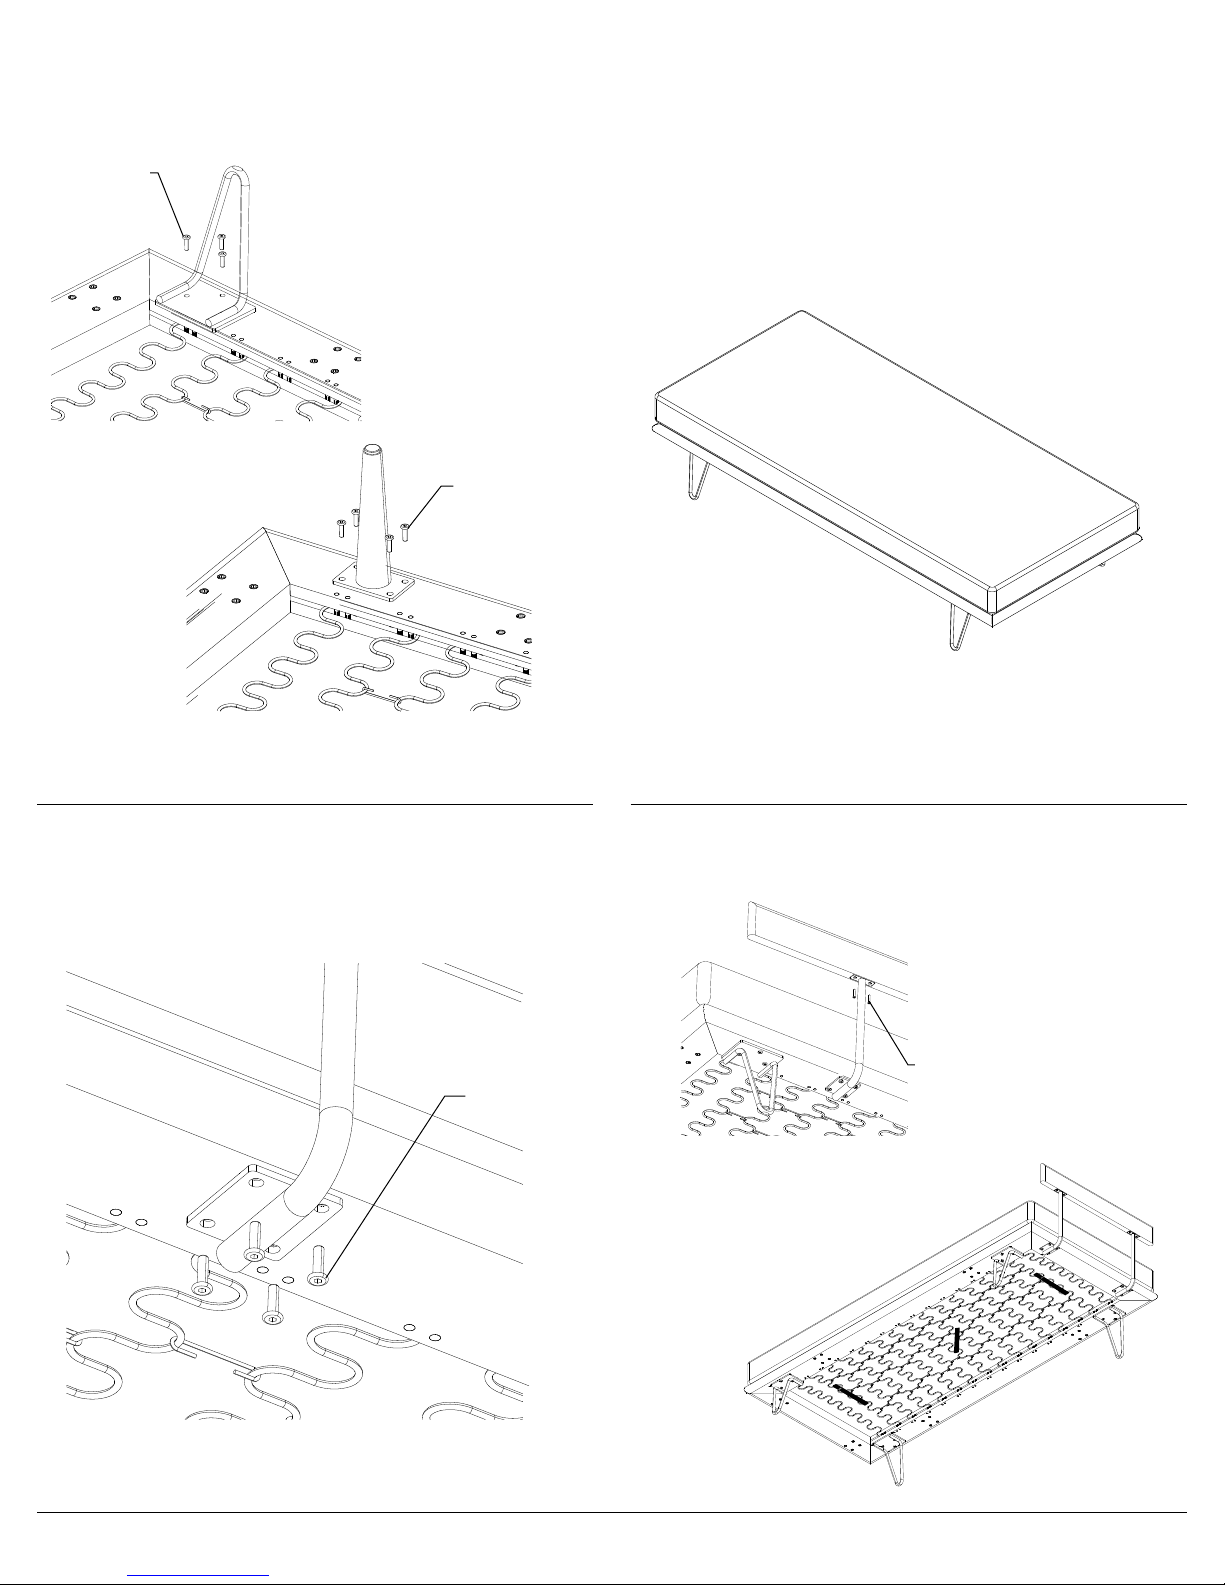
Step 2
Attach legs using 3 Short Bolts per leg for Hairpin Legs and 4 Short Bolts per leg
for Wood Legs.
Short Bolt
Short Bolt
Step 3
Flip platform and cushion over so it is right side up.
Step 4
Attach 2 Bolster supports with 4 Short Bolts either at back of daybed for back cushion
option, or side of daybed for side cushion option.
Short Bolt
Step 5
Attach wood bolster with 2 tapping screws at each support.
Tapping Screw
HermanMiller Assembly Instructions2
 Loading...