

Heritage QSEE QT Quick Start Manual

HERITAGE
Need
Help?
quick-start
GUIDE
QT SERIES
ANALOG DVRS
A A
Test cameras and connections prior to mounting.
If specialty camera(s), such as a PTZ, are included in your package, please review instructions for specialty camera(s) before proceeding to Step 1.
NOTE: Your DVR model may differ from
that shown in this illustration.
B C D E
A surge protector with the
following specifications is
STRONGLY recommended:
• UL-1449 Rated
• Clamping voltage of 330
or lower
• Joule rating of at least 400
• Response time of 10
nanoseconds or less
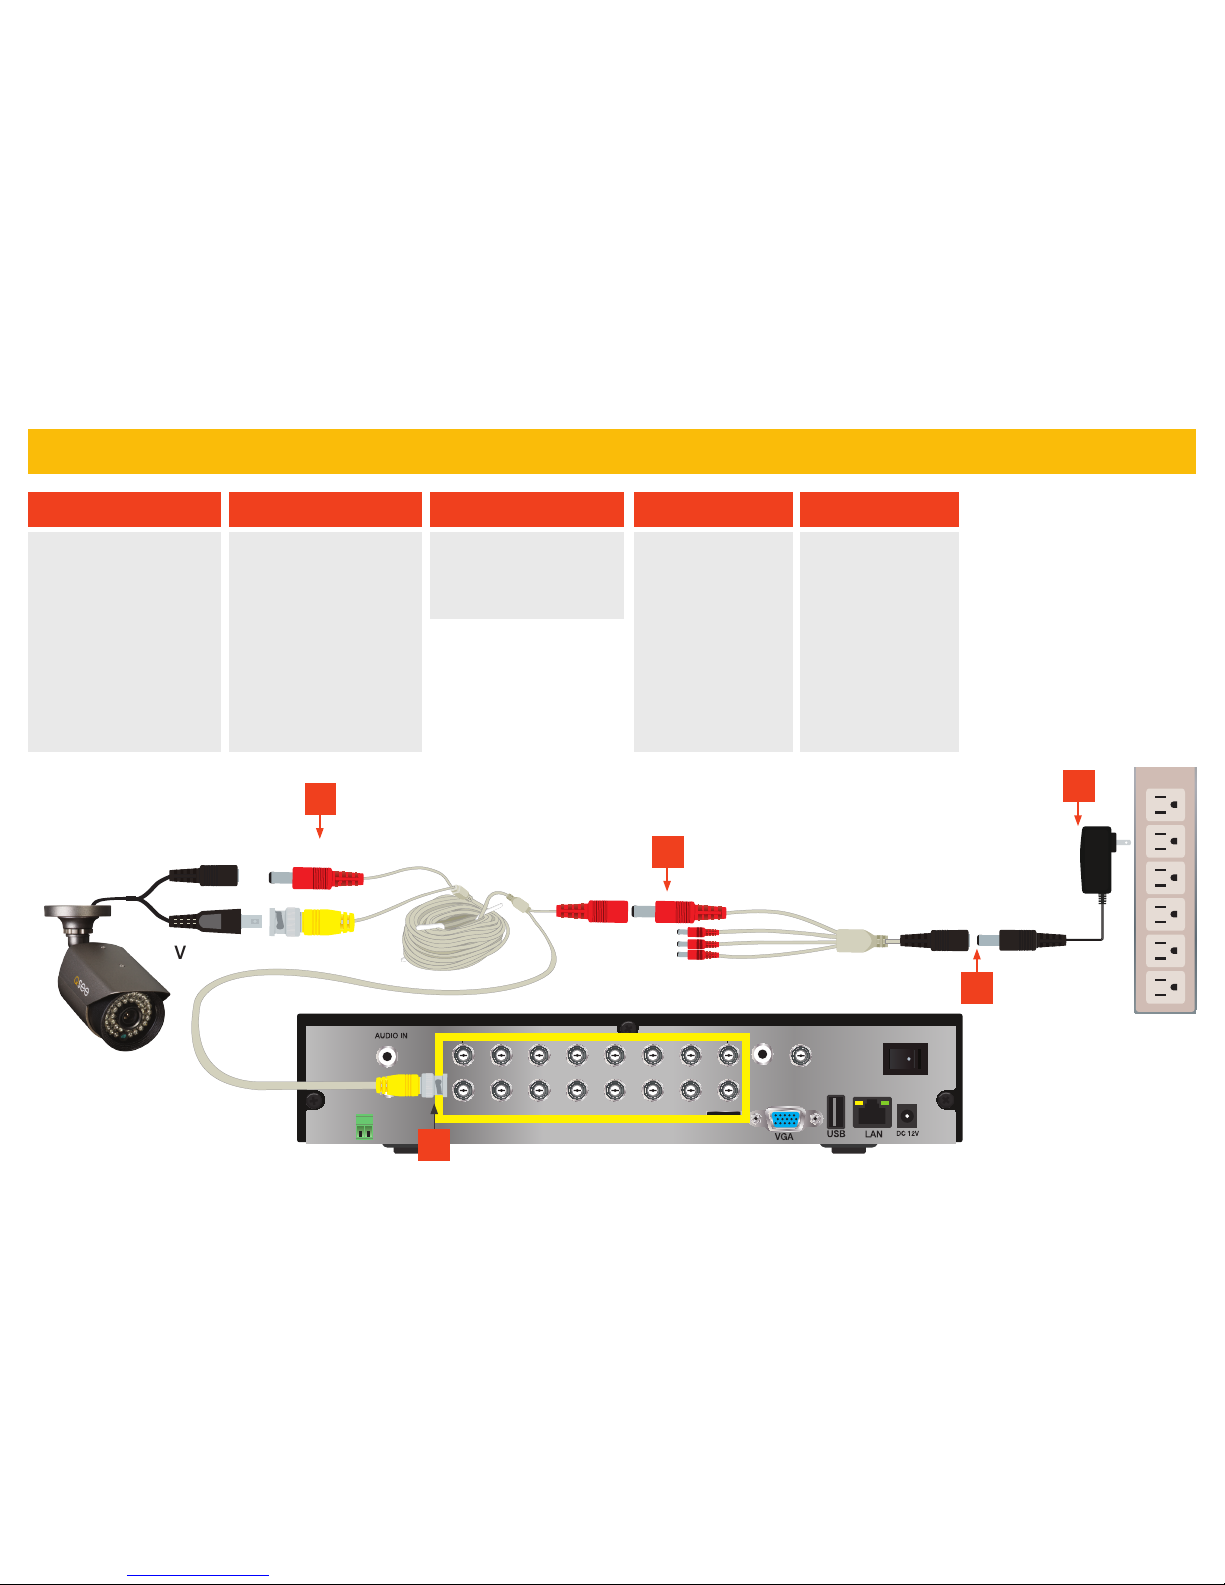
STEP 1 CONNECT YOUR CAMERAS
HDMI
AUDIO OUT
VIDEO IN
VIDEO
OUT
1
1 3 5 7 9 11 13 15
2 4 6 8 10 12 14 16
2
3 4
RS485
POWER CONNECTOR
EXTENSION
CABLE
POWER
SPLITTER
CAMERA
POWER
ADAPTER
VIDEO CONNECTOR
C
A
B
D
E
Connect the
power splitter
to the power
adapter.
• Plug the video
connector on the
other end of the
extension cable into
an available video-in
port on the back of
the DVR.
• Twist to lock.
Plug the extension
cable’s power
connector into the
power splitter.
Repeat steps A-C for
each camera. (There
may be more than one
camera power adapter
and power splitter.)
Plug the power
adapter into a
surge protector.
• Plug the camera’s
power connector into
the extention cable.
• Repeat for the video
connector, twisting
the end to lock it.
Complete instruction manuals and software available at www.Q-See.com/Support
 Loading...