

Page 1

IT A LI AN O
DEUTSCH
ESPAÑOL
NEDERLANDS
E NG LI SH
FRANÇAIS
CONTENTS
1. INTRODUCTION ................................................................................................................ 2
2. MINIMUM SYSTEM REQUIRE MENT S .............................................................................. 3
3. INSTALLATI ON ................................................................................................................. 4
3.1. First installation ........................................................................................................... 4
3.2. Power consumption .................................................................................................... 5
4. OVERVIEW ........................................................................................................................ 6
4.1. The top face ................................................................................................................ 6
5. CONNECTING HEA DPHONES ......................................................................................... 7
6. DJ CONTROL STEEL FEATURES ................................................................................... 8
6.1. Jog wheels .................................................................................................................. 8
6.2. Faders (sliders) ........................................................................................................... 8
6.3. Play/Pause, Stop and Cue buttons ............................................................................. 9
6.4. Backward and Forward buttons .................................................................................. 9
6.5. Pitch settings ............................................................................................................... 9
6.6. Effects and loops (buttons 1-6) ................................................................................... 9
6.7. Load Deck buttons .................................................................................................... 10
6.8. Cue Select buttons .................................................................................................... 10
6.9. Browser buttons ........................................................................................................ 10
6.10. Balance knob ............................................................................................................ 10
6.11. Monitor knob ............................................................................................................. 10
6.12. Equalization knobs .................................................................................................... 10
6.13. Kill buttons................................................................................................................. 11
6.14. Shift button ................................................................................................................ 11
6.15. Control 1 and 2 encoders .......................................................................................... 11
6.16. Apply Ctrl. On button ................................................................................................. 11
7. THE TASKBAR ICON AND CONT ROL PANEL ............................................................. 12
7.1. The DJ Control Steel taskbar icon ............................................................................ 12
7.2. Using the DJ Control Steel control panel .................................................................. 12
8. USING THE DJ CONTROL ST EEL AT A PARTY .......................................................... 15
8.1. Overview ................................................................................................................... 15
8.2. Mixing in VirtualDJ .................................................................................................... 15
8.3. Scratching ................................................................................................................. 19
9. MIDI STANDAR D SUPPORT .......................................................................................... 20
10. FREQUENTL Y ASKED QU ESTIONS ............................................................................. 26
11. TECHNICAL SUPPORT .................................................................................................. 27
ENVIRONMENTAL PROTECTION RECOMMENDATION ....................................................... 30
Page 2
1. INTRODUCTION
Your DJ Control Steel is a powerful and versatile piece of hardware that offers nearly unlimited
possibilities in terms of what you can do with your music. The DJ Control Steel is easy to learn
and also offers many advanced functionalities, making it perfect for all users from beginners to
seasoned professionals.
The DJ Control Steel functions with digital audio files, including MP3s. We would like to draw
your attention to the fact that musical creations are protected by copyright and that you must
comply with all applicable legislations. We strongly encourage you to support artists by acquiring
their works legally.
2/30 – User Manual
Page 3

IT A LI AN O
DEUTSCH
ESPAÑOL
NEDERLANDS
E NG LI SH
FRANÇAIS
2. MINIMUM SYSTEM REQUIREMENTS
PC:
Desktop/laptop PC with Intel Pentium III/Athlon 1GHz processor or compatible
512MB RAM
Operating system: Microsoft Windows XP/Vista 32-bit
Available USB port
Internal or external sound card (4 channel sound card or greater recommended for
previewing songs).
Headphones or amplified speakers
CD-ROM or DVD-ROM drive
1024x768 video resolution
Microphone, Internet connection + 100MB free hard disk space for some applications
Mac:
Desktop/laptop Mac with 1.5GHz processor
1GB RAM
Operating system: Mac OS 10.4/10.5 or higher Mac OS 10 release
Available USB port
Internal or external sound card (4 channel sound card or greater recommended for
previewing songs).
Headphones or amplified speakers
CD-ROM or DVD-ROM drive
1024x768 video resolution
Microphone, Internet connection + 100MB free hard disk space for some applications
User Manual – 3/30
Page 4

You must install your DJ Control Steel’s drivers before connecting it to your computer.
- Insert the installation CD-ROM into your CD-ROM drive.
Th e DJ Co ntrol Steel installation menu automatically appears.
If the installation menu is not launched
automatically:
PC:
- Double-click Computer (Windows Vista)/My Computer
(Windows XP).
- Double-click the CD-ROM icon.
- Double-click Setup.exe.
Mac:
- Open your Finder.
- Double-click the CD-ROM icon.
- Double-click Setup.exe.
- Follow the on-screen instructions to install the drivers and
software.
3. INSTALLATION
3.1. First installation
Note: Your installation screens and procedure may vary slightly from those described in this
manual.
Because drivers and software are constantly being developed, the ones provided on your
CD-ROM may not be the most recent versions. You can visit the Hercules website to verify this
and, if necessary, download the very latest versions.
3.1.1. Installing drivers and software
4/30 – User Manual
Page 5
IT A LI AN O
DEUTSCH
ESPAÑOL
NEDERLANDS
E NG LI SH
FRANÇAIS
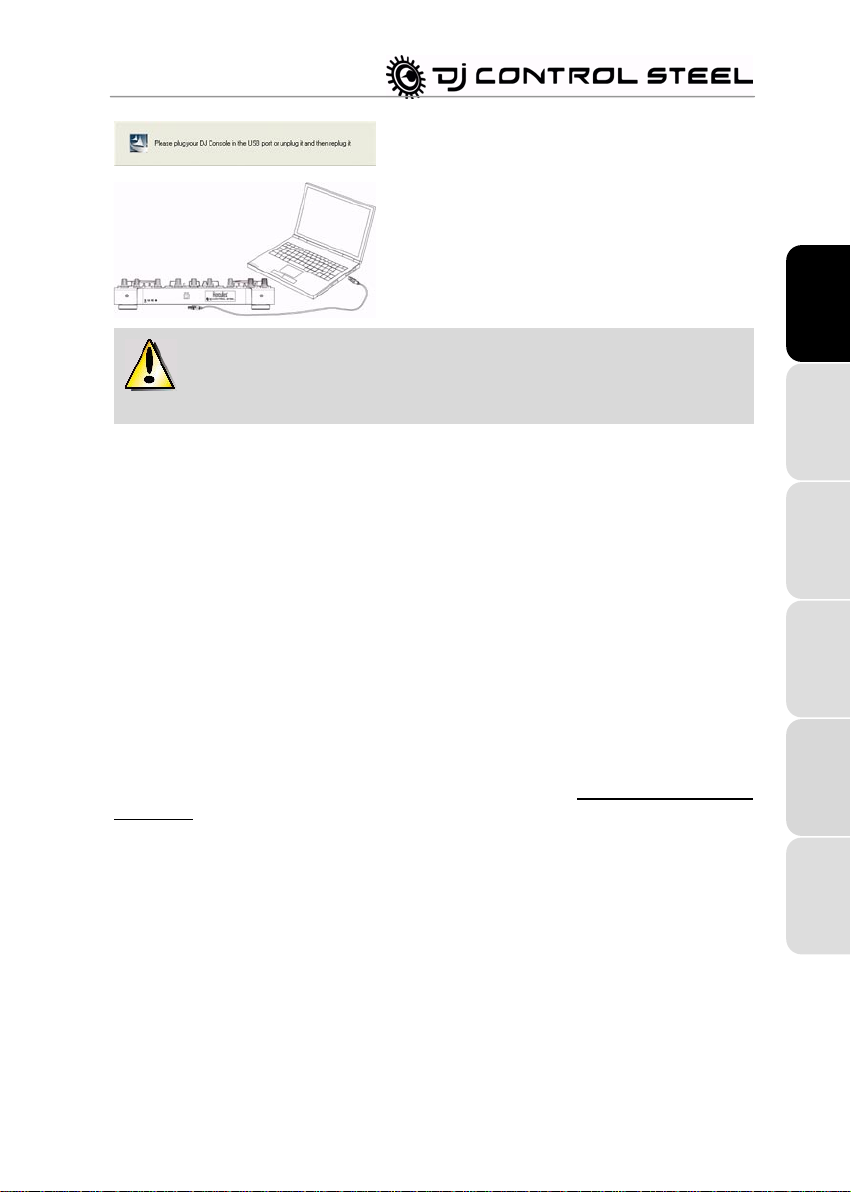
A dialog box appears, prompting you to connect the D J
Control Steel to your computer’s USB port.
- Connect the DJ Control Steel to one of your computer’s USB
ports using the USB cable provided.
We recommend that you connect the DJ Control Steel to a USB port on your
computer or to a powered USB hub. Don’t connect the console to a non-powered USB hub.
Your computer automatically detects your DJ Control Steel and installs the required drivers.
A progress bar appears, depicting the progress of the installation. Please note that this may take
up to 30 seconds, depending on your computer.
- Let the installation procedure run its course and do not do anything until you receive a message
indicating that the installation has completed.
You will be prompted to enter your VirtualDJ serial number the first time you run VirtualDJ, found
on the envelope of your DJ Control Steel installation CD-ROM .
- Enter the serial number and click O K .
VirtualDJ is launched automatically. The VirtualDJ icon now appears on your desktop.
Windows may prompt you to reboot your computer at the end of the driver installation.
The DJ Control Steel icon appears in the taskbar, indicating that your DJ Control Steel is ready for
use.
For information on launching the control panel, please see section 8.1. The DJ Control Steel
taskbar icon.
3.2. Power consumption
Your DJ Control Steel is optimized to achieve low power consumption when connected to your
computer via USB.
User Manual – 5/30
Page 6

4. OVERVIEW
4.1. The top face
Your DJ Control Steel has a variety of controls allowing you to interact with DJ software. There
are two sets of these controls, as the left and right sections of the DJ Control Steel each
correspond to a separate deck in DJ software applications. Descriptions of the default function of
each control are provided below.
1. Controls 1-2 buttons: Modulate an effect or plugin, if it can be modulated – The Apply Ctrl.
On button selects the deck on which Control 1 and Control 2 will be applied. (Please see
sections 6.15 & 6.16)
2. Shi ft button: If this control is enabled, buttons 1 to 6 send another set of functions, and become
buttons 7 to 12.
3. Gain button: increase or decrease the music level on each deck
4. Kill buttons: press to cut out/restore treble, medium and bass frequencies, respectively
5. EQ knobs: adjust treble, medium and bass frequencies
6. Balance knob: adjust the main output balance (1-2) between the left and right channels
7. Scratch button: select whether the jog wheels are used to scratch or seek within tracks
(scratch mode is enabled by default)
8. Up/down/left/right buttons: navigate within menus
9. Buttons 1-6: special effects/looping (please see section 6.6 Effects and loops)
10.Monitor knob: adjust the mix of what's being played on your headphones - the track you’re
cueing up in relation to the overall mix
11.Headphone volume knob: adjust the volume of your headphones
6/30 – User Manual
Page 7
IT A LI AN O
DEUTSCH
ESPAÑOL
NEDERLANDS
E NG LI SH
FRANÇAIS
12. Pitch bend +: adjust the pitch up
13. Pitch bend -: adjust the pitch down
14. Pit ch slider: adjust the pitch up or down
15.Sync button: synchronize the beat with the beat of the track on the opposite deck
16.Navigation buttons: move the cursor within the track
17.Jog wheels: use to scratch, navigate within tracks or scroll through menus
18.Play/pause button: pause music playback and move the cue point to the current position in the
track
19.Stop button: stop the music and do not change the track’s cue point
20.Cue button: set a cue point in the track
21.Cue Select button: select which deck is played on your headphones
22.Deck volume fader: set the volume for the deck
23.Main volume fader: set the overall volume
24.Cross fader: adjust the proportion of the left and right decks in your mix
25.Load Deck button: load a track on the corresponding deck
Note: These are descriptions of the DJ Control Steel’s default functions, which may vary
according to the application you are using.
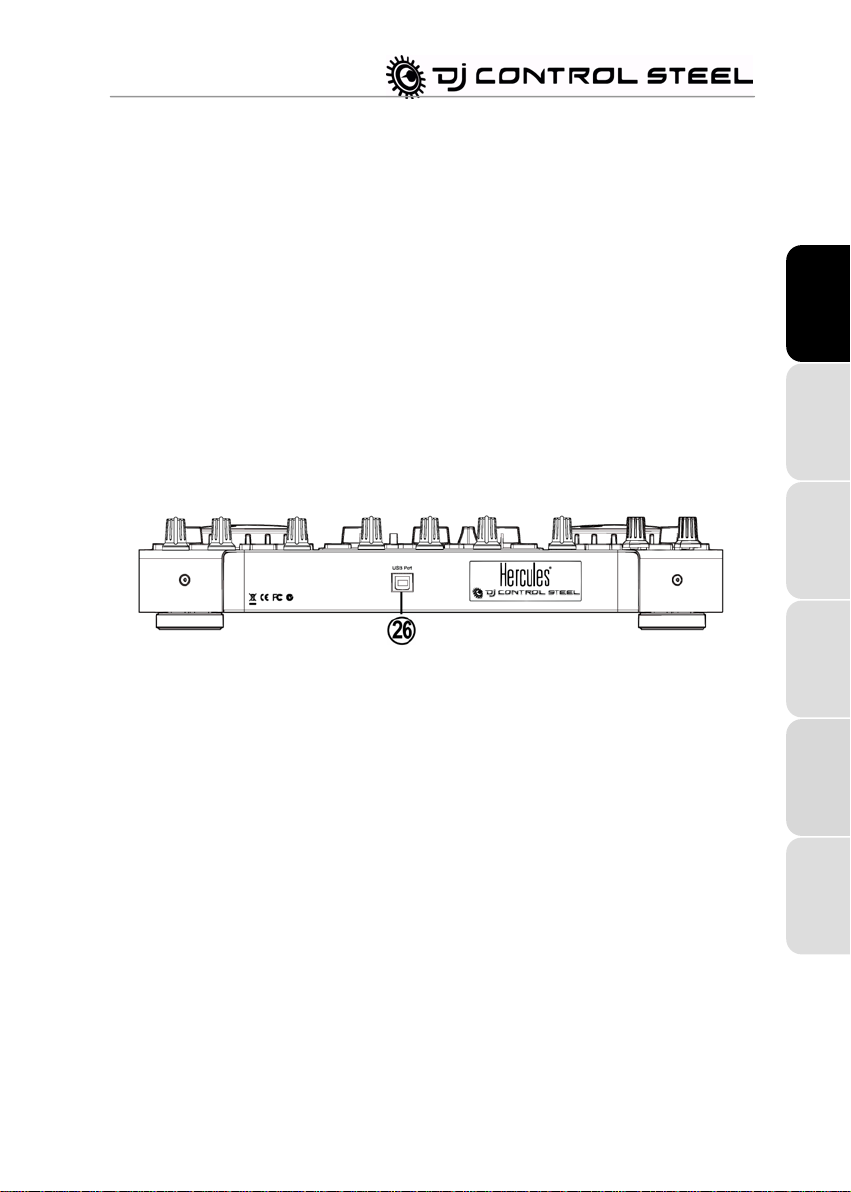
26. USB connector
5. CONNECTING HEADPHONES
With DJ Control Steel, your can use headphones connected to your PC’s sound card, taking care
to adjust the sound level directly in the operating system of your PC or Mac.
For a multimedia card, use headphones of 32 ohms maximum.
On most mass market soundcards, pre-amplification is carried out on outputs 1-2. Therefore, you
should direct the "headphones" sound to outputs 1-2 and your mix to outputs 3-4.
User Manual – 7/30
Page 8

6. DJ CONTROL STEEL FEATURES
6.1. Jog wheels
The jog wheels on your DJ Control Steel emulate vinyl turntables: turning a jog wheel lets you
scratch or move the cursor backward or forward within music tracks, allowing you to select the
cue point where playback will start for the audience.
The jog wheels feature adjustable resistance: if you wish, you can adjust the screws located on
the underside of the device under each jog wheel to increase or decrease its resistance,
according to your preference. You can also adjust their sensitivity using the control panel: you
can either keep the default sensitivity, or divide it by a factor of 2 or 4 to make them less sensitive.
The jog wheels can also be disabled via the control panel.
You can use the Scratch button to change the function of the jog wheels (scratch mode is
enabled by default): press the button to switch to the seek function, allowing you to move
backward or forward within a track. Press the button again to return to the default scratch
function.
You can also use the jog wheels to browse through music lists. When browsing through a
directory containing lots of music files, simply turn the jog wheel while keeping the Up or Down
button on your console pressed down in order to move through the list more quickly.
6.2. Faders (sliders)
Cross fader
Your DJ Control Steel plays 1 stereo music track per deck (2 stereo music tracks simultaneously).
The cross fader moves between the left and right decks, allowing the DJ to adjust the mix
between the 2 decks, and therefore between the 2 tracks.
Setting the cross fader completely to the right means that the mix (the music the audience hears)
comes 100% from the right deck: the audience doesn’t hear the music played on the left deck.
Setting the cross fader in the center means that the music comes 50% from the left deck and 50%
from the right, and so on.
2 Pitch f aders
You can use the pitch faders to adjust the playback speed of a track, increasing or reducing its
BPM (Beats Per Minute) rate, in order to make dancing easy by setting new music tracks at the
same BPM as the previous track so that dancers don’t need to change their rhythm during the
transition from one track to another.
In general, adjusting the pitch changes the music’s speed and tone: faster means a higher tone,
slower means a lower tone. However, you can keep the same pitch and tone by pushing the Beat
Lock button before changing the pitch so that the pitch fader only changes the tempo (i.e. speed)
of the track, and not the pitch itself. This mode is called Master Tempo.
8/30 – User Manual
Page 9
IT A LI AN O
DEUTSCH
ESPAÑOL
NEDERLANDS
E NG LI SH
FRANÇAIS
3 Volume fa ders
The Deck A volume fader controls the volume of the music played on Deck A, while the Deck B
volume fader controls the volume of the music played on Deck B. The main volume fader
controls the master volume.
Changing the volume on Deck A or Deck B lets you adjust transitions between the 2 decks.
If the volume on one of the decks is not loud enough when the corresponding volume fader is set
to its maximum level, simply adjust the Gain knob for that deck to increase the deck's maximum
volume.
6.3. Play/Pause, Stop and Cue buttons
These buttons are available for both decks on your DJ Control Steel.
- Play: starts music playback, while Pause pauses music playback at the current position in the
track and sets the cue point at this position.
- Cue: places a cue point (a marker where playback should start) at the current position in the
track.
- Stop: halts music playback and doesn’t change the track’s cue point.
6.4. Backward and Forward buttons
These buttons, found just above the jog wheel on each deck, allow you to quickly move the cursor
within music tracks. This is an easy way to quickly get to the exact point in a song that you're
looking for.
6.5. Pitch settings
- Sync: pushing this button synchronizes the speed (BPM) of the music played on the
corresponding deck to match the BPM rate of the music on the other deck.
6.6. Effects and loops (buttons 1-6)
In VirtualDJ, you can use these buttons to apply effects to your music or loop part of a track. You
can modulate the effect by turning the jog wheel while keeping the effect button pressed down.
These effects can be assigned to any of the 6 buttons, so these descriptions of the default
functions are only examples.
- Button 1 (Loop in): places a marker at the start of a loop.
- Button 2 (Pitch bend -): "bends" the pitch of the music lower.
- Button 3 (Flanger): applies an audio effect with a slight delay, similar to the sound of a jet
airplane taking off.
- Button 4 (Loop out): places a marker at the end of the loop.
- Button 5 (Pitch bend +): "bends" the pitch of the music higher.
User Manual – 9/30
Page 10

- Button 6 ( Beatg rid): adds a beat pattern over the music track, based on the track’s tempo.
Other functions can be assigned to these buttons as well:
- Record Sample: records the music.
- Play Sample: plays the sampled music. This allows you to play a sample stored on the button
where you have recorded the sample.
- Backspin: an effect mimicking the sound DJs make when they quickly pull the disc backward
after having switched off the turntable. Sends one impulse backward.
- Brake: slows down the music until it stops, if you keep on braking.
- Overloop: sets a loop on 1, 2, 4, 8 or 16 beats over the music.
6.7. Load Deck buttons
Use these buttons to load the highlighted music track on Deck A or Deck B.
6.8. Cue Select buttons
Use the Cue Select buttons to choose which deck is being monitored on your headphones. Only
one Cue Select button (i.e. one deck) can be enabled at a time.
6.9. Browser buttons
Use the Up, Down, Left and Right buttons to browse through folders and music libraries.
- Up/Down buttons: move to the previous (Up) or next (Down) music file/directory. You can
move through music lists more quickly by pressing the Up or Down button and turning the jog
wheel at the same time.
- Left/Right buttons: switch the root directory (Left) or enter a directory (Right).
6.10. Balance knob
Use the balance knob to set the balance of the main output (1-2) between the left and right
channels.
6.11. Monitor knob
Use the Monitor knob to adjust the level of the track you are cueing up in relation to the overall
mix on your headphones or monitoring speakers. The Cu e side of the knob’s rotation represents
the selected deck you are cuing up, while the Mix side represents the mix on Deck A + Deck B.
6.12. Equalization knobs
Use the equalization knobs (Bass, Medium and Treble) for each deck to add color to your music
with custom settings. For example:
10/30 – User Manual
Page 11

IT A LI AN O
DEUTSCH
ESPAÑOL
NEDERLANDS
E NG LI SH
FRANÇAIS
- Make dancing easier by enhancing the bass (the bass provides the tempo for dancing).
- Remix songs by boosting the mids (the mids contain the singer’s voice) on one track and
mixing it with another track on the other deck, where you’ve cut the mids.
You can also manipulate the bass to make transitions between two tracks:
- Synchronize the 2 tracks: move the pitch fader to set both tracks at the same BPM.
- Cut out the mids and treble on both decks, keeping only the beat of the bass.
- Move the cross fader from the first deck to the second, while restoring the mids and treble.
6.13. Kill buttons
Use the kill buttons (Bass, Medium and Treble) for each deck to cut off or restore the
corresponding frequency band of the music playing on that deck.
This is a faster way to cut off or restore a frequency band than using the rotary potentiometers,
and allows you to easily create interesting effects for your music with the push of a button.
6.14. Shift button
Changes buttons 1 to 6.
- If the Shift control is disabled (the Shift button's LED is off), buttons 1 to 6 send the functions
assigned to buttons 1 to 6.
- If the Shift control is enabled (the S hif t button's LED is lit up in green), buttons 1 to 6 send
another set of functions, and become buttons 7 to 12.
6.15. Control 1 and 2 encoders
Modulate an effect or plugin, if it can be modulated.
In VirtualDJ DJC 5, if the last effect enabled is a flanger, Control 1 modulates the flanger’s delay,
while Control 2 modulates the flanger's frequency. In VirtualDJ DJC 5, if the last effect cannot be
modulated (for example, the beatgrid is a beat repeater on 4 beats which cannot be modulated),
Control 1 and Control 2 have no effect.
6.16. Apply Ctrl. On button
Selects the deck on which Control 1 and Control 2 will be applied.
- If the Deck A LED is lit up, these encoders modulate the last effect enabled on deck A
(left),
- If the Select LED is lit up, these encoders modulate the last effect enabled on DJ
Control Steel, whether on the left or right side of the controller,
- If the Deck B LED is lit up, these encoders modulate the last effect enabled on deck B
(right).
User Manual – 11/30
Page 12

7. THE TASKBAR ICON AND CONTROL PANEL
7.1. The DJ Control Steel taskbar icon
An icon representing your DJ Control Steel appears in the right-hand side of your taskbar next to
the clock display. To launch the DJ Control Steel control panel, simply left-click the icon.
By right-clicking the icon, you can select to open the control panel (an alternative to left-clicking
the taskbar icon as described above), exit the control panel and remove the icon from the taskbar,
or check for updates for your DJ Control Steel. Please note that in order to check for updates,
you must have an active Internet connection.
This icon consolidates all Hercules DJ products you may have installed on your system. You can
select your DJ Control Steel by right-clicking the icon and choosing Select Device.
To check for updates for your DJ Control Steel:
- Right-click the DJ Control Steel icon in the taskbar and select Check for updates.
- If prompted by your system, allow your computer to access the Guillemot FTP server.
If no new version is available, a message will appear indicating that you already have the latest
version installed. If a new version is available, it will be downloaded and the setup will launch
automatically.
- Follow the on-screen instructions to install the update for your DJ Control Steel.
7.2. Using the DJ Control Steel control panel
The control panel allows you to manage your DJ Control Steel’s various settings.
12/30 – User Manual
Page 13

IT A LI AN O
DEUTSCH
ESPAÑOL
NEDERLANDS
E NG LI SH
FRANÇAIS
Main tab:
In this tab, you can:
- disable and re-enable the jog wheels.
- set the sensitivity of the jog wheels.
User Manual – 13/30
Page 14

About tab:
- This tab provides all of the information about the package, firmware, driver, DJ API and control
panel versions you are using. Please refer to this information when contacting technical
support.
14/30 – User Manual
Page 15

IT A LI AN O
DEUTSCH
ESPAÑOL
NEDERLANDS
E NG LI SH
FRANÇAIS
8. USING THE DJ CONTROL STEEL A T A P A R T Y
8.1. Overview
You are now about to learn everything a DJ needs to know to host his or her first parties. Let’s
start at the beginning, namely setting up the party: no DJ would allow him/herself to arrive
unprepared, which is why he/she would have organized his/her material and selected his/her
records beforehand.
You should do the same by sorting through your music. Have a good look through your music
collection and select the songs you are going to use. In order to be able to mix tracks effectively,
you must know the pieces perfectly.
Once this is done, make sure that you have all the hardware you will need. Got your computer,
DJ Control Steel, a pair of speakers, headphones and microphone handy? Perfect, then you’re
ready to go!
You’re probably asking yourself: and now, how do I get started? By way of introduction, here are
the basic principles of DJing: a DJ works with two decks (or turntables). The first deck plays one
part of the musical piece, while the DJ uses the second deck to listen to the next part on his/her
headphones. He/she can then work on this second part (speed it up so that it is at the same
tempo as the rest of the piece, etc.) before playing it out loud. At the end of a part, the DJ plays
the part on the other deck by doing a mix, which is to say a blending of the two parts creating a
perfect transition.
In concrete terms, you will launch the VirtualDJ software provided with your DJ Control Steel and
program pieces onto each of the decks.
Please read through the following sections to learn more about the art of DJing. We also
recommend that you consult the VirtualDJ help documentation for additional information.
8.2. Mixing in VirtualDJ
The art of mixing consists of preparing the next piece while a given piece is being played. When
the piece being played reaches its end, the DJ switches from one piece to the other progressively
using the cross fader, which regulates the volume of the two decks. This technique enables you to
avoid empty space between two pieces.
User Manual – 15/30
Page 16

To record your mix, click on the RE C button located in the upper right-hand section of
the Virtual DJ window.
- Click REC to start recording.
- Select a location for the .wav file that will be generated.
During the recording, the REC button turns blue.
- Click REC once again to stop recording.
Your DJ Control Steel allows you to work with digital audio sources. This section will give you
some practical examples of how you can switch from one musical piece to another and from one
audio source to another using the VirtualDJ software.
Mixing your songs in VirtualDJ is fun and easy to master. Thanks to the perfect integration of the
controls on your DJ Control Steel with the included VirtualDJ 5 DJC Edition software, in no time at
all you'll be mixing and scratching your favorite songs, looping and applying amazing effects just
like a pro and making seamless transitions from one song to the next.
Take some time to explore and get to know the VirtualDJ software: a good resource is the
VirtualDJ PDF manual, which should be installed on your system automatically along with the
application itself. You can also download the PDF manual for the VirtualDJ website. In it you will
find tons of information on how to get the most out of the software and all of its various features.
The VirtualDJ website also contains a wealth of information and resources regarding the software,
and you will be able to find links to many user groups and forums which may be of interest to you
as you progress in your understanding of the software and all of the possibilities it opens up.
16/30 – User Manual
Page 17

IT A LI AN O
DEUTSCH
ESPAÑOL
NEDERLANDS
E NG LI SH
FRANÇAIS
In this section, we'll give you a brief overview of some of the most common things you might want
to do to get started with your DJ Control Steel and VirtualDJ 5 DJC Edition.
Fi rst off, you'll need to load some music onto each of the decks. To do so, you can either use
your mouse or touchpad to navigate through your files in the lower left-hand side of the VirtualDJ
window, or use the Up, Down, Left and Right buttons in the center of your DJ Control Steel. Use
the Up/Down buttons to move to the previous (Up) or next (Down) music file/directory. You can
move through music lists more quickly by pressing the Up or Down button and turning the jog
wheel at the same time. Use the Left/Right buttons to switch the root directory (Left) or enter a
directory (Right). Press either of the Load Deck buttons on your DJ Control Steel to load the
highlighted track on the corresponding deck. If you're using your mouse or touchpad, simply drag
and drop songs onto the deck in question.
Under normal circumstances, you will probably want to set the Balance knob at the top of your DJ
Control Steel to the center position, which will evenly divide your mix between the left and right
channels. However, should you wish to tilt the balance towards the left or right channel, you can
use this knob to do so.
Make sure that the cross fader on your DJ Control Steel is set all the way to the left, meeting that
only Deck A will be heard in your mix. Press the Play/Pause button on Deck A of your DJ Control
Steel to launch playback on Deck A. At the top of the VirtualDJ window, you'll see a display with
blue and red wave forms represented: the blue waves represent the music loaded on Deck A,
while the red waves represent the music loaded on Deck B.
You will soon come to realize how important this visual display is to the functioning of VirtualDJ.
The peaks on the display represent the beats in the song: by lining up the peaks of the track on
one deck with the peaks of the track on the other deck, you can synchronize the songs with one
another so that they are on the same beat, which makes for a smooth transition between tracks.
Try using the Pitch slider on Deck A to see what it does: you'll notice that increasing the pitch
makes the music sound faster, with a higher tone, whereas decreasing it makes it sounds slower,
with a lower tone. Pressing the Reset button just above the Pitch slider gradually returns the
pitch to its default value.
Pressing the Beat Lock button enables/disables the Master Tempo function for the corresponding
deck. This function effectively locks the tone of a track in place, so that when you move the Pi tch
slider, the tempo (i.e. the speed) of the track changes to faster or slower, but the tone stays the
same.
While the music is playing on Deck A, you'll want to be preparing the track on Deck B. Get your
headphones on and then press the Cue Select button on Deck B: this means that Deck B is now
monitored on your headphones (you can only monitor one deck at a time). Use the Monitor
Select knob to adjust what you hear on your headphones: the Cue side of the knob’s rotation
represents the selected deck you are cuing up, while the Mix side represents the mix on Deck A +
Deck B. Use the Volume knob next to the headphone input on the top face of your DJ Control
Steel to adjust the volume of your headphones.
Try moving the jog wheel on Deck B: you'll see that you are scratching the track back and forth,
although your audience won't be able to hear it at this point because the cross fader is still all the
way to the left, which means that only the left deck is coming through in your mix. If you press the
User Manual – 17/30
Page 18

Scratch button on your DJ Control Steel, the jog wheels switch to the seek function, allowing you
to move quickly within a track. You can also move quickly within a track using the backward and
forward buttons, just above the jog wheel. Press the Scratch button again to return to the default
scratch function.
Use the Pit ch slider on Deck B to adjust the song's tempo to match that of the song on Deck A;
alternatively, you can press the Sync button on Deck B to match the tempo of the track on that
deck to the one on Deck A. Synchronizing the tempos makes it easier for dancers to maintain a
constant rhythm when switching from one song to another.
As the track on Deck B is playing, press the Play/Pause button on Deck B to pause the track at
the exact point where you wish to start playback: this pauses the song and sets the cue point
there (if you were to press the Stop button instead, the cue point would not be moved to the new
position; instead, it would go back to the track's original cue point, i.e. the start of the song).
As the track on Deck A is nearing its end, start moving the cross fader to the right towards Deck
B: the more you move it to the right, the more of Deck B will be heard in the mix. When you're
ready to start playback, press the Play/Pause button on Deck B to start playing the track from the
cue point where you had paused it. You can adjust the EQ knobs on Deck B to fine-tune the
equalization, or press one of the Kil l buttons to cut out the corresponding frequency band on the
deck for an interesting transition effect (just press the Kill button again to restore the frequency in
question). Continue moving the cross fader until it's all the way to the right, at which point only
the track playing on Deck A will be heard in your mix. You can use the Volume slider on Deck B
to adjust the track's volume if necessary, so that it is at the same level as the track that had been
playing on Deck A.
Now that the track on Deck B is playing, you may want to return it to its original pitch if the pitch
has been altered to match what had been playing on Deck A. To do so, you can either press the
Reset button on Deck B, or slowly move the Pitch slider to adjust it to its normal level.
Feel like saying something to your audience over the music? Press the Mic On/Off button on
your DJ Control Steel to toggle the microphone on and address the crowd: the music level is
automatically reduced so that your voice can be heard. Use the Volume knob next to the
microphone input on the top face of your DJ Control Steel to adjust the microphone volume.
When you're done talking, press the Mic On/Off button again to switch off your microphone and
restore the music to full volume.
Have fun experimenting with some of the effects that are available on buttons 1-6: loop in, loop
out, pitch bend, flanger, beatgrid and so on. You'll be amazed at some of the incredible sounds
you can easily produce, customize and manipulate. You can even modulate the effect by turning
the jog wheel while keeping the effect button pressed down. Pressing buttons 1-6 toggles the
corresponding effect on or off.
While the music on Deck B is playing, press the Cue Select button on Deck A: this means that
Deck A is now monitored on your headphones.
Start playback and adjust the level using the Gain knob on Deck A, which allows you to set the
overall level to match that of the track playing on the other deck. Once the overall level has been
set, you can use the Volume slider for the deck to make more precise adjustments. Cue up your
track to the spot where you want playback to start.
18/30 – User Manual
Page 19

IT A LI AN O
DEUTSCH
ESPAÑOL
NEDERLANDS
E NG LI SH
FRANÇAIS
As the music playing on Deck B is nearing its end, start moving the cross fader to the left and
then launch playback when you want to start making the switch. Adjust the EQ on Deck A as you
continue to move the cross fader, until it is completely to the left and your audience only hears
what is playing on Deck A.
Congratulations: you’ve just done your first mix! As you practice and get to know both your DJ
Control Steel and the VirtualDJ software better, you'll see just how versatile this mixing system is
and how much freedom it gives you to take your music to places you've only dreamed about. As
you continue to learn how everything functions and try out different approaches, you'll soon get
the hang of mixing and find ways of working that are right for you. After all, you're the DJ, and the
audience is in your hands!
8.3. Scratching
The DJ Control Steel allows you to scratch your MP3s and CDs in the same way that a DJ
scratches vinyl records. To do this you will use the DJ Control Steel’s jog wheels, together with
the cross fader to boost/interrupt the sound.
There are many scratch effects, the most well-known of which are described below:
Baby Scratch
No need to use the volume control for this basic scratch. It consists of doing a forward scratch,
immediately followed by a backward scratch.
Tear Scratch
The Tear Scratch doesn’t use the volume control either. As with the Baby Scratch, you do a
forward scratch followed by a backward scratch, but this backward scratch is broken down into
two different speeds: you must first scratch quickly, and then slowly. Thus, the different steps are
as follows: forward scratch, quick backward scratch, slow backward scratch.
Forward Scratch
You must do a forward scratch and then quickly lower the volume to its minimum setting before
doing a backward scratch to return to the initial position and restore the volume. Only the forward
scratch will be audible.
Backward Scratch
The reverse of the Forward Scratch: you must do a backward scratch and then quickly lower the
volume to its minimum setting just before doing the forward scratch, and then restore the volume.
Pass-Pass
The Pass-Pass is not a scratch technique, strictly speaking, since it uses the scratch as well as
other elements (pitch, cross fader, etc.) to create new compositions. To carry out this technique
you must play the same piece on both decks, and then it’s up to you to make use of the DJ
Control Steel’s functions to create new rhythmic combinations by alternating your manipulations
on each deck. A perfect mastery of the cross fader and of the basic scratch techniques is
required, as well as a good sense of rhythm and excellent familiarity with the piece.
User Manual – 19/30
Page 20

DJ Contro l Stee l
control
MIDI
mes sa ge
Me ss ag e ty pe
V a l u e description
Left Keypad 1
Bx 01 Value
Button - Toggling Output
7F: Pressed – 00: Released
Left Keypad 2
Bx 02 Value
Button - Toggling Output
7F: Pressed – 00: Released
Left Keypad 3
Bx 03 Value
Button - Toggling Output
7F: Pressed – 00: Released
Left Keypad 4
Bx 04 Value
Button - Toggling Output
7F: Pressed – 00: Released
Left Keypad 5
Bx 05 Value
Button - Toggling Output
7F: Pressed – 00: Released
Left Keypad 6
Bx 06 Value
Button - Toggling Output
7F: Pressed – 00: Released
Left Sync
Bx 07 Value
Button - Toggling Output
7F: Pressed – 00: Released
Left Beatlock
Bx 08 Value
Button - Toggling Output
7F: Pressed – 00: Released
Left Previous
Bx 09 Value
Button - Toggling Output
7F: Pressed – 00: Released
Left Next
Bx 0A Value
Button - Toggling Output
7F: Pressed – 00: Released
Left Play/Pause
Bx 0B Value
Button - Toggling Output
7F: Pressed – 00: Released
Left Cue
Bx 0C Value
Button - Toggling Output
7F: Pressed – 00: Released
Left Stop
Bx 0D Value
Button - Toggling Output
7F: Pressed – 00: Released
Left Kill Treble
Bx 0E Value
Button - Toggling Output
7F: Pressed – 00: Released
Left Kill Medium
Bx 0F Value
Button - Toggling Output
7F: Pressed – 00: Released
Left Kill Bass
Bx 10 Value
Button - Toggling Output
7F: Pressed – 00: Released
Left Reset
Bx 11 Value
Button - Toggling Output
7F: Pressed – 00: Released
Left Load
Bx 12 Value
Button - Toggling Output
7F: Pressed – 00: Released
Left Source
Bx 13 Value
Button - Toggling Output
7F: Pressed – 00: Released
Left Headphone Cue
Bx 14 Value
Button - Toggling Output
7F: Pressed – 00: Released
Right Beatlock
Bx 15 Value
Button - Toggling Output
7F: Pressed – 00:Released
Right Load
Bx 16 Value
Button - Toggling Output
7F: Pressed – 00: Released
Right Source
Bx 17 Value
Button - Toggling Output
7F: Pressed – 00: Released
Right Headphone
Cue
Bx 18 Value
Button - Toggling Output
7F: Pressed – 00: Released
Right Keypad 1
Bx 19 Value
Button - Toggling Output
7F: Pressed – 00: Released
Right Keypad 2
Bx 1A Value
Button - Toggling Output
7F: Pressed – 00: Released
Right Keypad 3
Bx 1B Value
Button - Toggling Output
7F: Pressed – 00: Released
Right Keypad 4
Bx 1C Value
Button - Toggling Output
7F: Pressed – 00: Released
Right Keypad 5
Bx 1D Value
Button - Toggling Output
7F: Pressed – 00: Released
Right Keypad 6
Bx 1E Value
Button - Toggling Output
7F: Pressed – 00: Released
Right Sync
Bx 1F Value
Button - Toggling Output
7F: Pressed – 00: Released
Right Reset
Bx 20 Value
Button - Toggling Output
7F: Pressed – 00: Released
Right Previous
Bx 21 Value
Button - Toggling Output
7F: Pressed – 00: Released
Right Next
Bx 22 Value
Button - Toggling Output
7F: Pressed – 00: Released
Right Play/Pause
Bx 23 Value
Button - Toggling Output
7F: Pressed – 00: Released
Right Cue
Bx 24 Value
Button - Toggling Output
7F: Pressed – 00: Released
Right Stop
Bx 25 Value
Button - Toggling Output
7F: Pressed – 00: Released
Right Kill Treble
Bx 26 Value
Button - Toggling Output
7F: Pressed – 00: Released
Right Kill Medium
Bx 27 Value
Button - Toggling Output
7F: Pressed – 00: Released
9. MIDI STANDARD SUPPORT
Your DJ Control Steel can function as a MIDI controller: the buttons and potentiometers can send
and receive MIDI signals that will then be interpreted by software. In software that accepts MIDI
commands, you must select your DJ Control Steel as the MIDI controller.
MIDI messages sent by DJ Control Steel:
20/30 – User Manual
Page 21

IT A LI AN O
DEUTSCH
ESPAÑOL
NEDERLANDS
E NG LI SH
FRANÇAIS
DJ Contro l Stee l
control
MIDI
me ss ag e
Me ss ag e t yp e
Value description
Right Kill Bass
Bx 28 Value
Button - Toggling Output
7F: Pressed – 00: Released
Scratch
Bx 29 Value
Button - Toggling Output
7F: Pressed – 00: Released
Menu Up
Bx 2A Value
Button - Toggling Output
7F: Pressed – 00: Released
Menu Down
Bx 2B Value
Button - Toggling Output
7F: Pressed – 00: Released
Menu Left
Bx 2C Value
Button - Toggling Output
7F: Pressed – 00: Released
Menu Right
Bx 2D Value
Button - Toggling Output
7F: Pressed – 00: Released
Talkover State
Bx 2E Value
Button - Momentary Output
7F: Enabled – 00: Disabled
Left Jog Wheel
Bx 2F Value
Incremental – Coarse
(128 values)
7F > 40: CCW Slow > Fast –
01 > 3F: CW Slow > Fast
Right Jog Wheel
Bx 30 Value
Incremental – Coarse
(128 values)
7F > 40: CCW Slow > Fast –
01 > 3F: CW Slow > Fast
Left Pitch
Bx 31 Value
Analog – Coarse
(128 values)
00 > 7F: Full Down > Full Up
Left Volume
Bx 32 Value
Analog – Coarse
(128 values)
00 > 7F: Full Down > Full Up
Left Gain
Bx 33 Value
Analog – Coarse
(128 values)
00 > 7F: Full CW: Full CCW
Left Treble
Bx 34 Value
Analog – Coarse
(128 values)
00 > 7F: Full CW: Full CCW
Left Medium
Bx 35 Value
Analog – Coarse
(128 values)
00 > 7F: Full CW: Full CCW
Left Bass
Bx 36 Value
Analog – Coarse
(128 values)
00 > 7F: Full CW: Full CCW
Balance
Bx 37 Value
Analog – Coarse
(128 values)
00 > 7F: Full CW: Full CCW
Main Volume
Bx 38 Value
Analog – Coarse
(128 values)
00 > 7F: Full Down > Full Up
Cross Fader
Bx 39 Value
Analog – Coarse
(128 values)
00 > 7F: Full Left > Full Right
Cue Mix
Bx 3A Value
Analog – Coarse
(128 values)
00 > 7F: Full CW: Full CCW
Right Pitch
Bx 3B Value
Analog – Coarse
(128 values)
00 > 7F: Full Down > Full Up
Right Volume
Bx 3C Value
Analog – Coarse
(128 values)
00 > 7F: Full Down > Full Up
Right Gain
Bx 3D Value
Analog – Coarse
(128 values)
00 > 7F: Full CW: Full CCW
Right Treble
Bx 3E Value
Analog – Coarse
(128 values)
00 > 7F: Full CW: Full CCW
Right Medium
Bx 3F Value
Analog – Coarse
(128 values)
00 > 7F: Full CW: Full CCW
Right Bass
Bx 40 Value
Analog – Coarse
(128 values)
00 > 7F: Full CW: Full CCW
Controls 1 Deck A
Bx 41 Value
Incremental – Coarse (128
values)
7F > 40 : CCW Slow>Fast – 01 >
3F : CW Slow>Fast
Controls 2 Deck A
Bx 42 Value
Incremental – Coarse (128
values)
7F > 40 : CCW Slow>Fast – 01 >
3F : CW Slow>Fast
Controls 1 Deck B
Bx 43 Value
Incremental – Coarse (128
values)
7F > 40 : CCW Slow>Fast – 01 >
3F : CW Slow>Fast
User Manual – 21/30
Page 22

DJ Contro l Stee l
control
MIDI
me ss ag e
Me ss ag e ty pe
Value description
Controls 2 Deck B
Bx 44 Value
Incremental – Coarse (128
values)
7F > 40 : CCW Slow>Fast – 01 >
3F : CW Slow>Fast
Controls 1 Select A
Bx 45 Value
Incremental – Coarse (128
values)
7F > 40 : CCW Slow>Fast – 01 >
3F : CW Slow>Fast
Controls 2 Select B
Bx 46 Value
Incremental – Coarse (128
values)
7F > 40 : CCW Slow>Fast – 01 >
3F : CW Slow>Fast
VOL_HP
Bx 47 Value
Analog – Coarse (128
values)
00 > 7F : Full CW : Full CCW
Left Shift + Key 1
(= 7 Left)
Bx 64 Value
Button-Toggling Output
“7F” : Pressed – “00” : Released
Left Shift + Key 2
(= 8 Left)
Bx 65 Value
Button-Toggling Output
“7F” : Pressed – “00” : Released
Left Shift + Key 3
(= 9 Left)
Bx 66 Value
Button-Toggling Output
“7F” : Pressed – “00” : Released
Left Shift + Key 4
(= 10 Left)
Bx 67 Value
Button-Toggling Output
“7F” : Pressed – “00” : Released
Left Shift + Key 5
(= 11 Left)
Bx 68 Value
Button-Toggling Output
“7F” : Pressed – “00” : Released
Left Shift + Key 6
(= 12 Left)
Bx 69 Value
Button-Toggling Output
“7F” : Pressed – “00” : Released
Right Shift + Key 1
(= 7 Right)
Bx 6A Value
Button-Toggling Output
“7F” : Pressed – “00” : Released
Right Shift + Key 2
(= 8 Right)
Bx 6B Value
Button-Toggling Output
“7F” : Pressed – “00” : Released
Right Shift + Key 3
(= 9 Right)
Bx 6C Value
Button-Toggling Output
“7F” : Pressed – “00” : Released
Right Shift + Key 4
(= 10 Right)
Bx 6D Value
Button-Toggling Output
“7F” : Pressed – “00” : Released
Right Shift + Key 5
(= 11 Right)
Bx 6E Value
Button-Toggling Output
“7F” : Pressed – “00” : Released
Right Shift + Key 6
(= 12 Right)
Bx 6F Value
Button-Toggling Output
“7F” : Pressed – “00” : Released
Apply ctrl on Deck A
Bx 70 Value
Button-Toggling Output
“7F” : Pressed – “00” : Released
Apply ctrl on Deck B
Bx 71 Value
Button-Toggling Output
“7F” : Pressed – “00” : Released
Apply ctrl on Select
Bx 72 Value
Button-Toggling Output
“7F” : Pressed – “00” : Released
Left Shift Status
Bx 73 Value
Button-Toggling Output
“7F” : Pressed – “00” : Released
Right Shift Status
Bx 74 Value
Button-Toggling Output
“7F” : Pressed – “00” : Released
Note: CW = Clockwise; CCW = Counterclockwise.
Continued on the following page.
22/30 – User Manual
Page 23

IT A LI AN O
DEUTSCH
ESPAÑOL
NEDERLANDS
E NG LI SH
FRANÇAIS
MIDI messages received by DJ Control Steel:
MIDI control
MI DI m ess ag e
Value description
LED left key 1
Bx 01 Value
00 : OFF – 7F: ON
LED left key 2
Bx 02 Value
00 : OFF – 7F: ON
LED left key 3
Bx 03 Value
00 : OFF – 7F: ON
LED left key 4
Bx 04 Value
00 : OFF – 7F: ON
LED left key 5
Bx 05 Value
00 : OFF – 7F: ON
LED left key 6
Bx 06 Value
00 : OFF – 7F: ON
LED left Sync
Bx 07 Value
00 : OFF – 7F: ON
LED left pitch bend +
Bx 08 Value
00 : OFF – 7F: ON
LED left Play
Bx 0B Value
00 : OFF – 7F: ON
LED left Cue
Bx 0C Value
00 : OFF – 7F: ON
LED left Stop
Bx 0D Value
00 : OFF – 7F: ON
LED left KillTreb
Bx 0E Value
00 : OFF – 7F: ON
LED left KillMed
Bx 0F Value
00 : OFF – 7F: ON
LED left KillBass
Bx 10 Value
00 : OFF – 7F: ON
LED left pitch bend -
Bx 11 Value
00 : OFF – 7F: ON
LED Folders
Bx 12 Value
00 : OFF – 7F: ON
LED left Mode
Bx 13 Value
00 : OFF – 7F: ON
LED left CueSelect
Bx 14 Value
00 : OFF – 7F: ON
LED right pitch bend +
Bx 15 Value
00 : OFF – 7F: ON
LED Files
Bx 16 Value
00 : OFF – 7F: ON
LED right Mode
Bx 17 Value
00 : OFF – 7F: ON
LED right CueSelect
Bx 18 Value
00 : OFF – 7F: ON
LED right key 1
Bx 19 Value
00 : OFF – 7F: ON
LED right key 2
Bx 1A Value
00 : OFF – 7F: ON
LED right key 3
Bx 1B Value
00 : OFF – 7F: ON
LED right key 4
Bx 1C Value
00 : OFF – 7F: ON
LED right key 5
Bx 1D Value
00 : OFF – 7F: ON
LED right key 6
Bx 1E Value
00 : OFF – 7F: ON
LED right Sync
Bx 1F Value
00 : OFF – 7F: ON
LED right pitch bend +
Bx 20 Value
00 : OFF – 7F: ON
LED right Play
Bx 23 Value
00 : OFF – 7F: ON
LED right Cue
Bx 24 Value
00 : OFF – 7F: ON
LED right Stop
Bx 25 Value
00 : OFF – 7F: ON
LED right KillTreb
Bx 26 Value
00 : OFF – 7F: ON
LED right KillMed
Bx 27 Value
00 : OFF – 7F: ON
LED right KillBass
Bx 28 Value
00 : OFF – 7F: ON
LED_Scratch
Bx 29 Value
00 : OFF – 7F: ON
Blink LED left key 1
Bx 31 Value
00 : OFF – 7F: ON
Blink LED left key 2
Bx 32 Value
00 : OFF – 7F: ON
Blink LED left key 3
Bx 33 Value
00 : OFF – 7F: ON
Blink LED left key 4
Bx 34 Value
00 : OFF – 7F: ON
Blink LED left key 5
Bx 35 Value
00 : OFF – 7F: ON
Blink LED left key 6
Bx 36 Value
00 : OFF – 7F: ON
Blink LED left Sync
Bx 37 Value
00 : OFF – 7F: ON
Blink LED left pitch bend+
Bx 38 Value
00 : OFF – 7F: ON
Blink LED left Play
Bx 3B Value
00 : OFF – 7F: ON
Blink LED left Cue
Bx 3C Value
00 : OFF – 7F: ON
User Manual – 23/30
Page 24

MIDI contro l
MI DI m ess ag e
Value description
Blink LED left Stop
Bx 3D Value
00 : OFF – 7F: ON
Blink LED left KillTreb
Bx 3E Value
00 : OFF – 7F: ON
Blink LED left KillMed
Bx 3F Value
00 : OFF – 7F: ON
Blink LED left KillBass
Bx 40 Value
00 : OFF – 7F: ON
Blink LED left pitch bend-
Bx 41 Value
00 : OFF – 7F: ON
Blink LED Folders
Bx 42 Value
00 : OFF – 7F: ON
Blink LED_left Mode
Bx 43 Value
00 : OFF – 7F: ON
Blink LED left CueSel
Bx 44 Value
00 : OFF – 7F: ON
Blink LED right Stop
Bx 46 Value
00 : OFF – 7F: ON
Blink LED Files
Bx 47 Value
00 : OFF – 7F: ON
Blink LED right key 1
Bx 4A Value
00 : OFF – 7F: ON
Blink LED right key 2
Bx 4B Value
00 : OFF – 7F: ON
Blink LED right key 3
Bx 4C Value
00 : OFF – 7F: ON
Blink LED right key 4
Bx 4D Value
00 : OFF – 7F: ON
Blink LED right key 5
Bx 4E Value
00 : OFF – 7F: ON
Blink LED right key 6
Bx 50 Value
00 : OFF – 7F: ON
Blink LED right Play
Bx 53 Value
00 : OFF – 7F: ON
Blink LED right Cue
Bx 54 Value
00 : OFF – 7F: ON
Blink LED right pitch
bend-
Bx 55 Value
00 : OFF – 7F: ON
Blink LED right Mode
Bx 57 Value
00 : OFF – 7F: ON
Blink LED right CueSel
Bx 58 Value
00 : OFF – 7F: ON
Blink LED Scratch
Bx 59 Value
00 : OFF – 7F: ON
Blink LED right KillTreb
Bx 5A Value
00 : OFF – 7F: ON
Blink LED right KillMed
Bx 5B Value
00 : OFF – 7F: ON
Blink LED right KillBass
Bx 5C Value
00 : OFF – 7F: ON
Blink LED right Sync
Bx 5F Value
00 : OFF – 7F: ON
Blink LED right pitch
bend+
Bx 60 Value
00 : OFF – 7F: ON
LED left shift + Key 1
Bx 64 Value
00 : OFF – 7F: ON
LED left shift + Key 2
Bx 65 Value
00 : OFF – 7F: ON
LED left shift + Key 3
Bx 66 Value
00 : OFF – 7F: ON
LED left shift + Key 4
Bx 67 Value
00 : OFF – 7F: ON
LED left shift + Key 5
Bx 68 Value
00 : OFF – 7F: ON
LED left shift + Key 6
Bx 69 Value
00 : OFF – 7F: ON
LED right shift + Key 1
Bx 6A Value
00 : OFF – 7F: ON
LED right shift + Key 2
Bx 6B Value
00 : OFF – 7F: ON
LED right shift + Key 3
Bx 6C Value
00 : OFF – 7F: ON
LED right shift + Key 4
Bx 6D Value
00 : OFF – 7F: ON
LED right shift + Key 5
Bx 6E Value
00 : OFF – 7F: ON
LED right shift + Key 6
Bx 6FValue
00 : OFF – 7F: ON
Update_All_Analogs
Bx 70 Value
00 : OFF – 7F: ON
Blink LED left shift + Key
1
Bx 74 Value
00 : OFF – 7F: ON
Blink LED left shift + Key
2
Bx 75 Value
00 : OFF – 7F: ON
Blink LED left shift + Key
3
Bx 76 Value
00 : OFF – 7F: ON
24/30 – User Manual
Page 25

IT A LI AN O
DEUTSCH
ESPAÑOL
NEDERLANDS
E NG LI SH
FRANÇAIS
MIDI contro l
MI DI m ess ag e
Value description
Blink LED left shift + Key
4
Bx 77 Value
00 : OFF – 7F: ON
Blink LED left shift + Key
5
Bx 78 Value
00 : OFF – 7F: ON
Blink LED left shift + Key
6
Bx 79 Value
00 : OFF – 7F: ON
Blink LED right shift +
Key 1
Bx 7A Value
00 : OFF – 7F: ON
Blink LED right shift +
Key 2
Bx 7B Value
00 : OFF – 7F: ON
Blink LED right shift +
Key 3
Bx 7C Value
00 : OFF – 7F: ON
Blink LED right shift +
Key 4
Bx 7D Value
00 : OFF – 7F: ON
Blink LED right shift +
Key 5
Bx 7E Value
00 : OFF – 7F: ON
Blink LED right shift +
Key 6
Bx 7FValue
00 : OFF – 7F: ON
Hercules has released a MIDI Mapper application for the DJ Control Steel: this software allows
you to change the DJ Control Steel’s MIDI messages and values.
The MIDI Mapper application is intended for advanced users familiar with the MIDI standard and
can be downloaded from http://ts.hercules.com.
User Manual – 25/30
Page 26

10. FREQUENTLY ASKED QUES TI ONS
1. Can I use DJ Control Steel with DJ software other than Vi rtual DJ?
Yes: A variety of DJ software applications are compatible with DJ Control Steel, including
Traktor, MixVibes and DJ Decks, with more and more programs integrating compatibility on a
continual basis. Please check with the publishers of other DJ software for details on whether
their software is currently compatible with DJ Control Steel.
2. Can I use DJ Control Steel without a computer?
No, DJ Control Steel cannot function at all without being connected to a computer.
3. Can I mix directly from audio CDs in the DJ mixing software?
Yes, you can mix audio CDs directly from your CD/DVD-ROM drive in Virtual DJ. Simply load
the CD-Audio track in your playlist on a DJ Console deck, as if it were an audio file, and you
can mix it immediately.
4. Is DJ Control Steel a MIDI controller?
Yes, DJ Control Steel functions as a MIDI controller and can send and receive MIDI
commands. Please see section 10. MIDI standard support.
5. Will DJ Control Steel function when connected to a USB hub?
Yes, as long as the USB hub’s power supply is connected, since DJ Control Steel needs a
USB port’s full power in order to function properly.
6. What’s the use of the Stop buttons on the DJ Control Steel?
In VirtualDJ 5 DJC Edition, the Stop button stops the music and places the cursor at the
original cue point of the track, while the Play/Pause button pauses music playback and moves
the cue point to the current position in the music track.
7. How can I change an effect?
In VirtualDJ 5 DJC Edition, you switch on an effect by pressing the button (1-6) to which the
effect is assigned (please see section 7.7 Effects and loops). You can modulate the effect by
turning the jog wheel while keeping the effect button pressed down.
8. How can I expand directories in VirtualDJ 5 DJC Edition?
You can use the Up/Down/Left/Right buttons on your DJ Control Steel to browse through
directories and music files. When you select a directory, clicking the Load button expands the
directory.
9. How can I browse through music directories faster with VirtualDJ 5 DJC Edition?
When browsing through a directory containing lots of music files, simply turn the jog wheel
while keeping the Up or Down button on your console pressed down in order to move through
the list more quickly.
26/30 – User Manual
Page 27

IT A LI AN O
DEUTSCH
ESPAÑOL
NEDERLANDS
E NG LI SH
FRANÇAIS
11. TECHNICAL SUPPORT
United Kingdom
0207 216 0047
price of a national phone call, Monday to Friday
from 12PM to 4PM and from 5PM to 10PM
Un it ed St ate s /
Ca nad a
514-279-9911
price of a long distance phone call, Monday to Friday
from 7AM to 11AM and from 12PM to 5PM (Eastern time)
De nma rk
82 33 28 58
price of a national phone call, Monday to Friday
from 1PM to 5PM and from 6PM to 11PM
Finland
09 81 71 01 54
price of a national phone call, Monday to Friday
from 2PM to 6PM and from 7PM to 12AM
Ne th erl an ds
0900 2026765
€0.30/min, Monday to Friday
from 1PM to 5PM and from 6PM to 11PM
Nor way
23 50 01 16
price of a national phone call, Monday to Friday
from 1PM to 5PM and from 6PM to 11PM
Sw ed en
08-51992032
price of a national phone call, Monday to Friday
from 1PM to 5PM and from 6PM to 11PM
If you encounter a problem with your product, please go to http://ts.hercules.com and select your
language. From there you will be able to access various utilities (Frequently Asked Questions
(FAQ), the latest versions of drivers and software) that may help to resolve your problem. If the
problem persists, you can contact the Hercules products technical support service (“Technical
Support”):
By email:
In order to take advantage of technical support by email, you must first register online. The
information you provide will help the agents to resolve your problem more quickly.
Click Registration on the left-hand side of the Technical Support page and follow the on-screen
instructions.
If you have already registered, fill in the Username and Password fields and then click Login.
By telephone:
User Manual – 27/30
Page 28

11.1. Warranty information
Worldwide, Guillemot Corporation S.A. (“Guillemot”) warrants to the consumer that this Hercules product will be free from material
defects and manufacturing flaws for a period of two (2) years from the original date of purchase. Should the product appear to be
defective during the warranty period, immediately contact Technical Support, who will indicate the procedure to follow. If the defect is
confirmed, the product must be returned to its place of purchase (or any other location indicated by Technical Support).
Within the context of this warranty, the consumer’s defective product will, at Technical Support’s option, be either repaired or replaced.
Where authorized by applicable law, the full liability of Guillemot and its subsidiaries (including for indirect damages) is limited to the
repair or replacement of the Hercules product. The consumer’s legal rights with respect to legislation applicable to the sale o f
consumer goods are not affected by this warranty.
This warranty shall not apply: (1) if the product has been modified, opened, altered, or has suffered damage as a result of inappropriate
or abusive use, negligence, an accident, normal wear, or any other cause not related to a material defect or manufacturing flaw; (2) in
the event of failure to comply with the instructions provided by Technical Support; (3) to software not published by Guillemot, said
software being subject to a specific warranty provided by its publisher.
11.2. Additional warranty provisions
In the United States of America and in Canada, this warranty is limited to the product’s internal mechanism and external housing. Any
applicable implied warranties, including warranties of merchantability and fitness for a particular purpose, are hereby limited to two (2)
years from the date of purchase and are subject to the conditions set forth in this limited warranty. In no event shall Guillemot
Corporation S.A. or its affiliates be liable for consequential or incidental damage resulting from the breach of any express or implied
warranties. Some States/Provinces do not allow limitation on how long an implied warranty lasts or exclusion or limitation of
incidental/consequential damages, so the above limitation may not apply to you. This warranty gives you specific legal rights, and you
may also have other legal rights which vary from State to State or Province to Province.
28/30 – User Manual
Page 29

IT A LI AN O
DEUTSCH
ESPAÑOL
NEDERLANDS
E NG LI SH
FRANÇAIS
Tr ad em ark s
Hercules® is a registered trademark of Guillemot Corporation S.A. Intel® and Pentium® are registered trademarks of Intel Corporation.
Microsoft® Windows® 98 SE, Me, 2000 and XP are either registered trademarks or trademarks of Microsoft Corporation in the United States
and/or other countries. Velcro® is a registered trademark of Velcro Industries B.V. VirtualDJ™ is a trademark of Atomix Productions. All other
trademarks and brand names are hereby acknowledged and are property of their respective owners. Illustrations not binding. Contents, designs
and specifications are subject to change without notice and may vary from one country to another.
Declaration of conformity
EC COMPLIANCE NOTICE: this equipment has been tested and found to comply with the limits of the Council Directive 89/336/EEC of 3 May
1989 on the approximation of the laws of the Member States relating to electromagnetic compatibility, amended by Directive 93/68/EEC. In a
domestic environment this product may cause radio interference in which case the user may be required to take adequate measures.
CANADIAN COMPLIANCE NOTICE: this Class B digital apparatus meets all requirements of the Canadian Interference-Causing Equipment
Regulations.
USA COMPLIANCE NOTICE: this equipment has been tested and found to comply with the limits for a Class B digital device, pursuant to Part 15
of the FCC rules. Operation is subject to the following two conditions:
(1) This device may not cause harmful interference, and
(2) This device must accept any interference received, including interference that may cause undesired operation.
These limits are designed to provide reasonable protection against harmful interference in a residential installation. This equipment generates,
uses and can radiate radio frequency energy and, if not installed and used in accordance with the instructions, may cause harmful interference to
radio communications. However, there is no guarantee that interference will not occur in a particular installation. If this equipment does cause
harmful interference to radio or television reception, which can be determined by turning the equipment on and off, the user is encouraged to try to
correct the interference by one or more of the following measures:
- Reorient or relocate the receiving antenna.
- Increase the separation between the equipment and receiver.
- Connect the equipment into an outlet on a circuit different from that to which the receiver is connected.
- Consult the dealer or an experienced radio/TV technician for help.
Co py ri gh t
© 2008 Gui lle mo t C or po rat io n S .A . All rights reserved.
This publication may not be reproduced in whole or in part, summarized, transmitted, transcribed, stored in a retrieval system, or translated into
any language or computer language, in any form or by any means, electronic, mechanical, magnetic, photocopying, recording, manual or
otherwise, without the prior written permission of Guillemot Corporation S.A.
Discla imer
Guillemot Corporation S.A. reserves the right to make changes to specifications at any time and without notice. The information provided by this
document is believed to be accurate and reliable. However, no responsibility is assumed by Guillemot Corporation S.A. either for its use or for the
infringement of patents or other rights of third parties resulting from its use. This product may exist in a light or special version for PC integration or
other purposes. Certain functions detailed in this manual may not be available in these versions. Wherever possible, a R EAD ME.T XT will be
included on the installation CD-ROM detailing the differences between the supplied product and the product described in the present
documentation.
En d-user software license Agreement
IMPORTANT: please read the Agreement carefully prior to opening and installing the Software. By opening the Software package, you agree to
be bound by the terms of this Agreement. The Software enclosed in this package is licensed, not sold, and is only available under the terms of the
present license Agreement. If you do not agree with the terms hereafter, you must promptly return the Software within 15 days, together with the
entire contents of the box, to the place of purchase.
The Guillemot Corporation S.A. Software (hereafter named the “Software”) is copyrighted by Guillemot Corporation S.A. All rights are reserved.
The term “Software” refers to all documentation and related material, including drivers, executable programs, libraries and data files. The
purchaser is granted a license to use the Software only. The licensee also agrees to be bound by the terms and conditions of the present
Agreement concerning copyright and all other proprietary rights for any third party Software, documentation and related material included in the
Software package.
Guillemot Corporation S.A. reserves the right to terminate this license in the event of failure to comply with any of the terms o r
conditions laid out in the pre sent Agree ment. On termina tion, all copies of the Software shall immediately b e returned to Guillemot
Co rp ora ti on S. A.; t he pu rc has er r ema in ing l iab le f or an y and a ll re sul ti ng da ma ges .
License:
1. The license is granted to the original purchaser only. Guillemot Corporation S.A. retains all title to and ownership of the Software and reserves
all rights not expressly granted. The licensee is not permitted to sub-license or lease any of the rights that are hereby granted. Transfer of the
license is permitted, provided that the transferor does not retain any part or copy of the Software and the transferee accepts to be bound by the
terms and conditions of the present Agreement.
2. The licensee may only use the Software on a single computer at any time. The machine-readable portion of the Software may be transferred to
another computer provided it is previously erased from the first machine and there is no possibility that the Software can be used on more than
one machine at any one time.
3. The licensee acknowledges the copyright protection belonging to Guillemot Corporation S.A. The copyright notice must not be removed from
the Software, nor from any copy thereof, nor from any documentation, written or electronic, accompanying the Software.
4. The licensee is granted the right to make one back-up copy of the machine-readable portion of the Software on the condition that all copyright
and proprietary notices are also reproduced.
5. Except where the present Agreement expressly permits, the licensee is strictly prohibited from engaging in, nor may he permit third parties to
engage in, the following: providing or disclosing the Software to third parties; providing use of the Software in a network, multiple PCs, multiuser or time-sharing arrangement where the users are not individual licensees; making alterations or copies of any kind of the Software; making
any attempt to disassemble, de-compile or reverse engineer the Software in any way or form, or engaging in any activity aimed at obtaining
underlying information not visible to the user during normal use of the Software; making copies or translations of the User Manual.
User Manual – 29/30
Page 30

ENV IRO NMEN TAL PRO TECT ION REC OMM ENDA TION
At the end of its working life, this product should not be disposed of with standard household waste,
but rather dropped off at a collection point for the disposal of Waste Electrical and Electronic
Equipment (WEEE) for recycling.
This is confirmed by the symbol found on the product, user manual or packaging.
Depending on their characteristics, the materials may be recycled. Through recycling and other
forms of processing Waste Electrical and Electronic Equipment, you can make a significant
contribution towards helping to protect the environment.
Please contact your local authorities for information on the collection point nearest you.
30/30 – User Manual
 Loading...