

Page 1

E8.'+
IHK!L
Owner’s Manual &
Safety Instructions
!M<
!"#$%&''($)*+,$%*-.'/
01234356$ 78$ 9/':'-($ ;'/<8=;$ <->=/?@$ A;'/$ ,=;($ /'*.$ *-.$
=-.'/;(*-.$BC-'/D;$E*-=*+F$$%1GH$7I4%$E13A1J.
When unpacking, make sure that the product is intact and undamaged.
If any parts are missing or broken, please call 1-888-866-5797
as soon as possible. Reference 56602.
Page 2

IMPORTANT SAFETY INFORMATION
General Power Tool Safety Warnings
2'*.$*++$;*V'(?$C*/-<-W;@$<-;(/=O(<8-;@$<++=;(/*(<8-;$
$
*-.$;9'O<V<O*(<8-;$9/8:<.'.$C<(&$(&<;$98C'/$(88+F$
Failure to follow all instructions listed below may
result in electric shock, fire and/or serious injury.
%*:'$*++$C*/-<-W;$*-.$<-;(/=O(<8-;$
V8/$V=(=/'$/'V'/'-O'F
The term “power tool” in the warnings refers
to your mains-operated (corded) power tool or
battery-operated (cordless) power tool.
Work Area Safety
1. X''9$C8/Y$*/'*$O+'*-$*-.$C'++$+<(F$
Cluttered or dark areas invite accidents.
2. Z8$-8($89'/*('$98C'/$(88+;$<-$'[9+8;<:'$
*(,8;9&'/';@$;=O&$*;$<-$(&'$9/';'-O'$8V$
V+*,,*\+'$+<P=<.;@$W*;';$8/$.=;(F$Power tools
create sparks which may ignite the dust or fumes.
3. X''9$O&<+./'-$*-.$\?;(*-.'/;$*C*?$
C&<+'$89'/*(<-W$*$98C'/$(88+F$Distractions
can cause you to lose control.
Electrical Safety
1. )8C'/$(88+$9+=W;$,=;($,*(O&$(&'$8=(+'(F$
3':'/$,8.<V?$(&'$9+=W$<-$*-?$C*?F$Z8$-8($=;'$
*-?$*.*9('/$9+=W;$C<(&$'*/(&'.$]W/8=-.'.^$
98C'/$(88+;F$Unmodified plugs and matching
outlets will reduce risk of electric shock.
2. 1:8<.$\8.?$O8-(*O($C<(&$'*/(&'.$8/$W/8=-.'.$
;=/V*O';@$;=O&$*;$9<9';@$/*.<*(8/;@$/*-W';$
*-.$/'V/<W'/*(8/;F$There is an increased risk of
electric shock if your body is earthed or grounded.
3. Z8$-8($'[98;'$98C'/$(88+;$(8$/*<-$8/$C'($
O8-.<(<8-;F$Water entering a power tool
will increase the risk of electric shock.
4. Z8$-8($*\=;'$(&'$O8/.F$3':'/$=;'$(&'$O8/.$
V8/$O*//?<-W@$9=++<-W$8/$=-9+=WW<-W$(&'$98C'/$
(88+F$X''9$O8/.$*C*?$V/8,$&'*(@$8<+@$;&*/9$
'.W';$8/$,8:<-W$9*/(;F$Damaged or entangled
cords increase the risk of electric shock.
5. 0&'-$89'/*(<-W$*$98C'/$(88+$8=(.88/;@$
=;'$*-$'[('-;<8-$O8/.$;=<(*\+'$V8/$8=(.88/$
=;'F$Use of a cord suitable for outdoor
use reduces the risk of electric shock.
6. 4V$89'/*(<-W$*$98C'/$(88+$<-$*$.*,9$+8O*(<8-$
<;$=-*:8<.*\+'@$=;'$*$W/8=-.$V*=+($O</O=<($
<-('//=9('/$]5N_4^$9/8('O('.$;=99+?F$Use of
a GFCI reduces the risk of electric shock.
Personal Safety
1. %(*?$*+'/(@$C*(O&$C&*($?8=$*/'$.8<-W$*-.$=;'$
O8,,8-$;'-;'$C&'-$89'/*(<-W$*$98C'/$(88+F$Z8$
-8($=;'$*$98C'/$(88+$C&<+'$?8=$*/'$(</'.$8/$=-.'/$
(&'$<-V+='-O'$8V$./=W;@$*+O8&8+$8/$,'.<O*(<8-F$$
A moment of inattention while operating power
tools may result in serious personal injury.
2. A;'$9'/;8-*+$9/8('O(<:'$'P=<9,'-(F$1+C*?;$
C'*/$'?'$9/8('O(<8-F$$Protective equipment
such as dust mask, non-skid safety shoes, hard
hat, or hearing protection used for appropriate
conditions will reduce personal injuries.
3. )/':'-($=-<-('-(<8-*+$;(*/(<-WF$H-;=/'$(&'$
;C<(O&$<;$<-$(&'$8VVQ98;<(<8-$\'V8/'$O8--'O(<-W$
(8$98C'/$;8=/O'$*-."8/$\*(('/?$9*OY@$9<OY<-W$
=9$8/$O*//?<-W$(&'$(88+F$Carrying power tools
with your finger on the switch or energizing power
tools that have the switch on invites accidents.
4. 2',8:'$*-?$*.>=;(<-W$Y'?$8/$C/'-O&$
\'V8/'$(=/-<-W$(&'$98C'/$(88+$8-F$$A wrench
or a key left attached to a rotating part of the
power tool may result in personal injury.
5. Z8$-8($8:'//'*O&F$X''9$9/89'/$V88(<-W$*-.$
\*+*-O'$*($*++$(<,';F This enables better control
of the power tool in unexpected situations.
6. Z/';;$9/89'/+?F$Z8$-8($C'*/$+88;'$O+8(&<-W$8/$
>'C'+/?F$X''9$?8=/$&*</@$O+8(&<-W$*-.$W+8:';$
*C*?$V/8,$,8:<-W$9*/(;F$$Loose clothes, jewelry
or long hair can be caught in moving parts.
7. 4V$.':<O';$*/'$9/8:<.'.$V8/$(&'$O8--'O(<8-$8V$
.=;($'[(/*O(<8-$*-.$O8++'O(<8-$V*O<+<(<';@$'-;=/'$
(&';'$*/'$O8--'O('.$*-.$9/89'/+?$=;'.F$$Use of
dust collection can reduce dust-related hazards.
8. Z8$-8($+'($V*,<+<*/<(?$W*<-'.$V/8,$V/'P='-($=;'$
8V$(88+;$*++8C$?8=$(8$\'O8,'$O8,9+*O'-($*-.$
<W-8/'$(88+$;*V'(?$9/<-O<9+';F$$A careless action
can cause severe injury within a fraction of a second.
9. B-+?$=;'$;*V'(?$'P=<9,'-($(&*($&*;$\''-$
*99/8:'.$\?$*-$*99/89/<*('$;(*-.*/.;$*W'-O?F$$
Unapproved safety equipment may not provide
adequate protection. Eye protection must be
ANSI-approved and breathing protection
must be NIOSH-approved for the
specific hazards in the work area.
10. 1:8<.$=-<-('-(<8-*+$;(*/(<-WF$$$
Prepare to begin work before turning on the tool.
11. Z8$-8($+*?$(&'$(88+$.8C-$=-(<+$<($&*;$O8,'$(8$
*$O8,9+'('$;(89F$$Moving parts can grab the
surface and pull the tool out of your control.
Page 2 N8/$('O&-<O*+$P=';(<8-;@$9+'*;'$O*++$!QRRRQRSSQTUMUF Item 56602
Page 3

12. 0&'-$=;<-W$*$&*-.&'+.$98C'/$(88+@$
,*<-(*<-$*$V</,$W/<9$8-$(&'$(88+$C<(&$
\8(&$&*-.;$(8$/';<;($;(*/(<-W$(8/P='F
13. Z8$-8($+'*:'$(&'$(88+$=-*(('-.'.$C&'-$<($<;$
9+=WW'.$<-(8$*-$'+'O(/<O*+$8=(+'(F$$Turn off the tool,
and unplug it from its electrical outlet before leaving.
14. 7&<;$9/8.=O($<;$-8($*$(8?F$$
Keep it out of reach of children.
15. )'89+'$C<(&$9*O',*Y'/;$;&8=+.$O8-;=+($(&'</$
9&?;<O<*-];^$\'V8/'$=;'F$$Electromagnetic fields
in close proximity to heart pacemaker could cause
pacemaker interference or pacemaker failure.
In addition, people with pacemakers should:
• Avoid operating alone.
• Do not use with Switch locked on.
• Properly maintain and inspect to avoid
electrical shock.
• Properly ground power cord.
Ground Fault Circuit Interrupter (GFCI)
should also be implemented – it prevents
sustained electrical shock.
16. 7&'$C*/-<-W;@$9/'O*=(<8-;@$*-.$<-;(/=O(<8-;$
.<;O=;;'.$<-$(&<;$<-;(/=O(<8-$,*-=*+$O*--8($
O8:'/$*++$98;;<\+'$O8-.<(<8-;$*-.$;<(=*(<8-;$
(&*($,*?$8OO=/F$$It must be understood by the
operator that common sense and caution are
factors which cannot be built into this product,
but must be supplied by the operator.
Power Tool Use and Care
1. Z8$-8($V8/O'$(&'$98C'/$(88+F$A;'$(&'$O8//'O($
98C'/$(88+$V8/$?8=/$*99+<O*(<8-F$$The correct
power tool will do the job better and safer
at the rate for which it was designed.
2. Z8$-8($=;'$(&'$98C'/$(88+$<V$(&'$;C<(O&$
.8';$-8($(=/-$<($8-$*-.$8VVF$$Any power
tool that cannot be controlled with the switch
is dangerous and must be repaired.
3. Z<;O8--'O($(&'$9+=W$V/8,$(&'$98C'/$;8=/O'$*-."
8/$/',8:'$(&'$\*(('/?$9*OY@$<V$.'(*O&*\+'@$V/8,$
(&'$98C'/$(88+$\'V8/'$,*Y<-W$*-?$*.>=;(,'-(;@$
O&*-W<-W$*OO';;8/<';@$8/$;(8/<-W$98C'/$
(88+;F$$Such preventive safety measures reduce
the risk of starting the power tool accidentally.
4. %(8/'$<.+'$98C'/$(88+;$8=($8V$(&'$/'*O&$8V$
O&<+./'-$*-.$.8$-8($*++8C$9'/;8-;$=-V*,<+<*/$
C<(&$(&'$98C'/$(88+$8/$(&';'$<-;(/=O(<8-;$
(8$89'/*('$(&'$98C'/$(88+F$$Power tools are
dangerous in the hands of untrained users.
5. E*<-(*<-$98C'/$(88+;$*-.$*OO';;8/<';F$
_&'OY$V8/$,<;*+<W-,'-($8/$\<-.<-W$8V$,8:<-W$
9*/(;@$\/'*Y*W'$8V$9*/(;$*-.$*-?$8(&'/$
O8-.<(<8-$(&*($,*?$*VV'O($(&'$98C'/$(88+D;$
89'/*(<8-F$$4V$.*,*W'.@$&*:'$(&'$98C'/$(88+$
/'9*</'.$\'V8/'$=;'F Many accidents are
caused by poorly maintained power tools.
6. X''9$O=((<-W$(88+;$;&*/9$*-.$O+'*-F$$Properly
maintained cutting tools with sharp cutting edges
are less likely to bind and are easier to control.
7. A;'$(&'$98C'/$(88+@$*OO';;8/<';$*-.$(88+$\<(;$
'(OF$<-$*OO8/.*-O'$C<(&$(&';'$<-;(/=O(<8-;@$
(*Y<-W$<-(8$*OO8=-($(&'$C8/Y<-W$O8-.<(<8-;$
*-.$(&'$C8/Y$(8$\'$9'/V8/,'.F$$Use of the
power tool for operations different from those
intended could result in a hazardous situation.
8. X''9$&*-.+';$*-.$W/*;9<-W$;=/V*O';$./?@$O+'*-$
*-.$V/''$V/8,$8<+$*-.$W/'*;'F$$Slippery handles
and grasping surfaces do not allow for safe handling
and control of the tool in unexpected situations.
Service
1. I*:'$?8=/$98C'/$(88+$;'/:<O'.$\?$*$
P=*+<V<'.$/'9*</$9'/;8-$=;<-W$8-+?$<.'-(<O*+$
/'9+*O','-($9*/(;F$$This will ensure that the
safety of the power tool is maintained.
2. E*<-(*<-$+*\'+;$*-.$-*,'9+*(';$8-$(&'$(88+F$$$
These carry important safety information.
If unreadable or missing, contact
Harbor Freight Tools for a replacement.
Vibration Safety
This tool vibrates during use.
Repeated or long-term exposure to vibration may
cause temporary or permanent physical injury,
particularly to the hands, arms and shoulders.
To reduce the risk of vibration-related injury:
1. 1-?8-'$=;<-W$:<\/*(<-W$(88+;$/'W=+*/+?$8/$V8/$*-$
'[('-.'.$9'/<8.$;&8=+.$V</;($\'$'[*,<-'.$\?$*$
.8O(8/$*-.$(&'-$&*:'$/'W=+*/$,'.<O*+$O&'OYQ=9;$
(8$'-;=/'$,'.<O*+$9/8\+',;$*/'$-8($\'<-W$O*=;'.$
8/$C8/;'-'.$V/8,$=;'F$$Pregnant women or people
who have impaired blood circulation to the hand, past
hand injuries, nervous system disorders, diabetes,
or Raynaud’s Disease should not use this tool.
If you feel any symptoms related to vibration (such
as tingling, numbness, and white or blue fingers),
seek medical advice as soon as possible.
2. Z8$-8($;,8Y'$.=/<-W$=;'F$$Nicotine reduces
the blood supply to the hands and fingers,
increasing the risk of vibration-related injury.
3. 0'*/$;=<(*\+'$W+8:';$(8$/'.=O'$(&'$
:<\/*(<8-$'VV'O(;$8-$(&'$=;'/F
4. A;'$(88+;$C<(&$(&'$+8C';($:<\/*(<8-$
C&'-$(&'/'$<;$*$O&8<O'F
5. 4-O+=.'$:<\/*(<8-QV/''$9'/<8.;$'*O&$.*?$8V$C8/YF
6. 5/<9$(88+$*;$+<W&(+?$*;$98;;<\+'$]C&<+'$;(<++$Y''9<-W$
;*V'$O8-(/8+$8V$<(^F$$Let the tool do the work.
7. 78$/'.=O'$:<\/*(<8-@$,*<-(*<-$(&'$(88+$*;$
'[9+*<-'.$<-$(&<;$,*-=*+F$$If any abnormal
vibration occurs, stop use immediately.
Page 3N8/$('O&-<O*+$P=';(<8-;@$9+'*;'$O*++$!QRRRQRSSQTUMUFItem 56602
Page 4

GROUNDING
7B$)2HGH37$HJH_724_$%IB_X$13Z$
ZH17I$N2BE$43_B22H_7$52BA3Z$
042H$_B33H_74B36$
_&'OY$C<(&$*$P=*+<V<'.$'+'O(/<O<*-$<V$?8=$
*/'$<-$.8=\($*;$(8$C&'(&'/$(&'$8=(+'($<;$9/89'/+?$
W/8=-.'.F$$Z8$-8($,8.<V?$(&'$98C'/$O8/.$9+=W$
9/8:<.'.$C<(&$(&'$(88+F$$3':'/$/',8:'$(&'$W/8=-.<-W$
9/8-W$V/8,$(&'$9+=WF$$Z8$-8($=;'$(&'$(88+$<V$(&'$
98C'/$O8/.$8/$9+=W$<;$.*,*W'.F$$4V$.*,*W'.@$&*:'$
<($/'9*</'.$\?$*$;'/:<O'$V*O<+<(?$\'V8/'$=;'F$$4V$(&'$
9+=W$C<++$-8($V<($(&'$8=(+'(@$&*:'$*$9/89'/$8=(+'($
<-;(*++'.$\?$*$P=*+<V<'.$'+'O(/<O<*-
Grounded Tools: Tools with
Three Prong Plugs
`Q)/8-W$)+=W$*-.$B=(+'(
1. Tools marked with “Grounding Required” have
a three wire cord and three prong grounding
plug. The plug must be connected to a properly
grounded outlet. If the tool should electrically
malfunction or break down, grounding provides
a low resistance path to carry electricity away
from the user, reducing the risk of electric shock.
]%''$`Q)/8-W$)+=W$*-.$B=(+'(F^
2. The grounding prong in the plug is connected
through the green wire inside the cord to the
grounding system in the tool. The green wire
in the cord must be the only wire connected to
the tool’s grounding system and must never
be attached to an electrically “live” terminal.
]%''$`Q)/8-W$)+=W$*-.$B=(+'(F^
3. The tool must be plugged into an appropriate outlet,
properly installed and grounded in accordance
with all codes and ordinances. The plug and outlet
should look like those in the preceding illustration.
]%''$`Q)/8-W$)+=W$*-.$B=(+'(F^
Double Insulated Tools: Tools
with Two Prong Plugs
B=(+'(;$V8/$LQ)/8-W$)+=W
1. Tools marked “Double Insulated” do not
require grounding. They have a special
double insulation system which satisfies
OSHA requirements and complies with
the applicable standards of Underwriters
Laboratories, Inc., the Canadian Standard
Association, and the National Electrical Code.
2. Double insulated tools may be used in either of the
120 volt outlets shown in the preceding illustration.$$$
]%''$B=(+'(;$V8/$LQ)/8-W$)+=WF^
Extension Cords
1. Grounded tools require a three wire extension cord.
Double Insulated tools can use either
a two or three wire extension cord.
2. As the distance from the supply outlet increases,
you must use a heavier gauge extension cord.
Using extension cords with inadequately sized wire
causes a serious drop in voltage, resulting in loss of
power and possible tool damage. ]%''$7*\+'$1F^
3. The smaller the gauge number of the wire, the
greater the capacity of the cord. For example,
a 14 gauge cord can carry a higher current
than a 16 gauge cord. ]%''$7*\+'$1F^
4. When using more than one extension cord to make
up the total length, make sure each cord contains at
least the minimum wire size required. ]%''$7*\+'$1F^
5. If you are using one extension cord for more
than one tool, add the nameplate$amperes
and use the sum to determine the required
minimum cord size. ]%''$7*\+'$1F^
6. If you are using an extension cord outdoors, make
sure it is marked with the suffix “W-A” (“W” in
Canada) to indicate it is acceptable for outdoor use.
7. Make sure the extension cord is properly wired
and in good electrical condition. Always replace
a damaged extension cord or have it repaired
by a qualified electrician before using it.
8. Protect the extension cords from sharp objects,
excessive heat, and damp or wet areas.
Page 4 N8/$('O&-<O*+$P=';(<8-;@$9+'*;'$O*++$!QRRRQRSSQTUMUF Item 56602
Page 5
71aJH$16$$2H_BEEH3ZHZ$E434EAE$042H$
51A5H$NB2$Hb7H3%4B3$_B2Z%c$]!LK"L#K$GBJ7^
31EH)J17H
1E)H2H%
]*($V=++$+8*.^
0 – 2.0 18 18 18 18 16
2.1 – 3.4 18 18 18 16 14
3.5 – 5.0 18 18 16 14 12
5.1 – 7.0 18 16 14 12 12
7.1 – 12.0 18 14 12 10 -
12.1 – 16.0 14 12 10 - -
16.1 – 20.0 12 10 - - -
c$a*;'.$8-$+<,<(<-W$(&'$+<-'$:8+(*W'$./89$(8$V<:'$:8+(;$*($
!TKe$8V$(&'$/*('.$*,9'/';F
Hb7H3%4B3$_B2Z$
JH357I
LTd TKd UTd !KKd !TKd
Symbology
Warning Symbols and Definitions
$7&<;$<;$(&'$;*V'(?$*+'/($;?,\8+F$$4($<;$=;'.$(8$
*+'/($?8=$(8$98('-(<*+$9'/;8-*+$<->=/?$&*g*/.;F$$
B\'?$*++$;*V'(?$,';;*W';$(&*($V8++8C$(&<;$;?,\8+$(8$
*:8<.$98;;<\+'$<->=/?$8/$.'*(&F
4-.<O*(';$*$&*g*/.8=;$
;<(=*(<8-$C&<O&@$<V$-8($
*:8<.'.@$C<++$/';=+($<-$.'*(&$8/$;'/<8=;$<->=/?F
4-.<O*(';$*$&*g*/.8=;$
;<(=*(<8-$C&<O&@$<V$-8($
*:8<.'.@$O8=+.$/';=+($<-$.'*(&$8/$;'/<8=;$<->=/?F
4-.<O*(';$*$&*g*/.8=;$
;<(=*(<8-$C&<O&@$<V$-8($
*:8<.'.@$O8=+.$/';=+($<-$,<-8/$8/$,8.'/*('$<->=/?F
1../';;';$9/*O(<O';$-8($
/'+*('.$(8$9'/;8-*+$<->=/?F
G
f
1
n0 xxxx/min.
Double Insulated
Volts
Alternating Current
Amperes
No Load Revolutions
per Minute (RPM)
WARNING marking concerning Risk
of Eye Injury. Wear ANSI-approved
safety goggles with side shields.
Read the manual before
set-up and/or use.
WARNING marking
concerning Risk of Fire.
Do not cover ventilation ducts.
Keep flammable objects away.
WARNING marking concerning
Risk of Electric Shock.
Properly connect power cord
to appropriate outlet.
SPECIFICATIONS
Electrical Rating 120VAC / 60Hz / 2.4A
No Load Speed 15,000/min
Dust Port Opening 1 1/4″
Pad Dimensions 4" x 4 3/8"
SETUP - BEFORE USE:
$ 2'*.$(&'$H3742H$4E)B27137$
%1NH7h$43NB2E174B3$;'O(<8-$*($(&'$
\'W<--<-W$8V$(&<;$,*-=*+$<-O+=.<-W$
*++$('[($=-.'/$;=\&'*.<-W;$(&'/'<-$
\'V8/'$;'($=9$8/$=;'$8V$(&<;$9/8.=O(F
Assembly
1. Slide the Z=;($a8[ onto the Dust Chute at the
back of the Sander. Push the Dust Box fully
onto the Dust Chute using firm pressure until the
Locking Tabs snap into place in the Tab Slots.
2. The Dust Box will only work if you use the included
I8+'$)=-O& to punch holes in the sandpaper and
they are aligned with the holes in the Backing Pad.
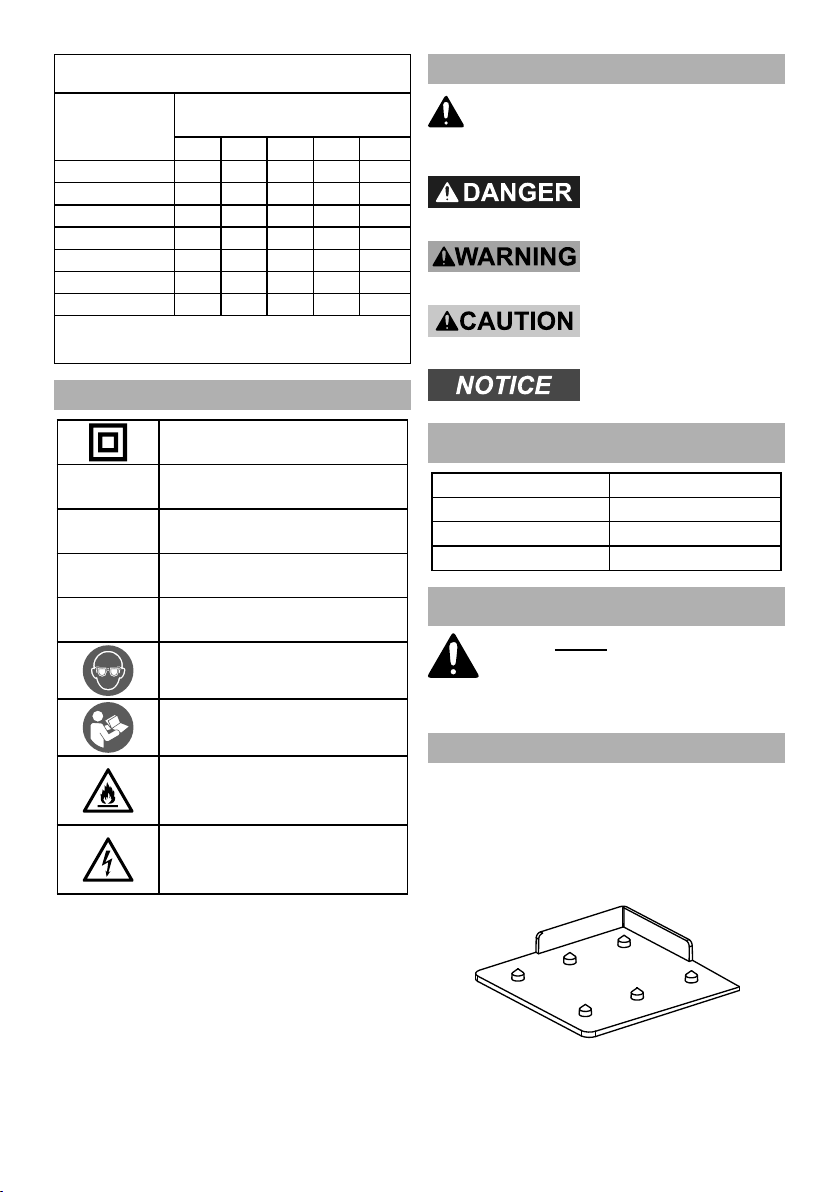
I8+'$)=-O&
Page 5N8/$('O&-<O*+$P=';(<8-;@$9+'*;'$O*++$!QRRRQRSSQTUMUFItem 56602
Page 6

Power Supply Requirements
120VAC, 60Hz
Functions
!
U
1. On/Off Switch
2. Handle
3. Dust Box
4. Lock Tab
5. Backing Pad
6. Clamp Lever
7. Clamp Wire
L
#
S
T
OPERATING INSTRUCTIONS
$ 2'*.$(&'$H3742H$4E)B27137$
%1NH7h$43NB2E174B3$;'O(<8-$*($(&'$
\'W<--<-W$8V$(&<;$,*-=*+$<-O+=.<-W$
*++$('[($=-.'/$;=\&'*.<-W;$(&'/'<-$
\'V8/'$;'($=9$8/$=;'$8V$(&<;$9/8.=O(F
Workpiece and Work Area Set Up
1. Workpiece selection:
a. Workpiece must be free of foreign objects.
b. Wear a NIOSH-approved respirator and
have appropriate ventilation whenever
sanding pressure treated lumber.
2. Designate a work area that is clean and well lit.
The work area must not allow access by children
or pets to prevent distraction and injury.
3. Route the power cord along a safe route to reach
the work area without creating a tripping hazard or
exposing the power cord to possible damage. The
power cord must reach the work area with enough
extra length to allow free movement while working.
4. Secure loose workpieces using a vise or clamps
(not included) to prevent movement while working.
5. There must not be objects, such as utility lines,
nearby that will present a hazard while working.
Tool Changing
7B$)2HGH37$%H24BA%$43iA2h$N2BE$
1__4ZH371J$B)H2174B36
E*Y'$;=/'$(&*($(&'$%C<(O&$<;$<-$(&'$8VVQ98;<(<8-$
*-.$=-9+=W$(&'$(88+$V/8,$<(;$'+'O(/<O*+$8=(+'($
\'V8/'$9'/V8/,<-W$*-?$9/8O'.=/'$<-$(&<;$;'O(<8-F
1. Press the Clamp Wire Tab inward on both
`
sides of the unit and swing the clamps
on both sides up, out, and down.
2. Cut standard size 9″ x 11″ sheets of sandpaper
into thirds lengthwise to fit the Backing Pad. There
will be a little extra to overlap and fit under the
Clamp Wire. Z8$-8($=;'$(8/-$8/$V/*?'.$;*-.9*9'/F
3. After wrapping the overlapped edges of sandpaper
under the Clamp Wire, push the Clamp Wire back
into its locked position, thus trapping the ends of
the sandpaper in front and rear of the sander. The
sandpaper should now be held securely in place.
4. Use the included Hole Punch to
punch holes in the sandpaper.
Setting and Testing
1. Ensure the sanding paper is correctly attached to the
Sander and the Hole Punch has been used to make
holes in the sanding paper. Check that the holes
align with the holes in the Backing Pad so the Dust
Box will collect debris during the sanding operation.
2. Switch the On/Off Switch to ON and run
the tool for at least 30 seconds.
3. If abnormal noise/vibration occurs or the
sandpaper slips off, have the problem
corrected before further use.
General Instructions for Use
1. Hold the Sander using the Handle.
2. Make sure that the Switch is in the
off-position, then plug in the tool.
3. Hold the Sander securely with both hands.
Turn the Sander on by pressing the Switch ON.
0123435j The tool will restart automatically if stalled.
4. Always run the Sander for a few seconds
before contacting the workpiece.
5. Contact the workpiece with minimal pressure.
If the Sander is not removing enough material,
try a grittier piece of sandpaper. If you want to
remove a lot of material fast, use a belt sander.
38('6 All sanders leave sanding marks on the
workpiece. To minimize sanding marks, always
try to sand with the grain of the wood.
6. Occasionally stop the tool and empty the
Dust Box and check the sandpaper for tears,
wear, or fraying. Replace if necessary.
7. To prevent accidents, turn off the tool and
unplug it after use. Empty Dust Box and clean
tool. Store indoors out of children’s reach.
Page 6 N8/$('O&-<O*+$P=';(<8-;@$9+'*;'$O*++$!QRRRQRSSQTUMUF Item 56602
Page 7

MAINTENANCE AND
SERVICING INSTRUCTIONS
$ )/8O'.=/';$-8($;9'O<V<O*++?$'[9+*<-'.$
<-$(&<;$,*-=*+$,=;($\'$9'/V8/,'.$
8-+?$\?$*$P=*+<V<'.$('O&-<O<*-F
7B$)2HGH37$%H24BA%$43iA2h$N2BE$
1__4ZH371J$B)H2174B36$
E*Y'$;=/'$(&*($(&'$%C<(O&$<;$<-$(&'$8VVQ98;<(<8-$
*-.$=-9+=W$(&'$(88+$V/8,$<(;$'+'O(/<O*+$8=(+'($
\'V8/'$9'/V8/,<-W$*-?$9/8O'.=/'$<-$(&<;$;'O(<8-F
7B$)2HGH37$%H24BA%$43iA2h$N2BE$7BBJ$
N14JA2H6$
Z8$-8($=;'$.*,*W'.$'P=<9,'-(F$$
4V$*\-8/,*+$-8<;'$8/$:<\/*(<8-$8OO=/;@$&*:'$
(&'$9/8\+',$O8//'O('.$\'V8/'$V=/(&'/$=;'F
1. aHNB2H$H1_I$A%H@ inspect the general
2. 1N7H2$A%H@ empty Dust Box and wipe
3. 0123435j$$4V$(&'$9+=W$8/$(&'$;=99+?$O8/.$
Cleaning, Maintenance,
and Lubrication
condition of the tool. Check for:
• loose hardware,
• misalignment or binding of moving parts,
• damaged cord/electrical wiring,
• cracked or broken parts, and
• any other condition that may
affect its safe operation.
external surfaces of the tool with clean cloth.
8V$(&<;$98C'/$(88+$<;$.*,*W'.@$<($,=;($\'$
/'9+*O'.$8-+?$\?$*$P=*+<V<'.$;'/:<O'$('O&-<O<*-F
Troubleshooting
)/8\+', )8;;<\+'$_*=;'; J<Y'+?$%8+=(<8-;
Tool will not start. 1. Cord not connected.
2. No power at outlet.
3. Tool’s thermal reset breaker
tripped (if equipped).
4. Internal damage or wear.
(Carbon brushes or
Tool operates slowly. 1. Forcing tool to work too fast.
Performance
decreases over time.
Excessive noise
or rattling.
Overheating. 1. Forcing tool to work too fast.
Switch, for example.)
2. Extension cord too long or cord
diameter too small.
Carbon brushes worn or damaged. Have qualified technician replace brushes.
Internal damage or wear. (Carbon
brushes or bearings, for example.)
2. Blocked motor housing vents.
3. Motor being strained by long or
small diameter extension cord.
1. Check that cord is plugged in.
2. Check power at outlet. If outlet is unpowered,
turn off tool and check circuit breaker.
If breaker is tripped, make sure circuit is right
capacity for tool and circuit has no other loads.
3. Turn off tool and allow to cool.
Press reset button on tool.
4. Have technician service tool.
1. Allow tool to work at its own rate.
2. Eliminate use of extension cord. If an extension
cord is needed, use one with the proper diameter
for its length and load. See Extension Cords
in Guard Plate Bolt section on page 4.
Have technician service tool.
1. Allow tool to work at its own rate.
2. Wear ANSI-approved safety goggles and
NIOSH-approved dust mask/respirator while
blowing dust out of motor using compressed air.
3. Eliminate use of extension cord. If an extension
cord is needed, use one with the proper diameter
for its length and load. See Extension Cords
in Guard Plate Bolt section on page 4.
$ N8++8C$*++$;*V'(?$9/'O*=(<8-;$C&'-':'/$.<*W-8;<-W$8/$;'/:<O<-W$(&'$(88+F$$$
Z<;O8--'O($98C'/$;=99+?$\'V8/'$;'/:<O'F
Page 7N8/$('O&-<O*+$P=';(<8-;@$9+'*;'$O*++$!QRRRQRSSQTUMUFItem 56602
Page 8

LIMITED 90 DAY WARRANTY
Harbor Freight Tools Co. makes every effort to assure that its products meet high quality and durability
standards, and warrants to the original purchaser that this product is free from defects in materials
and workmanship for the period of 90 days from the date of purchase. This warranty does not apply to
damage due directly or indirectly, to misuse, abuse, negligence or accidents, repairs or alterations outside
our facilities, criminal activity, improper installation, normal wear and tear, or to lack of maintenance.
We shall in no event be liable for death, injuries to persons or property, or for incidental, contingent,
special or consequential damages arising from the use of our product. Some states do not allow the
exclusion or limitation of incidental or consequential damages, so the above limitation of exclusion
may not apply to you. THIS WARRANTY IS EXPRESSLY IN LIEU OF ALL OTHER WARRANTIES,
EXPRESS OR IMPLIED, INCLUDING THE WARRANTIES OF MERCHANTABILITY AND FITNESS.
To take advantage of this warranty, the product or part must be returned to us with transportation charges
prepaid. Proof of purchase date and an explanation of the complaint must accompany the merchandise.
If our inspection verifies the defect, we will either repair or replace the product at our election or we may
elect to refund the purchase price if we cannot readily and quickly provide you with a replacement. We will
return repaired products at our expense, but if we determine there is no defect, or that the defect resulted
from causes not within the scope of our warranty, then you must bear the cost of returning the product.
This warranty gives you specific legal rights and you may also have other rights which vary from state to state.
2'O8/.$)/8.=O(D;$%'/<*+$3=,\'/$I'/'6$
38('6$$4V$9/8.=O($&*;$-8$;'/<*+$-=,\'/@$/'O8/.$,8-(&$*-.$?'*/$8V$9=/O&*;'$<-;('*.F
38('6 Replacement parts are not available.
LST#!$1W8=/*$28*.$$k$$_*+*\*;*;@$_1$M!`KL$$k$$!QRRRQRSSQTUMU
 Loading...