

Page 1
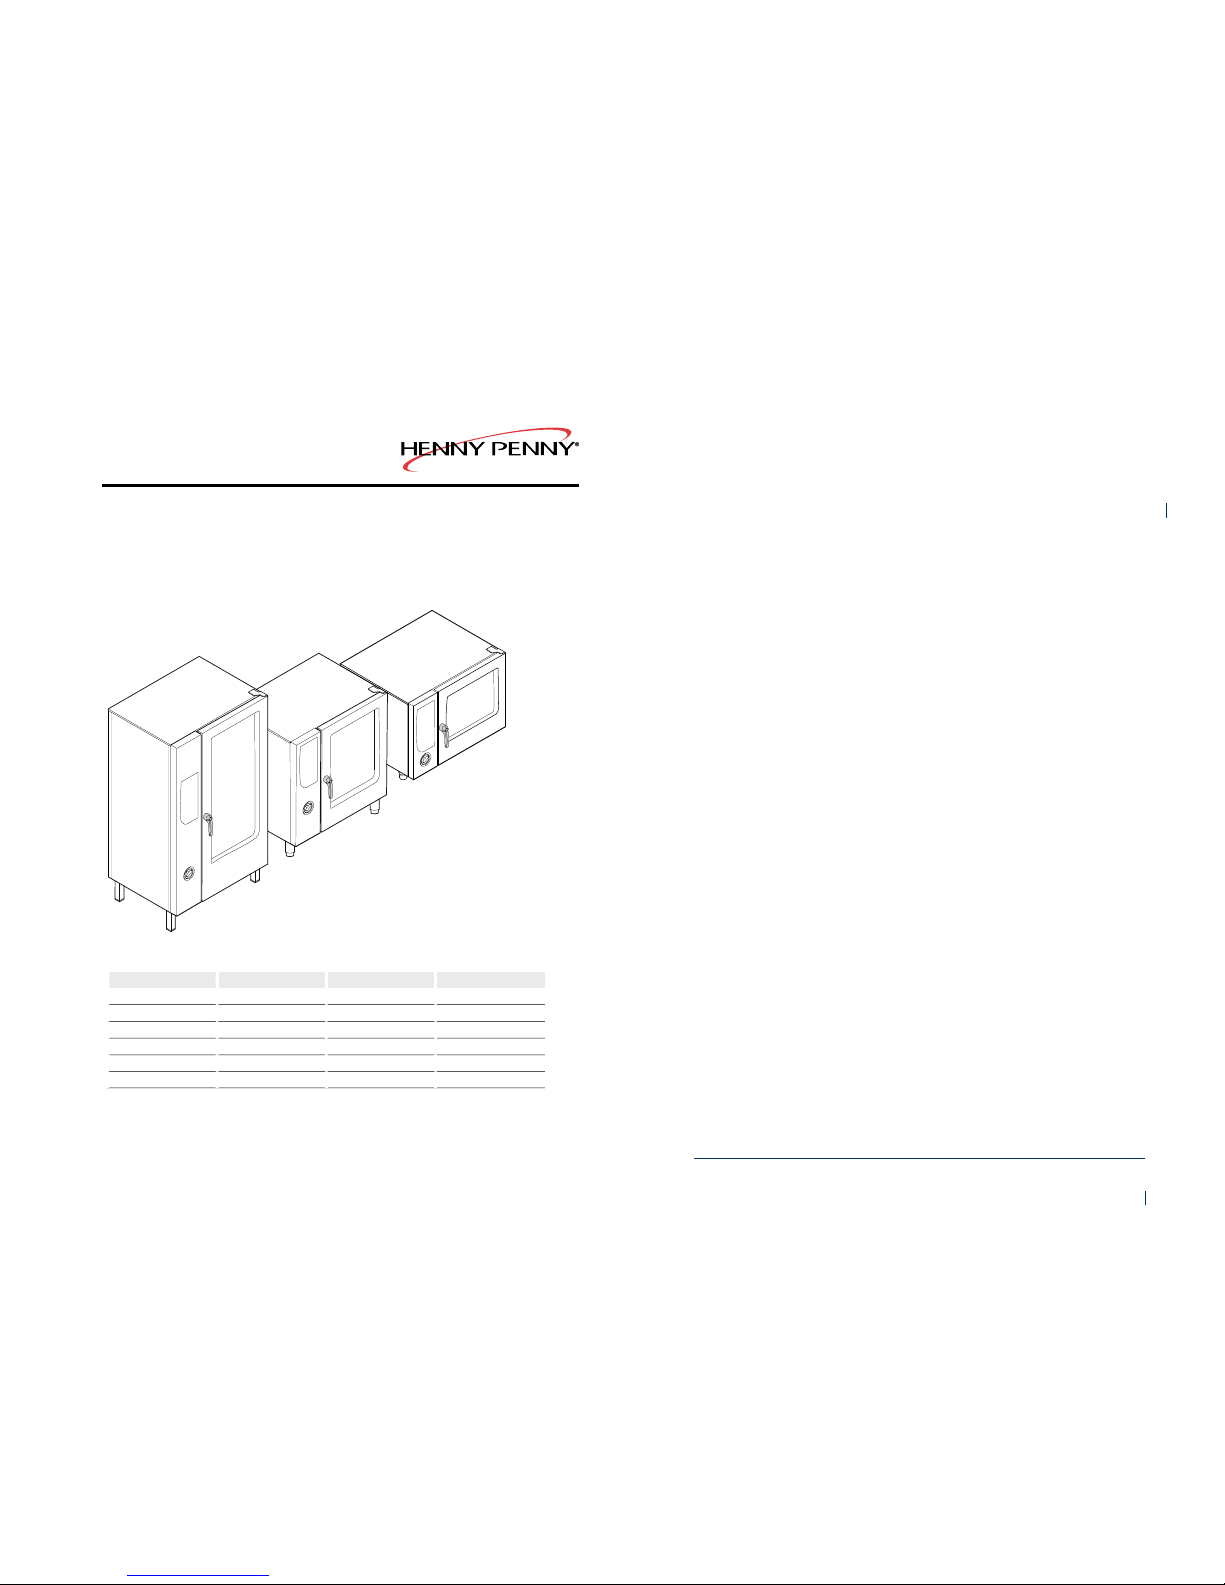
Operating manual
SmartCombi
SizeType no. (gas)Type no. (electric)Version
615GSC61XXXXESC61XXXXSmar tCombi
620GSC62XXXXESC62XXXXSmar tCombi
115GSC11XXXXESC11XXXXSmar tCombi
120GSC12XXXXESC12XXXXSmar tCombi
215GSC21XXXXESC21XXXXSmar tCombi
220GSC22XXXXESC22XXXXSmar tCombi
Open out the cover page to see the
controls.
Operating manual
*FM05-061-A* en-US
Smart Combi
™
Global Foodservice Solutions
306173----ABAE6- / 13.10.2009 / TAG-MaBr
Page 2
Controls
Smart
with
Menu
1
18
16
2
3
4
5
6
7
8
9
10
11
12
13
14
15
17
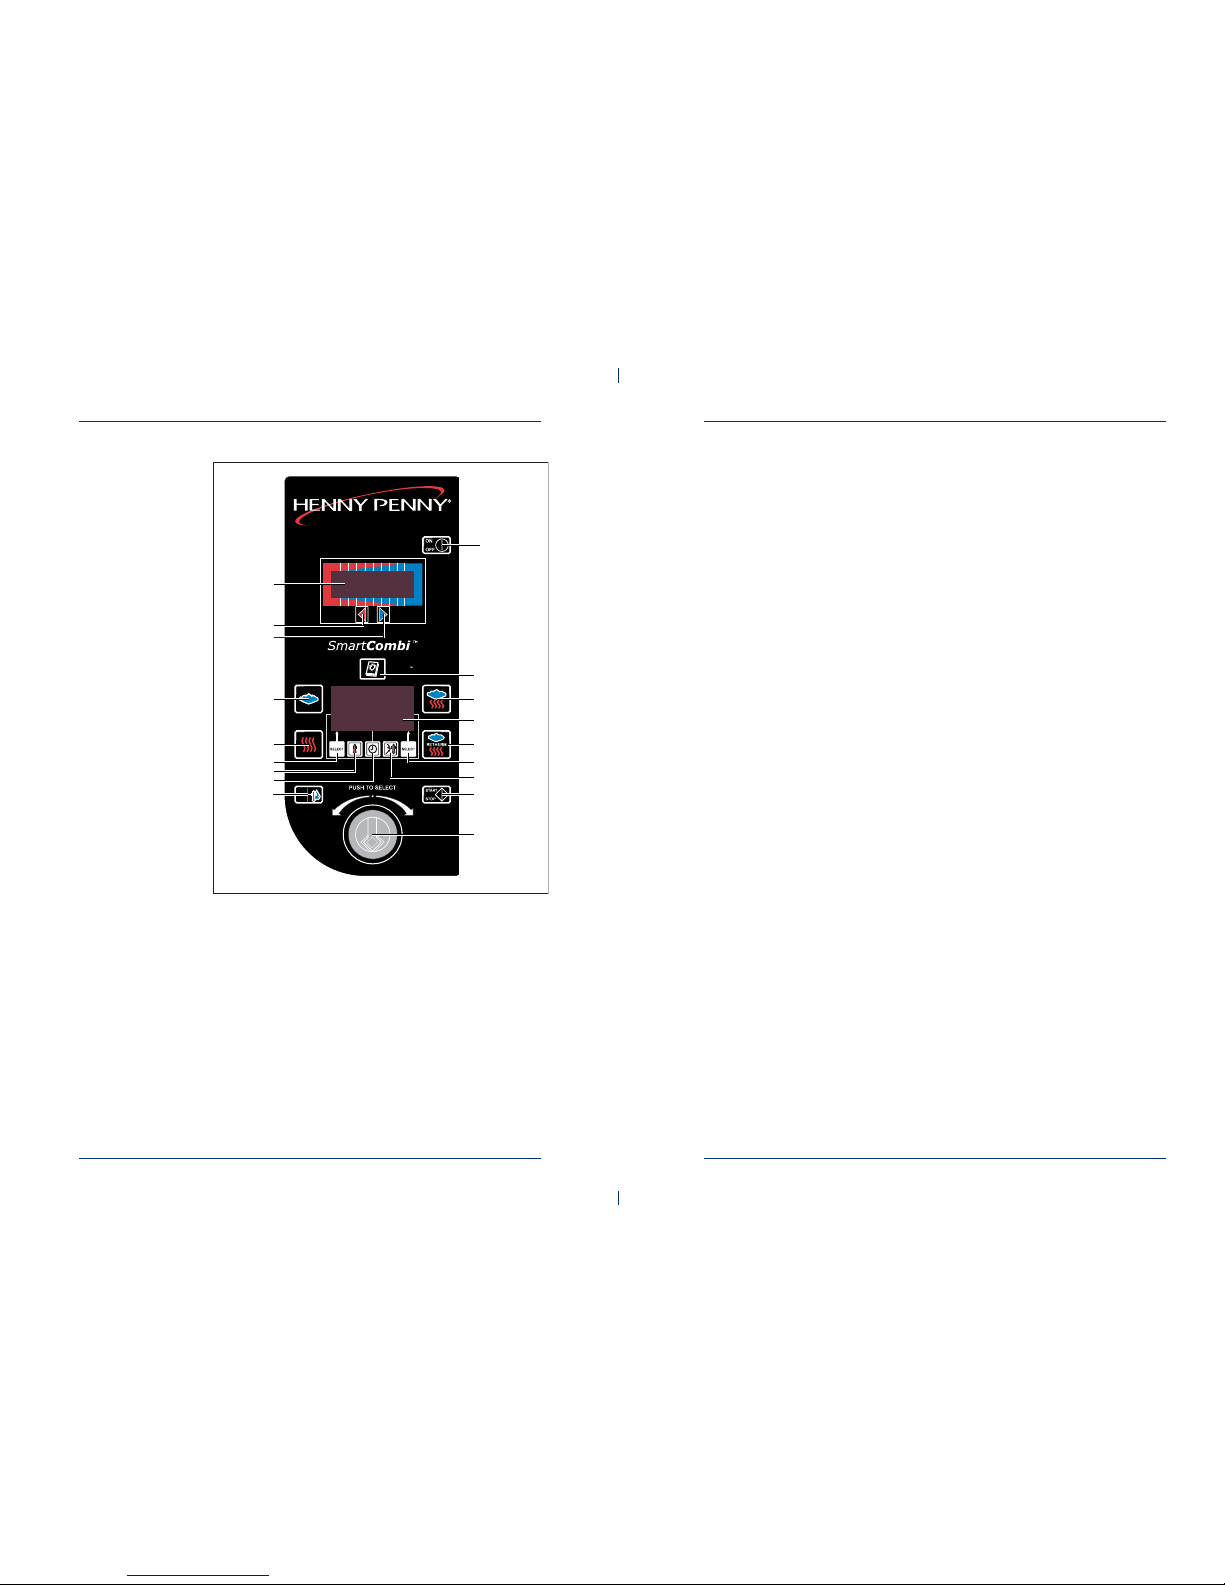
“Ready2Cook” button10“On/Off” button1
“Cooking time” button11“SmartMenu” button2
“Cooking temperature” button12“Combisteaming” cooking mode
button
3
Multi-function select button13Display4
“Convection” cooking mode button14“Perfection” cooking mode button5
“Steaming” cooking mode button15Multi-function select button6
Set button for the AtmosControl climate control system
16“Core temperature” button7
Set button for the AtmosControl climate control system
17“Start/Stop” button8
ClimaMonitor18“CombiDial”9
Operating manualOperating manual
SmartCombi
™
SmartCombi
™
Page 3

7Introduction ........................................................1
7Intended use ...................................................................1.1
7About this operating manual .........................................1.2
8Warnings .........................................................................1.3
8Warranty and liability .....................................................1.4
9Signs and symbols .........................................................1.5
10Safety information ..............................................2
14Construction and function ................................3
14Description of the unit ...................................................3.1
17Description of the controls ............................................3.2
17Operating modes ............................................................3.3
18SmartMenu (automatic cooking) ...................................3.4
18Manual cooking ..............................................................3.5
18Steaming ..................................................................................3.5.1
20Combisteaming ........................................................................3.5.2
20Convection ...............................................................................3.5.3
21Perfection (climate and regeneration) ......................................3.5.4
22Delta-T cooking ........................................................................3.5.5
24Low temperature cooking .........................................................3.5.6
26Advanced cooking functions ........................................3.6
26Programmable steaming ..........................................................3.6.1
26Manual steaming ......................................................................3.6.2
26Rest period ...............................................................................3.6.3
26Preset start time .......................................................................3.6.4
27Ready2Cook (prepare for cooking) ..........................................3.6.5
27RackControl .............................................................................3.6.6
27Reduced heat output ................................................................3.6.7
28Add functions .................................................................3.7
28SES steam exhaust system .....................................................3.7.1
28Cycle fan operation ..................................................................3.7.2
28Reduced fan speed ..................................................................3.7.3
29End of step signal ....................................................................3.7.4
29AtmosControl climate control system ..........................3.8
29Core temperature measurement ...................................3.9
29HACCP log ......................................................................3.10
31WaveClean automatic cleaning system ........................3.11
3Operating manual
Global Foodservice Solutions
Contents
SmartCombi
™
Page 4

31USB interface ....................................................................3.12
32Operation ...............................................................4
32
Opening and closing cooking chamber door (tabletop
units) ..................................................................................
4.1
32Opening the cooking chamber door ............................................4.1.1
32Closing the cooking chamber door .............................................4.1.2
33
Opening and closing cooking chamber door (floor
standing units) ..................................................................
4.2
33Opening the cooking chamber door ............................................4.2.1
33Closing the cooking chamber door .............................................4.2.2
34Filling and emptying the unit (tabletop unit) ..................4.3
34Filling and emptying the unit (with loading trolley) ......................4.3.1
35Filling and emptying the unit (without loading trolley) .................4.3.2
36Filling and emptying the unit (floor standing units) ......4.4
36Switch on/switch off unit ..................................................4.5
36Switching on ...............................................................................4.5.1
36Switching off ...............................................................................4.5.2
37Working with the CombiDial ............................................4.6
37Basic functions .................................................................4.7
37Changing the language ...............................................................4.7.1
37Call up the setup menu and change parameters ........................4.7.2
38Displaying actual temperature values .........................................4.7.3
38Set the cooking temperature .......................................................4.7.4
38Setting the cooking time .............................................................4.7.5
39AtmosControl climate control system (set chamber humidity) ....4.7.6
39Measuring the core temperature .................................................4.7.7
40Connecting the USB memory stick .............................................4.7.8
40Saving the HACCP log ................................................................4.7.9
41Saving error messages ...............................................................4.7.10
41SmartMenu (automatic cooking) .....................................4.8
41Selecting the cooking program ...................................................4.8.1
42Starting the cooking program ......................................................4.8.2
43Ending the cooking program .......................................................4.8.3
43Display last program ...................................................................4.8.4
43Changing the cooking program during operation ........................4.8.5
44Save changed program ...............................................................4.8.6
44Create your own cooking programs ............................................4.8.7
45Entering a cooking program (example) .......................................4.8.8
45Copying a cooking program ........................................................4.8.9
Global Foodservice Solutions
Operating manual4
SmartCombi
™
Contents
Page 5

46Locking and releasing the SmartMenu program memory ........4.8.10
47Saving SmartMenu cooking programs .....................................4.8.11
47Loading SmartMenu cooking programs ...................................4.8.12
48Manual cooking ..............................................................4.9
48Starting the steaming process .................................................4.9.1
48Start Combisteaming ...............................................................4.9.2
49Starting the convection cooking mode .....................................4.9.3
49Starting perfection mode (climate and regeneration) ...............4.9.4
50Start Delta-T cooking ...............................................................4.9.5
50Starting low temperature cooking ............................................4.9.6
51Advanced cooking functions ........................................4.10
51Programmable steaming ..........................................................4.10.1
52Manual steaming ......................................................................4.10.2
52Setting the rest period ..............................................................4.10.3
53Setting the preset start time .....................................................4.10.4
53Starting Ready2Cook (prepare for cooking) ............................4.10.5
54Working with RackControl ........................................................4.10.6
55Reduced heat output ................................................................4.10.7
56Add functions .................................................................4.11
56Activate/deactivate add functions .............................................4.11.1
56Modify add function ..................................................................4.11.2
56Reducing the fan speed ...........................................................4.11.3
56Activating the end-of-step signal ..............................................4.11.4
57Changing standard settings ..........................................4.12
57Set service interval water volume ............................................4.12.1
58Standard settings ...........................................................4.13
62Cleaning ..............................................................5
62Automatic cleaning WaveClean .....................................5.1
62Preparing the cooking chamber ...............................................5.1.1
62Selecting the WaveClean level .................................................5.1.2
63Using the WaveClean cartridge ................................................5.1.3
64Start WaveClean ......................................................................5.1.4
64Ending WaveClean ...................................................................5.1.5
64Cancelling WaveClean .............................................................5.1.6
65WaveClean faults .....................................................................5.1.7
66System-supported manual cleaning .............................5.2
66Preparing the cooking chamber ...............................................5.2.1
66Start cleaning program .............................................................5.2.2
67Spraying cleaning solution .......................................................5.2.3
5Operating manual
Global Foodservice Solutions
Contents
SmartCombi
™
Page 6

67Let the cleaner work ...................................................................5.2.4
67Cleaning ......................................................................................5.2.5
68Rinsing out ..................................................................................5.2.6
68Cleaning the door seal ................................................................5.2.7
68Drying .........................................................................................5.2.8
69General cleaning ...............................................................5.3
69Cleaning the outside of the housing ...........................................5.3.1
69Cleaning the cooking chamber ...................................................5.3.2
69Cleaning the door seal ................................................................5.3.3
70Cleaning the cooking chamber door ...........................................5.3.4
71Cleaning the steam outlet port ....................................................5.3.5
71Descaling ....................................................................................5.3.6
72Removing the ventilation plate ........................................5.4
72Removing the ventilation plate (table top models) ......................5.4.1
72Removing the ventilation plate (floor standing units) ..................5.4.2
74Faults .....................................................................6
74Correcting faults ...............................................................6.1
74Resetting the control electronics ....................................6.2
75Cause of errors and troubleshooting ..............................6.3
77Limited Warranty ...................................................7
Global Foodservice Solutions
Operating manual6
SmartCombi
™
Contents
Page 7

1 Introduction
1.1 Intended use
Henny Penny combisteamers are solely intended to be used for
commercial purposes, especially in commercial kitchens.
The unit may only be used for cooking food and only with the correct
racks, containers, baking sheets, rack trolleys and slide-in units.
The unit may only be used with the purest quality drinking water for
producing steam; if necessary, in combination with a water preparation
system.
It is not permitted to use the unit for the following purposes, among
others:
●
As a dishwasher
●
As a storage container
●
As a smoking oven
●
Drying towels, paper or dishes
●
Heating acids, brines or other chemicals
●
Heating closed containers (e.g. tinned food)
●
Heating inflammable liquids
●
Melting fats or salts
●
Heating rooms
●
Deep frying
●
Cleaning air filters
●
Operation without slide-in rails/trolley
1.2 About this operating manual
This operating manual is part of the equipment and contains information
required by the persons operating the unit to enable them to operate
it safely, for cleaning and looking after the unit and for handling faults.
●
The employees engaged to perform any tasks with the unit must
have read the operating manual, especially the section “Safety
information”, before beginning work.
●
Keep this operating manual stored safely during the life of the unit.
●
Make sure that this operating manual is constantly available for
the staff at the place where the unit is used.
●
Supply this operating manual to any subsequent owner or user of
the unit.
●
Include any supplements received from the manufacturer.
●
Supplement the instructions, including supervisory or notification
requirements, to take account of special operational circumstances
e.g. work organisation, workflows or deployed staff.
7Operating manual
Global Foodservice Solutions
Introduction
SmartCombi
™
Page 8

Target group
●
This operating manual is intended for employees who are responsible
for operating, cleaning and looking after the unit as well as handling
faults.
●
Repairs to the unit may only be carried out by specially trained
technical staff.
●
Adults may not use the unit without supervision if
-
they are unable to do so due to their physical, sensory or mental
capabilities,
-
they do not have the knowledge and experience required to
operate the unit safely and in the manner intended.
1.3 Warnings
Warnings are indicated with a pictogram and a signal word.
The type and source of the risk as well as the consequences are described
together with instructions for avoiding the danger. The meanings of the
pictograms and signal words used are explained in section “Signs and
symbols” (see Chapter “Signs and symbols”, Page 9).
1.4 Warranty and liability
The unit may not be modified or technically changed.
All guarantees or warranties cease to exist if technical changes are made.
Furthermore, the safety of the unit is no longer guaranteed.
Claims for warranty or liability for damages to persons or property are
excluded if they arise from one or more of the following causes:
●
Improper use of the unit
●
Incorrect installation, commissioning, operation or servicing of the
unit
●
Technical changes to the unit without the binding agreement of the
manufacturer
●
Use of spare parts or accessories not approved by Henny Penny
●
Faults resulting from the failure to comply with these operating
instructions
Global Foodservice Solutions
Operating manual8
SmartCombi
™
Introduction
Page 9
1.5 Signs and symbols
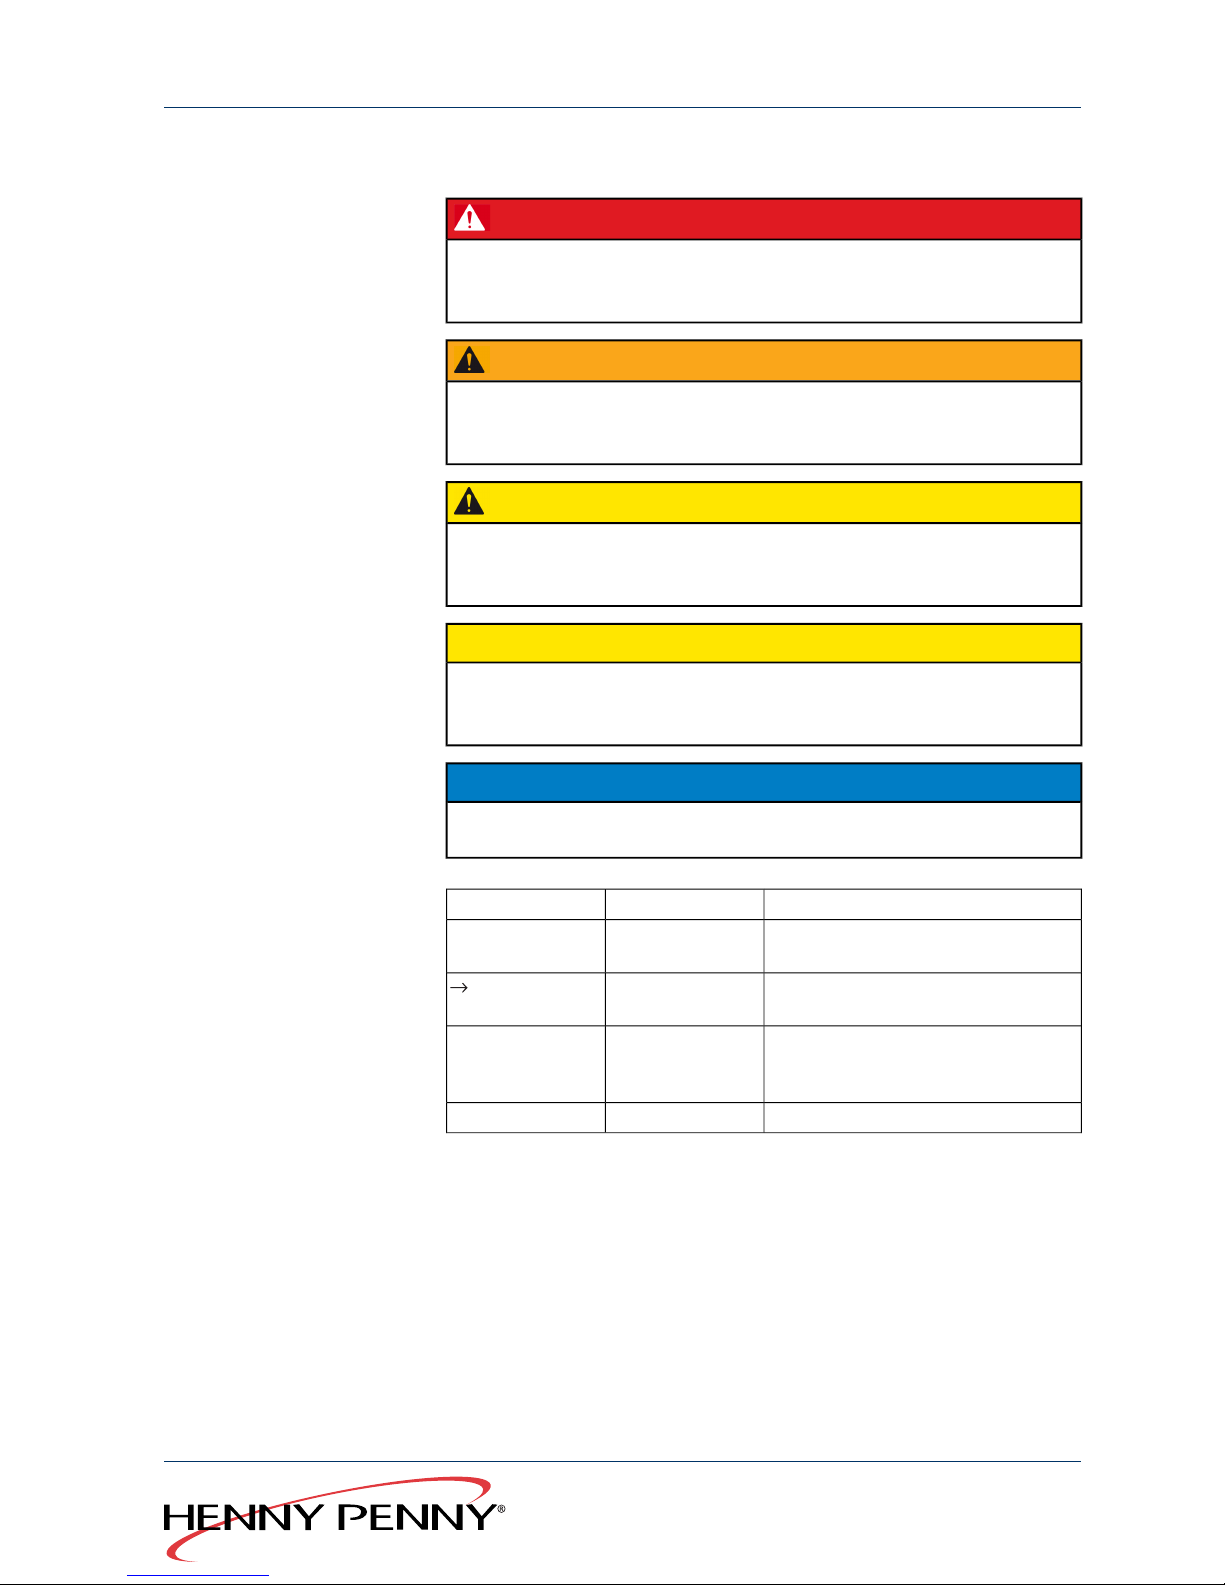
DANGER
Imminent danger
→
Non-compliance poses a threat of death or serious injury.
WARNING
Possible danger
→
Non-compliance may pose a threat of death or serious injury.
CAUTION
Dangerous situation
→
Non-compliance may result in slight injuries.
CAUTION
Dangerous situation
→
Non-compliance may result in equipment damage.
NOTICE
Provides helpful information regarding use.
ExplanationMeaningSymbol
These must be fulfilled before you can
follow the instructions.
RequirementsRequirements
An action is required here.Instruction, single
step
Instructions must be followed in the
order given.
Instruction, multiple steps
1.
2.
Emphasises the name of the controlControlOn/Off
9Operating manual
Global Foodservice Solutions
Introduction
SmartCombi
™
Page 10
2 Safety information
Henny Penny appliances comply with the relevant safety standards.
However, this does not exclude all possible dangers from arising, e.g.
due to improper use.
Therefore, when installing and operating the unit, the operating personnel
must be familiar with and observe local regulations, including BGR 111
“Working in catering kitchens”.
The following safety measures must also be observed:
WARNING
Possible danger
→
Non-compliance may pose a threat of death or serious injury.
Electricity Risk of electric shock
●
The cover of the housing may only be opened by specially trained
technical staff.
●
Repairs to the unit and to the mains power supply may only be carried
out by specially trained technical staff.
●
Disconnect the unit from the power supply before opening the cover
of the housing.
●
Do not operate the unit when the housing cover is open.
Gas Risk of explosion due to escaping gas
●
If you smell gas:
-
Shut off the gas supply.
-
Ensure the area is adequately ventilated.
-
Do not activate any switches or use any electrical devices.
-
Do not use any open flames.
-
Notify the gas supply company and/or fire department. Use a
telephone that is outside the installation site.
●
In the event of fire
-
Shut off the gas supply.
-
Put out the fire with a fire extinguisher (class F or ABC powder)
or fire blanket, never with water.
Soiled and greasy films Risk of fire due to soiled and greasy films
●
Clean the unit after each use.
●
Observe the instructions regarding cleaning.
Global Foodservice Solutions
Operating manual10
SmartCombi
™
Safety information
Page 11

Hot surfaces, steam and
liquids
Risk of burns due to hot surfaces
●
Wear insulated protective gloves during operation.
●
Always open the door of the cooking chamber wide enough and
let it lock in place.
●
Allow surfaces to cool before cleaning.
●
Do not touch the interior of the unit or the inside of the cooking
chamber door immediately after use.
Risk of burns due to hot steam
●
Only open the door of the cooking chamber slightly at first to allow
the steam to escape. Then open the door fully.
●
Do not look into the steam outlet ports.
●
Do not hold your hand over the steam outlet ports.
Risk of burns due to hot liquids
●
Keep the door of the cooking chamber closed during the cleaning
program.
●
Do not insert containers with liquids to be cooked above eye-level.
●
When transporting food items, use a heat-resistant container with
handles and sealable lid.
●
Secure loading/rack trolleys against tipping over.
Rotating fan Risk of crushing fingers
●
Do not operate the unit without the ventilation plate.
Damaged windows Risk of injury due to glass splinters
●
Do not operate the unit if the windows are damaged.
●
Do not operate the unit if the cooking chamber lighting is defective.
●
Dispose of foods spoiled by glass splinters.
Cleaning Risk of burns caused by cleaning agents
●
Wear protective gloves and glasses when using caustic cleaning
agents.
●
Observe the information provided by the manufacturer of the
cleaning agent.
●
Store WaveClean and rinsing agent cartridges out of the reach of
children.
●
Observe the instructions for the storage of WaveClean and rinsing
agent cartridges.
11Operating manual
Global Foodservice Solutions
Safety information
SmartCombi
™
Page 12

CAUTION
Dangerous situation
→
Non-compliance may result in equipment damage.
Core temperature
measurement
Do not overheat the core temperature sensor
●
Do not heat the core temperature sensor with a lighter or similar
object.
Incorrect handling Equipment damage due to incorrect handling
●
To avoid damaging the electronics, do not operate the unit if the
controls are damaged.
●
To avoid moisture penetrating the unit, do not operate if the door
seals are damaged.
Cleaning Equipment damage due to incorrect cleaning
●
Do not cool the cooking chamber abruptly after use (e.g. with a
hand-held rinsing head).
●
Do not clean the unit with a high-pressure cleaner.
●
Do not clean the surfaces with abrasive cleaners, scouring pads or
chemically aggressive cleaners.
●
Observe the reaction times for cleaning agents.
●
Clean the unit regularly.
●
Keep the cooking chamber free of scale.
●
For “WaveClean” automatic cleaning, only use the two-in-one original
cartridges.
●
Remove all GN containers and accessories from the cooking chamber
before cleaning.
Improper use Damage to equipment due to improper use
●
Do not operate the unit at continually high temperatures.
●
Do not operate the unit at temperatures below 4 °C (39.2 °F).
●
Remove the core temperature sensor before removing the food item.
●
Replace the core temperature sensor back in its holder after use.
●
Only connect USB memory sticks based on flash memory.
Do not connect USB printers, external hard disks, WLAN, UMTS or
Bluetooth adapters or any other USB devices.
●
Do not connect PCs or notebooks.
●
Do not use force to insert USB memory sticks.
●
Insert the USB memory stick before reading/writing data and only
remove it once the data has been completely transferred.
Global Foodservice Solutions
Operating manual12
SmartCombi
™
Safety information
Page 13

NOTICE
Provides helpful information regarding use.
Handling foodstuffs Provisions governing foodstuffs
●
For the function “Preset start time”, observe the provisions regarding
foodstuffs.
13Operating manual
Global Foodservice Solutions
Safety information
SmartCombi
™
Page 14
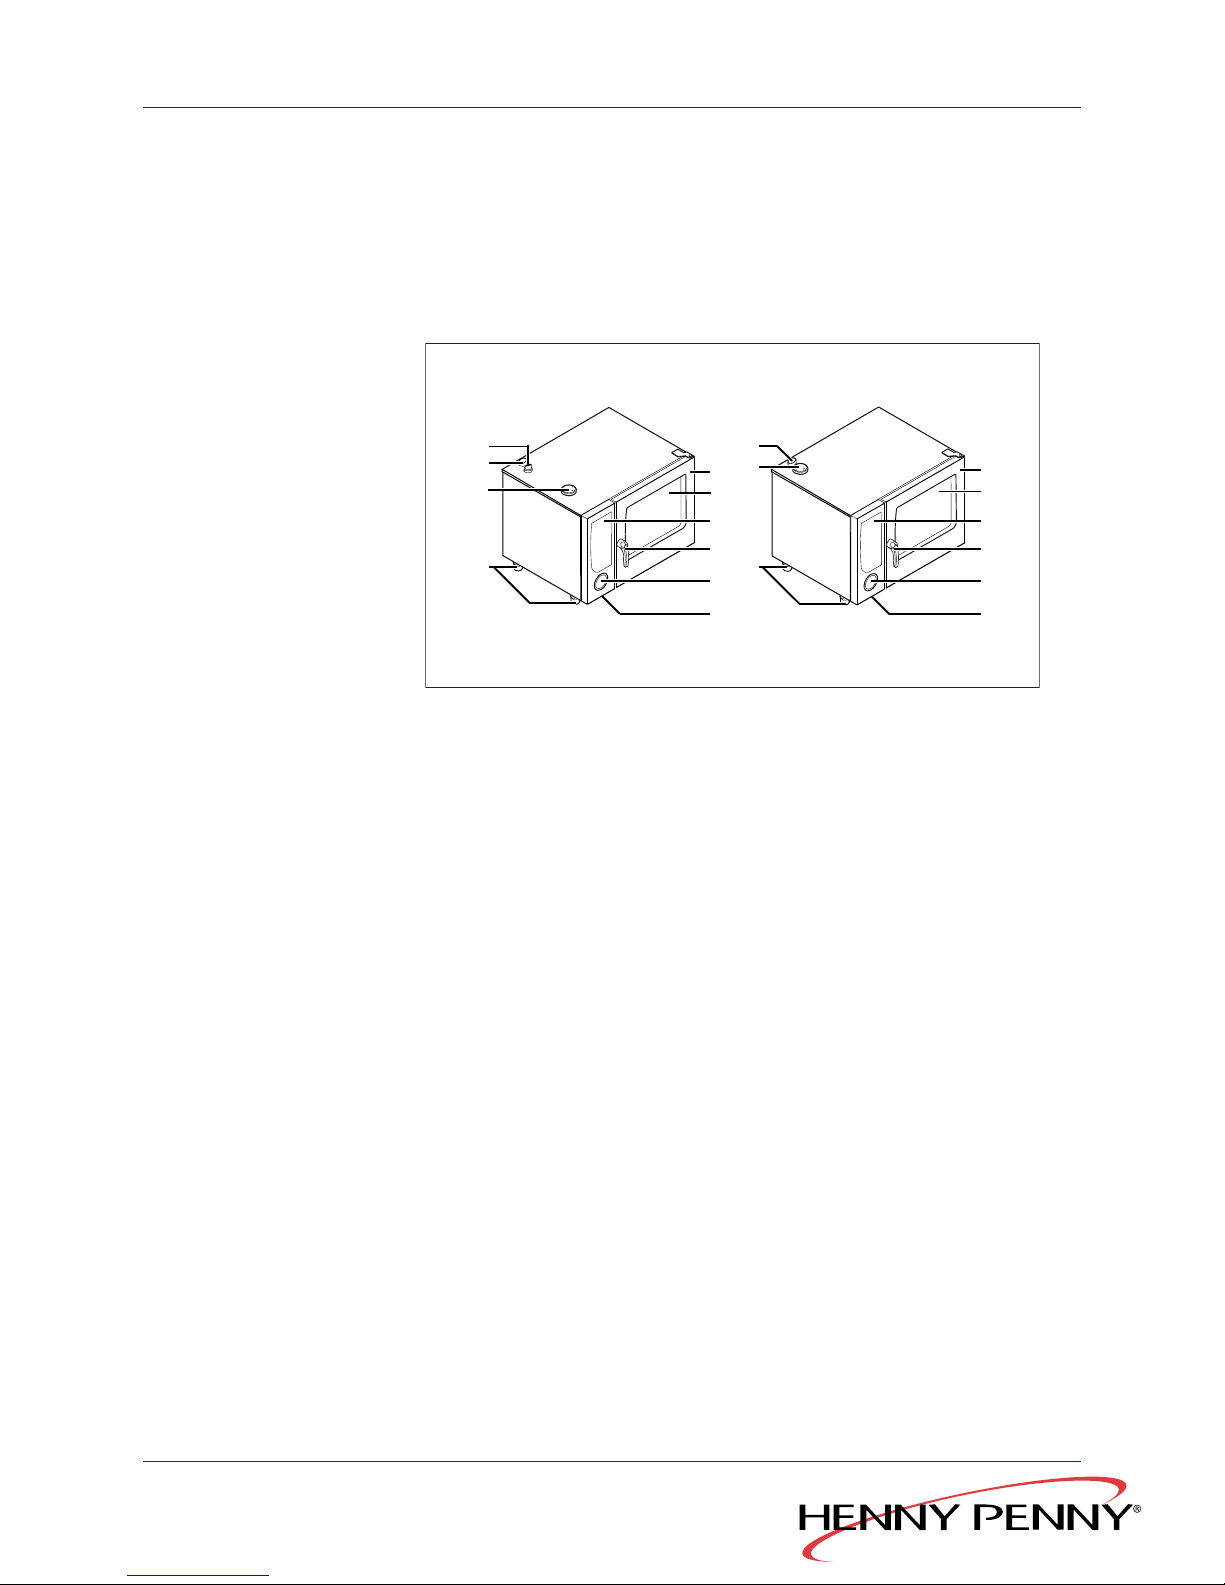
3 Construction and
function
3.1 Description of the unit
1
2
4
3
5
6
7
8
9
10
1
2
4
3
5
6
7
8
9
Figure 1: Sizes 615 and 620, left: gas, right: electric
Data interface (concealed)6Cooking chamber door1
Height-adjustable feet7Insulated window2
Air intake port for the cooking
chamber
8Controls3
Steam outlet port9Door handle4
Flue outlet10Hand-held rinsing head5
Global Foodservice Solutions
Operating manual14
SmartCombi
™
Construction and function
Page 15
1
2
4
3
5
6
7
8
1
2
4
3
5
6
7
8
9
9
10
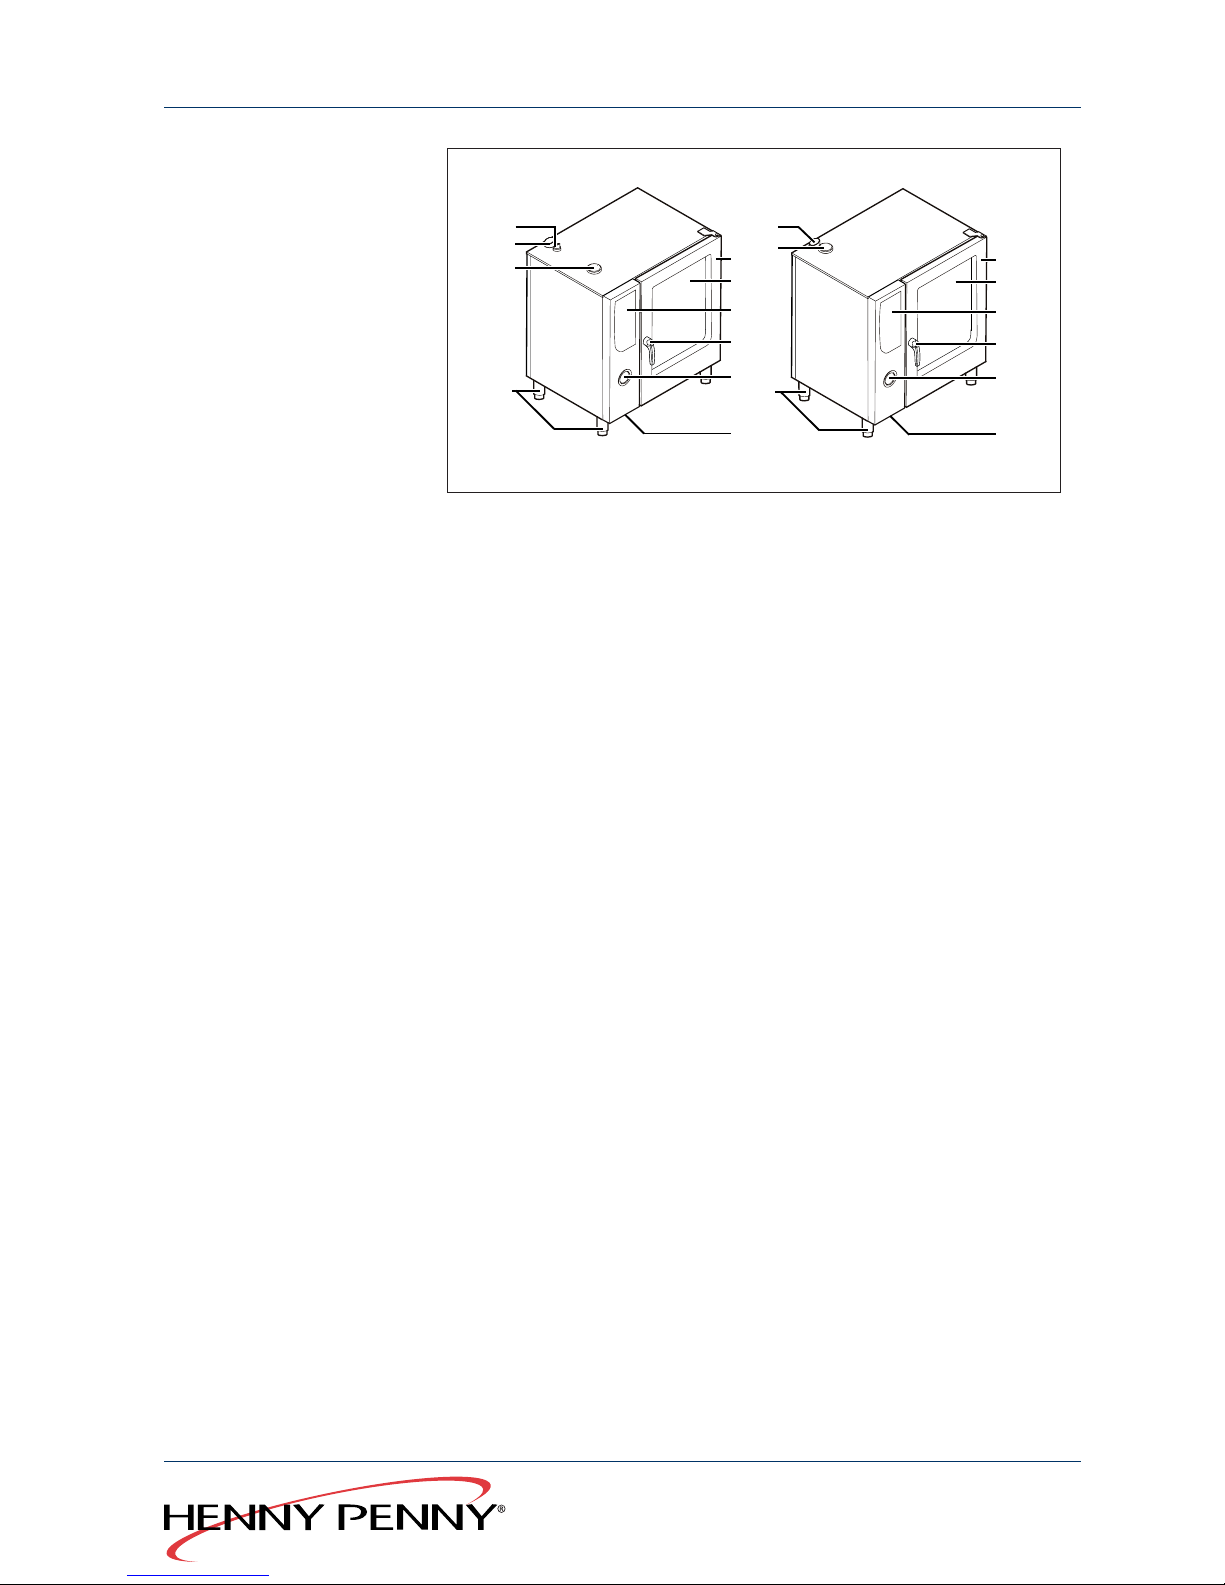
Figure 2: Sizes 115 and 120, left: gas, right: electric
Data interface (concealed)6Cooking chamber door1
Height-adjustable feet7Insulated window2
Air intake port for the cooking
chamber
8Controls3
Steam outlet port9Door handle4
Flue outlet10Hand-held rinsing head5
15Operating manual
Global Foodservice Solutions
Construction and function
SmartCombi
™
Page 16
1
2
4
3
5
6
7
8
9
11
10
12
1
2
4
3
5
6
7
8
10
9
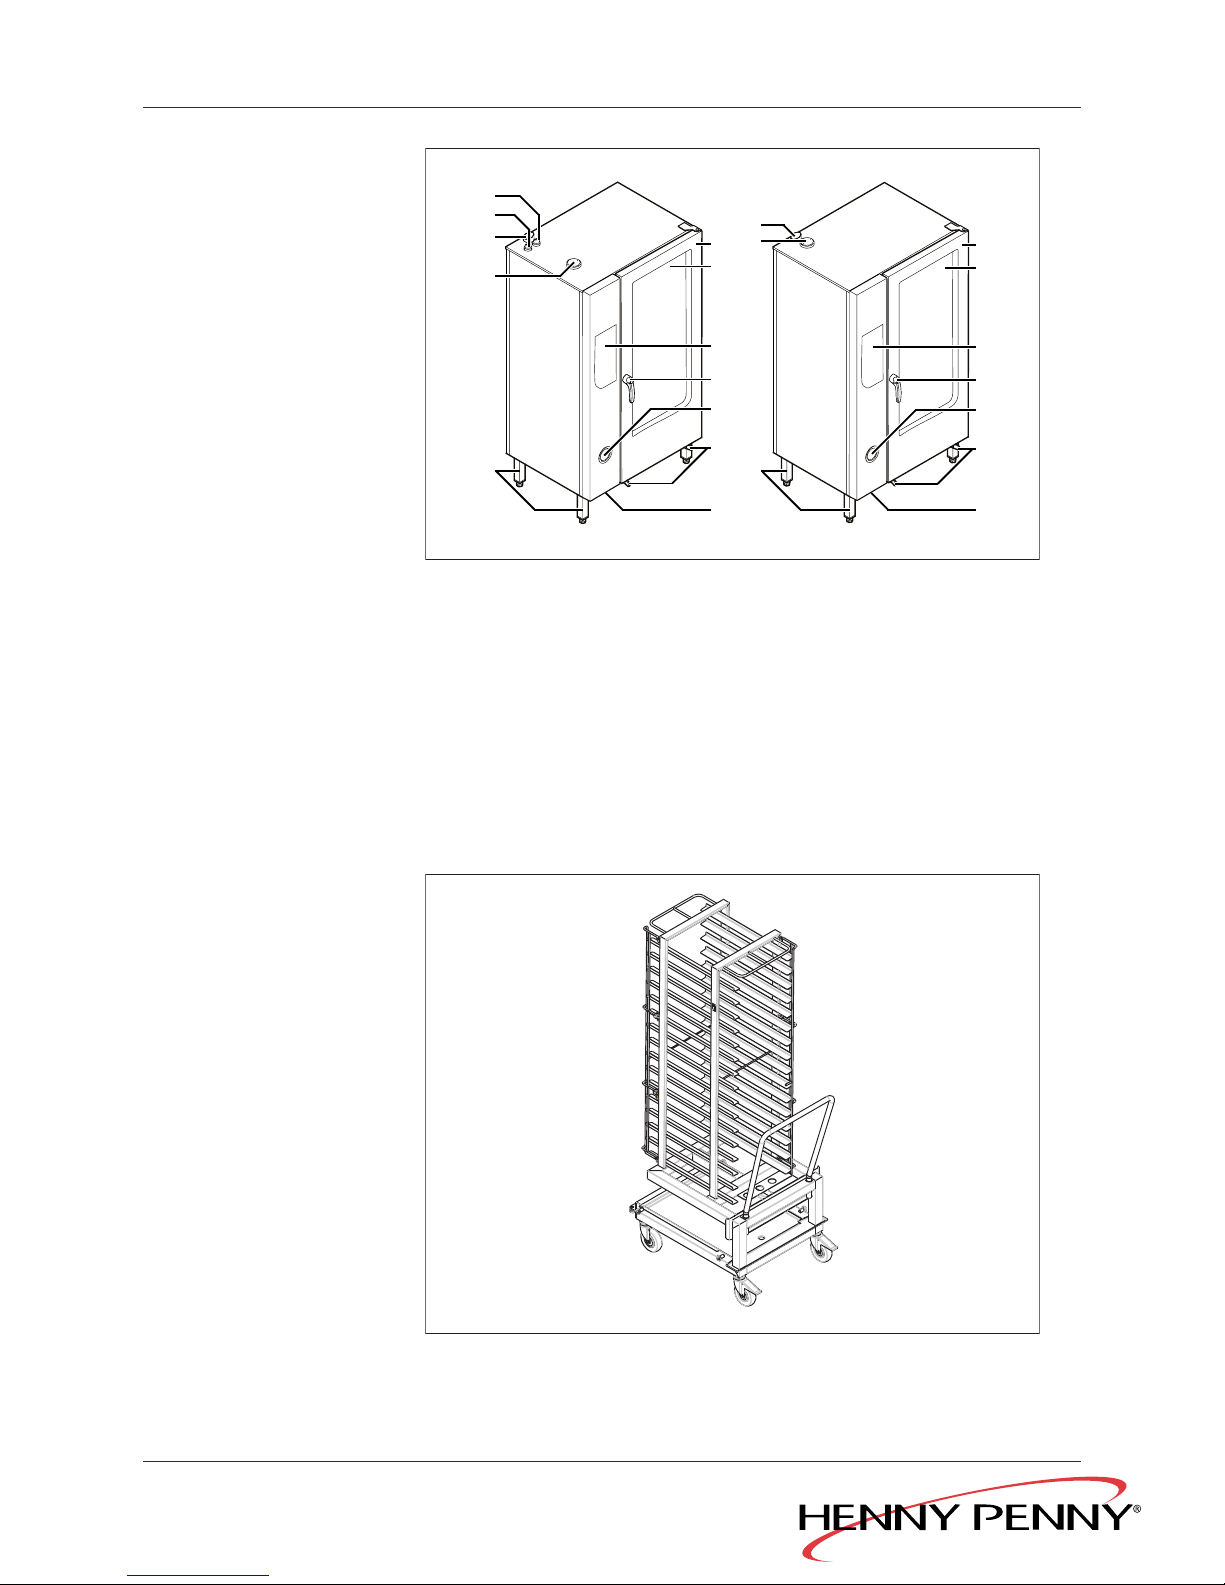
Figure 3: Sizes 215 and 220, left: gas, right: electric
Data interface (concealed)7Cooking chamber door1
Height-adjustable feet8Insulated window2
Air intake port for the cooking
chamber
9Controls3
Steam outlet port10Door handle4
Flue outlet (lower burner)11Hand-held rinsing head5
Flue outlet (upper burner)12Rails for rack trolley6
Figure 4: Rack trolley (for sizes 215 and 220)
Global Foodservice Solutions
Operating manual16
SmartCombi
™
Construction and function
Page 17
3.2 Description of the controls
NOTICE
Open out the front cover to see the controls.
DescriptionControl
Display for the SmartMenu cooking categories
Chamber humidity display
ClimaMonitor
Display of temperatures and cooking times
Menu navigation display
Selection of SmartMenu cooking categories
Anzeige
Call up “Combisteaming” cooking modeCooking mode button “Comb-
isteaming”
Call up “Perfection” (climate and regeneration) cooking mode
Cooking mode button “Perfection”
Call up “Convection” cooking modeCooking mode button “Convection”
Call up “Steaming” cooking modeCooking mode button “Steaming”
Call up various functions
The multi-function display (4) shows the
respectively assigned function
Multi-function select button
Increase or decrease cooking chamber
humidity
Set button for the AtmosControl climate control system
Switch on/off“On/Off” button
Call up SmartMenu (automatic cooking)“SmartMenu” button
Start/stop operation“Start/Stop” button
Call up the “core temperature measurement” function
“Core temperature measurement”
button
Start the “Ready2Cook” function (prepare
for cooking)
“Ready2Cook” button
Display and change cooking time“Cooking time” button
Display and change cooking temperature“Cooking temperature” button
Navigation in menus
Selection of values
“CombiDial”
3.3 Operating modes
The unit has two operating modes:
●
SmartMenu (automatic cooking)
●
Manual cooking
You can use different cooking methods in both of these operating
modes.
17Operating manual
Global Foodservice Solutions
Construction and function
SmartCombi
™
Page 18

Advanced cooking functions and add functions allow you to adjust the
cooking processes individually.
Cooking modes
●
Steaming
●
Combisteaming
●
Convection
●
Perfection (climate and regeneration)
●
Delta-T cooking
●
Low temperature cooking
Advanced cooking
functions
●
Programmable steaming
●
Manual steaming
●
Rest period
●
Preset start time
●
Ready2Cook (prepare cooking)
●
Reduced heat output
●
RackControl
Add functions
●
SES steam exhaust system
●
Cycle fan operation
●
Reduced fan speed
●
End of step signal
3.4 SmartMenu (automatic cooking)
The SmartMenu operating mode is the function for automatic cooking.
The SmartMenu cooking program was developed by Henny Penny chefs,
however, it can be individually adapted.You can also create new
SmartMenu programs.
3.5 Manual cooking
3.5.1 Steaming
With the Steaming cooking mode, you can blanch, steam, steep, boil,
preserve and poach.
There are three steaming methods:
●
Soft Steaming: 30 °C (86 °F) to 99 °C (210.2 °F)
●
Steaming: 100 °C (212 °F)
●
Express Steaming: 101 °C (213.8 °F) to 130 °C (266 °F)
Benefits
●
Fast production of dishes that are firm to the bite with a good colour
and an intensive natural flavour.
●
Vitamins and minerals are retained.
●
Flavours are not transferred. The food retains its taste and aroma;
mixed loads are possible.
Global Foodservice Solutions
Operating manual18
SmartCombi
™
Construction and function
Page 19

●
Less seasoning, fats and salt needed.
Tips
●
Use perforated GN containers with a depth of 40–65 mm. These
allow for short cooking times and avoid the food underneath being
overcooked.
●
Break up lumps of ice when using frozen foodstuffs so that all the
food will be heated evenly.
●
Chill vegetables quickly after steaming, add butter and season.
●
Use stock for vegetable bundles. Steam the vegetables in
perforated GN containers and catch the stock in unperforated
containers.
●
Steam long grain rice in unperforated containers.
Use 1½ parts of cold water or cold stock to 1 part of rice.
●
Steam hard wheat pasta in unperforated containers.
Use at least 5 parts of water for 1 part of pasta.
●
Steam large and small dumplings in perforated containers lined
with baking paper.
Uncover immediately after cooking.
If necessary, keep them warm in water thickened with starch.
●
Sprinkle potatoes with fine grained salt and mix immediately before
steaming.
Alternatively, place potatoes in salt water for 15 minutes.
Soft steaming
Steaming at temperatures between 30 °C (86 °F) and 99 °C (210.2 °F)
is called Soft steaming.
You can use soft steaming to prepare dishes especially gently, to swell
grains or to cook ham or sausages.
NOTICE
Cooking time is longer than with steaming or express steaming.
Benefits
●
Less weight loss with meat and sausages.
●
Burst skin or gut is avoided when scalding or heating sausages.
●
Optimal food quality with delicate dishes such as terrines, jellies,
flans, forcemeat dumplings, creme caramel or diet meals.
●
Good when using vacuum pouches with the sous vide process.
●
Egg white sets optimally thanks to the precise cooking temperature
and doesn't run out of the food.
Tips
●
Allow yeast doughs for bread, buns or pastries to rise at a
temperature of 32 °C (89.6 °F).
●
When preparing poached trout, pour vinegar or wine over the fish.
19Operating manual
Global Foodservice Solutions
Construction and function
SmartCombi
™
Page 20

Express steaming
Steaming at temperatures between 101 °C (213.8 °F) and 130 °C (266 °F)
is called Express steaming.
Express steaming is suitable for foods that are not damaged easily such
as jacket potatoes, beetroot, swede, pulses and cabbage.
Benefits The cooking time is reduced by about 10% as compared to the “Steaming”
cooking mode.
Tips
●
Set the cooking temperature between 105 °C (221 °F) and 110 °C
(230 °F) for small loads.
●
If the unit is fully loaded, set the temperature between 110 °C (230 °F)
and 130 °C (266 °F).
3.5.2 Combisteaming
The Combisteaming cooking mode is especially suitable for large roasting
joints, casseroles and baked foods.
Benefits
●
Optimal cooking chamber climate: the food does not dry out.
●
Very fast cooking with minimum weight loss.
●
Flavours are not transferred. The food retains its taste and aroma;
mixed loads are possible.
●
Foods such as yeast-based doughs rise optimally when baking.
●
The steam closes the pores of large roasting joints immediately;
searing is not necessary.
Tips
●
Preheat unit for at least 10–15 minutes.
●
Reduce cooking temperature by 20–30 % compared to other cooking
methods.
●
Food starts to brown at a cooking temperature of 120 °C (248 °F)
and above.
The higher the set cooking temperature, the greater the food's weight
loss but the more intensive the level of browning.
●
Place roast joints on racks.The pores of the joint will be closed from
all sides, the joints do not have to be turned over.
●
Place a drip tray underneath the rack holding the joints for gravy or
drippings. Place bones, roast vegetables and seasonings in the drip
tray and pour water or stock over them.
3.5.3 Convection
The Convection cooking mode is especially suitable for products that
don't need any additional humidity.
Benefits
●
Large capacity.
●
Even cooking results thanks to auto-reverse fan.
Global Foodservice Solutions
Operating manual20
SmartCombi
™
Construction and function
Page 21

●
Up to 95 % less fat required as with other cooking modes.
Tips
●
Preheat unit for at least 10–15 minutes.
●
Food starts to brown at a cooking chamber temperature of 120 °C
(248 °F) and above.
The higher the set cooking chamber temperature, the greater the
food's weight loss but the more intensive the level of browning.
●
To produce crumbed dishes, use convenience products that are
suitable for convection or crumbed products with browning fats.
3.5.4 Perfection (climate and regeneration)
With the perfection cooking mode, food can be regenerated in perfect
quality on plates, platters or in GN containers.
Benefits
●
Production and presentation of meals in quiet, slack periods: for
banquets, you can regenerate as many plates as you wish on
demand.
●
No loss of quality due to keeping prepared meals warm.
●
Optimal cooking chamber climate: the food does not dry out.
●
No condensation or dry edges on the plates.
Tips
●
Preheat the unit then fill it quickly. In this way, the prewarmed air
remains in the cooking chamber.
●
Large thick foods such as dumplings, roulades or casseroles need
more time to regenerate: slice up thick components.
●
Individually arrange meal components evenly on the plate. Keep
overlaps to a minimum and avoid different heights when arranging.
●
Only add sauces to the plates after regeneration is completed.
●
Place fish and meat on a raised bed so that they will be regenerated
evenly and not stick to the plate.
●
Meat should be pre-cooked precisely to the minute if it is to be
served medium after regenerating.
●
Season vegetables, rice and pasta and add fat before regenerating.
●
Use thermo covers and multiple banquet trolleys if the meals are
to be transported over a long distance and for large banquets.
Warm the thermo covers before use.
Plates can only be kept warm for a maximum of 20 minutes.
Regenerate further batches during this time: in this way you can
serve the meals to your guests at the same time.
●
To reduce cooking time, use portioned GN containers with lids for
regenerating foods that are already portioned.
●
Regeneration time and regeneration temperature are dependent
on the number of plates (see table “Plate capacities” and table
“Regeneration temperatures and times”).
21Operating manual
Global Foodservice Solutions
Construction and function
SmartCombi
™
Page 22
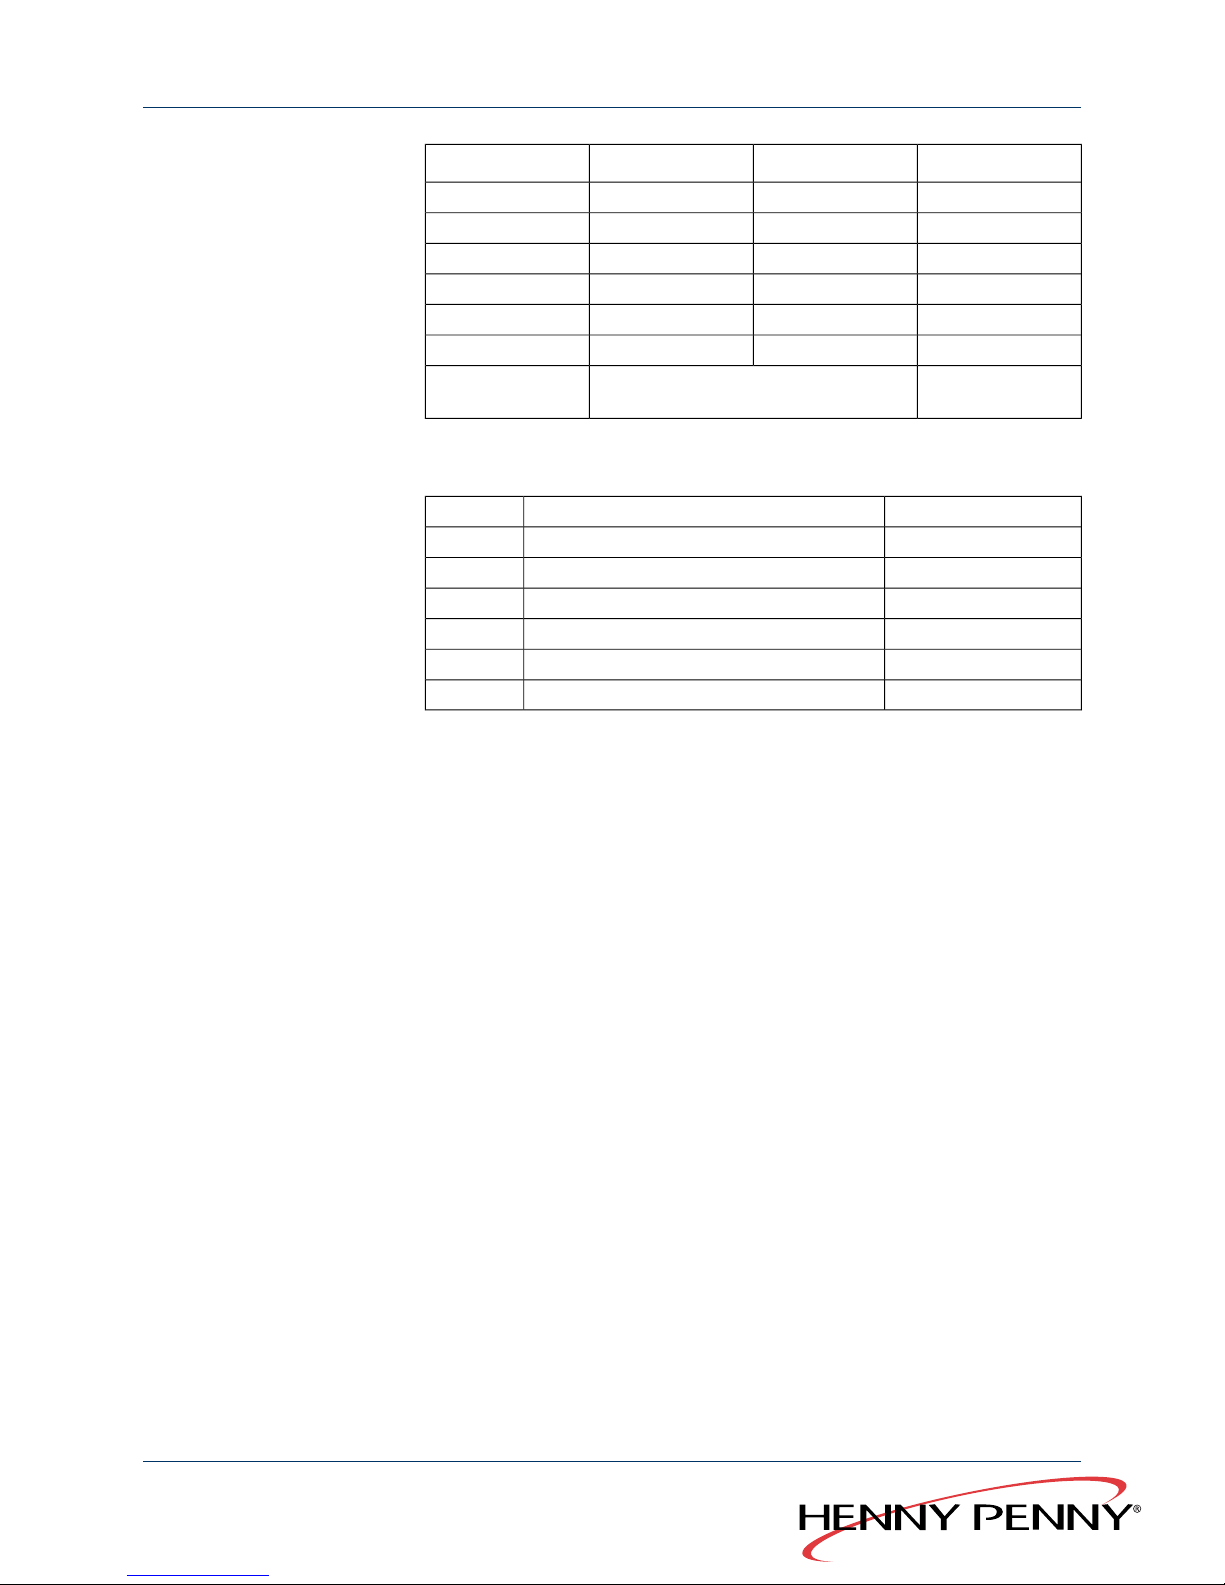
∅ 32 cm (12.6")∅ 28 cm (11")∅ 26 cm (10.2")
Size
222430615
222430620
404050115
404050120
8080100215
80120120220
(plate rack frame or
rack trolley)
On slide-in racks (1/1 unit with special
FlexiRack racks)
Table 1: Plate capacities
Regeneration timeRegeneration temperatureSize
4–8 minutes120 °C (248 °F)–130 °C (266 °F)615
4–8 minutes120 °C (248 °F)–130 °C (266 °F)620
4–8 minutes120 °C (248 °F)–130 °C (266 °F)115
4–8 minutes120 °C (248 °F)–130 °C (266 °F)120
6–10 minutes120 °C (248 °F)–130 °C (266 °F)215
6–10 minutes120 °C (248 °F)–130 °C (266 °F)220
Table 2: Regeneration temperatures and times
3.5.5 Delta-T cooking
With Delta-T cooking, the cooking temperature depends on the core
temperature of the food being cooked. Cooking times with Delta-T cooking
are longer than with other cooking modes.You can make good use of
slack periods by using the additional “preset start time” function.
With Delta-T cooking, the cooking temperature is always higher than the
actual core temperature of the food being cooked.This difference is a
previously set value (Delta-T value).
The formula is:
current core temperature + Delta-T value = cooking temperature
Since the core temperature of the food being cooked is needed, you must
use the core temperature sensor with Delta-T cooking.
Global Foodservice Solutions
Operating manual22
SmartCombi
™
Construction and function
Page 23

T
t
T
t
1
t
0
1
2
Delta-T value
ΔT
Timet
Target core temperature1Cooking process beginst
0
Target core temperature
reached
2Cooking process endst
1
TemperatureT
NOTICE
The higher the cooking temperature, the greater the food's weight
loss but the more intensive the level of browning.
The Delta-T value should always be at least 10 °C (50 °F) to avoid
very long cooking times.
Target core temperat-
ure
Delta-T valueCooking mode
21 °C (69.8 °F)–99 °C
(210.2 °F)
1 °C (33.8 °F)–31 °C
(87.8 °F)
Steaming
1 °C (33.8 °F)–151 °C
(303.8 °F)
Combisteaming
1 °C (33.8 °F)–201 °C
(393.8 °F)
Convection
Table 3: Possible Delta-T values, depending on cooking mode
23Operating manual
Global Foodservice Solutions
Construction and function
SmartCombi
™
Page 24
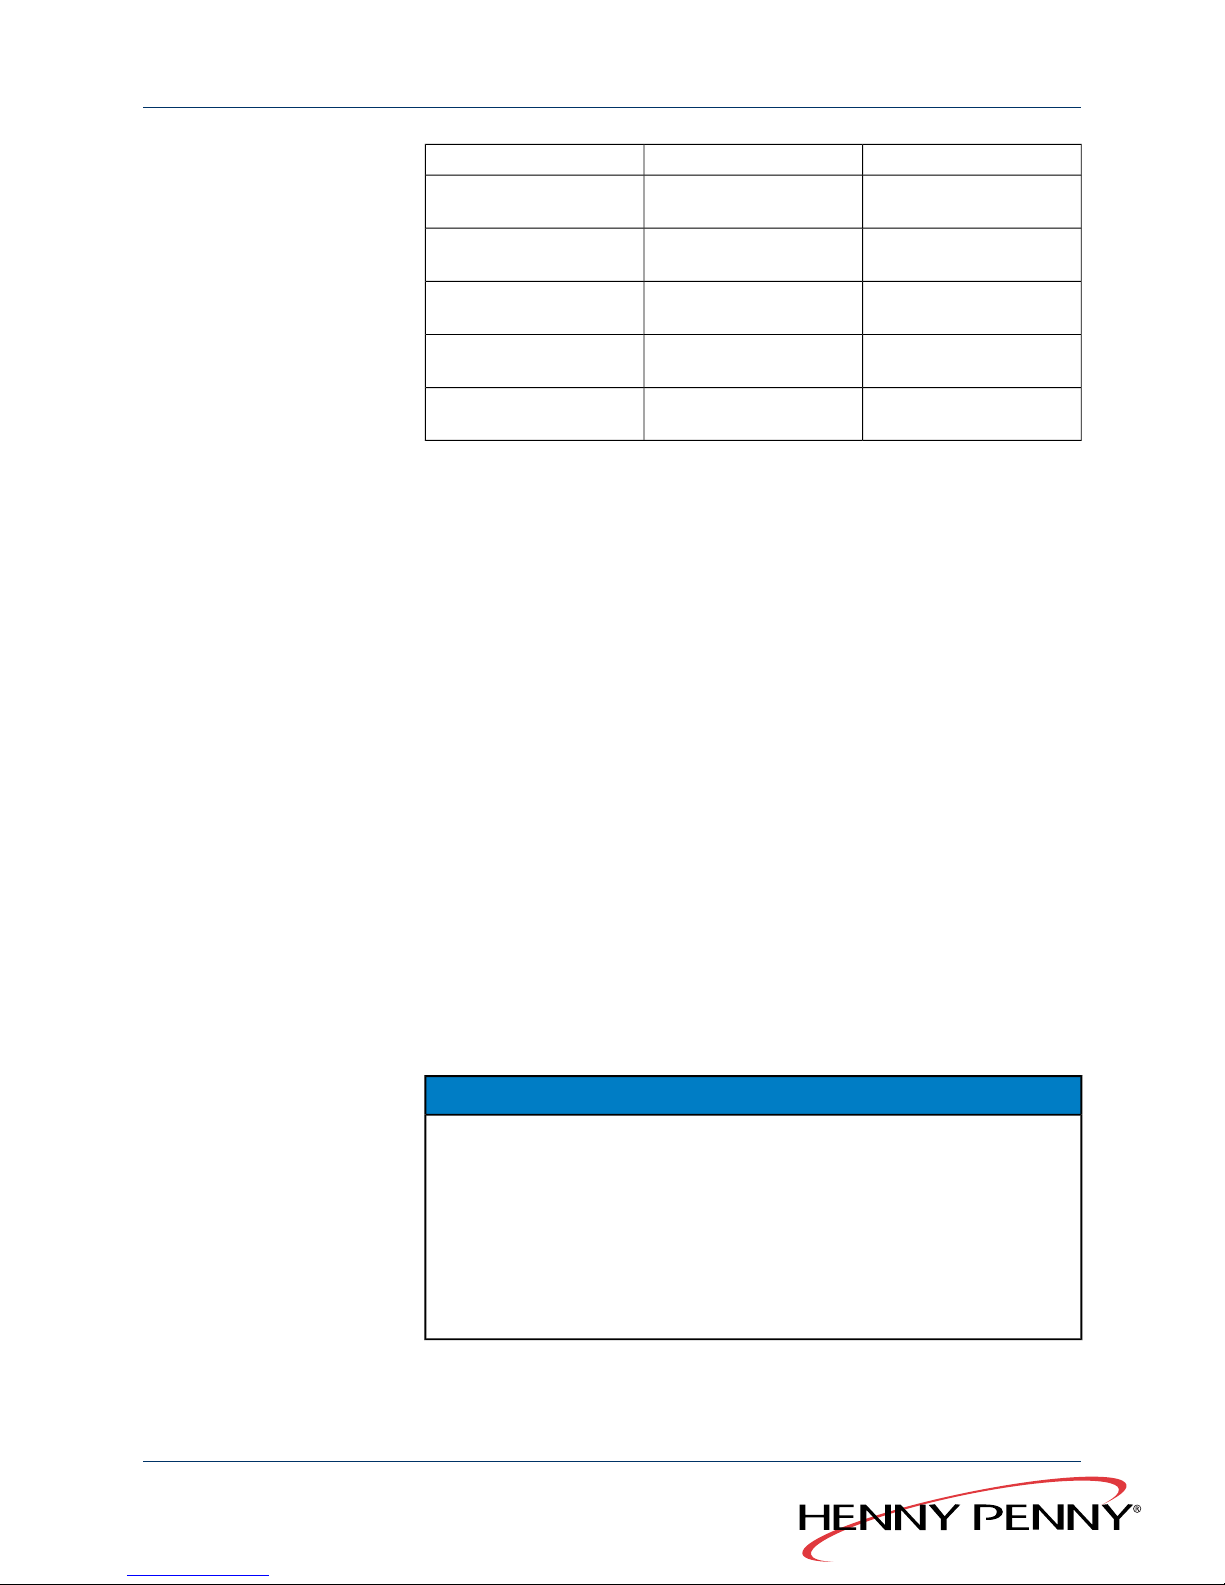
Target core temperatureDelta-T valueLarge roasting joint
48 °C (118.4 °F)–58 °C
(136.4 °F)
50 °C (122 °F)–55 °C
(131 °F)
Roast beef
50 °C (122 °F)–60 °C
(140 °F)
50 °C (122 °F)–60 °C
(140 °F)
Fillet of beef
78 °C (172.4 °F)50 °C (122 °F)–70 °C
(158 °F)
Roast veal
78 °C (172.4 °F)50 °C (122 °F)–70 °C
(158 °F)
Neck of pork
78 °C (172.4 °F)50 °C (122 °F)–60 °C
(140 °F)
Boiled ham
Table 4: Recommended cooking temperatures for large roasting joints
3.5.6 Low temperature cooking
The Low temperature cooking mode is especially suitable for dark
meats.
The raw weight of large roasting joints is almost fully retained thanks to
the especially gentle cooking process (temperature range of60 °C
(140 °F)–100 °C (212 °F)); cooking losses are minimal.
To avoid crusts forming, the AtmosControl climate control system
optimises the cooking chamber climate and the fan operates in cycle
mode.
The benefits are:
●
Reduced dehydration
●
Even cooking
●
Reduced crust formation
To obtain a crisp crust, sear with higher temperatures in a previous
cooking step.
●
Food can be kept warm without the surface becoming dry.
Low temperature cooking consists of two cooking steps: searing and the
actual low-temperature cooking step.
NOTICE
The chamber temperature should be only slightly, but at least 5 °C (41
°F), above the target core temperature for the food to be cooked. If the
difference between chamber temperature and core temperature is less
than 5 °C (41 °F), it is possible that the target core temperature will not
be reached.
The higher the cooking chamber temperature, the greater the food's
cooking loss but the more intensive the level of browning.
Global Foodservice Solutions
Operating manual24
SmartCombi
™
Construction and function
Page 25
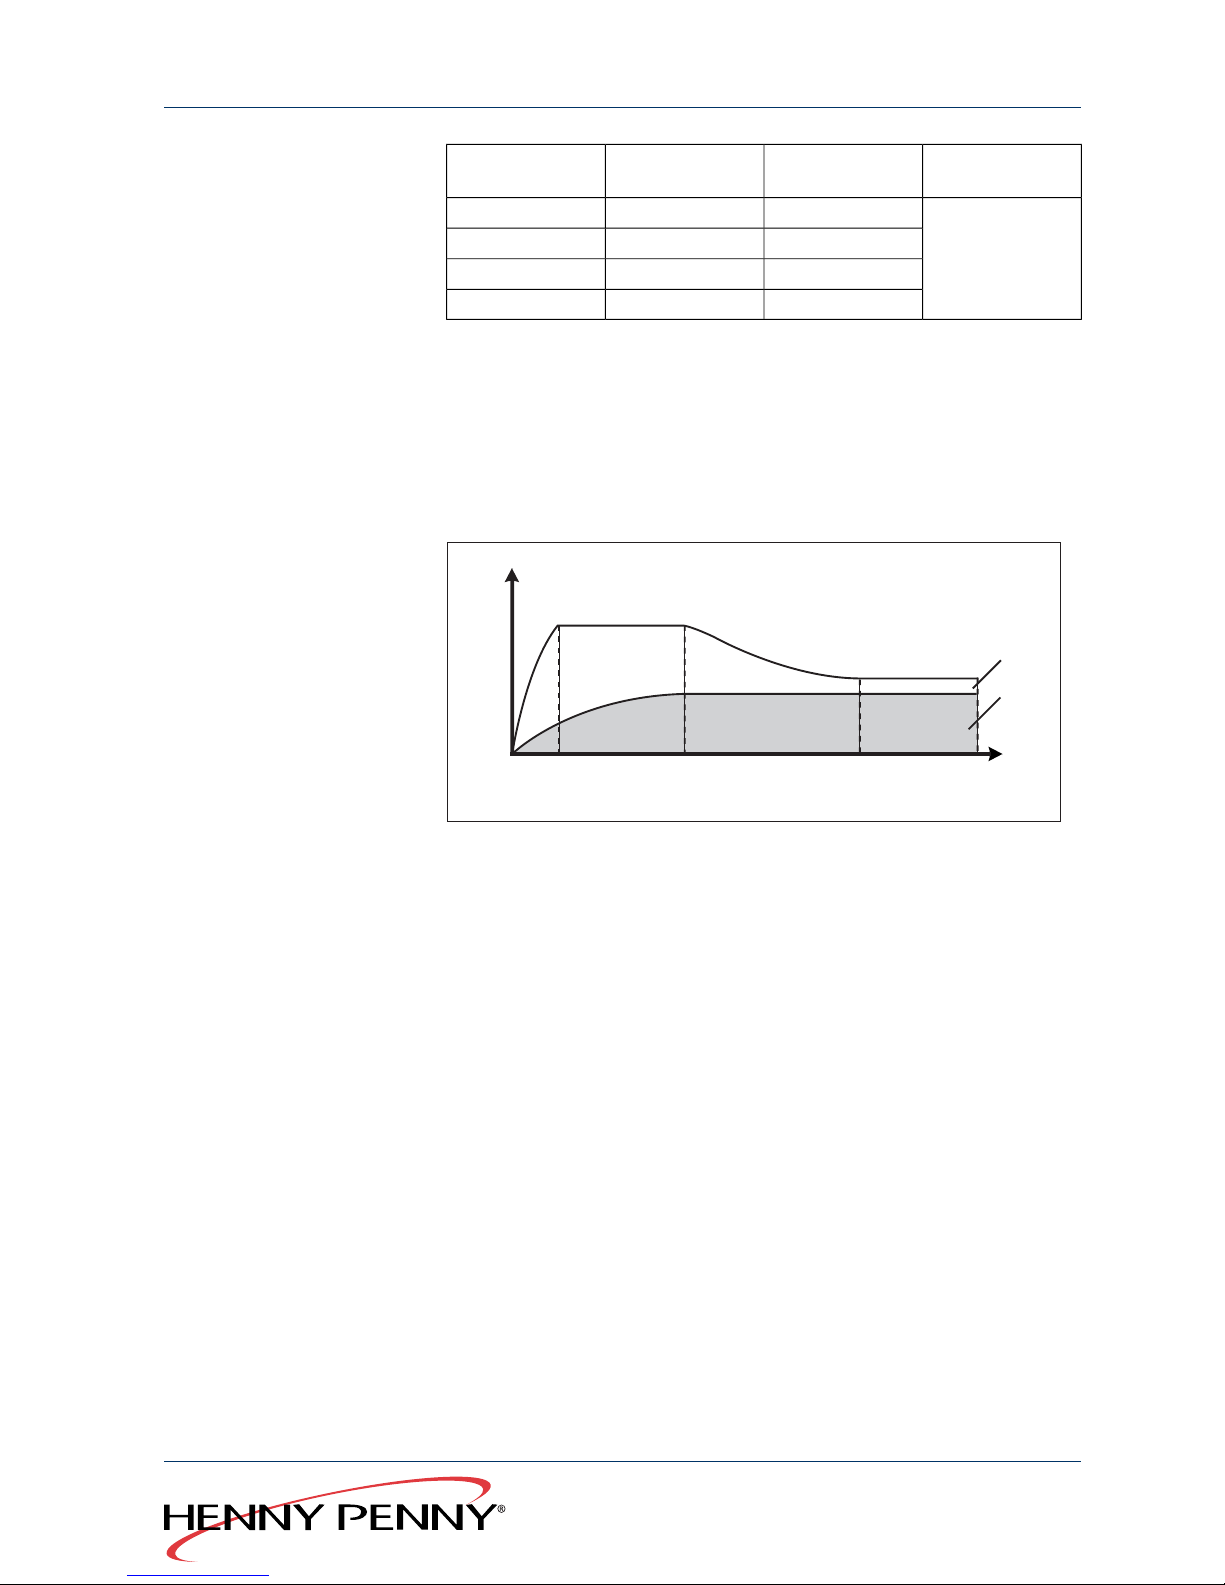
Cooking stepsChamber temper-
ature
Target core tem-
perature
Large roasting
joint
1.
Convection or
combisteaming
2.
Low temperature cooking
60 °C (140 °F)55 °C (131 °F)Roast beef
80 °C (176 °F)75 °C (167 °F)Roast pork
75 °C (167 °F)70 °C (158 °F)Roast veal
80 °C (176 °F)75 °C (167 °F)Roast lamb
Table 5: Recommended cooking temperatures for large roasting joints
Low temperature cooking is possible with or without core temperature
measurement.
Low temperature cooking
without core temperature
measurement
When using low temperature cooking without core temperature
measurement, the unit switches to low temperature cooking from the
first cooking step as soon as the set cooking temperature is reached.
T
t
t
1
t
0
1
2
t
2
t
3
t
4
1st cooking step is endedt
2
Chamber temperature1
2nd cooking step is ended
Food is ready to serve
t
3
Cooking temperature2
Maximum keep-warm periodt
4
Startt
0
Cooking chamber preheatedt
1
Low temperature cooking
with core temperature
measurement
When using low temperature cooking with core temperature
measurement, the unit switches to low temperature cooking from the
first cooking step as soon as 80 % of the target core temperature is
reached.
25Operating manual
Global Foodservice Solutions
Construction and function
SmartCombi
™
Page 26
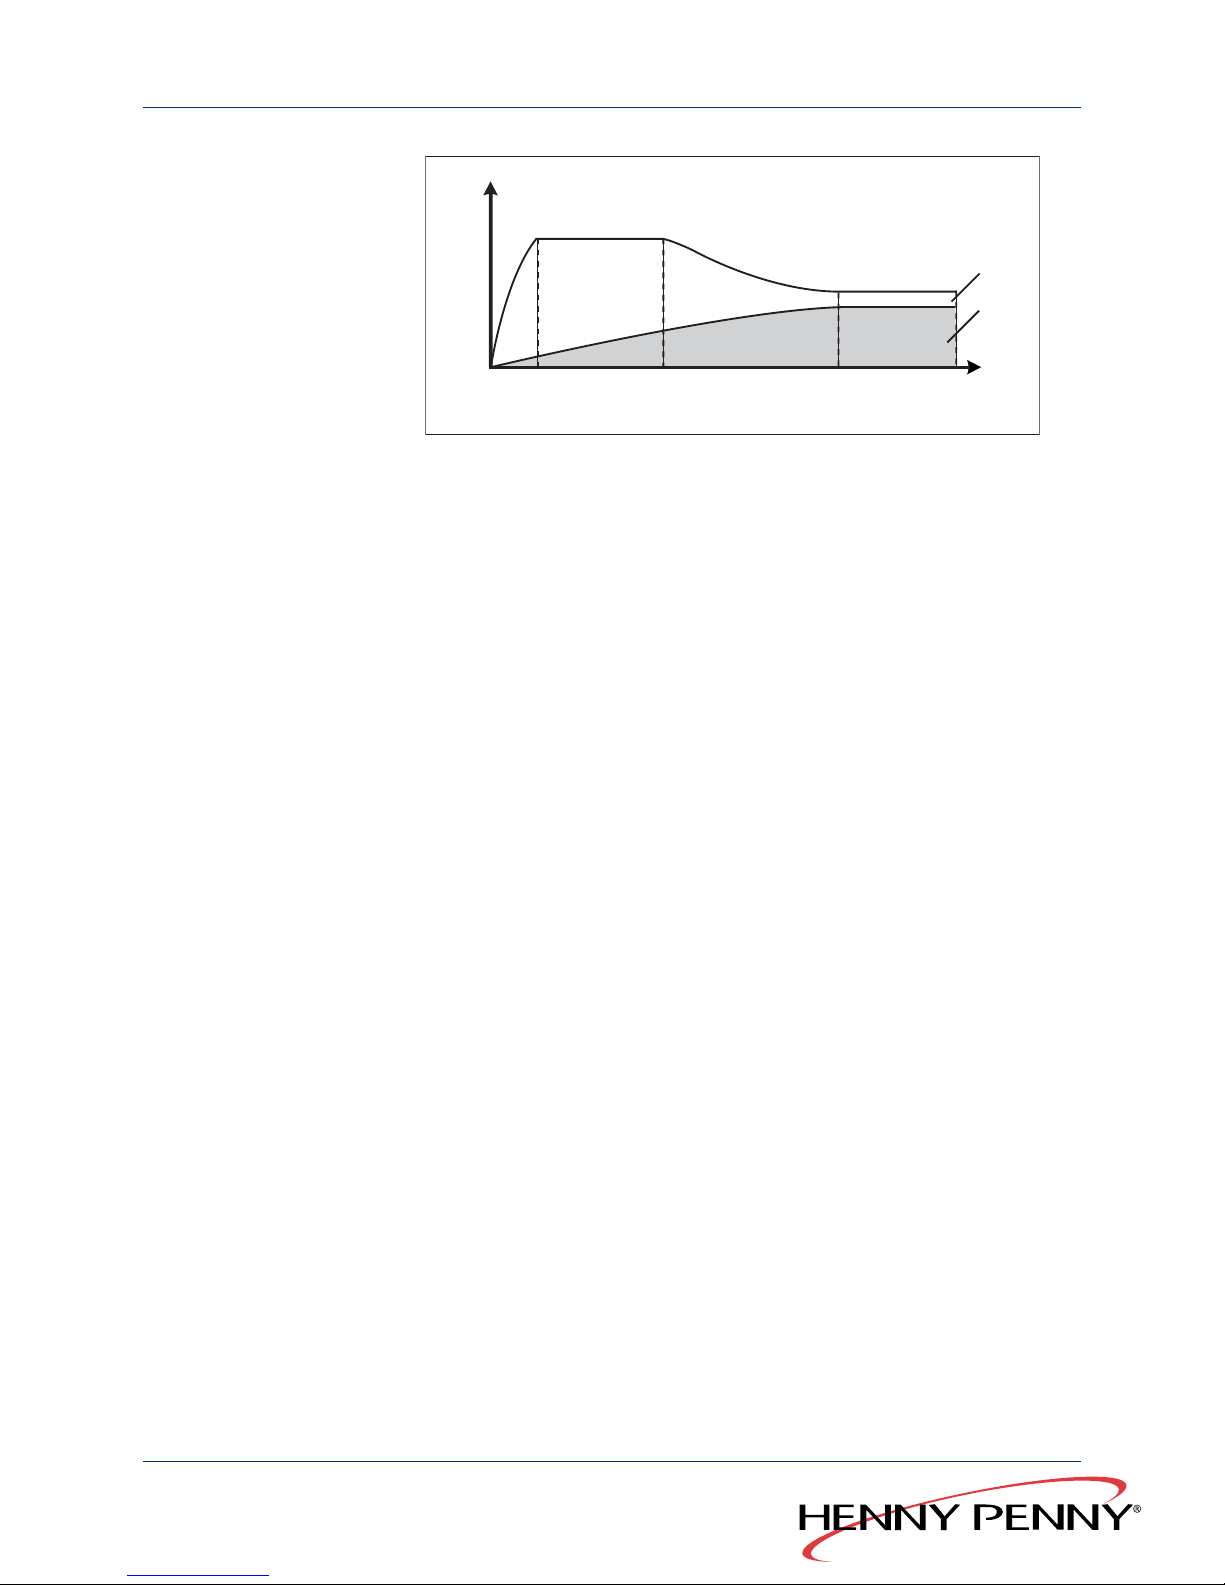
T
t
t
1
t
0
1
2
t
2
t
3
t
4
1st cooking step is endedt
2
Chamber temperature1
2nd cooking step is ended
Food is ready to serve
t
3
Core temperature2
Maximum keep-warm periodt
4
Startt
0
Cooking chamber preheatedt
1
3.6 Advanced cooking functions
3.6.1 Programmable steaming
The programmable steaming advanced function, is primarily used for
baking dough that requires high levels of humidity in the cooking chamber
before the baking phase starts.
3.6.2 Manual steaming
The manual steaming advanced cooking function lets you increase the
humidity in the cooking chamber during operation.
Manual steaming is possible during operation with all cooking modes
apart from steaming.
3.6.3 Rest period
With the rest period advanced cooking function, you can specify a period
during which the fan is inactive.
This function is primarily used following programmed steaming to allow
the steaming process to take effect.
3.6.4 Preset start time
The delay period before a program starts can be set with the preset start
time function.
Global Foodservice Solutions
Operating manual26
SmartCombi
™
Construction and function
Page 27
This lets you prepare the food, fill the unit and select the program that
you want long before the cooking process is to begin.
Bottlenecks in producing and preparing dishes can be avoided in this
way.
NOTICE
When using the preset start time feature, temperatures may occur in
the cooking chamber that encourage the growth of harmful germs on
the food to be cooked.
Observe the provisions governing foodstuffs.
3.6.5 Ready2Cook (prepare for cooking)
The right starting conditions are important for many programs (e. g.
baking).
The advanced function Ready2Cook heats if the cooking chamber is
too cold, cools if it is too hot and prepares the cooking climate for
cooking.
NOTICE
The function can be started manually if necessary.
3.6.6 RackControl
If products with different cooking times, such as potatoes, cauliflower,
peas, carrots and meat are to be cooked in one process or if the same
meals are to be cooked at different times, the advanced function
RackControl allows you to monitor up to 5 different cooking times.
When a cooking time is reached a short signal sounds and the food
that is ready can be removed.
The cooking process is not interrupted by this (continuous operation).
“RackControl” is especially useful when regenerating plate dishes
(“perfection”). The cooking times of several plate dishes can be
monitored thanks to continuous operation.
3.6.7 Reduced heat output
The advanced cooking function Reduced heat output lowers the unit's
output and enables output peaks in the power supply to be reduced.
●
With tabletop units: A heating circuit is deactivated.
●
With floor standing units: The lower chamber is turned off.
The function is suitable for:
27Operating manual
Global Foodservice Solutions
Construction and function
SmartCombi
™
Page 28

●
Cooking large roasting joints
●
Low temperature cooking
●
Cooking small loads
NOTICE
The reduced heat output increases the cooking time. For this reason,
the function is not suitable for the “Perfection” (climate and regeneration)
cooking mode.
3.7 Add functions
With the add functions, individual cooking steps can be adjusted to suit
the food being cooked, in order to further optimise the cooking result.
The following add functions are available.
●
SES steam exhaust system
●
Cycle fan operation
●
Reduced fan speed
●
End of step signal
3.7.1 SES steam exhaust system
The unit is equipped with a safety steam extraction system. The SES
steam exhaust system extracts the steam from the cooking chamber
and condenses it at the end of the cooking time.
This avoids annoying clouds of steam escaping from the cooking chamber
when opening the door after cooking has finished. The function has no
effect on the cooking results.
The function is activated as default for all cooking programs longer than
6 minutes.
There is an add function allowing you to turn off the SES steam exhaust
system.
3.7.2 Cycle fan operation
With the add function cycle fan operation, the fan operates in interval
mode.
The function can be combined with the add function “reduced fan speed”
in order to obtain 6 different fan speeds in the cooking chamber.
3.7.3 Reduced fan speed
The add function reduced fan speed lets you reduce the air circulation
in the cooking chamber, in several stages, for dishes that are easily
Global Foodservice Solutions
Operating manual28
SmartCombi
™
Construction and function
Page 29

damaged by a strong air flow, such as soufflé. meringue, sponges,
cream puffs or flaky pastry.
3.7.4 End of step signal
With the add function end of step signal, a signal can be activated for
each step of a multi-step cooking program. It signalises that some
action is to be taken e.g. “turn the roast”.
A signal sounds for 10 seconds at the end of the cooking step (cooking
time/target core temperature reached).
The next cooking step starts immediately. The next cooking step is not
delayed because of the signal.
The end of step signal is activated as default for the last cooking step
of a program.
3.8 AtmosControl climate control system
The humidity in the cooking chamber can be set from 0−100 % in 10 %
steps with the active humidifying and dehumidifying function of the
AtmosControl climate control system.
By setting a value under 100%, you can dehumidify the cooking
chamber to achieve crisp cooking results for foods containing a lot of
water. The excess steam is extracted from the cooking chamber and
condensed.
3.9 Core temperature measurement
With core temperature measurement, the temperature in the inner
of the food being cooked is measured with a sensor.
The cooking process is ended automatically as soon as the target core
temperature is reached.
Core temperature measurement offers the following benefits:
●
Energy and water consumption is lower
●
No overcooking
●
The food loses less weight
●
High HACCP safety levels
3.10 HACCP log
Core temperature values are summarized in individual hourly blocks
for the HACCP log. This data is then printed or transferred to a PC as
a text file.
29Operating manual
Global Foodservice Solutions
Construction and function
SmartCombi
™
Page 30
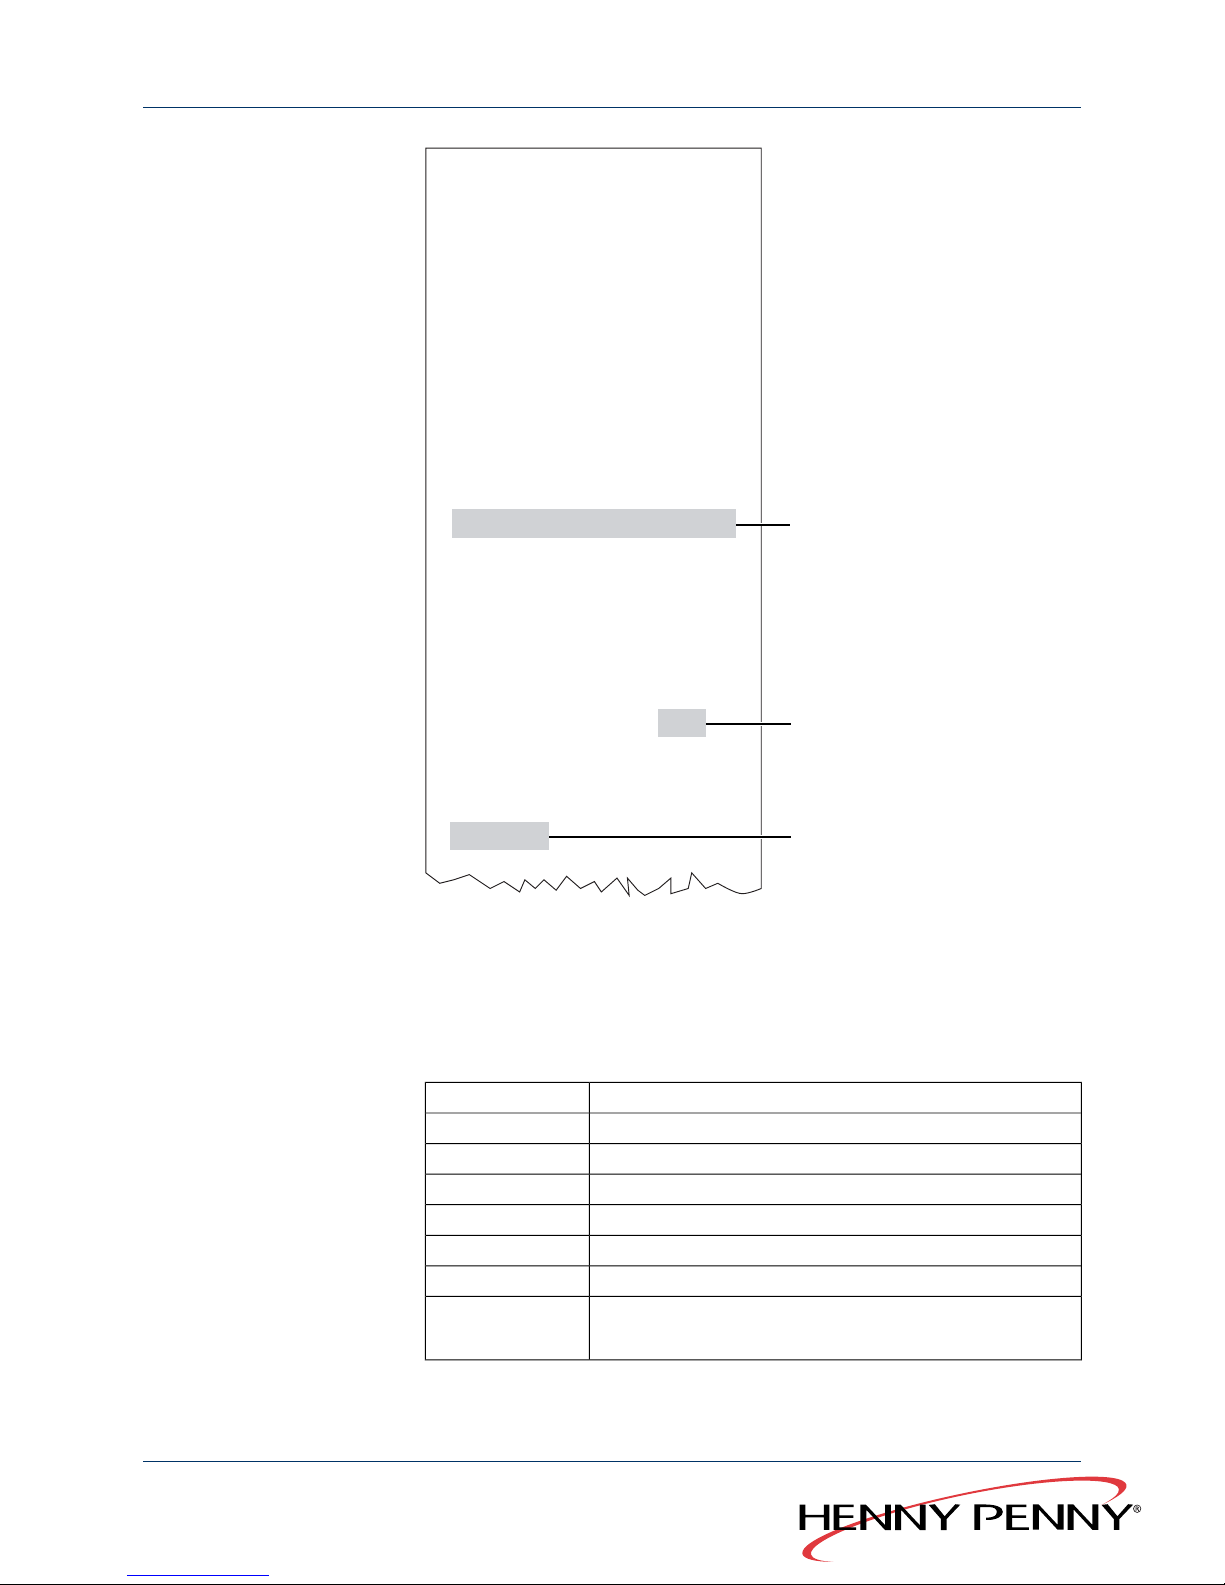
Serial no.: 01234567
Unit type: 6.1
Date of print: 23.06.2008
Abbrev. CM=cooking mode, S=steaming
CS=combi steaming, HC=convection
CT= core temperature
Program: Knuckle (of pork)
Cooking date:19.06.2008 8:59 End: 10:38
Cooking time: 1:39
Temp Time
2 CS 99, 99 75 - 0:00
3 CS 99, 161 85 - 0:11
4 CS 157, 179 90 - 0:06
5 HC 179, 199 95 - 0:27
core temp. values
58, 62, 68, 72, 75, 78 5min.
9:58 82, 84, 89, 92, 93, 94 5min.
94, 95 5min.
1 S 96, 133 - 1:00 0:49
1
No. CM Min, Max CT set act.
3
2
8:59 45, 25, 30, 38, 45, 52 5min.
Door opened.
Figure 5: HACCP log (example)
1 See the following table for an explanation of the abbreviations
2 Query interval
3 Special event
ExplanationAbbreviation
Number of the cooking stepNo.
Cooking modeCM
Minimum cooking temperature during this cooking stepMin
Maximum cooking temperature during this cooking stepMax
Target core temperatureCT
Set target timeSet
Period over which the cooking temperature was maintained
Time in which the target core temperature was reached
Act.
Table 6: HACCP log abbreviations
Global Foodservice Solutions
Operating manual30
SmartCombi
™
Construction and function
Page 31

3.11 “WaveClean” automatic cleaning system
WaveClean is an automatic cleaning system, which cleans and rinses
the cooking chamber automatically.
3.12 USB interface
NOTICE
You can find notes on operating the optional PC software on the
software installation CD.
Henny Penny-combination steamers of the “SmartCombi” and
“SpaceSaver PLUS” versions are equipped with a USB 2.0 interface.
Using a USB stick enables you to copy SmartMenu cooking programs
you have made onto other devices. HACCP logs and error messages
can also be archived in this way.
File names may only be up to 8 characters long followed by an
extension. Longer file names are shortened and receive an additional
serial number, e.g.“COOKBO~1.CSP” instead of “COOKBOOK.CSP”.
File names consist of the device no. and the file name extension:
●
“HAC” for HACCP logs, e.g. “12345678.HAC”
●
“CSP” for SmartMenu cooking programs, e.g. “12345678.CSP”
●
“DIA” for error messages, e.g. “12345678.DIA”
31Operating manual
Global Foodservice Solutions
Construction and function
SmartCombi
™
Page 32
4 Operation
4.1 Opening and closing cooking chamber
door (tabletop units)
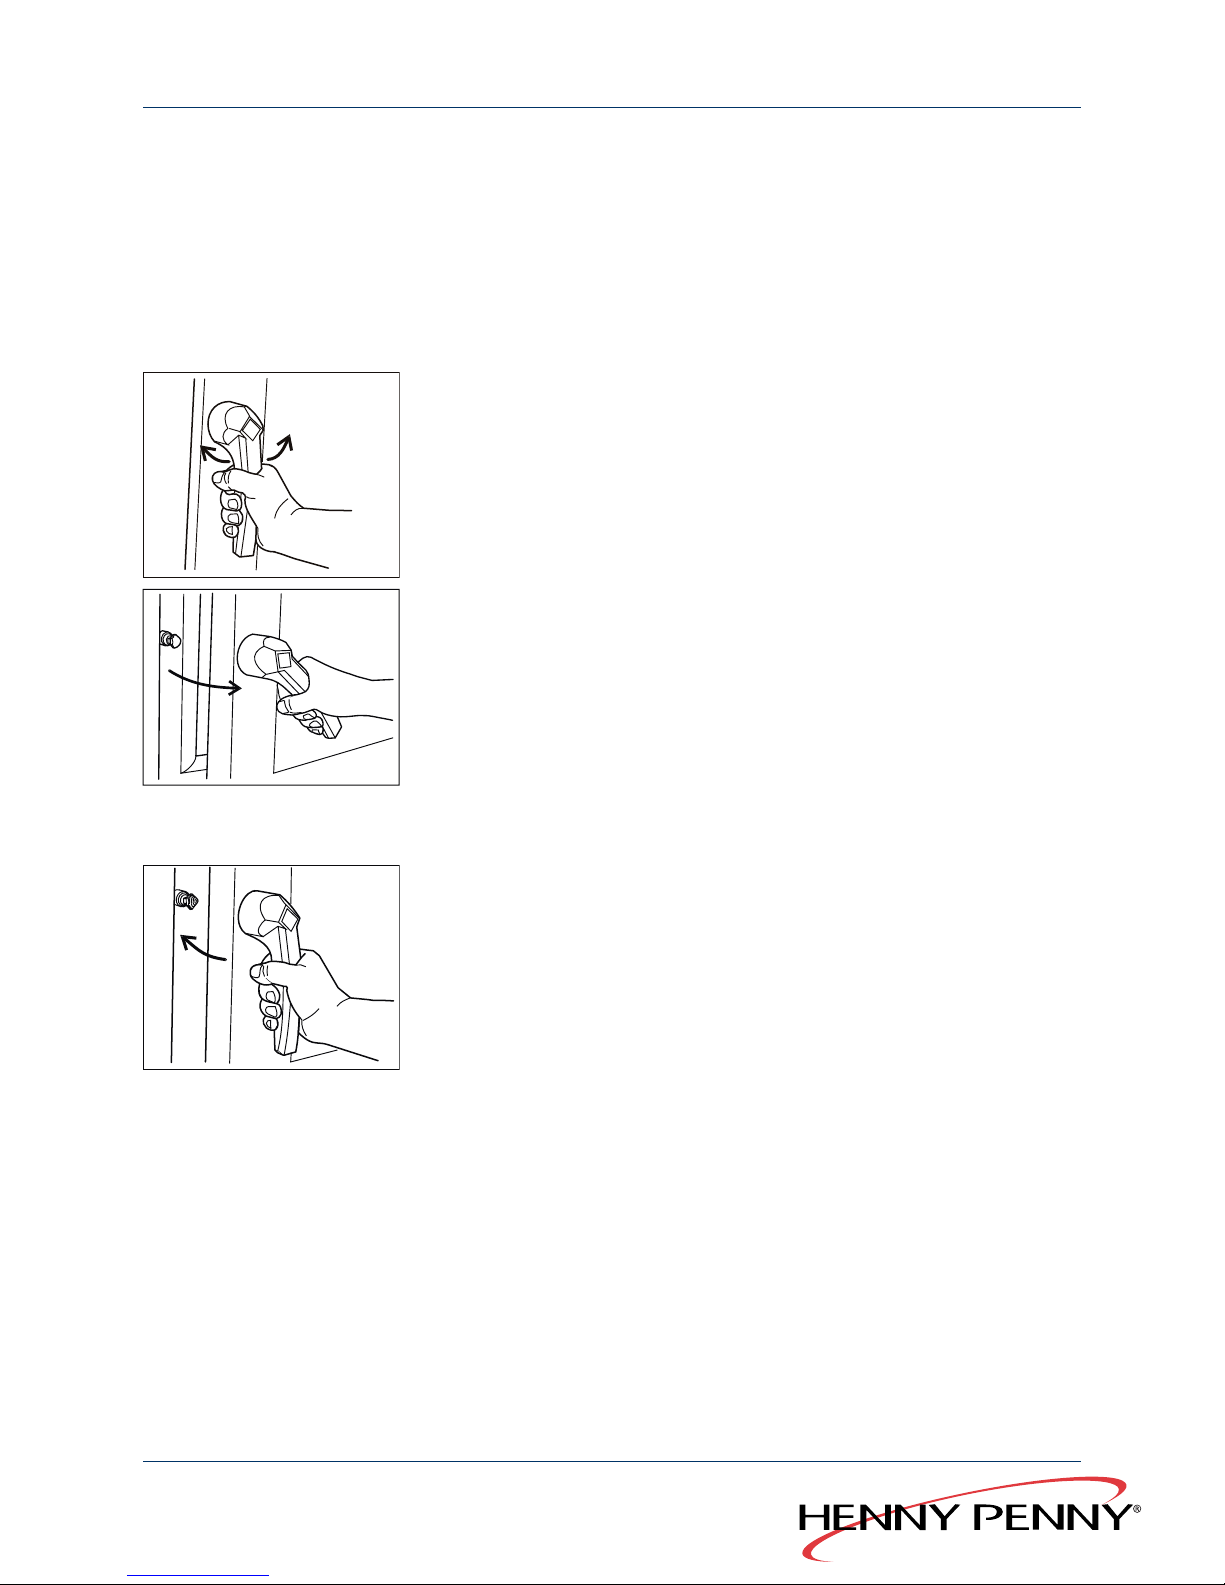
4.1.1 Opening the cooking chamber door
1. Turn the door handle to the side.
The cooking chamber door will open.
2. Open the chamber door wide.
If you let go of the door handle, it will return to the starting position.
4.1.2 Closing the cooking chamber door
1. Turn the door handle downwards.
2. Push the door closed.
The door of the cooking chamber is closed.
Global Foodservice Solutions
Operating manual32
SmartCombi
™
Operation
Page 33
4.2 Opening and closing cooking chamber
door (floor standing units)
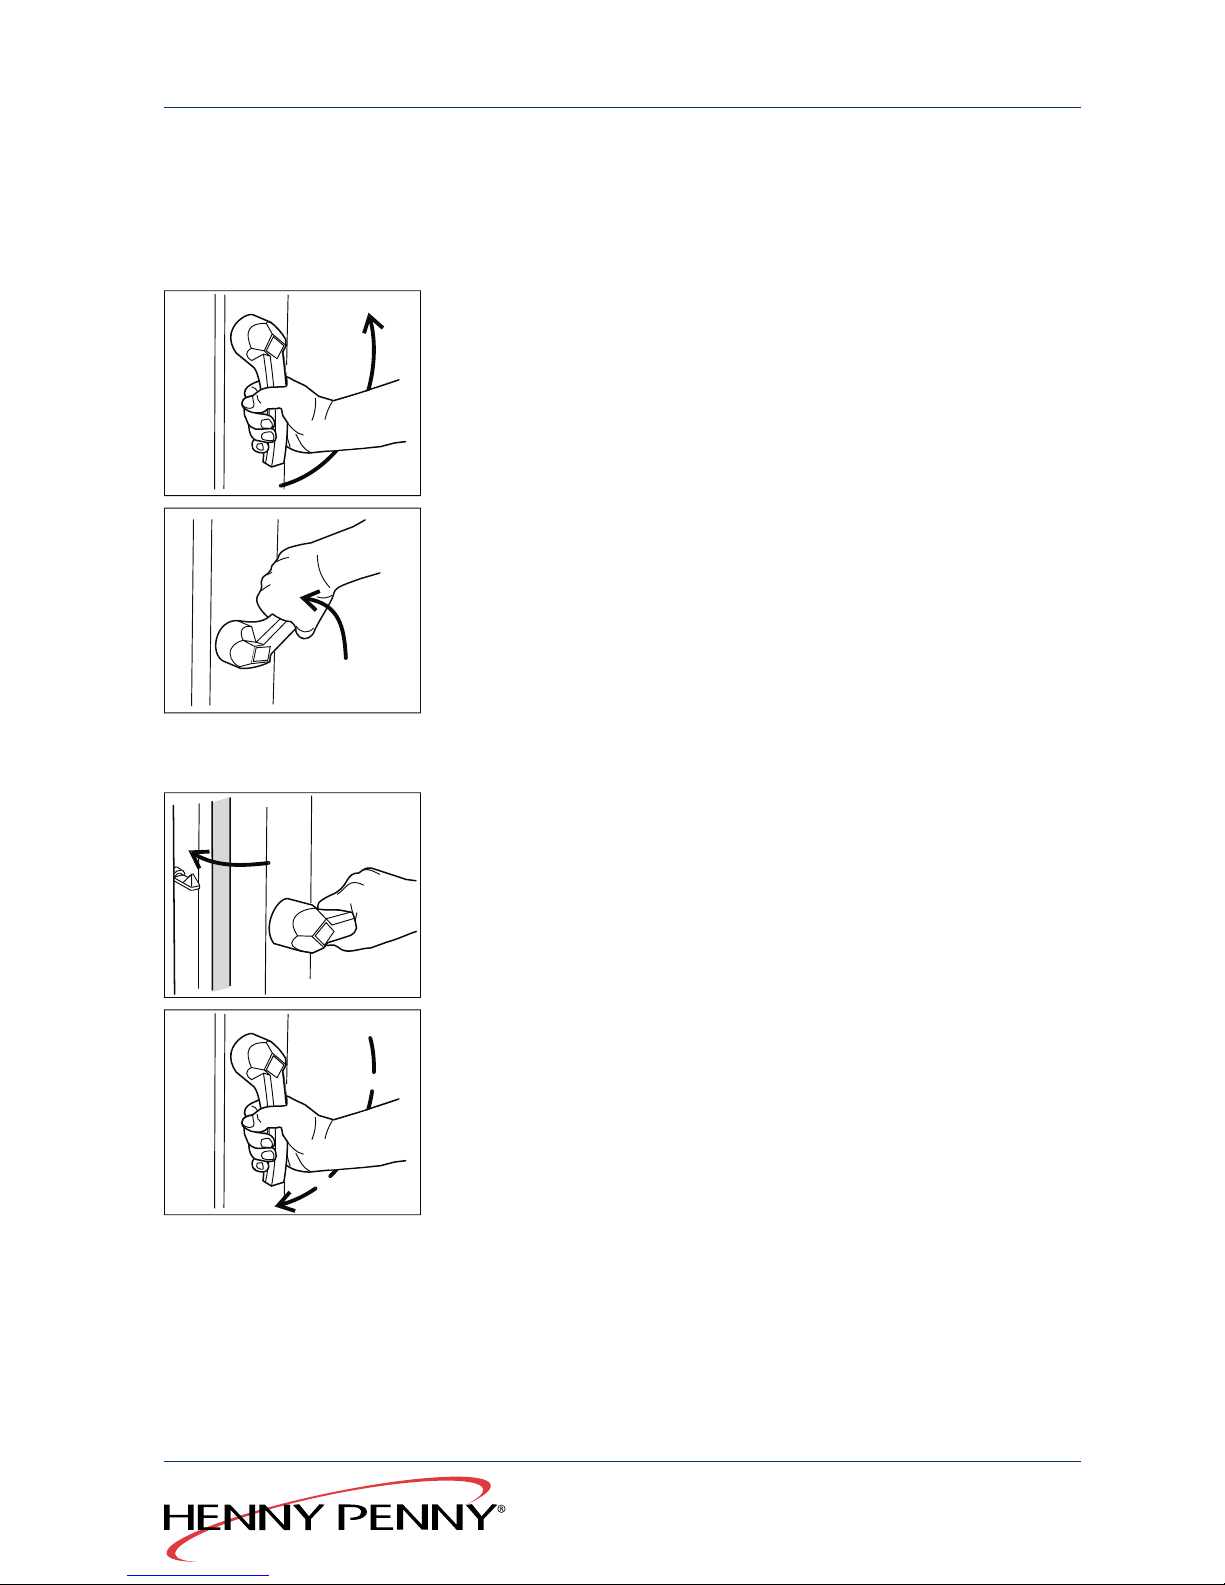
4.2.1 Opening the cooking chamber door
1. Turn door handle to horizontal.
The cooking chamber door will open but remain engaged.
2. Turn the door handle further upwards.
The door will disengage.
3. Let the door handle spring back to horizontal and open the chamber
door wide.
4.2.2 Closing the cooking chamber door
1. Position the door handle horizontally.
2. Close the door with the door handle horizontal.
3. Turn the door handle downwards.
The door of the cooking chamber is closed.
33Operating manual
Global Foodservice Solutions
Operation
SmartCombi
™
Page 34
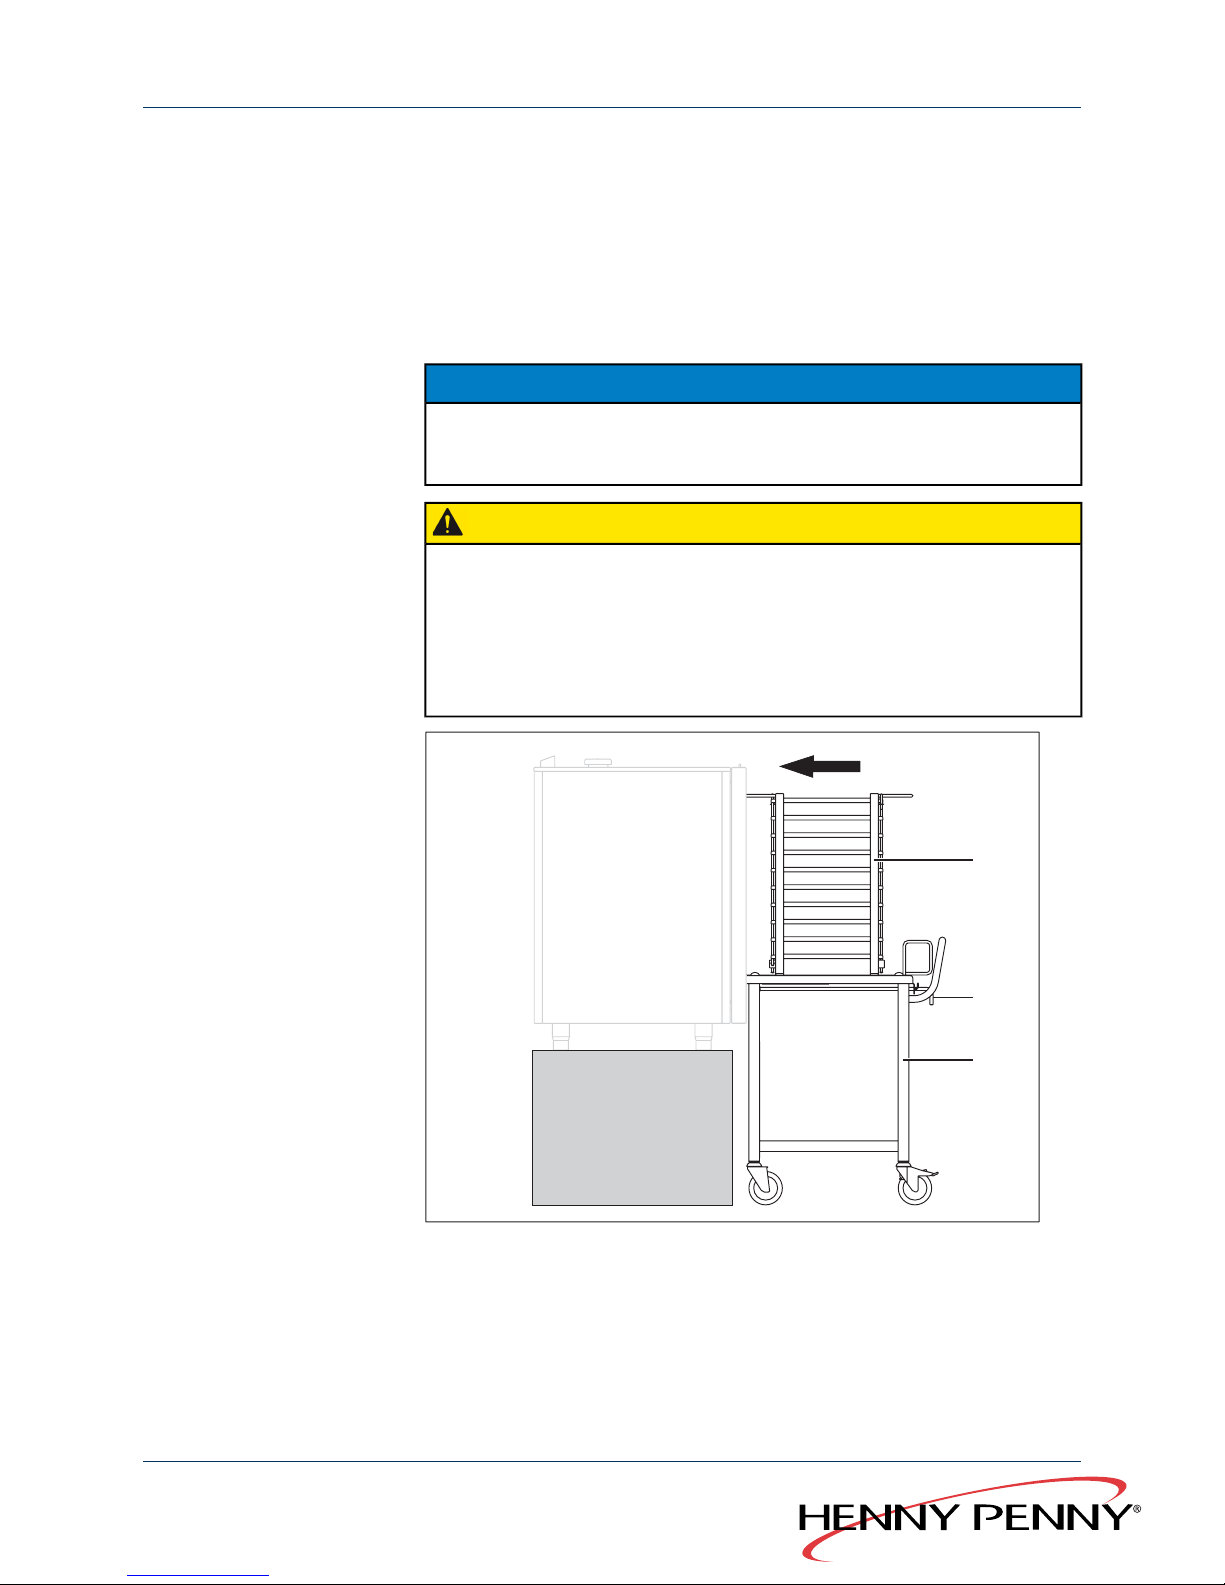
4.3 Filling and emptying the unit (tabletop
unit)
4.3.1 Filling and emptying the unit (with loading trolley)
Requirements Suspension frame is removed
Check that food racks are correctly positioned in the suspension frames
NOTICE
This section describes the process of filling/emptying with a loading
trolley (optional accessory).
CAUTION
Risk of burns due to hot liquids
→
Only use the correct racks: The racks must lie safely on the
supporting brackets.
→
Always push the racks into the U-shaped runners.
→
Do not push in containers with liquids to be cooked above eye-level.
1
3
2
Figure 6: Filling/emptying with loading trolley
1. Open the chamber door.
2. Mount the push-in frame on the bolts.
3. Rotate the lever (2).
The rack frame is secured against rolling off.
Global Foodservice Solutions
Operating manual34
SmartCombi
™
Operation
Page 35
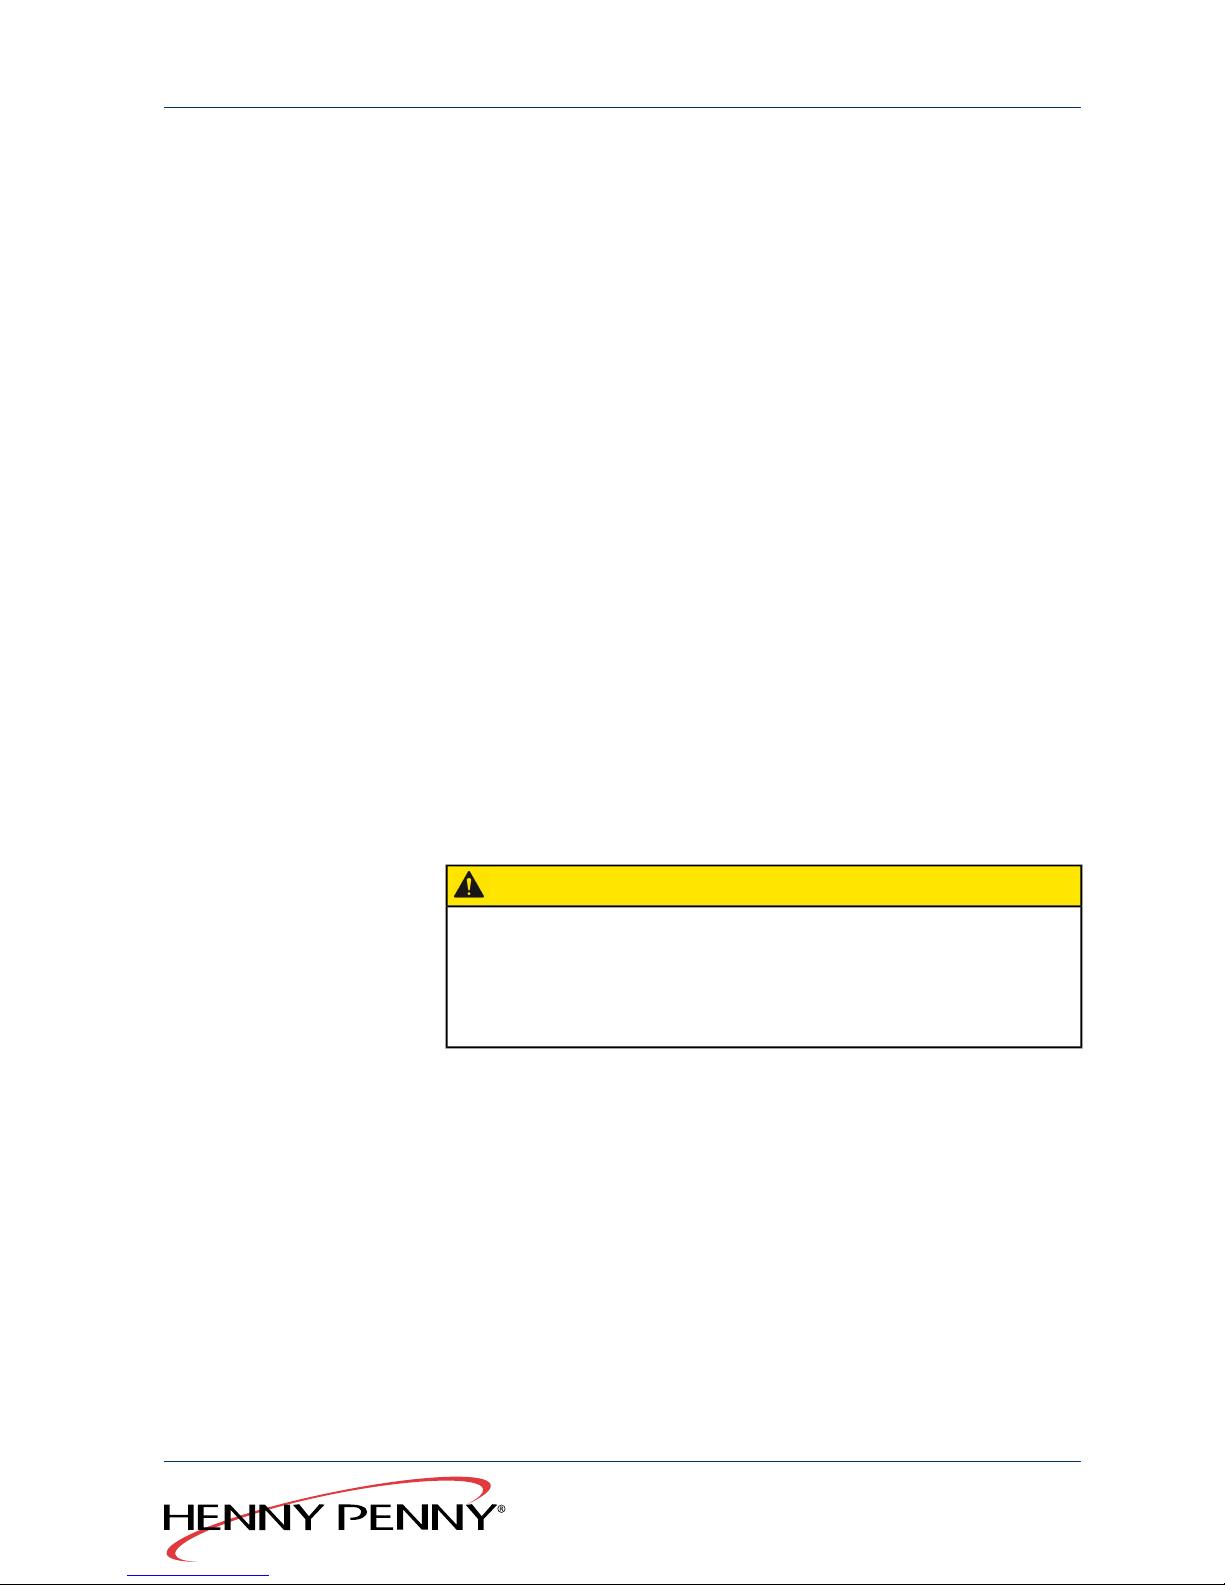
4. Push the loading trolley (1) close to the unit.
5. Rotate the lever (2).
Catch of the rack frame is released.
Loading trolley is secured against rolling away.
6. Check the catch of the loading trolley by pulling lightly.
7. Push in the rack frame (3) until the wheels click into the opening
of the slide-in frame.
8. Rotate the lever (2).
The catch of the rack frame is released.
9. Push the loading trolley (1) away from the unit.
10. Close chamber door.
11. Start cooking process.
12. Open the chamber door and leave it slightly ajar until the next use.
This will increase the life of the door seal.
No moisture will build up in the chamber.
13. Empty completely after cooking is finished.
14. Remove all scraps of food from the outlet filter when emptying.
4.3.2 Filling and emptying the unit (without loading trolley)
CAUTION
Risk of burns due to hot liquids
→
Only use the correct racks.
→
Do not push in containers with liquids to be cooked above
eye-level.
1. Open the chamber door.
2. Slide racks into the suspension frame.
3. Close chamber door.
4. Start cooking process.
5. Open the chamber door and leave it slightly ajar until the next use.
This will increase the life of the door seal.
No moisture will build up in the chamber.
6. Remove racks.
7. Remove all scraps of food from the outlet filter when emptying.
35Operating manual
Global Foodservice Solutions
Operation
SmartCombi
™
Page 36
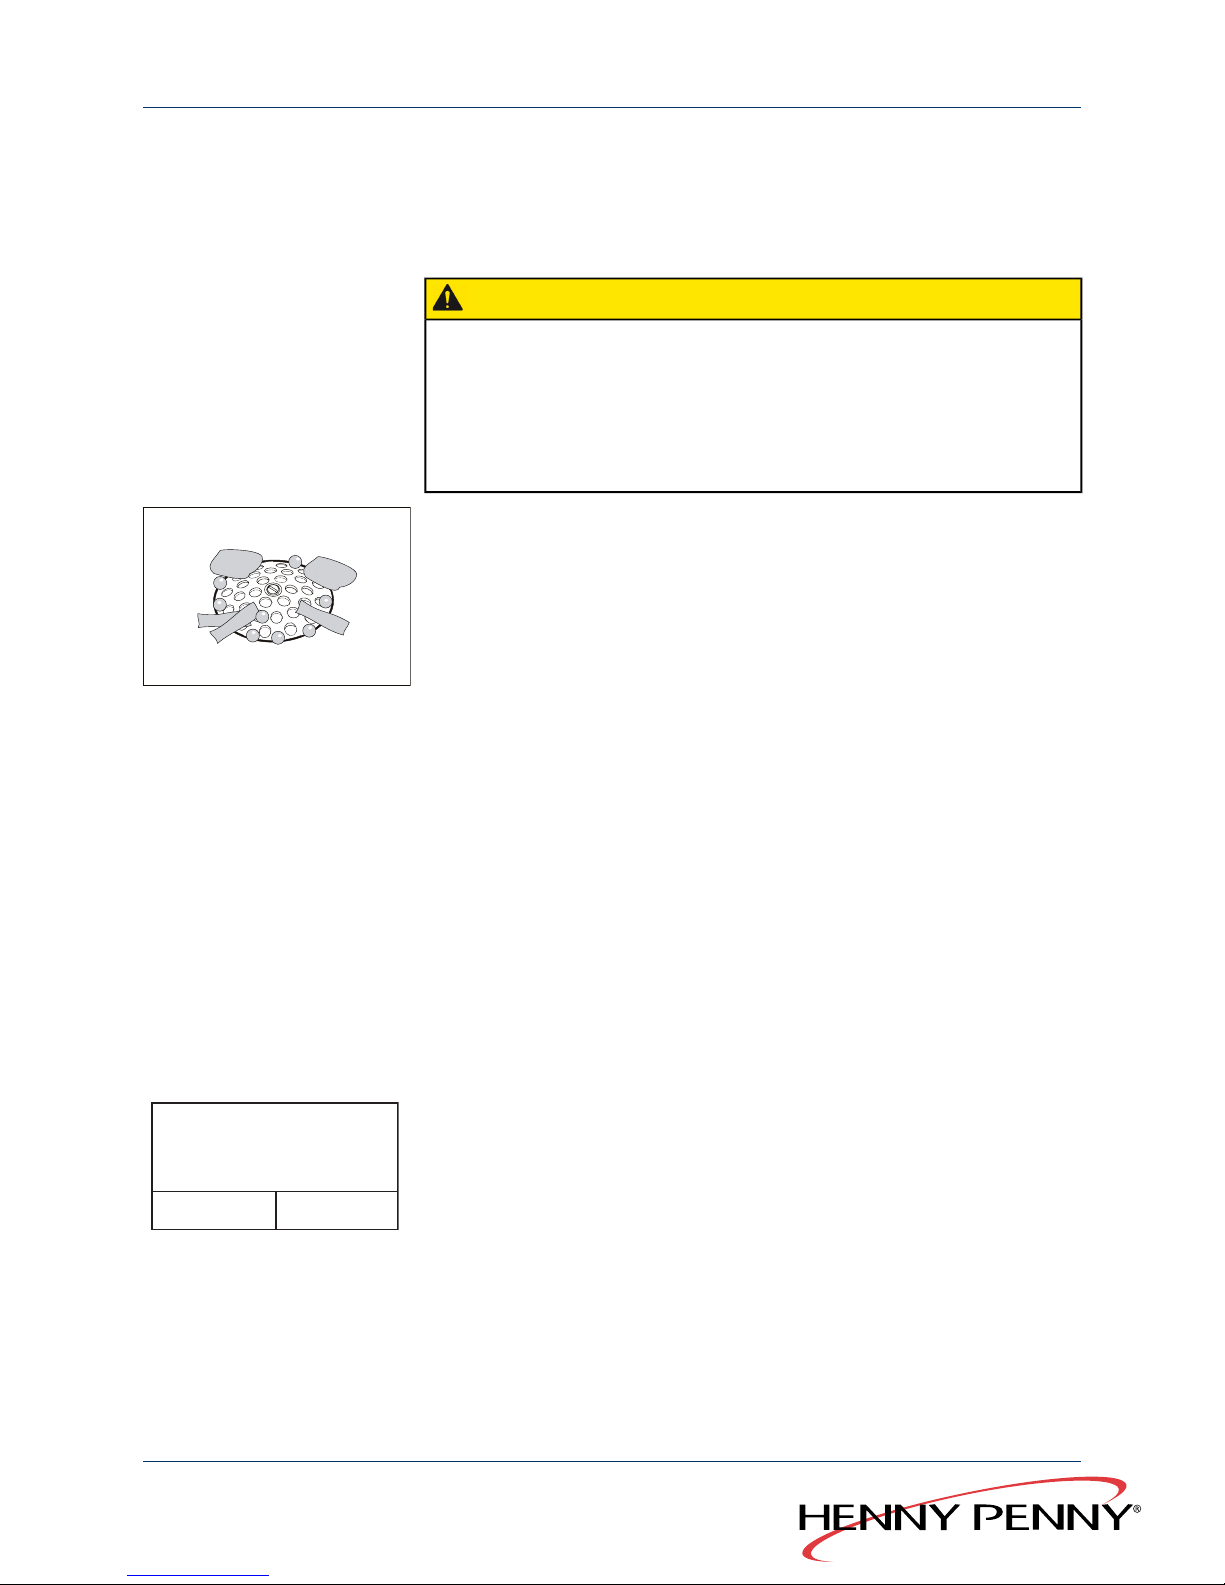
4.4 Filling and emptying the unit (floor
standing units)
Requirements Check that food racks are correctly positioned in the trolley
CAUTION
Risk of burns due to hot liquids
→
Only use the correct racks: The racks must lie safely on the
supporting brackets.
→
Always push the racks into the U-shaped runners.
→
Do not insert containers with liquids to be cooked above eye-level.
1. Load trolley.
2. Push in trolley completely.
3. Close the chamber door.
4. Start the cooking process.
5. Open the chamber door and leave it slightly ajar until the next use.
This will increase the life of the door seal.
No moisture will build up in the cooking chamber.
6. Empty completely after cooking is finished.
7. Remove all scraps of food from the drain sieve when emptying.
4.5 Switch on/switch off unit
4.5.1 Switching on
Requirements Supply lines have been checked.
→
Press On / Off (1) .
On / Off (1) is lit.
12. 08. 2008 13:32
Menu RackCont.
ΔT/LTC/...
The multi-function display (4) shows the start screen.
Unit is switched on.
4.5.2 Switching off
Requirements Current program is completed.
→
Press On / Off (1).
Unit is switched off.
Global Foodservice Solutions
Operating manual36
SmartCombi
™
Operation
Page 37
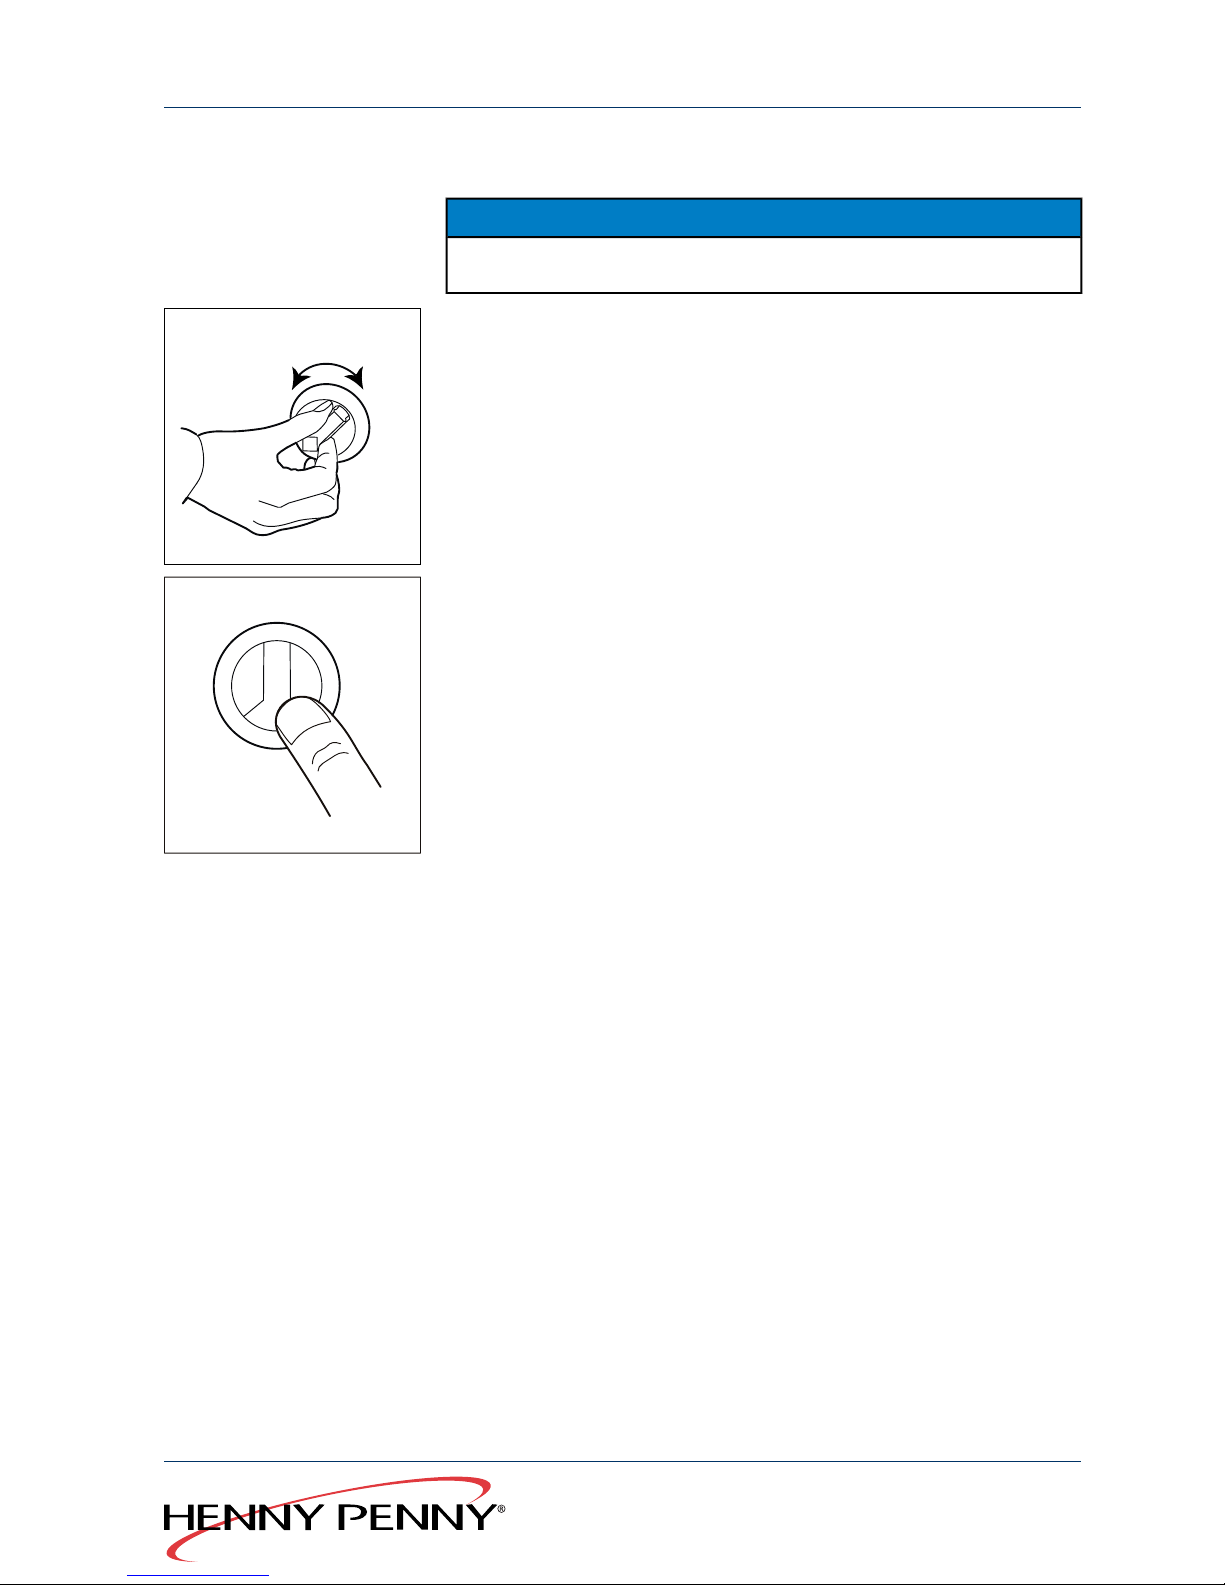
4.6 Working with the CombiDial
NOTICE
Open out the cover page to see the controls.
1. Turn the C omb iDial (9) to select menu items or values.
2. Press Co m biD ial (9) to confirm the selection.
4.7 Basic functions
4.7.1 Changing the language
Requirements Unit is switched on
1. Press the left select button (13) to open the menu.
2. Use CombiDial (9) to select the “Settings” menu.
3. Press the right select button (6).
4. Select the desired language with Co m biD ial (9).
5. Press the right select button (6) to save the settings.
4.7.2 Call up the setup menu and change parameters
Requirements Unit is switched on
1. Press the left select button (13) to open the menu.
2. Use CombiDial (9) to select the “Settings” menu.
37Operating manual
Global Foodservice Solutions
Operation
SmartCombi
™
Page 38
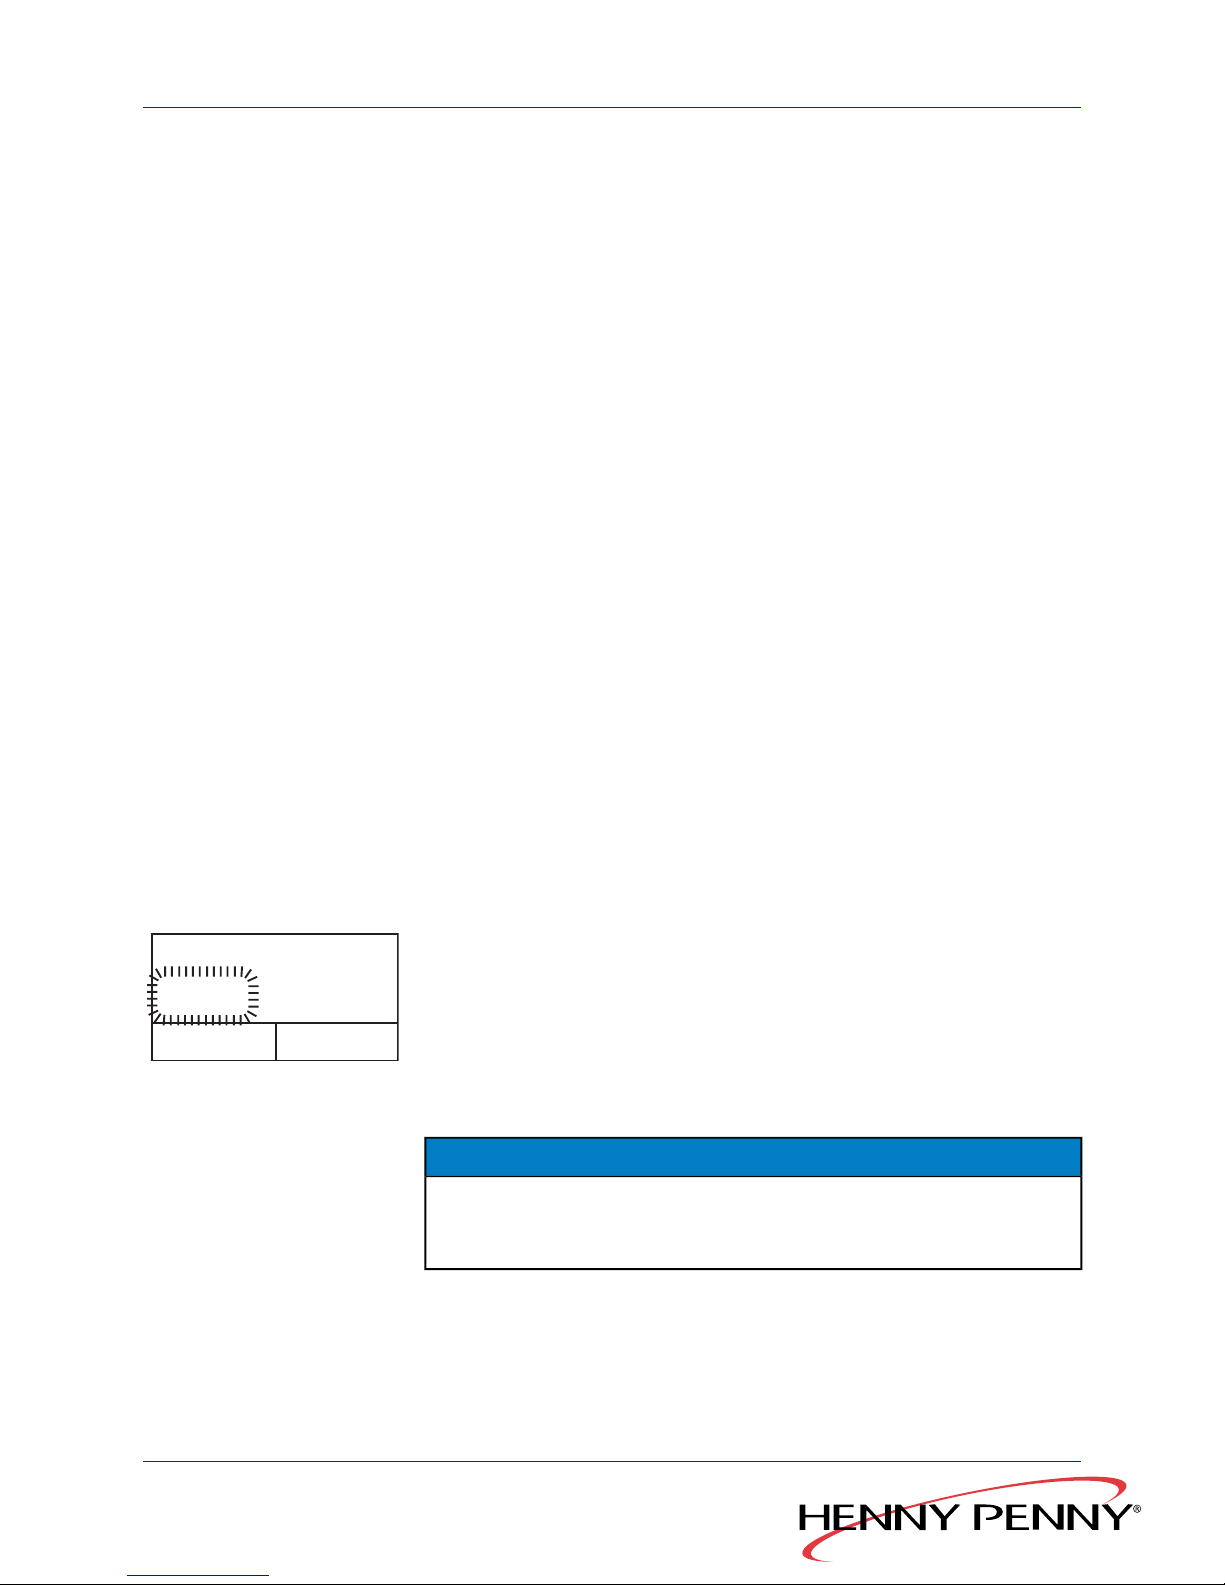
3. Press Co m biD ial (9) to open the menu.
The multi-function display (4) shows “Password” and “000”.
4. Use CombiDial (9) to enter the password “111”.
5. Press St a r t /Stop (8).
The multi-function display (4) shows the first parameter “Time/Date” with
the parameter number “000”.
6. Select the parameter using Com biD ial (9).
7. Set the parameter to the desired value with Comb iDial (9).
8. Press the right select button (6) to save the settings.
The display changes back to the parameter list.
9. Press the left select button (13) to exit the menu.
4.7.3 Displaying actual temperature values
The current cooking temperature can be displayed during operation.
→
Hold Cooking temperature (12) pressed for about 3 seconds.
The multi-function display (4) shows the current cooking temperature for
8 seconds. The target temperature is then shown again.
4.7.4 Set the cooking temperature
Requirements Unit is switched on
1. Press the cooking mode button.
100 C 0: 00
Steaming
01/
01
More
functions
Home
The multi-function display (4) shows the preset cooking temperature and
the cooking time.
2. Set the cooking temperature with Com biD ial (9).
4.7.5 Setting the cooking time
NOTICE
Minimum: 1 minute.
Maximum: 23 hours, 59 minutes.
Global Foodservice Solutions
Operating manual38
SmartCombi
™
Operation
Page 39
1. Press Co m biD ial (9) to switch to entering the cooking time.
2. Set the time with Co m biD ial (9).
3. For continuous operation: With a time display of “0:00”, turn
CombiDial (9) to the left and hold for 3 seconds.
The time display changes to “– –”.
4.7.6 AtmosControl climate control system (set chamber
humidity)
The cooking chamber humidity currently set is shown in the Info monitor
(18).
NOTICE
After selecting the cooking mode, the standard settings for this cooking
mode are shown in the Info monitor (18).
→
Set the chamber humidity with set button (16) or set button
(17)
4.7.7 Measuring the core temperature
DANGER
Risk of injury due to the sensor bursting.
The probe tip may burst if it becomes overheated.
→
Never heat sensors with a lighter or other source of heat.
NOTICE
Use core temperature measurement with all programs if possible.
120 °C
120 °C
60 °C
40 °C
60 °C
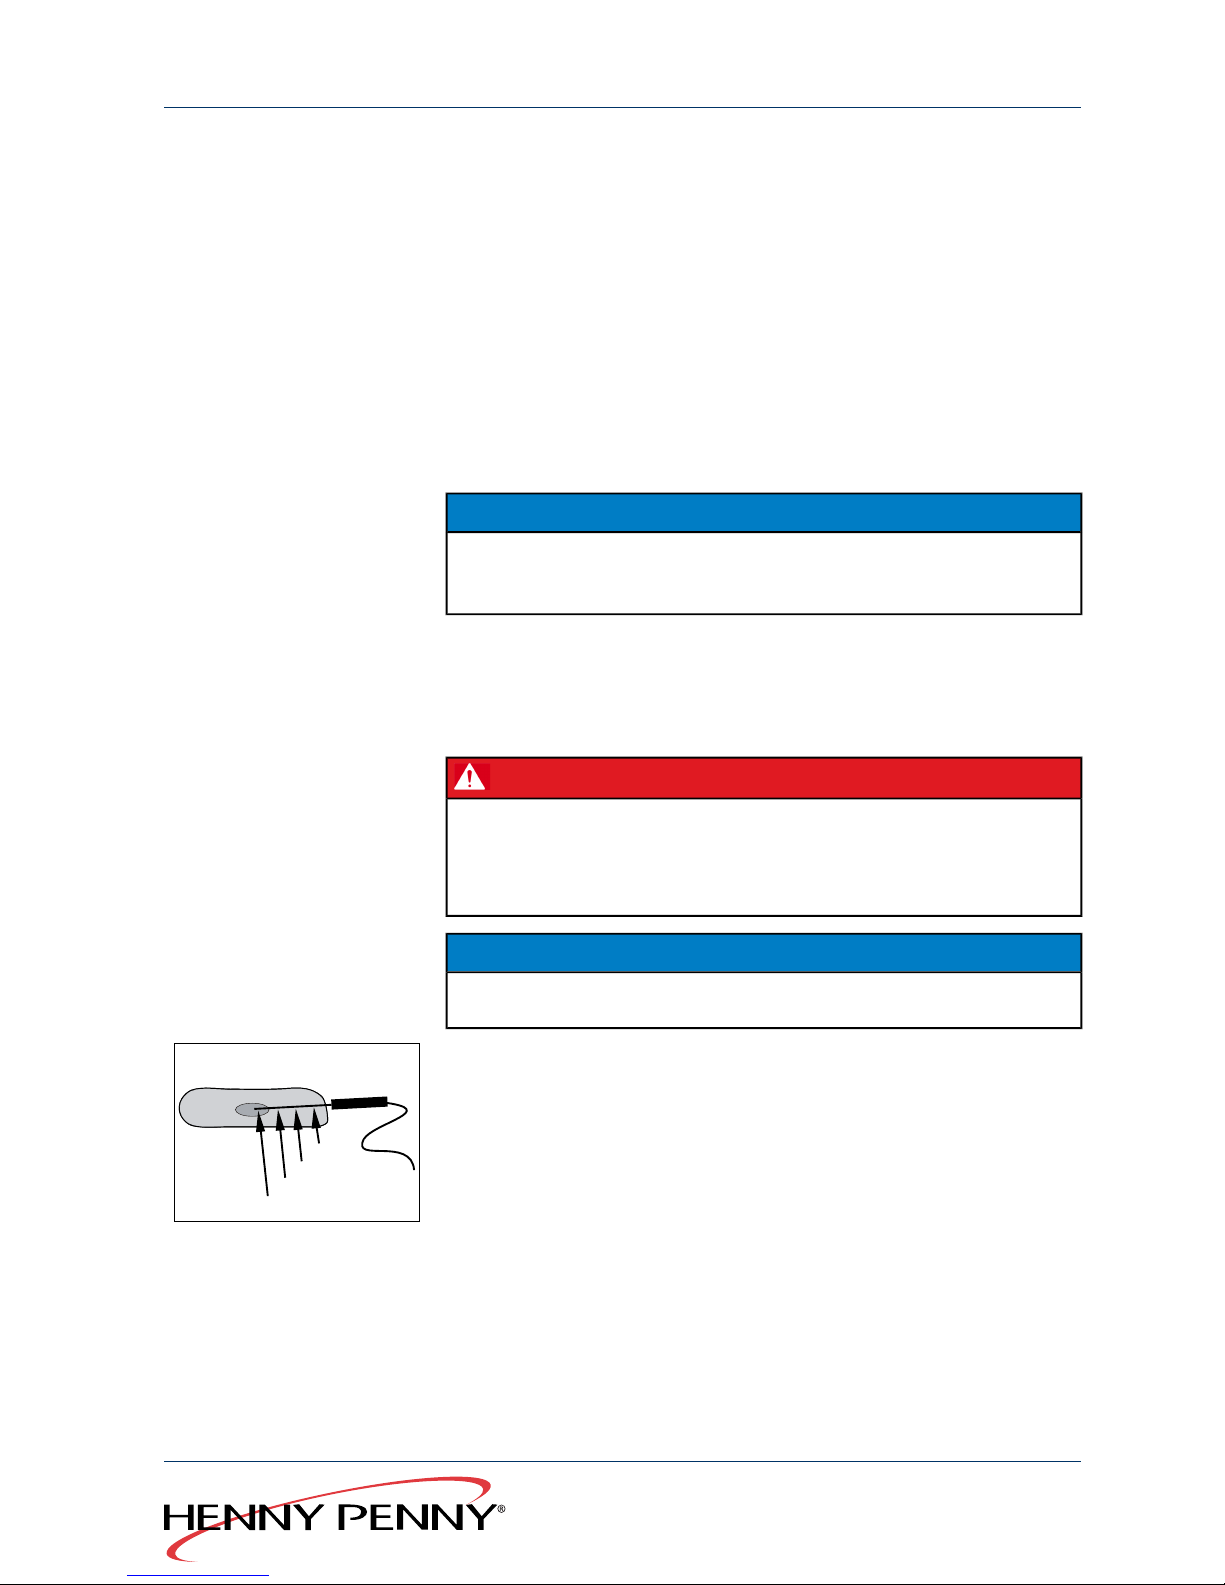
The sensor measures the core temperature at four points; the coldest
point measured is used for controlling the cooking process.This means
that the tip of the sensor may be positioned somewhat away from the
core of the food to be cooked.
●
Insert the sensor into the food to be cooked at the thickest point.
●
For roasting cuts with bone (e.g. cutlets), insert the sensor close
to the bone.
●
With long roasts (e.g. sides of pork), insert the sensor crosswise
in order to avoid a hole in the middle of the slices when cutting.
●
With poultry, insert the sensor in the inner side of the thigh.
39Operating manual
Global Foodservice Solutions
Operation
SmartCombi
™
Page 40
1. If possible, thaw frozen food before cooking.
2. Insert the sensor into the food to be cooked.
3. Place the food with the sensor in the middle of the cooking chamber.
4.7.8 Connecting the USB memory stick
Requirements A suitable USB memory stick is available.
NOTICE
Use an extension cable for USB memory sticks which cannot be
connected to the interface due to their size.
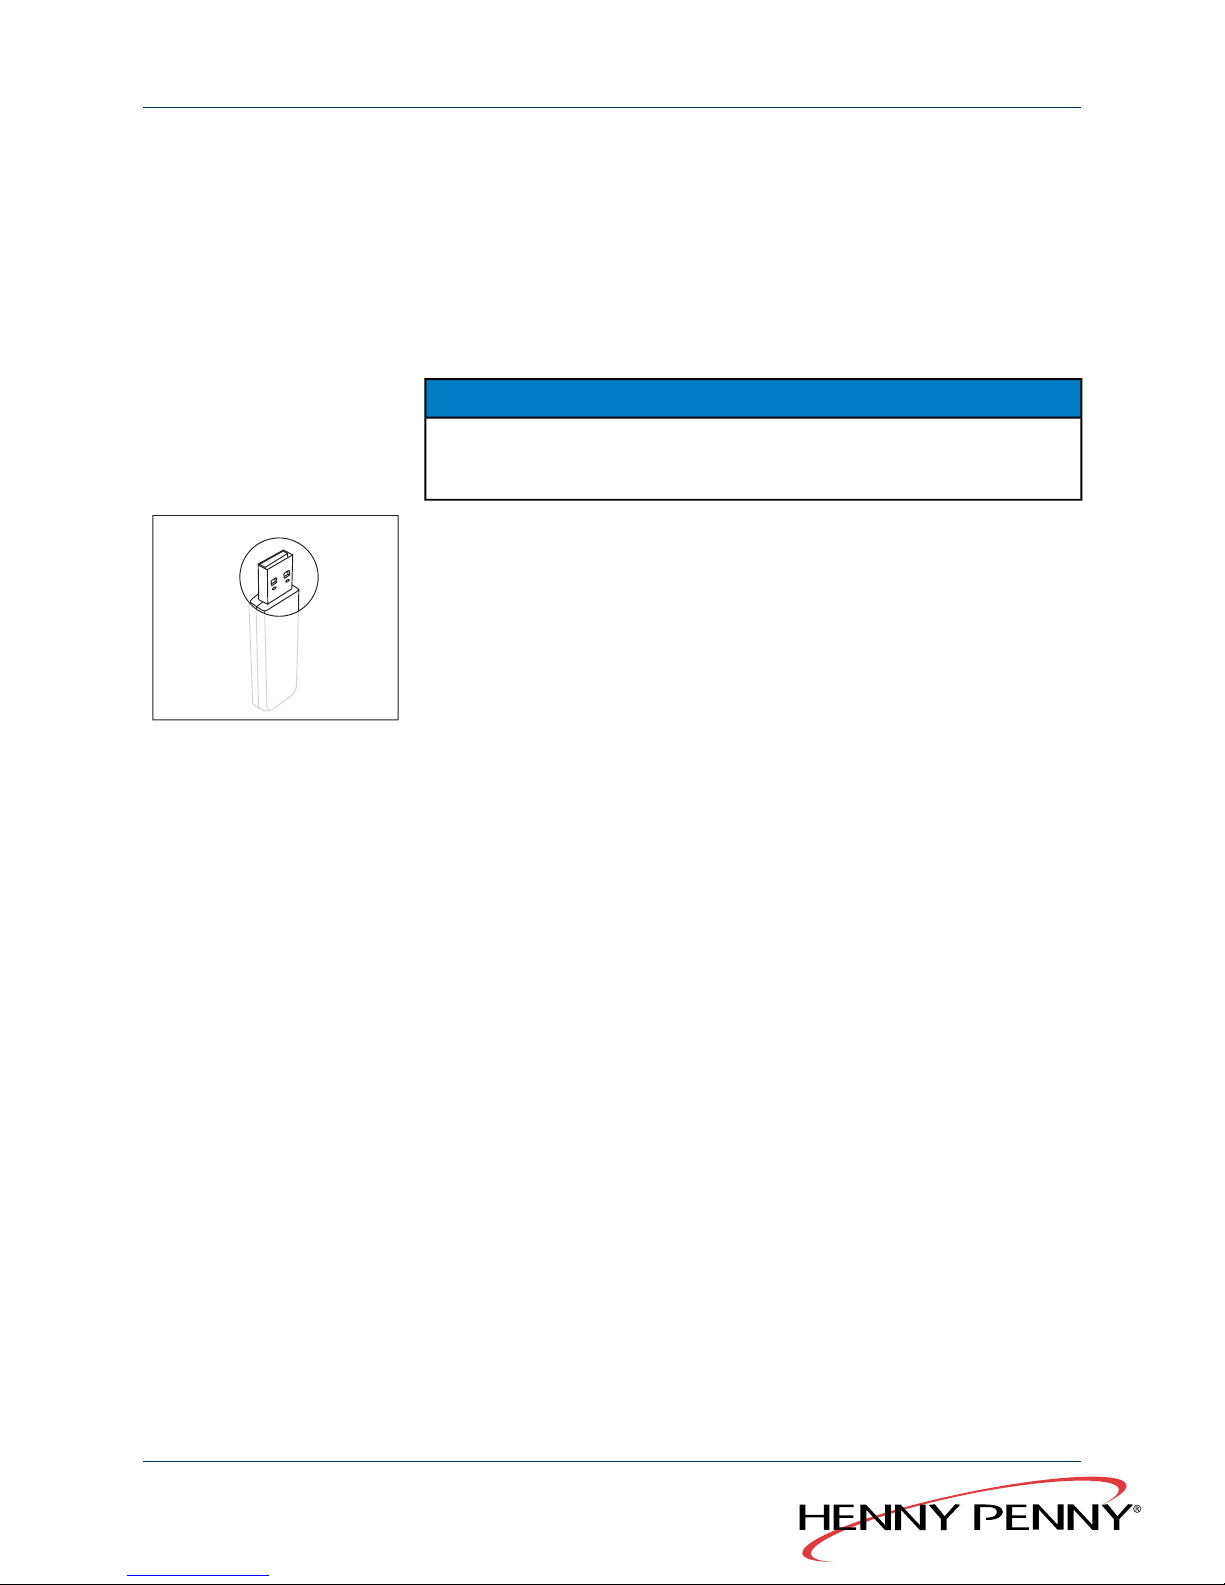
1. Open the black cap under the switch cover.
2. Insert the USB memory stick with the opening to the rear.
The USB memory stick is ready to use after about 5 seconds.
The USB memory stick is connected.
4.7.9 Saving the HACCP log
Requirements The USB memory stick is connected.
The device stores up to 200 HACCP logs, depending on the number of
program steps.
HACCP logs can be saved via the USB interface with a USB memory
stick.
1. Press the left button (13) to open the menu.
2. Press Co m biD ial (9) to select the “HACCP” menu.
3. Press Co m biD ial (9) (9) to select the HACCP log to be saved.
4. Press the right Select button (6) briefly to save the selected HACCP
log.
or
→
Press and hold down the right Select button (6) to save all HACCP
logs from the one selected through to the latest HACCP log (daily or
weekly overview).
The HACCP log is saved on the USB memory stick.
While it is saving, the multi-function display (4) flashes “Please wait” on
the screen.
Global Foodservice Solutions
Operating manual40
SmartCombi
™
Operation
Page 41
Once it has been saved, the multi-function display (4) flashes
“Complete” on the screen.
NOTICE
If a file of the same name is already on the USB memory stick, the
new HACCP logs will be attached.
4.7.10 Saving error messages
Requirements The USB memory stick is connected.
Error messages which occurred during operation can be saved on a
USB memory stick.
} USB
Back
000
01.05.2009 10:30
No water
Error message
1. Press the left button (13) to open the menu.
2. Press Co m biD ial (9) to select the “Diagnosis” menu.
Multi-function display (4) shows the latest error message.
3. Press the right button (6) to save the error messages.
Back
01.05.2009 10:30
finished
Error messages are saved on the USB memory stick.
While it is saving, the Multi-function display (4) flashes “Please wait”
on the screen.
Once it has been saved, the multi-function display (4) shows
“Complete” on the screen.
NOTICE
If a file of the same name is already on the USB memory stick, it will
be overwritten.
4.8 SmartMenu (automatic cooking)
4.8.1 Selecting the cooking program
1. Switch on the unit.
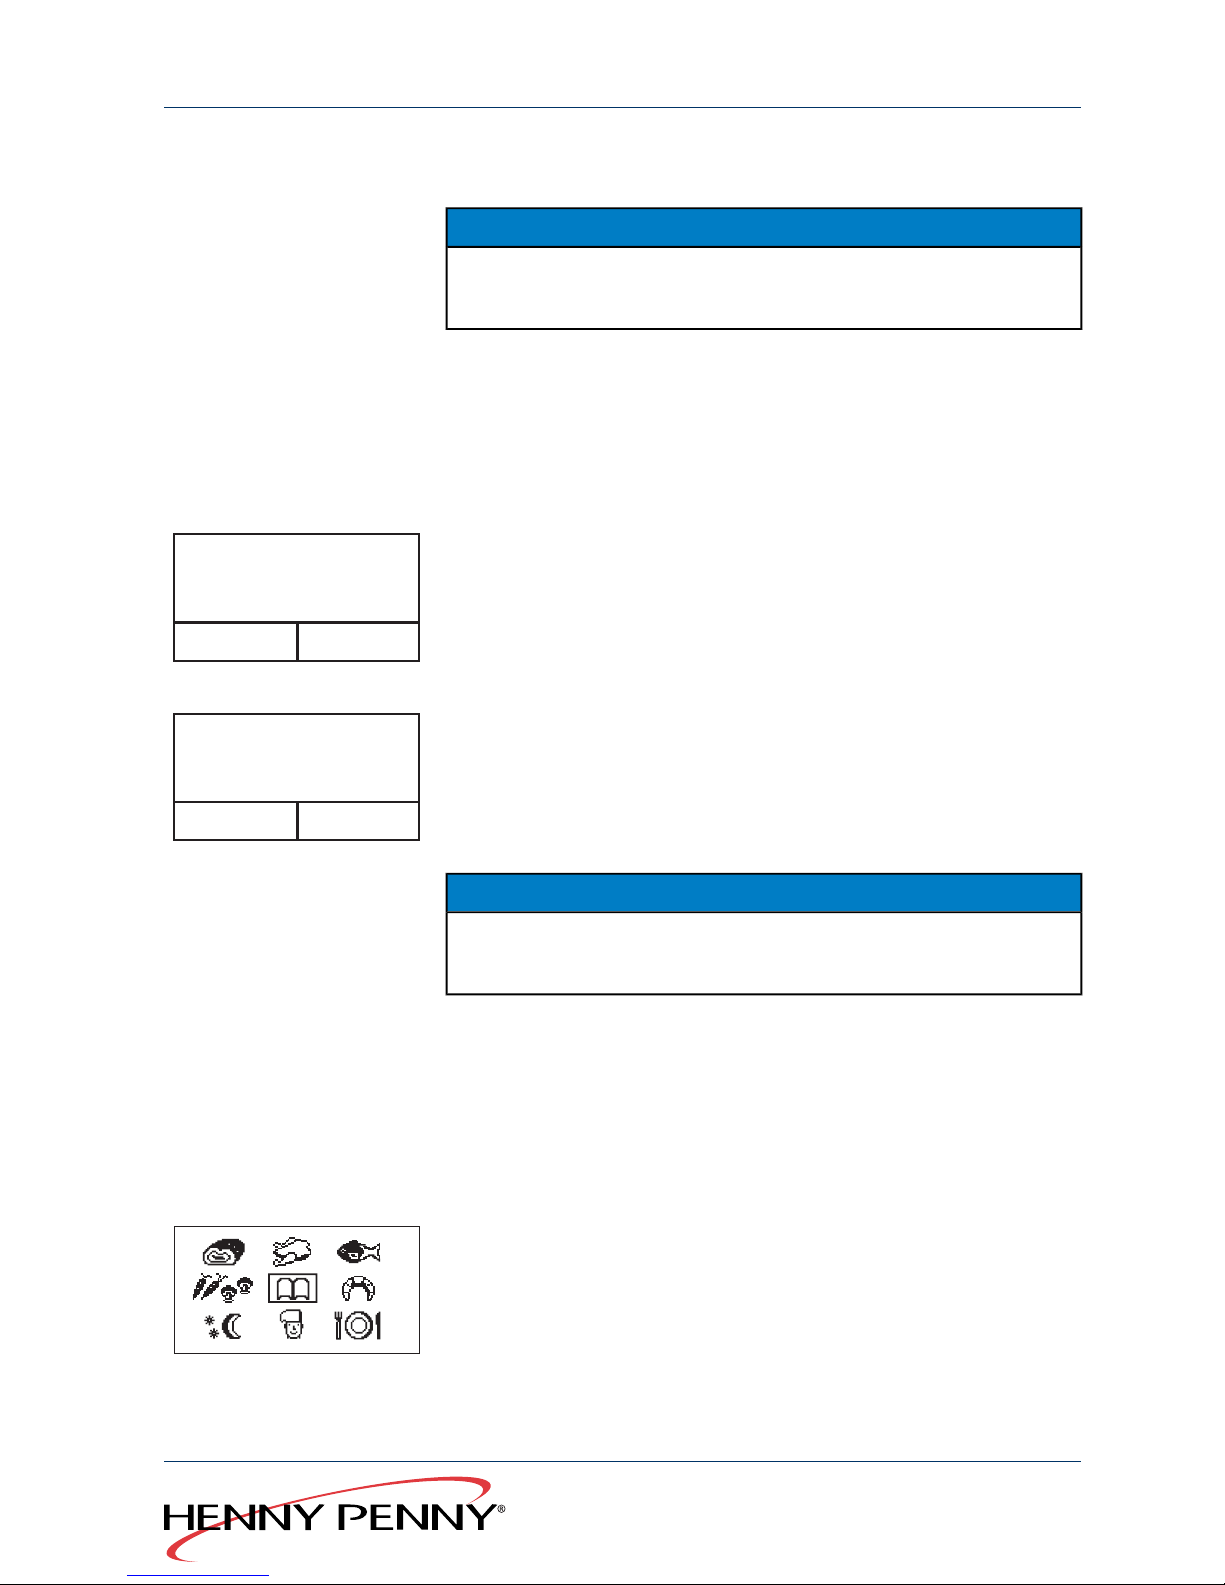
2. Press Sm a r t Menu (2 ) .
The multi-function display (4) shows the SmartMenu cooking categories.
41Operating manual
Global Foodservice Solutions
Operation
SmartCombi
™
Page 42
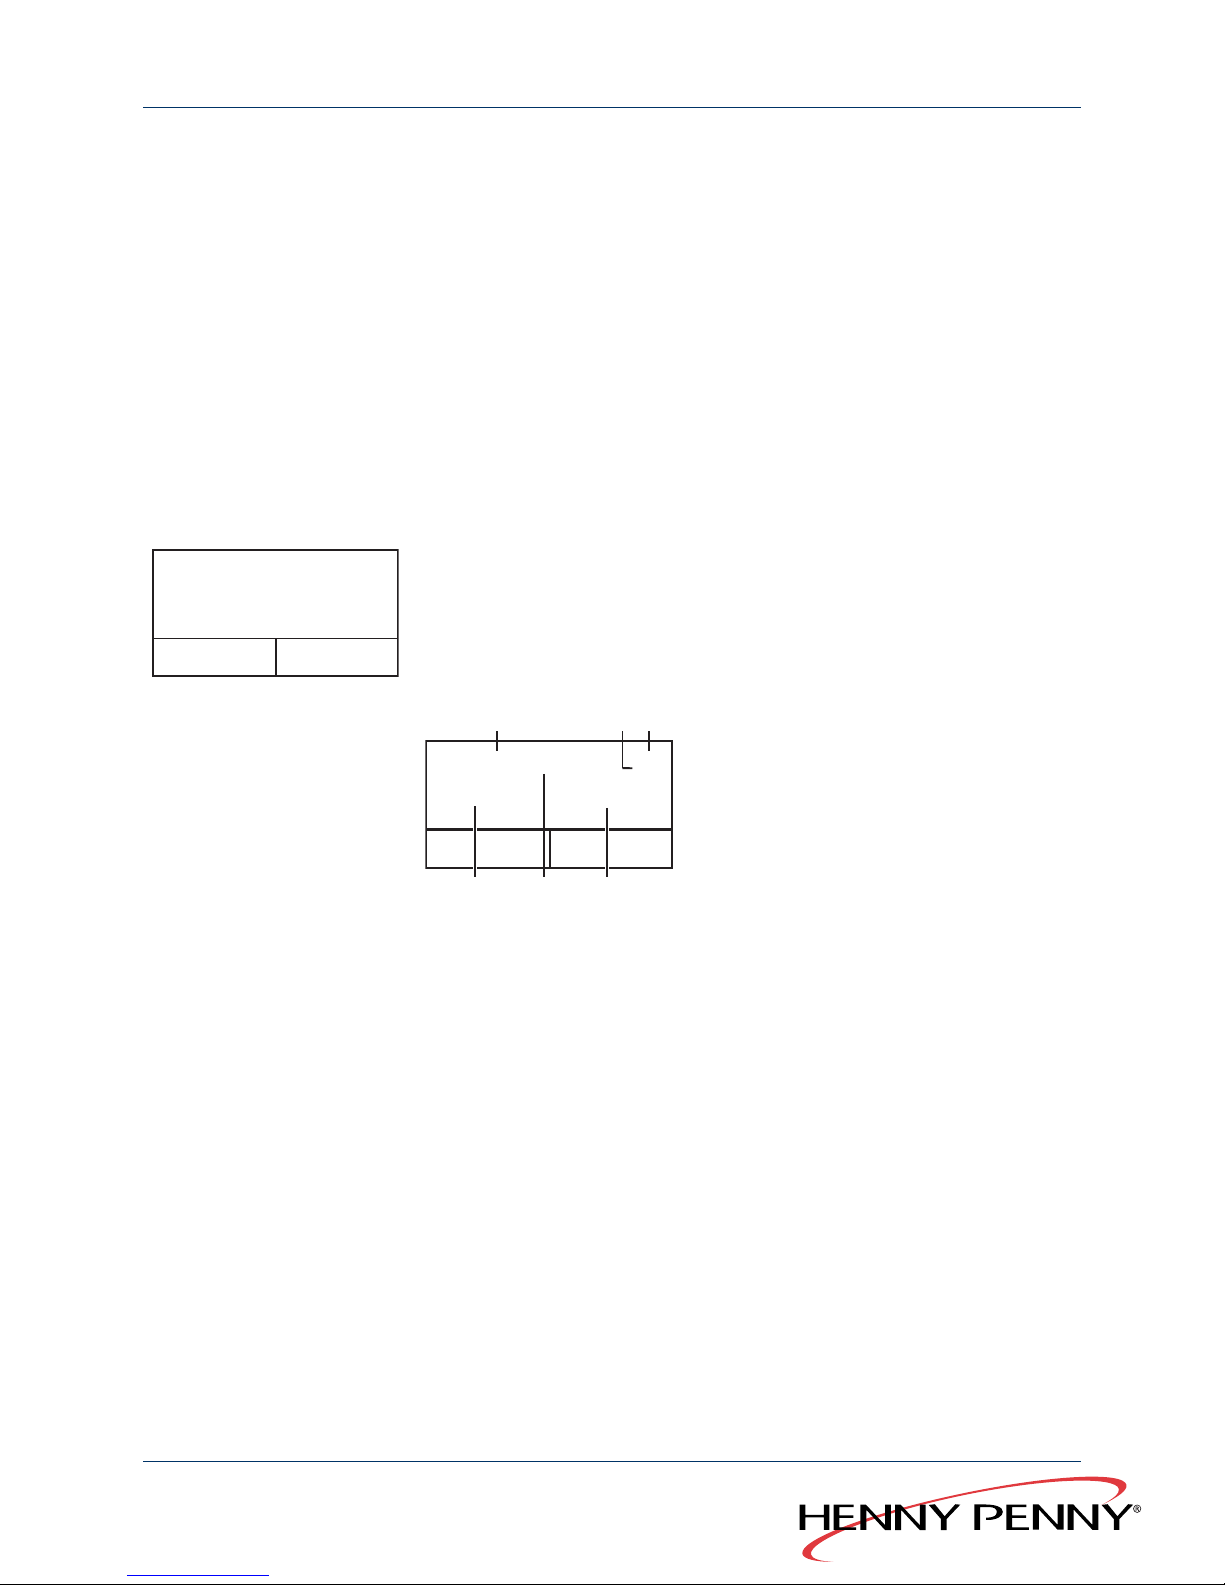
-
Meat (steak, roast pork)
-
Poultry (chicken, turkey)
-
Fish (perch fillet, trout)
-
Vegetables, side dishes (carrots, mushrooms, potatoes)
-
Bakery products (bread, croissants)
-
Overnight cooking (core temperature cooking, low temperature
cooking)
-
MyChef Special (individual programs and programs that can not be
assigned to other categories)
-
Perfection (plate dishes, banquets)
-
Cookbook (contains all cooking programs)
3. Using Co m biD ial (9), select the SmartMenu cooking category.
Cauliflower, fresh
Beans, green
Fried potatoes
01/
02
Prior
Programs
Delete
Program
The list is in alphabetical order; the first program flashes.
4. Select the cooking program with Com b iDial (9).
The multi-function display (4) shows the name of the cooking program,
the number of program steps and the respective values for temperature
and cooking time.
2
31
465
170 C 0: 30
Fried potatoes
Combisteaming
01/
02
More
Functions
Home
1 Name of the program
2 Total number of program steps
3 Current program step
4 Cooking time or core temperature for the program step
5 Cooking mode for the current program step
6 Target temperature for the current program step
4.8.2 Starting the cooking program
→
Select the cooking program with one of the following buttons:
- Start/Stop (8)
- Ready2Cook (10)
- Cooking time (11) (hold pressed)
The multi-function display (4) will show the name of the program and the
cooking mode for the first cooking step.
Global Foodservice Solutions
Operating manual42
SmartCombi
™
Operation
Page 43
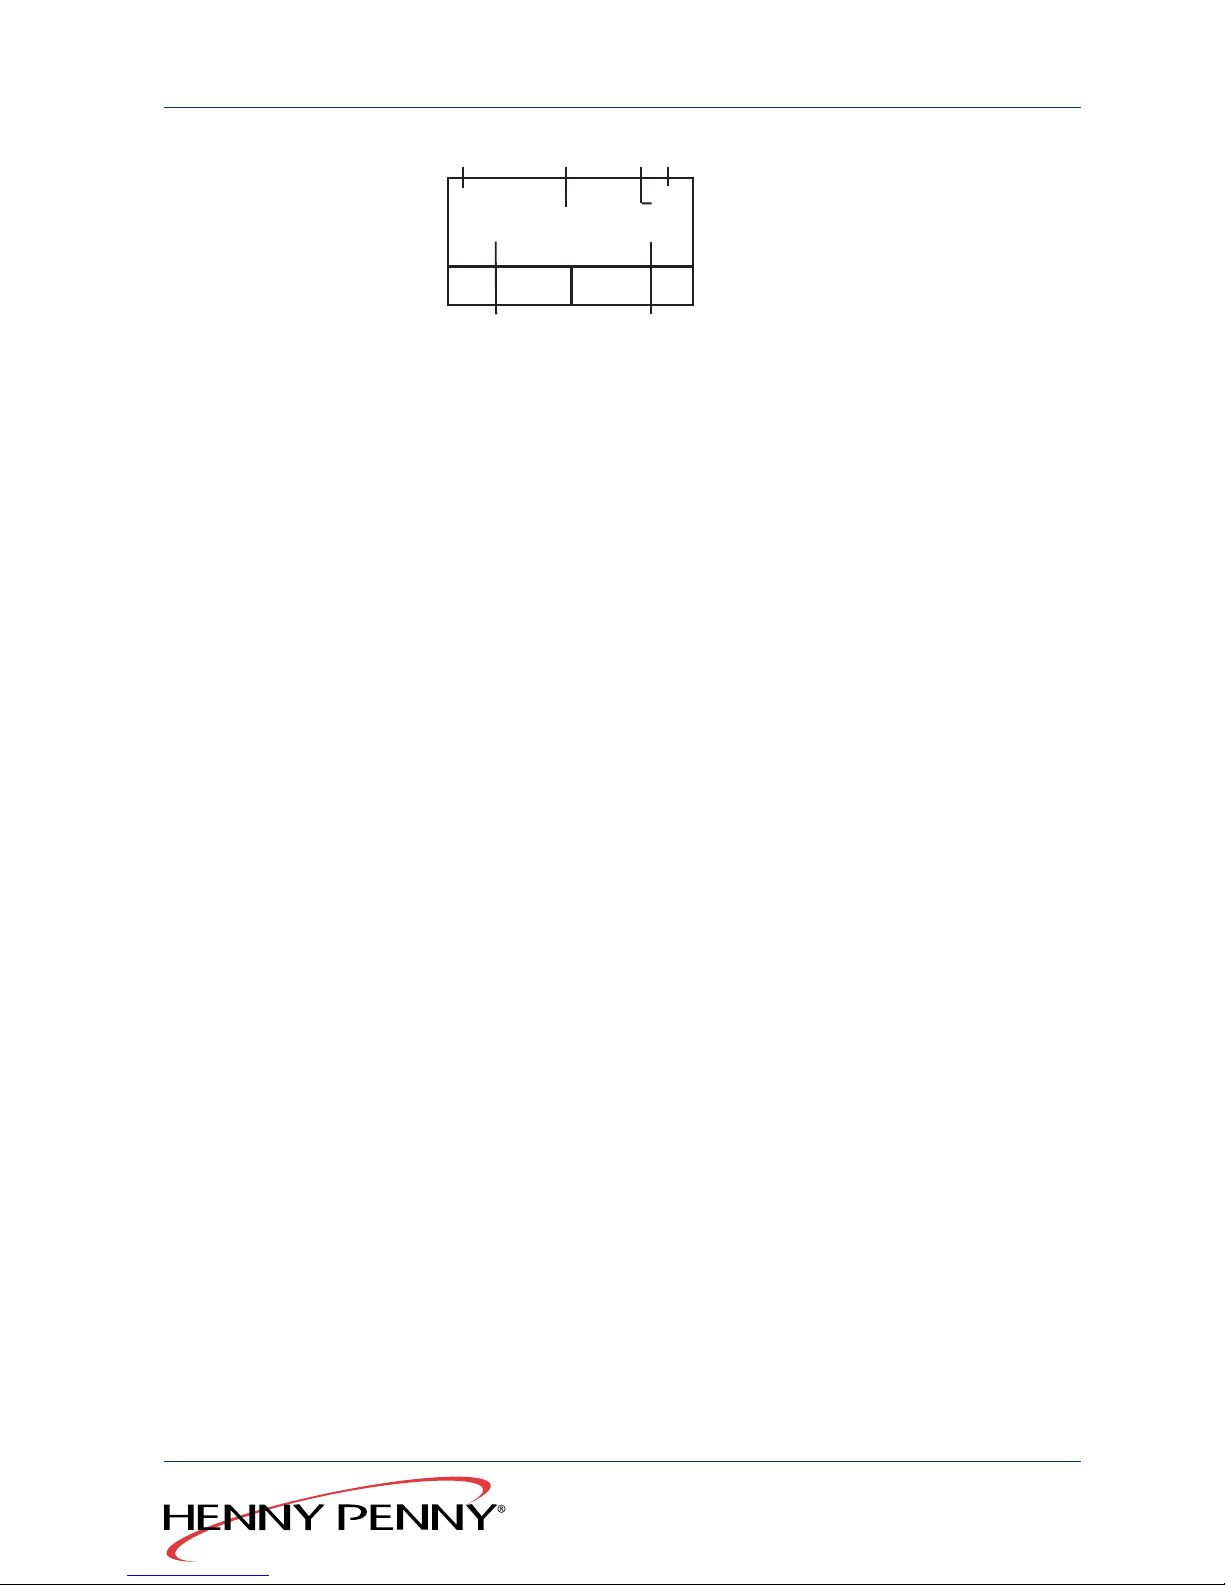
78 C 60 C
Baked ham
53 °
01/
02
1 2 43
56
Manual
Steam
1 Name of the program
2 Actual core temperature
3 Total number of program steps
4 Current program step
5 Target core temperature
6 Target chamber temperature
4.8.3 Ending the cooking program
The program is ended automatically after the cooking time is over or
when the core temperature is reached.
A signal sounds and the lighting in the cooking chamber flashes.
→
Press St a r t /Stop (8) or open the door of the chamber to turn off
the signal.
or
→
Press St a r t/stop (8) to end the program prematurely.
4.8.4 Display last program
1. Press Sm a r t Menu (2 ) .
2. Press Co m biD ial (9).
3. Press the left select button (13) to display the last cooking
program.
The programs that were last used are shown, up to a maximum of ten.
4.8.5 Changing the cooking program during operation
You can change the cooking time, cooking temperature or target core
temperature for the individual cooking steps during operation by using
the buttons Core temperature (7), Cooking time (11), Cooking
temperature (12) and C omb i Dial (9).
43Operating manual
Global Foodservice Solutions
Operation
SmartCombi
™
Page 44
NOTICE
Changes made during operation only apply to the running program and
are not adopted as default values.
1. Press Core temperature (7), Cooking time (11) or Cooking
temperature (12).
2. Change the values with Com b iDial (9).
1
65 C 72 C
Baked ham*
Steaming
01/
03
More
functions
Home
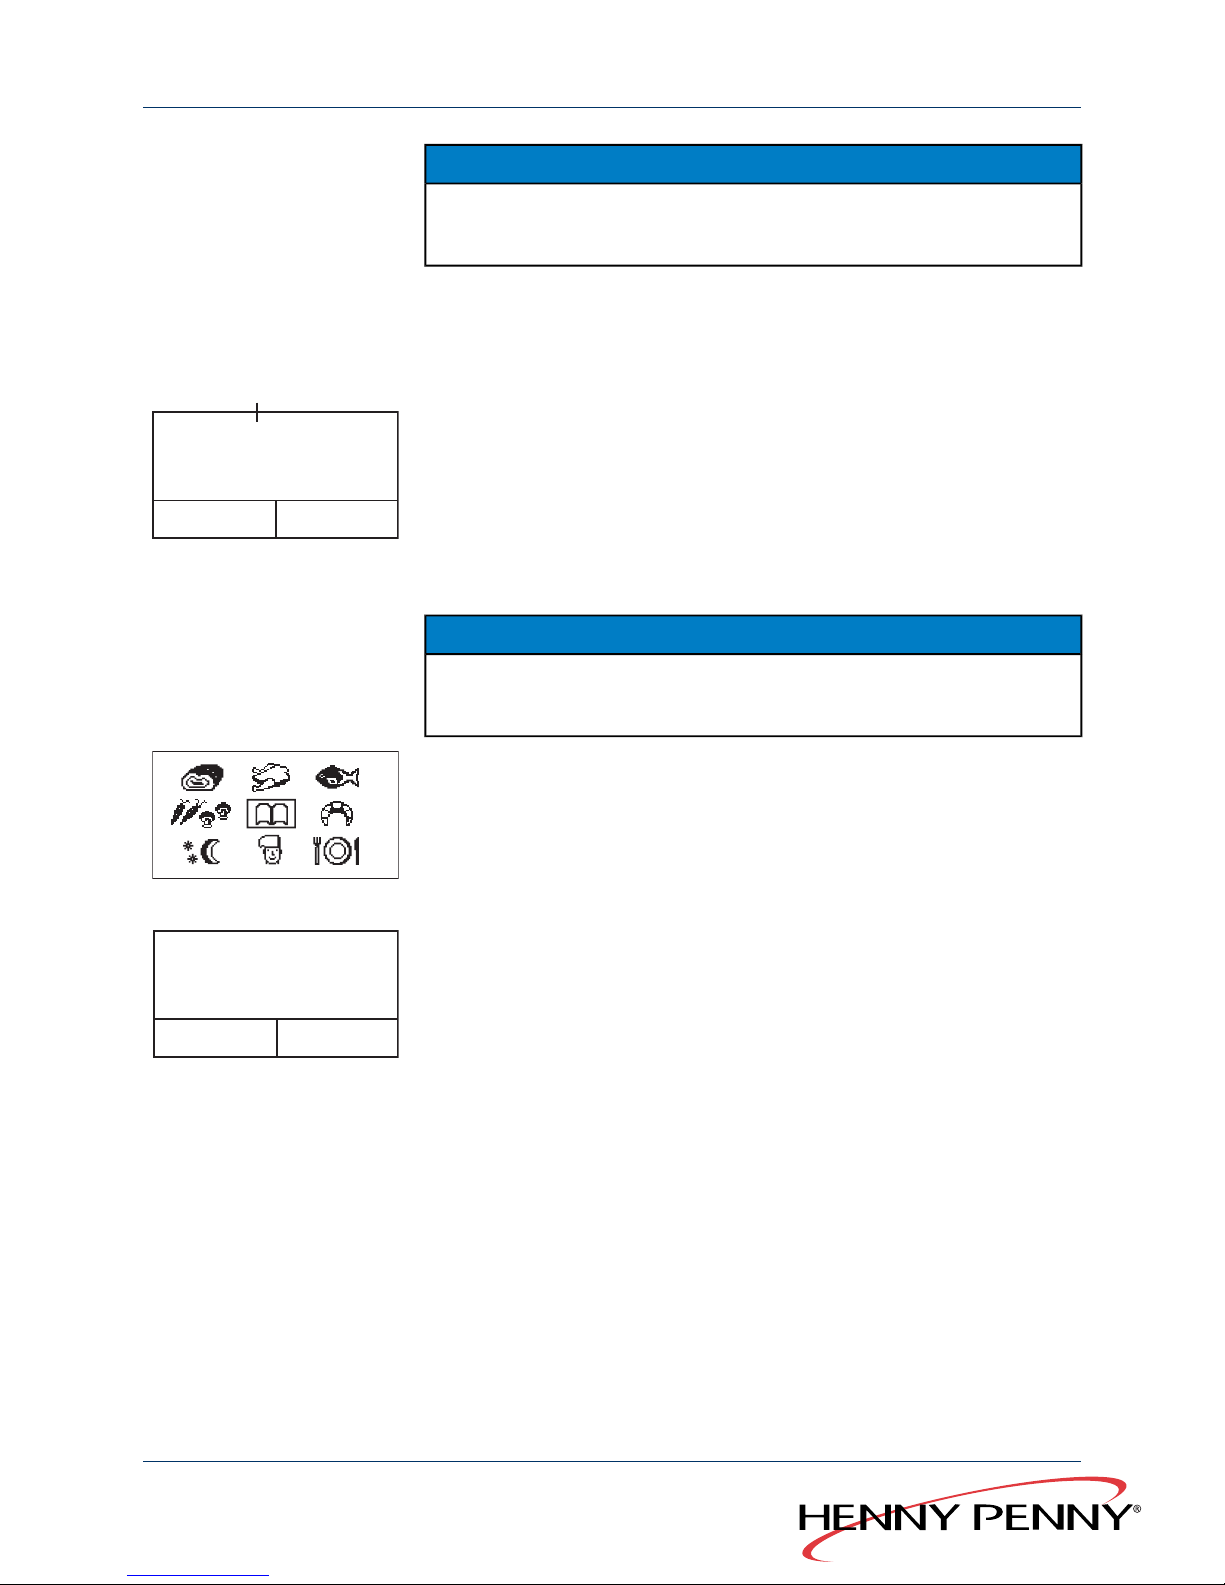
An asterisk (1) alongside the program name indicates that the saved
program has been modified temporarily.
4.8.6 Save changed program
NOTICE
Always save programs that you have copied and changed under a new
name.
1. Press Sm a r t Menu (2 ) longer.
The program will be saved.
The multi-function display (4) shows the SmartMenu cooking categories.
2. Use CombiDial (9) to select the SmartMenu cooking category.
Saved
01/
01
The multi-function display (4) shows “Saved” for three seconds.
Then the display returns to the stand-by mode.
4.8.7 Create your own cooking programs
The unit can store up to 350 programs.
There are two ways of creating your own programs:
●
Copy an existing cooking program, make individual adjustments and
save it under a new name in the SmartMenu program memory.
●
Create a new cooking program and save it in the SmartMenu program
memory. It makes no difference whether you save a program first
and then start it or start it first and then save it.
Global Foodservice Solutions
Operating manual44
SmartCombi
™
Operation
Page 45
4.8.8 Entering a cooking program (example)
The process of creating and storing a two-step cooking program is
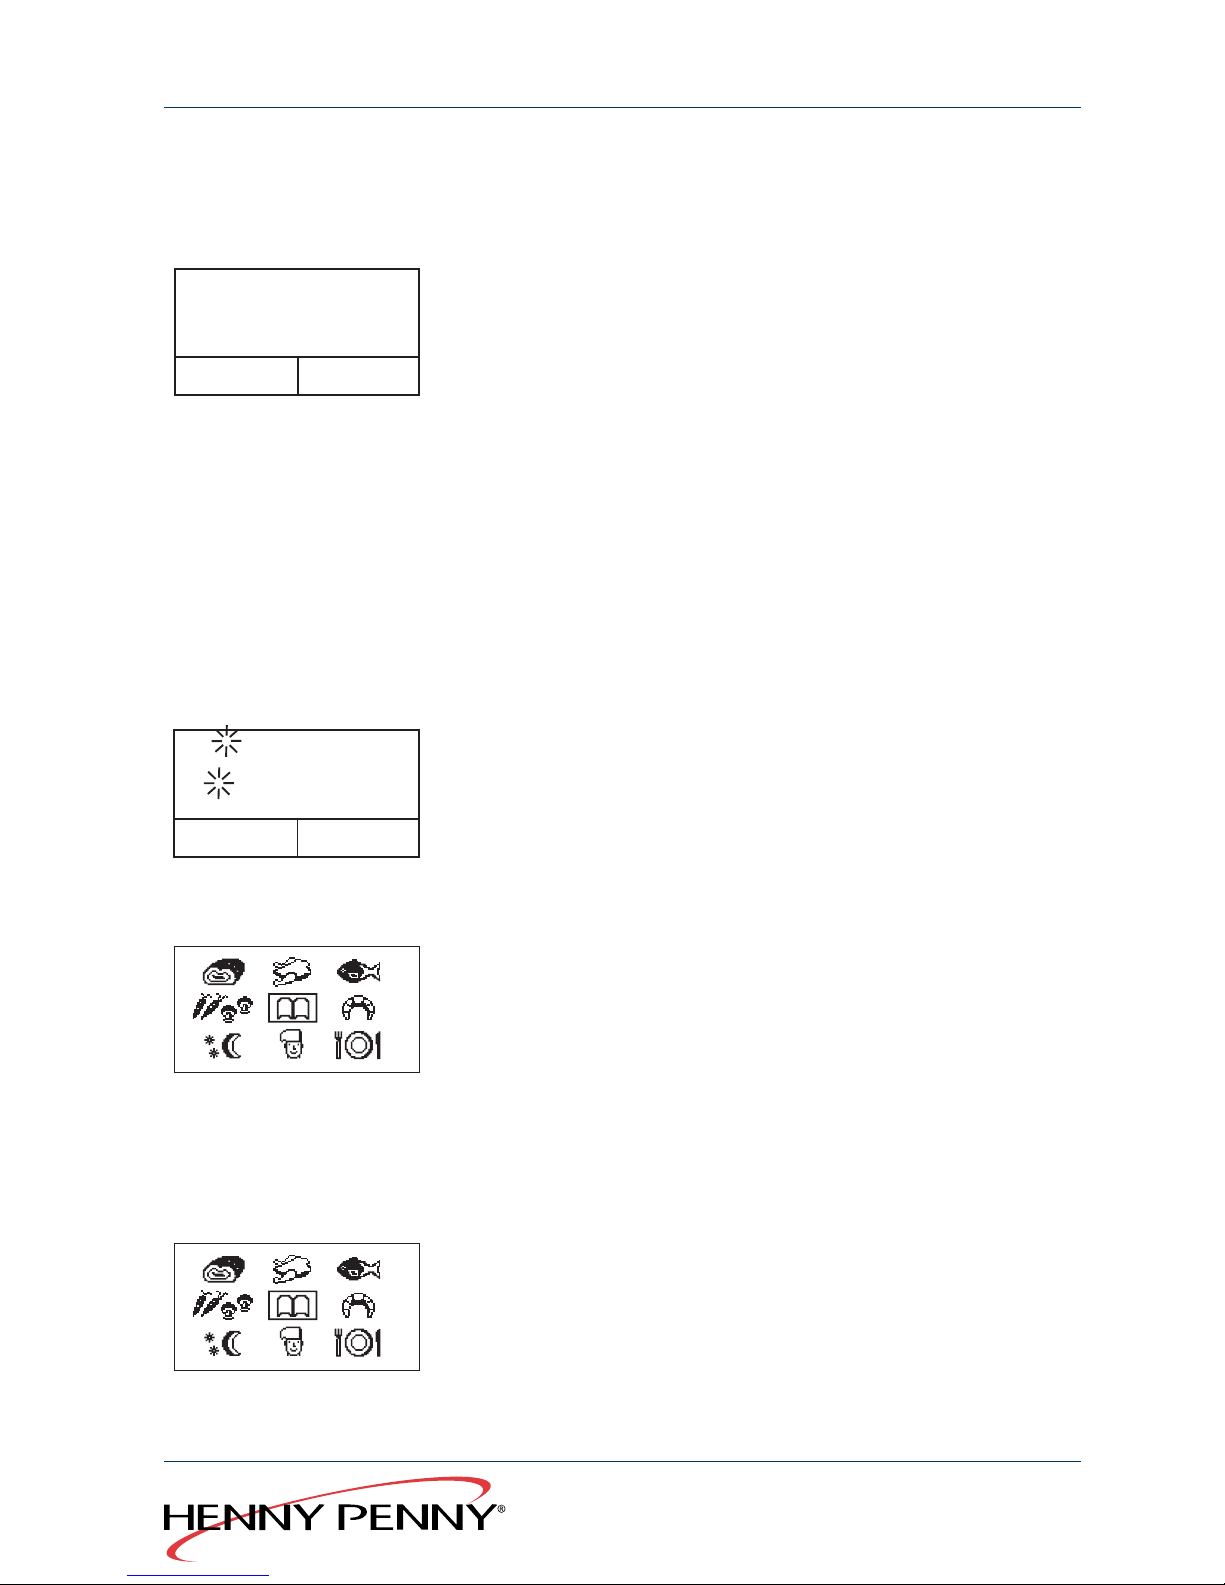
described using the “Baked ham” program as an example.
78 C 60 C
Steaming
01/
01
More
functions
Home
1. Press Steaming (15).
2. Set the cooking temperature.
3. Set the cooking time.
4. Set the target core temperature.
Cooking temperature: 78 °C (172.4 °F), core temperature: 60 °C
(140 °F)
5. Press Co n v ection (14).
6. Set the cooking temperature.
7. Set the cooking time.
8. Set the target core temperature.
Cooking temperature: 180 °C (356 °F), core temperature: 65 °C (149 °F)
9. Hold Sm a r t Menu (2 ) pressed for 4 seconds.
Baked
abcdefghijklmnopqrstu
vwxyz
01/
01
a } A
1 } !
Correction
10. Enter a name for the new program with Co m biD ial (9).
Press the left select button (13) to switch between upper and
lower case letters or for special characters.
Press the right select button (6) to correct mistakes.
11. Press Sm a rt Menu (2 ) longer.
The program will be saved.
The multi-function display (4) shows the SmartMenu cooking categories.
The Info monitor (18) shows in text format the respective SmartMenu
cooking category that is selected.
12. Use CombiDial (9) to select the SmartMenu cooking category.
The multi-function display (4) shows “Saved” for five seconds.
4.8.9 Copying a cooking program
Each program can be modified individually.
1. Press Sm a r t Menu (2 ) .
The multi-function display (4) shows the SmartMenu cooking categories.
2. Use CombiDial (9) to select the SmartMenu cooking category.
45Operating manual
Global Foodservice Solutions
Operation
SmartCombi
™
Page 46
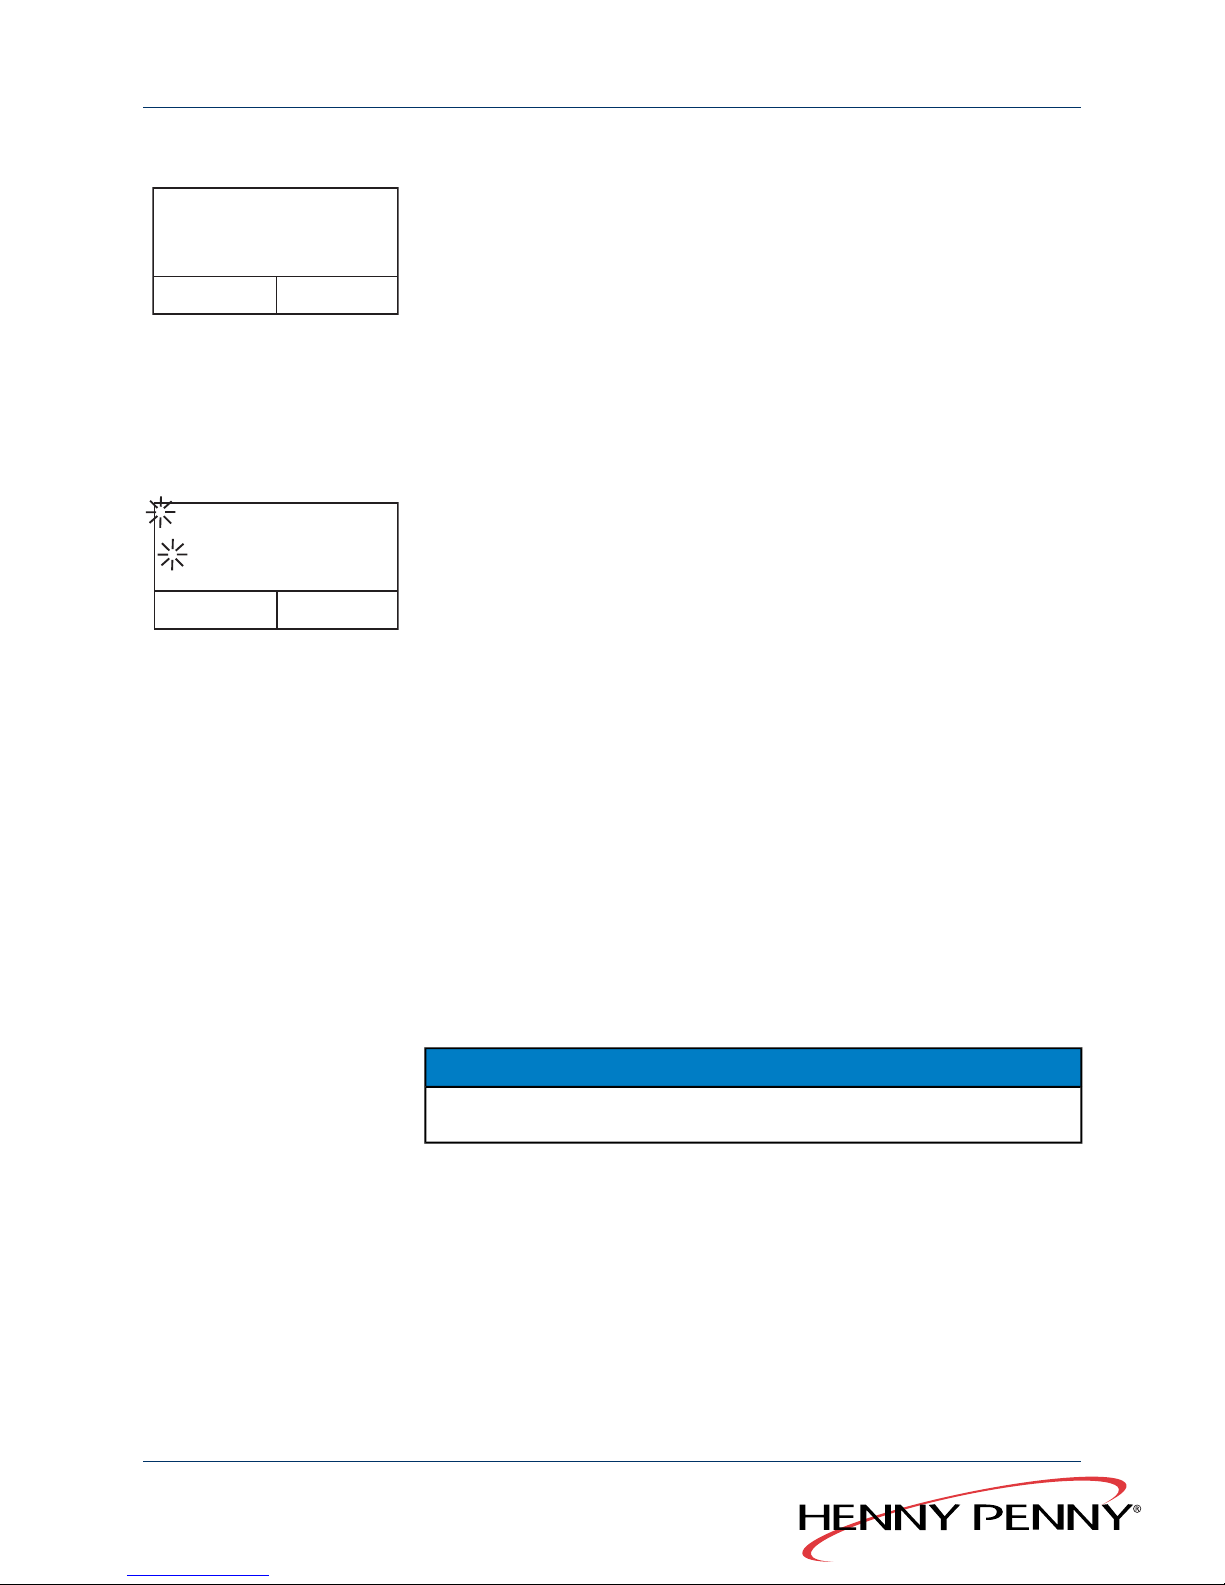
3. Select the cooking program with Com b iDial (9).
175 C 0: 20
Bread, crusty
Convection
01/
01
More
Functions
Home
The multi-function display (4) shows the name of the cooking program,
the number of program steps and the respective values for temperature
and cooking time.
4. Set the values for temperature and time with Co mbi D ial (9).
5. Add further program steps if needed.
An asterisk appears next to the program name as soon as a change is
made.
6. Press Sm a r t Menu (2 ) longer.
The program will be copied.
Bread, crusty
ABCDEFGHIJKLMNOPQRSTU
VWXYZ
01/
01
a } A
1 } !
Correction
The multi-function display (4) shows the original program name.
7. Enter a name for the new program with Co m biD ial (9).
Press the left select button (13) to switch between upper and
lower case letters or for special characters.
Press the right select button (6) to correct mistakes.
4.8.10 Locking and releasing the SmartMenu program
memory
In the “Settings menu”, you can mark the SmartMenu program memory
as fully accessible or locked.
1. Press the left select button (13) to open the menu.
2. Use CombiDial (9) to select the “Settings” menu.
3. Use CombiDial (9) to enter the password “111”.
4. Use CombiDial (9) to select the “Lock program memory” menu.
Programs in the SmartMenu program memory can no longer be created,
modified or deleted.
NOTICE
Proceed as described here to release the SmartMenu program memory.
Global Foodservice Solutions
Operating manual46
SmartCombi
™
Operation
Page 47
4.8.11 Saving SmartMenu cooking programs
Requirements The USB memory stick is connected.
CAUTION
Loss of data due to improper use
→
Only use Henny Penny software to edit SmartMenu cooking
programs
NOTICE
SmartMenu cooking programs can be saved on a USB memory stick.
Only SmartMenu cooking programs which you have made can be
saved. Saving preinstalled cooking programs is not possible.
1. Press the left button (13) to open the menu.
2. Press Co m biD ial (9) to select the “Cookbook > USB” menu.
3. Press the right button (6) to save SmartMenu cooking programs.
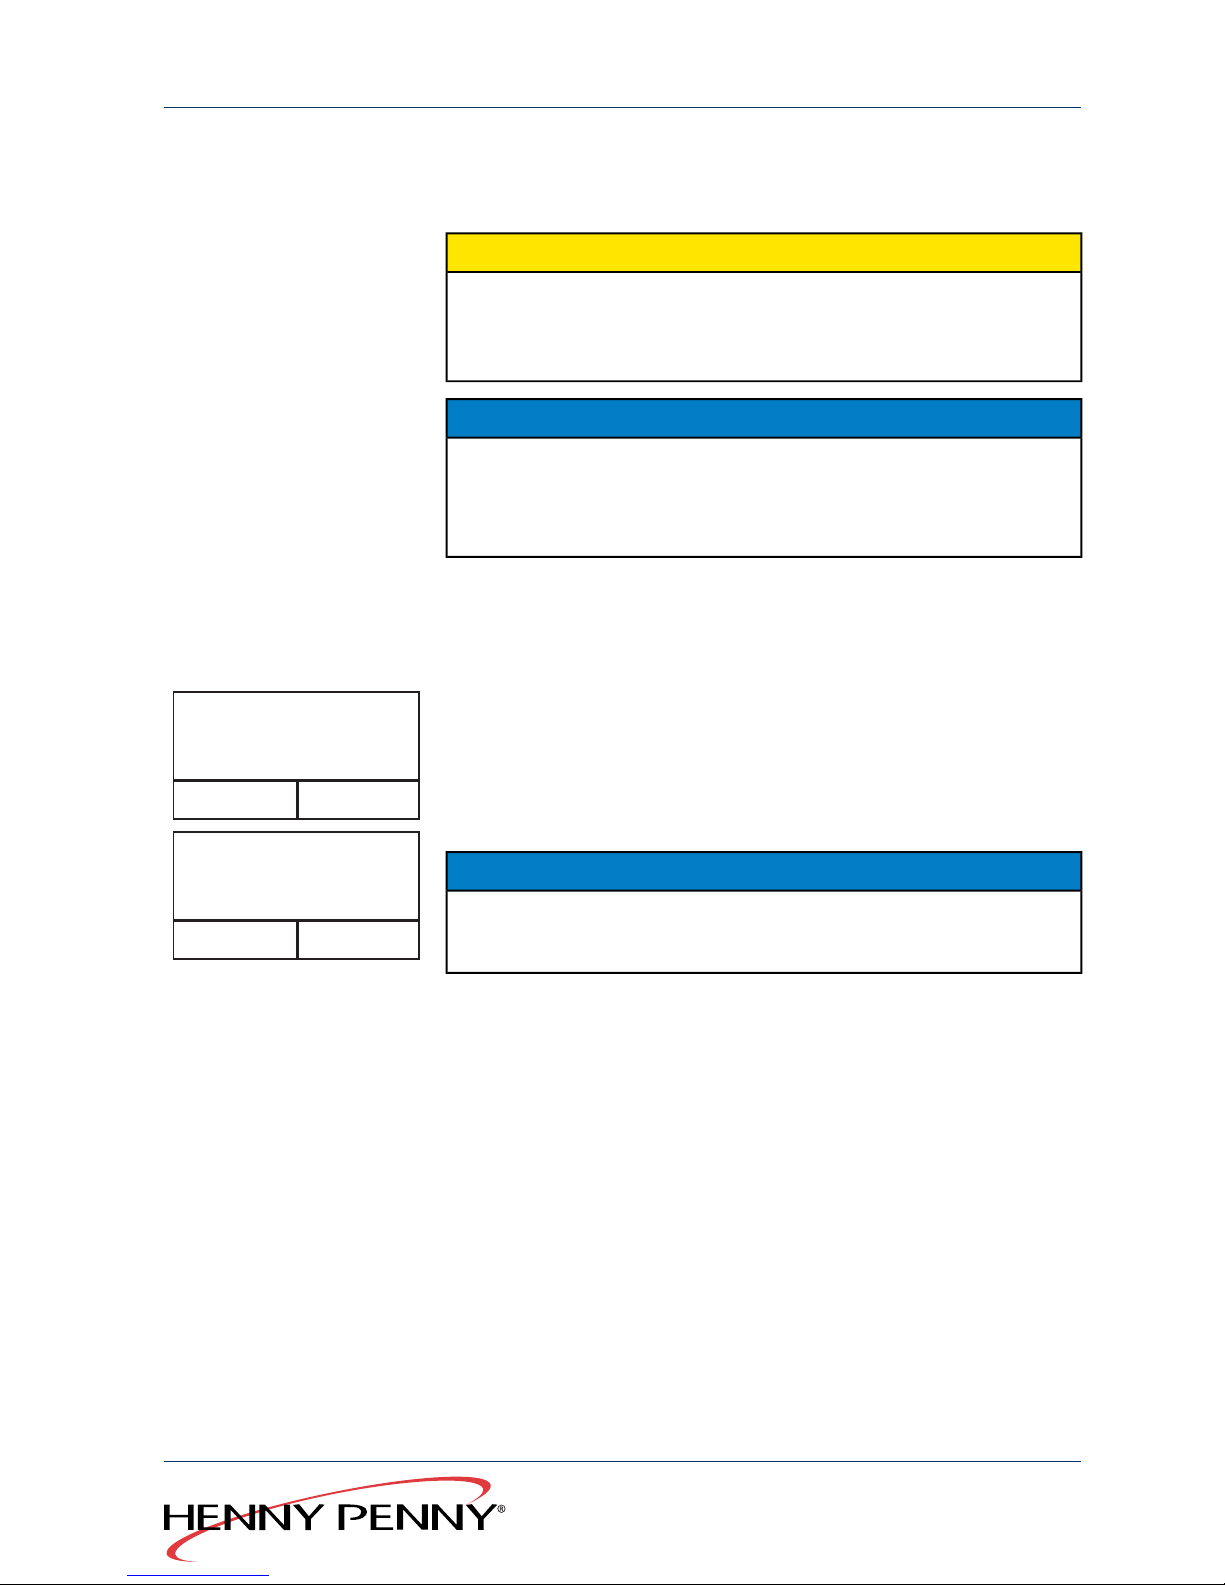
sending cookbook
6 cookbook } USB
SmartMenucooking programs are saved on the USB memory stick.
While it is saving, the multi-function display (4) flashes “Cookb. edition
active” on the screen.
finished
6 Cookbook } USB
Once it has been saved, the multi-function display (4) flashes
“Complete” on the screen.
NOTICE
If a file of the same name is already on the USB memory stick, it will
be overwritten.
4.8.12 Loading SmartMenu cooking programs
Requirements The USB memory stick is connected.
Appropriate files with SmartMenu cooking programs are already on the
USB memory stick.
SmartMenu cooking programs which have been made on other Henny
Penny-combination steamers of the “SmartCombi” or “SpaceSaver
PLUS” versions or with Henny Penny software, can be loaded from a
USB memory stick.
1. Press the left button (13) to open the menu.
2. Press Co m biD ial (9) to select the “USB > cookbook”.
3. Press the right button (6) to open SmartMenu cooking program
files.
47Operating manual
Global Foodservice Solutions
Operation
SmartCombi
™
Page 48
4. Press Co m biD ial (9) to select SmartMenu cooking programs to
load.
5. Press the right button (6) to SmartMenucooking programs.
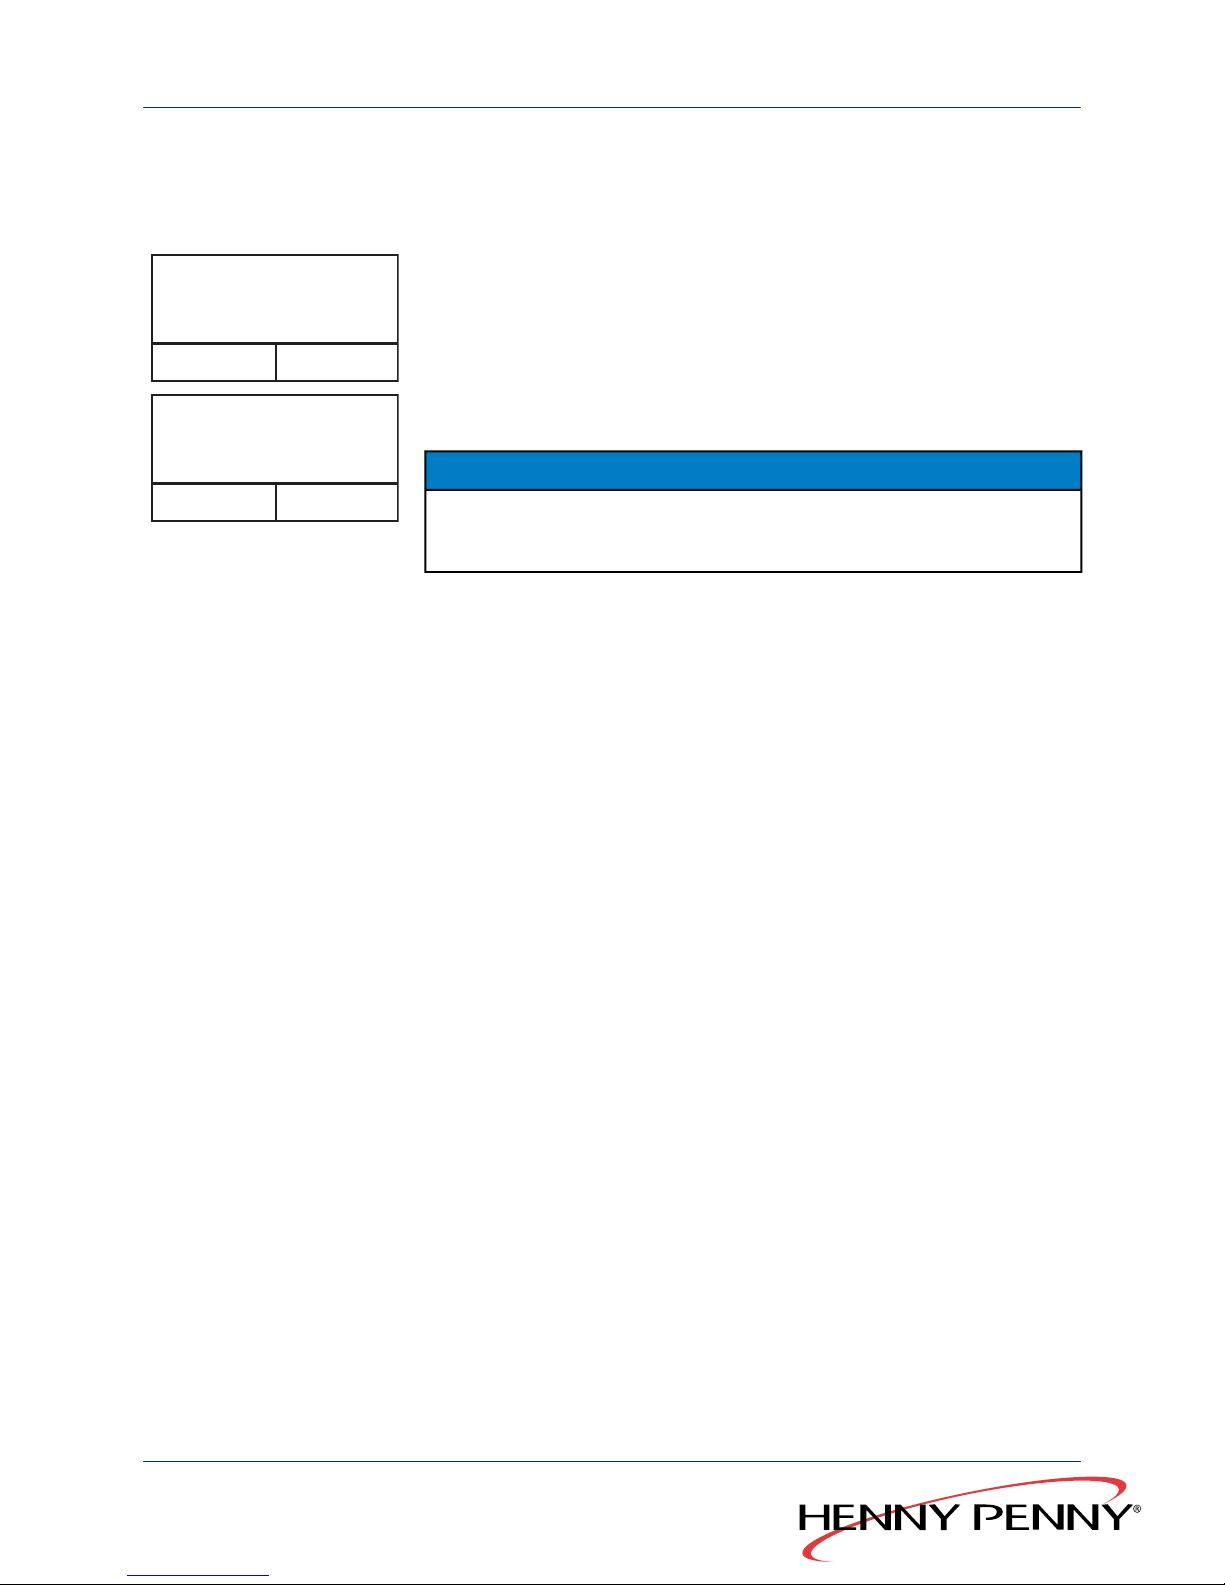
receiving 1
7 USB } cookbook
SmartMenu cooking programs are loaded from the USB memory stick.
While it is saving, the multi-function display (4) flashes “Loading” on the
screen.
The total number of cooking programs loaded appears.
Cookbook loaded 50
7 USB } cookbook
Once it has been saved, the multi-function display (4) shows “Cookbook
loaded” on the screen and the total number of loaded cooking programs.
NOTICE
If a SmartMenu cooking program of the same name is already on the
device, it will be overwritten.
4.9 Manual cooking
4.9.1 Starting the steaming process
Requirements Unit is switched on
1. Press Steaming (15).
2. Set the cooking temperature.
3. Set the cooking time.
4. Set the target core temperature if desired.
5. Load the unit.
6. Insert the core temperature sensor into the food to be cooked (see
Chapter “Measuring the core temperature”, Page 39).
7. Press St a r t /Stop (8).
The multi-function display (4) shows:
-
the set cooking temperature
-
the set cooking time
-
the target core temperature
4.9.2 Start Combisteaming
Requirements Unit is switched on.
1. Press Co m bisteaming (3).
2. Set the cooking temperature.
3. Set the cooking time.
Global Foodservice Solutions
Operating manual48
SmartCombi
™
Operation
Page 49

4. Set the target core temperature if desired.
5. Set the chamber humidity.
6. Load the unit.
7. Insert the core temperature sensor into the food to be cooked (see
Chapter “Measuring the core temperature”, Page 39).
8. Press St a r t /Stop (8).
The multi-function display (4) shows:
-
the set cooking temperature
-
the set cooking time
-
the target core temperature
4.9.3 Starting the convection cooking mode
Requirements Unit is switched on
Unit has been preheated for at least 10–15 minutes with the
“Ready2Cook” function.
1. Press Co n v ection (14).
2. Set the cooking temperature.
3. Set the cooking time.
4. Set the target core temperature if desired.
5. Load the unit.
6. Insert the core temperature sensor into the food to be cooked (see
Chapter “Measuring the core temperature”, Page 39).
7. Press St a r t /Stop (8).
The multi-function display (4) shows:
-
the set cooking temperature
-
the set cooking time
-
the target core temperature
4.9.4 Starting perfection mode (climate and regeneration)
Requirements Unit is switched on
Unit has been preheated for at least 10–15 minutes with the
“Ready2Cook” function.
1. Press Pe rfection (5).
2. Set the cooking temperature.
3. Set the cooking time.
49Operating manual
Global Foodservice Solutions
Operation
SmartCombi
™
Page 50

4. Set the target core temperature if desired.
5. Set the chamber humidity.
6. Load the unit.
7. Press St a r t /Stop (8).
The multi-function display (4) shows:
-
the set cooking temperature
-
the set cooking time
-
the target core temperature
4.9.5 Start Delta-T cooking
Requirements Unit is switched on
NOTICE
Since the core temperature of the food being cooked is needed, you
must use the core temperature sensor with Delta-T cooking.
1. Press the right select button (6).
The multi-function display (4) shows “ΔT cooking” and “LT cooking”.
2.
Use CombiDial (9) to select “ΔT cooking”.
NOTICE
Delta-T cooking is possible with the “Steaming”, “Combisteaming” and
“Convection” cooking modes.
3. Press cooking mode button.
The key's LEDs are lit.
The multi-function display (4) shows the cooking mode, Delta-T value
and target core temperature.
4. Use CombiDial (9) to set the Delta-T value.
5. Set the target core temperature with Com biD ial (9).
6. Press St a r t /Stop (8) to start the cooking program.
The multi-function display (4) shows the current chamber temperature
and the target core temperature.
4.9.6 Starting low temperature cooking
Low temperature cooking without core temperature measurement
Global Foodservice Solutions
Operating manual50
SmartCombi
™
Operation
Page 51

Set the chamber temperature manually to about 5 °C (41 °F) higher
than the desired target core temperature.
Low temperature cooking with core temperature measurement
With this function, the selected cooking mode is automatically switched
to “Keep warm” once the temperature of the food item has reached
80% of the target core temperature.
NOTICE
If the difference between the chamber temperature and the target
core temperature is less than 5 °C (41 °F), it is possible that the target
core temperature will not be reached.
1. Press the right select button (6) to call up the menu.
2. Use CombiDial (9) to select “LT cooking”.
3. Set the cooking temperature with Com biD ial (9).
The multi-function display (4) shows the cooking time.
The cooking time “0:00” flashes.
4. Set the cooking time with Co m biD ial (9).
5. Press St a r t /Stop (8) to start the cooking program.
4.10 Advanced cooking functions
4.10.1 Programmable steaming
Requirements Unit is switched on
Chamber temperature is below 130 °C (266 °F)
NOTICE
If the chamber temperature is over 130 °C (266 °F), the function
“Programmable steaming” is not carried out.
1. Press the right select button (6) to call up the menu.
2. Use C o mbi Dial (9) to select the “Programmable steaming” menu.
3. Use CombiDial (9) to set the cooking chamber temperature (30
(86)–130 °C (266 °F)) and water quantity (0–5000 ml).
4. Press Co m biD ial (9) to enter further program steps.
5. Press St a r t /Stop (8) to start the cooking program.
While the program is running, the multi-function display (4) shows:
51Operating manual
Global Foodservice Solutions
Operation
SmartCombi
™
Page 52

●
The remaining time for all program steps
●
the cooking mode
●
the active program step
●
the amount of water remaining (ml)
4.10.2 Manual steaming
NOTICE
The advanced function Manual steaming is not programmable and,
therefore, cannot be included in the SmartMenu program memory.
→
Press the left select button (13).
The humidity in the chamber will be increased as long as the select
button (13) is pressed.
4.10.3 Setting the rest period
Requirements Unit is switched on
With the advanced cooking function Rest period, you can specify a period
during which the fan is inactive.
1. Press the right select button (6) to call up the menu.
2. Use CombiDial (9) to select the “Rest period” menu.
3. Set the rest period (in hours, minutes) with Com biD ial (9).
4. Press Co m biD ial (9) to enter further program steps.
5. Press St a r t /Stop (8) to start the cooking program.
While the program “Rest period” is running, the multi-function display (4)
shows:
●
“Pause”
●
the remaining time for all program steps
●
the active program step
●
the remaining time for the active program phase
Global Foodservice Solutions
Operating manual52
SmartCombi
™
Operation
Page 53
4.10.4 Setting the preset start time
CAUTION
Dangers to health due to spoiled food
When using the preset start time feature, temperatures may occur in
the cooking chamber that encourage the growth of harmful germs.
→
Observe the provisions governing foodstuffs.
1. Select the cooking program.
2. Hold Cooking time (11) pressed.
The multi-function display (4) shows “Start in: 00:01”.
3. Set the delay period with Com b iDial (9).
If a program without core temperature measurement follows, the finish
time is shown. “Ready at: ”.
If a program with core temperature measurement follows, the target
core temperature is shown.
4. Press Co m biD ial (9) to confirm the preset start time.
The multi-function display (4) shows the remaining sdelay time and the
cooking chamber temperature.
Once the delay period has elapsed, the program that was set will be
started automatically.
NOTICE
The lighting in the cooking chamber is switched off during the delay
period.
5. Press the left select button (13) to end the preset start time.
4.10.5 Starting Ready2Cook (prepare for cooking)
The advanced function Ready2Cook heats if the cooking chamber is
too cold, cools if it is too hot and prepares the cooking climate for
cooking.
53Operating manual
Global Foodservice Solutions
Operation
SmartCombi
™
Page 54
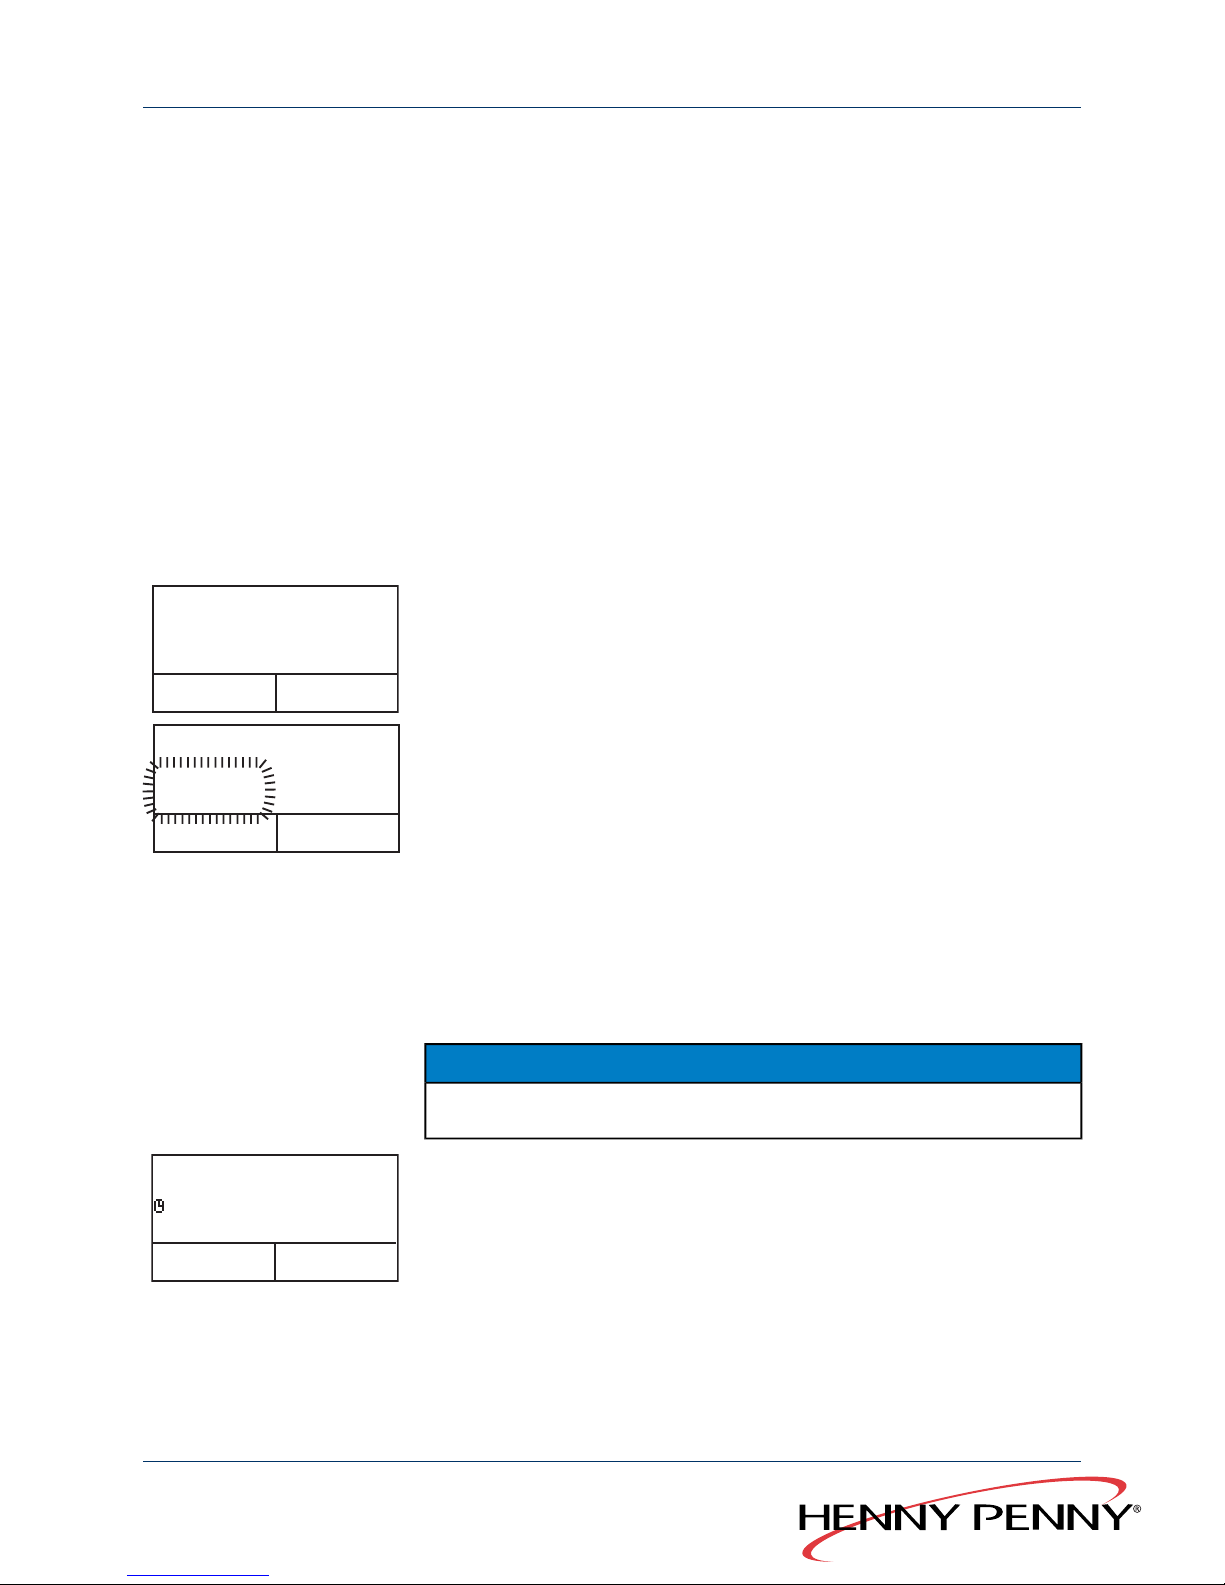
→
Press Ready2Cook (10) briefly: The chamber will be heated to a
temperature 15 % higher than that of the first program step (default
value).
or
→
Press Ready2Cook (10) longer: The cooking chamber will be
preheated to 275 °C (527 °F).
4.10.6 Working with RackControl
Requirements Unit is switched on.
1. Press the right select button (6).
The multi-function display (4) flashes “RackControl”.
2. Press the right select button (6) or CombiDial (9) to confirm
the selection.
Cooking mode?
Home
The multi-function display (4) shows “Select cooking mode”.
120 C 0: 00
RackControl
01/
01
More
functions
Home
3. Press the cooking mode button.
The LEDs for the cooking mode button are lit.
The multi-function display (4) flashes the preset cooking temperature for
this cooking mode.
4. Set the cooking temperature with Com biD ial (9).
5. Press Cooking time (11).
6. Set the cooking time with Co m biD ial (9).
The set cooking time will then be used as the specified value for the
individual areas (racks).
NOTICE
The cooking time can be adjusted for each individual area, if necessary.
RackControl
R:>1 2 3 4 5
: 0 0 0 0 0
100
°
7. Press St a r t /Stop (8).
The key's LED flashes.
The unit operates continuously.
The multi-function display (4) shows the five areas with the specified
values.
An arrow indicates the selected area.
Global Foodservice Solutions
Operating manual54
SmartCombi
™
Operation
Page 55
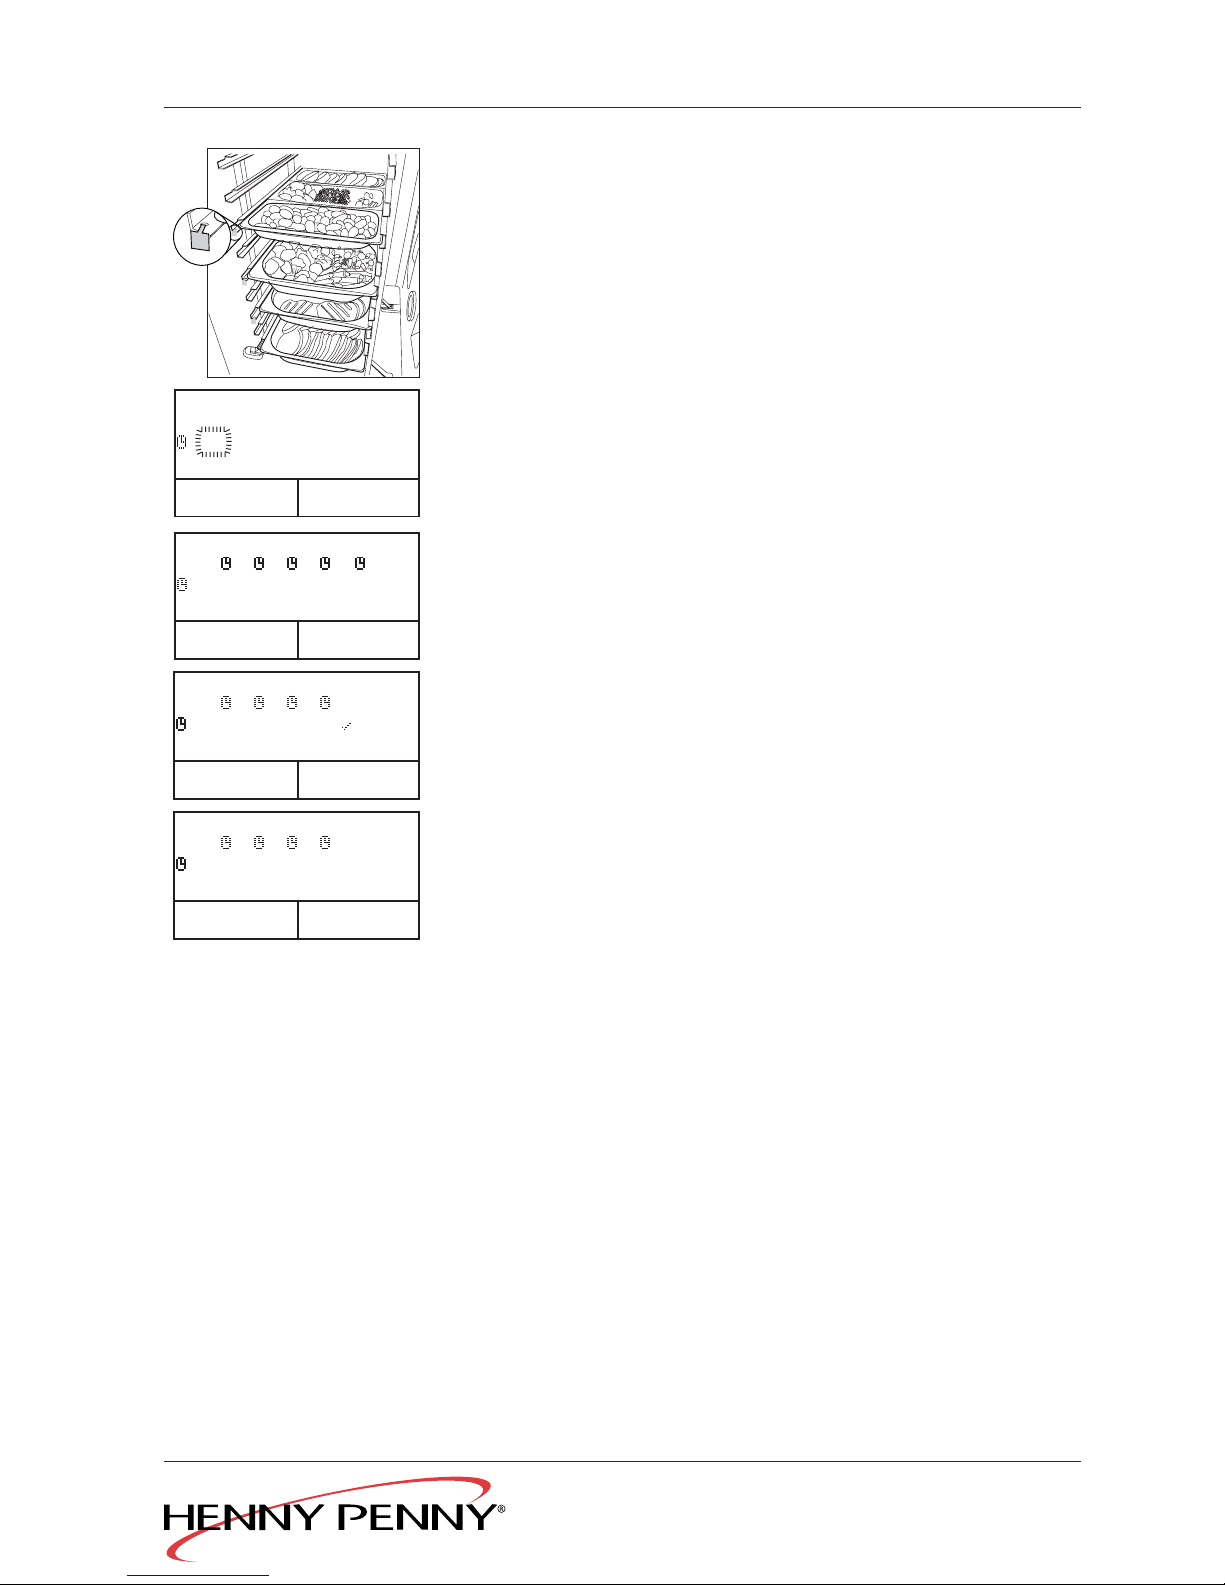
3
2
1
1
8. Place containers with food in the cooking chamber, mark with
heat-resistant tags if necessary R1, R2 etc.
9. Select the area for which you want to change the cooking time with
CombiDial (9).
RackControl
R:>1 2 3 4 5
: 7 0 0 0 0
100
°
10. Set the cooking time with Co m biD ial (9).
11. Press Co m biD ial (9) to start the time signal for this area.
The multi-function display (4) shows a clock icon next to the selected
area.
RackControl
R: 1 2 3 4 5
: 7 5 6 3 2
100
°
12. Set the cooking time for additional areas.
The multi-function display (4) shows the remaining time for all five
areas.
RackControl
R: 1 2 3 4 5
: 5 3 4 1
100
°
13. A signal sounds when the cooking time is over.
The clock icon disappears from the multi-function display (4) for this
area.
A tick is shown instead of the remaining time.
RackControl
R: 1 2 3 4 5
: 5 3 4 1 0
100
°
14. Remove containers.
New plates can be placed in the area that is now free.
Start the cooking time for the newly loaded area as previously described.
15. Press St a rt /Stop (8) to end RackControl.
4.10.7 Reduced heat output
The advanced cooking function Reduced heat output cannot be
programmed; it must be selected manually with each new start.
→
Press St a r t /Stop (8) for longer when starting the program.
The multi-function display (4) shows “E/2”.
With tabletop units: A heating circuit is deactivated.
With floor standing units: The lower chamber is turned off.
55Operating manual
Global Foodservice Solutions
Operation
SmartCombi
™
Page 56

4.11 Add functions
4.11.1 Activate/deactivate add functions
1. Press the left select button (13) while entering data.
NOTICE
There are always only those add functions available that can be used
in the respective cooking mode.
2. Turn CombiDial (9) and select the additional function.
The selected function flashes.
3. Press Co m biD ial (9) and activate or deactivate the additional
function.
4. Make adjustments with Com b iDial (9) as necessary.
5. Press the left select button (13) to return to the settings menu.
4.11.2 Modify add function
Most add functions can also be activated or deactivated during operation.
1. Press one of the following buttons briefly:
- Core temperature (7)
- Cooking time (11)
- Cooking temperature (12)
2. Select the cooking step for which you want to activate or deactivate
an additional function with Co m biD ial (9).
3. Press the left select button (13).
4. Select the additional function with Co m biD ial (9).
4.11.3 Reducing the fan speed
1. Select the additional function “Reduced fan speed”.
2. Set the desired fan speed with Com b iDial (9).
4.11.4 Activating the end-of-step signal
With multi-step programs, the end-of-step signal can be activated for each
cooking step.
Global Foodservice Solutions
Operating manual56
SmartCombi
™
Operation
Page 57

NOTICE
The end-of-step signal is activated as default for the last cooking step
of a program.
1. Press the left select button (13) when entering a cooking
program.
2. Select the end-of-step signal with Co m biD ial (9).
3. Press the left select button (13) to return to the settings menu.
4.12 Changing standard settings
Requirements Unit is switched on
1. Press the left select button (13) to open the menu.
2. Use CombiDial (9) to select the “Settings” menu.
3. Use CombiDial (9) to enter the password “111”.
4. Press St a r t /Stop (8).
5. Select the parameter with Com biD ial (9).
The multi-function display (4) shows the set value.
The parameter name flashes.
6. Press Co m biD ial (9), to change the value.
The parameter value flashes.
7. Change the value with Com b iDial (9).
8. Press the right select button (6) or CombiDial (9) to adopt
the value.
The parameter name flashes.
9. Change other parameters as necessary.
10. Press the right select button (6) to save the changes.
or
→
Press the left select button (13) to discard the changes.
4.12.1 Set service interval water volume
In the “Settings” menu, you can specify the service interval by means
of the volume of used water.
1. Press the left select button (13) to open the menu.
2. Use CombiDial (9) to select the “Settings” menu.
57Operating manual
Global Foodservice Solutions
Operation
SmartCombi
™
Page 58

3. Use CombiDial (9) to enter the password “111”.
4. Use CombiDial (9) to select the “Service water volume” menu.
5. Set the water volume (in 100 litre increments) with Co mbi Dial (9).
4.13 Standard settings
The unit is already pre-configured when delivered.
The values listed in the following table can be adjusted individually (see
Chapter “Changing standard settings”, Page 57).
ExplanationPossible settingsPre-set valueParametersNo.
Changeover summer time/winter time
is automatic. Date format: Parameter
144
Time/dateThe operator's
local time
Time/date000
Temperature display in °F is irrespective
of the system language.
°C/°Fin °CTemperature reading006
On: At the end of the cooking time the
lighting flashes in addition to the
acoustic signal sounding. It flashes as
long as the signal sounds.
On/offOnLighting flashes023
Increase the preheat factor for full loads
of large masses (roasts, loaves of
bread) to prevent the temperature from
falling too much.
0–30 %15Preheat factor %082
Applies for external water preparation
systems and only for the soft water
connection.
See Chapter “Set service interval water
volume”, Page 57 for further informa-
tion.
0–90000 l in 100 l increments
0Service water volume076
DD = day
MM = month
JJJJ = year
●
DD.MM.YYYY
●
YYYY/MM/DD
●
MM/DD/YYYY
DD.MM.YYYYDate format144
●
Free: you can change,delete or save
programs
●
Blocked: you may not change,delete
or save programs. But you may
make changes during the cooking
process.
●
Fully blocked: No changes are possible in the SmartMenu program
memory or during the cooking process.
●
Free
●
Blocked
●
Fully blocked
FreeSmartMenu program
memory
097
Set “fan cycle operation”.The temperature in the cooking chamber can be kept
to 14 °C (57.2 °F) for 6 h by placing an
ice block in the bottom drawer.
On/offOffTime delay fan032
Global Foodservice Solutions
Operating manual58
SmartCombi
™
Operation
Page 59
ExplanationPossible settingsPre-set valueParametersNo.
●
“Minimum”: Minimum water consumption but higher condensation
temperature and a greater volume
of waste steam.
●
“Maximum”: Maximum water consumption but low condensation
temperature and a low volume of
waste steam.
At this setting, the drain temperature is < 60 °C (140 °F).
Minimum, Normal,
Maximum
NormalCooling waste steam024
An external extraction hood can be
switched on at the end of the program.
0–600 seconds60Time ext. hood (sec.)083
0 = beep off0–180 seconds20Beep time (sec.)084
Altitude above sea level. Set to 0–500
m (1,640 ft.) if the altitude is not known.
●
0–500 m (1,640
ft.)
●
500 m (1,640
ft.)–1000 m (3,281
ft.)
●
1000 m (3,281
ft.)–1500 m (4,921
ft.)
●
> 1500 m (4,921
ft.)
0–500 m.Altitude015
Individual passwords can be configured in this area.
000–500111Password096
Rotation direction of CombiDial (9)
in menus and in the SmartMenu program memory.
Normal/inverseNormalScroll direction225
The default cooking temperature for
this cooking mode can be set within
the shown limits.
30–130 °C100 °CTemp. Steam235
The default cooking temperature for
this cooking mode can be set within
the shown limits.
30–250 °C130 °CTemp. Combi236
The default cooking temperature for
this cooking mode can be set within
the shown limits.
30–300 °C180 °CTemp. Convec.237
The default cooking temperature for
this cooking mode can be set within
the shown limits.
30–180 °C120 °CTemp. Regeneration238
The default cooking temperature for
this cooking mode can be set within
the shown limits.
60–100 °C60 °CTemp. LT cooking239
The default cooking temperature for
this cooking mode can be set within
the shown limits.
1–100 °C20 °CTemp. DT cooking240
The default cooking temperature for
this cooking mode can be set within
the shown limits.
30–99 °C60 °CTemp. T-Core241
59Operating manual
Global Foodservice Solutions
Operation
SmartCombi
™
Page 60

ExplanationPossible settingsPre-set valueParametersNo.
With “History” you can display the most
recently used programs (max.10) and
start them again.
0–100History242
●
Meat
●
Poultry
●
Fish, vegetables
●
Side dishes,
bakery products
●
Overnight cooking
●
MyChef special
●
Perfection
●
Cookbook
CookbookStandard category397
Global Foodservice Solutions
Operating manual60
SmartCombi
™
Operation
Page 61

ExplanationPossible settingsPre-set valueParametersNo.
You can load SmartMenu program
memories for a specific country.
Programs that were deleted can also
be recreated in this way.
Select SmartMenu program memory
and then save. After switching the
SmartMenu program memory, press
“Save”.
The display shows “Analysis”. Programs that were created on the unit
are retained when switching over.
●
0 = Only self-created cooking programs
●
1 = German
●
2 = English GB
●
3 = Italian
●
4 = French
●
5 = Dutch
●
6 = Spanish
●
7 = Polish
●
8 = Danish
●
9 = Russian
●
10 = Czech
●
11 = Lithuanian
●
12 = Latvian
●
13 = Chinese GB
China
●
14 = Chinese Big5
Taiwan
●
15 = Korean
●
16 = Hebrew
●
17 = Slovenian
●
18 = Croatian
●
19 = Hungarian
●
20 = English SC
●
21 = Swedish
●
22 = Turkish
●
23 = Slovakian
●
24 = Serbian
●
25 = Greek
●
26 = Portuguese
●
30 = German (A)
●
31 = German (CH)
●
32 = English
(Asia)
●
100 = Henny
Penny English
0SmartMenu program
memory number
403
Table 7: Standard settings
61Operating manual
Global Foodservice Solutions
Operation
SmartCombi
™
Page 62
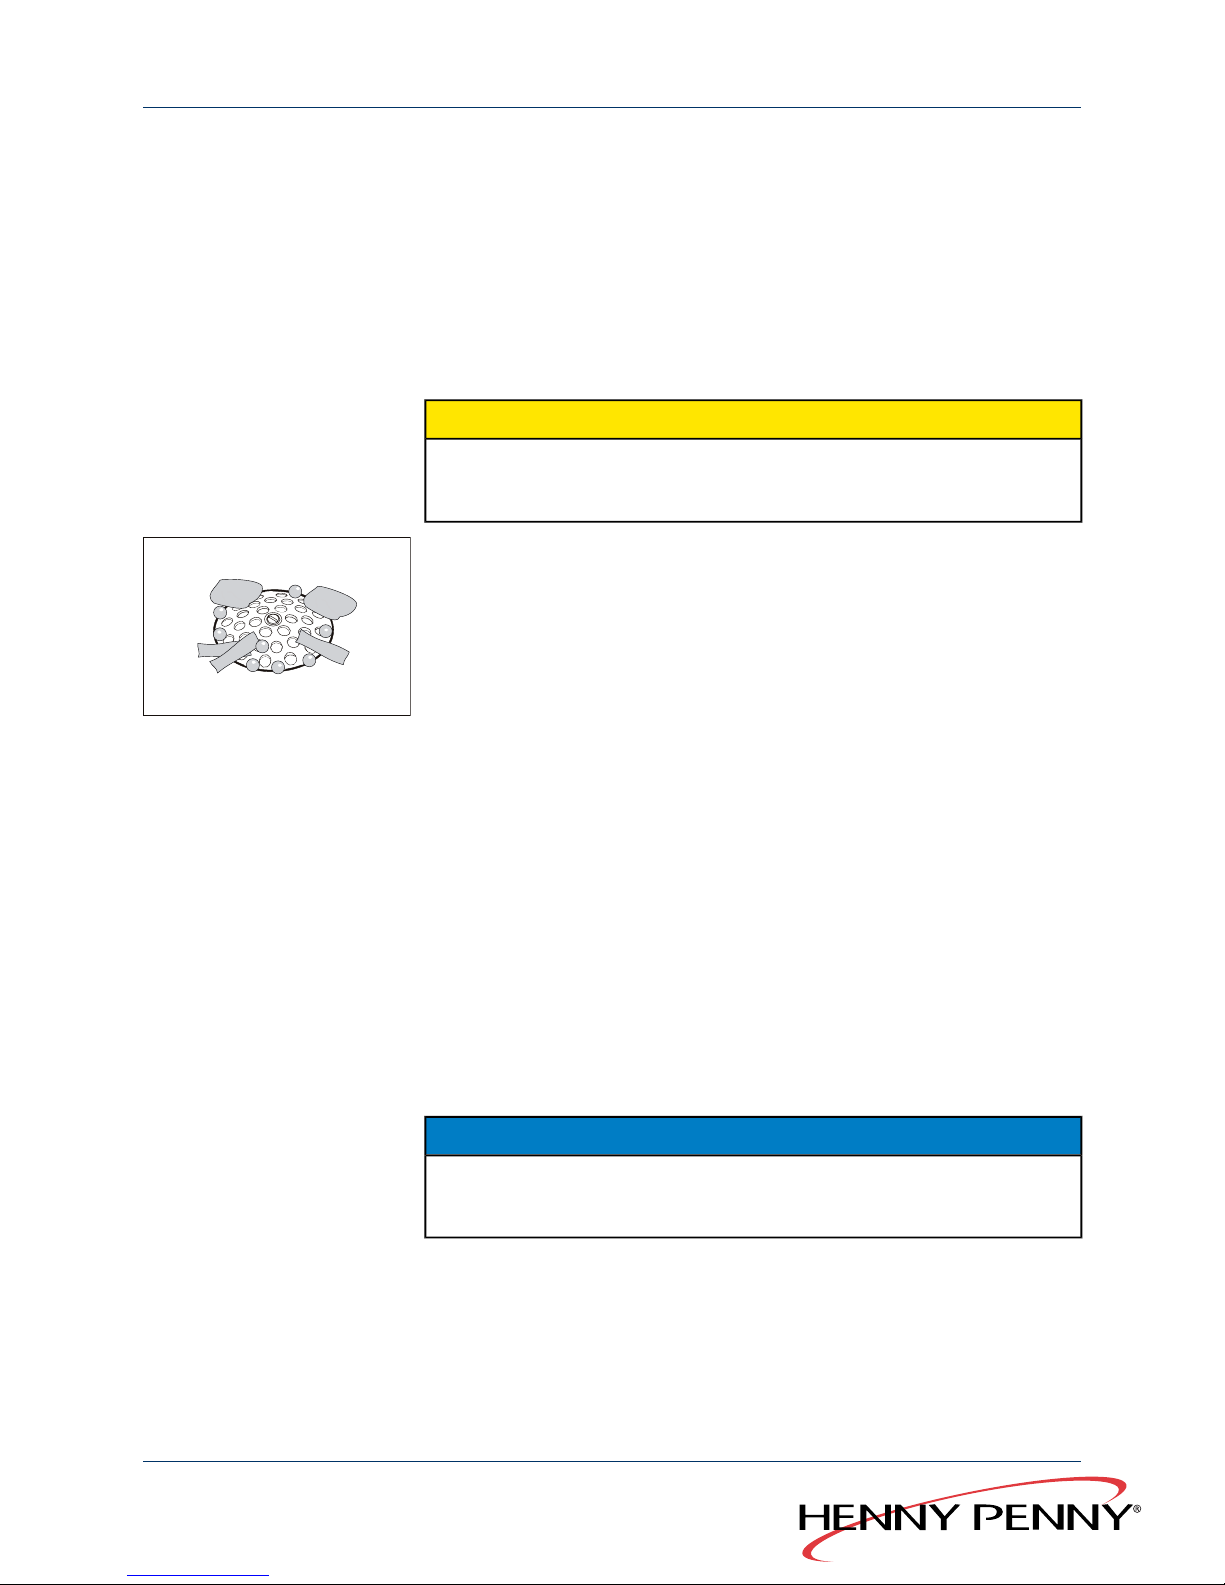
5 Cleaning
5.1 Automatic cleaning “WaveClean”
5.1.1 Preparing the cooking chamber
Requirements GN containers, baking sheets and racks have been removed from the
cooking chamber
CAUTION
Damage caused by unsuitable cleaning agents
→
Only use Henny Penny products for cleaning the cooking chamber.
1. Leftover food has been removed from the cooking chamber.
The drain sieve must be clear.
2. With tabletop units: only leave the slide-in frame in the cooking
chamber.
With floor standing units: push empty trolleys into the cooking
chamber.
3. Close cooking chamber door.
5.1.2 Selecting the WaveClean level
Requirements Unit is switched on
1. Press the left select button (13).
The multi-function display (4) shows the cleaning menu.
2. Use CombiDial (9) to select the “WaveClean” menu.
3. Select the cleaning level with Co mbi D ial (9).
- WaveClean, short: duration approx. 1 hour
- WaveClean, normal: duration approx. 2 hours
- WaveClean, extra: duration approx. 3 hours (for heavy soiling)
NOTICE
All cleaning levels require the same amount of water although the time
required for cleaning is different.
4. Press Co m biD ial (9) to confirm the selection.
The chamber will be heated or cooled automatically until it reaches the
WaveClean temperature of 50 °C (122 °F).
Global Foodservice Solutions
Operating manual62
SmartCombi
™
Cleaning
Page 63
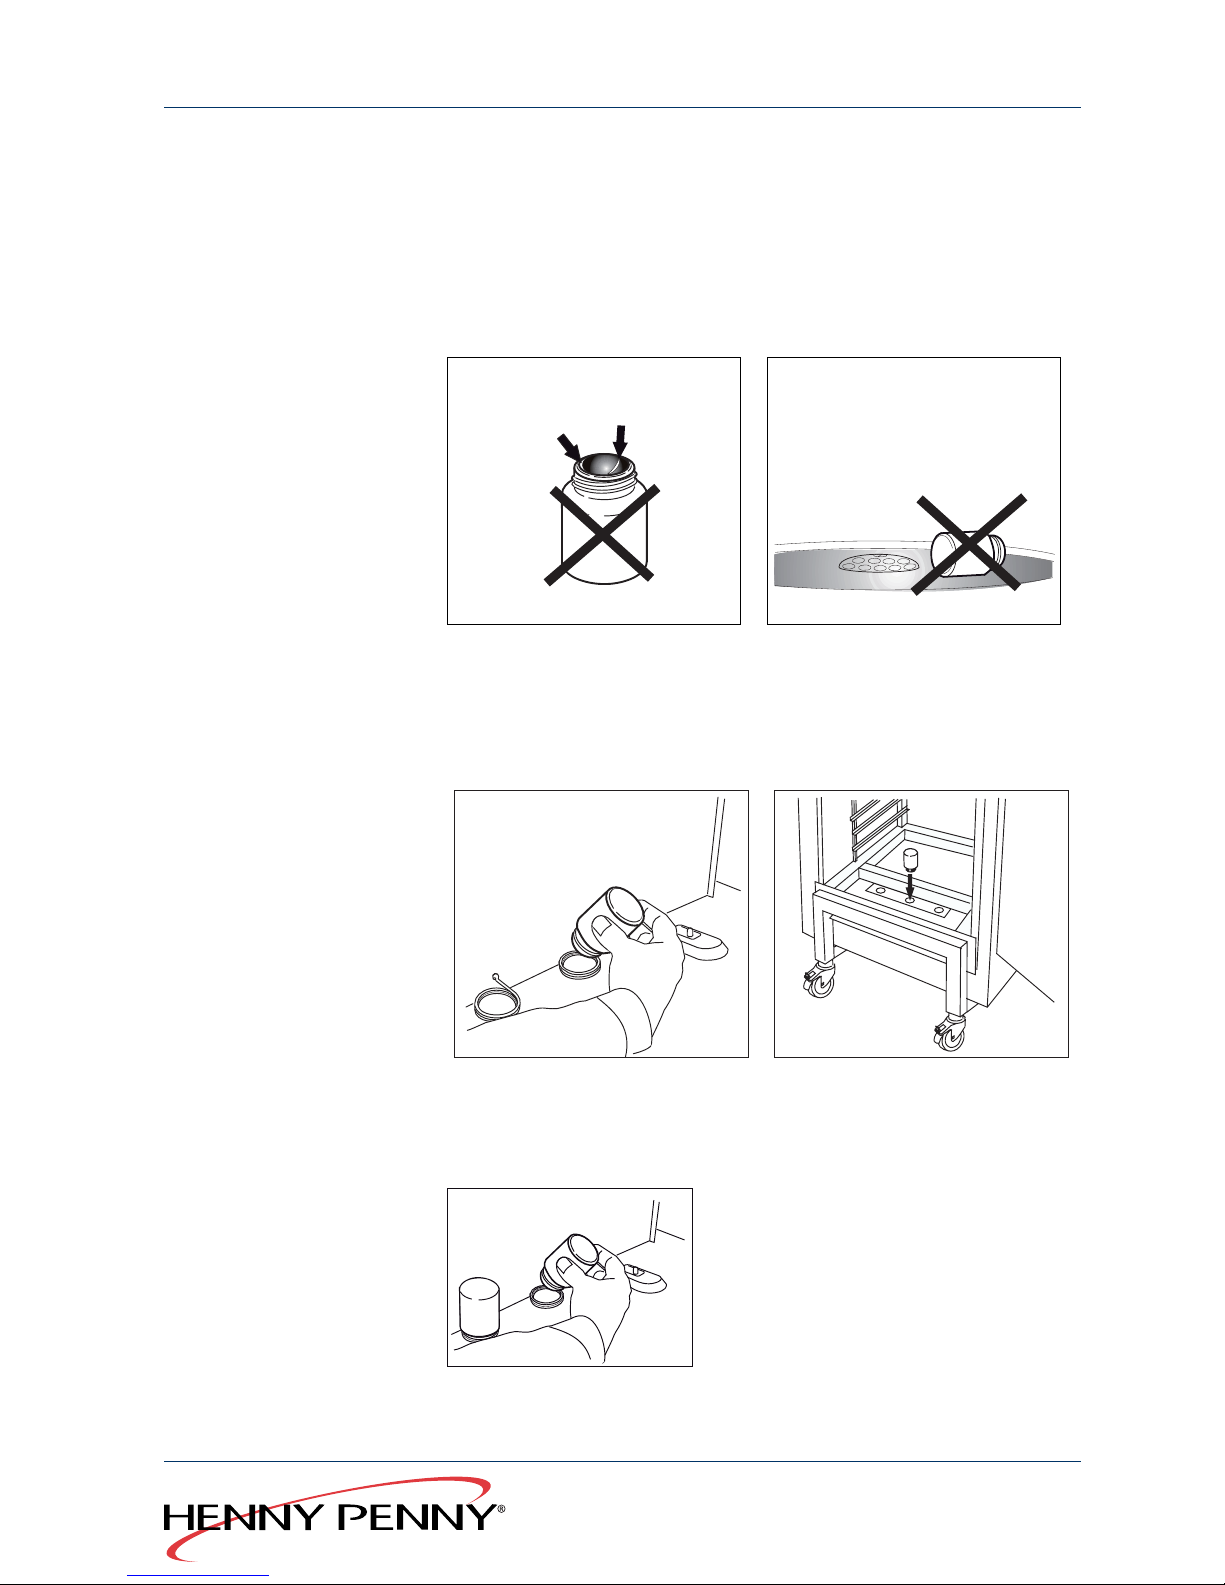
5.1.3 Using the WaveClean cartridge
Only use sealed cartridges.
If the wax seal is damaged, this may lead to the cleaning agent entering
the cleaning cycle too early or not dissolving fully; in this case thorough
cleaning is not guaranteed.
Do not place the cartridge on the floor of the chamber.
When the chamber has reached the cleaning temperature, the
multi-function display (4) shows “Insert cartridge”.
1. Open the chamber door.
2. Unscrew the cartridge lid.
3. With tabletop units: place cartridge in the holder in front of the
ventilation plate.
With floor standing units: place cartridge in the holder of the rack
trolley.
63Operating manual
Global Foodservice Solutions
Cleaning
SmartCombi
™
Page 64

NOTICE
Use additional cartridges if necessary:
-
If heavily soiled: use 2 two-in-one cartridges. Select “WaveClean
extra” .
-
If scaled: use a two-in-one cartridge + clear rinse cartridge.
5.1.4 Start WaveClean
Requirements Hard water and soft water taps are open
→
Close the chamber door and confirm with the right select button
(6).
The cleaning program starts. The multi-function display (4) shows the
remaining cleaning time.
5.1.5 Ending WaveClean
The unit switches itself off automatically when the cleaning process is
finished. The multi-function display (4) shows “Remove cartridge” when
the unit is restarted.
1. Open the cooking chamber door.
2. Remove the empty cartridge.
3. Rinse thoroughly by hand to remove any cleaner or rinsing agent
residues.
NOTICE
See Chapter “WaveClean faults”, Page 65 for possible causes of cleaner
residues in the cooking chamber.
4. Close the cooking chamber door.
5. Press the right select button (6) and confirm that the cartridge
has been removed.
6. Open the chamber door and leave it slightly ajar until the next use.
This will increase the life of the door seal.
No moisture will build up in the cooking chamber.
5.1.6 Cancelling WaveClean
The “WaveClean” automatic cleaning function can also be ended manually.
Power failure during cleaning also leads to the process being terminated.
Global Foodservice Solutions
Operating manual64
SmartCombi
™
Cleaning
Page 65
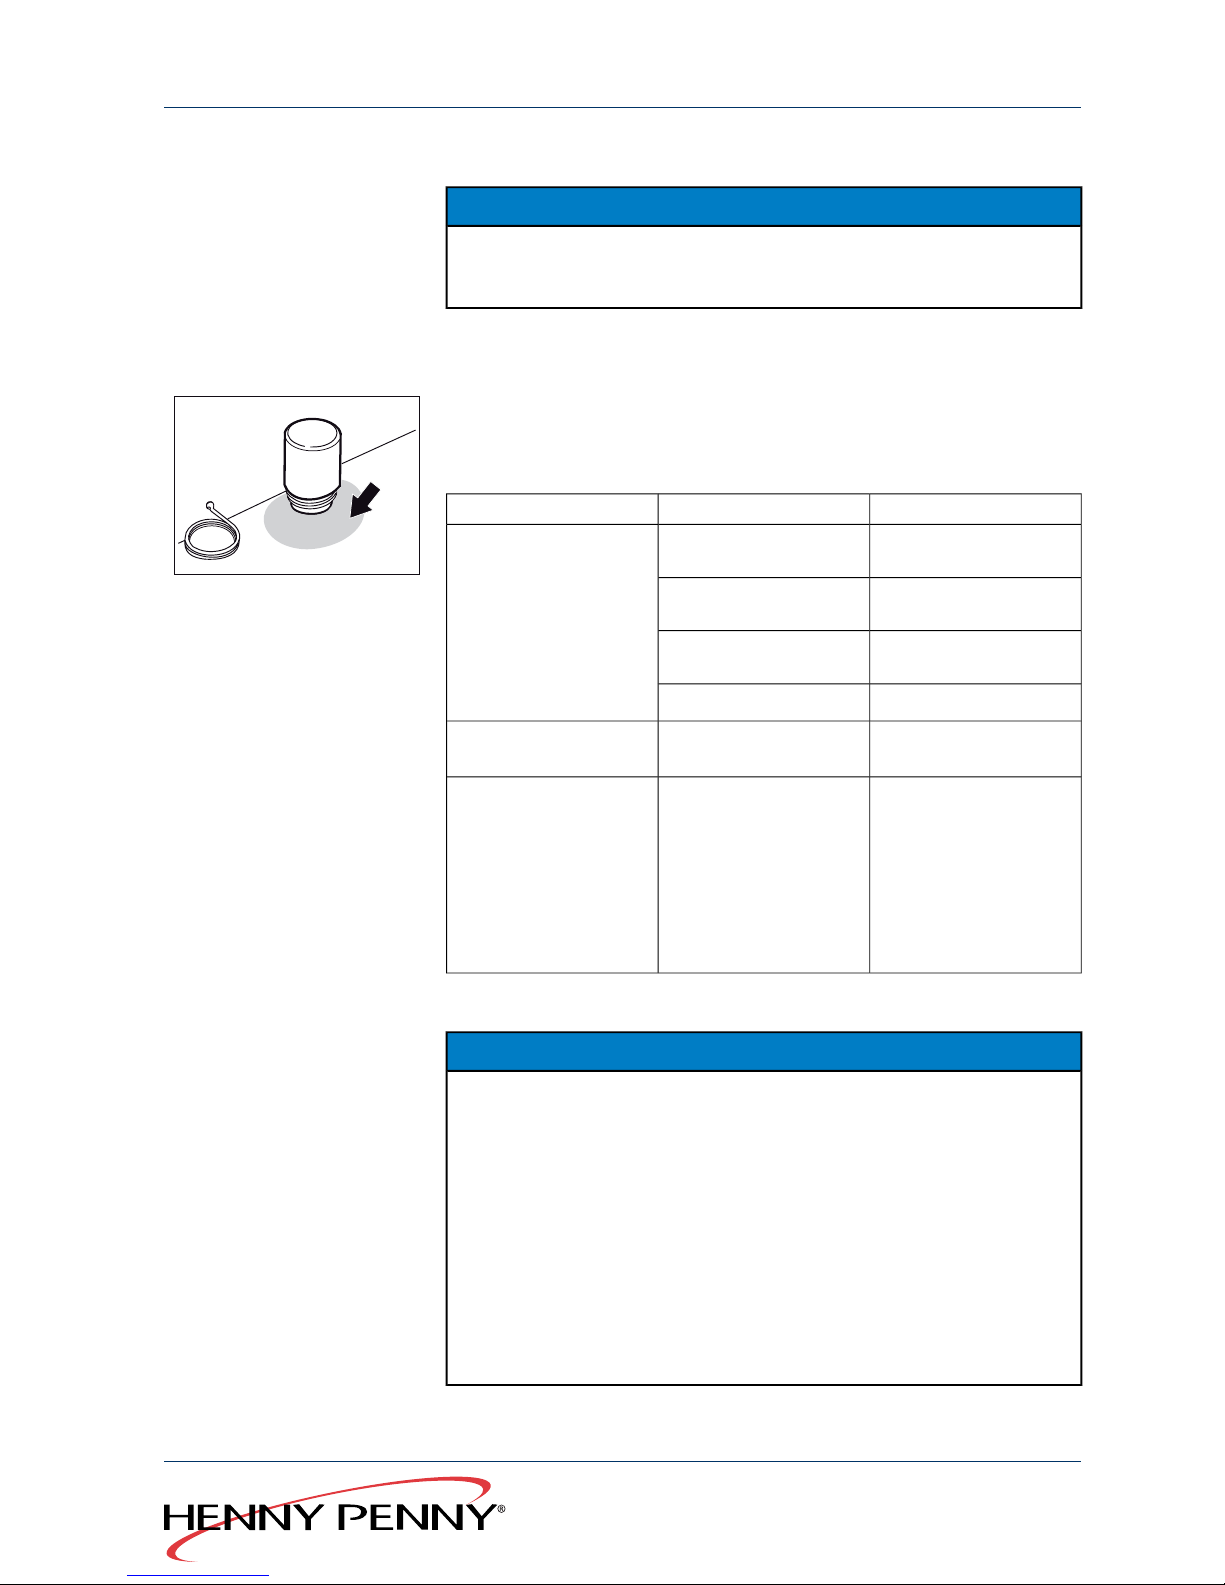
→
Press the left select button (13) to abort the cleaning program.
NOTICE
For safety reasons, a rinsing process (duration 12 minutes) runs
automatically when WaveClean is cancelled.
5.1.7 “WaveClean” faults
Discolouring may occur to the floor of the cooking chamber underneath
the cartridge. This discolouring is harmless and does not have any
effect on the operation of the unit.
RemedyPossible causeFault
Adjust the unit horizontally
Unit is leaning
●
Cartridges are not
fully emptied
●
Residues of cleaner/rinsing agent remain in the cartridge
●
Rinsing agent is released at the same
time as the cleaner
Contact customer servicePower failure/unit mal-
function
Adjust holder positionHolder is bent: cartridge
too close to the floor
Contact customer serviceHeater not working
Contact customer serviceCirculating pump defect-
ive
●
Cooking chamber remains dry
●
Empty outlet filter before cleaning.
●
Remove heavy soiling
and large particles
manually before
cleaning.
●
Shorten the cleaning
interval.
Cooking chamber too
heavily soiled
Washing water circulation interrupted
●
Cooking chamber is
not clean
Table 8: Causes of faults and troubleshooting
Information regarding
operation with hard water
NOTICE
The unit can be used without softening the water up to a hardness
of 5 °dH. However, water having a total hardness exceeding 0 °dH
contains lime scale, which may form deposits in the cooking chamber.
The amount of lime scale deposited in the cooking chamber is
normally so low that it has no detrimental effect on the operation of
the unit. However, there may be white deposits in the cooking
chamber.
The two-in-one cartridges contain a clear rinsing agent with descaling
properties, which usually prevents these deposits from building up if
the “WaveClean” automatic cleaning function is used regularly.
65Operating manual
Global Foodservice Solutions
Cleaning
SmartCombi
™
Page 66
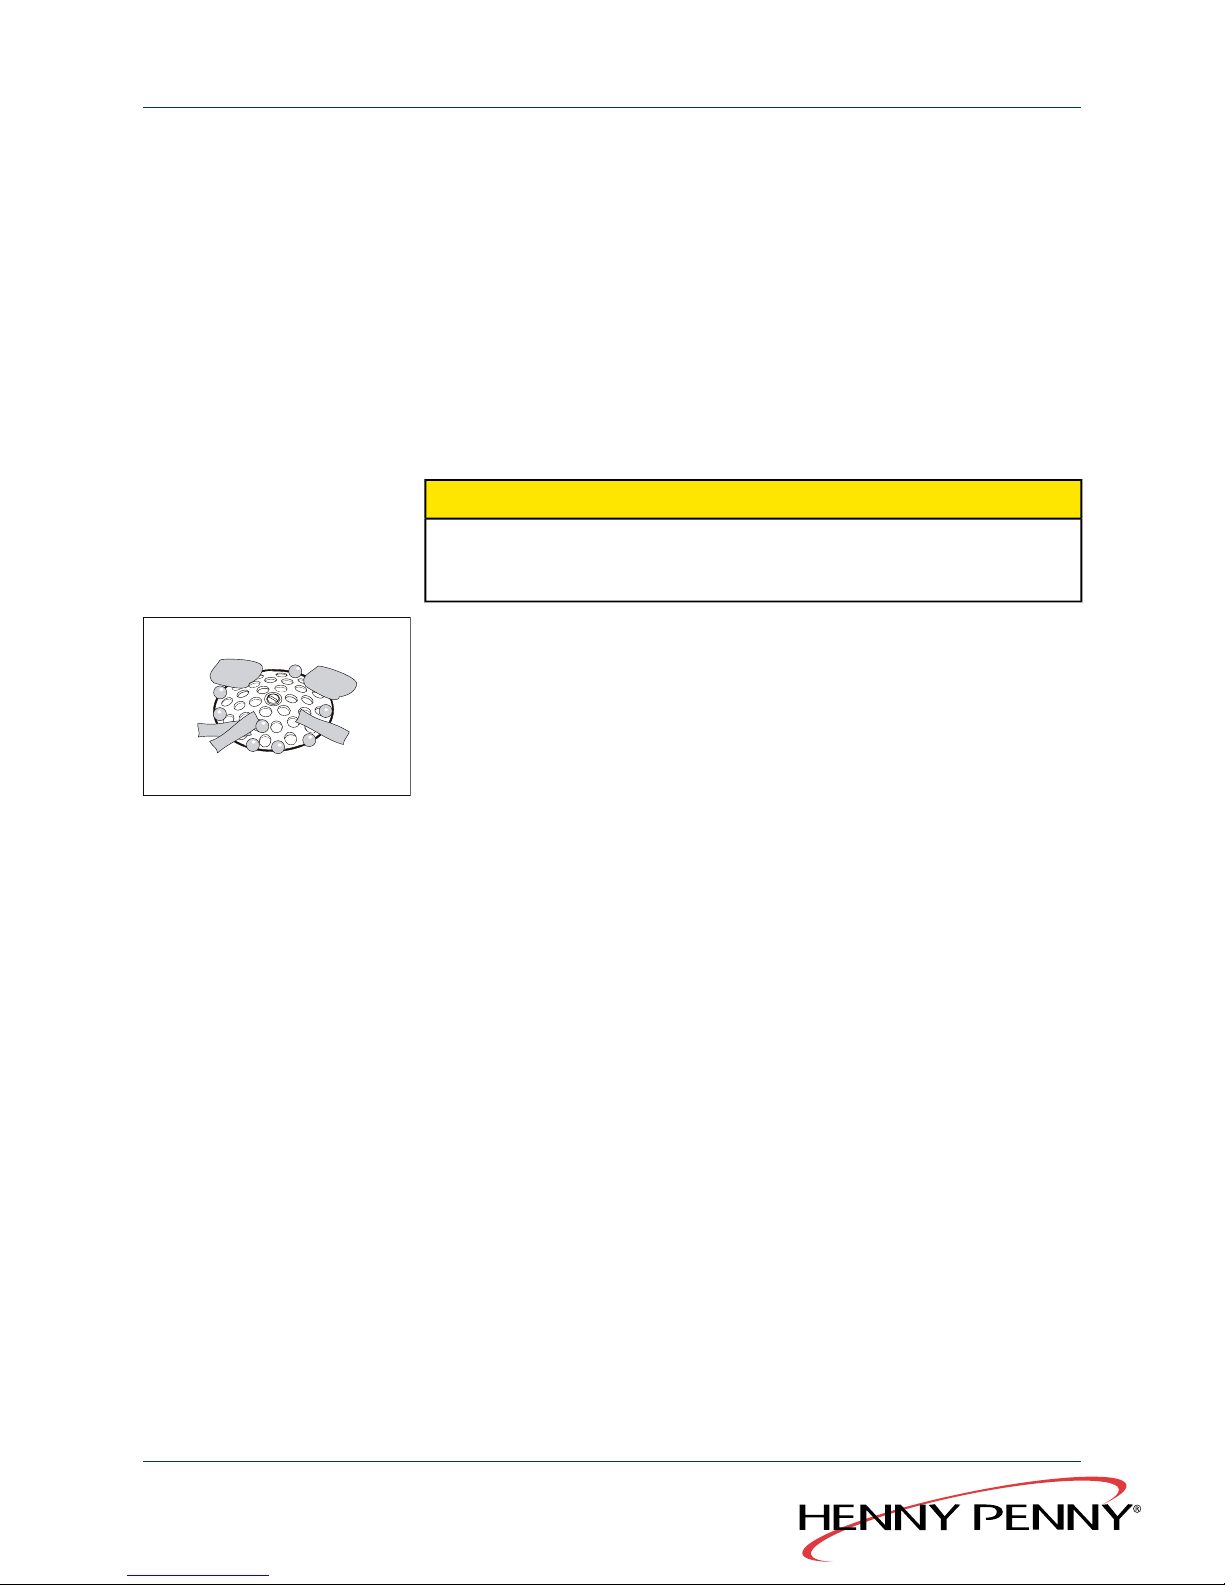
●
Clean daily with the “WaveClean extra” cleaning level, even if the
degree of soiling is low.
●
Use a clear rinse cartridge in addition to the cleaning cartridge.
●
Descale manually.
5.2 System-supported manual cleaning
5.2.1 Preparing the cooking chamber
Requirements GN containers, baking sheets and racks have been removed from the
cooking chamber
CAUTION
Damage caused by unsuitable cleaning agents
→
Only use Henny Penny products for cleaning the cooking chamber.
1. Leftover food has been removed from the cooking chamber.
The drain sieve must be clear.
2. With tabletop units: only leave the slide-in frame in the cooking
chamber.
With floor standing units: push empty trolleys into the cooking
chamber.
3. Close cooking chamber door.
5.2.2 Start cleaning program
Requirements Unit is switched on
1. Press the left select button (13) to open the menu.
2. Use CombiDial (9) to select the menu “Man. cleaning”.
3. Press the right select button (6) to start the cleaning program.
The chamber will be cooled or heated automatically until it reaches the
soaking temperature of 50 °C (122 °F).
The multi-function display (4) shows the current chamber temperature.
When the soaking temperature is reached, the multi-function display (4)
shows the remaining soaking time.
Global Foodservice Solutions
Operating manual66
SmartCombi
™
Cleaning
Page 67
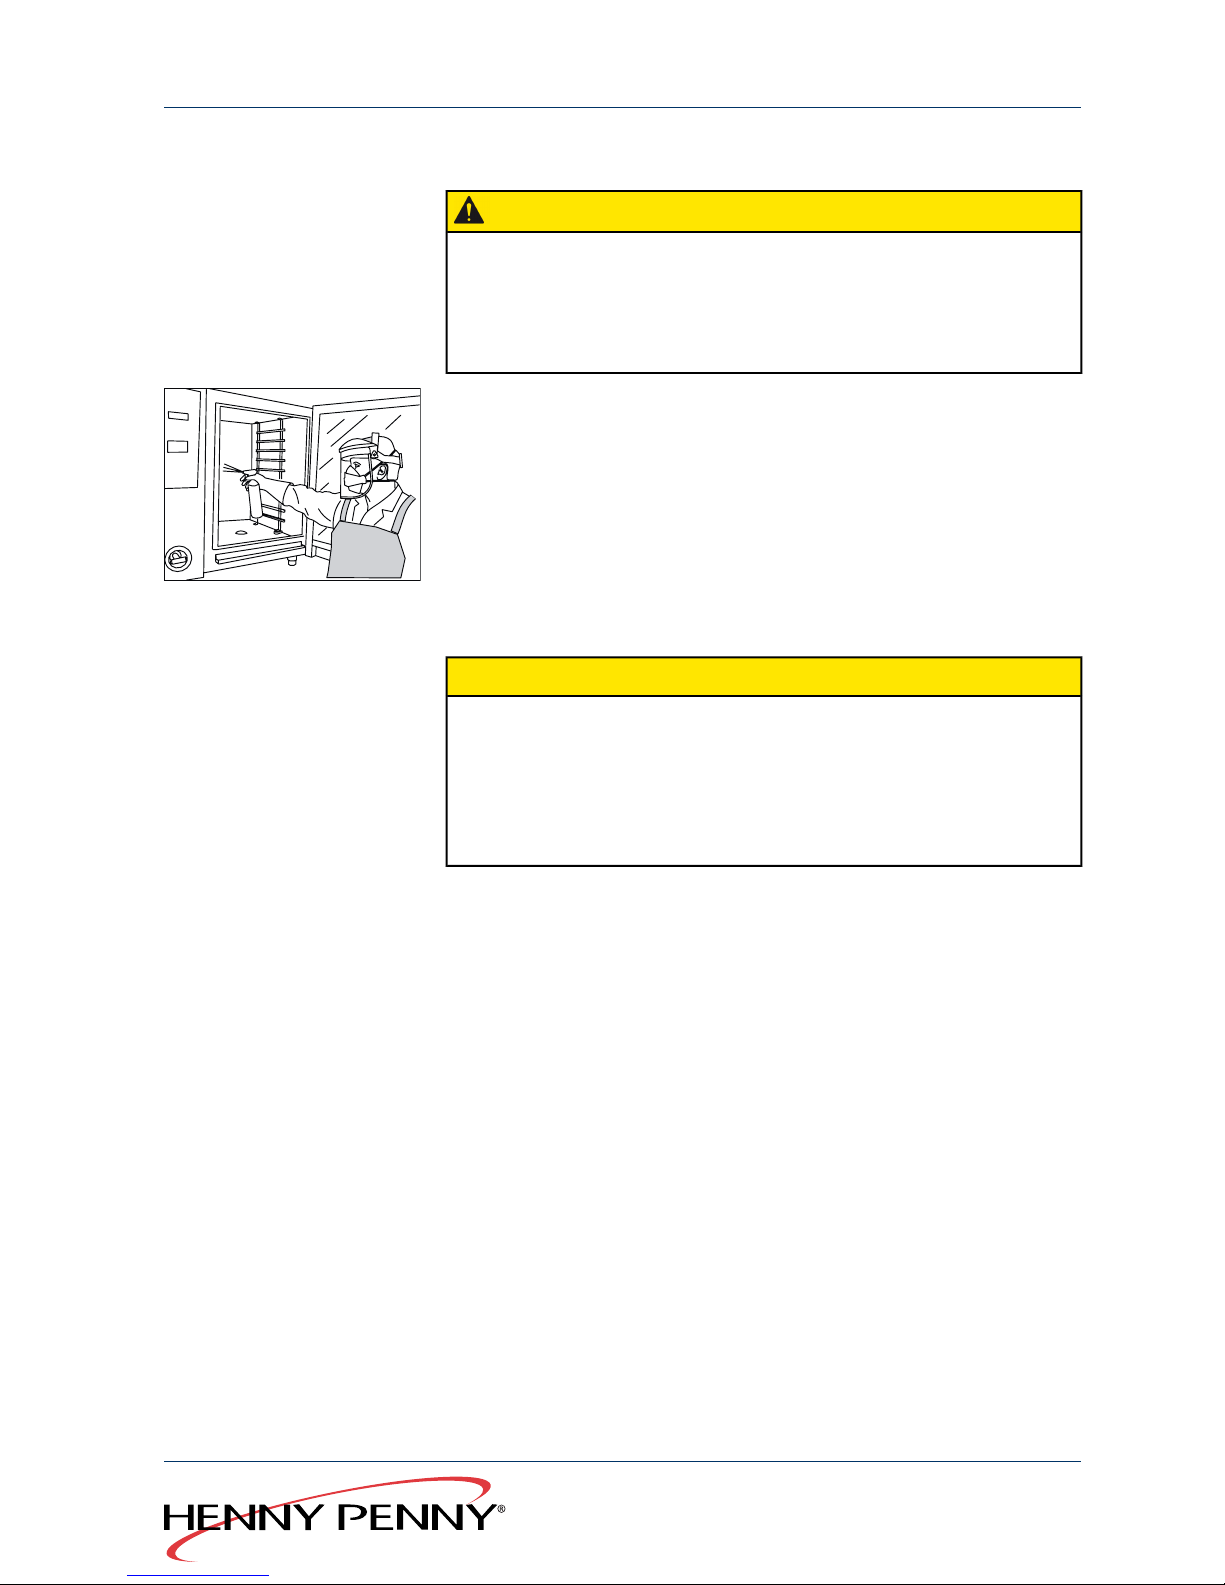
5.2.3 Spraying cleaning solution
CAUTION
Risk of burns due to caustic liquids
→
Wear protective clothing.
→
Also wear respiratory protection because of the formation of
aerosols or mists.
1. After soaking, the multi-function display (4) shows “Apply cleaning
solution”.
2. Open the cooking chamber door.
3. Spray cooking chamber, heating register and fan wheel (by opening
the ventilator plate) with cleaner.
5.2.4 Let the cleaner work
CAUTION
Damage caused by exceeding the recommended reaction time
The surface of the cooking chamber may be damaged due to the
corrosive effects of the cleaner used.
→
Do not allow the cleaner to react for longer than the period
specified by the program.
→
Close chamber door.
The reaction time starts after the chamber door is closed.
The unit is inactive during the reaction time. The multi-function display
(4) shows the remaining reaction time.
5.2.5 Cleaning
The cleaning process starts at the end of the reaction time.
In this process, the chamber is heated to 80 °C (176 °F).
The multi-function display (4) shows the chamber temperature and the
remaining cleaning time.
After the cleaning, the multi-function display (4) shows “Rinse cooking
chamber”.
67Operating manual
Global Foodservice Solutions
Cleaning
SmartCombi
™
Page 68

5.2.6 Rinsing out
1. Open the chamber door.
2. Remove ventilation plate (see Chapter “Removing the ventilation
plate”, Page 72).
3. Thoroughly rinse the cooking chamber for about 3 minutes using the
hand shower.
4. Replace ventilation plate.
5.2.7 Cleaning the door seal
1. Clean the door seal (see Chapter “Cleaning the door seal”, Page 69).
2. Close chamber door.
5.2.8 Drying
1. Drying starts automatically after closing the chamber door.The
chamber will be heated to 130 °C (266 °F) for five minutes.
2. The multi-function display (4) shows the current chamber temperature
and the drying time.
3. Open the chamber door and leave it slightly ajar until the next use.
This will increase the life of the door seal.
No moisture will build up in the chamber.
Global Foodservice Solutions
Operating manual68
SmartCombi
™
Cleaning
Page 69
5.3 General cleaning
5.3.1 Cleaning the outside of the housing
CAUTION
Damage caused by water penetrating the electronic controls
The electronic controls are not splash-proof.
→
Only use the hand shower for rinsing the cooking chamber.
→
Do not spray the outside of the housing with the hand shower.
CAUTION
Damage to surfaces caused by incorrect cleaning
→
Do not abrasive cleaners or cloths.
→
Do not use aggressive cleaners (e.g. oven cleaner).
→
Wipe the outside of the housing with tepid soapy water and a cloth.
5.3.2 Cleaning the cooking chamber
The unit is delivered with two cleaning programs as standard:
●
“WaveClean” automatic cleaning system: automatic cleaning and
rinsing of the cooking chamber
●
menu guided manual cleaning
We recommend the use of the automatic cleaning system “WaveClean”.
You save the lengthy, and hence expensive manual cleaning.You don't
come into contact with the cleaner, thanks to the use of the patented
two-in-one cartridge.
5.3.3 Cleaning the door seal
Animal fats together with high temperatures can destroy the door seal
in a short time if it is not cared for properly. For this reason, it is
important to clean the door seal regularly to ensure a long service life.
NOTICE
When cleaning with “WaveClean” or system-supported manual
cleaning, the outside of the door seal is not cleaned. The door seal
must be cleaned separately after each cleaning.
Do not use aggressive cleaners!
69Operating manual
Global Foodservice Solutions
Cleaning
SmartCombi
™
Page 70
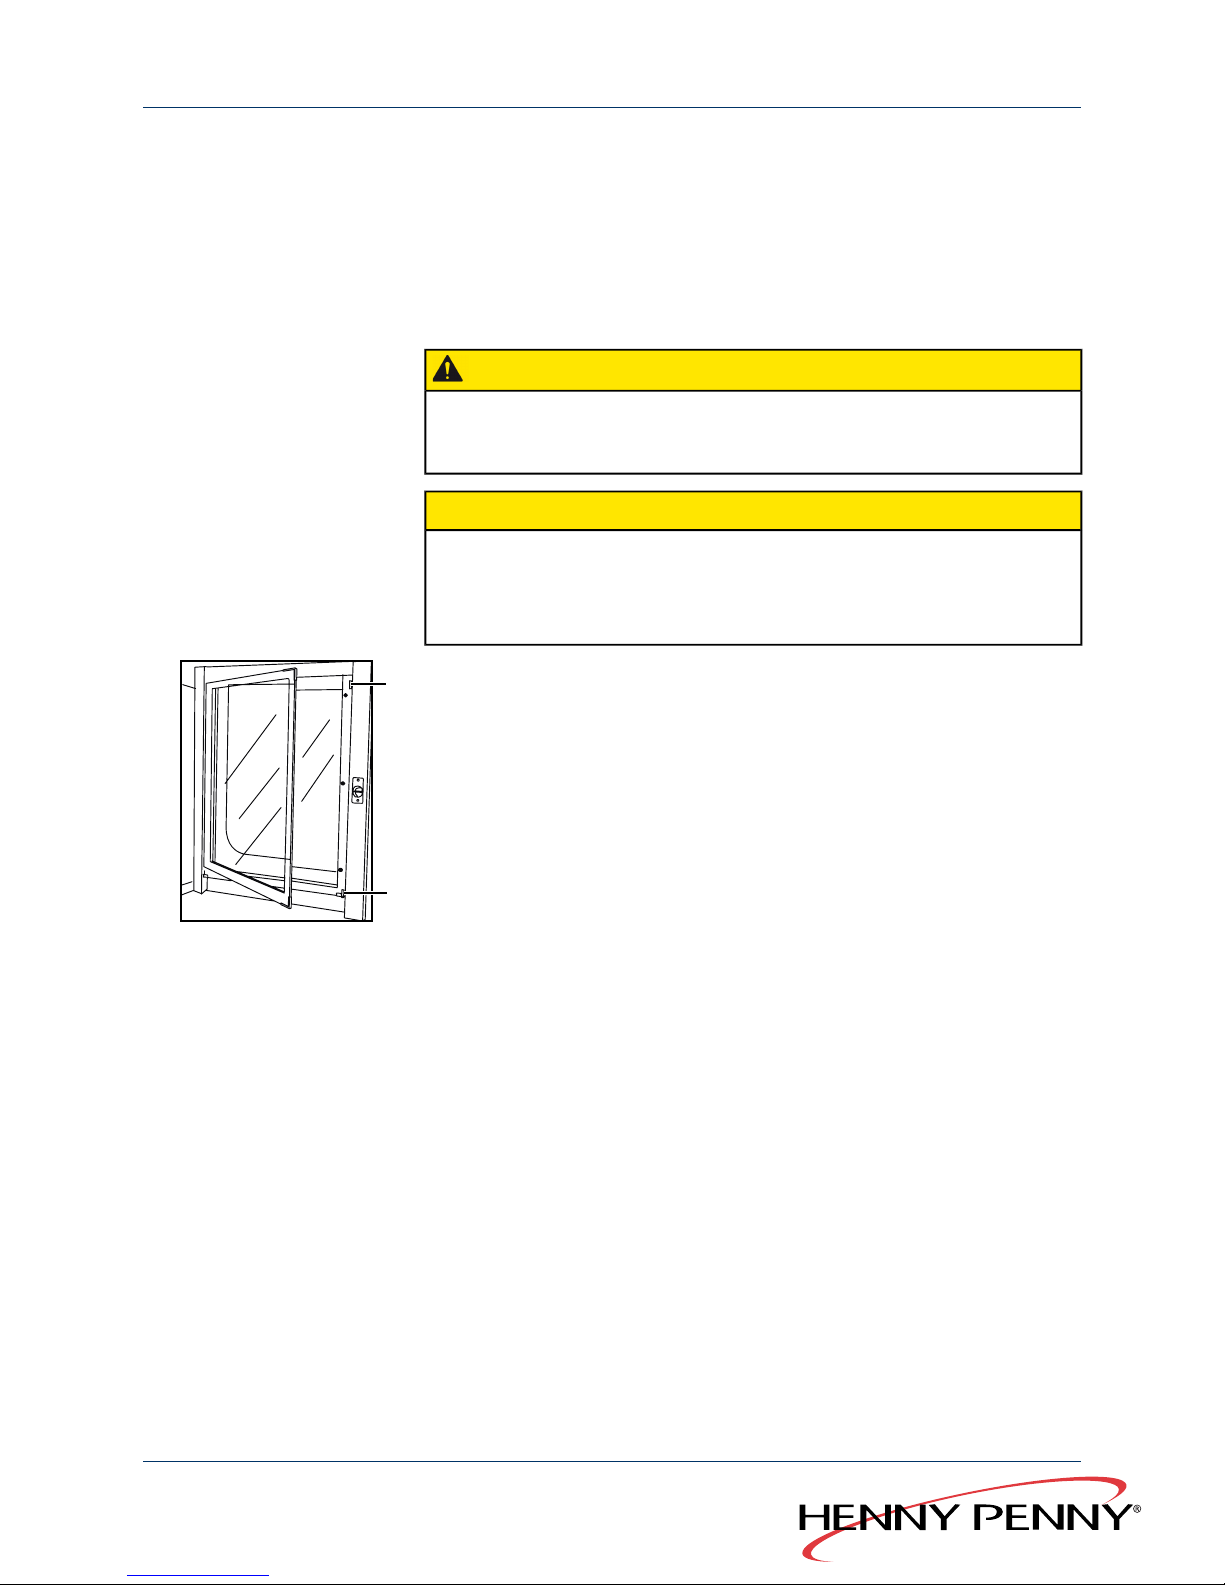
1. Clean fats from the door seal after operation using a mild soap
solution.
2. Also clean the door seal in breaks during operation if the unit is mainly
used for roasting.
5.3.4 Cleaning the cooking chamber door
CAUTION
Risk of burns due to hot surfaces
→
Allow surfaces to cool before cleaning.
CAUTION
Damage to surfaces caused by incorrect cleaning
→
Do not abrasive cleaners or cloths.
→
Do not use oven cleaner.
1
1
The inner glass plate of the cooking chamber door can be swung out.
1. Open the cooking chamber door to 90 degrees.
2. Remove the retaining spring (1) and swing out the inner glass plate
to 90 degrees.
Do not lift the glass plate when swinging out.
Do not swing the glass plate out to its full extent.
Hold the inner glass plate during cleaning.
3. Remove scale residues from the glass plate with vinegar or citric acid.
4. Swing the inner plate back in after cleaning and allow the retaining
spring (1) to click in place.
Global Foodservice Solutions
Operating manual70
SmartCombi
™
Cleaning
Page 71
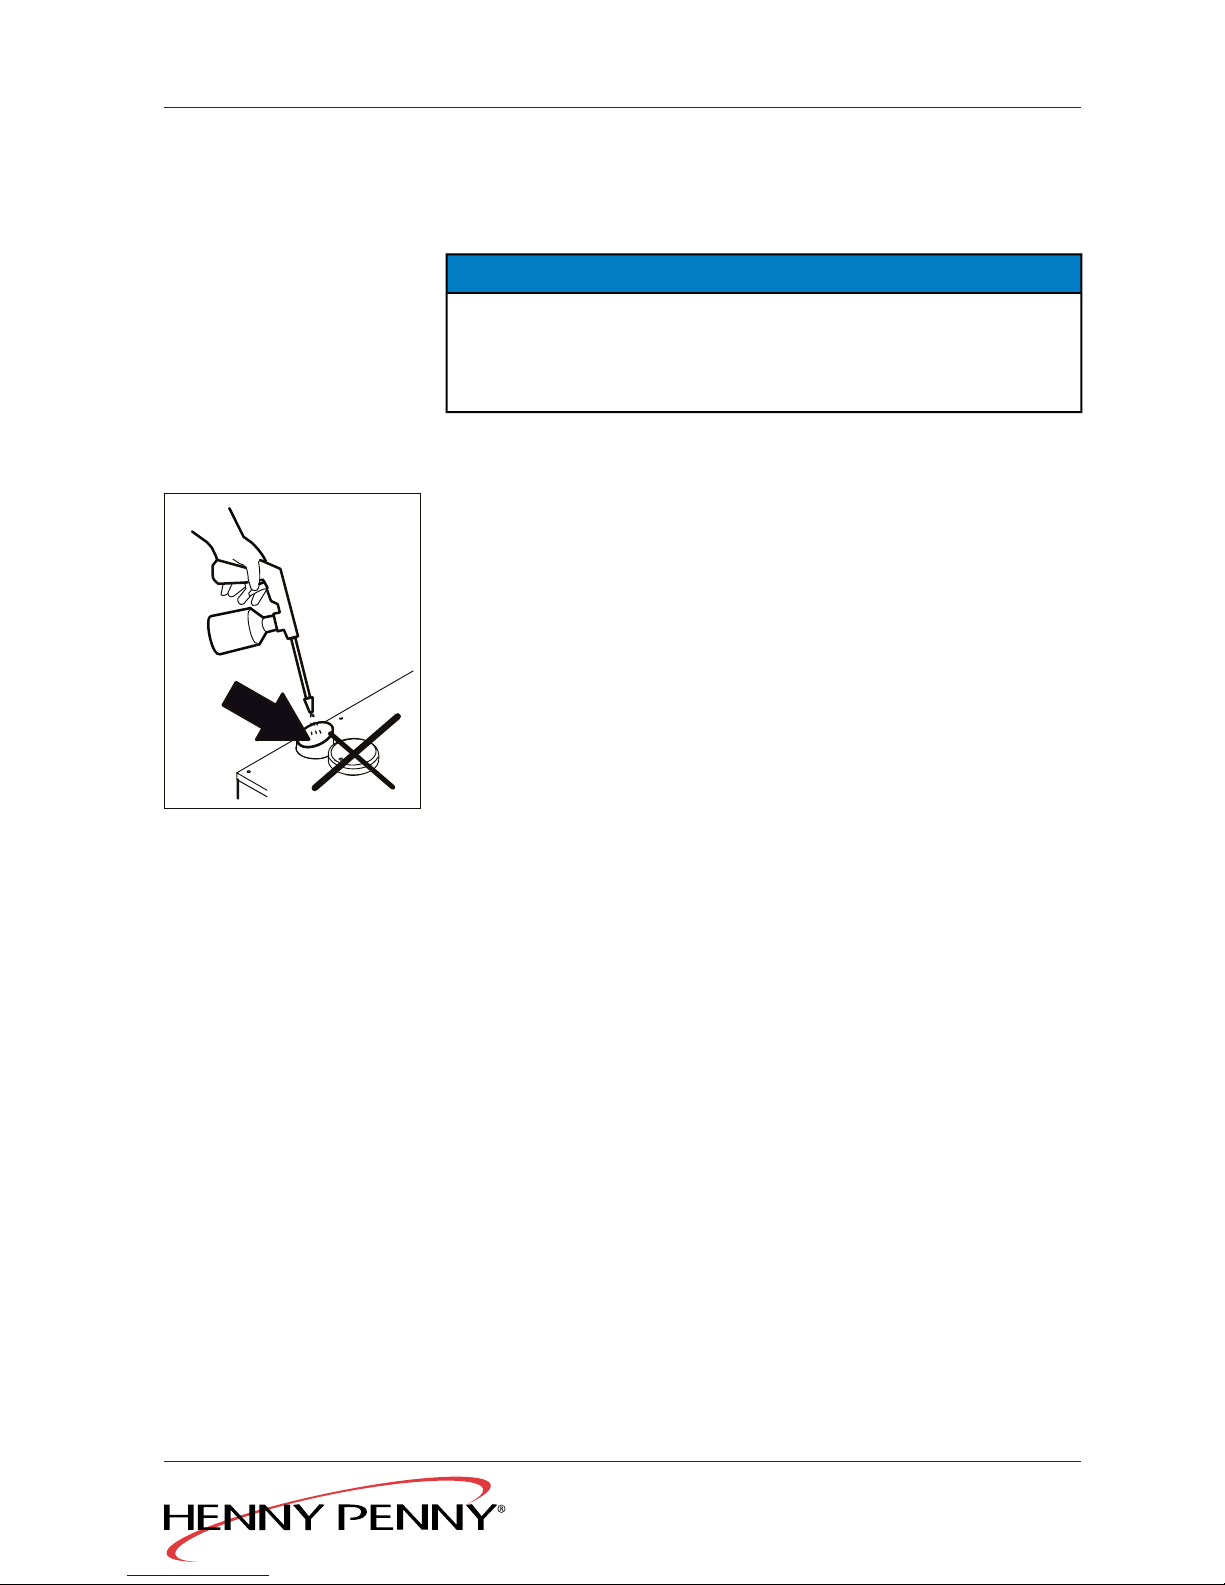
5.3.5 Cleaning the steam outlet port
Deposits can block the steam outlet port and the pipes connected to
it.
NOTICE
Use liquid cleaner with a maximum of 10 % soda or caustic potash
solution.
It is not necessary to rinse with water.
1. Inspect the steam outlet port and the pipes connected to it for
deposits.
2. Spray liquid cleaner in the steam outlet port.
3. With units with a condensate hood (optional), remove the
connecting pipe between the condensate hood and the steam outlet
port twice a year.
4. Spray liquid cleaner into the steam outlet port and in the opening
of the condensate hood.
5. Then replace the connecting pipe.
5.3.6 Descaling
Requirements Cooking chamber temperature less than 40 °C (104 °F)
Cooking chamber is clean
To avoid a build-up of scale in the cooking chamber, only softened
water should be used for operation.
If hard water is used, the cooking chamber must be descaled regularly
to avoid damage to the unit.
Use Henny Penny special descaler together with a hand-held sprayer
for manual decalcification.
1. Dilute the special descaler with water at the ratio of 1:2.
2. Open the ventilation plate so that the parts behind it are moistened.
3. Spray the diluted special descaler into the cooking chamber.
4. Allow the solution 30 minutes of contact time, then rinse the
chamber thoroughly.
71Operating manual
Global Foodservice Solutions
Cleaning
SmartCombi
™
Page 72
5. Examine the chamber for scale residues. Repeat decalcification if
necessary.
6. Open the chamber door and leave it slightly ajar until the next use.
This will increase the life of the door seal.
No moisture will build up in the cooking chamber.
5.4 Removing the ventilation plate
5.4.1 Removing the ventilation plate (table top models)
The ventilation plate can be removed for cleaning.
CAUTION
Risk of crushing fingers due to rotating fan
→
Disconnect the unit from the power supply before you remove the
ventilation plate.
→
Do not operate the unit without the ventilation plate.
1. Remove the suspension frame on the left-hand side.
2. Open the front catch.
3. Fold the ventilation plate towards the rear wall.
4. Open the rear catch.
5. Slightly raise the ventilation plate and remove it.
6. Clean the cooking chamber behind the ventilation plate.
7. Push the ventilation plate onto the upper bolts.
8. Close the rear catch.
9. Fold the ventilation plate towards the side wall.
10. Close the front catch.
11. Check the catches.
12. Replace the suspension frame on the left-hand side.
5.4.2 Removing the ventilation plate (floor standing units)
Requirements Necessary tools: box spanner
The ventilation plate can be removed for cleaning.
Global Foodservice Solutions
Operating manual72
SmartCombi
™
Cleaning
Page 73

CAUTION
Risk of crushing fingers due to rotating fan
→
Disconnect the unit from the power supply before you remove
the ventilation plate.
→
Do not operate the unit without the ventilation plate.
1. Remove the screws in the middle of the ventilation plate.
2. Open the front catch.
3. Fold the ventilation plate towards the rear wall.
4. Open the rear catch.
5. Slightly raise the ventilation plate and remove it.
6. Clean the cooking chamber behind the ventilation plate.
7. Push the ventilation plate onto the upper bolts.
8. Close the rear catch.
9. Fold the ventilation plate towards the side wall.
10. Close the front catch.
11. Check the catches.
12. Replace the screws in the middle of the ventilation plate.
73Operating manual
Global Foodservice Solutions
Cleaning
SmartCombi
™
Page 74
6 Faults
6.1 Correcting faults
This section describes the steps to be taken in the event that faults with
the unit occur during operation.
1. Reset control electronics (Chapter “Resetting the control electronics”,
Page 74).
2. Observe the information in the table “Causes of faults and
troubleshooting” (Chapter “Cause of errors and troubleshooting”,
Page 75).
3. Contact customer service.
6.2 Resetting the control electronics
Requirements Unit is switched on
Errors in the program sequence (e.g. deviations from the set values) can
be corrected by resetting (initialising) the control electronics.
This resets the electronics to the start mode.
NOTICE
Stored programs are not deleted when doing this!
1. Hold On / Off (1) pressed for about 8 seconds, until the control
electronics switch off.
The multi-function display (4) goes dark.
2. After about 10 seconds, the control electronics switch on again
automatically.
12. 08. 2008 13:32
Demo mode
Menu RackCont.
ΔT/LTC/...
3. If the unit is switched off and On/ O ff ( 1) is pressed for longer than
20 seconds, the control electronics change to Demo mode.
The multi-function display (4) shows “Demo mode”.
4. To leave demo mode, switch off the unit and press On /Of f (1 ) until
the unit switches on again.
12. 08. 2008 13:32
Menu RackCont.
ΔT/LTC/...
The control electronics switch back to the normal operating mode.
Unit is in start mode (standby).
Global Foodservice Solutions
Operating manual74
SmartCombi
™
Faults
Page 75
6.3 Cause of errors and troubleshooting
RemedyPossible causesError
●
Open tapTap closedNo water
●
Contact customer serviceUnit is defective
●
Do not use unit
●
Contact customer service
Fault in the waste water systemLeakage of water un-
derneath the unit
●
Open gas tap
●
Check gas pressure
Gas tap closed
Gas pressure too low
No gas
●
Do not use unit
●
Contact customer service
Unit is defectiveCooking chamber
overheated
●
Contact customer serviceUnit is defectiveSTL triggered
●
Allow unit to cool down
●
Check cooling air intake
●
Contact customer service
Motor overheated, cooling faultyMotor STL triggered
●
Check cooling air intake
●
Set a lower cooking temperature
●
Contact customer service
Heat source near to the cooling air intake
Cooling air intake restricted or blocked
Ambient temperature too high
Electronics too warm
●
Do not use unit
●
Check cooling air intake
●
Contact customer service
Cooling faulty, ambient temperature too highElectronics too hot
●
Use cooking program without core temperature measurement
●
Contact customer service
Sensor brokenCore temperature
sensor faulty
●
Use cooking program without core temperature measurement
●
Core temperature sensor as substitute
for chamber sensor:
-
Leave core temperature sensor in the
chamber
-
Do not insert the core temperature
sensor into the food
●
Contact customer service
Sensor brokenChamber sensor
faulty
●
Check electrical connection
Observe safety information (see Chapter
“Safety information”, Page 10)
●
Contact customer service
●
Fan not working
●
Missing phase
●
Unit is defective
No fan
●
Observe the ambient air requirements for
operation
Temperature below 0 °C (32 °F)Danger of frost
●
Stored data will be lost in the event of a
power failure
●
Contact customer service
Back-up battery is flat (service life: approx.
8 years)
Battery is flat
●
Perform configuration
●
Contact customer service
Necessary configuration not performedPerform configuration
75Operating manual
Global Foodservice Solutions
Faults
SmartCombi
™
Page 76

RemedyPossible causesError
●
Unit can be used (emergency operation)
●
Contact customer service
Waste water temperature measurement
faulty, cooling water is permanently turned
on
Expelled steam
sensor broken
●
Unit can be used (emergency operation)
●
Contact customer service
Humidity sensor faulty, humidity emergency
program is active
Humidity sensor faulty
●
Contact customer serviceCore temperature sensor or keypad defectiveHW faulty: UREF0 T-
measurement too high
●
Contact customer serviceIncorrect gas quality
Unit is defective
General gas fault
●
Contact customer serviceUnit is defectiveNo gas fan
●
Repeat procedure for loading/savingFile on USB memory stick is damagedLine too long
Missing s
●
Use another USB memory stickInsufficient memory on USB memory stickUSB memory is full
●
Insert USB memory stick completely
●
Use another USB memory stick
USB memory stick is not inserted
Faulty USB memory stick
USB not available
Table 9: Cause of errors and troubleshooting
Global Foodservice Solutions
Operating manual76
SmartCombi
™
Faults
Page 77
7 Limited Warranty
LIMITED WARRANTY FOR HE NNY PENNY EQUIPMENT
Subject to the following conditions, Henny Penny Corporation makes the following limited warranties to the original purchaser
only for Henny Penny appliances and replacement parts:
NEW EQUIPMENT: Any part of a new applian ce, except baskets, lamps, and fuses, which proves to be defective in
material or workmanship within two (2) years from date of original installation, will be repaired or replaced without
charge F.O.B. factory, Eaton, Ohio, or F.O.B. authorized distributor. Baskets will be repa ired or replaced for ninety (90)
days from date of original installation. Lamps and fuses ar e not covered under this Limited Warranty. To validate this
warranty, the registration card for the appliance must be mailed to Henny Penny within ten (10) days after installation.
FILTER SYSTEM : Failure of any parts within a fryer filter system caused by the use of the non-OEM filters or other
unapproved filters is not covered under this Limited Warranty.
REPLACEMENT PARTS: Any appliance replacement part, except lamp s and fuses, which proves to be defective in
material or workmanship within ninety (90) days from date of original installation will be repaired or replaced without
charge F.O.B. factory, Eaton, Ohio, or F.O.B. authorized distributor.
The warranty for new equipment covers the repair or replacement of the defective part and includes labor charges and
maximum mileage charges of 200 miles round trip for a period of one (1) year from the date of original installation.
The warranty for replacement parts covers only the repair or replacement of the defective part and does not include any labor
charges for the removal and installation of any parts, travel, or other expenses incidental to the repair or replacement of a part.
EXTENDED FRYPOT WARRANTY: Henny Penny will replace any frypot that fails due to manufacturing or workmanship
issues for a period of up to seven (7) years from date of manufacture. This warranty shall not cover any frypot that fails due to any
misuse or abuse, such as heating of the frypot without shortening.
0 TO 3 YEARS: During this time, any frypot that fails due to manufacturing or workmanship issues will be
replaced at no charge for parts, labor, or freight. He nny Penny will either install a new frypot at no cost or
provide a new or reconditioned replacement fryer at no cost.
3 TO 7 YEARS: During this time, any frypot that fails due to manufacturing or workmanship issues will be
replaced at no charge for the frypot only. Any freight charges an d labor costs to install the new frypot as well as
the cost of any other parts replaced, such as insulation, thermal sensors, high limits, fittings, and hardware, will
be the responsibility of the owner.
Any claim must be presented to either Henny Penny or the distributor from whom the appliance was purchased. No allowance
will be granted for repairs made by anyone else without Henny Penny’s written consent. If damage occurs during shipping, notify
the sender at once so that a claim may be filed.
THE ABOVE LIMITED WARRANTY SETS FORTH TH E SOLE REMEDY AGAINST HENNY PENNY FOR ANY
BREACH OF WARRANTY OR OTHER TERM. BUYER AGREES THAT NO OTHER REMEDY (INCLUDING CLAIMS
FOR ANY INCIDENTAL OR CONSEQUENT IAL DAMAGES) SHALL BE AVAILABLE.
The above limited warranty does not apply (a) to damage resulting from accident, alteration, misuse, or abuse; (b) if the
equipment’s serial number is removed or defaced; or (c) for lamps and fuses. THE ABOVE LIMITED WARRANTY IS
EXPRESSLYIN LIEU OF ALL OTHER WARRANTIES, EX PRESS OR IMPLIED, INCLUDING MERCHANTABILITYAND
FITNESS, AND ALL OTHER WARRANTIES ARE EX CLUDED. HENNY PENNY NEITHER ASSUMES NOR
AUTHORIZES ANY PERSON TOASSUME FOR IT ANY OTHER OBLIGATION OR LIABILITY.
Revised 01/01/07.
77Operating manual
Global Foodservice Solutions
Limited Warranty
SmartCombi
™
Page 78

Global Foodservice Solutions
Operating manual78
SmartCombi
™
Limited Warranty
Page 79

Operating manual
SmartCombi
™
Page 80

Global Foodservice Solutions
Henny Penny Corporation
P.O. Box 60
Eaton, OH 45320
1-937-456-8400
1-937-456-8402 Fax
Toll free in USA
1-800-417-8417
1-800-417-8434 Fax
www.hennypenny.com
Manufactured by:
MKN Maschinenfabrik
Wolfenbüttel, Germany
Operating Manual
SmartCombi™
 Loading...