

Page 1
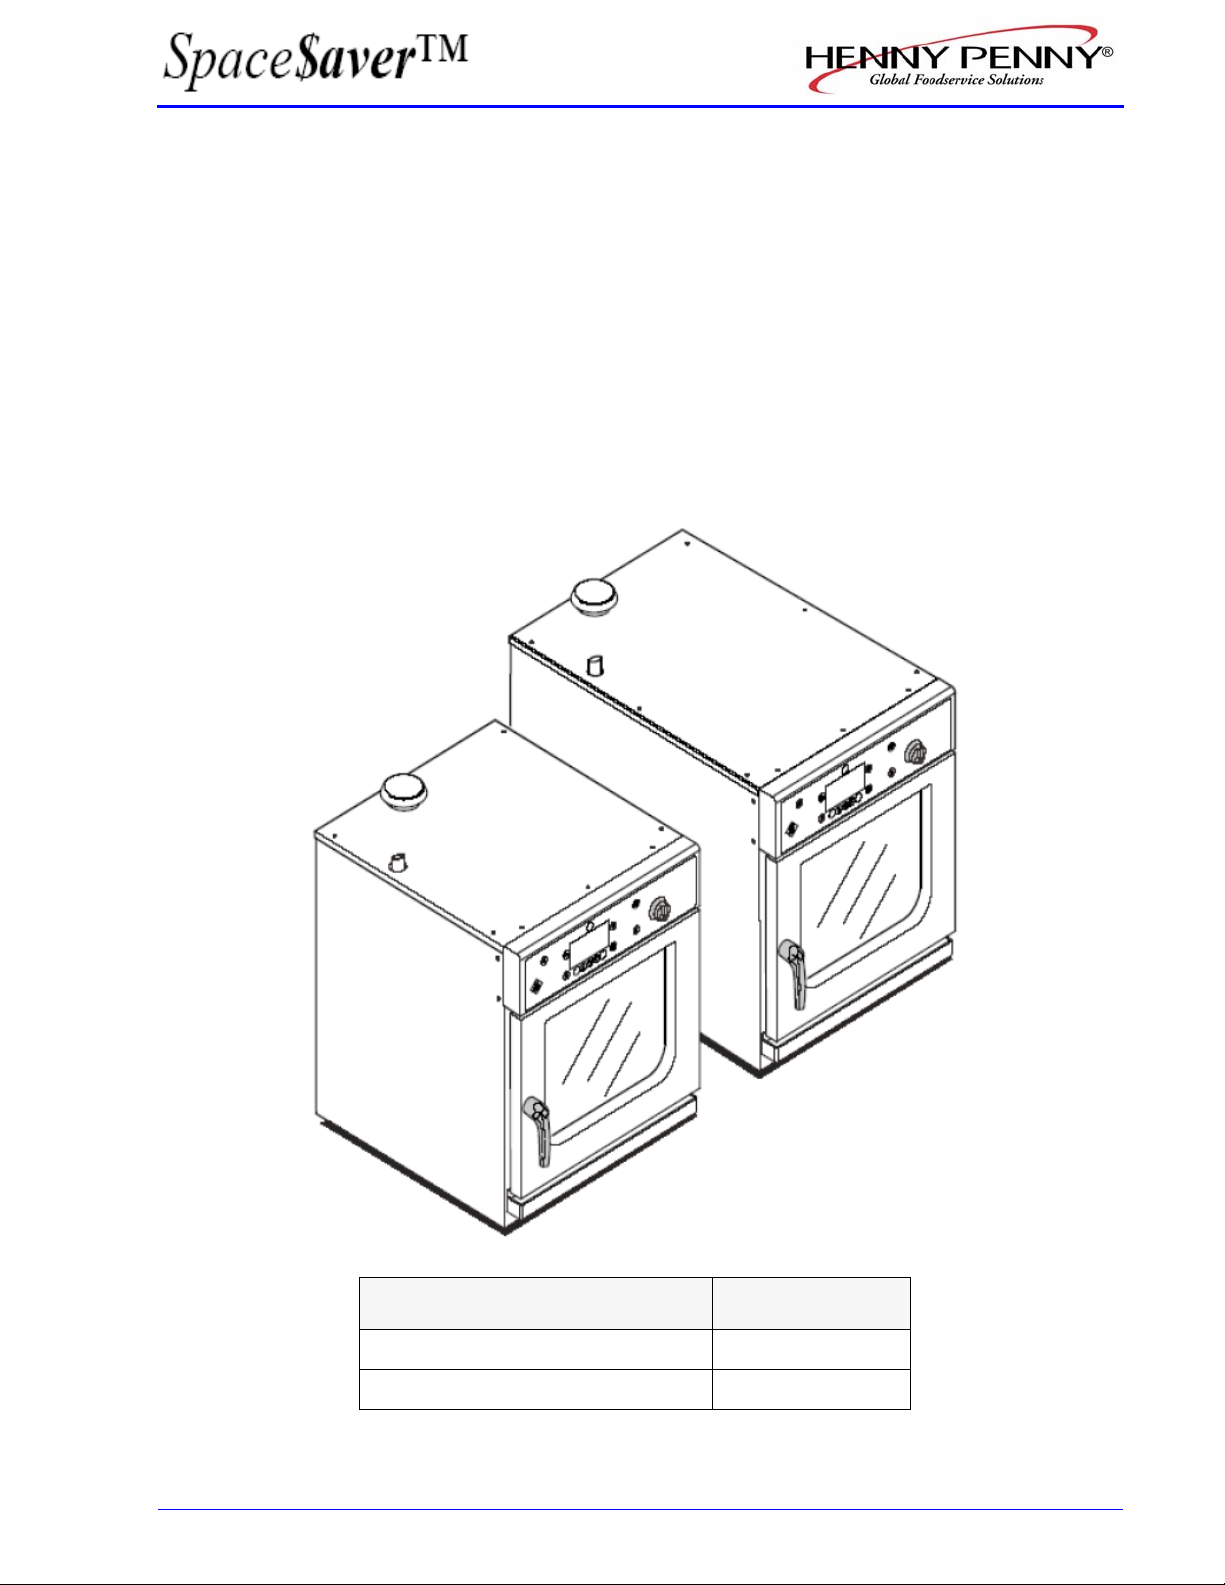
Operating Manual
Electric Space$aver™ &
Electric Space$aver™ Plus
Model Model No.
Electric Space$aver™ 605 ECS-605
Electric Space$aver™ Plus 610 ESC-610
Page 2

Page 3
LIMITED WARRANTY FOR HENNY PENNY EQUIPMENT
Subject to the following conditions, Henny Penny Corporation makes the following limited warranties to the original purchaser
only for Henny Penny appliances and replacement parts:
NEW EQUIPMENT:
material or workmanship within two (2) years from date of original installation, will be repaired or replaced without
charge F.O.B. factory, Eaton, Ohio, or F.O.B. authorized distributor. Baskets will be repaired or replaced for ninety (90)
days from date of original installation. Lamps and fuses are not covered und er this Limited Warranty. To validate this
warranty, the registration card for the appliance must be mailed to Henny Penny within ten (10) days after installation.
FILTER SYSTEM
unapproved filters is not
REPLACEMENT PARTS:
material or workmanship within ninety (90) days from date of original installation will be repaired or replaced without
charge F.O.B. factory, Eaton, Ohio, or F.O.B. authorized distributo r.
The warranty for new equipment covers the repair or replacement of the defective part and includes labor charges and
maximum mileage charges of 200 miles round trip for a period of one (1) year from the date of original installation.
The warranty for replacement parts covers only the repair or replacement of the defective part and does not include any labor
charges for the removal and installation of any parts, travel, or other expenses incidental to the repair or replacement of a part.
EXTENDED FRYPOT WARRANTY:
issues for a period of up to seven (7) years from date of manufacture. This warranty shall not cover any frypot that fails due to any
misuse or abuse, such as heating of the frypot without shortening.
Any part of a new appliance, except baskets, lamps, and fuses, which proves to be defective in
: Failure of any parts within a fryer filter system caused by the use of the non-OEM filters or other
covered under this Limited Warranty.
Any appliance replacement part, except lamps and fuses, which proves to be defective in
Henny Penny will replace any frypot that fails due to manufacturing or workmanship
0 TO 3 YEARS:
replaced at no charge for parts, labor, or freight. Henny Penny will either install a new frypot at no cost or
provide a new or reconditioned replacement fryer at no cost.
3 TO 7 YEARS:
replaced at no charge for the frypot only. Any freight charges and labor costs to install the new frypot as well as
the cost of any other parts replaced, such as insulation, thermal sensors, high limits, fittings, and hardware, will
be the responsibility of the owner.
Any claim must be presented to either Henny Penny or the distributor from whom the appliance was purchased. No allowance
will be granted for repairs made by anyone else without Henny Penny’s written consent. If damage occurs during shipping, notify
the sender at once so that a claim may be filed.
THE ABOVE LIMITED WARRANTY SETS FORTH THE SOLE REMEDY AGAINST HENNY PENNY FOR ANY
BREACH OF WARRANTY OR OTHER TERM. BUYER AGREES THAT NO OTHER REMEDY (INCLUD ING CLAIMS
FOR ANY INCIDENTAL OR CONSEQUENTIAL DAMAGES) SHALL BE AVAILABLE.
The above limited warranty does not apply (a) to damage resulting from accident, alteration, misuse, or abuse; (b) if the
equipment’s serial number is removed or defaced; or (c) for lamps and fuses. THE ABOVE LIMITED WARRANTY IS
EXPRESSLY IN LIEU OF ALL OTHER WARRANTIES, EXPRESS OR IMPLIED, INCLUDING MERCHANTABILITY AND
FITNESS, AND ALL OTHER WARRANTIES ARE EXCLUDED. HENNY PENNY NEITHER ASSUMES NOR
AUTHORIZES ANY PERSON TO ASSUME FOR IT ANY OTHER OBLIGATION OR LIABILITY.
During this time, any frypot that fails due to manufacturing or work manship issues will be
During this time, any frypot that fails due to manufacturing or work manship issues will be
Model Model No.
Electric Space$aver™ 605 ECS-605
Electric Space$aver™ Plus 610 ESC-610
Revised 01/01/07.
Page 4

Page 5

Contents
Appliance description.............................................11
Operation................................................................ 19
Intended use.............................................................................. 11
Incorrect use.............................................................................. 11
Hazards of improper use........................................................... 11
Training of operating personnel................................................ 11
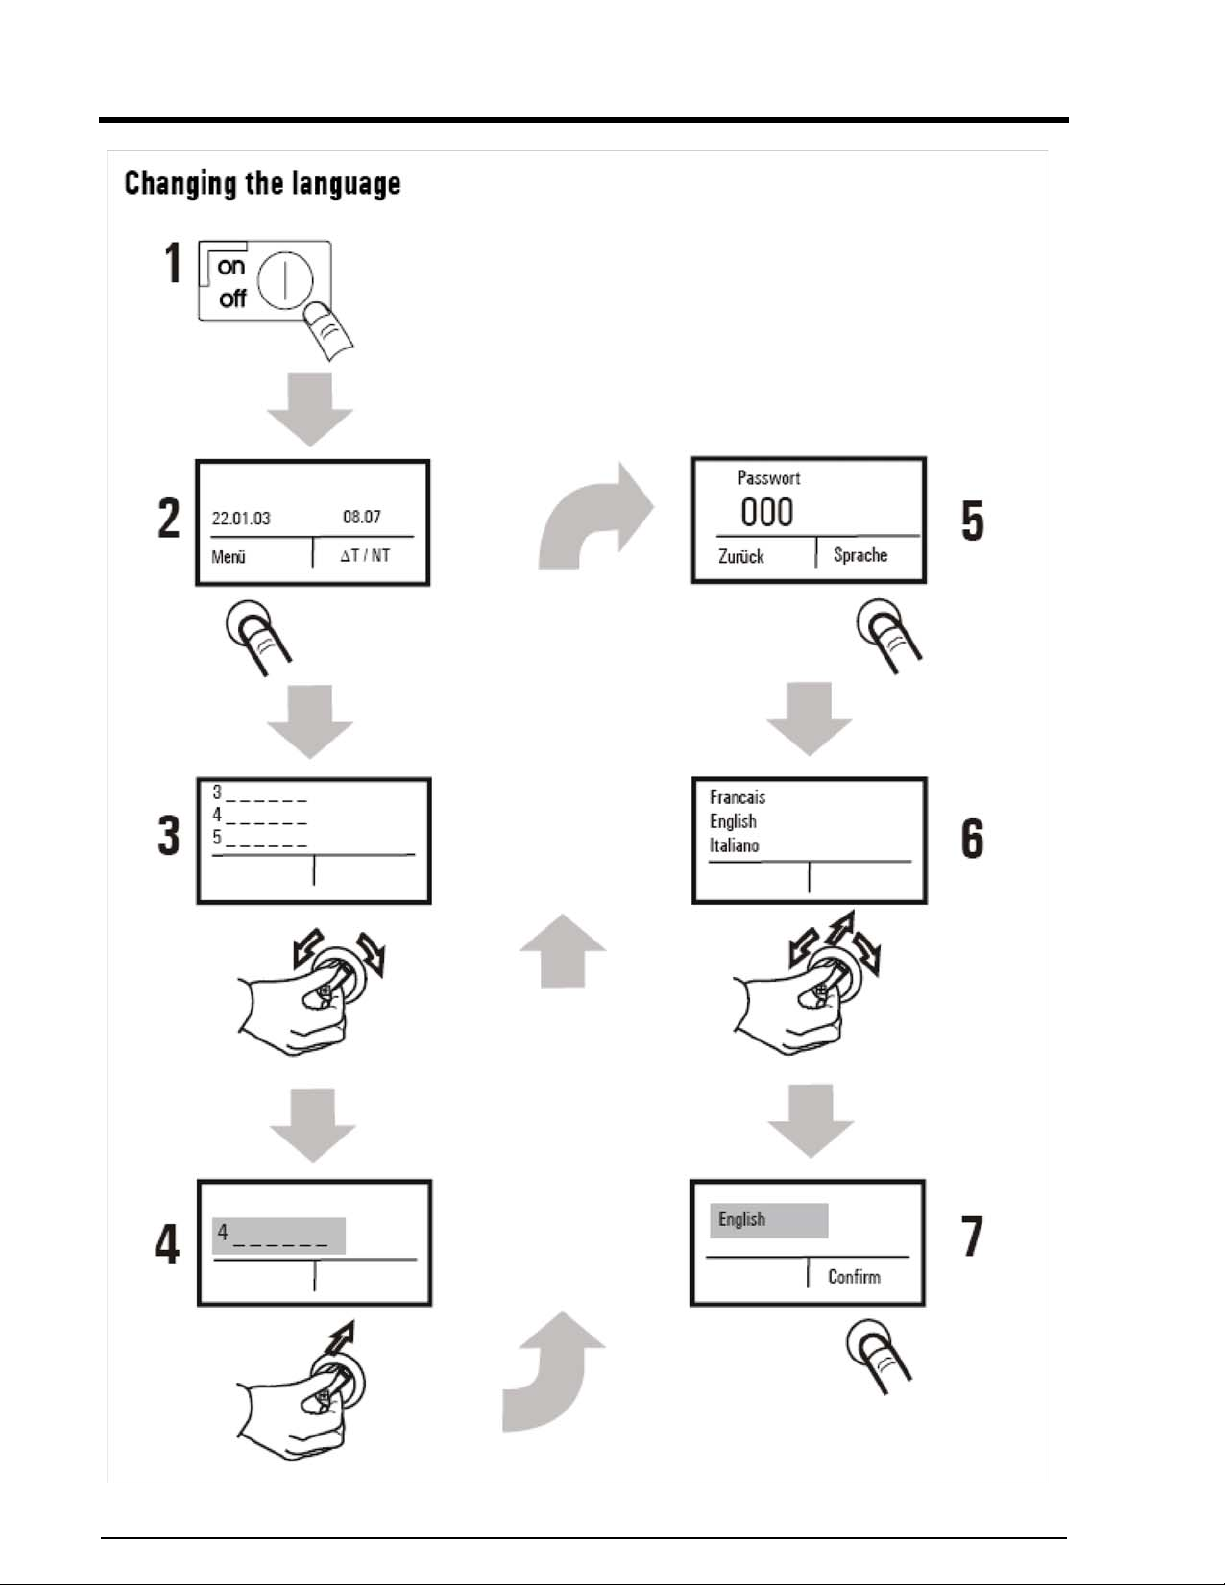
Changing Language ................................................................. 12
Safety instuctions...................................................... 13
Transport through cold surrounding ......................................... 13
Cleaning.................................................................................... 14
Defective Appliance.................................................................. 15
After Use................................................................................... 15
Door lock of.............................................................................. 16
Overview .................................................................................. 17
Operating Modes....................................................................... 19
Additional functions.................................................................. 19
"Smart Menu" ........................................................................... 20
Prior Programs.......................................................................... 21
Preheating ................................................................................. 21
Different programs.................................................................... 21
Location of the selection frame................................................. 21
Moist Heat Mode...................................................... 22
Setting the Temperature ........................................................... 22
Setting the Time ....................................................................... 22
Probe temperature Setting......................................................... 22
Starting Moist Heat................................................................... 22
Displaying actual temperatures................................................. 22
Changes while in cooking cycle ............................................... 22
End of Moist Heat Mode........................................................... 22
Combisteaming.........................................................23
Setting the Temperature............................................................ 23
Setting the Time........................................................................ 23
Probe temperature setting ......................................................... 23
Humidity Control...................................................................... 23
Using the Combi Mode............................................................. 23
Changing the setting ................................................................. 23
End of Combi Mode.................................................................. 23
Operating Manual
5
Page 6

Dry Heat Mode .........................................................24
Setting the Temperature ............................................................24
Setting the Time ........................................................................24
Probe temperature setting..........................................................24
Humidity Control ......................................................................24
Starting Dry Heat Mode............................................................24
Displaying actual temperatures.................................................24
Changing the setting..................................................................24
End of Dry Heat Mode..............................................................24
Rethermalization Mode ...........................................25
Setting the Temperature ............................................................25
Setting the Time ........................................................................25
Probe temperature setting..........................................................25
Humidity Control ......................................................................25
Using Retherm Mode ................................................................25
Displaying actual temperatures.................................................25
Changing the setting..................................................................25
Contents
End of Retherm Mode...............................................................25
Probe Cooking ..........................................................26
Positioning the Probe.................................................................27
Do not overheat core-temperature probe...................................28
Drill an insertion channel..........................................................28
Delta-T cooking.........................................................29
Delta-T cooking.........................................................................29
Starting Delta-T cooking...........................................................30
Current Temperature Display....................................................30
End of Delta-T cook cycle.........................................................30
Hints on Delta-T cooking.......................................................... 30
SLow Roast & Hold (Over-night Cooking.............31
SRH without using the probe ....................................................31
SRH using the probe..................................................................31
Setting SRH cooking mode.......................................................33
Starting SRH..............................................................................33
Steam Injection.........................................................34
Selecting steam injection........................................................... 34
Rest period ................................................................35
Selecting rest period..................................................................35
6
Operating Manual
Page 7

Contents
Additional functions............................................. 43
Changing settings .....................................................36
Default settings ......................................................................... 36
To access the Setup Mode......................................................... 36
Custom Programming.............................................. 40
Creating your own programs .................................................... 40
Copying a cooking program...................................................... 40
Saving changed program........................................................... 40
Creating a program ................................................................... 41
Locking/unlocking cookbook ................................................... 41
Starting selected program ......................................................... 42
Changing settings during the program cycle ............................ 42
History function........................................................................ 42
Delayed Start Time................................................... 43
Setting the time delay................................................................ 43
Cancel the delayed start ........................................................... 43
Note........................................................................................... 43
Preheating.................................................................44
Starting preheat......................................................................... 44
Steam Injection.........................................................44
More functions........................................................ 45
Dehumidifying the oven chamber...........................45
Fan Cycle...................................................................45
RackControl.............................................................. 46
Activating "RackControl"......................................................... 47
Termintating "RackControl"..................................................... 48
End-of-step signal.....................................................49
Practical tips........................................................... 53
Cool down mode.......................................................53
Moist heat..................................................................53
Advantages of moist heat.......................................................... 53
The following should be taken into consideration.................... 53
Moist heat tips........................................................................... 53
Operating Manual
7
Page 8

Tender steaming.......................................................54
Advantages tender steaming......................................................54
The following should be taken into consideration ....................54
Tender steaming tips .................................................................54
Forced steaming........................................................55
Advantages of forced steaming.................................................55
The following should be taken into consideration ....................55
Forced steaming tips:.................................................................55
Combination Mode (moist and dry heat ................55
Advantages of combination mode.............................................55
The following should be taken into consideration ....................56
Combination mode tips .............................................................56
Dry Heat.................................................................... 56
Advantages of dry heat only......................................................56
The following should be taken into consideration ....................56
Dry heat cooking tips: ...............................................................56
Contents
Slow Roast & Hold...................................................57
Advantages of SRH...................................................................57
The following should be taken into consideration ....................57
SRH tips ....................................................................................57
Rethermalization ......................................................58
Advantages of Rethermalization...............................................58
The following should be taken into consideration ....................58
Rethermalization tips.................................................................59
Rethermalization guidelines......................................................59
Cleaning ..................................................................61
Safety notes ...............................................................................61
Cleaning the outside of the unit.................................................61
Cleaning the inside of the unit...................................................61
Cleaning the door gasket...........................................................61
Cleaning the door ......................................................................62
Cleaning exhaust pipe ...............................................................62
Manual cleaning ....................................................... 63
Preparation of oven chamber.....................................................63
Selecting manual cleaning.........................................................63
Soaking......................................................................................63
Spraying cleaner .......................................................................63
8
Operating Manual
Page 9

Contents
Cleaning.................................................................................... 64
Rinsing...................................................................................... 64
Cleaning door gasket................................................................. 64
Drying....................................................................................... 64
Deliming ................................................................................... 64
"WaveClean®" automatic cleaning .......................65
"2-in-1" cartridge ..................................................................... 65
Storage of cartridges................................................................. 65
Preparing the unit...................................................................... 65
Select the cleaning level............................................................ 65
Cooking chamber too hot.......................................................... 66
Insert cartridge.......................................................................... 66
Start "WaveClean".................................................................... 67
Cancel "WaveClean" ................................................................ 67
Completion of "WaveClean" .................................................... 67
"WaveClean" problems............................................................. 68
Information on "WaveClean®" ................................................ 68
"WaveClean extra".................................................................... 68
Water softening......................................................................... 68
Errors...................................................................... 69
Resetting (initializing) control electronics................................ 70
Measuring mode........................................................................ 70
HACCP ................................................................... 71
Printing reports.......................................................................... 71
The HACCP report ................................................................... 72
Operating Manual
9
Page 10

Contents
10
Operating Manual
Page 11

Appliance description
Intended use The Space$aver™ combi is intended for use exclusively for
commercial applications. It is not to be operated as a household
appliance and doing so voids any warranty and liability
Space$aver™’s must only be used to cook food using the
specified grills, containers, baking trays, mobile oven racks
and inserts. Only clean drinking water may be used for steam
generation in the appliance.
Incorrect usage The Space$aver™ should not be used for the following
purposes:
• as a storage cupboard
• as a smoker
• for drying cloths or cutlery
• for heating acids, caustic agents or other chemicals
Space$aver™
Hazards when incorrectly
used
• for heating flammable liquids
• for melting fats or salts
• for heating rooms
• for frying
• for heating sealed containers such as tins
• as a dish washer
• for cleaning air filters
• operation without insertion rails/mobile oven racks
Improper use of appliance can cause property damage,
injury or death. Read the installation, operating and
maintenance instructions thoroughly before using this
appliance.
Do not operate the appliance without the fan cover in place,
or personal injury could result. Disconnect the power to
the unit when opening the fan cover, and after closing, lock
the cover in place.
Training of operatoring
personnel
Before the Space$aver™ is used for the first time, operating
personnel are to be made aware of the residual risks that exist
even when the appliance is operated correctly and procedures
in the event of faults or a fire.
Electric Space$aver™
11
Page 12
Space$aver™
Appliance description
12
Electric Space$aver™
Page 13
Appliance description
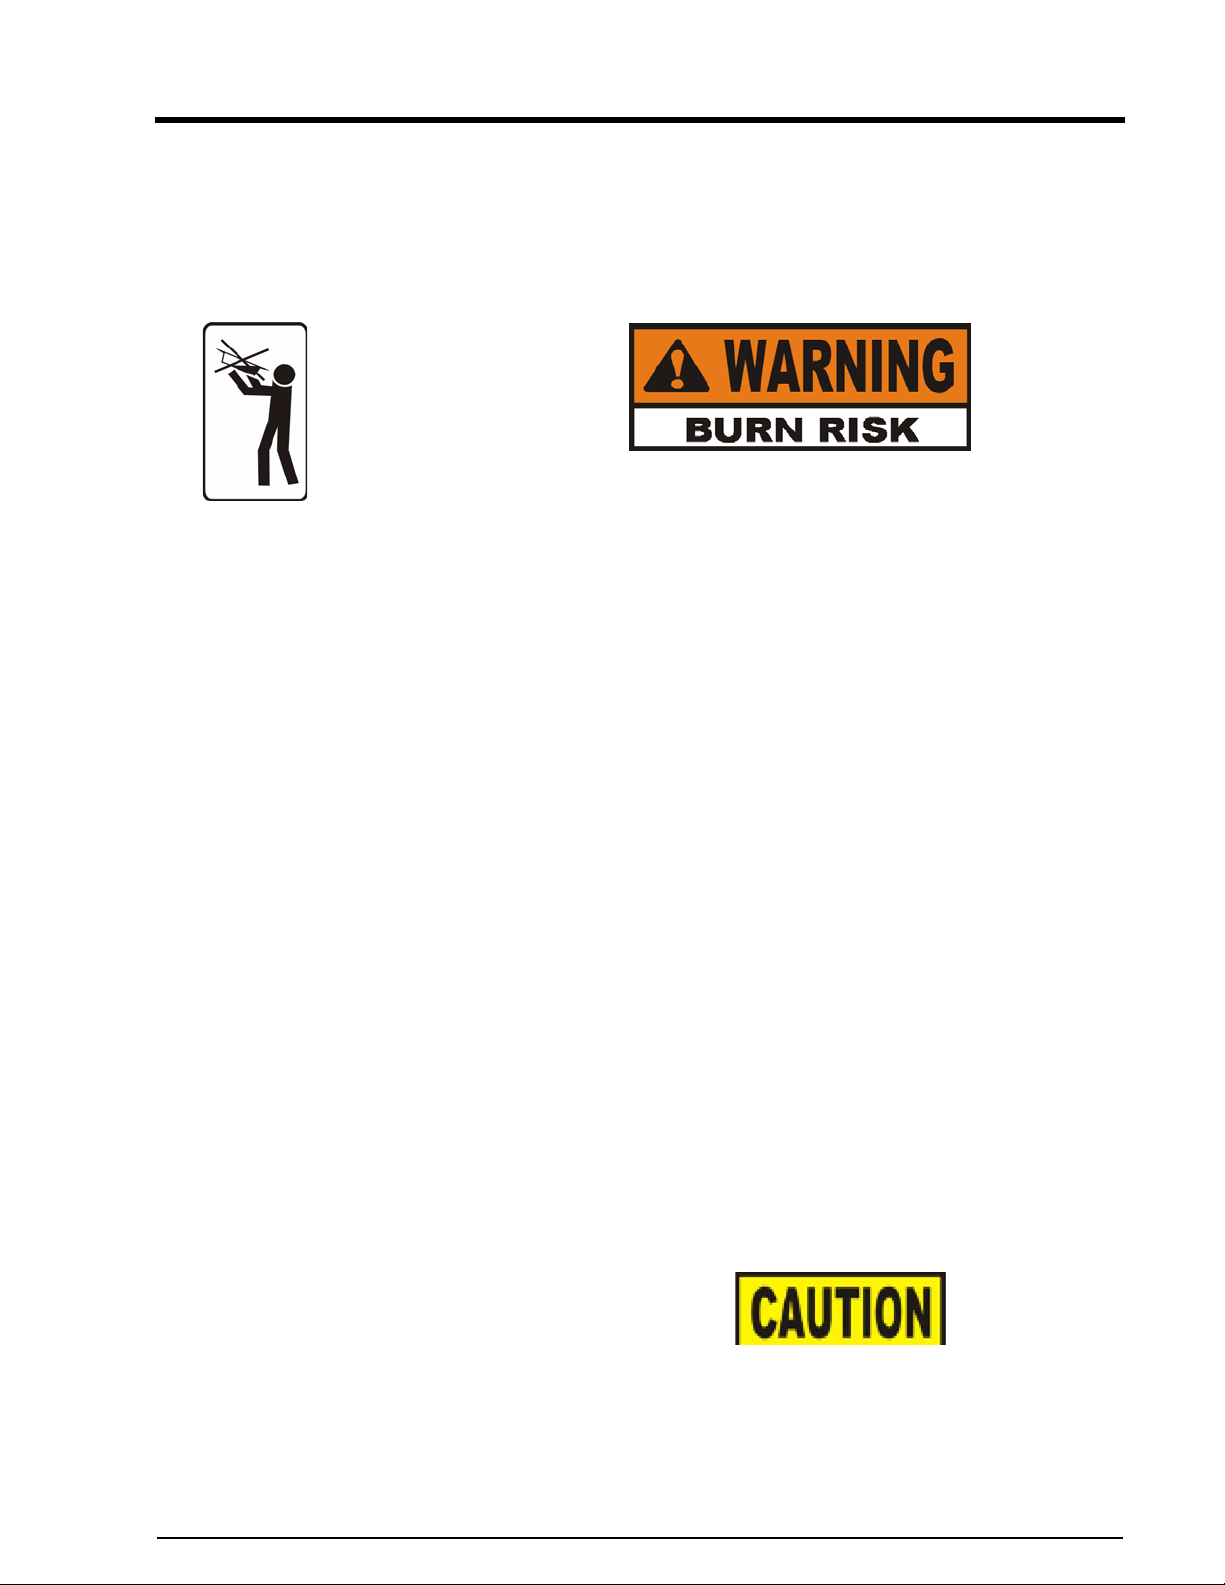
Safety instructions The Space$aver™ c onforms to all safety standards. However,
this does not rule out all risks, such as those caused by operator
error.
The following safety instructions must therefore be observed
when operating the Space$aver™.
• Do not place cooking containers where the food being
cooked generates liquid e. g.(stock, roasting juices)
above eye level, as the food must be watched
continuously during cooking.
• Open the door only slightly, allow the steam to escape
and then open it all the way to the stop position.
If the door is opened during operation, especially during
steaming, large amounts of steam may escape.
• Do not peer into the steam exhaust vent or hold your
hand over it. Hot steam is vented periodically during a
cooking operation.
• Wear protective gloves when opening door after
cooking. The cooking container, grills, mobile oven rack,
door sides and the temperature sensor can still be very
hot.
• Remove the food probe from cooked product before
removing it from the unit.
• When pulling the load out, ensure you do not stab
yourself with the sensor.
• Do not leave the sensor hanging loose outside the door;
replace in its holder.
Space$aver™
Transport through cold
surroundings
After transporting from cold surroundings into a warm
installation space, the combi steamer must be allowed to
warm up to room temperature before power is connected to it
and it is switched on.
Do not operate the combi steamer at temperatures below
40°F (4°C). The unit may not operate properly or damage to
the electronic controls could result
Electric Space$aver™
13
Page 14

Appliance description
Cleaning
Always wear chemical splash goggles or face shield
andprotective rubber gloves when cleaning the cooking
space with corrosive cleaning agents. Severe burns and
possible blindness could result. Observe the
manufacturer's instructions. If solution comes in contact
with your eyes, rinse thoroughly with cool water and see a
physician immediately.
To prevent damage, appliances with “WaveClean“ must
always be connected to hard- and soft water!
Space$aver™
To prevent burns, only carry out cleaning and
maintenance tasks when the oven has cooled down (below
140°F (60°C)).
14
Electric Space$aver™
14
Page 15
Appliance description
Defective appliance
Space$aver™
Do not operate the appliance with a damaged door seal.
Broken or damaged door seals may result in damage to
electrical and electronic components.
Replacement should only be undertaken by a cetified service
technician. The door seal is pushed into place. When fitting,
perfect seating is essential, i.e. the seal must be pushed fully
into its housing and sit firmly. Grease, high temperatures and
cleaning residues shorten the service life of the door seal.
After use
To prevent personal injury or property damage:
• Avoid continuous operation at high temperatures and
remove grease and cleaning residues regularly.
• The combi steamer should only be operated with
a correctly functioning magnetic door switch. If faulty,
advise service personnel immediately. Chemicals could
spray into the eyes or onto the skin of the operator,
during automatic cleaning and cause irritation and
burns.
• Do not operate the appliance if the glass panel is
damaged! The appliance must not be operated if the
glass is broken (cooking space light and door panel).
Food that is in the oven if the glass shatters must
be disposed of (danger of glass splinters).
After use close the water supply line shut-offs.
To prevent condensation forming in the appliance, leave the
door slightly ajar when not in use.
As the appliance door is well insulated, condensation may
form on the double-glazed panels if the oven is not used for a
long time. This disappears after a short while once the
appliance is being used.
Electric Space$aver™
15
Page 16
Appliance description
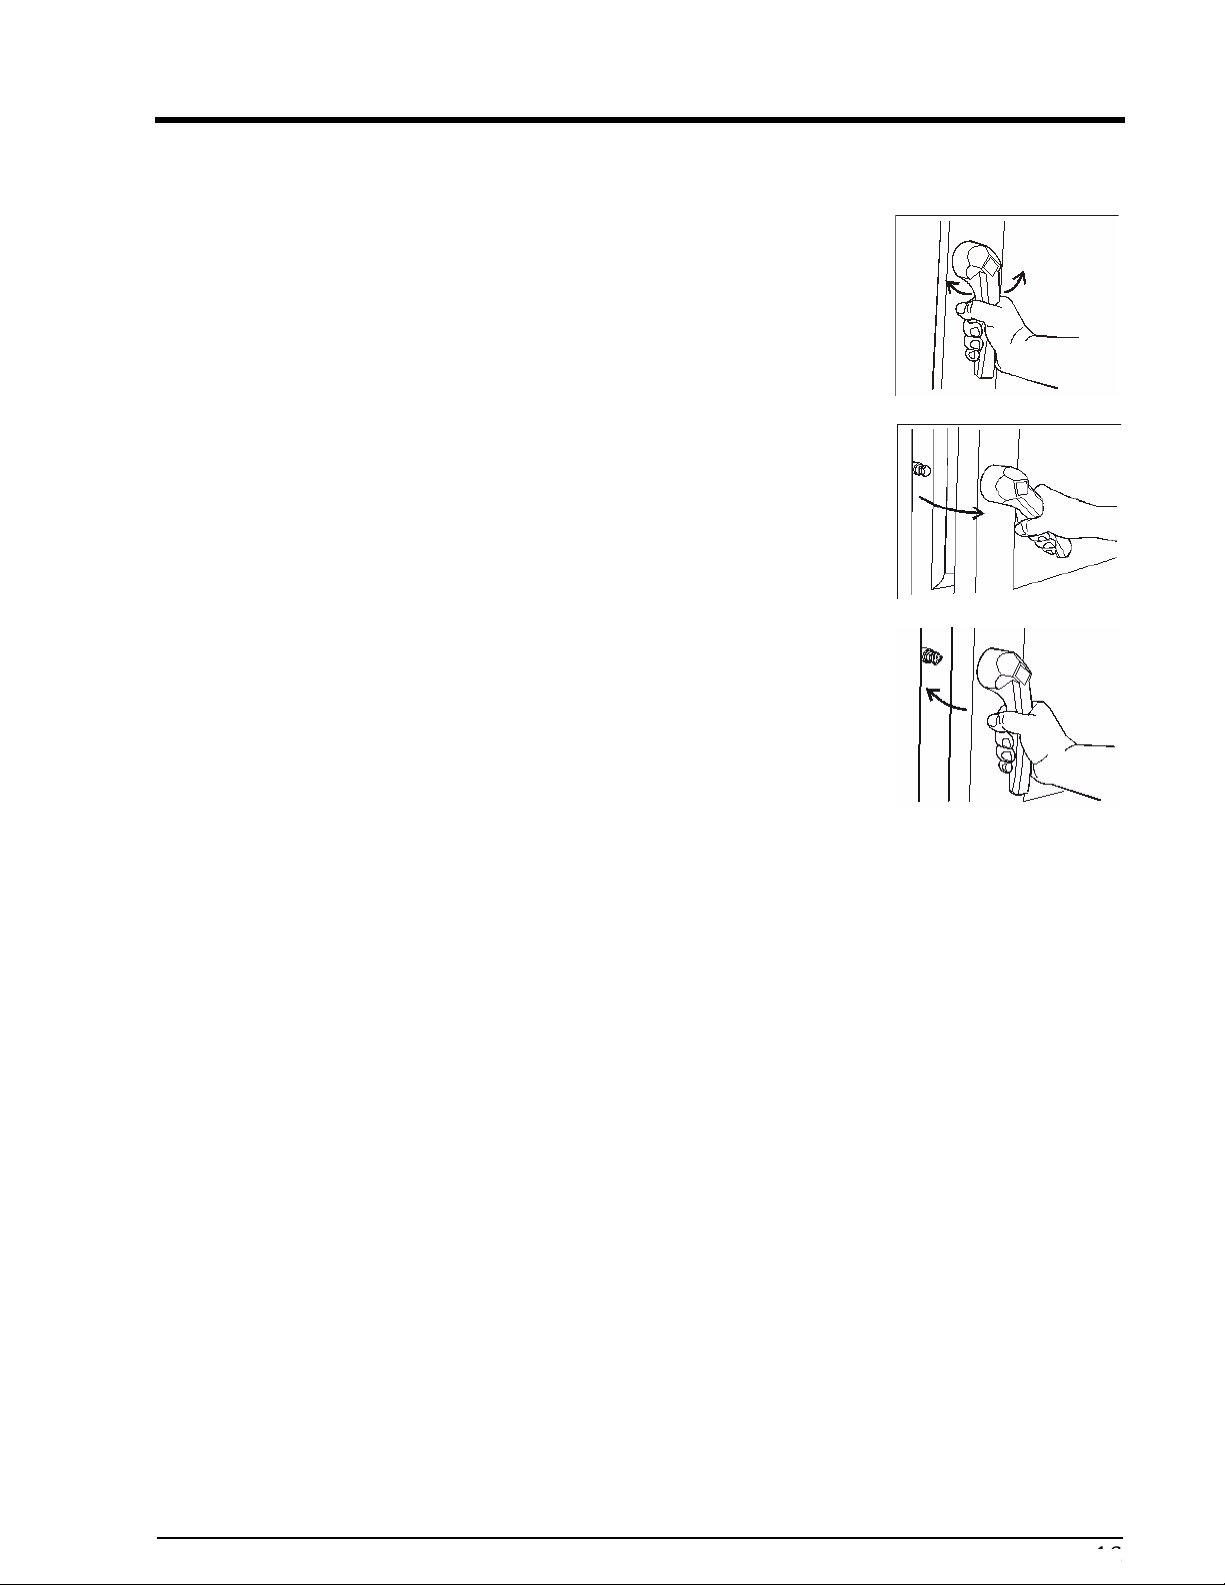
Door lock of
Opening
1.Turn door handle to the right
or left.
The door then opens.
2. Open the door fully. If the
door handle is released, it returns
to the vertical position.
Closing
Space$aver™
Press the door closed with door
handle vertical.
16
Electric Space$aver™
16
Page 17
Appliance description
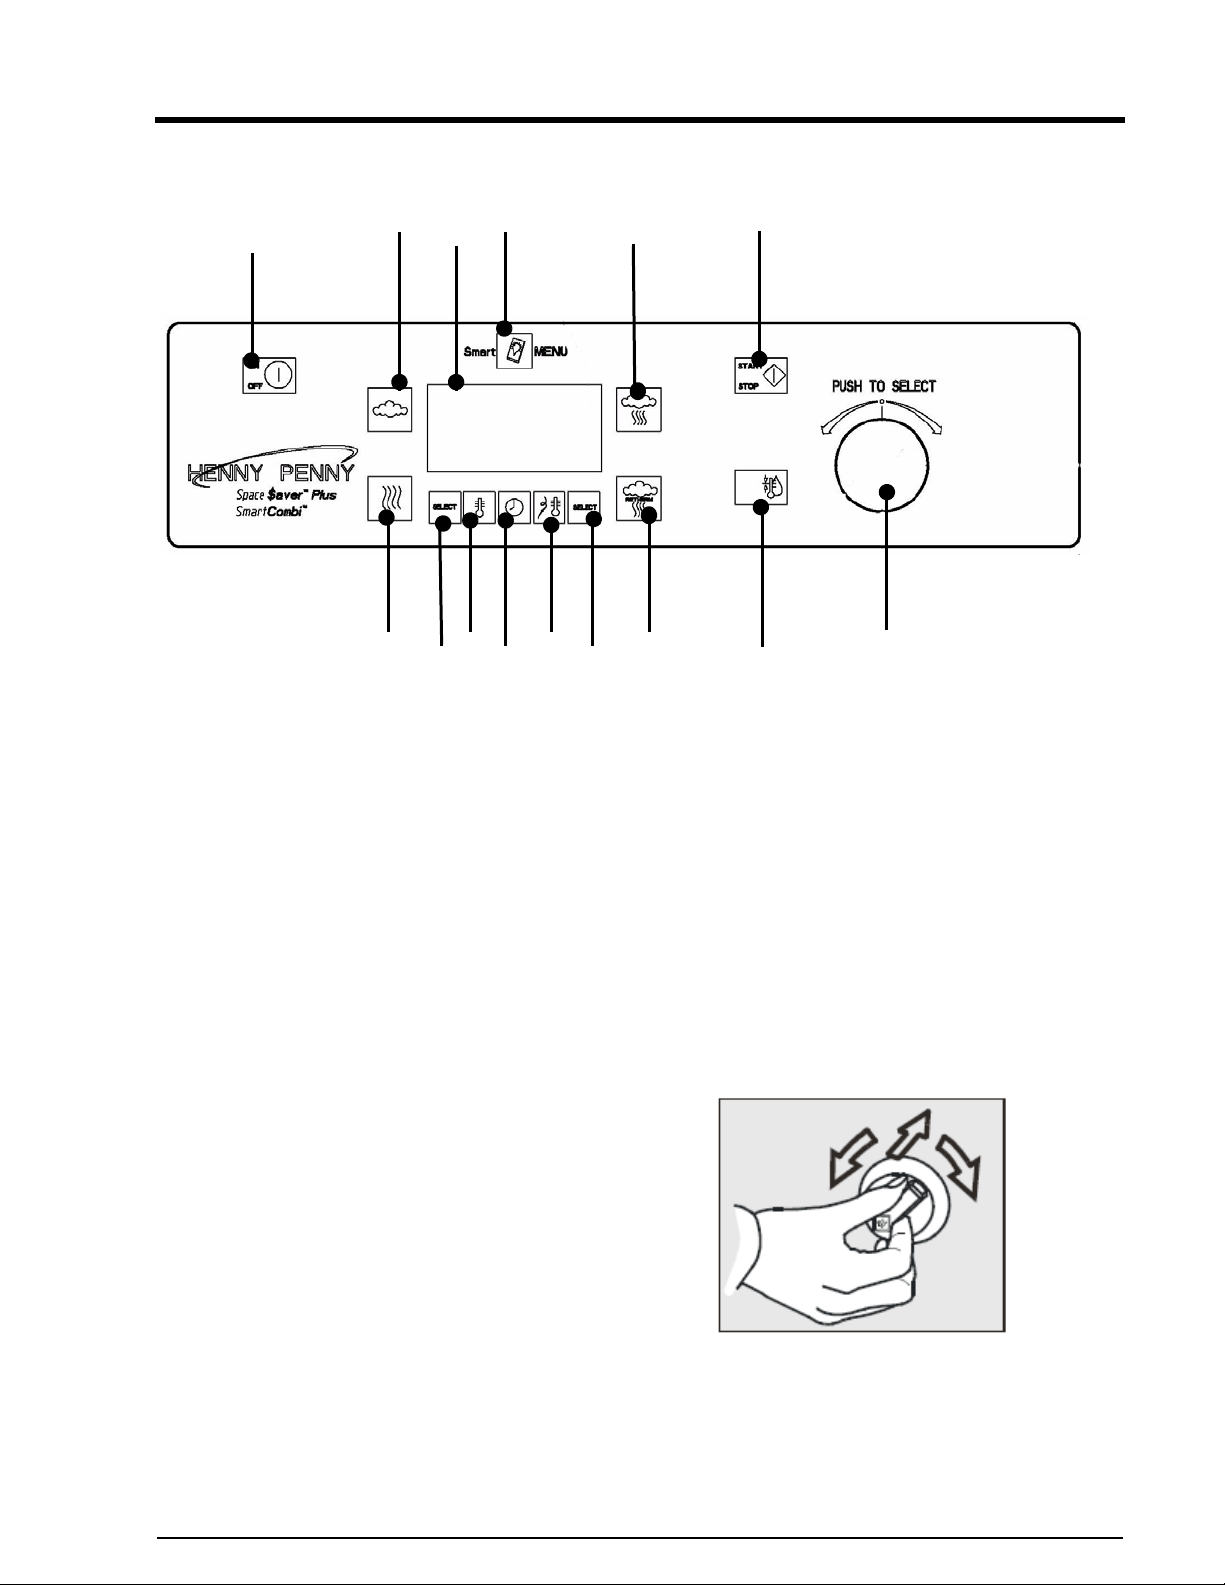
Space$aver™ display and console
Space$aver™
1
1 ON/OFF button
2 Cooking mode button with LED:
Moist Heat
3 Display: program, temperature,
time and additional functions
4 Selector button: Smart Menu
5 Cooking mode button with LED:
Combi steaming
6 Start/Stop button
7 Adjusting toggle: CombiDial
8 Selector button: Ready2Cook
9 Cooking mode button with LED:
Rethermalization
10 Right Select button
11 Selector button: probe
temperature measurement
12 Selector button: cooking time
13 Selector button: cooking
temperature
14 Left Select button
15 Cooking mode button with LED:
Dry heat
2
14
4
3
12
11
1315
10
5
9
6
8
7
CombiDial
Turn right/left: setting the
temperature, time, etc.
Press: confirm the selected
setting
Electric Space$aver™
17
Page 18

Space$aver™
2
1
8
9
10
Appliance description
Space
$aver™ & Space$aver™ Plus
1-Steam outlet vents
2-Air intake vents for cooking chamber
3-Combidial
4-Display
5-Film keypad with LEDs
6-On/Off switch
7-Appliance door
8-Insulating glass pane
9-Condensate catch trough
10-Door handle
11-Cooking chamber illumination
12-Temperature sensor for cooking cham-
ber
13-Core-temperature probe
14-Fan
15-Fan cover
16-Cartridge holder
17-Bottom drain
18-Insert rack
3
4
5
6
7
19-Data socket (RS232)
11
12
13
14
15
16
17
18
19
auto
ON
OFF
Chef
START
STOP
18
Electric Space$aver™
Page 19

Operation
Operating modes The Space$aver™ has a number of different
Space$aver™
operating modes:
• Smart Menu automatic cooking
• Moist Heat
• Combination of Moist and Dry heat
• Dry Heat
• Rethermalization
• Delta-T cooking
• Slow Roast & Holding (SRH)
• Steam Injection
•Rest Period
• Rack Control
Additional functions Cooking processes can be adjusted individually using
functions such as:
• Start time pre-selection
• Preheating
• Humidity control
• Manual steam injection
• Auto-reverse fan
• End-of-step signal
Electric Space$aver™
19
Page 20
"Smart Menu" The Smart Menu cooking programs were developed to have
automatic Cooking
Cookbook
Space$aver™
the clear advantage of being adaptable to your specific requirements and wishes and saveable in the corresponding category.
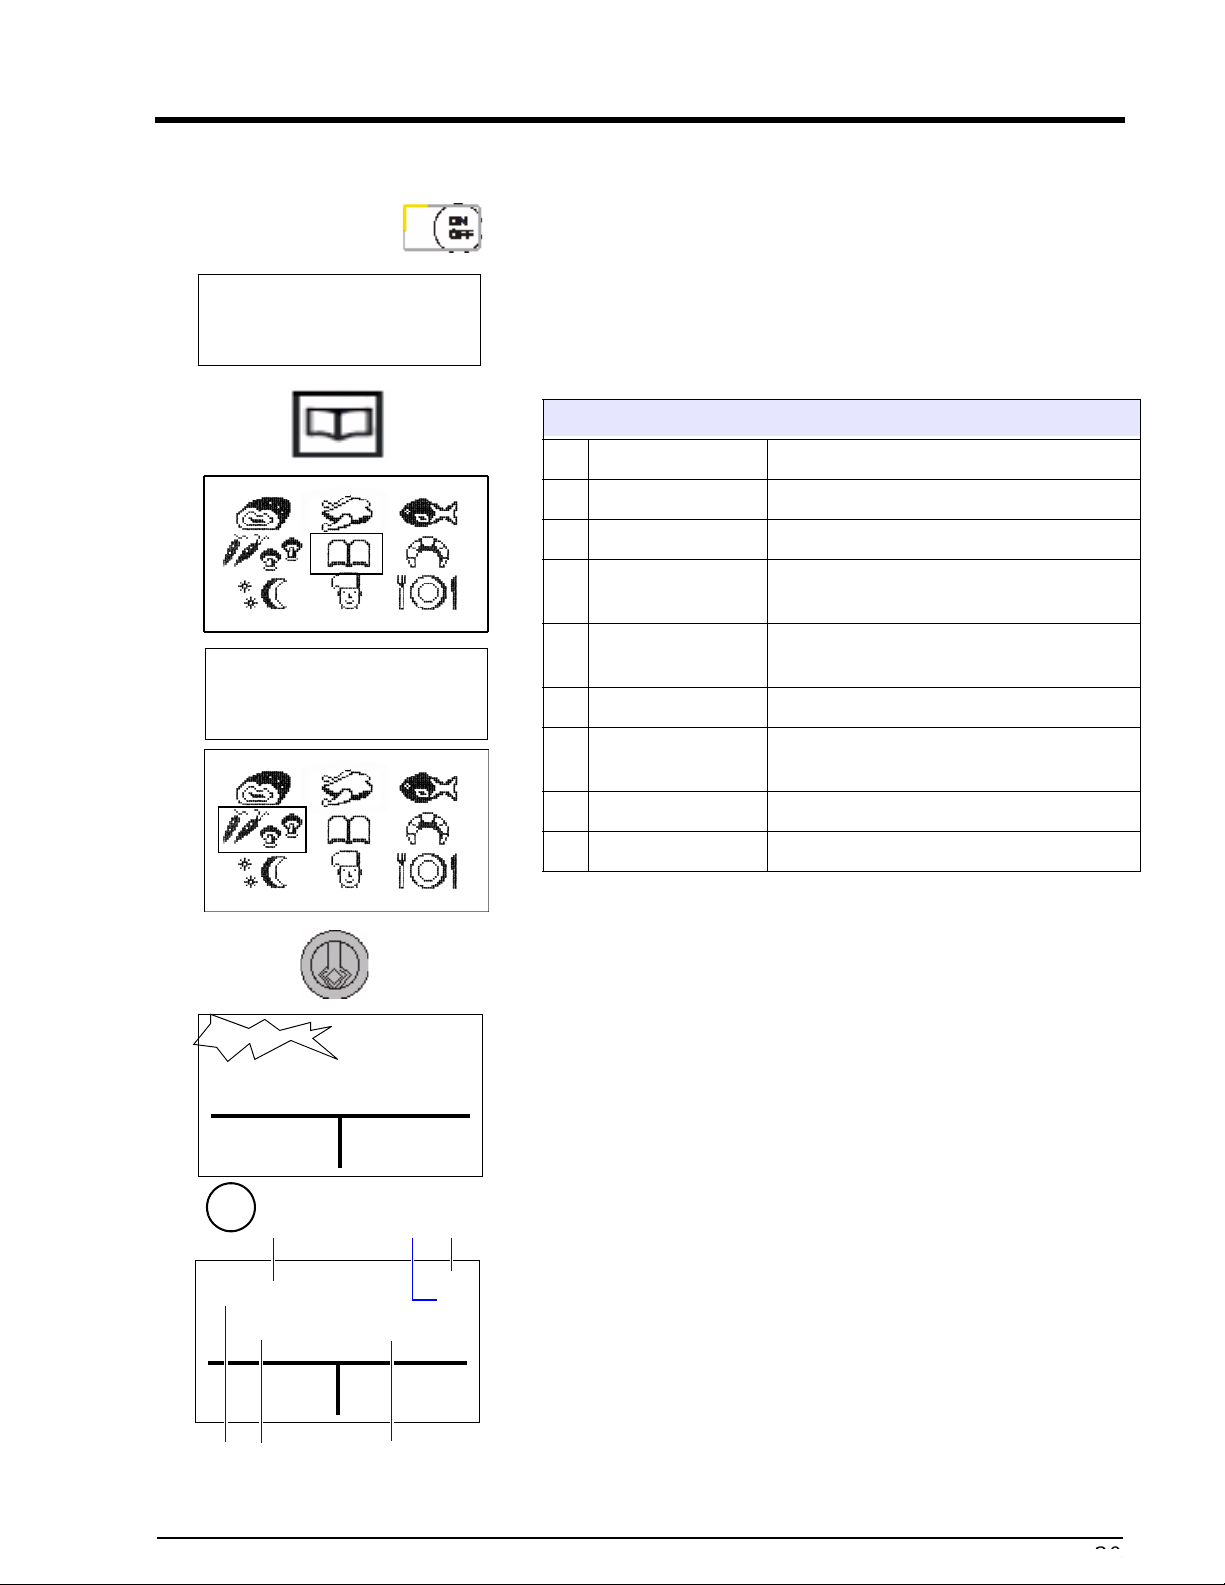
Switch on the steamer with the On/Off button and press the
Smart Menu button:
Pictograms for the individual program groups are displayed in
the bottom display.
The selected program group is bordered by a rectangle.
Program groups
1 Meat Steak, pork roast
1
4
7
2
89
3
5
automatic Cooking
Vegetables, side dishes
Cauliflower
Potatoes
Carrots
Prior
programs
Delete
program
2 Poultry Chicken, turkey
6
3Fish Redfish, trout
Vegetables, side
4
dishes
5 Cookbook
6 Bakery products Bread, croissants
7 Overnight cooking
8 MyChef - Special Individualised programs
9 Perfection Plated meals, banquets
Carrots, mushrooms, potatoes
Contains the programs of all program
groups
Core-temperature cooking, low-temperature cooking
The selected program group is displayed as text in the top display.
Move the selection frame to the desired program group, e.g.
Vegetables, side dishes, with the CombiDial.
1
Pressing the CombiDial opens the directory of the program
group.
The first cooking program appears and flashes in the alphabetically arranged list.
Scroll through the list with the CombiDial and push it to call
up the program.
Baked potatoes
Combisteaming
338°F
Prior
programs
546
20
123
01/
02
The display shows the following:
1 Name of the cooking program
2 Number of program steps
3 The program step displayed
0:30
Delete
program
4 Cooking type of the current program step
5 Temperature (setpoint) of the program step
6 Time or core temperature (in this case, time) of the pro-
Electric Space$aver™
gram step
20
Page 21

Space$aver™
Prior programs Pressing the Right-Side Selection button displays the last pro-
gram used.
Preheating For optimum cooking results, we recommend the
"Ready2Cook" button (Page 44).
Different programs Different programs can be selected (Page 20).
Location of the selection
frame
The location of the selection frame after the Smart Menu button is pressed can be set (Page 20).
Electric Space$aver™
21
Page 22
Space$aver™
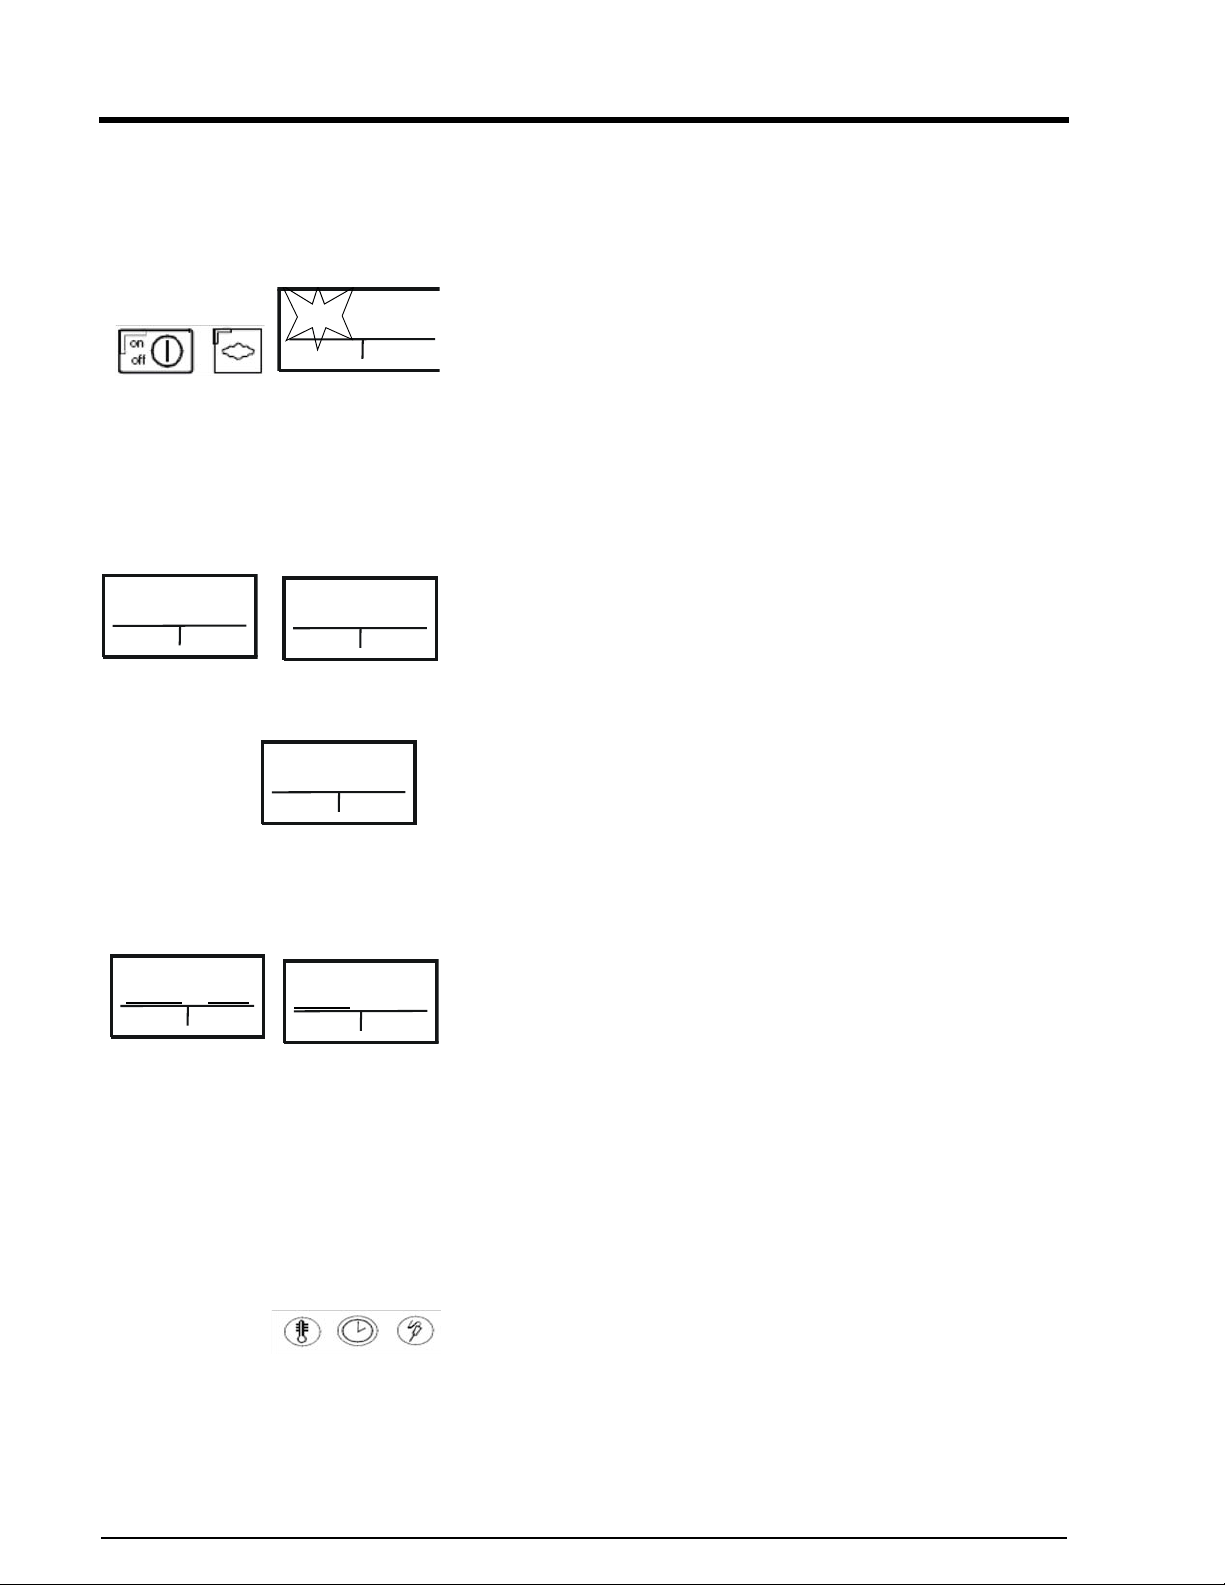
Moist Heat Mode
Operation
Use the “moist heat” program to boil, steam, blanch and
preserve.
Setting the temperature
selection
Steaming
212°F
Additional
function
0:00
Home
Switch on the Space$aver™ with the “On/ Off“ button.
Press the Moist Heat button ‹the display shows “212°F”
“(100°C)” and “0:00”.
Turn the CombiDial to adjust the cabinet temperature and
press the CombiDial to confirm:
Tender steam: 86°F to 210°F (30°C to 99°C)
Steaming: 212°F (100°C)
Forced steaming 214°F to 266°F (101°C to 130°C).
Setting the time Select time display by turning the CombiDial. Time can be set
from 1 min to 9 hours 59 min.
Additional
function
1:20212°F
Home
212°F
Additional
function
---
Home
Continuous mode: With Time set to “0:00”, turn the Combi-
Dial to the left and hold for 3 seconds ‹, display will change
Time to “---“ Continuous Run.
Probe Temperature Setting Press the Combi-Dilot twice after setting the Moist Heat
temperature to program the Probe temperature. Turn the
212°F
Additional
function
176°F
Home
CombiDial to chosen temperature and then press CombiDial to
set the Probe temperature.
NOTE: If a cooking time is entered before entering the Probe
temperature, the cooking temperature is ignored, as the Probe
temperature always takes priority.
Start Moist Heat After setting the temperature and timer or Probe temperature,
1:18
212°F
1:20
158°F
212°F
176°F
Displaying actual
temperatures
Changes while in cooking
cycle
press the Pre-Heat button, if preheating is needed. Press the
“Start/Stop” button to start the cooking cycle. Display shows
the selected cooking temperature along with the time or
probe setting, and also, the actual cooking time, if in
Continuous Run and the actual Probe temperature.
To display the actual cooking temperature, press and hold the
Cooking Temperature button for 8 seconds.
Time, temperature and probe temperature can be changed
during a cooking cycle by pressing the selection function and
using the CombiDial to make changes.
End of Moist Heat Mode When timed cycle or probe temperature is reached, the unit
will buzz. Press the Start/Stop button or open the door to turn
off the buzzer.
22
Electric Space$aver™
Page 23
Operation
Space$aver™
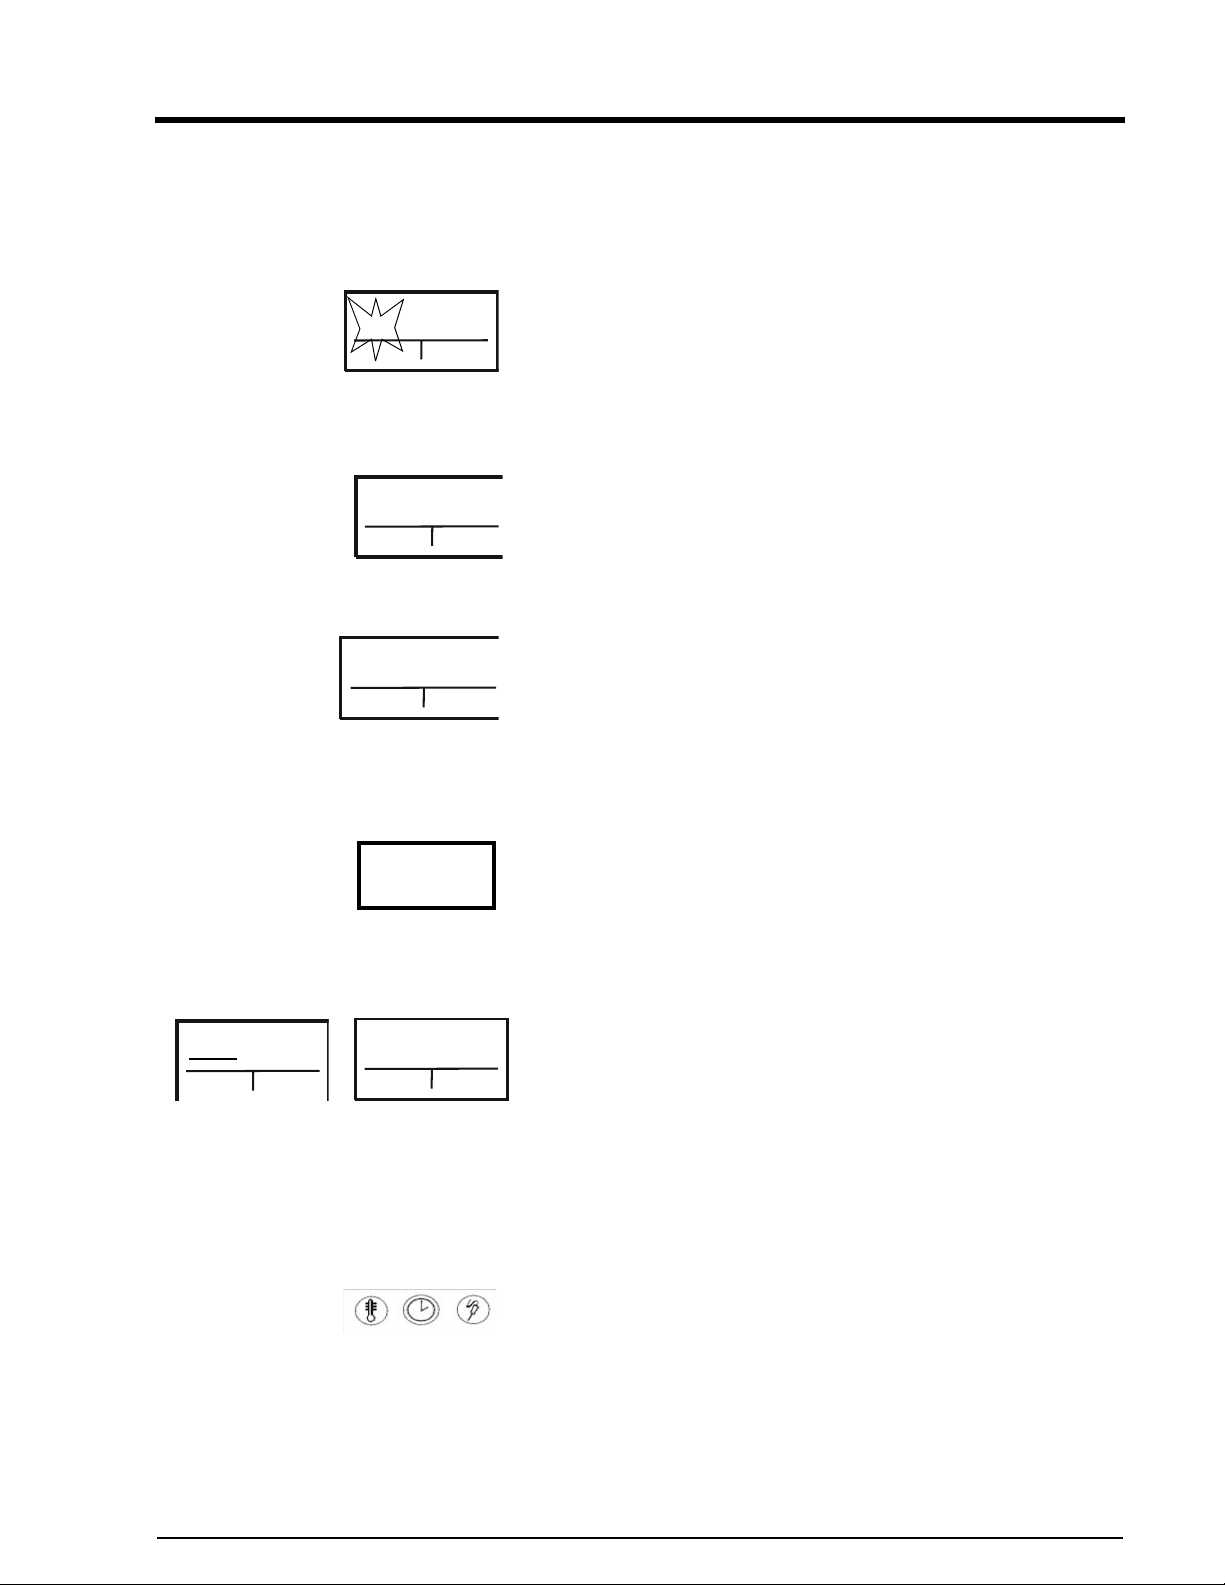
Combination of Moist and Dry Heat Mode
“Combi-steaming“ is especially suited to large roasts, cakes
and pastries.
Setting the temperature Press the “On/Off” button..
Combi-steaming
302°F
Additiona
l
0:00
Home
Setting the time Select the time by turning the CombiDial.
302°F
Additional
function
Home
Probe Temperature Setting Press the CombiDial twice after setting the temperature to set
302°F
Additional
function
176°F
Home
Press the “Combi Mode” button and the display shows “302°F‹
(150°C)” and “0:00”.
Turn the CombiDial to adjust the flashing temperature and
press the CombiDial to confirm.
Temperature range: 86°F-482°F (30°C - 250°C).
Time can be set from 1 min – 9 hours 59 min.
Continuous mode: With the time set to “0:00”, turn the
CombiDial to the left and hold for 3 seconds ‹, the time display
changes to “---” (Continuous Run).
the Probe temperature.
Turn the CombiDial to desired temperature and then press it to
confirm the probe temperature.
NOTE: If a cooking time is entered before entering the Probe
temperature, the cooking temperature is ignored, as the Probe
temperature always takes priority.
Humidity Control Press the CombiDial twice after setting the setpoint
Humidity
90%
temperature to set the humidity. Use the CombiDial to set the
humidity from 0-100% in 10% steps and then press the
CombiDial to confirm percentage of humidity.
Using the Combi mode After setting the temperature and timer, or probe temperature,
1:18
302°F
1:20
158 °F
302°F
176°F
press the “Start/Stop” button. The display shows the selected
cooking temperature, along with the time or probe setting. It
also shows the actual cooking time if in Continuous Run and
the actual probe temperature.
The Pre-Heat Mode may be used to pre-heat the unit before
placing product into the unit.
To display the actual cooking temperature, press and hold the
“Cooking Temperature“ button.
Changing the setting Use the time, temperature or core temperature buttons, and the
CombiDial to change the parameters during combi-steaming.
End of Combi mode After the cooking time has elapsed or when the core
temperature is reached, the signal sounds and the cooking
lighting will flash to indicate that the program has ended.
Pressing the “Start/Stop“ key or opening the steamer door
prematurely cancels (confirms) the buzzing and flashing.
Electric Space$aver™
23
Page 24
Space$aver™
Operation
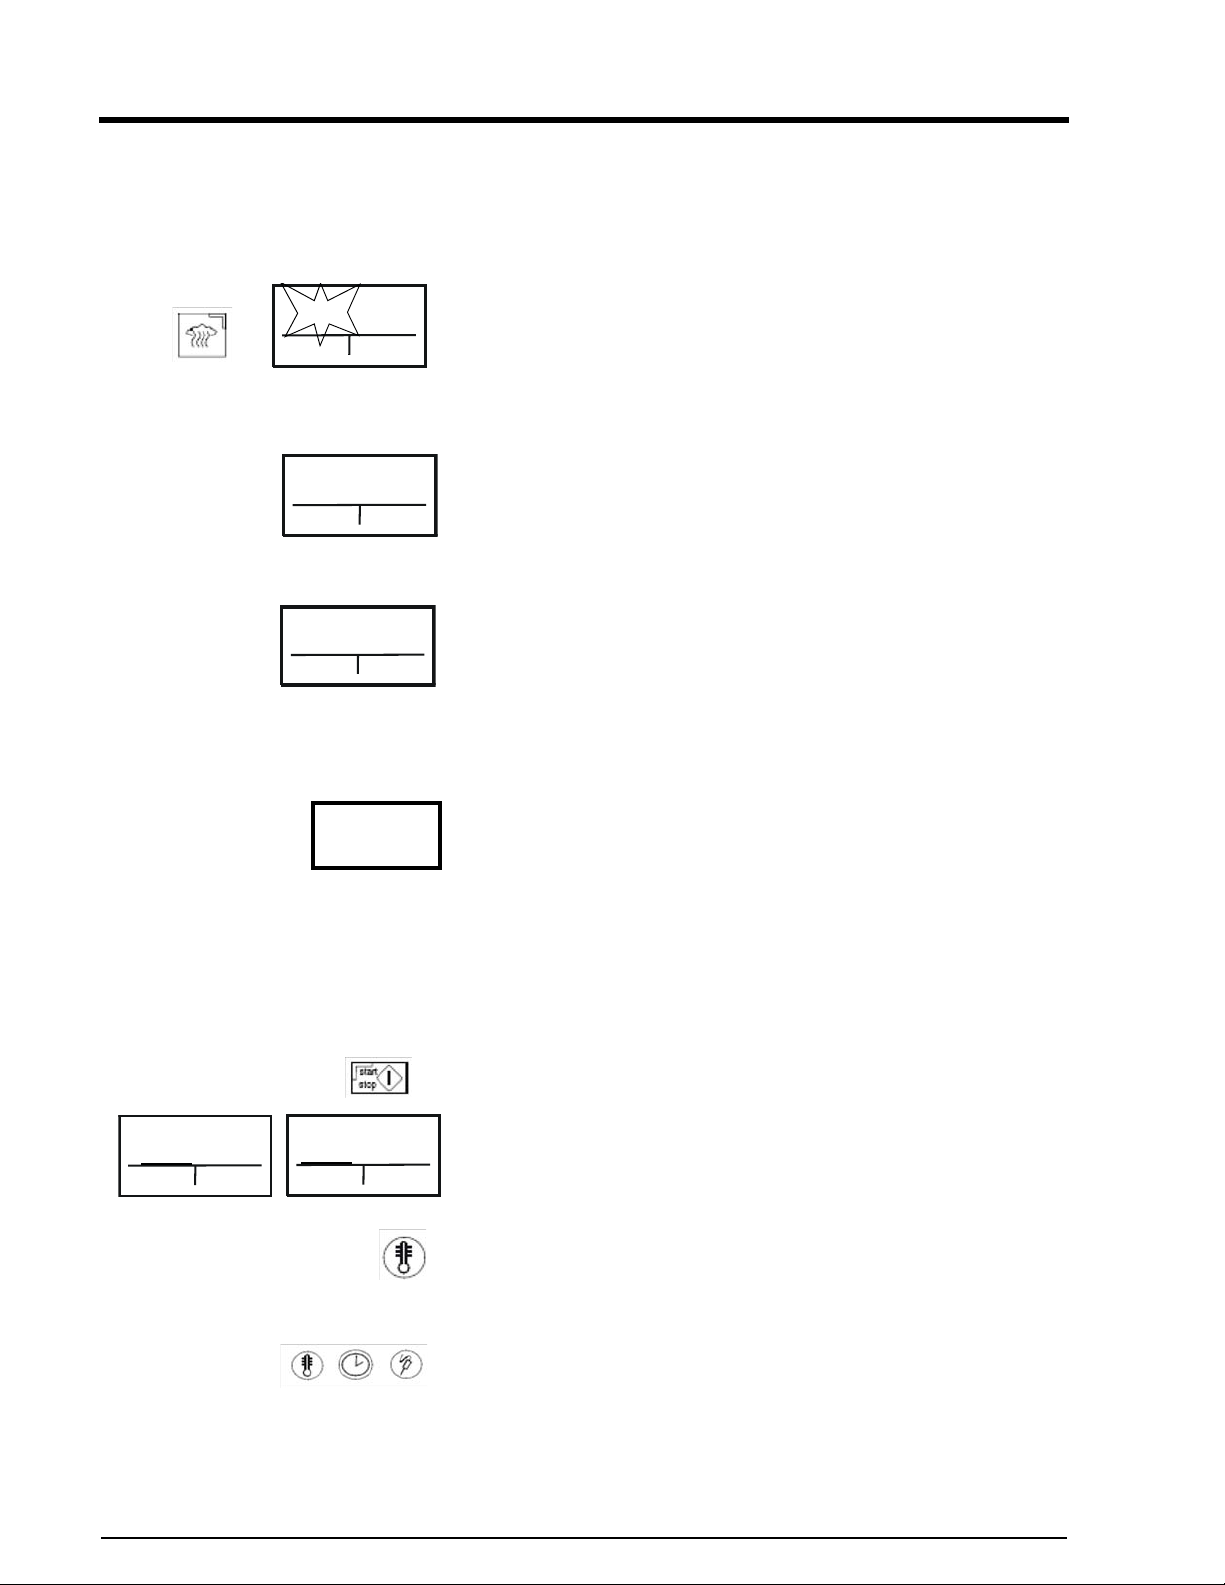
Dry Heat Mode
“Dry Heat” cooking is best suited to products that do not require any
humidity.
Setting the temperature Press the “On/Off“ button.
Hot air
356°F
Additional
function
0:00
Hom
Press the Dry Heat button and the display shows 356°F
and “0:00” appear.
Turn the CombiDial to adjust the cabinet temperature. Press the
CombiDial to confirm:
Temperature range: 86°F - 482°F (30°C - 250°C).
Setting the time Select the time display by turning the CombiDial to set the time
between 1 minute and 9 hours 59 minutes.
356°F
Additiona
function
---
Hom
Continuous mode
the left and hold for 3 seconds ‹, the time display changes to “---” for
Continuous Run.
: With time set to “0:00”, turn theCombiDial to
Probe Temperature Setting Press theCombiDial twice after setting the Dry Heat temperature.to
set the probe temperature. Turn the CombiDial to desired
356°F
Additionl
function
176°F
Hom
temperature and then press it to confirm the probe temperature.
Note: If a cooking time is entered before entering the final core
temperature, the control system will ignore this, as the core
temperature always takes priority.
“180°C“
Humidity Control
Humidity
90%
An appropriate cooking chamber humidity can be achieved for food
containing a lot of water by setting the steam quantity below 100%.
The excess steam is extracted from the cooking chamber, condensed
and blown out.
Press the CombiDial twice after setting the setpoint core temperature
and set the steam quantity. The steam quantity can be set from 0100% in 10% steps with the CombiDial.
With a setting of 100%, the cooking chamber humidity can rise to
100%, depending on the product type and quantity.
Starting Dry Heat mode After setting temperature and timer, or probe temperature, press the
“Start/Stop” button or the Pre-Heat button. The display now shows
the selected cooking temperature along with the time or probe
setting
.. It also shows the actual cooking time, and the actual
1:18
356°F
1:20
Displaying actual
temperatures
158°F
356°F
176°F
probe temperature if in Continuous Run.
If using the
buzzes.
To display the actual cooking temperature, press and hold the
Cooking Temperature button.
Ready2Cook Mode, open door and load when unit
Changing the setting Time, temperature and probe temperature can be changed during a
cook cycle by pressing the selection function using the CombiDial
to make changes.
24
End of Dry Heat mode The buzzer sound at the end of the cooking time or when the
core temperature is reached. Press the “Start/Stop“ key or open
the steamer door to switch off the buzzer.
Electric Space$aver™
Page 25
Operation
Space$aver™
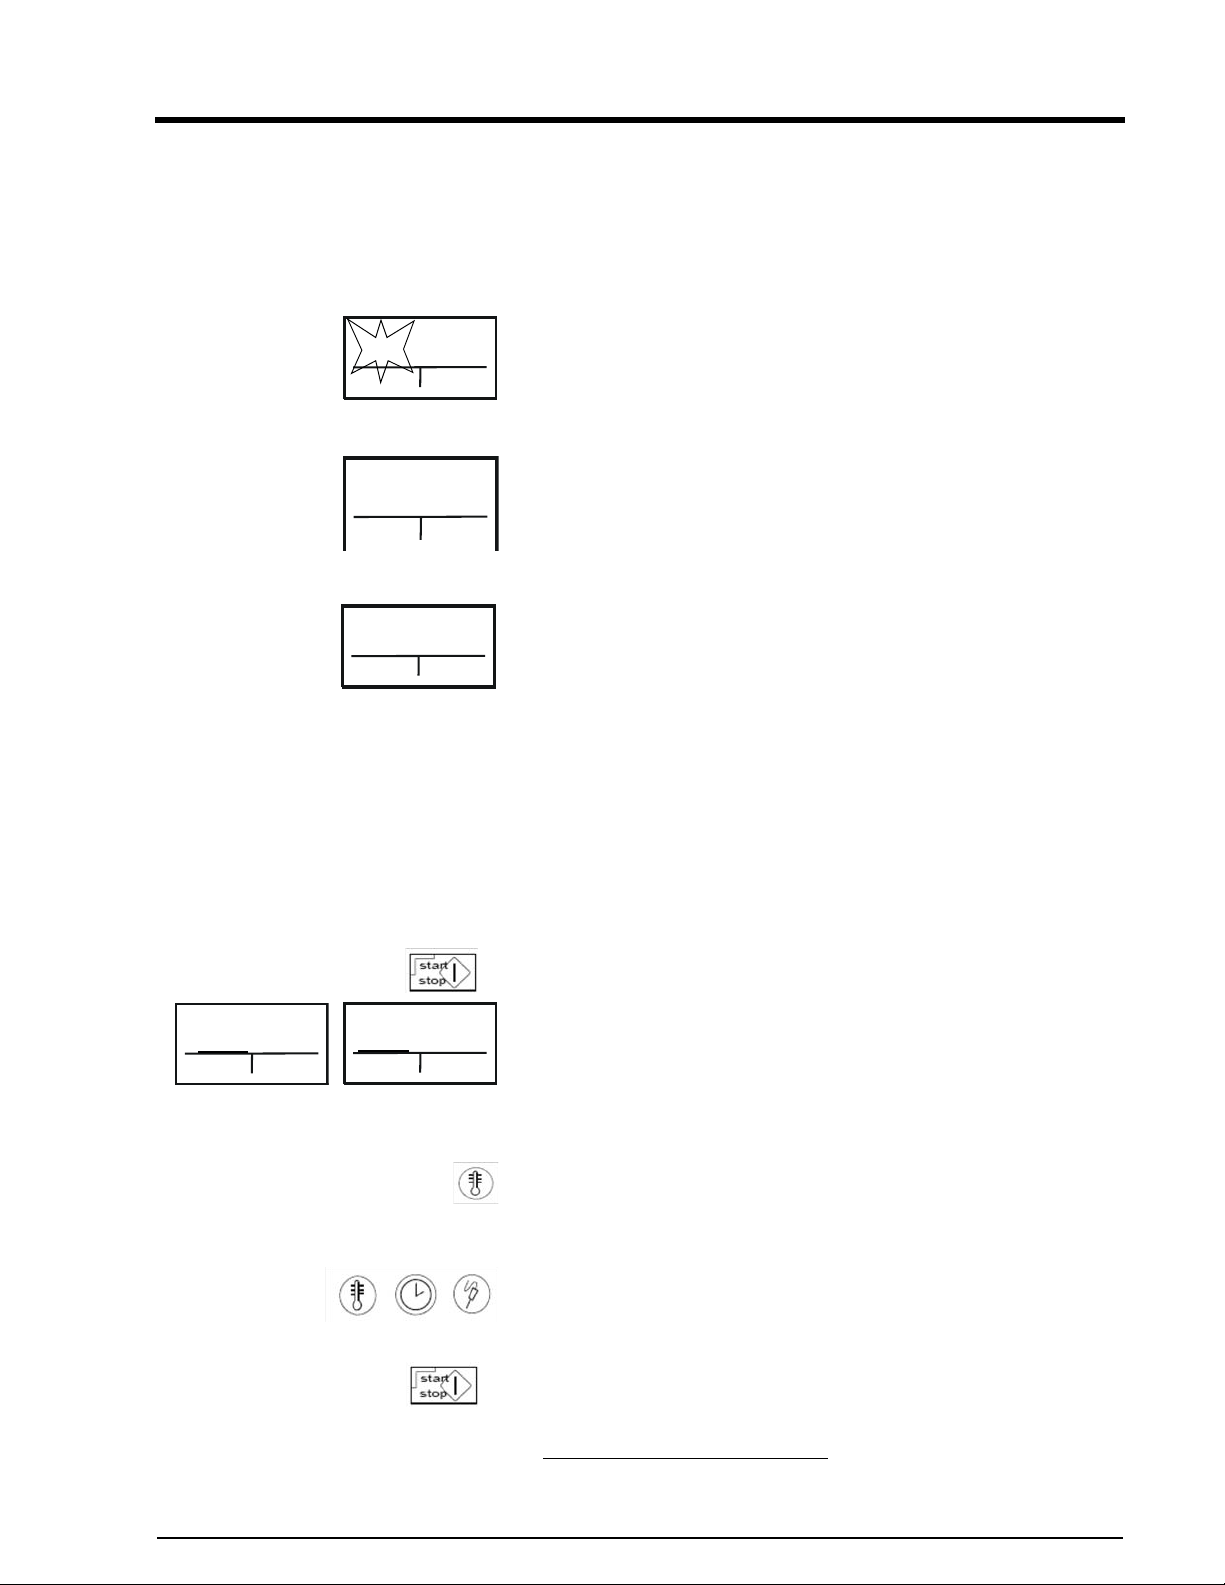
Rethermalization Mode
This mode is used to reheat meals on plates or dishes, or cooked
foods in pans or on grids, without any loss of quality. This mode has
a special pre-set air circulation setting.
Setting the temperature Press the “On/Off” button.
Regenerating
248°F
Additional
function
0:00
Hom
Setting the time Select the time by turning the CombiDial.
248°F
---
Additional
function
Home
Probe Temperature Setting Press the CombiDial twice after setting the retherm
212°F
Additional
function
176°F
Home
Press the “Retherm” button and the display shows “248°F
and “0:00”.
Turn the CombiDial to confirm.
Temperature range: 86°F - 356°F (30°C -180°C).
Time can be set from 1 min - 9 hours 59 min.
Continuous mode
the left and hold for 3 seconds ‹ the time display changes to “---” for
Continuous Run.
temperature
desired temperature and then press it to confirm the probe
temperature.
Note: If a cooking time is entered before entering the final core
temperature, the control system will ignore this, as the core
temperature always takes priority.
: With time set to “0:00”, turn the CombiDial to
to set the probe temperature. Turn the CombiDial to
(120°C)
Humidity Control
Press the CombiDial twice after setting the setpoint core temperature
and set the steam quantity. The steam quantity can be set from 0100% in 10% steps with the CombiDial.
Using Retherm mode After setting the temperature and timer, or probe temperature, press
the “Start/Stop” button. (The unit can be heated by pressing the
Ready2Cook button.) The display now shows the selected cooking
1:18
212°F
1:20
Displaying actual
temperatures
158°F
212°F
176°F
temperature, along with the time or probe setting..
the
actual cooking time,
Continuous Run
The temperature display shows the remaining cycle time (in
continuous mode “---” ) or the actual core temperature.
To display the actual cooking temperature, press and hold the
Cooking Temperature button.
.
and the
actual probe temperature
It also
Changing the setting Time, temperature and probe temperature can be changed during a
cooking cycle by pressing the selection function using the
CombiDial to make changes.
End of Retherm mode After the moist heat time is over and the probe temperature is
reached, a buzzer sounds
t
hat the cycle is over. Pressing the “Start/Stop” button before
opening the door cancels the program.
1
and the interior lights flashes, indicating
displays
if in
1.The duration of the sound and flashing is adjustable.
see Page . .
Electric Space$aver™
25
Page 26
Space$aver™
Probe Cooking
Operation
Probe cooking is particularly recommended for food requiring
long cooking.
Probe cooking works in all modes. Here, the temperature is
measured with a probe inserted down into the center of the
food being cooked and compared to the (selected) probe
temperature to be reached. As soon as the probe temperature
has been reached, the power and water supplies of the steamer
are shut off
The advantages of this are:
• Lower energy and water consumption
• No overcooking of product
• Higher yields/Lower weight loss
It is recommended that probe cooking be used with all cooking
processes if possible.
To ensure that the nominal probe temperature is reached and
the product is cooked thoroughly, the cooking temperature
must be set at least 7°F (5°C) higher.
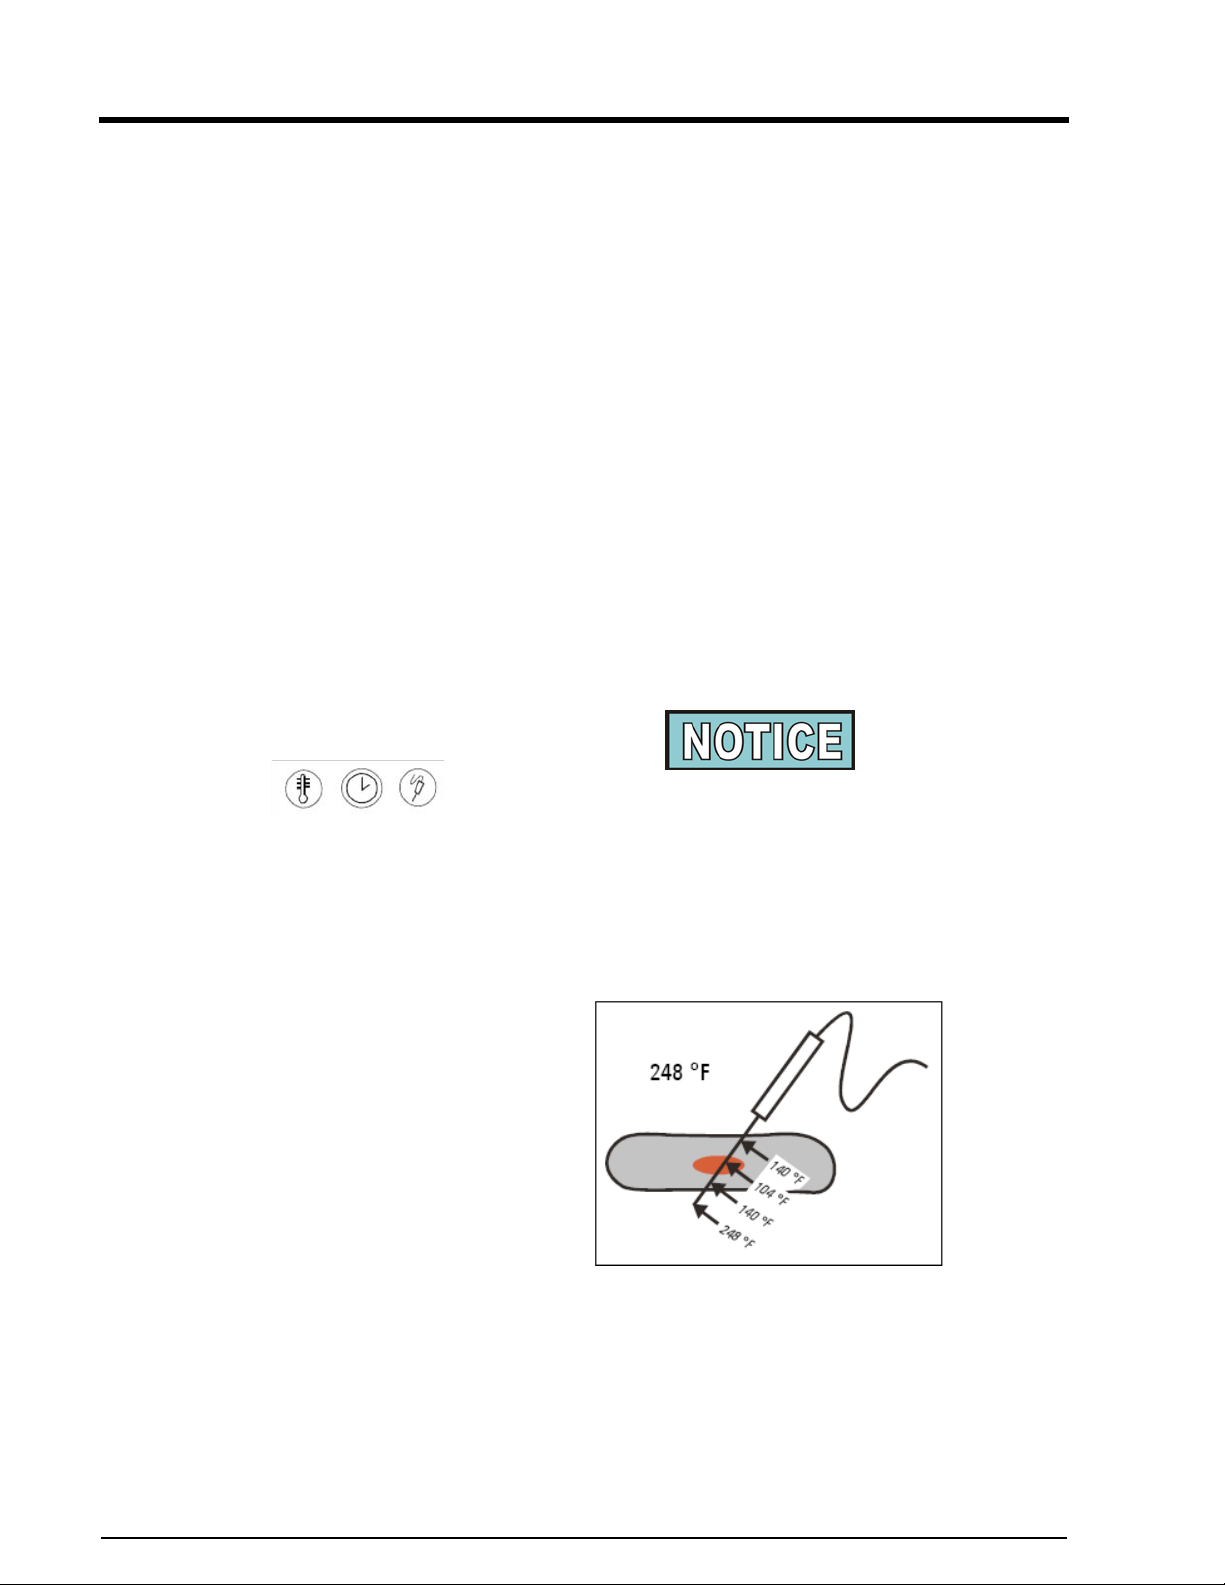
The Food Probe comes with a 4-point sensor. It measures the
core temperature of the product in 4 different points, with the
coolest point controlling the cooking process.
Temperatures on the probe at 248°F chamber
temperature (example)
26
Electric Space$aver™
Page 27
Operation
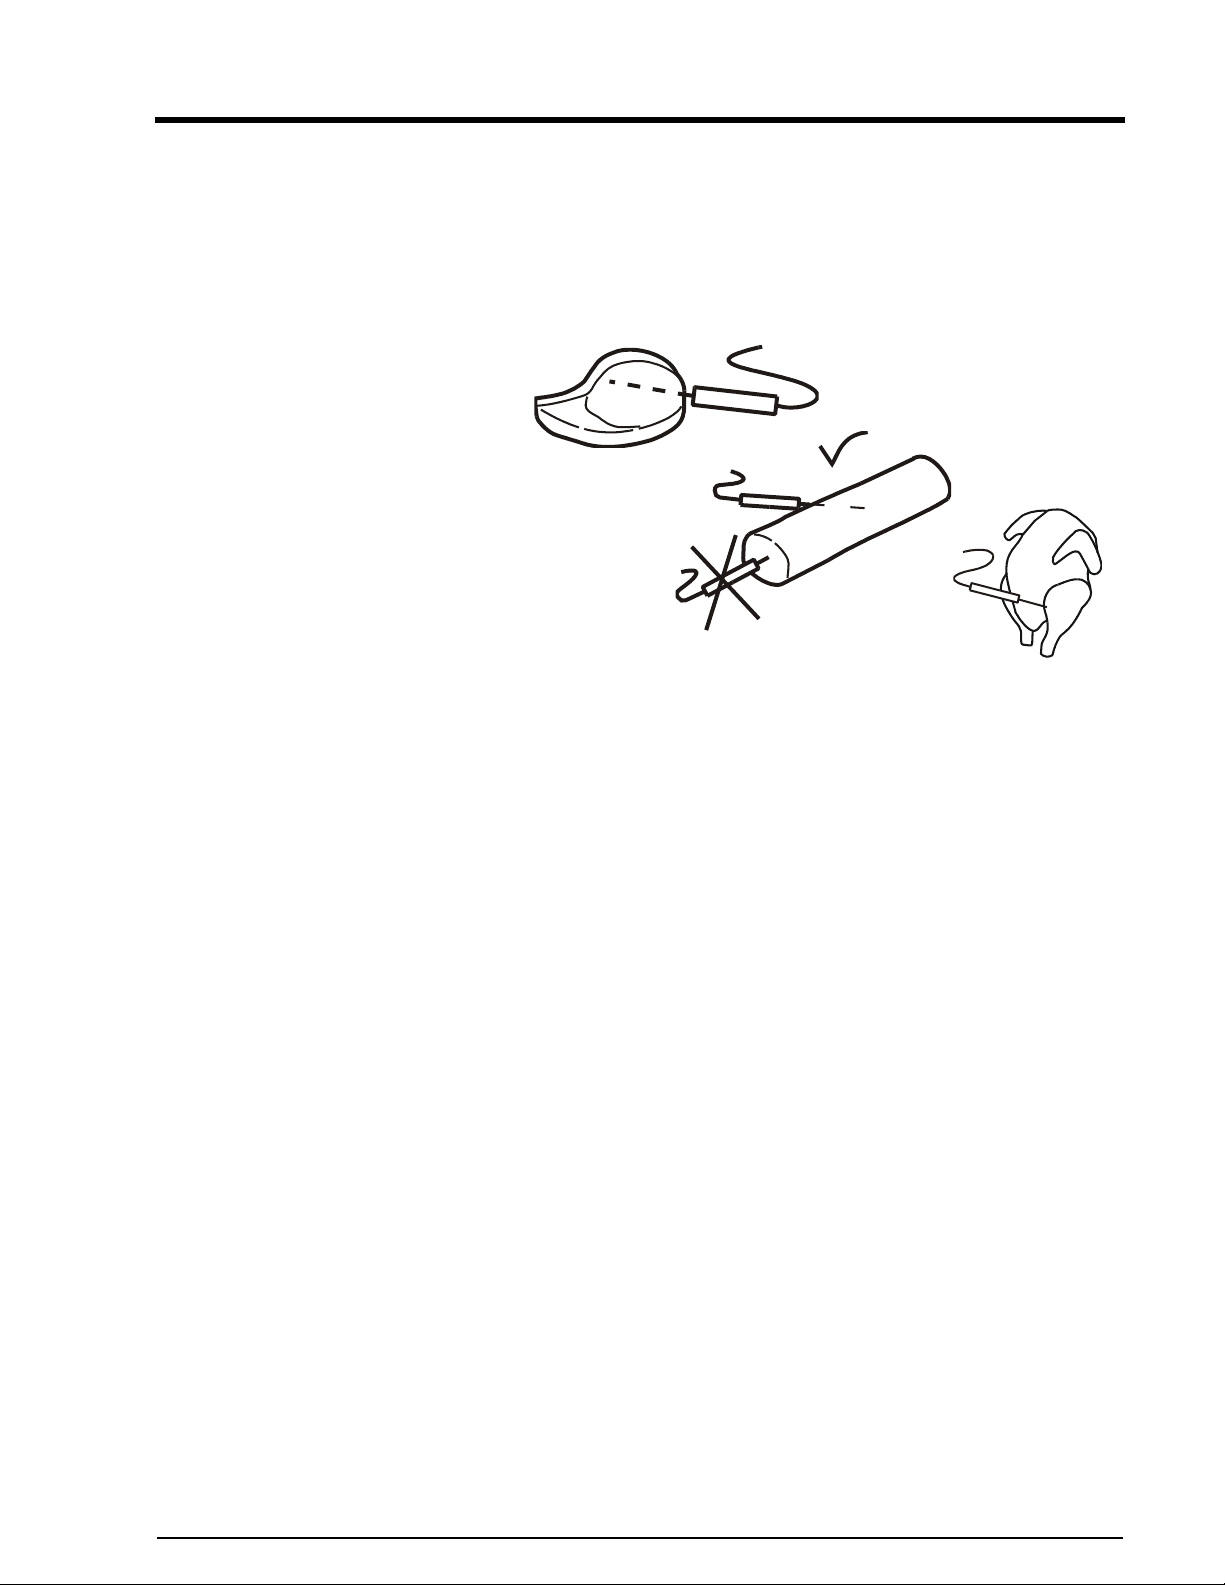
Positioning the probe When cooking a number of products, always position the
Space$aver™
probe in the center of the product and also set the product in
the center of the oven chamber (center shelf).
Always place the probe into the thickest part of the food to
be cooked. When cooking items with bones, e.g. cutlets, push
the probe in adjacent to the bones (insolate the bones).
When cooking long items, such as smoked pork loin, push in
the probe crossways. If the probe is placed longitudinally, a
hole remains in the middle of the slice when the product is cut
up.
When cooking poultry (differing weight distribution), such as
chickens, place the probe in the inside of the leg. The probe
should always be pushed in completely, or measurement errors
may occur.
Electric Space$aver™
27
Page 28
Space$aver™
Do not overheat core-
temperature probe
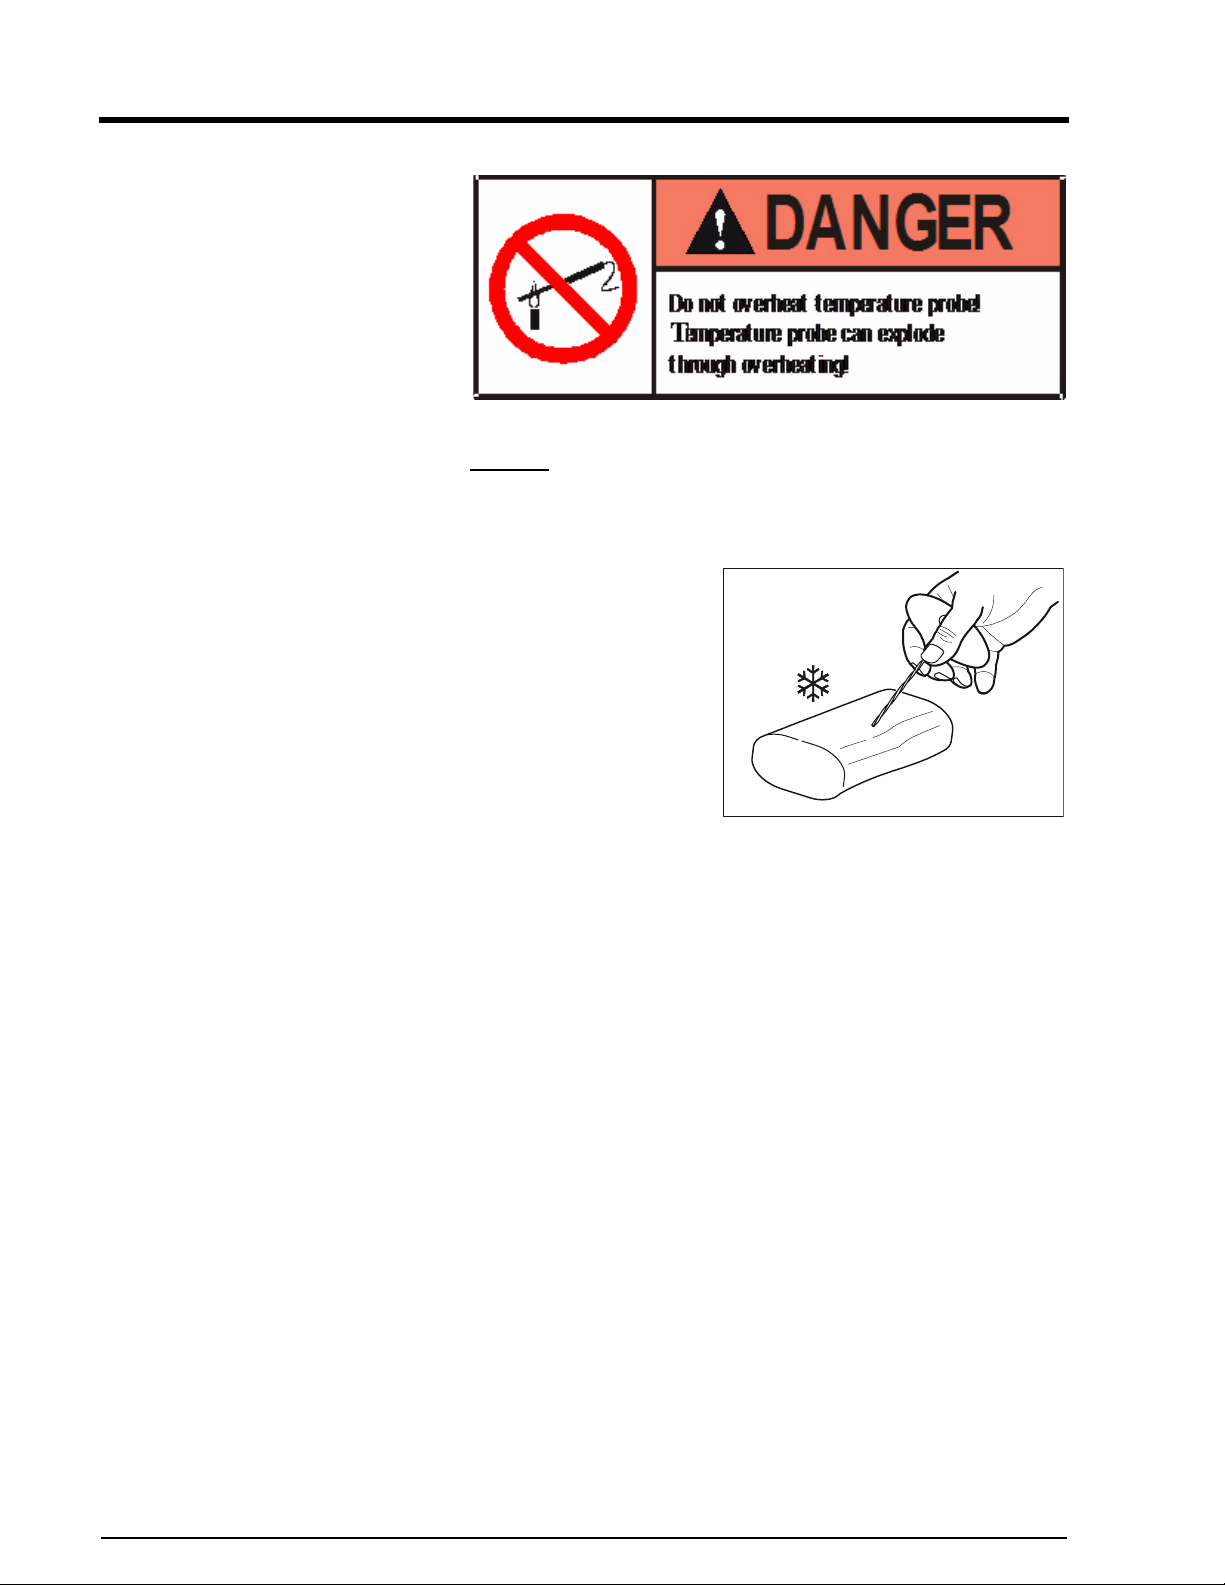
So that the temperature probe can be inserted into frozen food,
DO Not
heating can cause the temperature probe to explode.
Drill an insertion channel With frozen
food, first drill an
insertion channel
with a hand drill and then
insert the temperature
probe.
Operation
heat probe with a lighter or another heat source. Over-
28
Electric Space$aver™
Page 29

Operation
Space$aver™
Electric Space$aver™
29
Page 30

Space$aver™
Operation
30
Electric Space$aver™
Page 31
Operation
Delta-T cooking
Space$aver™
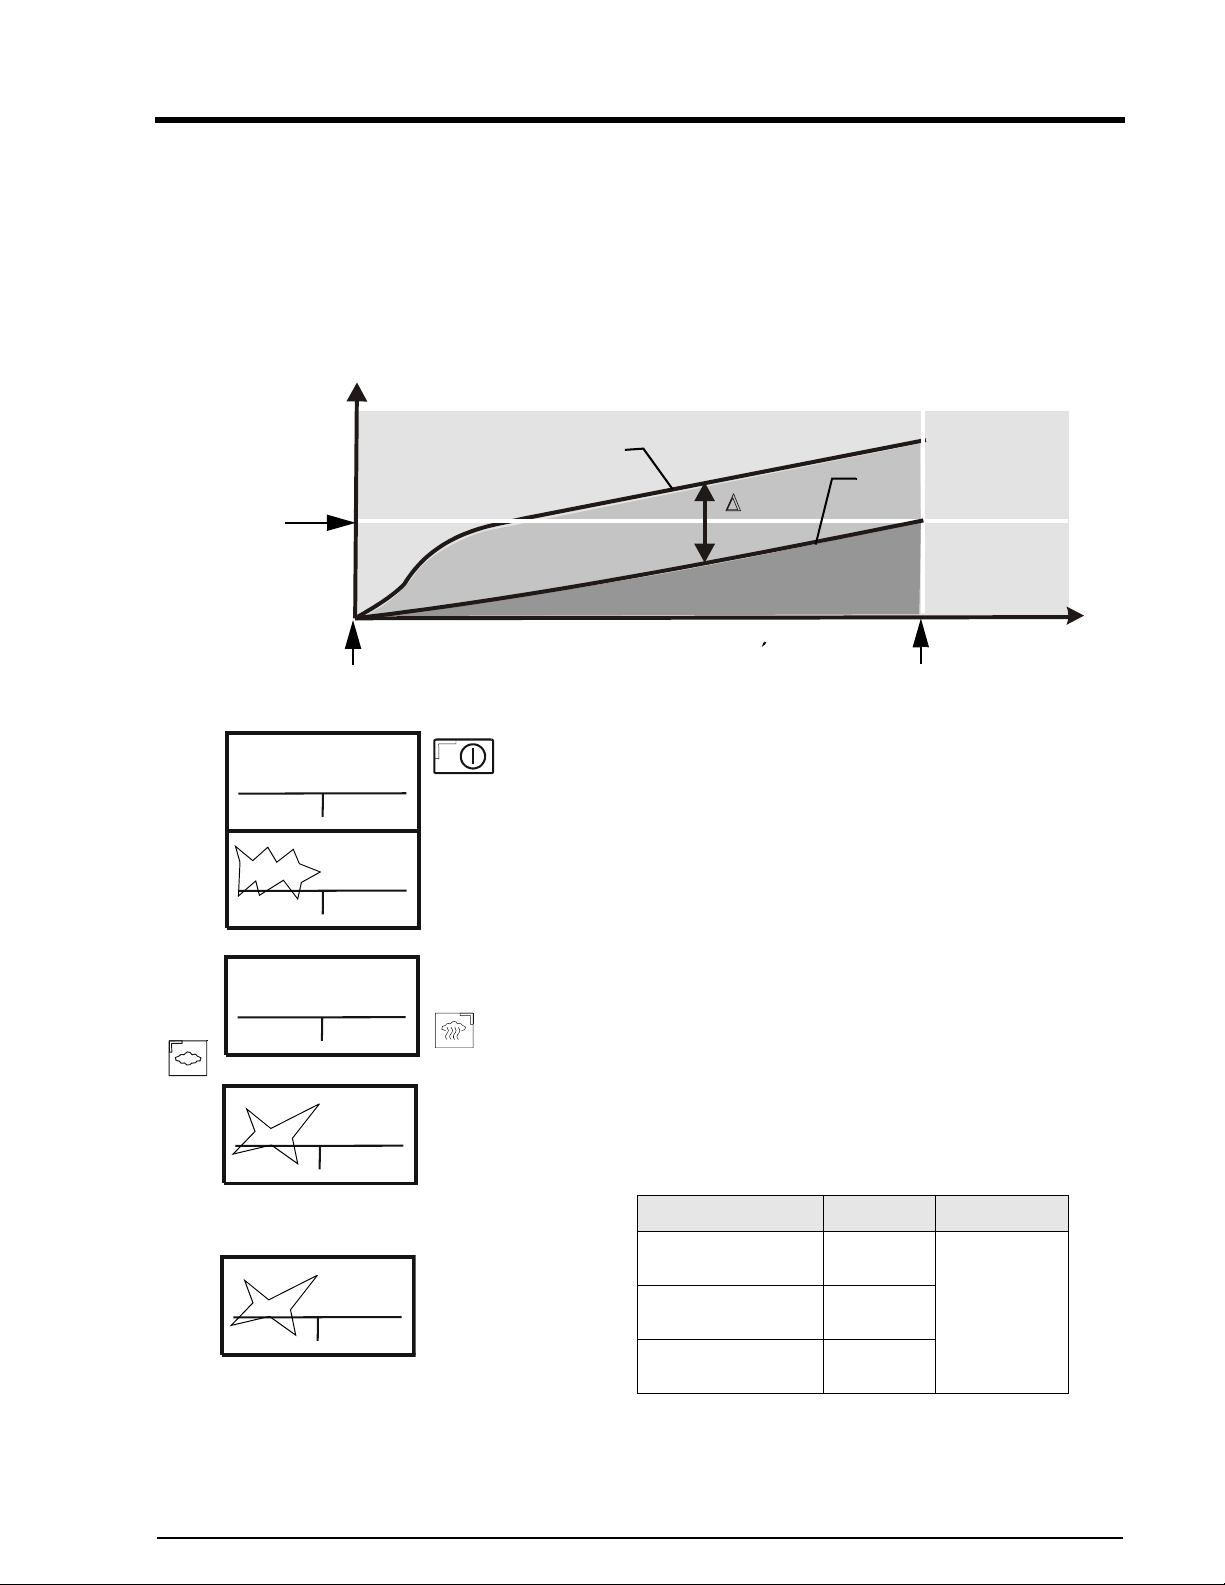
When using Delta-T cooking, the probe is always used. The
cooking temperature of the combi is base upon the core temperature
of the product being cooked and the set Delta-T temperature.
In general, the following equation can be applied for Delta -T
cooking:
Temperature
Nominal core
temperature
Delta-T cooking Press the On/Off” button.
25.03.03 09:30
Menu
∆T cooking
Back
Select cooking mode
Delta (∆):
--
∆T combi steaming
Delta (∆):
68°F
Add
Function
Target CT:
Target CT:
∆T/SRH
SRH
Confirm
--
140°F
HOME
Start
01/
01
01/
01
01/
01
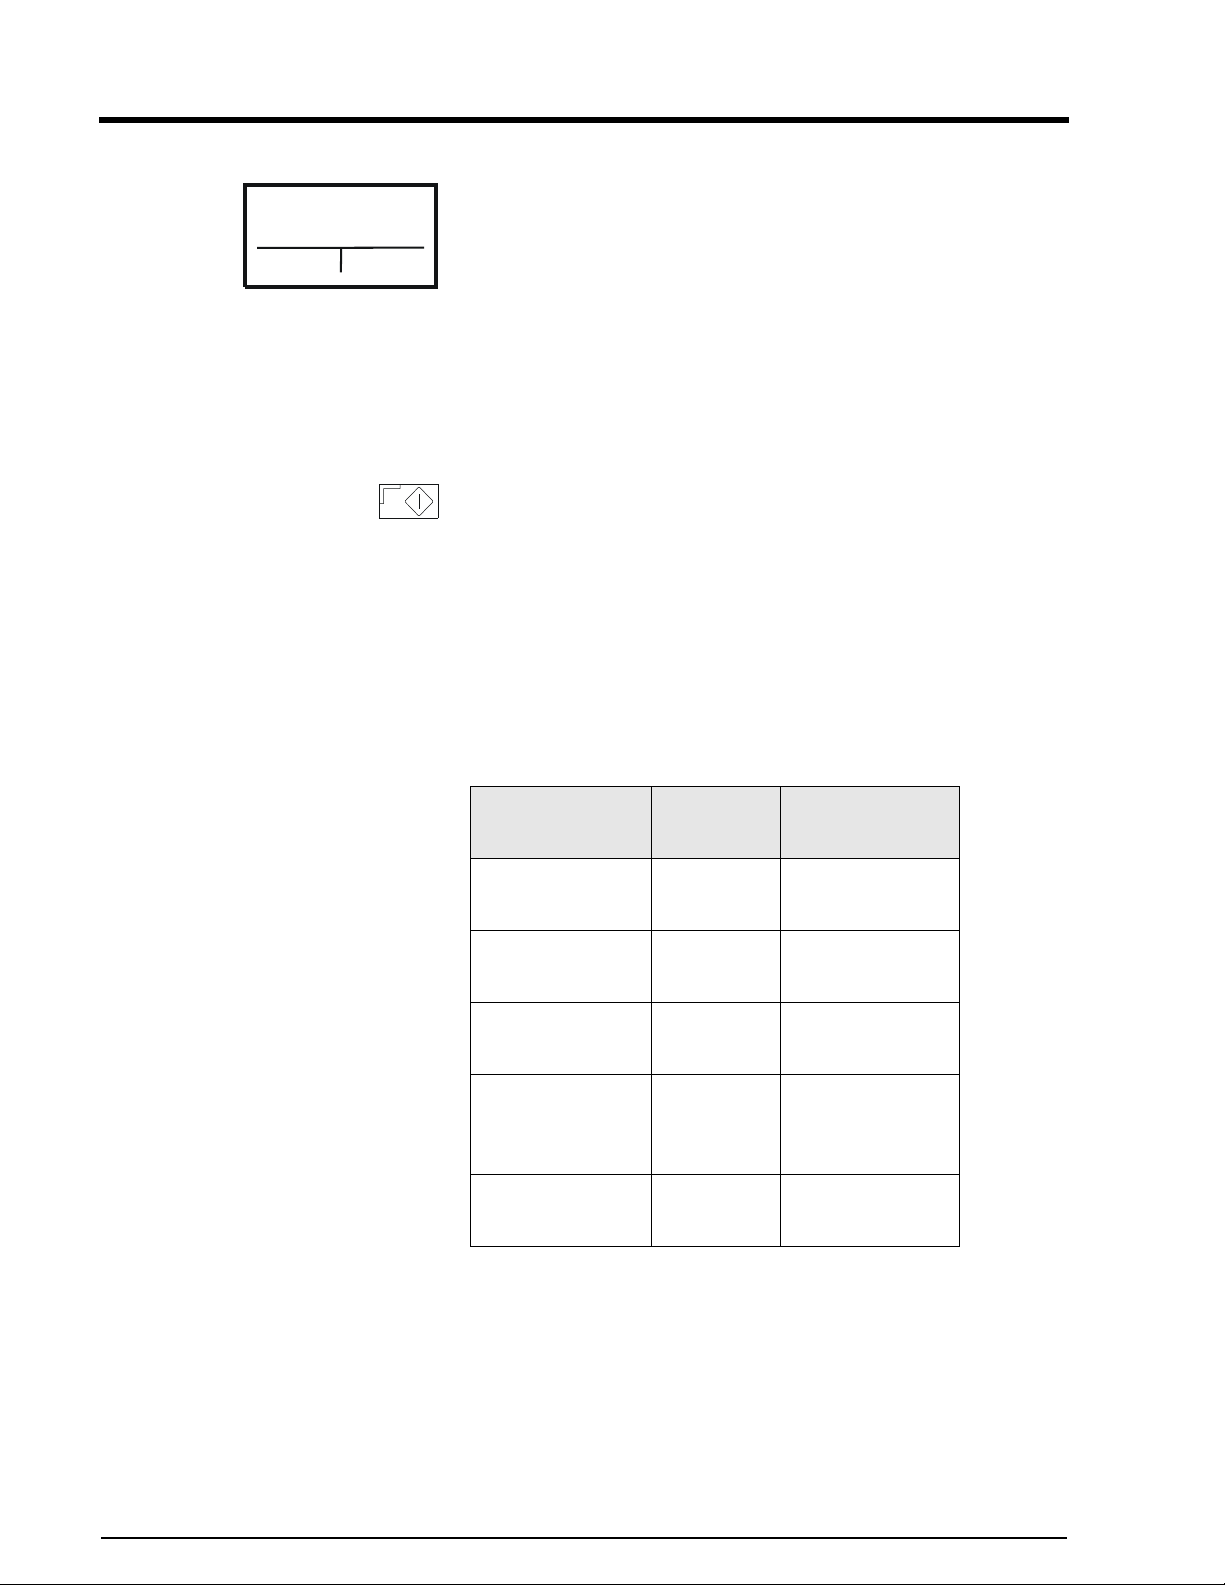
Actual core temperature + Delta-T temperature = Combi Cooking temperature
Space$aver™ cooking temperature
T
Nominal core temperature reached
on
off
Press Right-Select button to select “
DT cooking” and “SRH” shows in display, and “DT
“
cooking” flashes.
Press Right-Select button again or CombiDial to confirm
DT cooking”.
"
Display shows “Cooking Mode?”.
Press the desired cooking mode button, “Dry Heat”, “Moist
Heat"or “Combi.
The display shows the selected cooking mode, the preselected
DT temperature 68°F (20°C) and the preselected target core
temperature 140°F (60°C). The DT temperature flashes.
Press the CombiDial to confirm the
Set the flashing target cooking temperature with the
CombiDial and press it to comfirm.
Core temperature
Time
DT/SRH"
DT temperature
∆T combi steaming
Delta (∆):
68°F
Add
Function
Target CT:
140°F
HOME
01/
01
Cooking mode
Dry Heat
Moist Heat
Combi steaming
Electric Space$aver™
∆T
34-394°F
(1-201°C)
34-8°F
(1-31°C)
34-304°F
(1-151°C)
Target CT
106-210°F
(41-99°C)
31
Page 32
Space$aver™
Starting Delta-T cooking Press the Start/Stop button.
The display shows the current cooking and set probe
176°C ∆T
122°F.
Steam
01/
01
176°F
temperatures.
Operation
Current temperature
display
To display the actual cooking & probe temperature, press and
hold the Cooking or Probe Temperature buttons.
End of Delta-T cook cycle The buzzer sounds when the probe temperature has been
start
stop
reached. Press the “Start/Stop” button or open the steamer door
to turn the buzzer off.
Hints on Delta-T cooking The higher the temperature difference, the greater the weight
loss and the more intensive the browning. To ensure that the
cooking time is not too long, the Delta-T setting should be at
least 50°F (10°C). This type of cooking means that slow
operation times can be made use of. Use a pre-selected start
time with this method.
Large roasts ∆T
Roast beef
122-131°F
50 – 55°C
Core-tempera-
ture
118-136°F
48 – 58°C
Fillet of beef
Veal roast
Blade shoulder
of pork
Cooked ham
For further Delta-T cooking suggestions,
122-140°F
50 – 60 °C
122-158°F
50 – 70°C
5122-
158°F
50 – 70°C
122-140°F
50 – 60°C
see ‹ the “Practical Tips“ section
122-140°F
50 – 60°C
172°F
78 °C
172°F
78 °C
172°F
78 °C
32
Electric Space$aver™
Page 33
Operation
C
Slow Roast & Hold (Over-night Cooking)
Temperatures ranging from 155-212°F (60 -100°C) are used in
low temperature cooking (SRH). The benefits are as follows:
• Less drying out
• Even cooking
• Less crust formation
• More yield/Less shrinkage
SRH has two phases:
1 - Cooks product to a set core temperature
2 - Lets product “rest”, “mature” or tenderize for maximum
results
There are two ways of cooking at low temperatures.
Space$aver™
SRH without using the
probe
Set temperature 7°F (5°C) higher than the desired final
core temperature. The minimal difference in temperature is
sufficient for low-temperature cooking
If a crisp crust is wanted, first sear at a higher temperature
before completing cooking at the lower temperature.
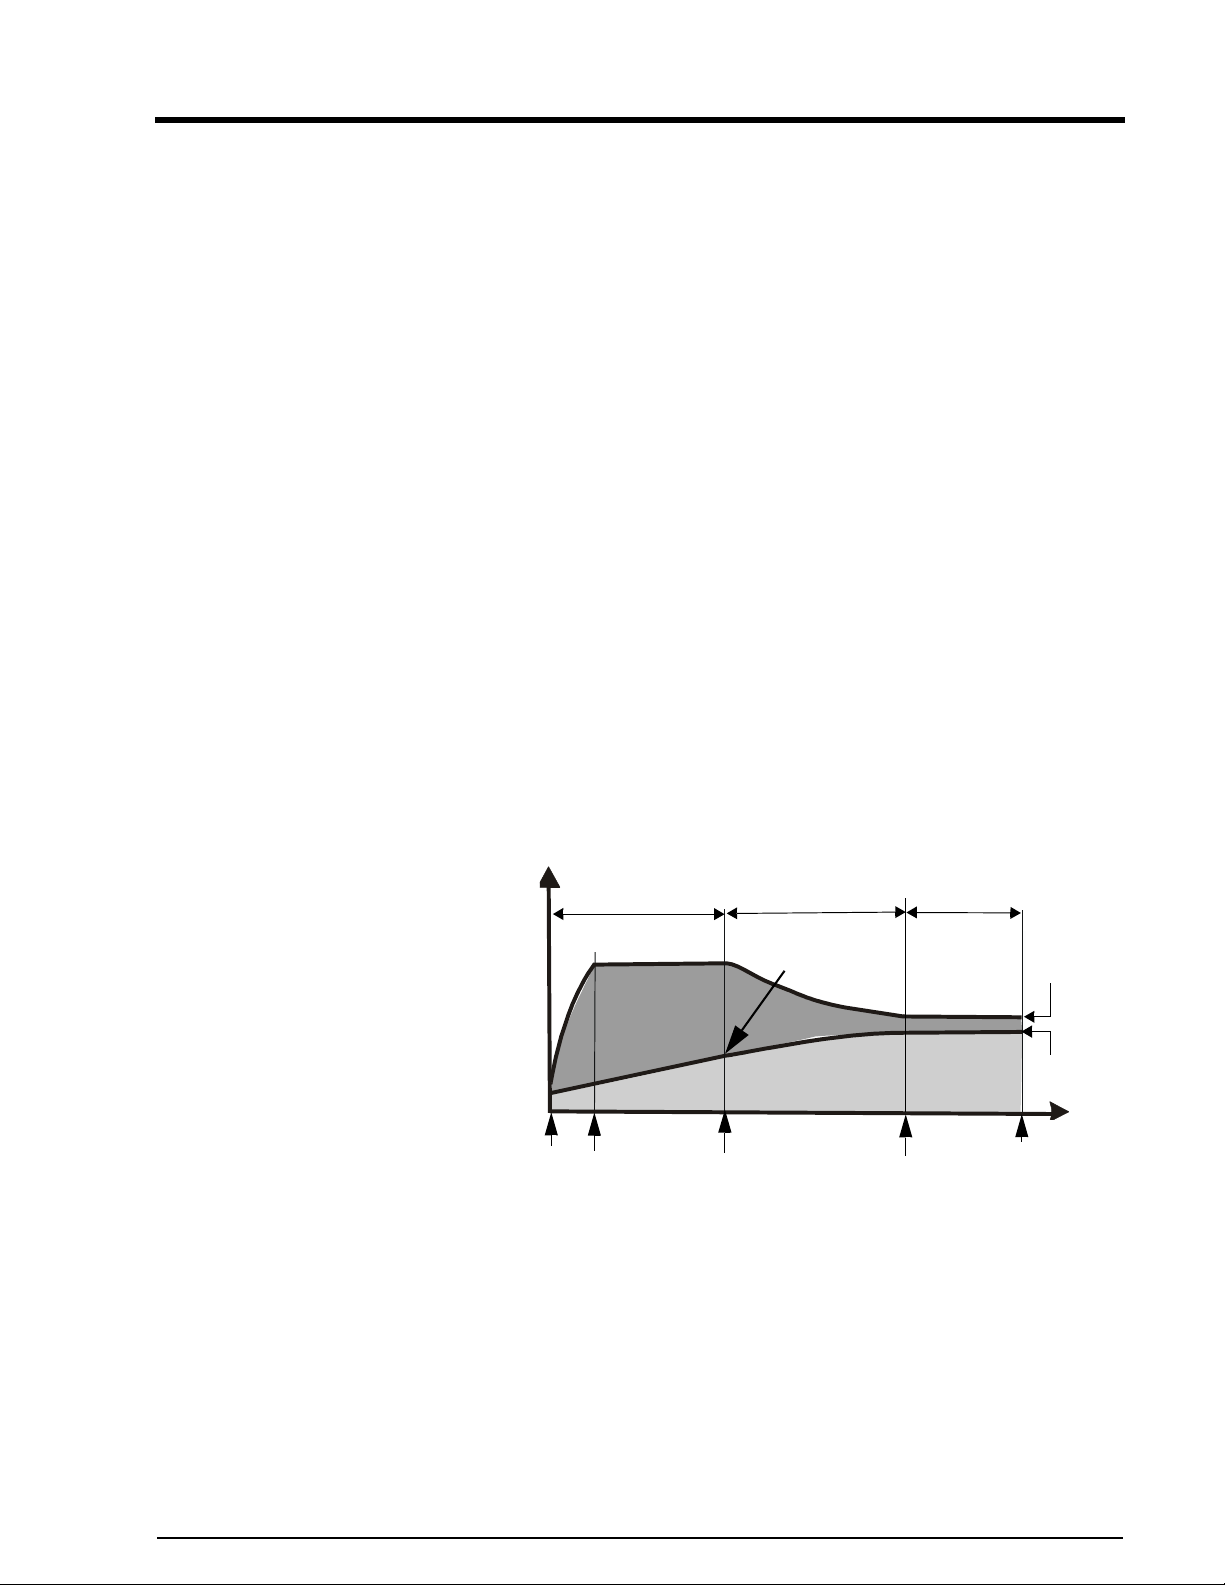
SRH using the probe SRH program first sears (browns) the product then
automatically goes to the cooking process. When the core
temperature reaches 80% of its final setpoint (see the graph),
the unit goes into a holding and maturing process. .
Temperature
Warming
Ready to serve
Start
1. 1st cooking stage
Oven chamber temperature
Oven chamber
preheated
Reduction
heating power
2. 2nd cooking stage (SRH)
80% of final CT
Core temperature (CT)
Oven chamber
Final CT + 7°
Final CT
Maximum
warming time
Time
Note: if the difference between oven chamber and core
temperature is less than 7°F (5°C), the final core temperature
may not be reached
.
Electric Space$aver™
33
Page 34
Space$aver™
Operation
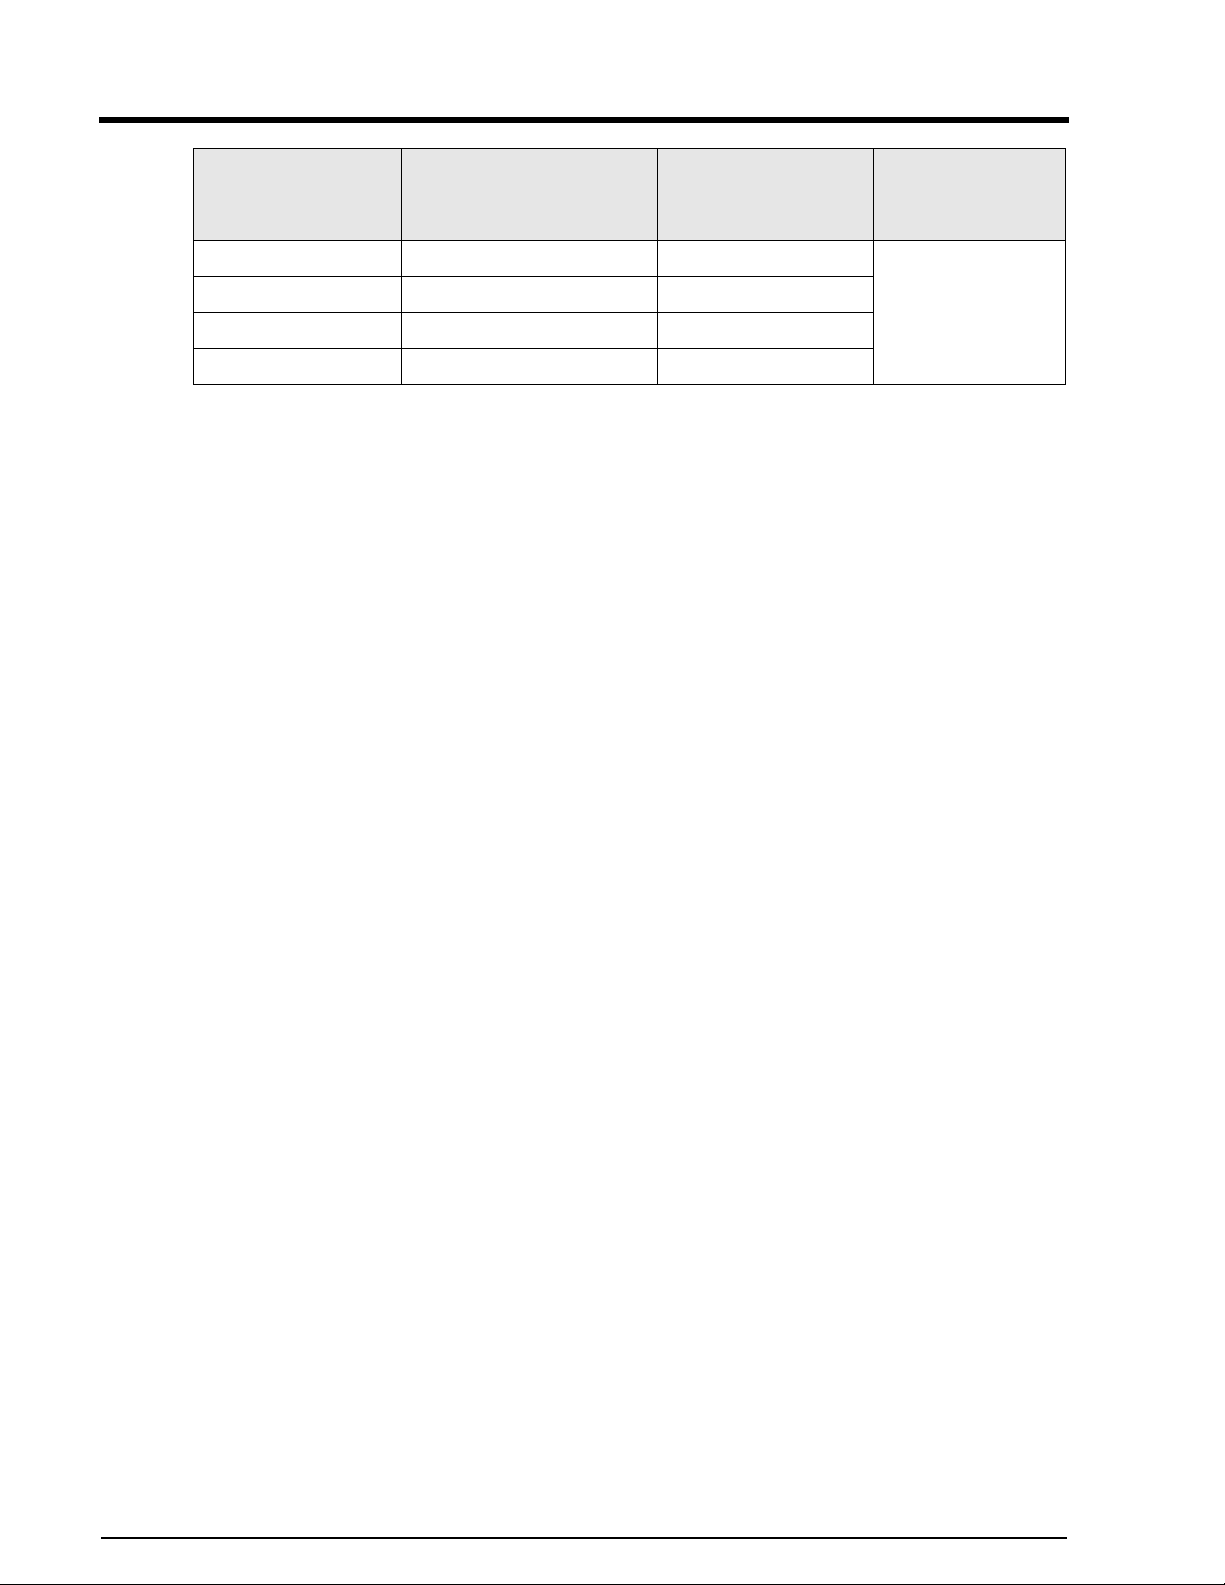
Final core temperature
Food
Roast beef 132°F (55°C) 140°F 60°C
Roast pork 167°F (75°C) 176°F 80°C
Roast veal 158°F (70°C) 167°F 75°C
Roast lamb 167°F (75°C) 176°F 80°C
(temp. to be
maintained)
Cooking
temperature
Program stages
1. Dry Heat
2. SRH
34
Electric Space$aver™
Page 35
Operation
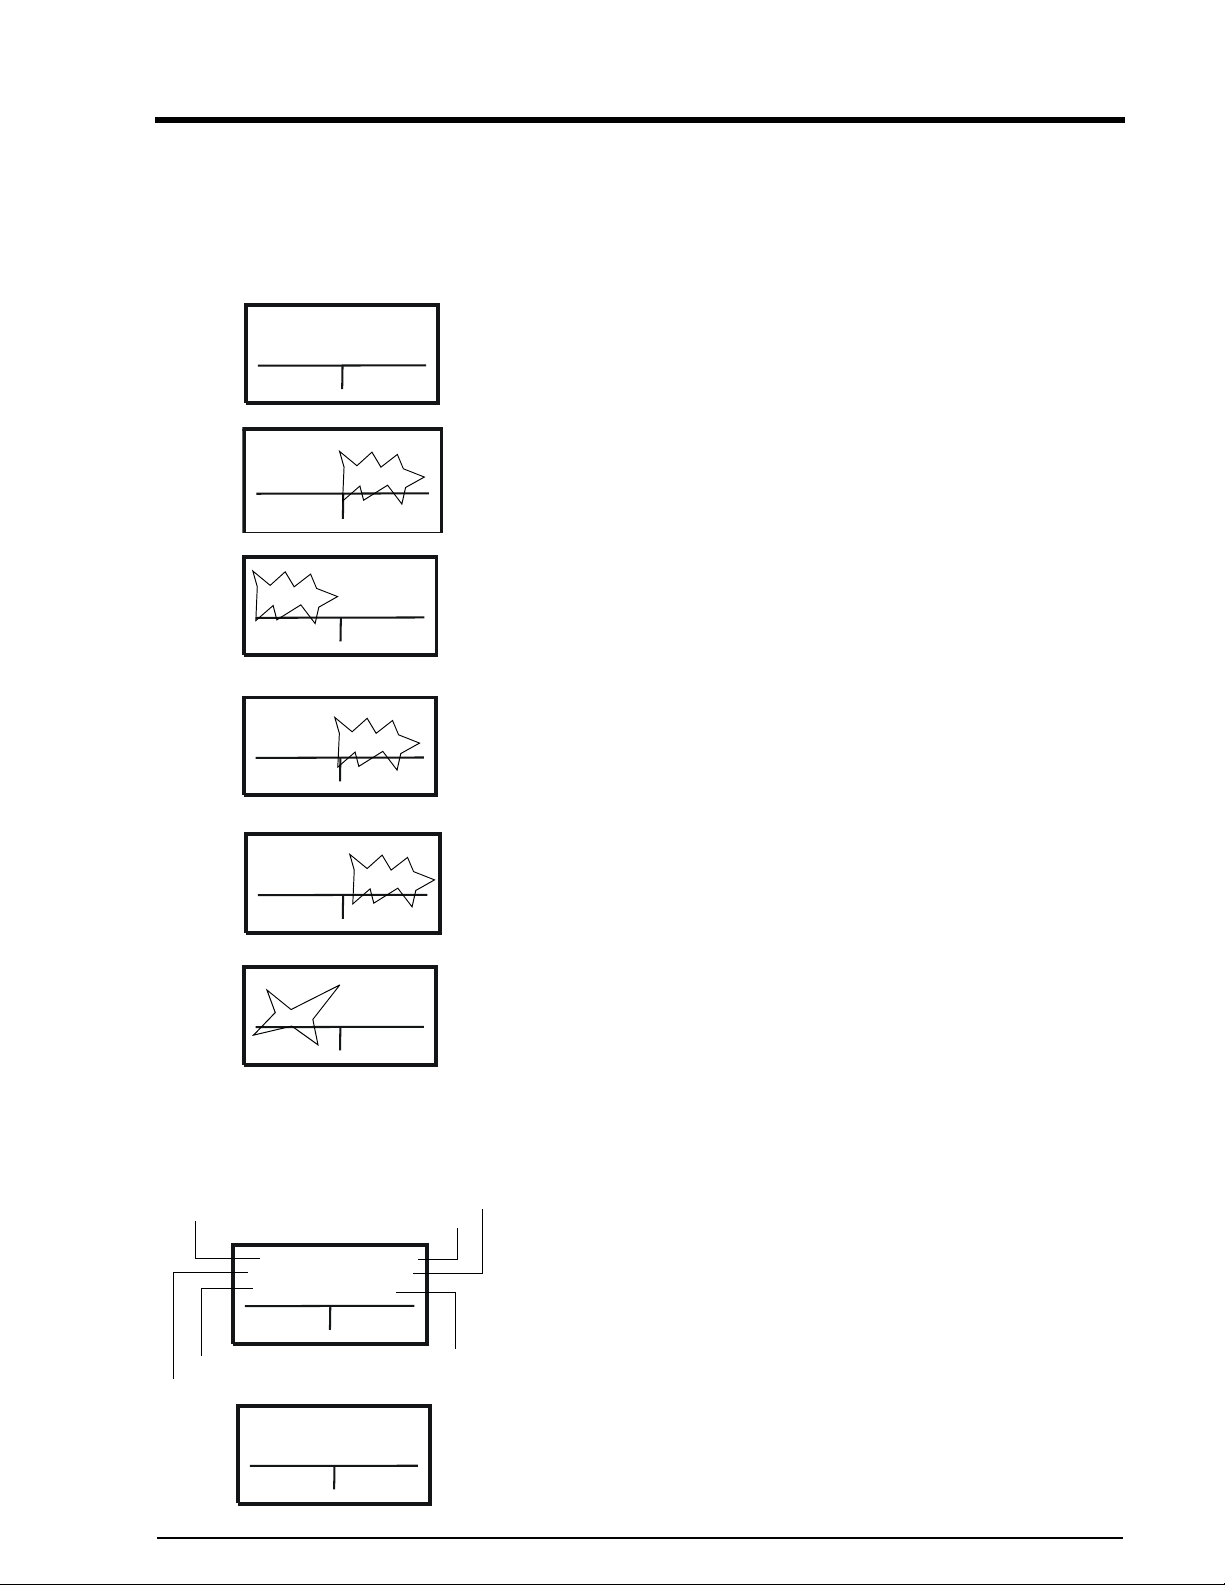
Setting SRH cooking mode Press the On/Off button.
Before SRH cooking, enter the first program step, i.e. "Dry
Heat", "Moist Heat", "Combination of Moist and Dry Heat" or
"Rethermalization" (see also the "Entry of several program
steps" chapter).
Space$aver™
25.03.03 09:30
Menu
∆T cooking
Back
SRH
140°F
Add
Function
SRH
140°F
Add
Function
SRH
140°F
Add
Function
∆T/SRH
SRH
Confirm
0:00
HOME
0:00
HOME
-:--°F
HOME
01/
01
02/
02
02/
02
02
02/
Press the Right-Select button to select “
DT/SRH”
“DT” and “SRH” shows in display and “DT cooking” flashes.I
Turn CombiDial to select “SRH” and press to confirm.
Select a cooking mode for the first step of the SRH processl
The display shows cooking temperature of 140°F (60°C)
flashes in the display.
Turn the CombiDial to set the temperature 86-250°F
(30-120°C) and press to confirm.
The display flashes cooking time "0:00".
Turn the CombiDial to set the cooking time, or press
CombiDial again to change from time to probe cooking.
The temperature display flashes. Set the final core temperature
104-210°F (40-99°C) with the CombiDial.
Note: If a cooking time is entered before entering the final core
temperature, the control system will ignore this, as the core
temperature always takes priority.
∆T combi steaming
Delta (∆):
Total cycle time
Program stages
Dry Heat
248°F
Selected
temperature
Cooking mode
248°F
01/
01
HOME
68°F
Add
Function
Target CT:
140°F
Starting SRH Start the program with the Start/Stop button.
Number of program stages
Active program stage
4:20
01/
02
0:20
Cycle time or probe temperature
of the active program stage
4:00
01/
02
4:00
Once the core temperature is entered, press the CombiDial to
enter another program step.
Pressing the CombiDial twice, the display reverts to the first
program step.
The display shows:
Number of program steps
Current program step
Cooking temperature
Cooking mode
Probe temperature or Time remaining.
Electric Space$aver™
35
Page 36
Space$aver™
Steam injection
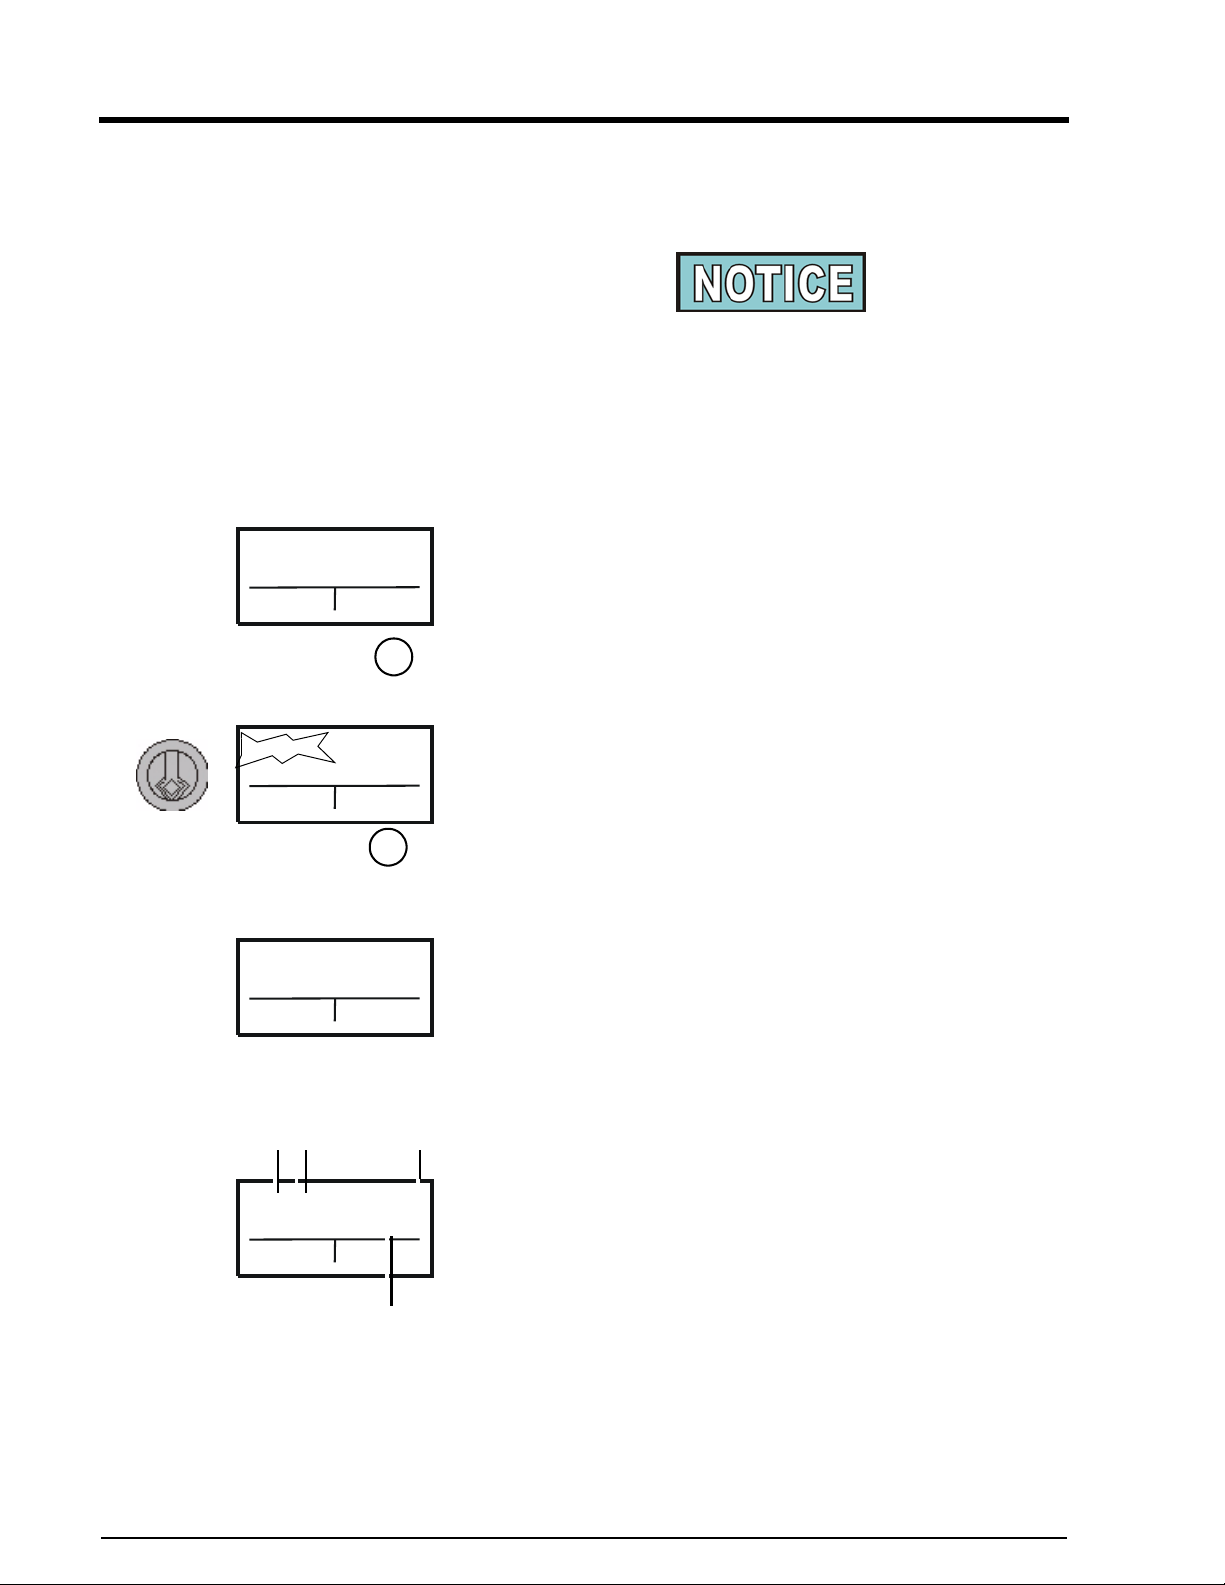
The "Steam Injection" cooking mode can be used for baking
pieces of dough that require lots of steam.
If the cooking temperature is higher than 266°F (130°C),
steam injection will not work!
Cool down the cooking chamber to below 266°F (130°C)
with Ready2Cook if necessary.
Selecting steam injection Switch the appliance on with the "On/Off" button.
The button LED illuminates.
Call up the menu with the Right-Side Select button.
02/
Cooking mode?
RackControl DT/
02
Scroll through to "Steam" with the CombiDial.
ol
Operation
Steam
Rest peri-
Back
Steam
Temperature ml wa-
212 °F 200
Add
functions
1
0:18 B
212°F
Confirm
Home
2
180
4
The "Steam" menu item flashes.
02/
02
Press the CombiDial or Right-Side Select button (input) and use
02/
02
the CombiDial to set the temperature at 86 - 266°F (30-130°C)
and the water quantity (0 - 5,000 ml).
To enter another program step, press the CombiDial or start the
program with the Start/Stop or Ready2Cook button.
3
The display shows the following while the program is running:
02/
1 Remaining time of all program steps
02
2 Cooking type B = steam
3 The number of the active program step
4 Remaining water quantity (ml)
36
Electric Space$aver™
Page 37
Rest period
Selecting rest period Switch the appliance on with the "on/off" button.
Space$aver™
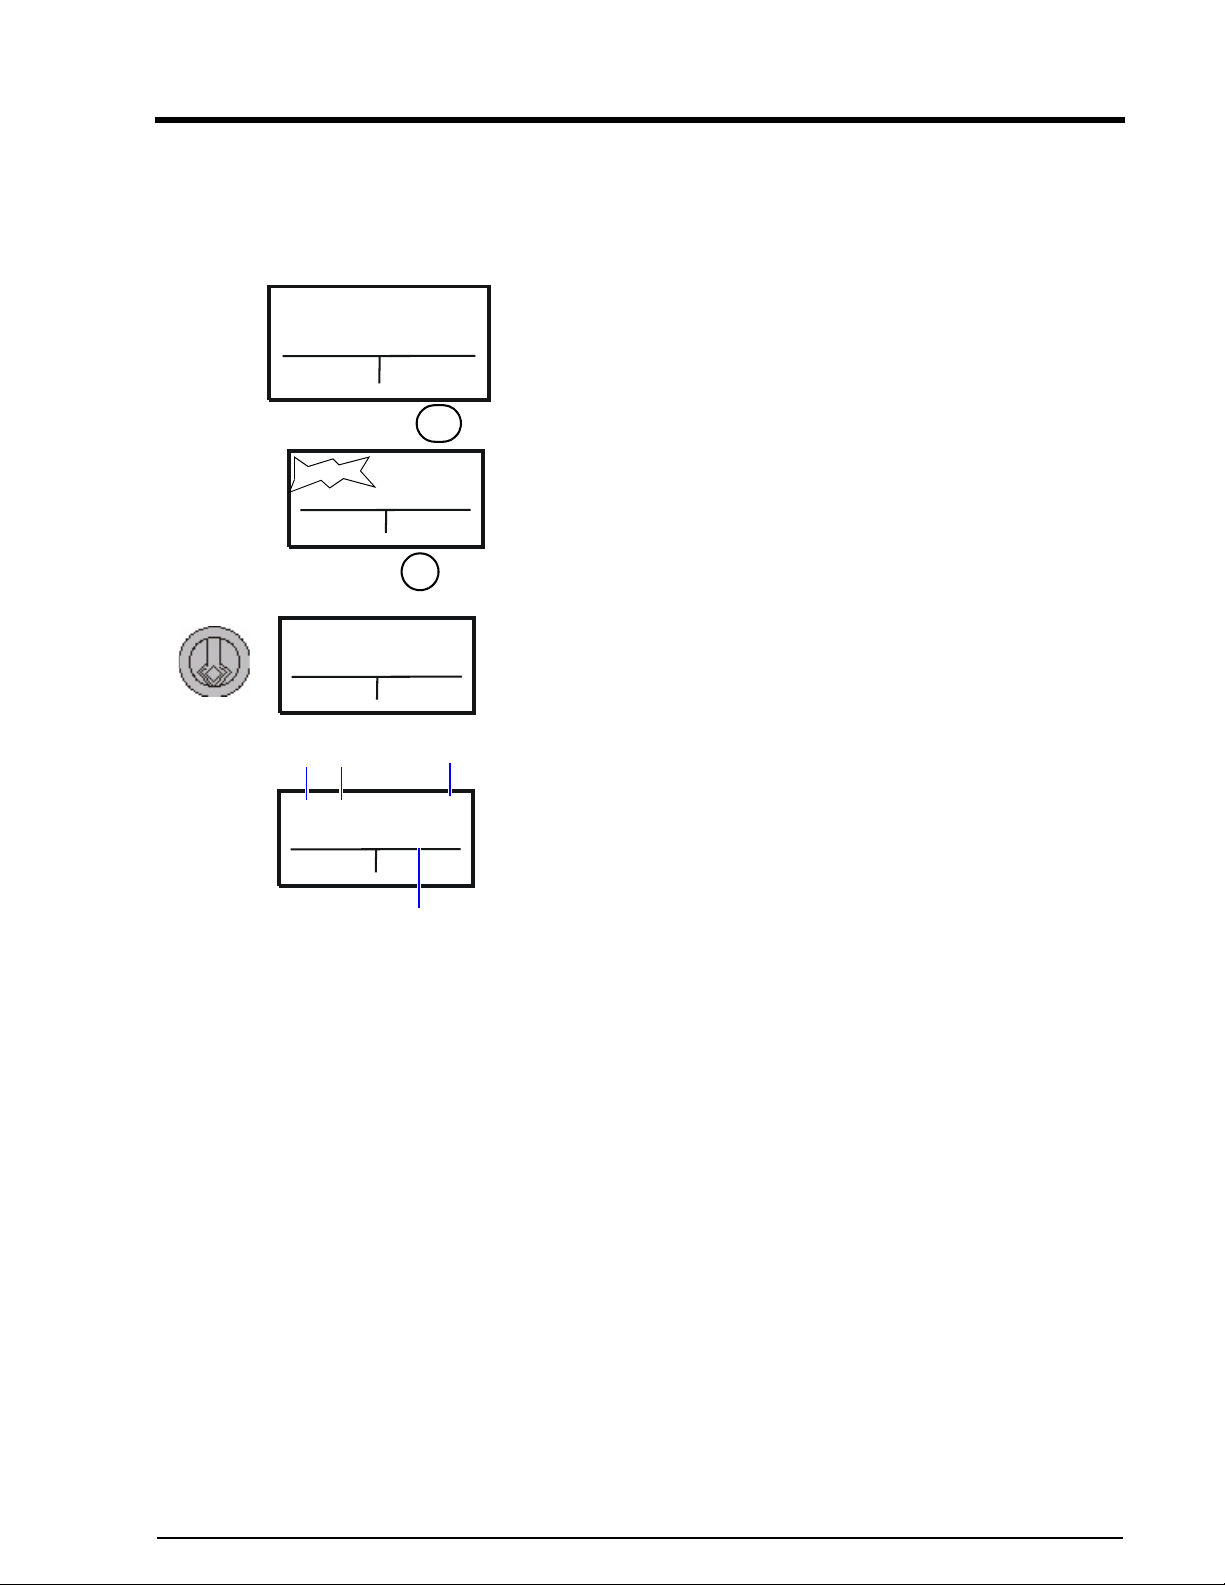
An operational pause (NOP) can be selected with the "rest period" cooking type.
0:10
Cooking mode?
Rest periLTC
Back
Rest period
More
functions
1
2
0:10 NOP
02/
02
RackControl
DT/LT/...
01
00
Confirm
02/
02
0:0
Home
3
02/
02
0:0
The button LED illuminates.
Call up the menu with the right-hand selector button.
Scroll through to Rest period with the combidial.
The "Rest period" menu item flashes.
Select the menu item by pressing the right-hand selector button
or the combidial.
Set the rest period (in minutes) with the CombiDial.
Press the CombiDial to enter an additional program step.
Press the "start/stop" button to start the program.
The display shows the following while the "Rest period" program step is running:
1 Remaining time of all program steps.
2 NOP = No Operation = Rest period
4
3 The number of the active program step
4 Remaining time of the active program step
Electric Space$aver™
37
Page 38
Space$aver™
1
Changing settings
Default settings The Space$aver™ comes from the factory pre-set. These
settings can be changed to your individual needs to a certain
extent.
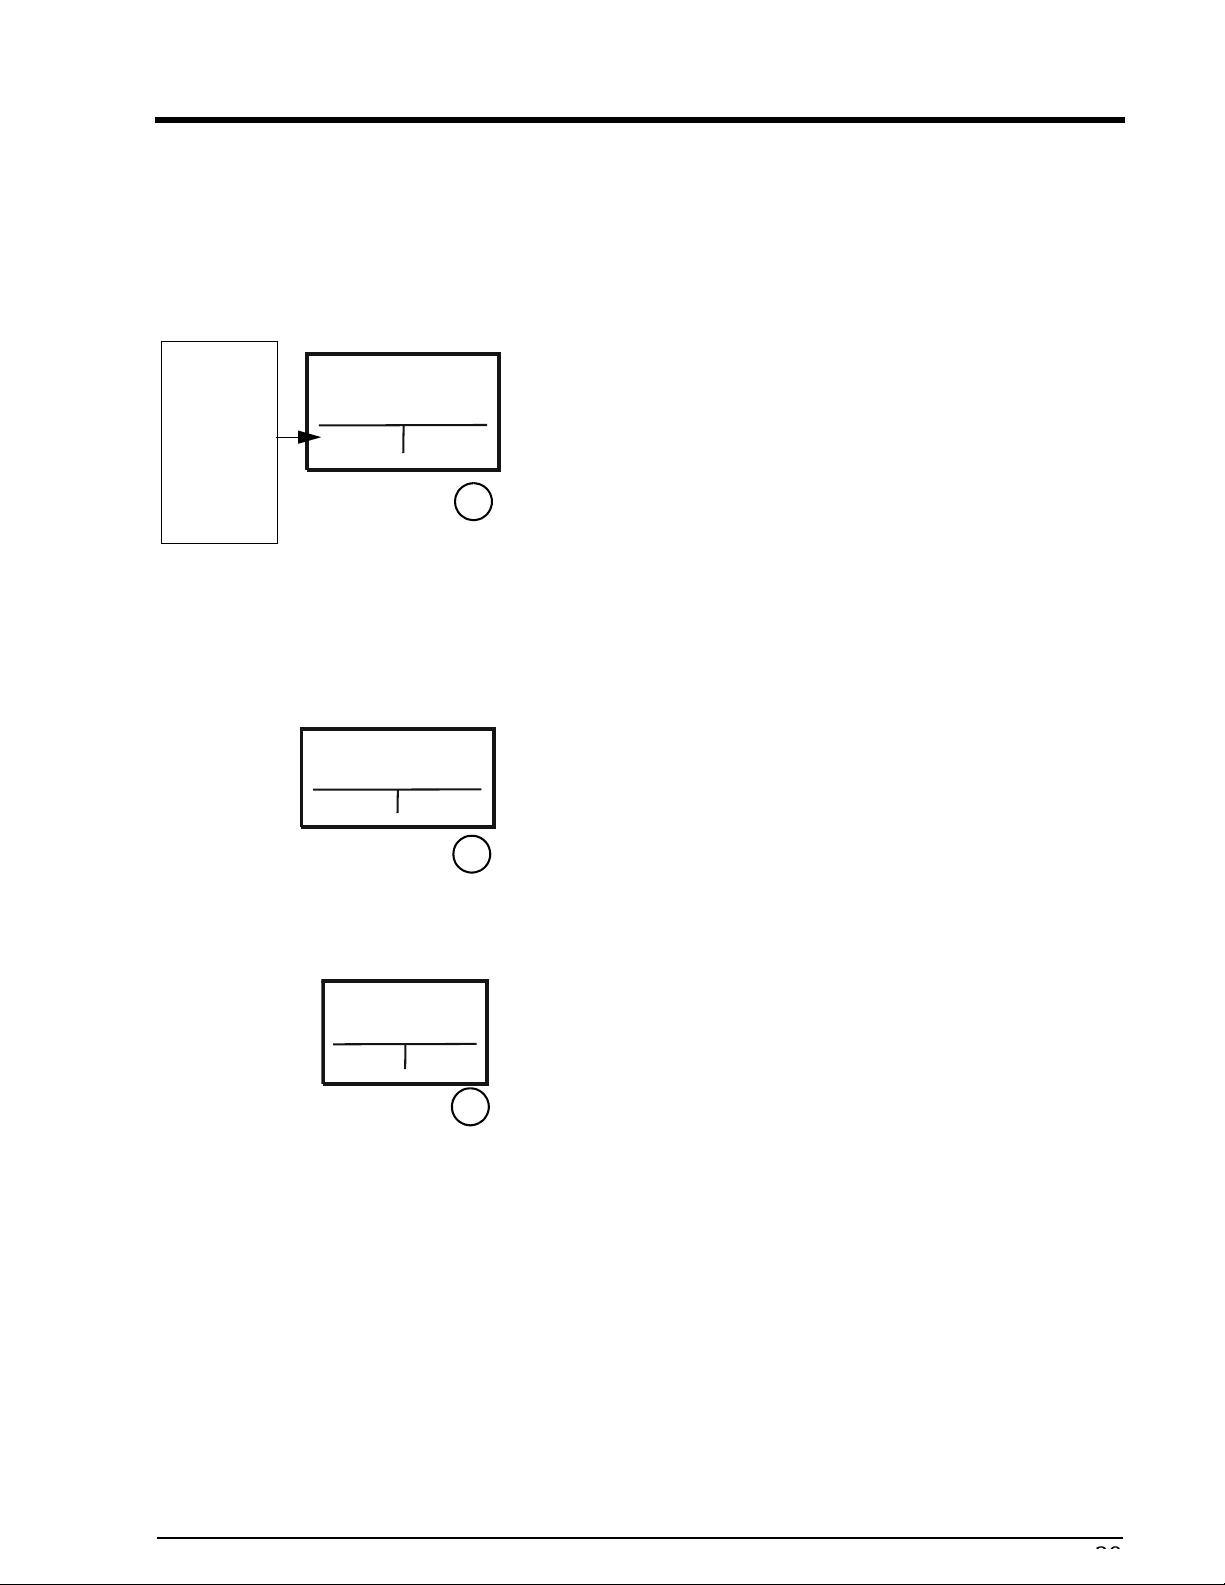
To access the Settings Mode Press the Left-Side Select button to access the Menu Mode.
Man. cleaning
2 WaveClean
3 HACCP
4 Setup
5 Diagnosis
6 Save
cookbook
7 Load
cookbook
08.05.2003 08:45
Menu
DT/SRH
Once in the Menu Mode and display shows “Menu”, use the
CombiDial to scroll down to “4.Setup”..
Press CombiDial to select “4 Setup”.
Display shows "Password” and “000”.
Press the Right-Hand Select button to select the display
language.
Enter the password “111” using the CombiDial and confirm
using the “Start/Stop” button.
Password
000
Language
Setting 000
Time/Date
11:55
Back
08.05.2003
Save
Once the time and date are set, you can turn the
CombiDial to page through the other settings (see following
table).
The display shows “Time/Date” and the setting number “000”.
Press the CombiDial to set the next flashing time/date setting.
Turn the CombiDial to set the new value and confirm by
pressing the Right-Hand Select button.
Press the CombiDial to select the next setting or press the
“Left-Hand Select button to return to the start-up display.
36
Electric Space$aver™
38
Page 39

Operation
Space$aver™
1
Settings
Time/Date
Light flashes
Preheating
factor %
Water
maintenance
litre
Date format
2
No.
000
023
082
076
144
3
Standard
setting
Local time
operator
On On/Off
15 0-30%
0
DD.MM.YY
YY
DD.MM.YYYY
YYYY/MM/DD
MM/DD/YYYY
4
Setting range
Time/date
0-90,000 L in
100-L
increments
5
Explanation
Automatic change between summer time / winter
time
See parameter No. 144 for date format
"On” means that when cooking is completed, the
light will flash in addition to the buzzer sounding.
The duration of the flashing matches the buzzerr, i.e.
if thebuzzeris set to “0”, the light will not flash (even
if flashing is activated).
Increase the preheating factor if fully loaded with
large amounts (roasts, bread loaves) so that the
temperature does not drop too severely.
For external water-treatment systems, for connection
to soft water only. Confirm receipt of the maintenance request with the "Read" button. The maintenance request is repeated until maintenance occurs
and the "Done" button is finally pressed.
TT = Day
MM = Month
JJJJ = Year
12 or 24 hour clock
Temperature
display
Cookbook
Time delay
fan
Cooling
water
006
in °C °C/°F
097
032
024
Free
Off Off/On
Standard
Free
Locked:
Fully locked
Minimum -
Maximum
The temperature display in °F is not linked to the
English display text.
Programs in the Cookbook can be changed, deleted,
or saved.
Programs in the Cookbook cannot be changed,
deleted, or saved. However, changes can be made
during cooking.
Changes cannot be made to the Cookbook or during
the cooking process.
When “On”, the fan runs during the time delay to
cool the oven chamber with a block of ice in the
bottom drawer.
For this purpose, place the perforated container in
the closed container, fill with approximately 4 litres
of water and allow to freeze. Insert the ice block into
the perforated container at the lowest level. This
allows a temperature of 57°F to be maintained for up
to 6 hours
“Minimum” setting: Minimum water consumption
but higher condensation temperature and greater
amount of waste steam.
“Maximum” setting: Maximum water consumption
but lower condensation temperature and less waste
steam.
Electric Space$aver™
39
Page 40
Space$aver™
Operation
1
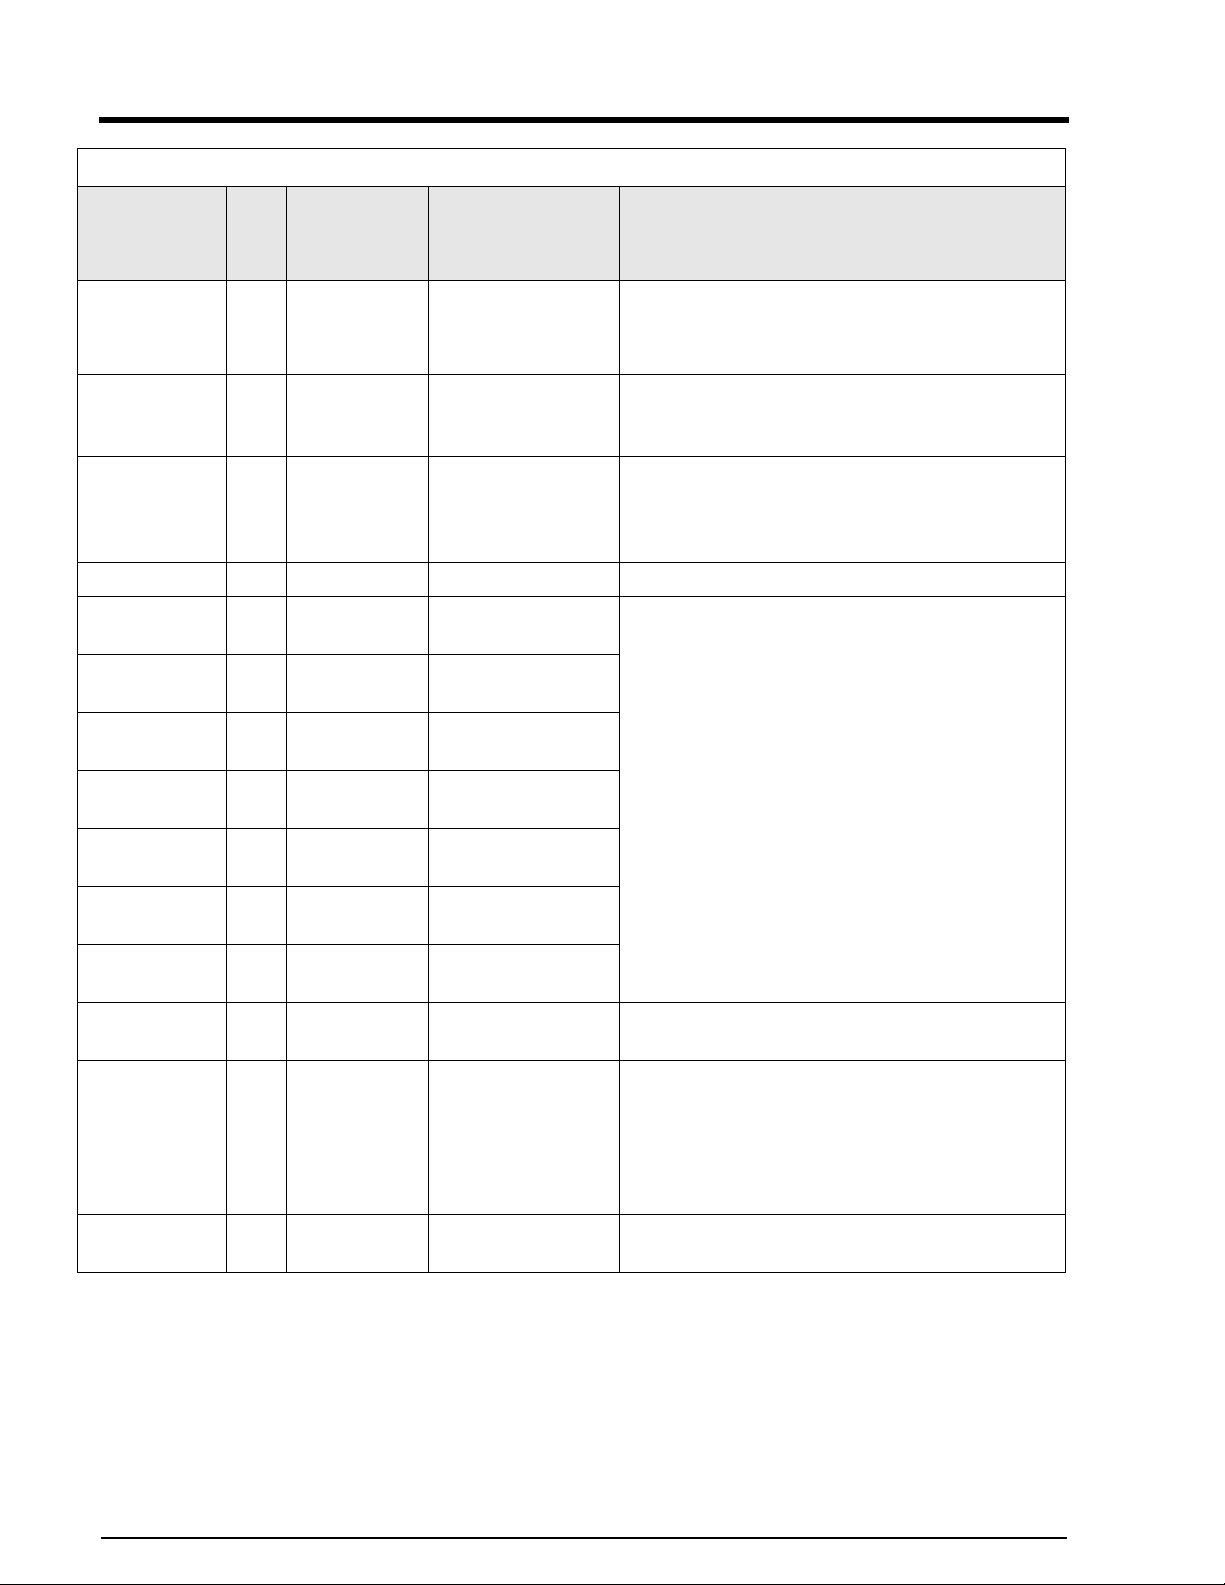
Settings
2
No.
3
Standard
4
Setting range
5
Explanation
setting
Time ext.
Hood
083
60 0 - 600
An external air extraction hood can be switched on at
the end of the program.
(seconds)
Time buzzer
(seconds)
Altitude 015 0 -500 m
Password 096 111 000-500 Individual passwords can be set up here.
Moist Heat
temperature
Combi
steaming temp.
Dry Heat temp. 237
Retherm
temperature
SRH temp. 239
084 20 0 - 180
0 - 500 m;
500 -1000 m;
1000 -1500 m
>1500 m
235
236
238
212°F
(100°C)
266°F
(130°C)
356°F
(180°C)
248°F
(120°C)
140°F
(60°C)
86-266°F
(30-130°C)
86-482°F
(30-250°C)
86-482°F
(30-250°C)
86-356°F
(30 -180°C)
140-212°F
(60-100°C)
0 = buzzer off
In additional to the buzzer, the Start/Stop button can
also be made to flash; see setting 023
Ask your nearest weather station about the altitude
(above sea level). Set 0 - 500m if the altitude is
unknown.
The pre-defined temperatures can be individually set
up for the cooking process within the limits shown
here.
DT cooking
temperature
DT probe
temperature
Smart Menu
history
Standard
Category
Scroll direction 225 Normal Normal/Inverse
240
241
242 0 0 -10
397 Cookbook
68°F
(20°C)
140°F
(60°C)
34°F-212°F
(1-100°C)
86-210°F
(30-99°C)
Meat, Poultry, Fish,
Vegetables, Side
dishes, Bakery products, Overnight
cooking, MyChef Special; Perfection
Press “History” to display the programs that were last
used (max. 10) and restart.
The direction of the CombiDial can be adjusted as required in the menus and Custom Library.
40
Electric Space$aver™
Page 41

Operation
Space$aver™
1
Settings
Cookbook
number
2
No.
3
Standard
setting
403 100
4
Setting range
0 Only your own cooking
programs
1 German;
2 UK English;
3 Italian; 4 French;
5 Dutch; 6 Spanish
7 Polish; 8 Danish;
9 Russian;10 Czech;
11 Lithuanian;
12 Latvian;
13 Chinese UK China;
14 Chinese Big5
Taiwan; 15 Korean;
16 Hebrew;
17 Slovenian;
18 Croatian; 19 Hungarian;
21 Swedish;
22 Turkish;
23 Slovakian;
24 Serbian;
25 Greek;
26 Portuguese;
100 US English
5
Explanation
Different country-specific cookbooks can be loaded
via cookbook switching. Deleted AutoChef cooking
programs can also be restored here. For this purpose,
select cookbook number and then save. Press "Save"
after switching the cookbook. "analysis" appears for
up to 5 minutes.
Cooking programs created on the appliance remain in
tact when switching occurs.
Electric Space$aver™
41
Page 42
Space$aver™
Custom Programming
Operation
Creating your own
programs
The Space$aver™ stores 300 cooking programs. There are
two options for entering your own recipes in the recipe book.
1. Duplicate a program from the cookbook, adjust the temperature, time etc. of the individual program steps as desired and
save in the cookbook with a new name.
2. Create new programs steps and save in the cookbook. It
makes no difference whether you save an entered program first
or start it and then save it.
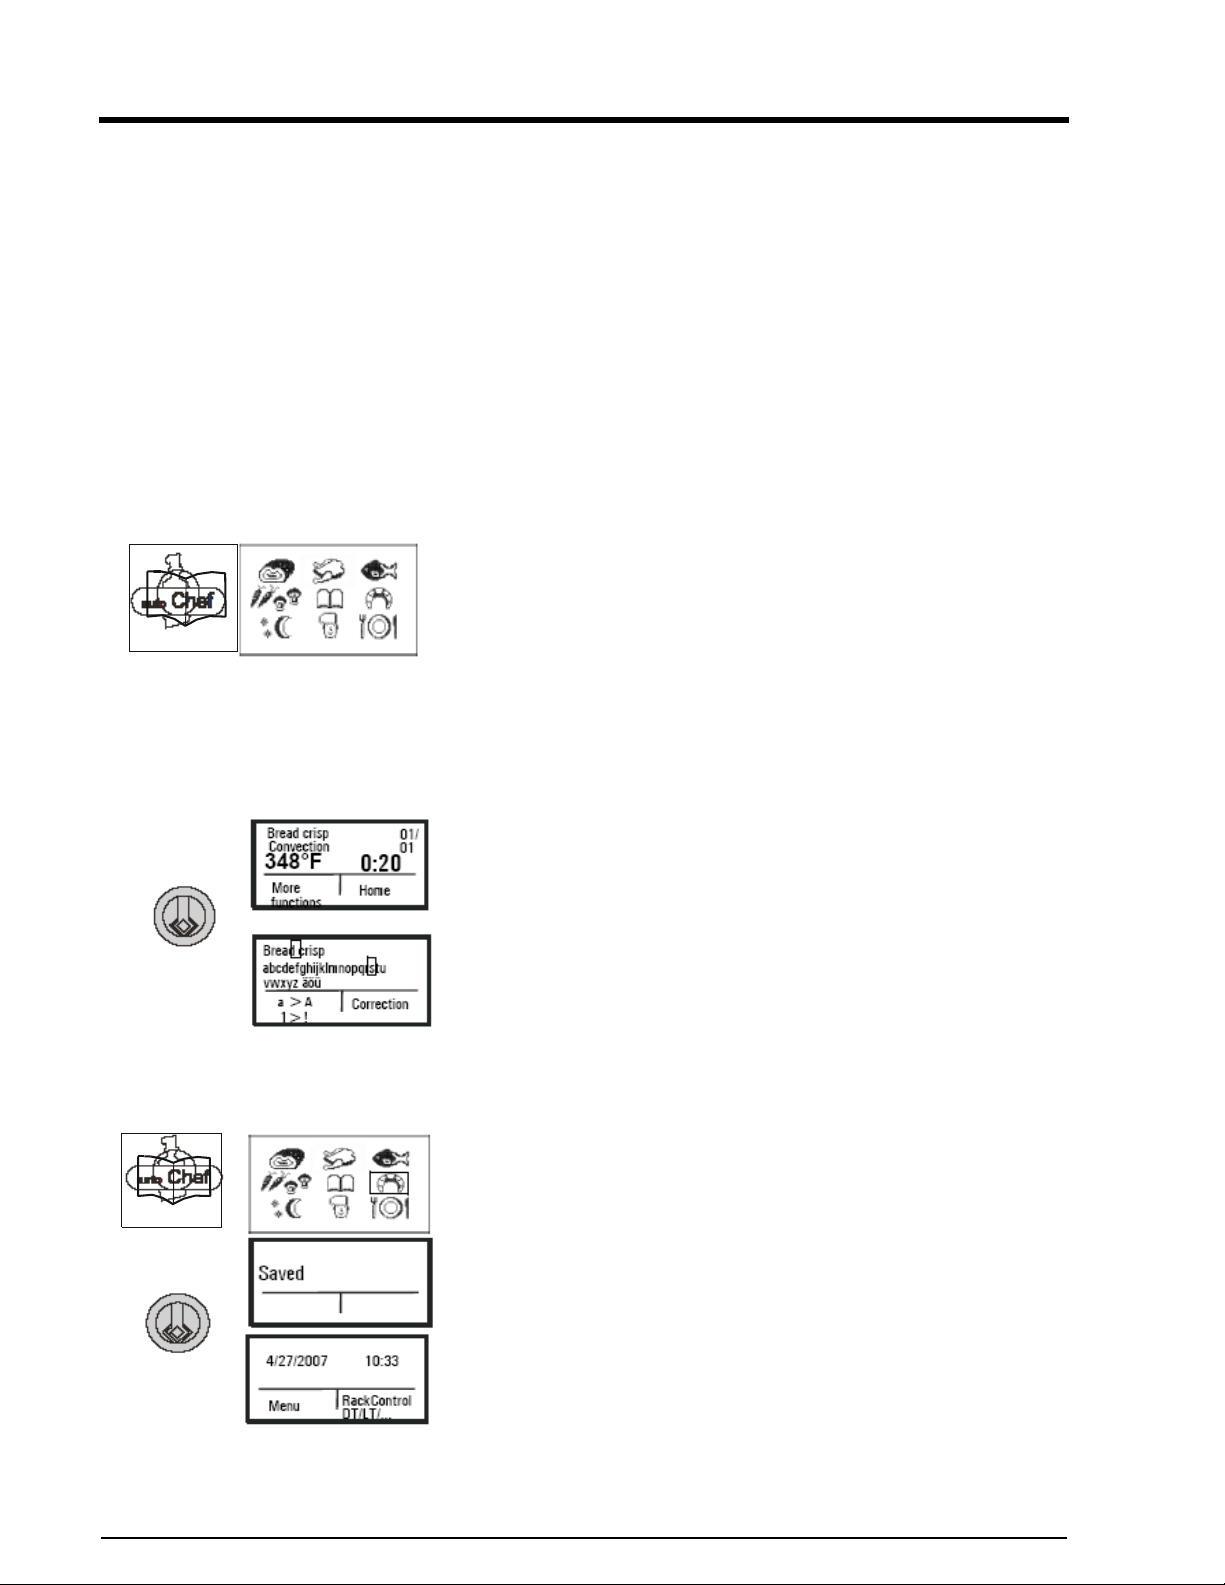
Copying a cooking program Press the "SmartMenu" button and select the cooking program
category with the CombiDial.
• Select the cooking program from the list with the CombiDial. After the CombiDial is pressed, the display shows the
name of the cooking program, the number of program steps
and the accompanying temperature and time values.
• Set the temperature and time values with the CombiDial
and add program steps if necessary . The asterisk next to the
program name indicates that the original program was
changed.
• Pressing and holding the "SmartMenu" button copies the
program and shows the previous program name in the display.
• Enter a new program name with the CombiDial and save it.
Saving changed program Pressing and holding the "SmartMenu" button saves the new
cooking program.
• The display shows the category overview.
• Select a category and press the CombiDial.
The message "Saved" appears for 5 seconds.
The "initial screen" appears in the display once again.
Always save duplicated programs with a new name.
42
Electric Space$aver™
Page 43
Space$aver™
Additional functions
You can optimise the cooking cycle by using additional
functions.
Delayed Start Time
In a delayed start, the cooking program doesn’t start until the
set delay time has counted down. The oven chamber
temperature is shown in the display during countdown.
If using the delayed start, temperatures in the oven
chamber may promote the growth of harmful bacteria on
the products to be cooked. The food may spoil, causing
sickness if eaten.
Additional functions
Always consider potentially hazardous product before using
the delayed start. This is NOT an overnight function, but may
be useful between lunch and dinner. Ice can be used in the oven
cavity to keep food cool for a short period.
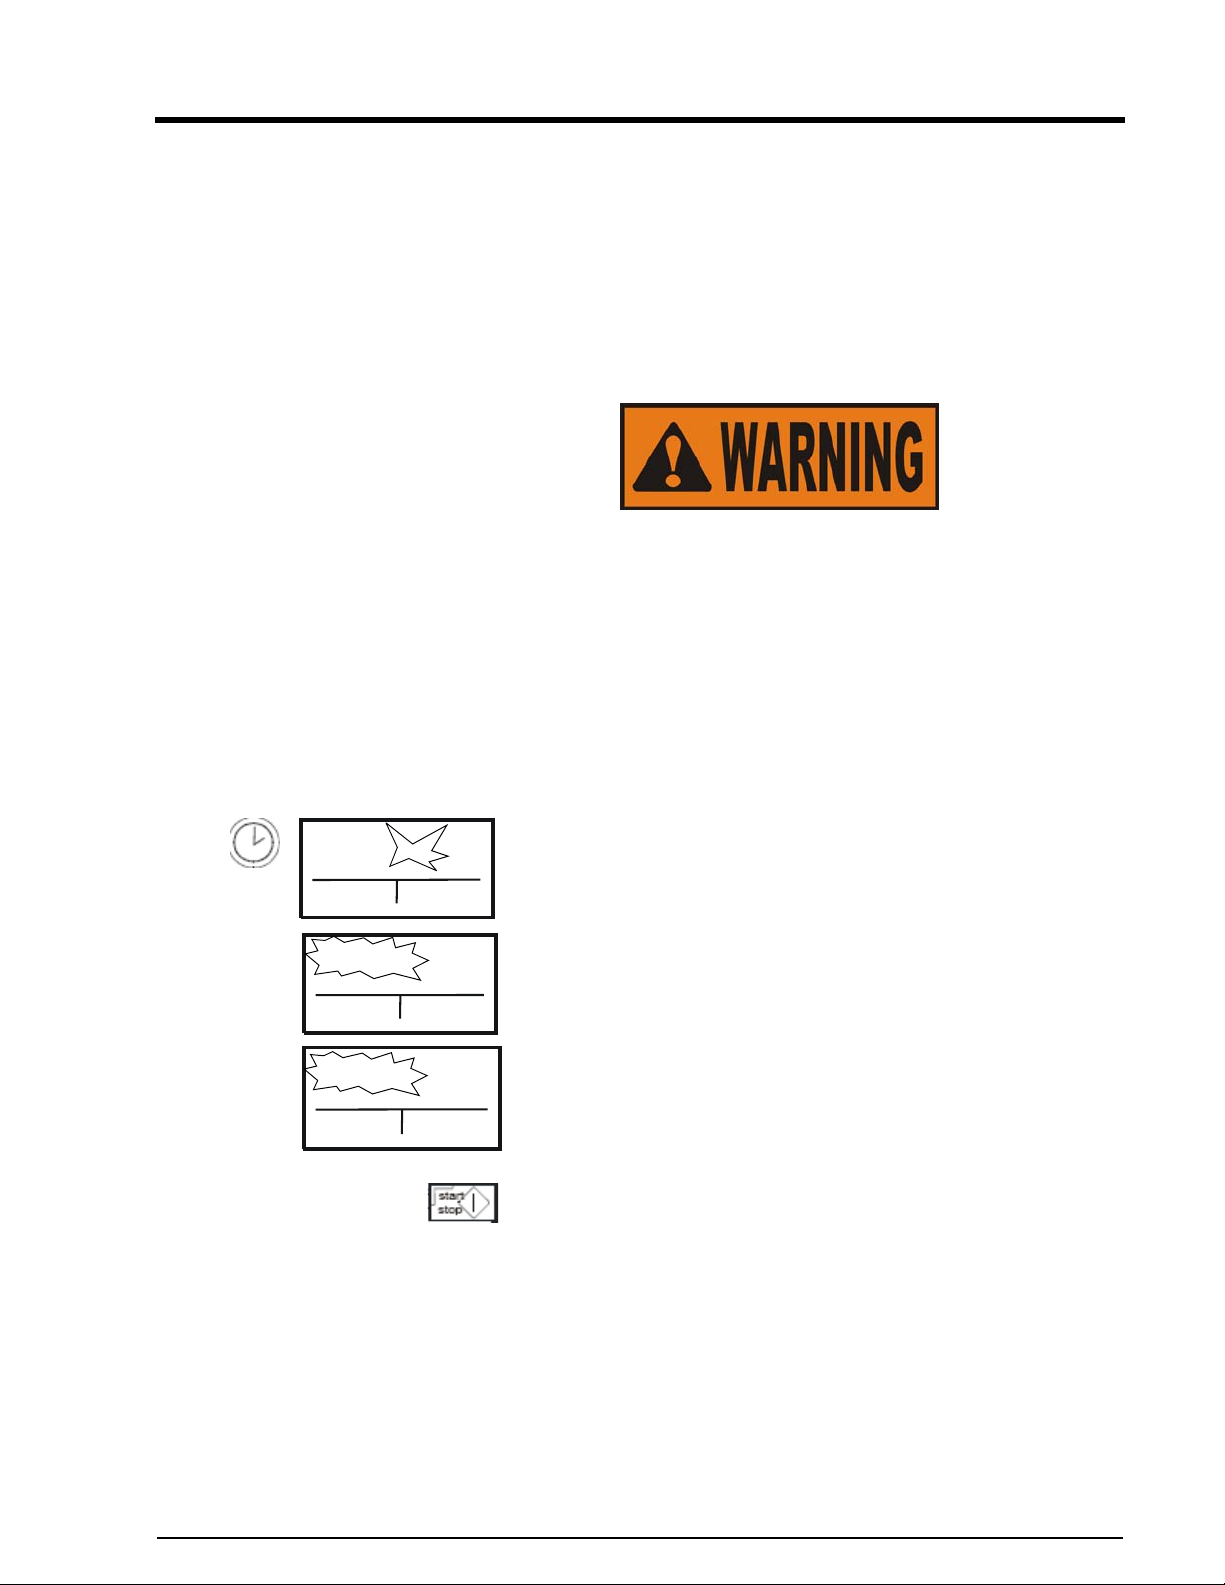
Setting the time delay 1. Enter or select the cooking program.
Starts at: 00:01
Finishes at: ----
Cancel
Cooking time: 00:45
Starts in: 02:00
Finishes at: 11:45
Cancel
Core temperature: t:176°F
Starts in: 02:00
Finishes at: --:--
Cancel
2. Press and hold down the Cooking Time button.
The display shows a flashing “Starts at: 00:01” . Use the
CombiDial to enter the time.
• After the countdown, if a cooking program is using
cooking time and not probe core temperaure, the finishing
time is calculated and displayed in the “Finishes at:” field.
• If the cooking program uses probe temperature, only the
highest nominal probe temperature is displayed.
3. Start the program with the Start/Stop button or the
CombiDial countdown. The light is off during the delayed
start.
4. After the countdown has finished, the cooking program
begins.
Cancel the delayed start Press the “Cancel” Left-Side Select button to cancel and delete
the delayed start time.
Note To avoid production and preparation bottlenecks, you can
prepare the food as normal, load the Space$aver™ and select
the desired cooking program long before the cooking process
is due to begin. Any power outage during the countdown does
not change the time in which the cooking program starts.
Electric Space$aver™
43
Page 44
Space$aver™
Ready2Cook
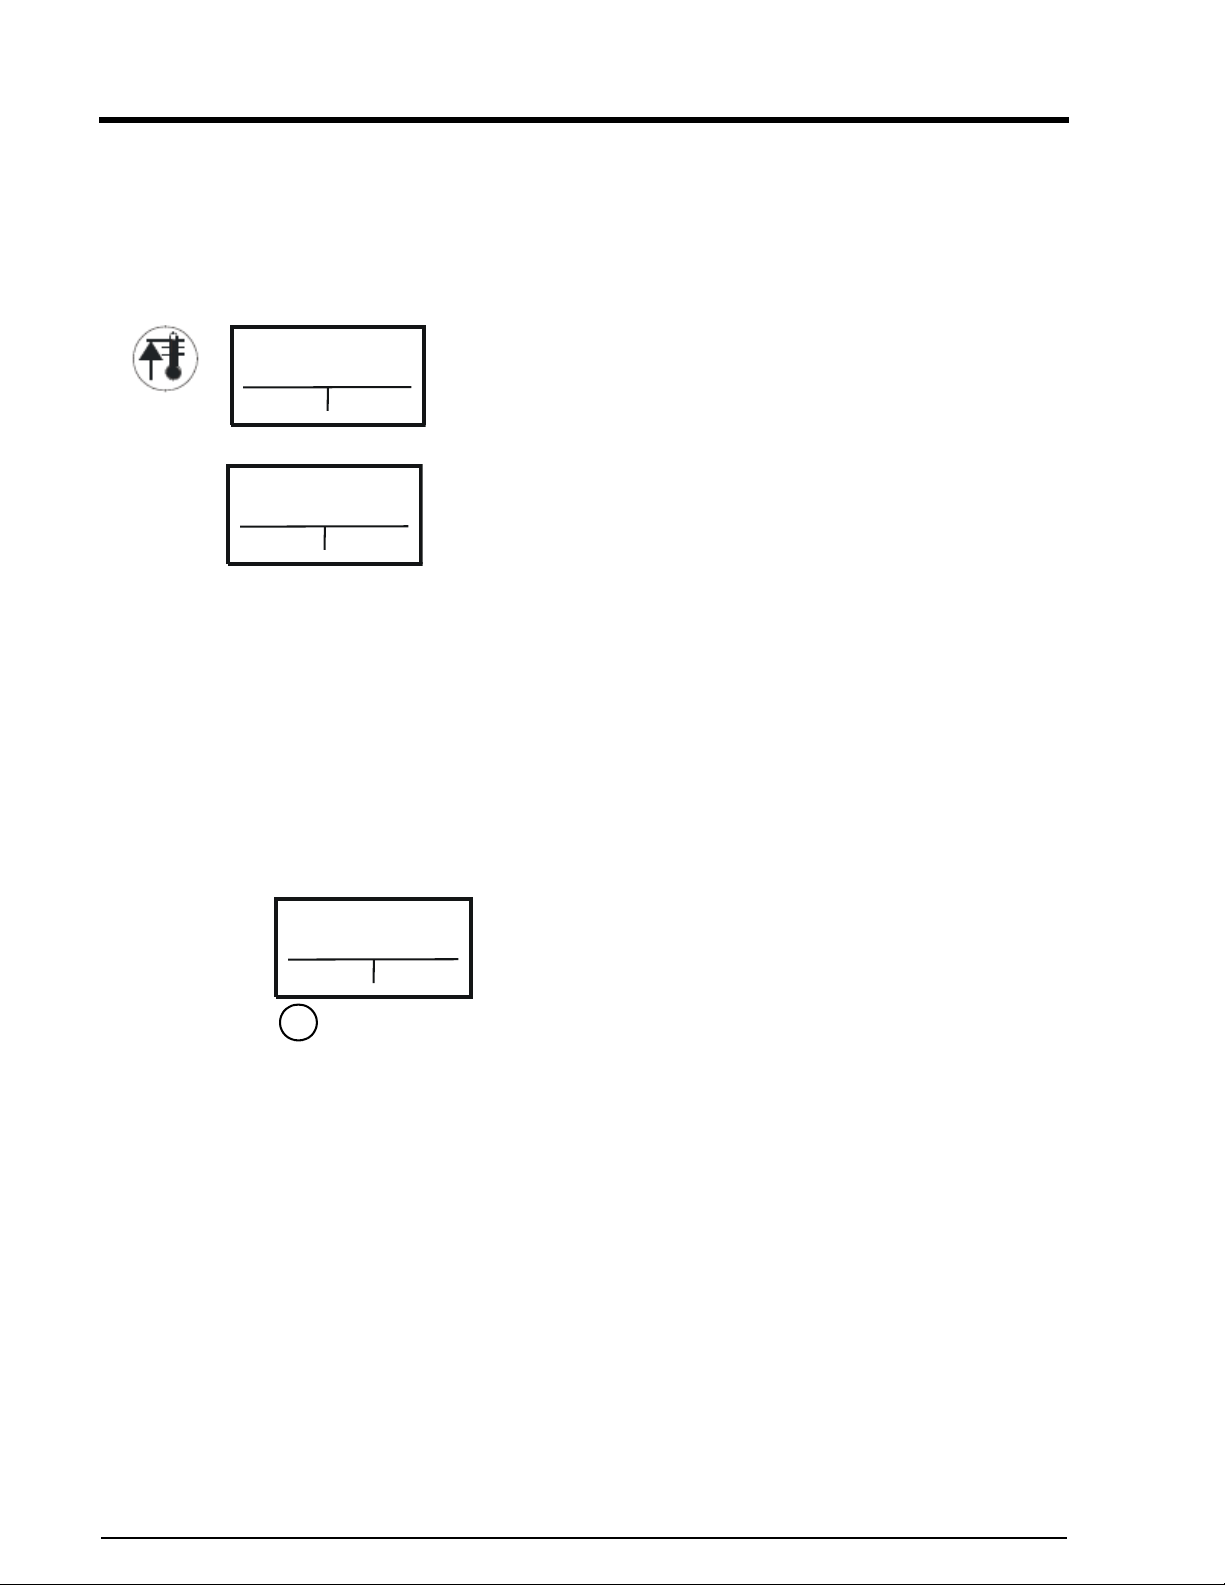
Starting Preheat Press the Ready2Cook button: the Space$aver™ will heat to
Preheating
Actual temp.: 248°F
Nominal temp.: 356°F
Cancel
Maintain
preheating
Additional functions
Many cooking programs (e.g. baking) require the oven to be
preheated. The Preheat Mode has a temperaure range of to
preheat the oven chamber up to 527°F (275°C).
about 15% above the temperature of step 1, of the program or
set temperature. (This addition can be changed, as described
under the “Change settings” section up to a maximum of 30%.)
Press and hold the Ready2Cook button for 3 seconds, and the
Space$aver™ automatically goes to 527°F (275°C),
regardless of the set temperature.
When preheat temperature is reached, buzzer will sound and
the display shows the holding temperature. (Standby Mode).
Open door, insert product, close door and start cooking cycle.
Ready2Cook cannot be permanently programmed in
cooking programs. The function must always be started
manually!
Steam Injection
Stuffed roasts
365°F
Manual
steaming
01
01/
0:20
This function cannot be used in a custom program.
Steam injection can be used, during operation, with all
cooking modes except for “Moist Heat”.
Press the Left-Hand Select button to inject extra moisture.
44
Electric Space$aver™
Page 45

Space$aver™
More functions
The additional functions can be used to adapt individual
673°F 0:15
More
functions
Home
Dehumidifying the oven chamber
cooking steps to the food to be cooked or to improve the
cooking results. The Left-Select button can be used to call up
the additional function while the data is being entered. Please
note that not all of the additional functions are available.
It is also possible to modify the additional functions during
operation. To do this, press the temperature, time or probe
temperature button. Then press the CombiDial, call up the
required step and then use the Left-Select button to call up
“More functions”.
Space$aver™ and Space$aver™ Plus are equipped with the
1
SES
steam extraction system. The SES extracts steam from
the cooking chamber and condenses it when cooking is complete. This prevents larger amounts of steam escaping when
the door is opened.
Additional functions
Fan cycle
The SES is activated for the last program step by default. With
cooking programs shorter than 6 minutes, the SES is not activated. This function can be deactivated via the additional functions.
In contrast to cooking chamber dehumidification, the SES has
no effect on the cooking result.
This function is used to drive the fan in intermittent mode.
Note that the oven is heated only during the phase when the fan
is running. “T1” is displayed on the screen. This function can
be combined with the reduced fan speed.
1. SES = Steam Exhaust System
Electric Space$aver™
45
Page 46

Space$aver™
RackControl
Additional functions
For single-step cooking programs, the "RackControl" additional function allows monitoring of five (different) cooking
times.
If products with different cooking times, e.g. potatoes, cauliflower, peas, carrots and meat, are to be cooked at one time or
if the same dishes are to be cooked at different times, we recommend using the "RackControl" function.
"RackControl" indicates the completion of cooking times started at different intervals with a 10-second audible signal. The
cooked food can be removed.
The cooking process is not interrupted here (continuous operation).
"RackControl" is especially helpful when regenerating plated
meals. While the Combisteamer is working in "RackControl"
mode in continuous operation, the cooking times of the batches
used at different times can be monitored.
46
Electric Space$aver™
46
Page 47
Space$aver™
Activating "RackControl"
Additional functions
on
off
4/17/2007 9.59
Menu
RackControl
Back Confirm
RackCont.
DT/LT/...
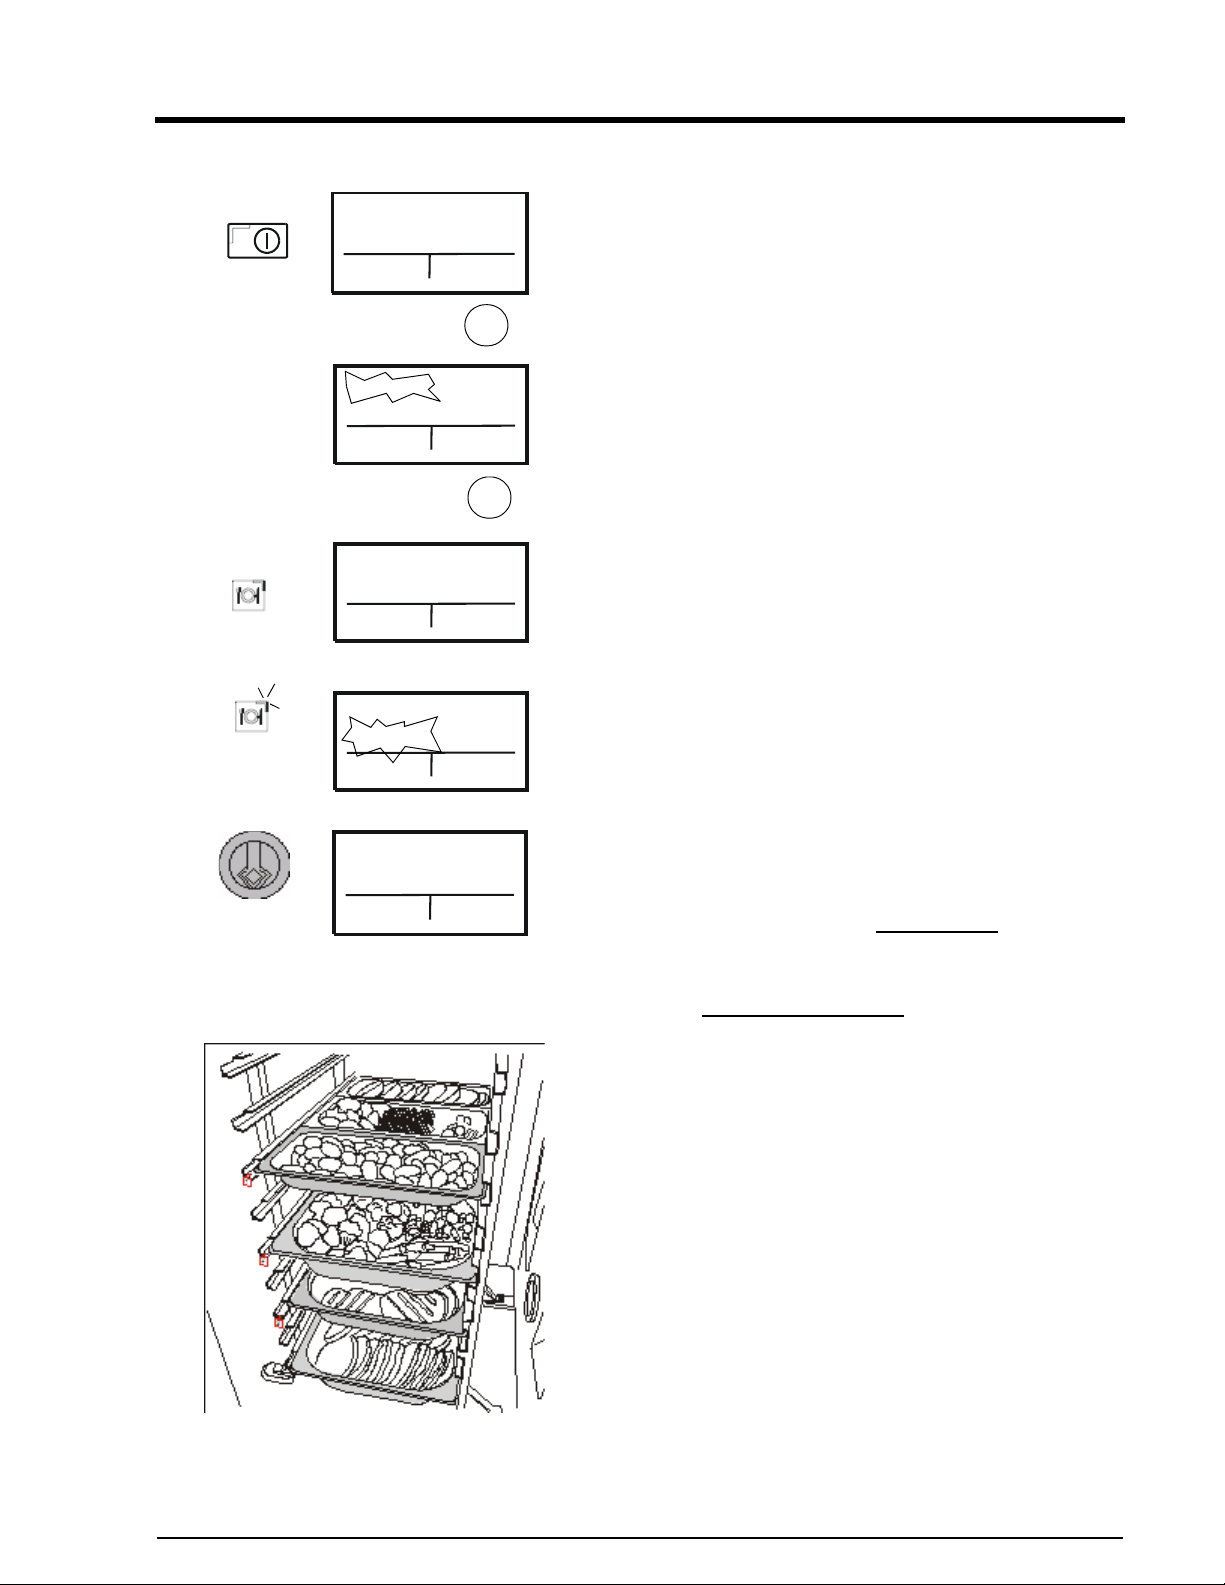
Switch on the steamer with the "on/off" button and
select "RackControl" with the right-hand selector button.
Confirm the flashing "RackControl" display with the
right-hand selector button.
The "Cooking mode?" prompt appears in the display.
Cooking mode?
Home
RackControl
248 °F
More
functions
Home
01/
01
Press the cooking mode button (e.g. Rethermalization)
The button LED illuminates.
The preset temperature for the selected cooking mode
flashes in the display.
The pre-selected temperature can be changed with the
combidial.
RackControl
212 °F
More
functions
Home
01/
01
Accept the temperature by pressing the combidial and
switch to the time setting.
Enter the default cooking time for the batch by turning
the combidial to the right/left. Do not press
the
combidial after entering the time. Press the "start/stop"
button. The button LED flashes, and the cooking process
now runs in continuous operation
.
Place containers with food in the cooking chamber and
mark as R1, R2 etc. with heat-resistant tags.
Electric Space$aver™
47
Page 48
Space$aver™
More functions
RackControl
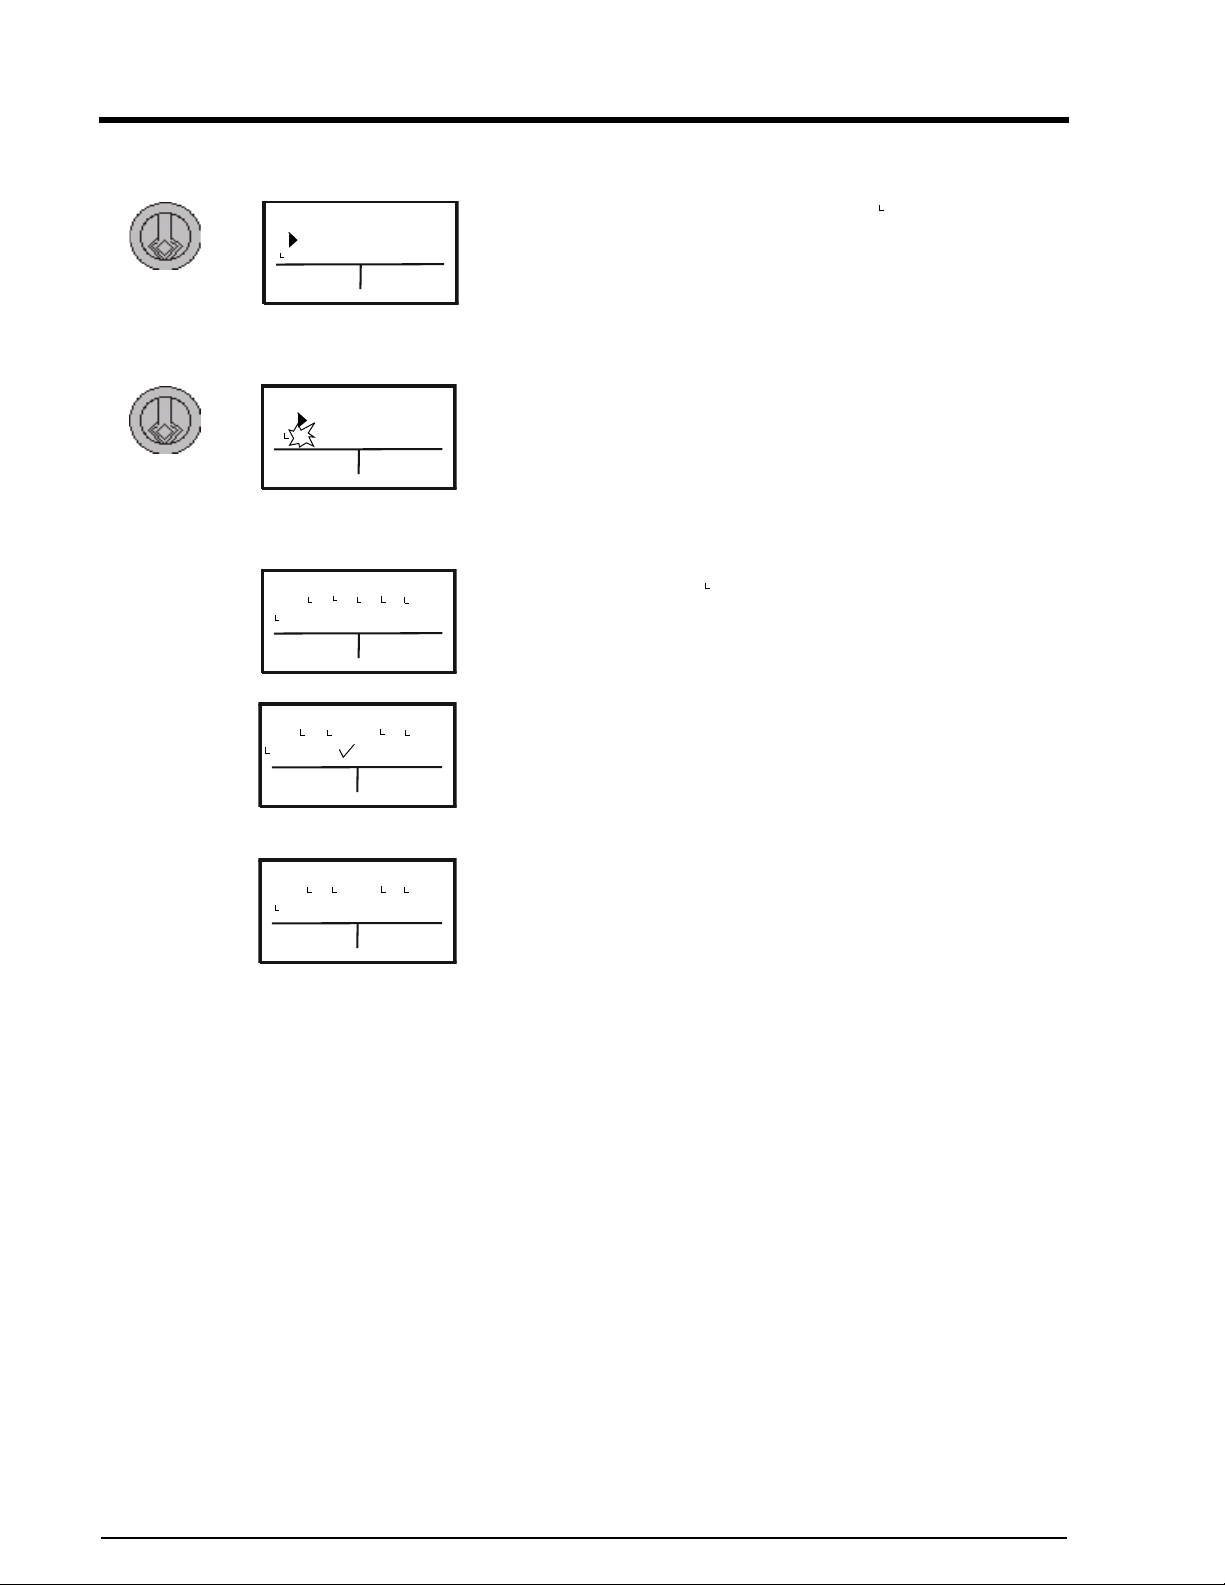
R: 1 2 3 4 5
O
: 0 0 0 0 0
RackControl
R: 1 2 3 4 5
: 7 0 0 0 0
O
RackControl
OOO
R: 1 2 3 4 5
: 6 5 7 3 2
O
RackControl
O
R: 1 2 3 4 5
: 2 4 5 8
O
O
O
O
O
O
212
°F
212
°F
212
°F
212
°F
The display shows the cooking time ( ) for all 5 areas
O
(R) of 0 min.
The arrow indicates the range selected for the time
specification.
The individual areas for time entry are selected by
turning the combidial left/right.
Press the CombiDial to enter the time:
The previously selected time of 7 min (example) appears
flashing in the display.
Change the time, if necessary, by turning the combidial
to the left/right and accept and start the changed time by
pressing it.
The clock symbol ( ) next to the rack number indicates
O
the start countdown, and the number below it indicates
the remaining time.
The signal sounds once the time has expired.
The clock symbol next to the area number disappears
from the display. The checkmark in the field below this
reminds you that the cooking time has expired, but the
food has not yet been removed.
RackControl
O
O
R: 1 2 3 4 5
: 3 6 0 2 4
O
212
O
O
°F
Termintating "RackControl"
"RackControl" is terminated when the "start/stop" button is pressed.
"0" is displayed instead of the checkmark when the food
container is removed.
New dishes (example) can be placed in the areas that
have become available. Start the cooking time for the
newly loaded area as described above.
Note:
"RackControl" programs can also be saved
48
Electric Space$aver™
Page 49
Space$aver™
End-of-step signal
Convection
356 °F 0:20
More
func-
Home
Additional functions
With multi-step cooking programs, the end-of-step signal can
be activated for each cooking step.
As a result, the end of the cooling step (time expired/probe
temperature reached) is signalled by a 10-second audible tone.
The next cooking step is started immediately, i.e. starting of
the next cooking step is not delayed by the signal.
An end-of-step signal does not need to be activated for the last
cooking step in a cooking program, as the completion of the
cooking program is indicated via a 20-second audible signal.
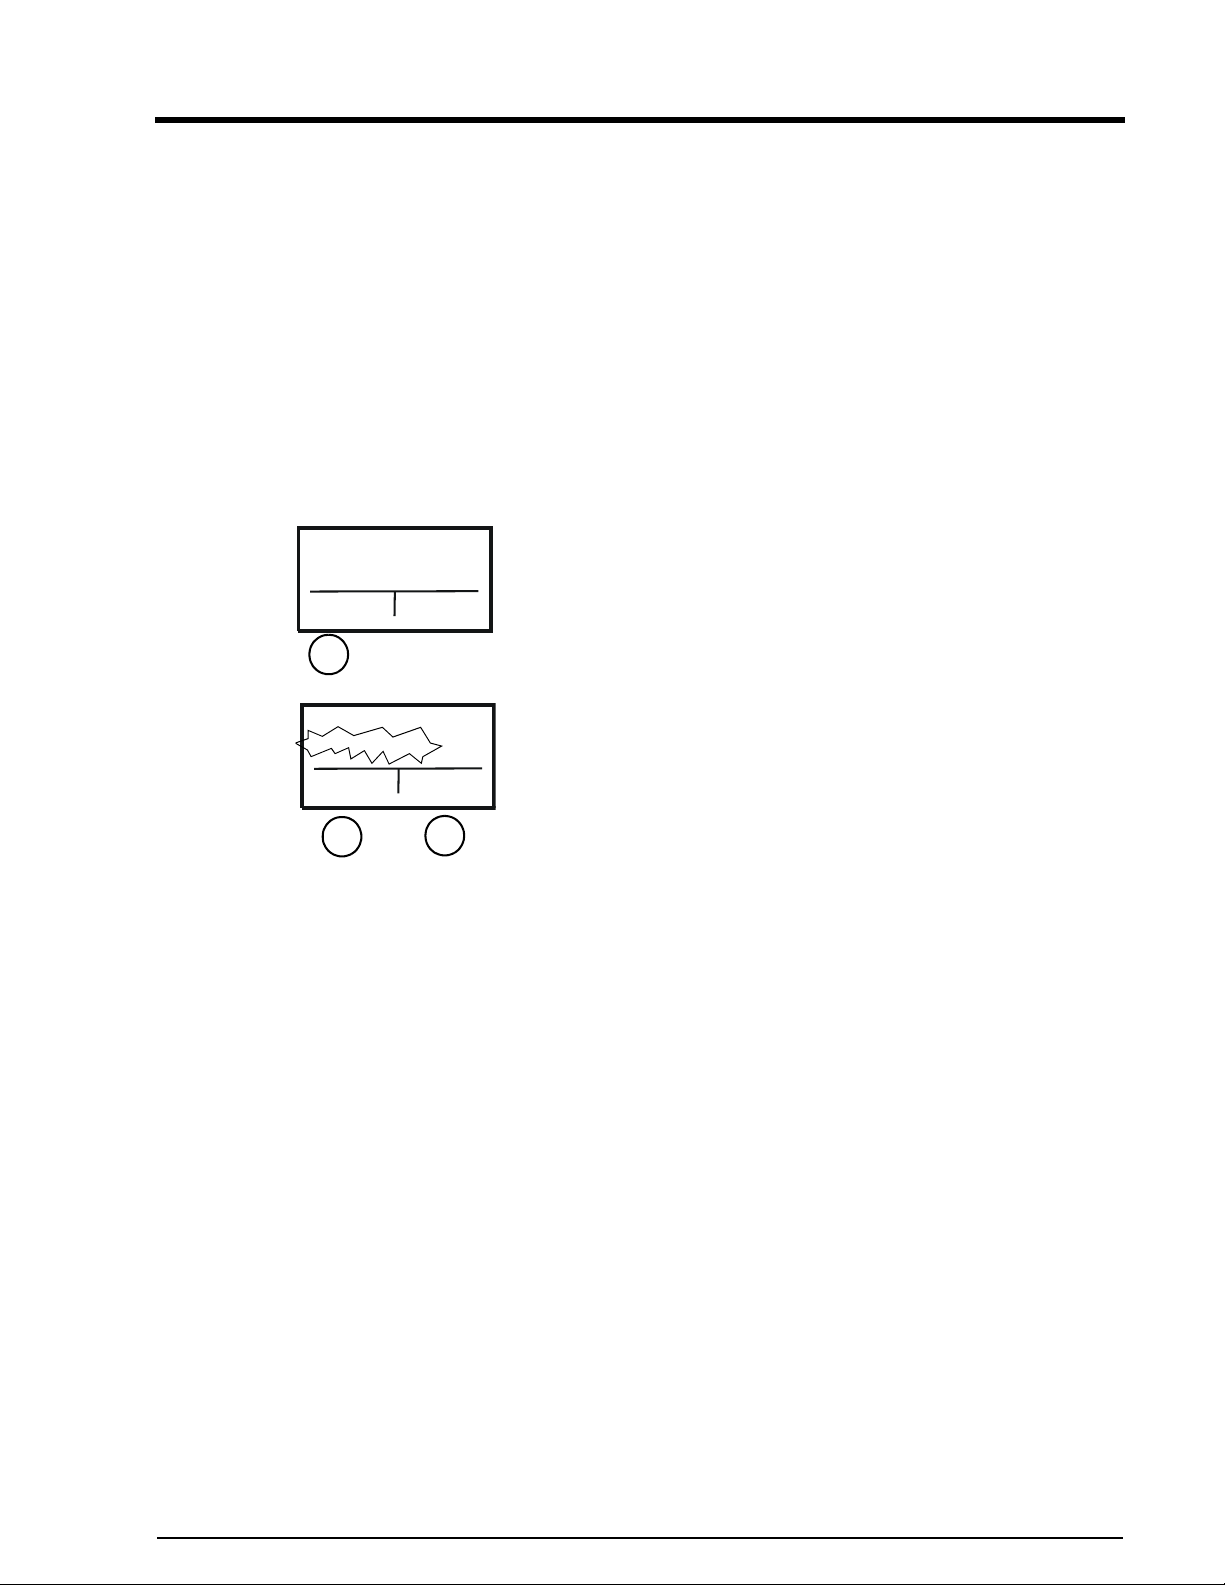
Call up the "More functions" menu with the left-hand selector
button after entering the temperature and time values.
01/
Select "End-of-step signal" with the combidial.
01
The selected menu item flashes.
Activate the end-of-step signal by pressing the combidial or
the right-hand selector button (Change).
More funcEnd-of-step signal
On
Back
Change
01/
01
Then return to the Setup menu by pressing the left-hand selector button (Back).
Electric Space$aver™
49
Page 50

Space$aver™
Additional functions
50
Electric Space$aver™
50
Page 51

Space$aver™
Additional functions
Electric Space$aver™
51
Page 52

Space$aver™
More functions
52
Electric Space$aver™
Page 53

Space$aver™
Practical tips
Cool down mode The steaming mode can be used for cooling down the oven
chamber. Press Moist Heat button. Set the required
temperature, enter the time and then press Start/Stop. The
steamer quickly cools down without filling the room with
noise and heat.
Moist heat The Moist Heat Mode is used for Steaming, Tender Steaming
and Forced Steaming, i.e. cooking, steaming, blanching,
poaching, simmering and preserving.
Advantages of moist heat • Meals have an appetizing color , crisp consistency and their
own strong flavors.
• Moist heat is particularly good for preserving vitamins and
minerals.
The following should be
taken into consideration:
• Even if you steam different foods together , such as fish and
vegetables, strong flavors are not transferred.
• You need less spice, fat and salt.
• You can work fast, as the steam is produced very quickly.
•
Perforated pan with a depth of 1-1/2 to 2-1/2” (40 - 65 mm
particularly suited to steaming. These allow short cooking
times and prevent food at the bottom of the pan from
overcooking.
• It is essential to break up lumps in frozen food to ensure
that everything cooks through evenly.
• If you are steaming different foods in a single load, you
will need to bear in mind the cooking times for the various
foods.
• When preserving, the cooking time depends on the product
type, package size and consistency. The Space$aver™ is
ideal for creating ½ to ¾ preserves. Please use the usual
method for preserving.
) are
Moist heat tips • Rinse, butter and season vegetables after steaming.
• To produce thickened vegetables, use stock. Steam the
vegetables in perforated containers and collect the stock in
non-perforated containers.
• Steam long grain rice in non-perforated containers. For
one part of rice, you need 1
stock for cooking.
Electric Space$aver™
½ parts of cold water or cold
53
Page 54

Space$aver™
Tender steaming
Practical tips
• Steam noodles in non-perforated containers. For one part
noodles, you need at least 5 parts water for cooking.
•To steam dumplings place dumplings on top of
a perforated container lined with greaseproof paper.
Uncover immediately after cooking. If they are to be
served over a longer time, keep warm in water thickened
with starch.
• Sprinkle table salt directly onto potatoes before steaming,
or soak in saltwater for 15 minutes.
Advantages of Tender
steaming
The following should be
taken into consideration:
• Foods cooked in a moisture laden environment which can
be temperature controlled from 86°F to 210°F (30°C to
99°C) .
• Your food retains more vitamins.
• You can reduce the weight loss in meat and sausages, and
achieve optimum flavor, aroma and color.
• You avoid burst skins when boiling or warming sausage
products.
• You achieve optimum food quality with sensitive foods
such as terrines, galantines, flans, stuffing, crème caramel
and diet foods.
• Well suited to the use of vacuum bags following the
vacuum-sealing process.
• Precise cooking sets egg whites optimally, i.e. they do not
leak from the food.
• Remember that the cooking time is longer in comparison to
steaming at 212°F (100°C).
54
Tender steaming tips •Allows small pastries and breads made from yeast
dough, bread dough or flaky pastry, to proof at a
temperature of 90°F (32°C).
• You can swell grains carefully for whole food dishes such
as muesli.
• Poached trout if you sprinkle the fish with vinegar or
wine.
• You can boil ham and sausage products.
•
•
•
•
Electric Space$aver™
Page 55

Practical tips
Forced steaming
Space$aver™
Advantages of Forced
steaming
The following should be
taken into consideration:
• Forced steaming is mainly suited to non-sensitive foods,
such as potatoes, beets, and carrots.
• Cooking times are shortened in comparison with steaming
at 212°F (100°C) by approximately 10%.
• For a small load, select a cooking temperature between
221°F and 230°F (105°C and 110°C), and for a full load
between 230°F and 266°F (110°C and 130°C).
Forced steaming tips • For gentle rethermalization with minimum cooking times
for preportioned foods, use covered pans.
Combination Mode (moist and dry heat)
Controlled cooking of large pieces of meat and baking
casseroles, etc., using a combination of moisture and heat.
Advantages of Combination
Mode
• Oven conditions are always optimum with moist & dry
heat.
• Food does not dry out, weight loss is reduced
• The flavour and aroma of the food is retained as much as
possible.
• Food cooks very quickly, with minimum weight loss.
• Flavors are not transferred when a number of different
foods are cooked together in one load. Mixed loads are
possible at any time.
• Bakery products, such as yeast dough, puff pastry and
bread dough rise perfectly.
• Large pieces of meat are sealed immediately by the steam,
so that the meat no longer needs searing.
Electric Space$aver™
55
Page 56

Space$aver™
Practical tips
The following should be
taken into consideration:
• Preheat the Space$aver™ for at least 10 - 15 minutes
before baking using the preheating function.
• The higher the oven temperature, the more the food will
brown; however, the higher the weight loss.
• Food begins to brown at a temperature of 248°F (120°C)
upwards.
• Reduces the overall cooking temperature by 20 - 30% as
compared to conventional cooking methods.
Combination mode tips • Place meat on a grid. This allows the meat's pores to be
sealed on all sides. The meat is cooked evenly without
having to turn it.
• T o make sauces, place a bowl under the grid containing the
roasts. Place bones, mirepoix (roasted vegetables), herbs
and spices in this bowl, and gradually add water or stock.
Dry Heat The Dry Heat Mode is suitable for all roasts and cakes and
pastries that do not require additional humidity.
Advantages of dry heat only • You have a higher capacity than standard oven
• You will achieve even cooking results thanks to the autoreverse fan.
• You can reduce the fat requirement by up to some 95%
compared with conventional cooking methods.
The following should be
taken into consideration:
• Preheat the Space$aver™ for at least 10 - 15 minutes
before cooking using the preheating function.
• The higher the oven temperature, the quicker the food
browns, but with greater weight loss.
Dry heat cooking tips: • Pre-made products suited to convection ovens should be
used for cooking food coated in breadcrumbs or use
browning oil to brown any breadcrumb-coated food.
56
Electric Space$aver™
Page 57

Practical tips
Slow Roast & Hold (SRH)
Advantages of SRH • Red meat is particularly suited to slow roasting.
Space$aver™
• As a result of gentle cooking, the uncooked weight of large
pieces of meat remains virtually intact, thus preventing
excessive shrinkage and toughening.
• A little steam is also required so that surface of the food
does not dry out and the fan will only run when it is cycled.
The following should be
taken into consideration:
SRH tips • You can keep prepared meals warm for up to two
• The oven chamber temperature should be just above the
required temperature of the food to be cooked (e.g. at least
7°F (5°C)).
• The higher the oven chamber's temperature, the higher is
the roasting shrinkage.
• This cooking method does not produce a crust.
hours at an oven temperature of 149°F (65°C), while the
fan cycles, without the surface drying out.
Electric Space$aver™
57
Page 58

Space$aver™
Rethermalization This program not only enables you to rethermalize food on
Practical tips
plates or trays within a short period, but also with full-size GN
pans.
Advantages of
Rethermalization
The following should be
taken into consideration:
• You always achieve the optimum oven chamber conditions
with rethermalization.
• You can produce food in advance during quiet periods and
arrange them on plates or trays.
• Individual portions ensures better food presentation
• There is no need to keep the food warm so there is no loss
of quality.
• The ready-to-serve meals do not dry out during
rethermalization.
• Neither condensation puddles nor dried edges form on the
plates.
• For banquets, you can rethermalize any number of dishes
as required.
• You can load the oven plate racks effortlessly from all
sides.
• Always preheat the Space$aver™ using the preheating
function.
• For regeneration times and temperatures, please refer to the
following table.
• After preheating, load the Space$aver™ with the prepared
plates or trays quickly. This procedure ensures that the
warm air remains in the Space$aver™.
• Large, bulky food components such as dumplings, stuffed
meats, and casseroles need longer for rethermalization
than, for example, cuts off a roast, portions of vegetables,
rice, quartered or chipped potatoes.
• Distribute the components of the meal evenly and in small
individual portions on the plate. Avoid large areas of
overlap and different heights of the components.
• After rethermalization, pour sauce on to the plate using a
sauce dispenser.
58
Electric Space$aver™
Page 59

Practical tips
Rethermalization tips •Place fish and meat on a bed of product, so that it
Space$aver™
rethermalizes evenly and does not stick to the plate.
• Cook meats to rare state, so that it will be cooked to
medium after rethermalization.
• Vegetables, rice and noodles should be buttered and
seasoned before rethermalization.
• Cut or break up dense lumps of product.
• If there is a long distance from the kitchen to the serving
area, use a heat retaining cover. Place the heat-retaining
cover over the product before using the Space$aver™ for
prewarming.
• At large banquets, operate with a number of oven plate
racks. Plates can be kept warm up to a maximum of 20
minutes using thermal covers; ideal is 15 minutes. You can
rethermalize further batches during this period. This allows
you to serve your guests with food all at the same time.
• Save your favorite rethermalization programs for standard
plates in the rethermalization recipe book. This guarantees
smooth running of banquets or your à la carte business.
Regeneration guidelines The regeneration time and temperature are dependent on the
number of dishes.
With GN grate
Model
Space$aver™ 6 248-266°F
Space$aver™
Plus
Dishes up to dia.
11 in (28cm)
12 248-266°F
Rethermalization
temperature
120–130°F
120–130°C
Rethermali-
zation time
4–8 min.
4–8 min.
Electric Space$aver™
59
Page 60

Space$aver™
Practical tips
60
Electric Space$aver™
Page 61
Cleaning
Safety notes To prevent damage to the appliance:
Space$aver™
• Always turn appliance off before cleaning.
• Clean appliance after every use.
• Do not use a high-pressure water or steam cleaner to clean
the appliance
Cleaning the outside of the
unit
• Do not use
containing chlorine, bromine, iodine, or ammonia
chemicals. These abrasives and chemicals deteriorate the
stainless steel and shorten the life of the cabinet.
• Do not allow cleaning agent to remain inside the appliance
longer than specified.
To reduce the risk of fire, the appliance should be kept
clean (if necessary after each cooking process) and free of
grease. During some cooking processes, e.g. grilling
chicken, a thick film of grease will form in the oven
chamber and outside of the unit. This grease film increases
the risk of fire.
Wipe the outside of the unit with lukewarm water, a domestic
washing up liquid detrgent and a soft cloth. Do not use
abrasives or a scouring sponge.
abrasive cleaners, or cleansers/sanitizers
Cleaning the inside of the
unit
Cleaning the door gasket
The Manual Cleaning Program in the Space$aver™ helps the
operator in cleaning the unit.
The “WaveClean” cleaning system automatically cleans the
unit without any supervision.
To prolong the life of the door gasket, keep the gasket clean
and dry. Grease can deteriorate the gasket. Clean the door
gasket during the cleaning process (WaveClean or manual
cleaning) using lukewarm water and a standard detergent
liquid before drying thoroughly.
Electric Space$aver™
61
Page 62
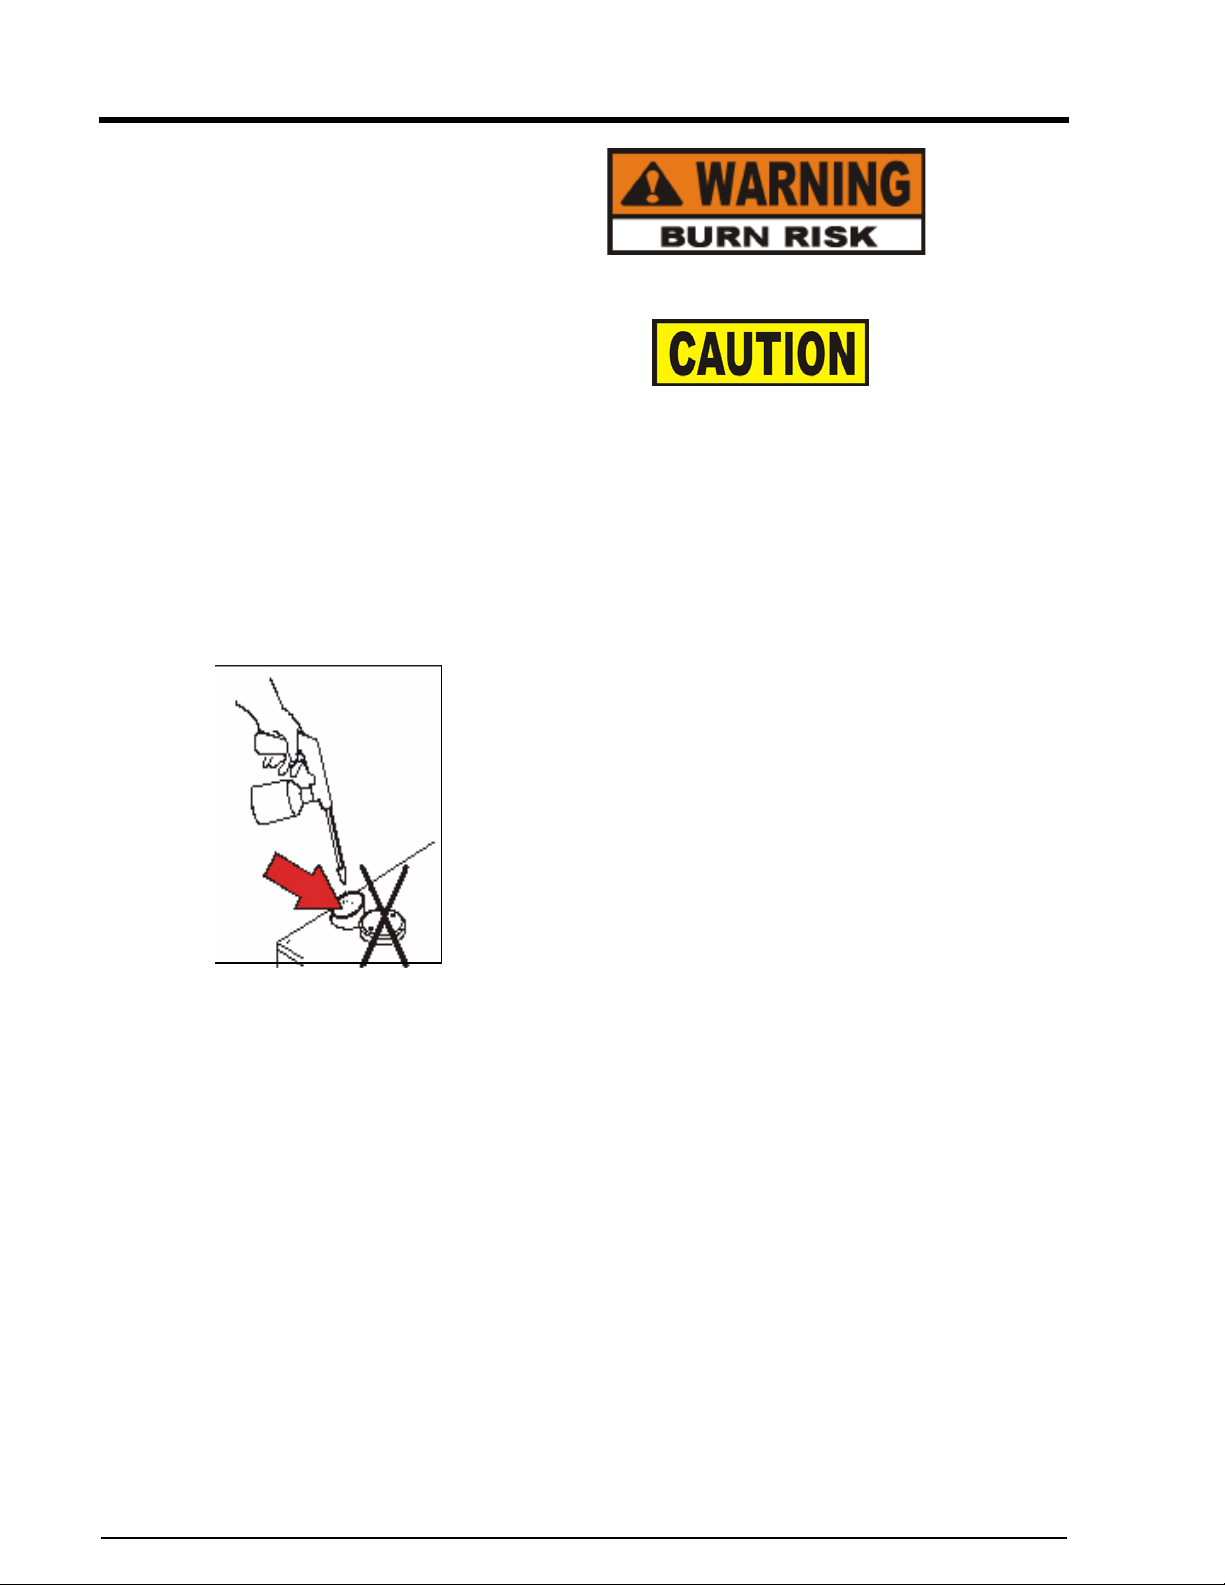
Space$aver™
Cleaning the door
Cleaning
To avoid burns, allow the unit to cool before cleaning.
The glass panes are provided with a special infrared-reflective
coating.
Do not use abrasives or cloth for cleaning.
Do not use grill cleaner, as it can cloud the surface of the
glass.
Lime residue on the glass pane can be removed with vinegar or
citric acid.
Cleaning the steam exhaust
pipe
If the unit is not cleaned regulary with WaveClean and it is
mostly used in convection mode for grilling, the exhaust pipe
has to be cleaned to prevent clogging. Every time the machine
is beeing cleaned manually, liquid detergent has to be sprayed
into the exhaust pipe (see picture). No flushing with water is
necessary. External pipes wich are connected to the exhaust
pipe have to be inspected regulary for clogging.If the
combisteamer is equiped with a hood, twice a year the
connection pipe between the combisteamer and the hood has to
be removed and liquid detergent has to be sprayed into the
exhaust pipe and into the hood opening. Use a liquid detergent
with maximum 10% sodium or pottasium hydroxide.
62
Electric Space$aver™
Page 63
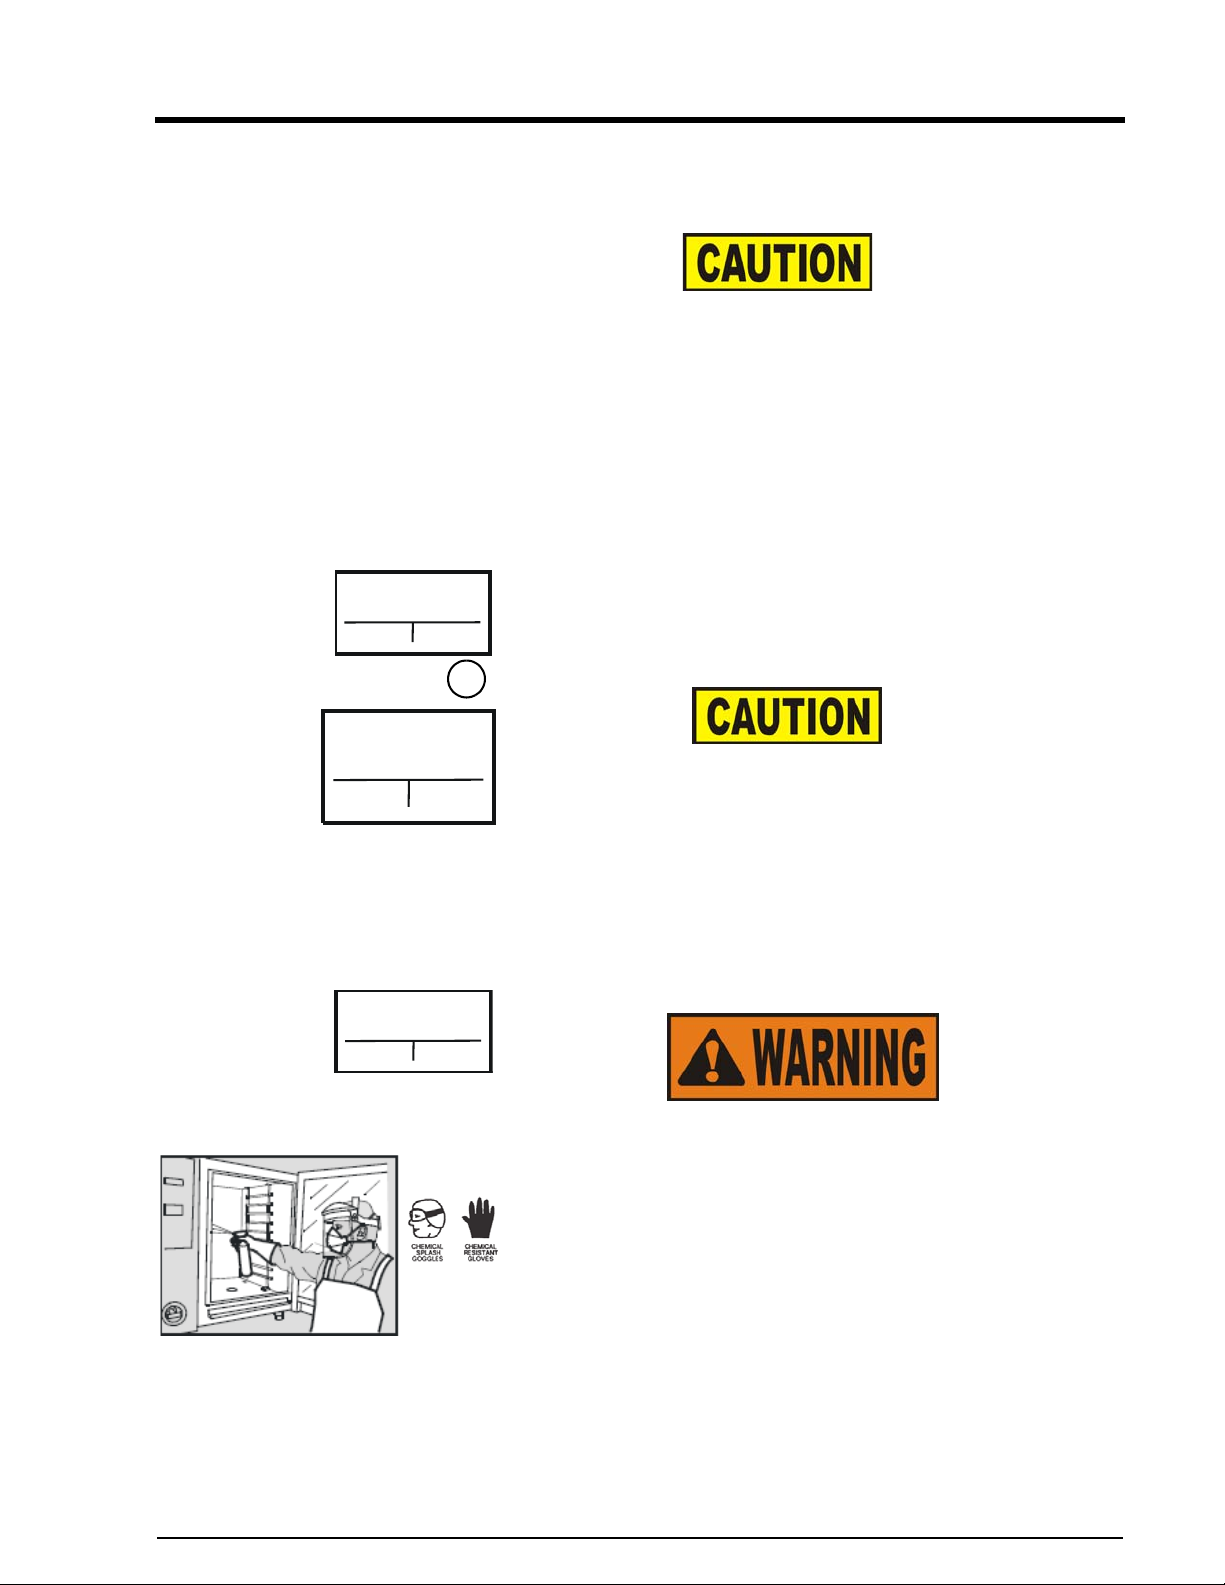
Cleaning
Manual cleaning
Preparation
of the oven chamber
Space$aver™
Remove baking trays, grids and containers from the unit
before starting manual cleaning. These extra pieces will
deflect the water and the cleaning process will be disrupted.
Clean the trays, grids and pans separately, e.g. in a
dishwasher.
Selecting manual cleaning
Menu
1 Manual cleaning
2
WaveClean
Back Confirm
Man. Cleaning
Soaking
Temperature
Time
109°F
--:--
Cancel
01/
06
Soaking
Man. Cleaning
Soaking
Temperature
Time
122°F
00:10
Cancel
01/
06
Turn unit on with the On/Off button and today’s date shows in the
display. Press the Left-Select button and display shows “Menu”.
Press the CombiDial to confirm Manual Cleaning and then start by
pressing the Right-Select button
twice.
If the unit is too hot, the machine is cooled automatically. Until the
soaking temperature is reached, the displayshows “--:--”.
Until the soaking temperature is reached, the display shows the
time as"--:--”.
Do not spray cold water into the hot cooking space using a hand
sprayer or onto the appliance door for cooling purposes. Sudden
cooling can distort the interior of the unit and could cause the glass
panel in the door to shatter.
See the Cool Down Mode in the Practical tips Section to cool the
unit down quickly.
Once the unit temperature reaches 122°F (50°C), the display shows
“Soaking” and the remaining time.
Spraying cleaner
Always wear chemical splash goggles or face shield and
protective rubber gloves when cleaning the unit. The cleaning
solution is highly alkaline. Avoid splashing orother contact of
the solution with your eyes or skin. Severe burns and possible
blindness can result. Carefully read the instructions on the
cleaner. If solution comes in contact with your eyes, rinse
thoroughly with cool water and see a physician immediately.
Additional breathing protection may be needed becauseof the
fumes
Electric Space$aver™
63
Page 64
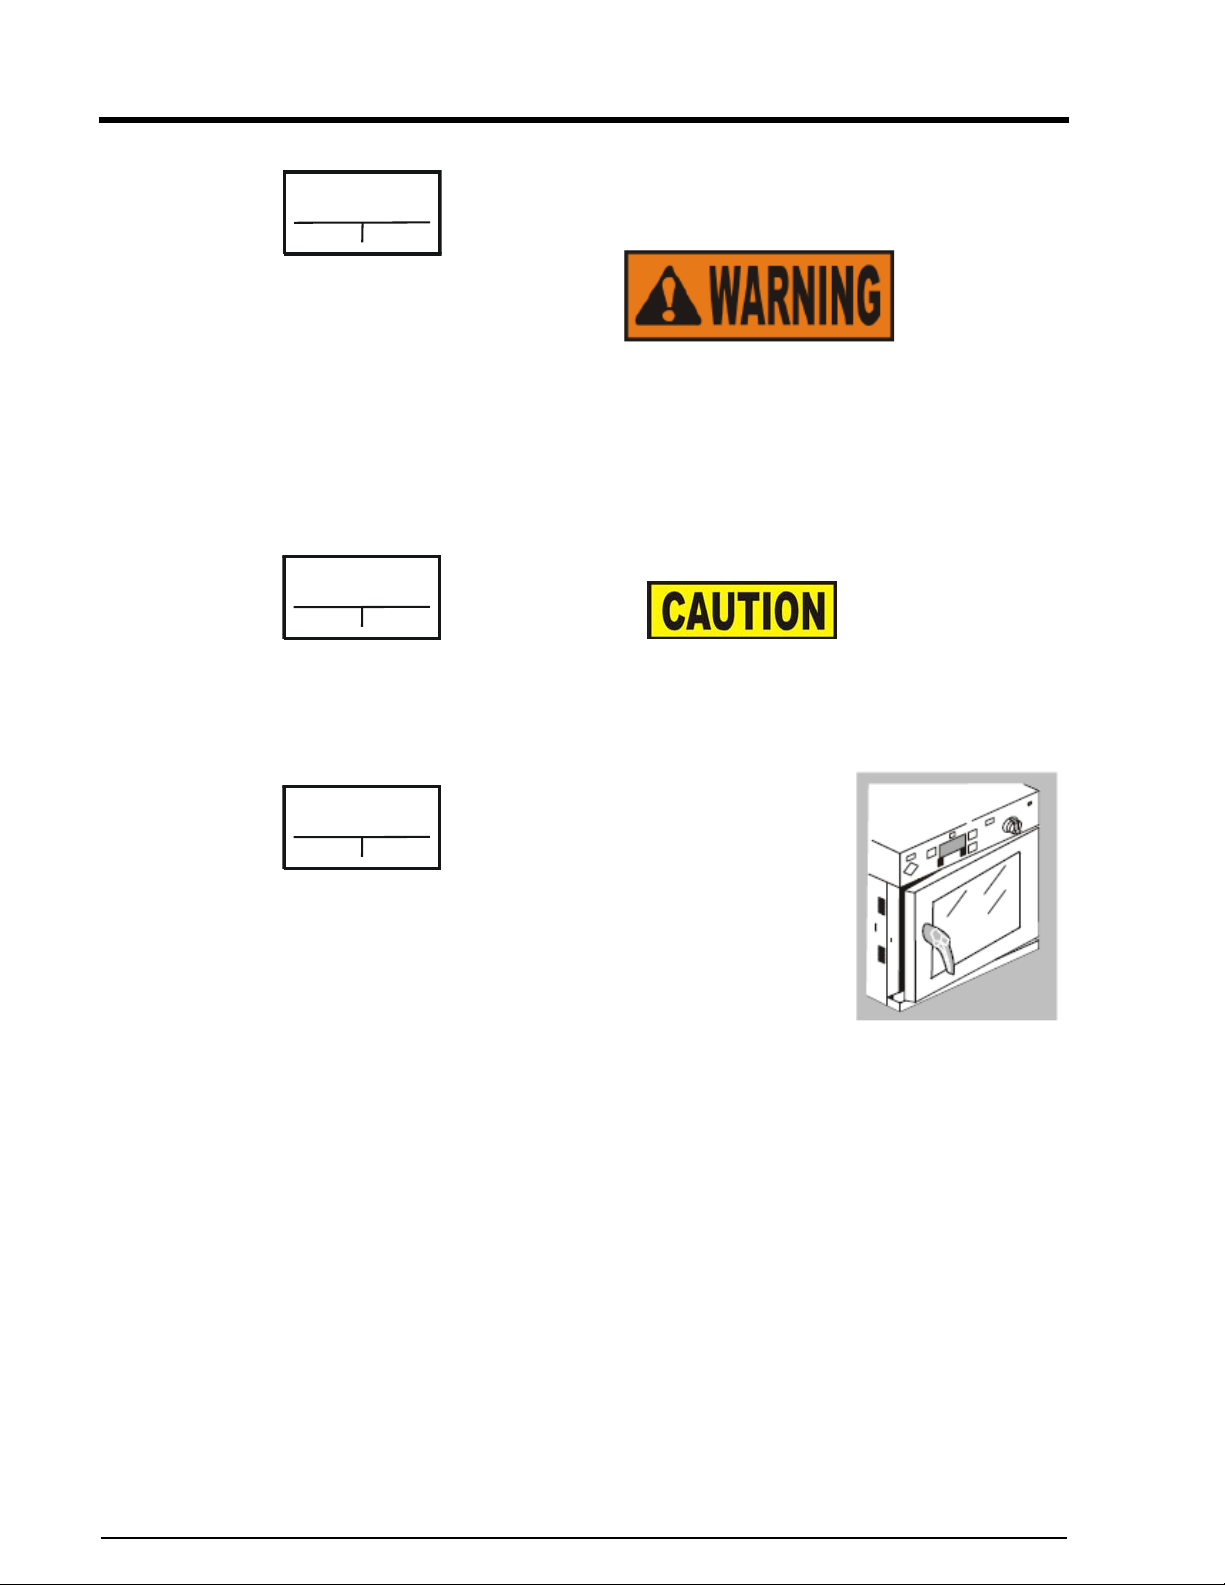
Space$aver™
Man. Cleaning
Spray cleaner
Temperature
Time
122°F
--:--
Cancel
Cleaning
When soaking time is over “Spray cleaner” appears in the
02/
display.Open the door and spray the interior, the heat source and the
06
fan wheel (via the openings in the ventilation guide plate) with
cleaner
Do not operate the appliance without the fan cover in place,
or personal injury could result. Disconnect the power to
the unit when opening the fan cover, and after closing, lock
the cover in place.
Cleaning
Man. Cleaning
Cleaning
Temperature
Time
00:30
Cancel
Timer starts after door is closed.
03/
06
Do not leave the cleaner on any longer than stipulated in the
program, or corrosion to the stainless steel could result
The actual cleaning process begins after 15 minutes of
working-in time (Moist Heat Mode).
Man. Cleaning
Cleaning
Temperature
Time
145°F
00:13
Cancel
The cooking chamber is heated to
03/
06
176°F (80°C) here. The display shows
the current temperature and the
remaining time..
Rinsing
When timer counts down to“0:00”,
"Rinse chamber” shows in the display.
Open the door and use the Manual Rinse
(left Select Button) to thoroughly rinse
the interior of the unit. Make sure to
clean behind the air baffle. Then shut the door again.
Cleaning door seal Clean the door seal as described in the section "Cleaning door
seal". Then close the door again:
64
Drying
Deliming
Drying is started automatically once the door has been closed (Dry
Heat at 266
heated to 266
°F
or 130
°C, 5 minutes)
. The cooking chamber is
°F here. The display shows the current
temperature and the remaining time.
When the timer counts down to “0:00”, the buzzer sounds. Open
the door and leave it open slightly until the next time it is used. This
extends the life of the door gasket and prevents dampness buildingup in the unit.
See Deliming Section of the Service Manual.
Electric Space$aver™
Page 65
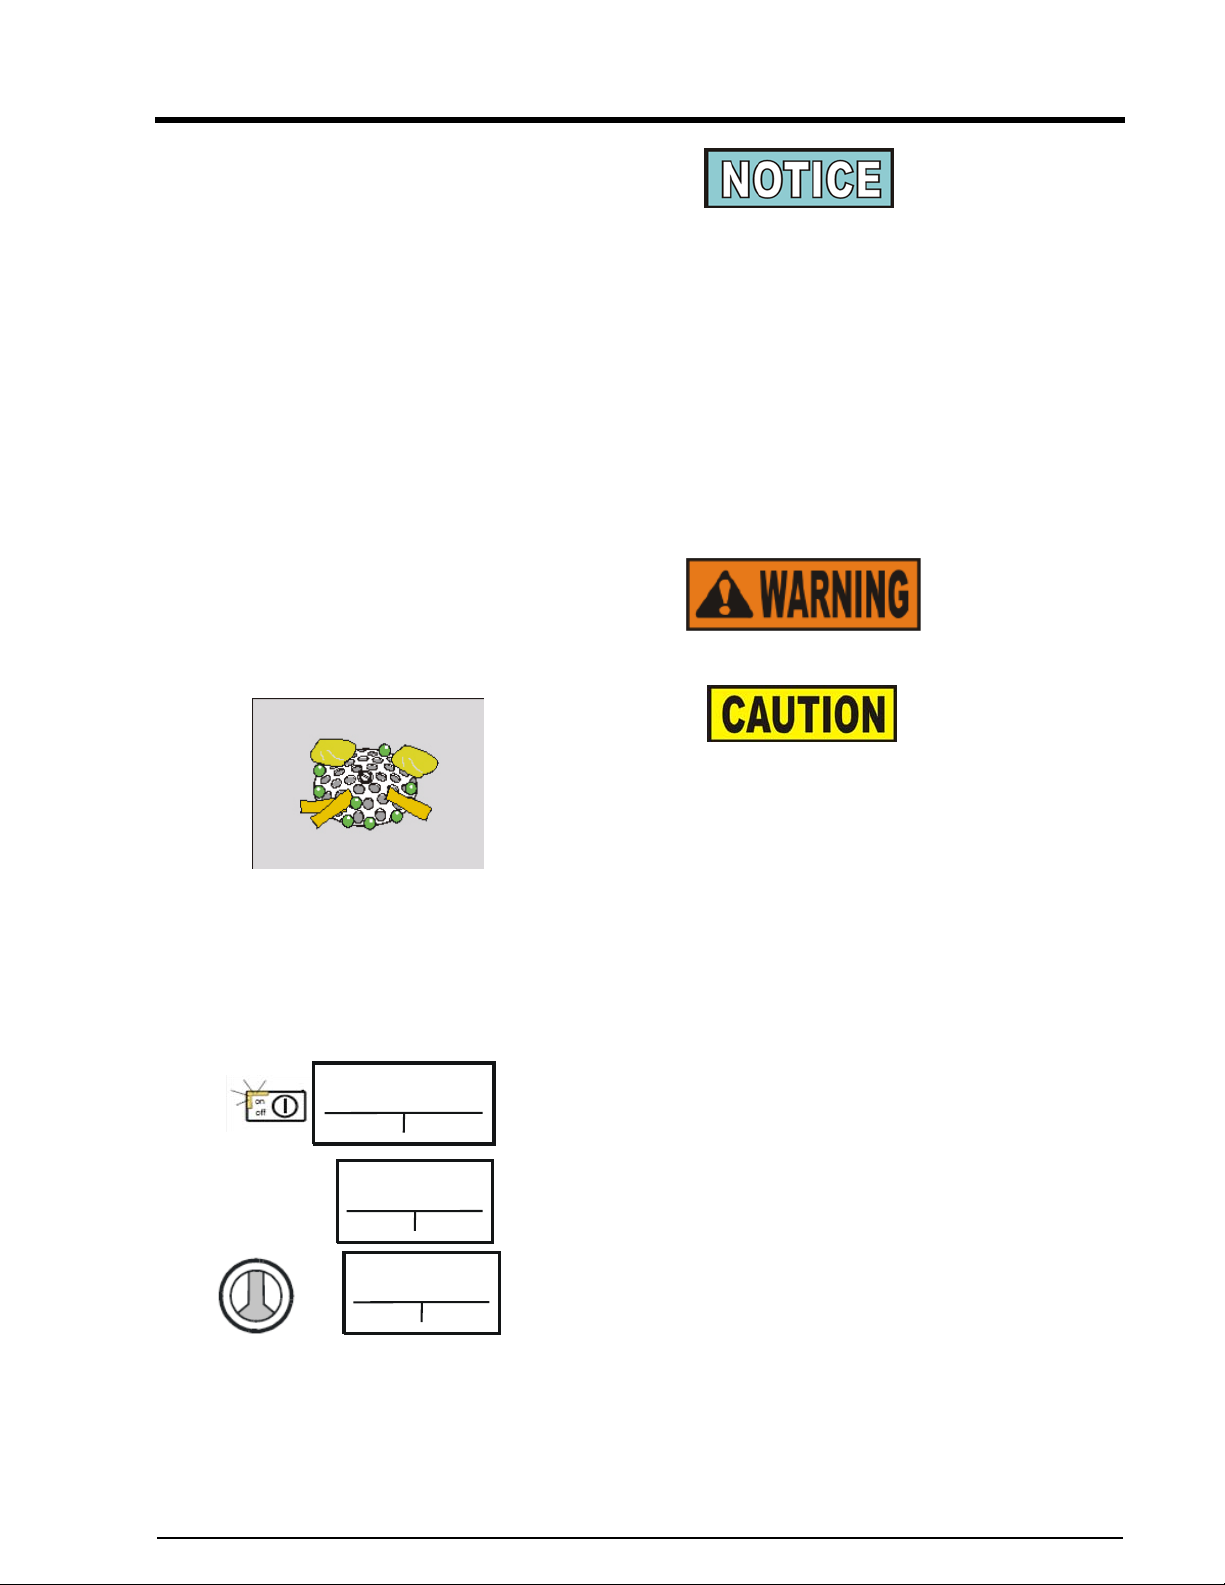
Cleaning
“WaveClean“ cleaning
Space$aver™
WaveClean does not clean the door gasket. It must be cleaned
separately. See Cleaning door gasket section.
"2-in-1" combination
cartridge
"WaveClean" is an automatic cleaning system that cleans and rinses
the cooking chamber with a
combination cartridge ("2-in-1").
Only this original cartridge may be used for this purpose. We are not
liable for damage caused by the use of other products.
Storage of cartridges Store the cartridges in a locked place in accordance with the
hazardous materials regulations. Store under 95°F (35°C), or room
temperature, with lids down, and protected from dampness and direct
sunlight.
Keep cartridges out of the reach of children.
Preparing the unit •
•
• Before cleaning, check the floor drain for blockage, or water
could overflow onto the kitchen floor.
• Remove all pans and grids from the unit before starting the
“WaveClean” process, or damage to the pump could result.
Leave only the pan racks in the unit and close the door. Do not leave
baking trays, grids or containers, but clean these separately, e.g. in
the dishwasher. Containers collect the cleansing water and thus
interrupt the cleaning cycle. This may cause the pump to run dry and
might also damage it!
Select the cleaning level Turn unit on by pressing the “On/Off” button. The button lights up
22.01.03 08:07
Menu DT/NT
Menu
1 Manual cleaning
2
WaveClean
Back Activate
WaveClean
WaveClean, short
WaveClean, normal
Back
122°F rinsing
and the display shows the start-up program.
Press the Left-Select button and “Cleaning Menu” shows in the
display.
Turn the CombiDial to select “WaveClean” and and press to confirm
the cleaning level:
WaveClean, short: approx. 1.0 hour .
WaveClean, normal: approx. 2.0 hours
WaveClean, extra: approx. 3.0 hours
All programs require the same amount of water, despite the different
cleaning times.
Electric Space$aver™
65
Page 66
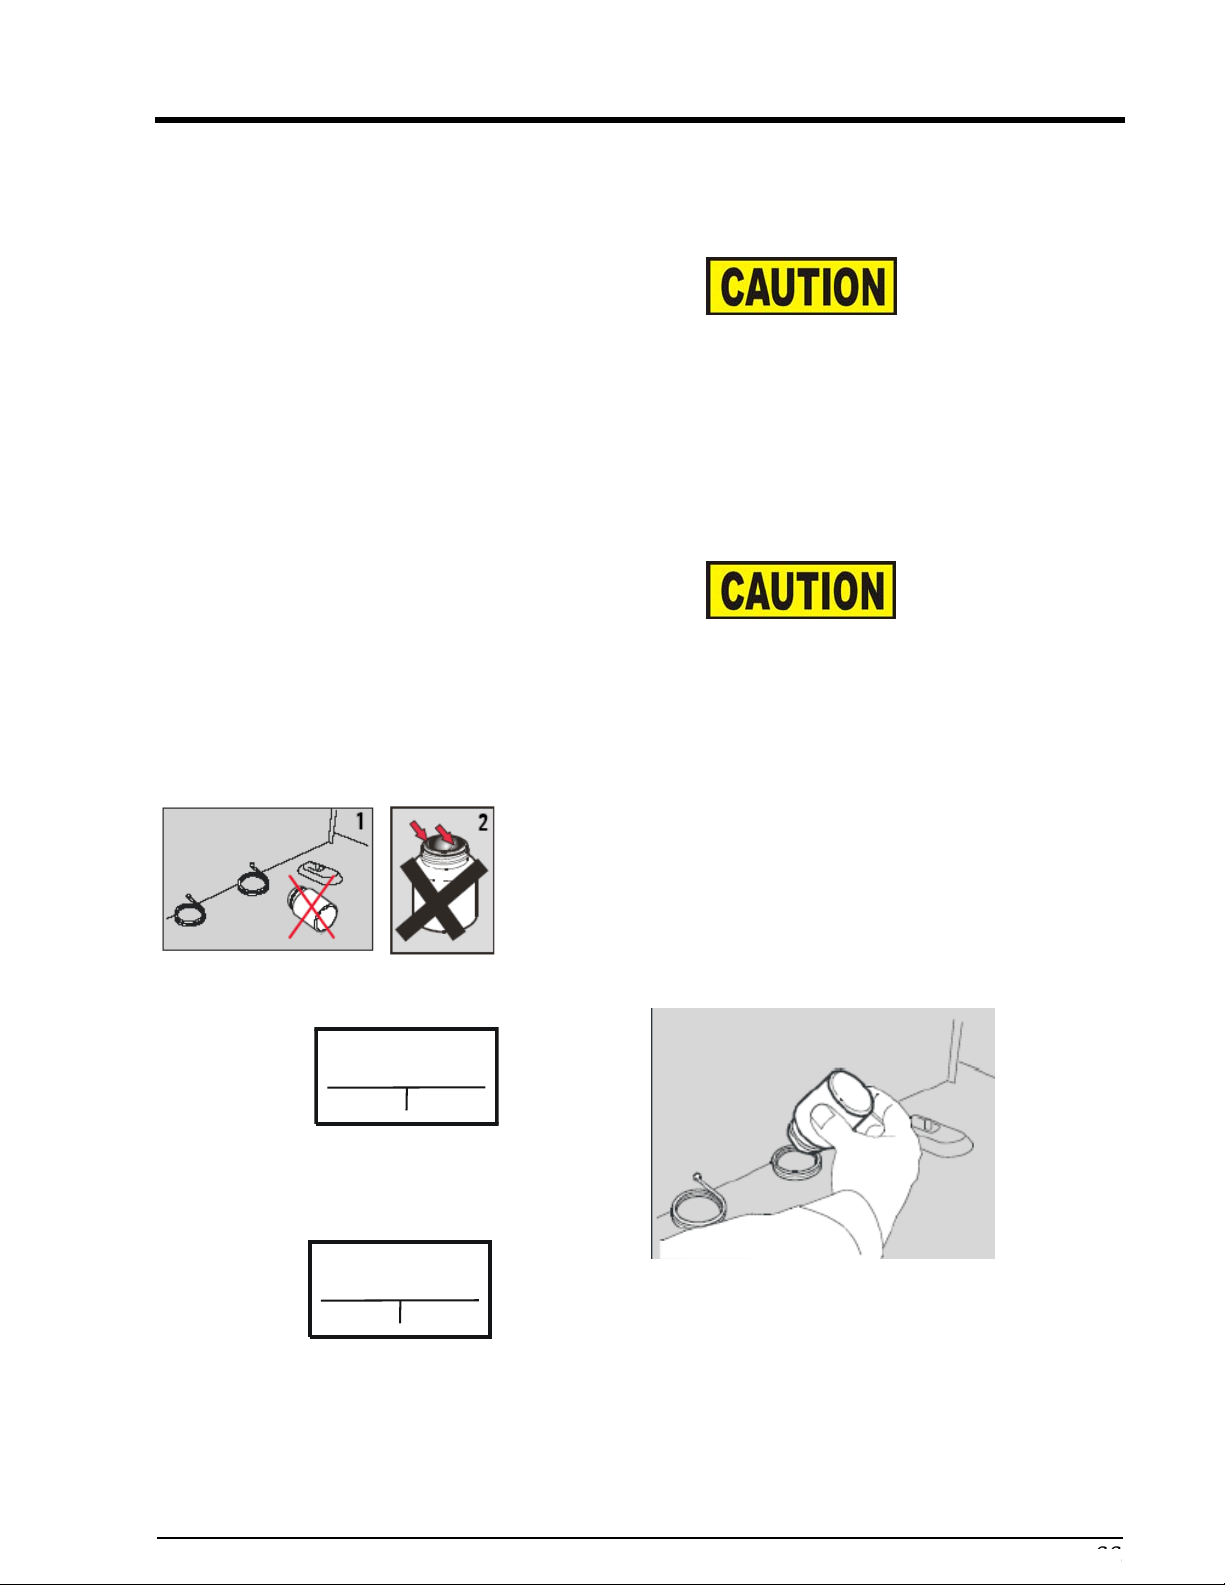
Space$aver™
Cooking chamber too hot "WaveClean" does not start until the cooking chamber has
reached a temperature of 122°F (50°C). If the temperature is
too high, the cooking chamber is automatically cooled.
"Temperature too high" appears in the display
Do not cool the hot interior of the unit by spraying it with cold
water or filling it with ice.
of the unit and could cause the glass panel in the door to shatter.
See the Cool Down Mode in the Practical Tips Section.
Insert cartridge
To prevent damage to the cartridge’s wax seal:
Sudden cooling can distort the interior
Insert cartridge
• Put a cartridge in place only when a prompt appears in the
display.
• Place a cartridge in the holder, do not put on the oven base
[1].
• Only use cartridges with undamaged wax seals. If the wax
seal is damaged, the cleaner or rinsing agent can enter the
cleaning cycle prematurely or might not dissolve. A
complete cleaning process may not take place.
After selecting a cycle, the display shows “Insert cartridge”
after the oven chamber has reached the cleaning temperature.
Unscrew the top of the cartridge and place the cartridge.
3
66
WaveClean extra 2:15
Cancel Confirm
[3] in the Foldaway Cartridge Assembly..
Use only Henny Penny 2-in-1 cartridges.
Two cartridges can be used if unit needs more cleaning and
“WaveClean extra” should be selected.
Electric Space$aver™
66
Page 67
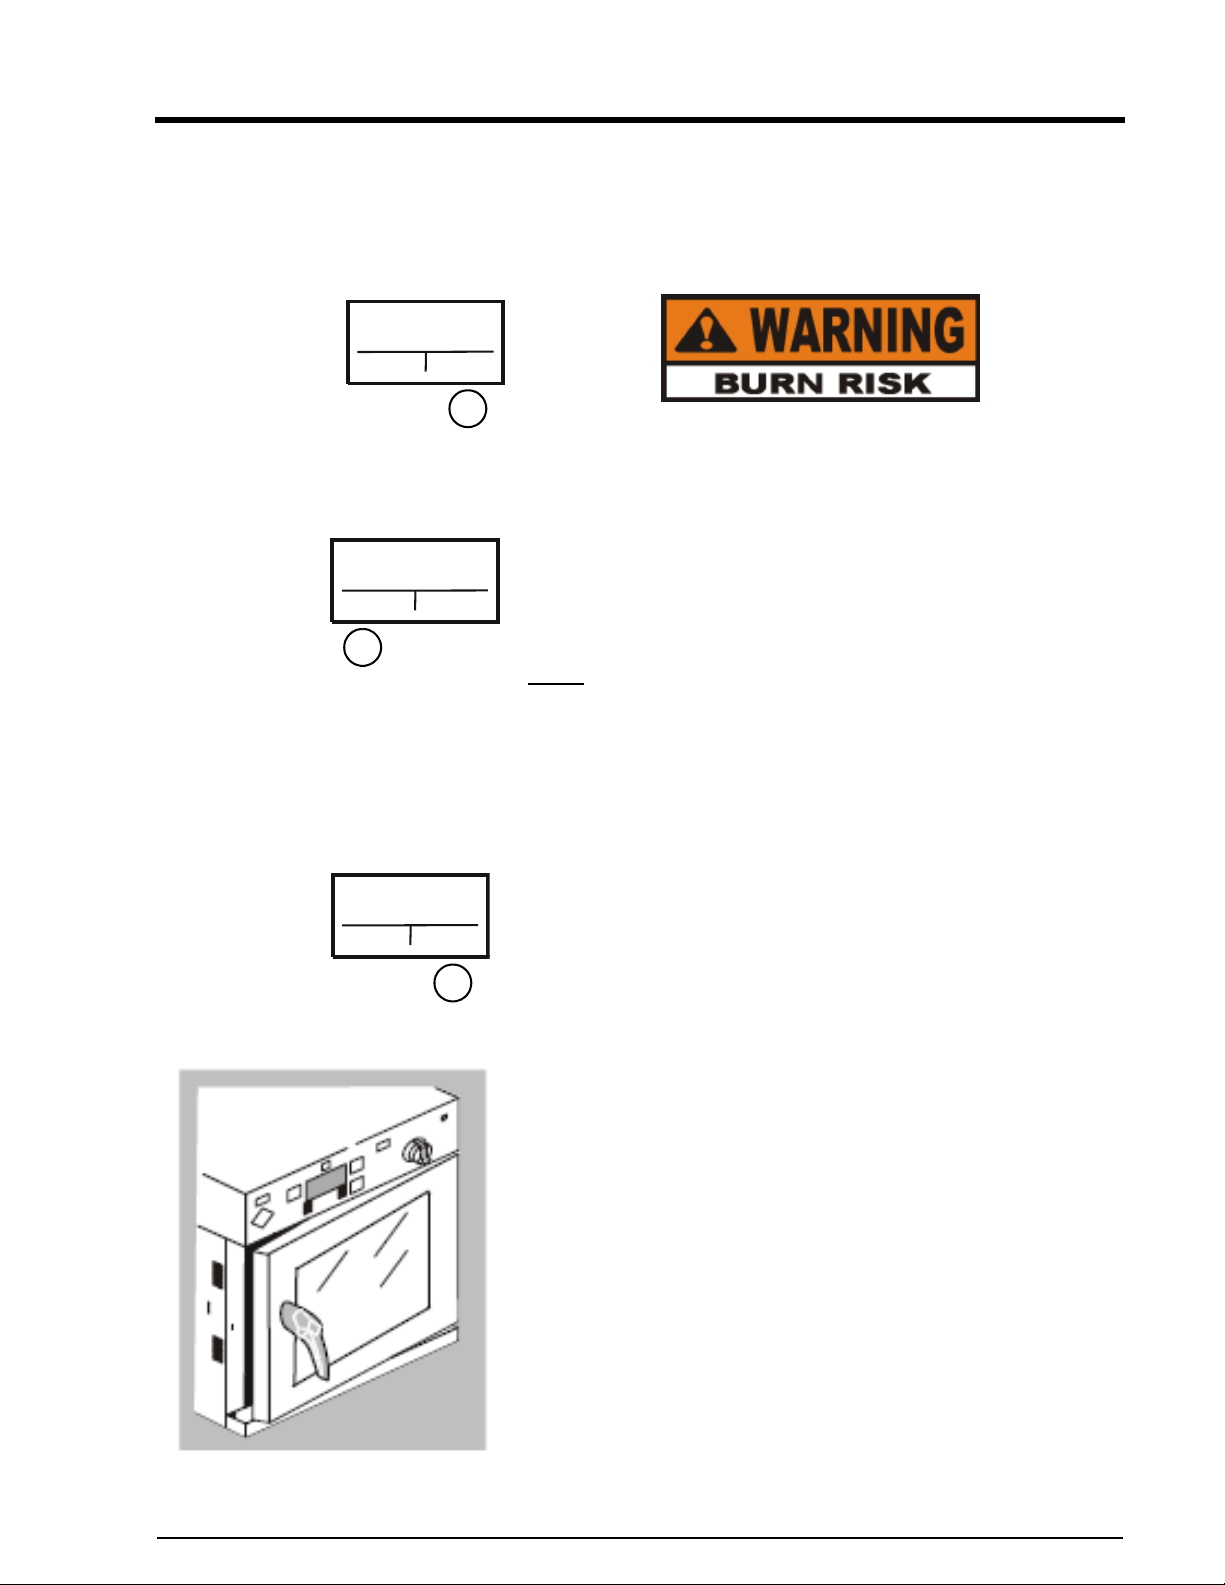
Cleaning
Cancel WaveClean "This command automatically starts a Rinsing Cycle
Space$aver™
Start WaveClean Close the door and then press the Right-Hand Select button.
The display shows “WaveClean” and the time remaining as the
timer counts down.
WaveClean extra 2:15
Cancel
WaveClean extra 2:15
Cancel
Confirm
Confirm
DO NOT open door during WaveClean operation, or
burns or personal injury could result.
(duration: approximately 10 minutes). Loss of power also
starts this cycle.
For safety reasons, the “WaveClean” program can only be
ended with a Forced Rinse Cycle.
Note:
There is a short time when the process cannot be
interrupted (while the cartridge is being emptied)End
“WaveClean“
Completion of
“WaveClean”
Remove cartridge
Confirm
When cleaning is complete, the appliance switches off
automatically. When restarted, the "Remove cartridge" request
appears in the display. Open the door and remove the empty
cartridge. Thoroughly rinse out any residual cleaner or rinser
with the hand shower. Close the door again and confirm the
removal of the cartridge with the Right-Side Select button.
If unit needs more rinsing, use the
Button)
and turn the power off.
.
. Leave door open to allow interior to dry completely
Manual Rinse (left Select
Electric Space$aver™
67
Page 68
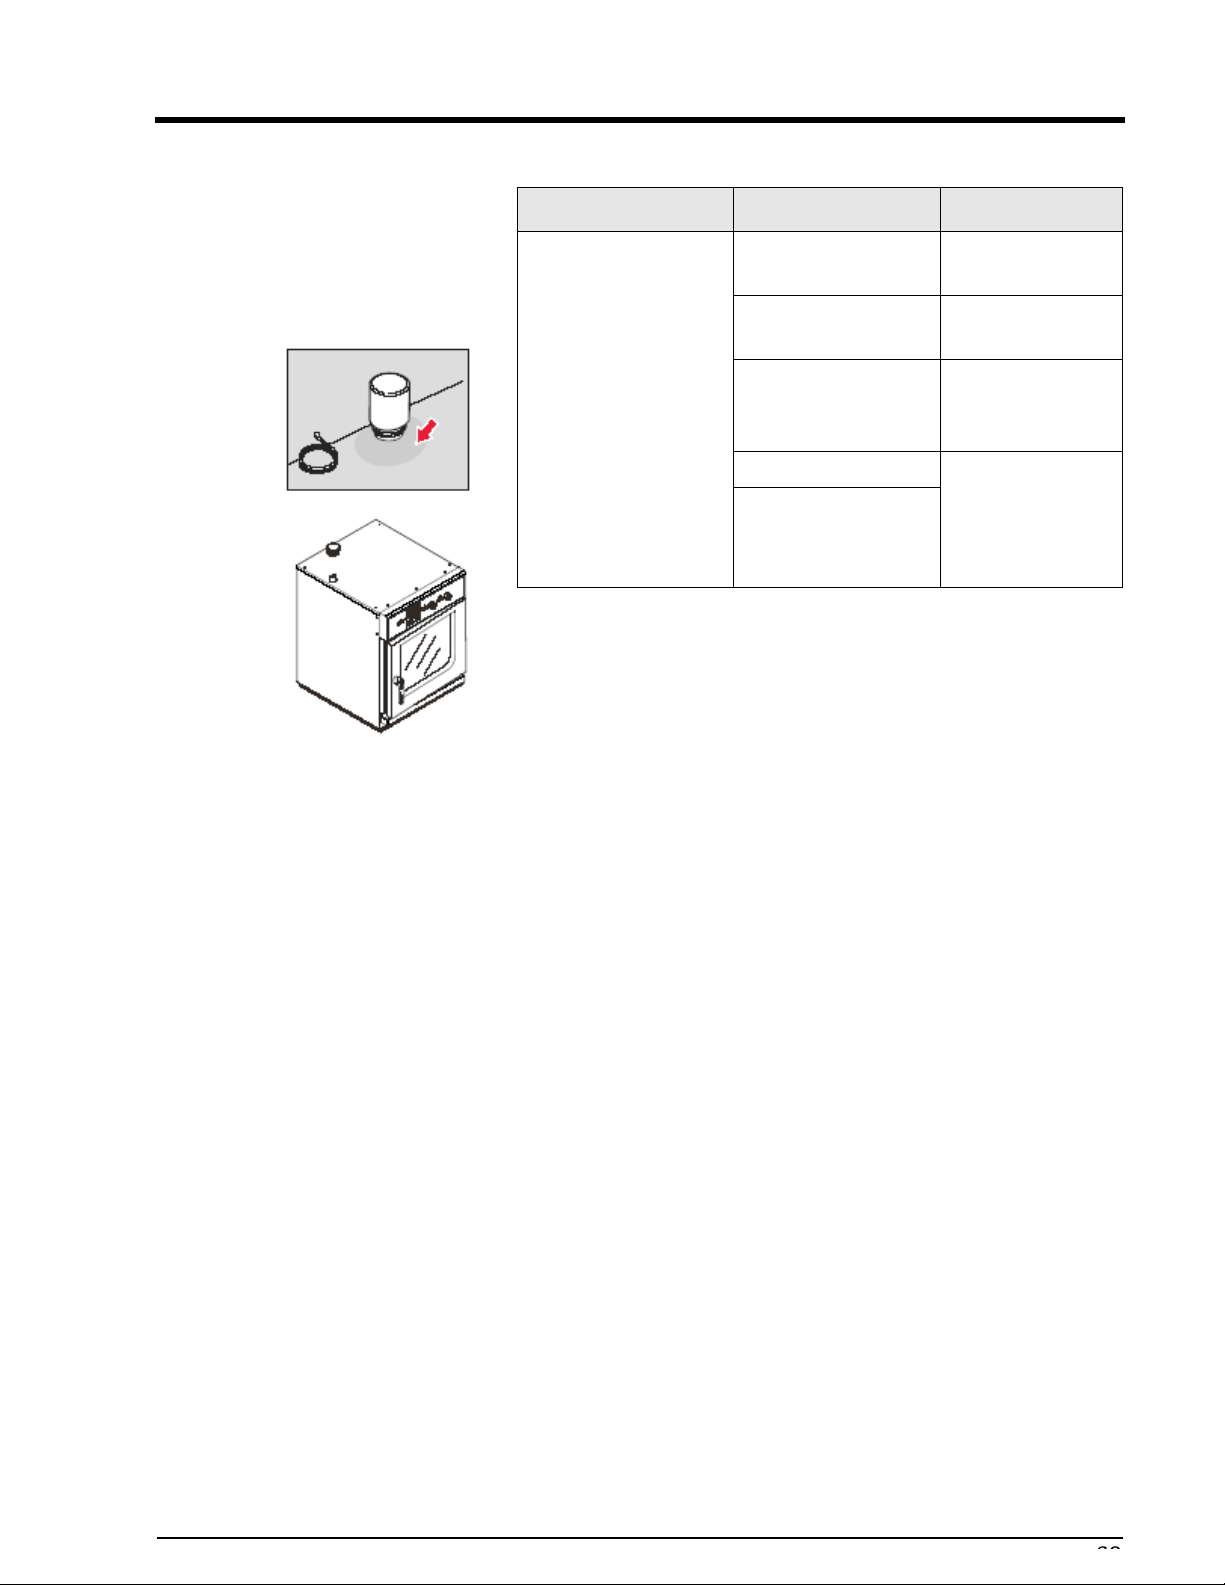
"WaveClean" Problems
Space$aver™
Problem Possible cause Remedy
Information on
"WaveClean®"
• Cartridges do
not activate
properly
• Residual cleaner
and
rinse water
remain in the
cartridge
• Rinse water acti-
vates with the
cleaner
Brown/black discolouration of the cooking chamber floor may
occur below the cartridge. This discolouration is harmless and
has no negative effects. Leave door open slightly until the next
use. This extends the service life of the door seal and prevents
stale moisture accumulating in the cooking chamber.
The Combisteamer can be operated up to 90 PPM (5 DH)
without additional water treatment measures. Water with a
total hardness greater than 0 PPM (0 DH), however, contains
lime, which can build up in the cooking chamber over time.
Appliance is tilted
Power failure
Appli. malfunction
Cartridge too close
to floor due to bent
holder
Heater defective
Circulation pump
defective
Align appliance
horizontally
Service
Bend cartridge
holder back into
place
Service
Even if "WaveClean" cleaning or manual
cleaning occurs comparatively infrequently, the quantity of
lime deposited is so small that, from a technical standpoint, the
appliance generally experiences no negative effects. White
deposits (lime) can appear in the cooking chamber, however.
"WaveClean extra" The "2-in-1" cleaning cartridge has been optimised for the
removal of especially strong grease soiling and burnt-in
soiling. It can only dissolve a certain amount of the lime
residue. The cooking chamber can remain white with
excessive quantities of lime.
In this case, regular cleaning with "WaveClean extra" (e.g.
daily) should be carried out, even if the degree of soiling is
low.
Water softening An additional measure for the prevention of lime deposits is
the softening of the soft water to 0 PPM (0 DH).
68
Electric Space$aver™
68
Page 69
Errors
Error message Cause Correction
Space$aver™
No water
Unit overheated Appliance defect
High limit Appliance defect Call Certified Sevice Agent
Fan high limit
Electronics too warm
Electronics too hot See above
Food probe defective Probe defective
Chamber temperature
probe defective
Water valve closed,
appliance defective
Fan overheating.
Defective cooling
Defective cooling, ambient
temperature too high
Probe defective
Water valve open
Contact customer service
Stop using appliance; Call Certified Sevic e
Agent
Allow to cool down. Appliance can be used.
Call Certified Sevice Agent
Appliance can be used, set a lower temperature.
Call Certified Sevice Agent
Appliance cannot be used any more
Call Certified Sevice Agent
Cooking programs without core tempe rature can
still be used. Call Certified Sevice Agent
Cooking programs without core tempe rature can
still be used. Core temperature probe is used as a
replacement sensor. Do not introduce core
temperature sensors into the products. The core
temperature probe must remain inside the oven
chamber. Call Certified Sevice Agent
Risk of freeze damage Temperature <32°F (0°C )
Battery empty
Carry out the
configuration program.
Drain probe defective
HW-Fail
Tem p UREF0 too hi gh
Backup battery empty
Normal operating life 8 years
The electronics were replaced
without essential configuration
being carried out.
Temperature measurement for
drain water defect.
Cooling water is switched on
intermittantly. Otherwise,
normal operation possible
Core-temperature probe or
keypad defective
CD = Customer service department
Only operate the appliance at temperatures of
<32°F (0°C ) and above. Freezing may lead to
cracks in pipes and components.
Settings are lost if the power fails. Otherwise,
normal operation possible. Call Certified Sevice
Agent
Call Certified Sevice Agent Carry out the
configuration program.
Call Certified Sevice Agent
Replace core-temperature probe or keypad,
call customer service
Electric Space$aver™
69
Page 70
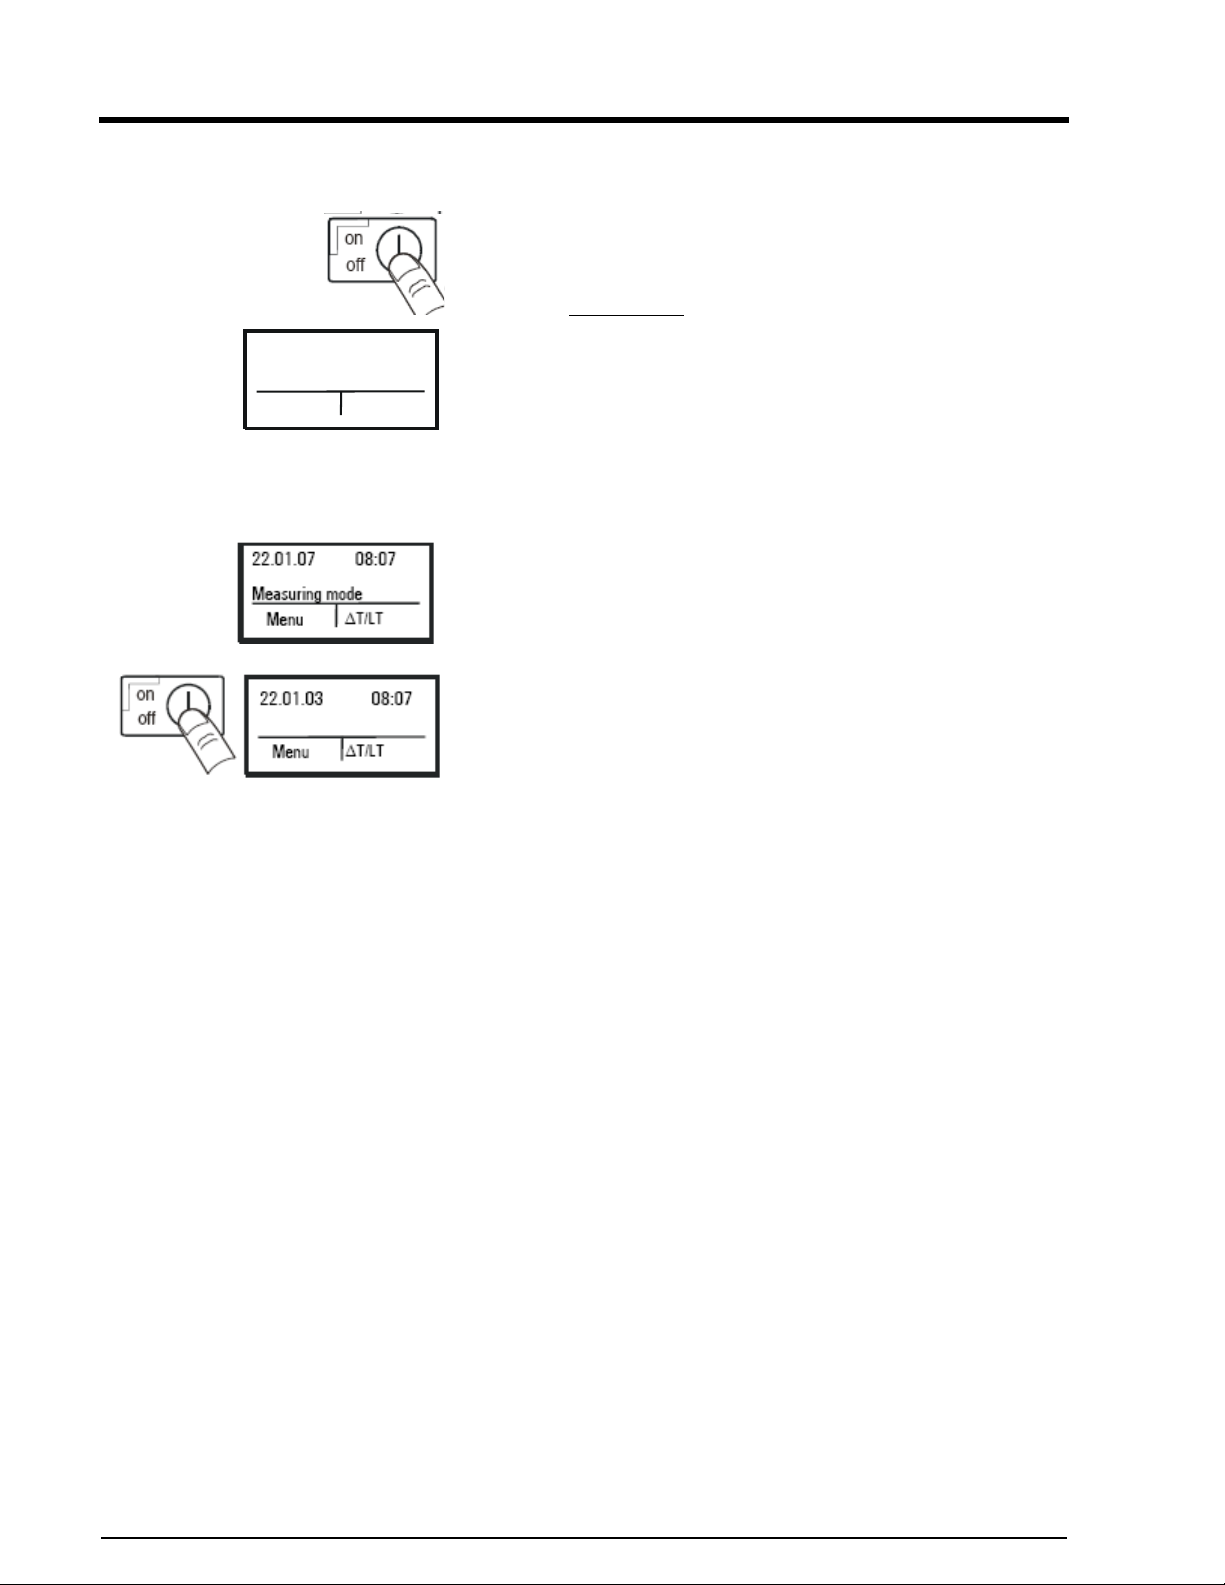
Space$aver™
Errors
Resetting (initializing) the
control electronics
22.01.03 08:07
Menu
∆T/SRH
Measuring mode If when resetting the control electronics the
Program running errors (e.g. specified settings were not kept);
can be corrected by resetting (initializing) the electronic
controls. This resets the electronics to the start mode. The
stored program will not be deleted.
To reset the system, press and hold the On/Off button (with the
appliance switched on
electronics turn off.
The electronics will switch back on after approx. 10 seconds.
The appliance is now in the start mode (standby) and the
following appears in the start screen display
"on/off" button is accidentally pressed for longer than 8 sec.
with the appliance switched off, the electronics change into the
measuring mode.
To deactivate the measuring mode again, the "on/off" button
must be pressed for 20 sec. with the appliance switched off.
Then the control electronics change to the normal operating
mode again.
) for approx. 8 seconds until the control
70
Electric Space$aver™
Page 71
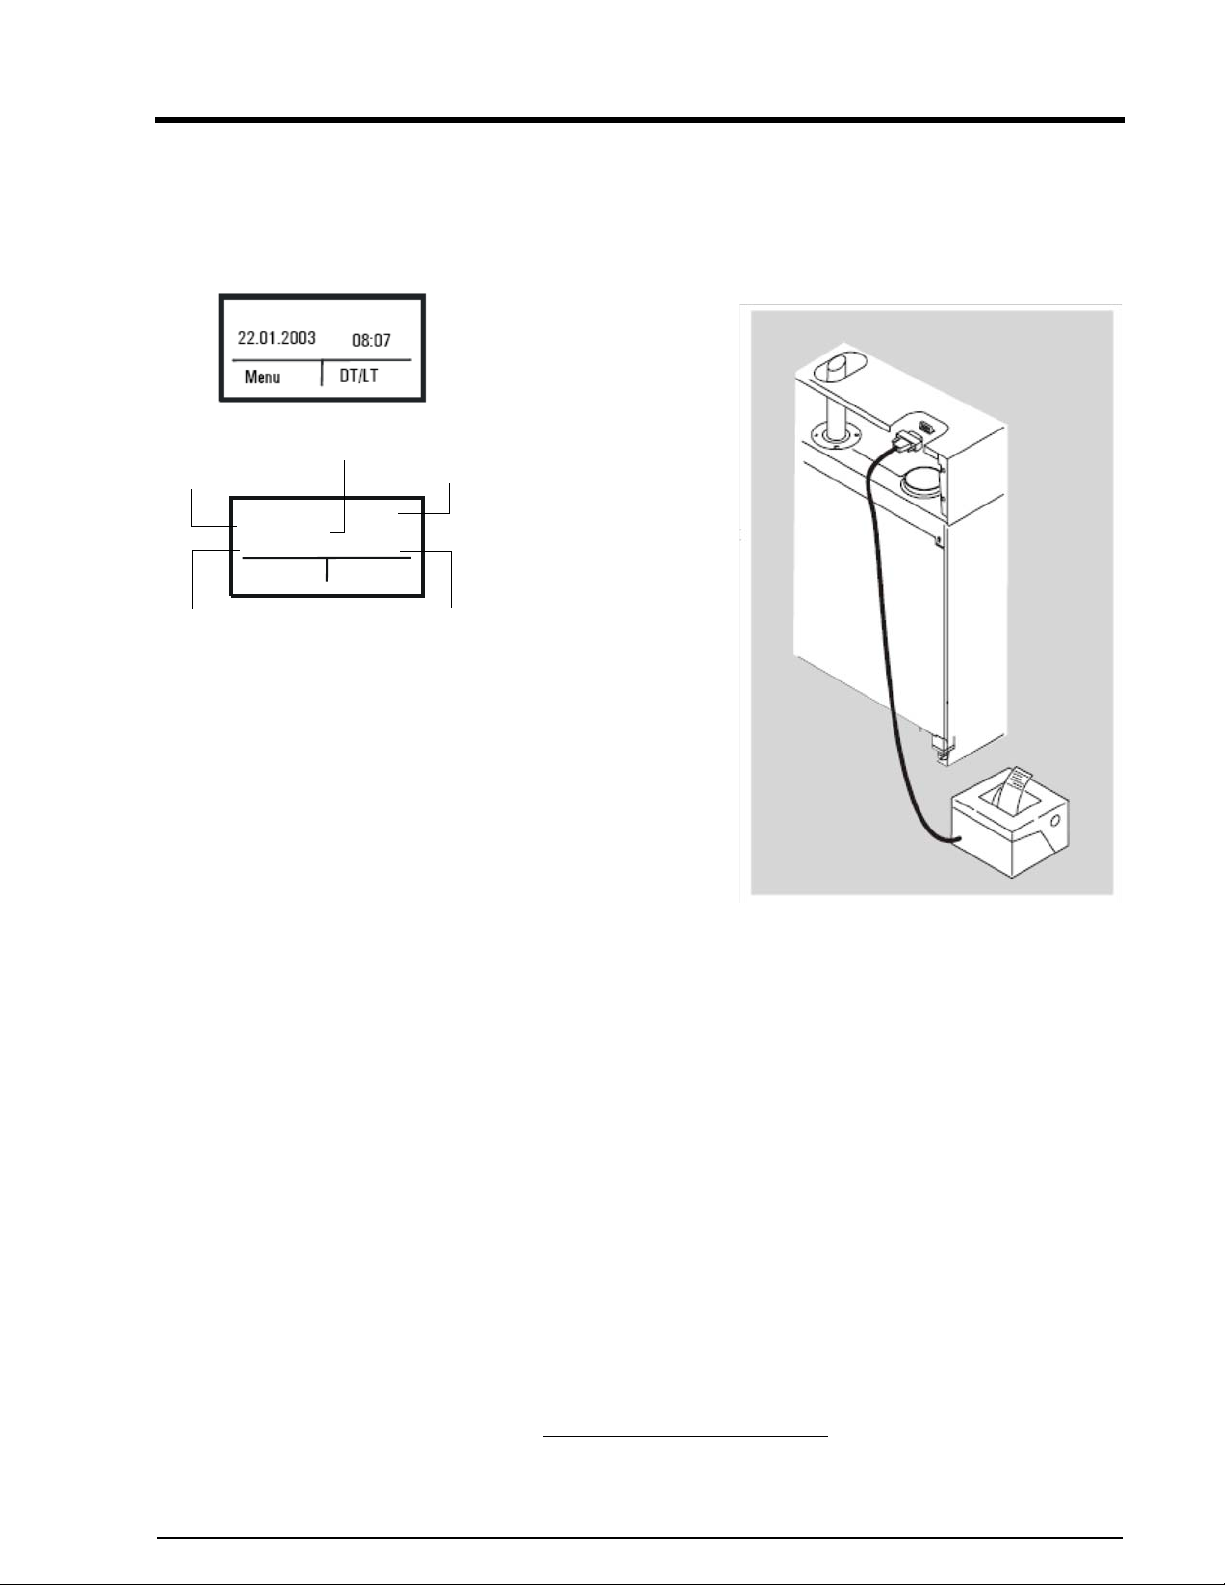
HACCP
Printing reports The Space$aver™ stores up to 200 HACCP reports,
Asterisk=
Record has been
printed previously
*Baked ham
Cooking date
Programme name
HACCP
22.01.2003 08:15
Back
Print
Recording start time
Record No.
000
Space$aver™
depending on the number of program stages.
A laptop or a serial
mini-printer
to produce the
reports via the RS
232 serial interface.
The maximum
length of the RS 232
connecting cable
must not exceed 3 m.
Use the Left-Select
button to call up the
menu in the display.
Select HACCP with
the CombiDial and
press to confirm.
1
is used
The display shows
the last report (latest)
record entered
marked as “000”.
The higher the
number, the older
the report.
Breaks can occur between the report numbers in the HACCP
memory. These are caused by cooking programs that take less
than one minute, since these are not logged.
Press the Right-Select button to print the selected report.
1.Serial printer, 40 columns, RS 232 interface,
Setting: 9600, N, 8.1
Electric Space$aver™ 6.23
71
Page 72
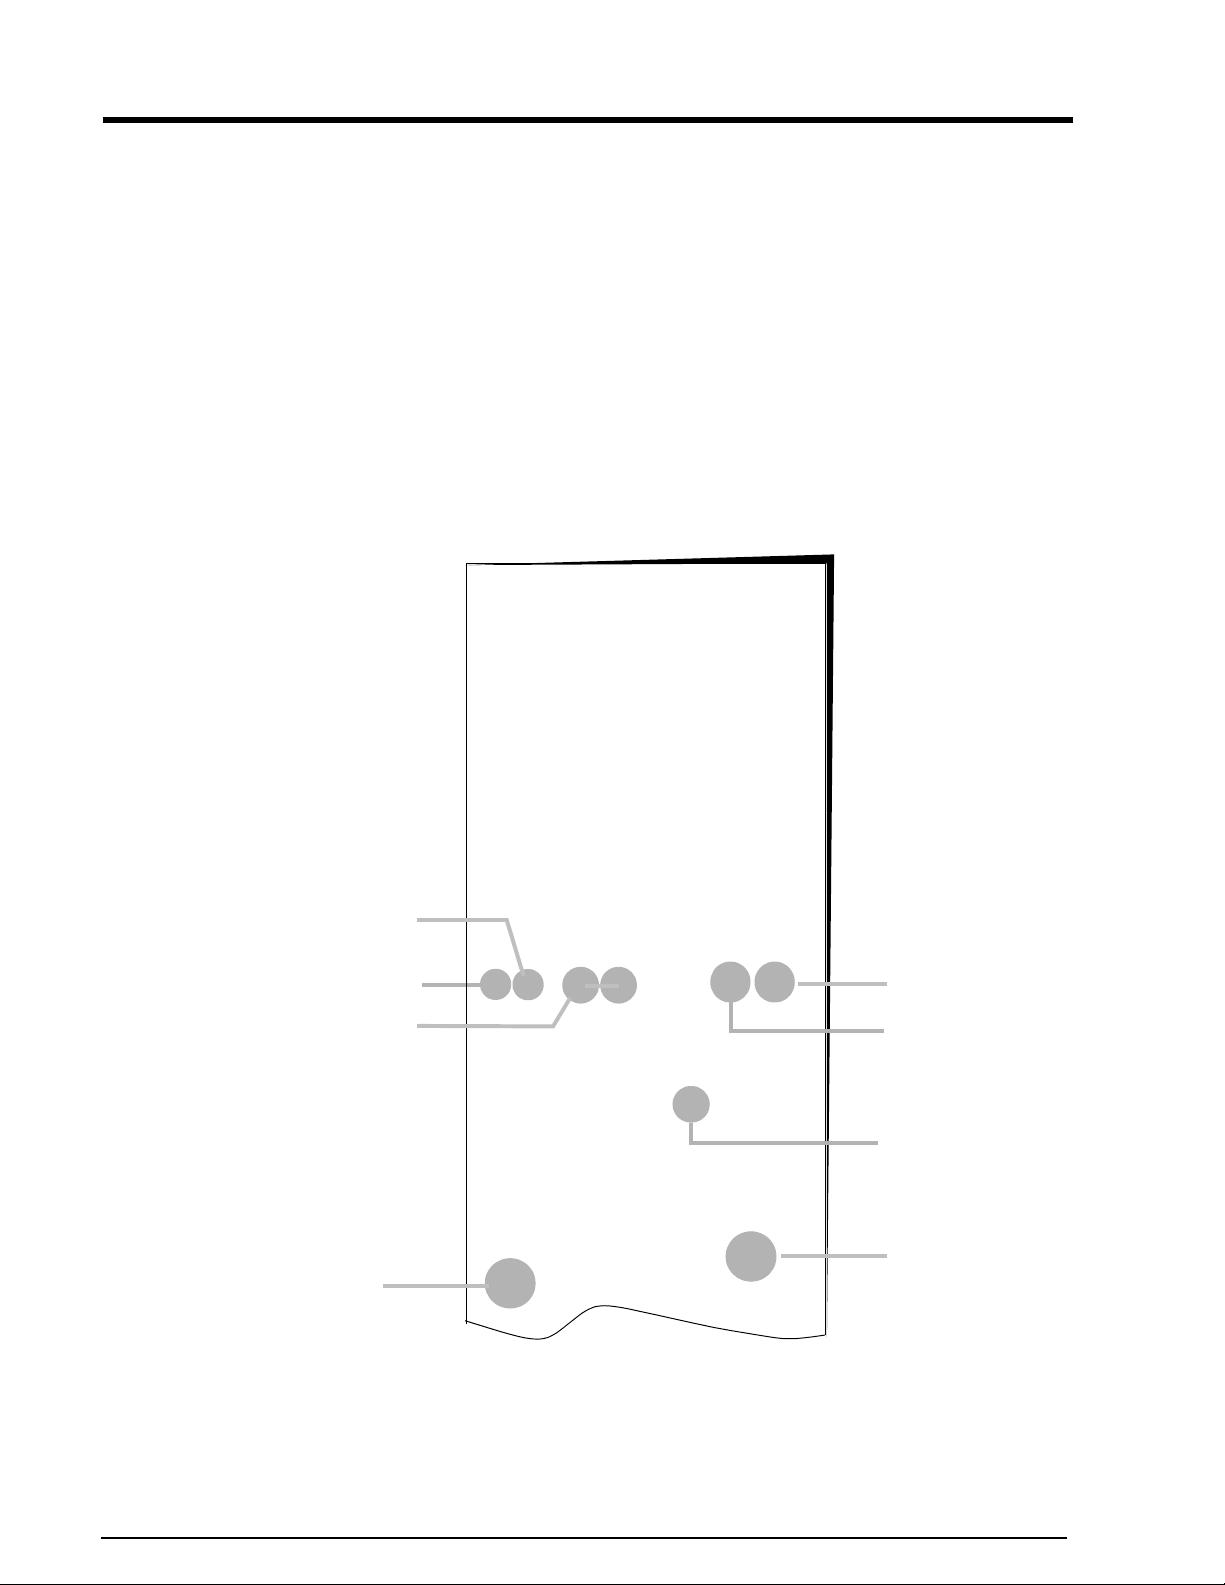
Space$aver™
The HACCP report A summary of the product core temperature settings will be
Cooking
mode
Step No.
Minimum and
maximum
temperature for this
step
Special
events
HACCP
printed out in hourly blocks. The cycle time (5, 10 or 15 min)
is indicated after the information on the time.
Press and hold the Right-Select button to print the reports from
the report selected to the latest ("000") report (day or week
overview).
The data can also be exported to a PC as a text file. ´To do this,
start up a terminal program installed in the PC (e.g.
hyperterminal ).
Serial No.: 01234567
Appliance model: 6.1
Date of printout: 23.06.2003
Abbreviations: CM = Cooking mode,
S = Moist, CD = Combi steaming ,
HC = Dry Heat R = Rethermalization,
CT = Core temperature
Cooking program: Right
Cooking date: 19.06.2003 8:59
End: 10:38
Cooking time: 1:39
Temp Time
No. CM Min, Max CT Nominal
Actual
1 S 96, 133 - 1:00 0:49
2 CS 99, 99 75 - 0:00
3 CS 99, 161 85 - 00:11
4 CS 157, 179 90 - 00:06
5 HC 179, 199 95 - 0:27
Core temperature values
8:59 45, 25, 30, 38, 45, 52 5 min.
58, 62, 68, 72, 75, 78 5 min.
09:58 82, 84, 89, 92, 93, 94 5 min.
94, 95 5 min.
Door was opened
Time at the
nominal temperature
Set nominal
time
Core
temperature
Nominal value
Settings
72
Electric Space$aver™ 6.23
Page 73

Page 74

*fm05-046-B*Henny Penny Corp., Eaton, Ohio 45320, Revised 08-01-08
Manufactured by:
MKN Maschinenfabrik
Wolfenbüttel, Germany
Henny Penny Corporation
P.O.Box 60
Eaton,OH 45320
1-937-456-8400
1-937-456-8402 Fax
To ll free in USA
1-800-417-8417
1-800-417-8434 Fax
www.hennypenny.com
 Loading...