

Henkel SubFloor User Manual
169
168
PREPARING THE SUBFLOOR
The flooring contractor has responsibility for laying the
floorcovering only when he is sa tisfied tha t the subfloor
is in a suitable condition to receive the flooring.
Local regulations regarding subfloors and the
installation of floorcoverings must be complied with.
GENERAL INFORMATION
(NEW SUBFLOORS OR RENOVATION)
The subfloor must be absolutely hard, level, dry, smooth
and structurally sound.
The subfloor must be free of cracks and other
irregularities and must not be contaminated with paint,
plaster, oil, grease or any other substance which could
affect adhesion.
Cracks must be filled with an appropriate material.
The following information provides you with basic
installation procedures. For technical products or more
detailed instructions please refer to our technical guide.
171 Tiles
172 Sheet
173 Saga
174 Conductive, dissipative
and antistatic
floorcoverings
174 Conductive flooring with
conductive adhesive and
conductive primer
175 Laying procedure for
residential sheet products
Laying procedures
168 to 175
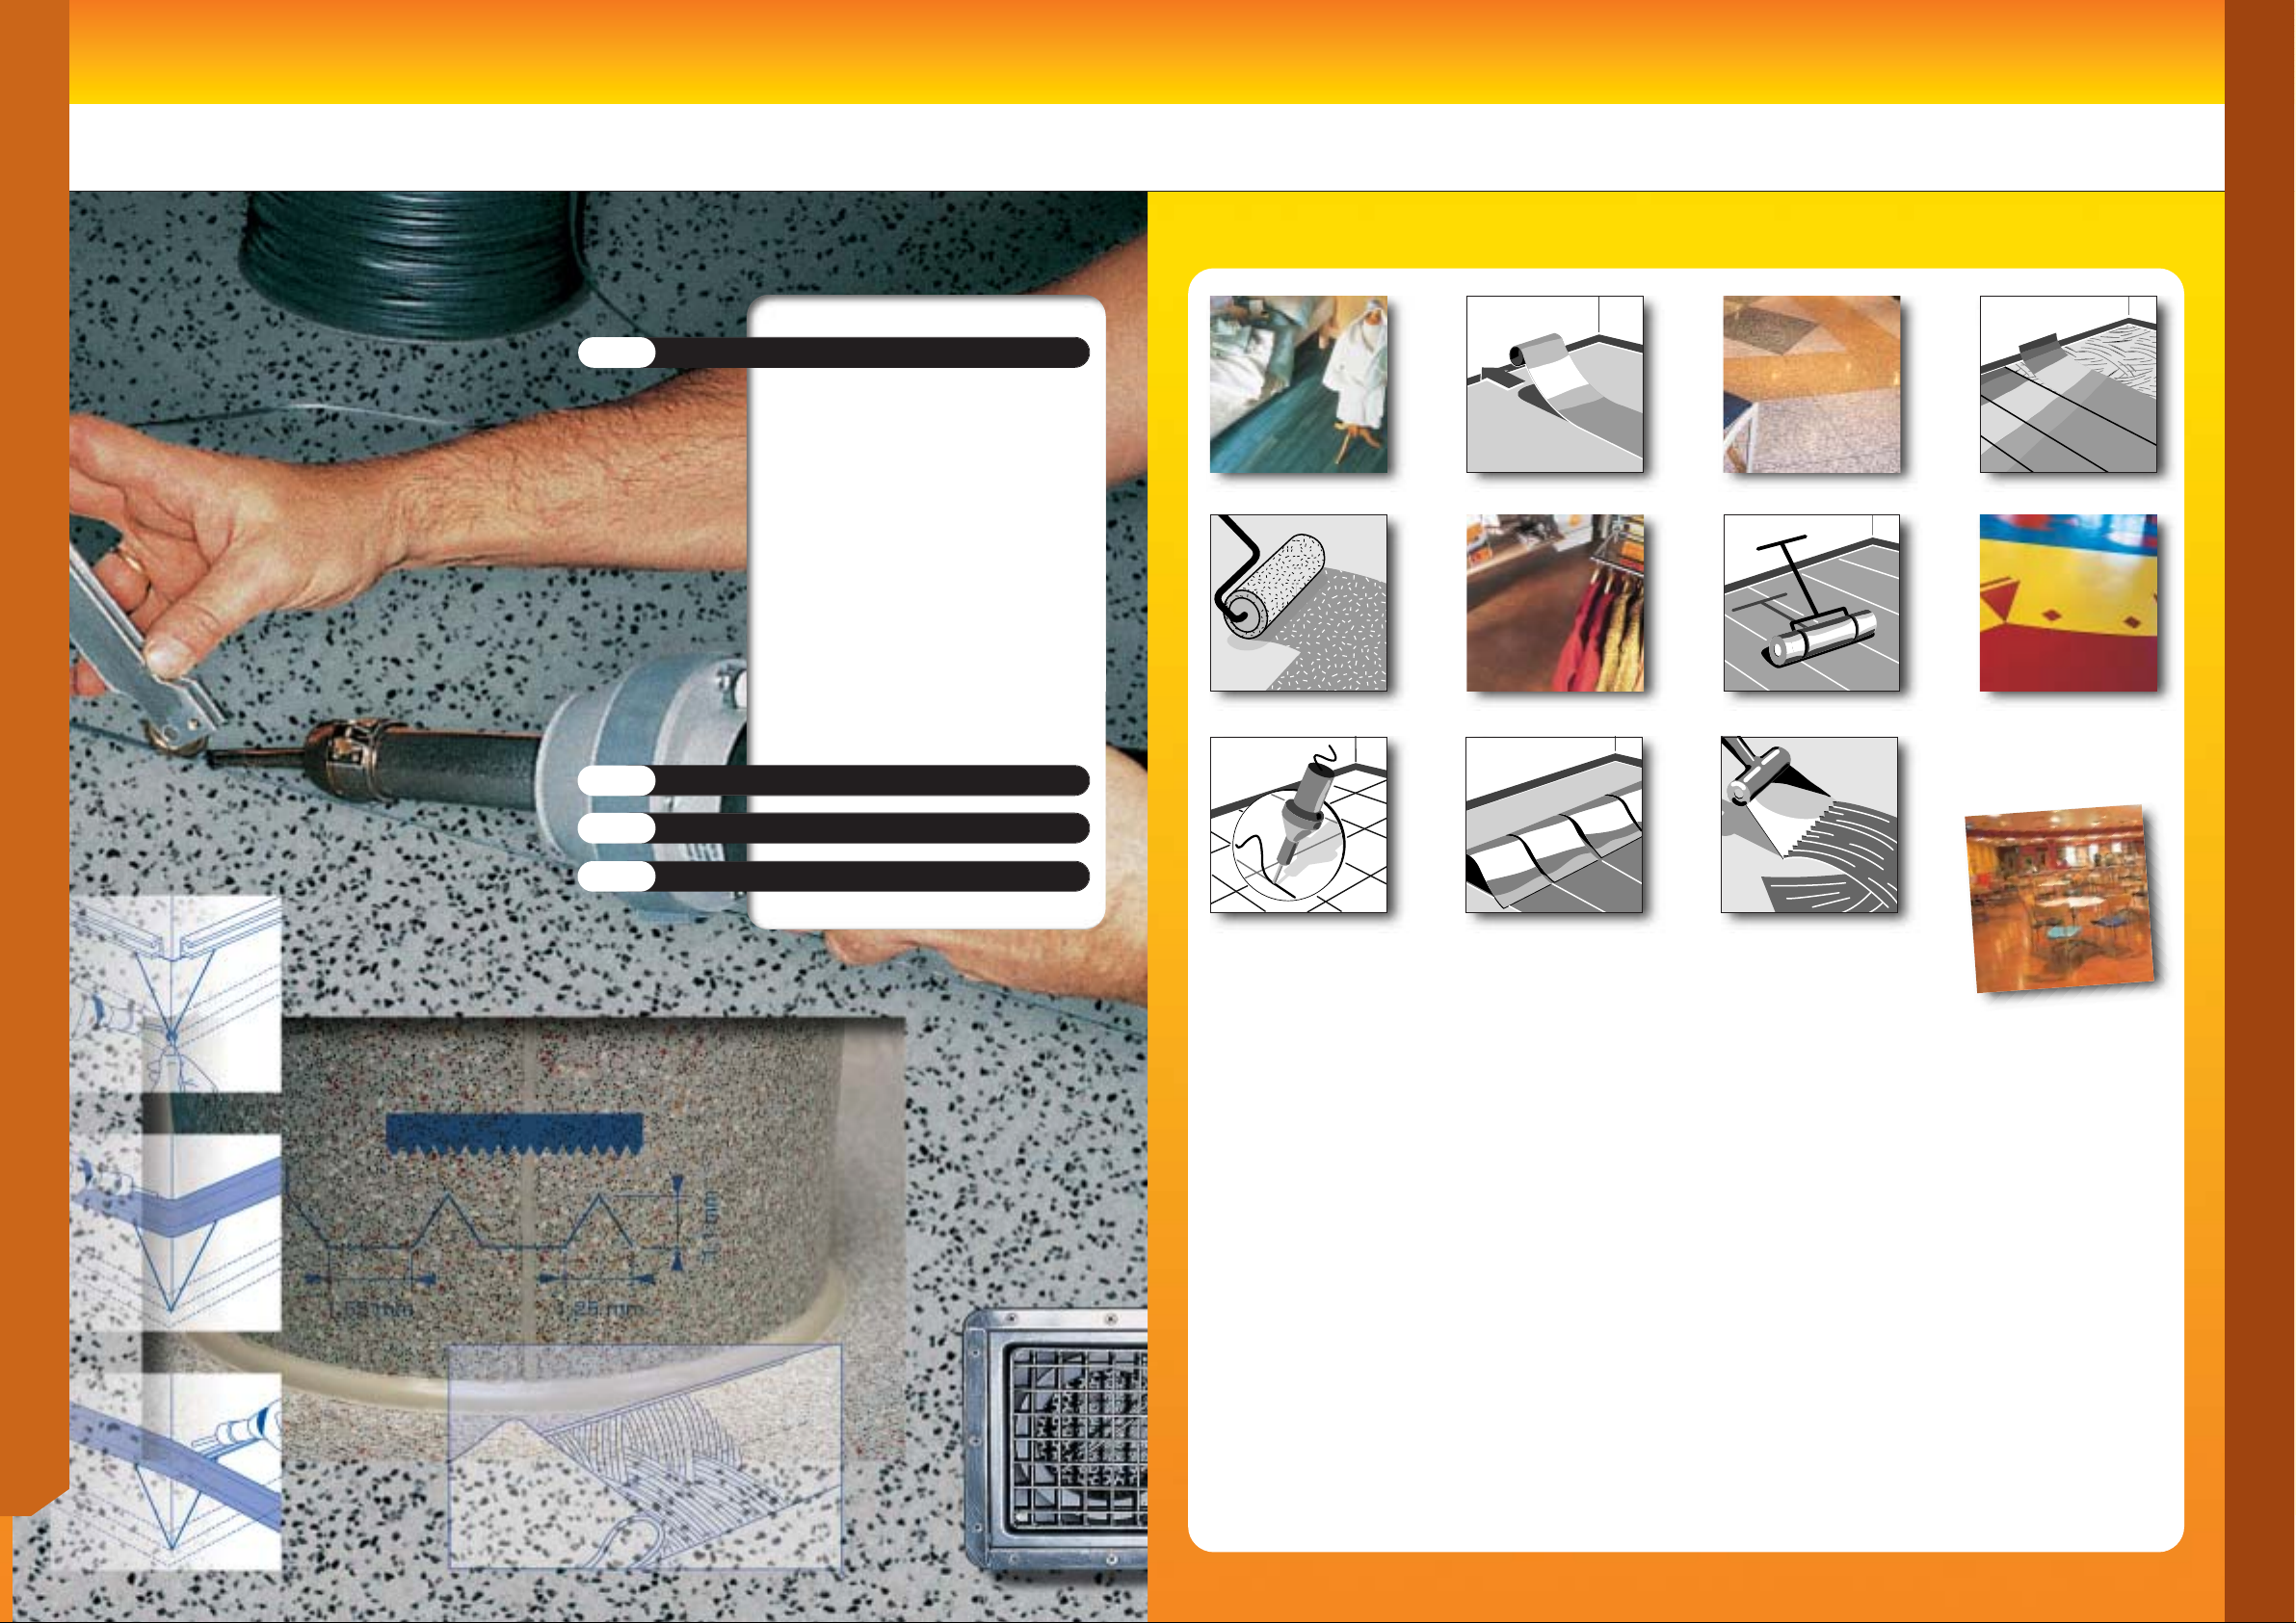
Cold and hot welding
176
Adhesives
177
Maintenance
178 to 181
Technical guide Technical guide
Technical
guide
171
170
Technical
guide
Laying procedure for tiles
Technical guide
Hardness
Use cement based products for subfloor preparation. They must be neither crumbly nor flaky.
Flatness
Maximum deflexion, for a 2 m ruler 7 mm, for a 0.20 m ruler 2 mm.
Surface state: fine and regular.
Dryness
Moisture content in subfloors should be measured using appropriate devices and should be in accordance with relevant
standards in each country. The relative humidity must not be higher than 75 % R.H.
Adapt the drying time according to how cold or damp the conditions are.
Smoothness
A smoothing compound must be applied to the entire surface according to the standards mentioned above. Smoothing
compounds are not designed to overcome levelling deficiencies. The smoothing compound must be allowed to dry in
accordance with manufacturer's instructions.
Rub down using a carborundum stone in order to obtain a perfectly smooth surface.
Sweep or vacuum up any dust. Spread the adhesive.
Expansion joints or movement joints
Floorcovering should be laid up to the joint and the joint should be covered with an appropriate plastic or metal sliding
joint cover.
Subfloors direct to ground
A damp-proof membrane must be laid under the concrete to act as a waterproof barrier against underlying hydrostatic
pressure and moisture.
Underfloor heating
The subfloor must be allowed to dry in accordance with local standards.
The heating system should have been switched on at least 4 weeks before laying the floor covering, then switched off 24
hours before any subfloor preparation, and remains switched off during installation of the floorcovering.
The heating should then be switched on 48 hours after installation of the flooring and the temperature progressively
increased to normal working temperatures over 5-7 days.
Glueline temperature < 28 °C (contact technical department for fur ther informa tion.)
Old carpeting
Remove, clean the subfloor and apply a smoothing compound.
Wooden floorboards
Check the condition of the floorboards, secure any loose boards.
Any knotholes to be filled as necessary.
Cover with hardboard, chipboard or plywood, minimum thickness 8 mm.
These sheets should be nailed or stapled every 10-15 cms.
Check that the floorboards are dry and ventilated on the underside.
All non ventilated woodenfloors must be removed.
Ceramic tiles
Any loose tiles must be stuck down and any traces of paint, plaster, gr ease, etc, must be r emo v ed. The cleaned tiles must
be primed with an appropriate primer prior to applying a smoothing compound fully in accordance with manufacturers
instructions.
Leave to dry then rub down to a smooth finish.
Sweep thoroughly. Apply the adhesive in accordance with manufacturers instructions.
Old vinyl flooring
Old vinyl, linoleum and rubber floorcoverings should always be removed and the subfloor be examined and prepared as
necessary before installing new floorcoverings.
Technical guide
Technical
guide
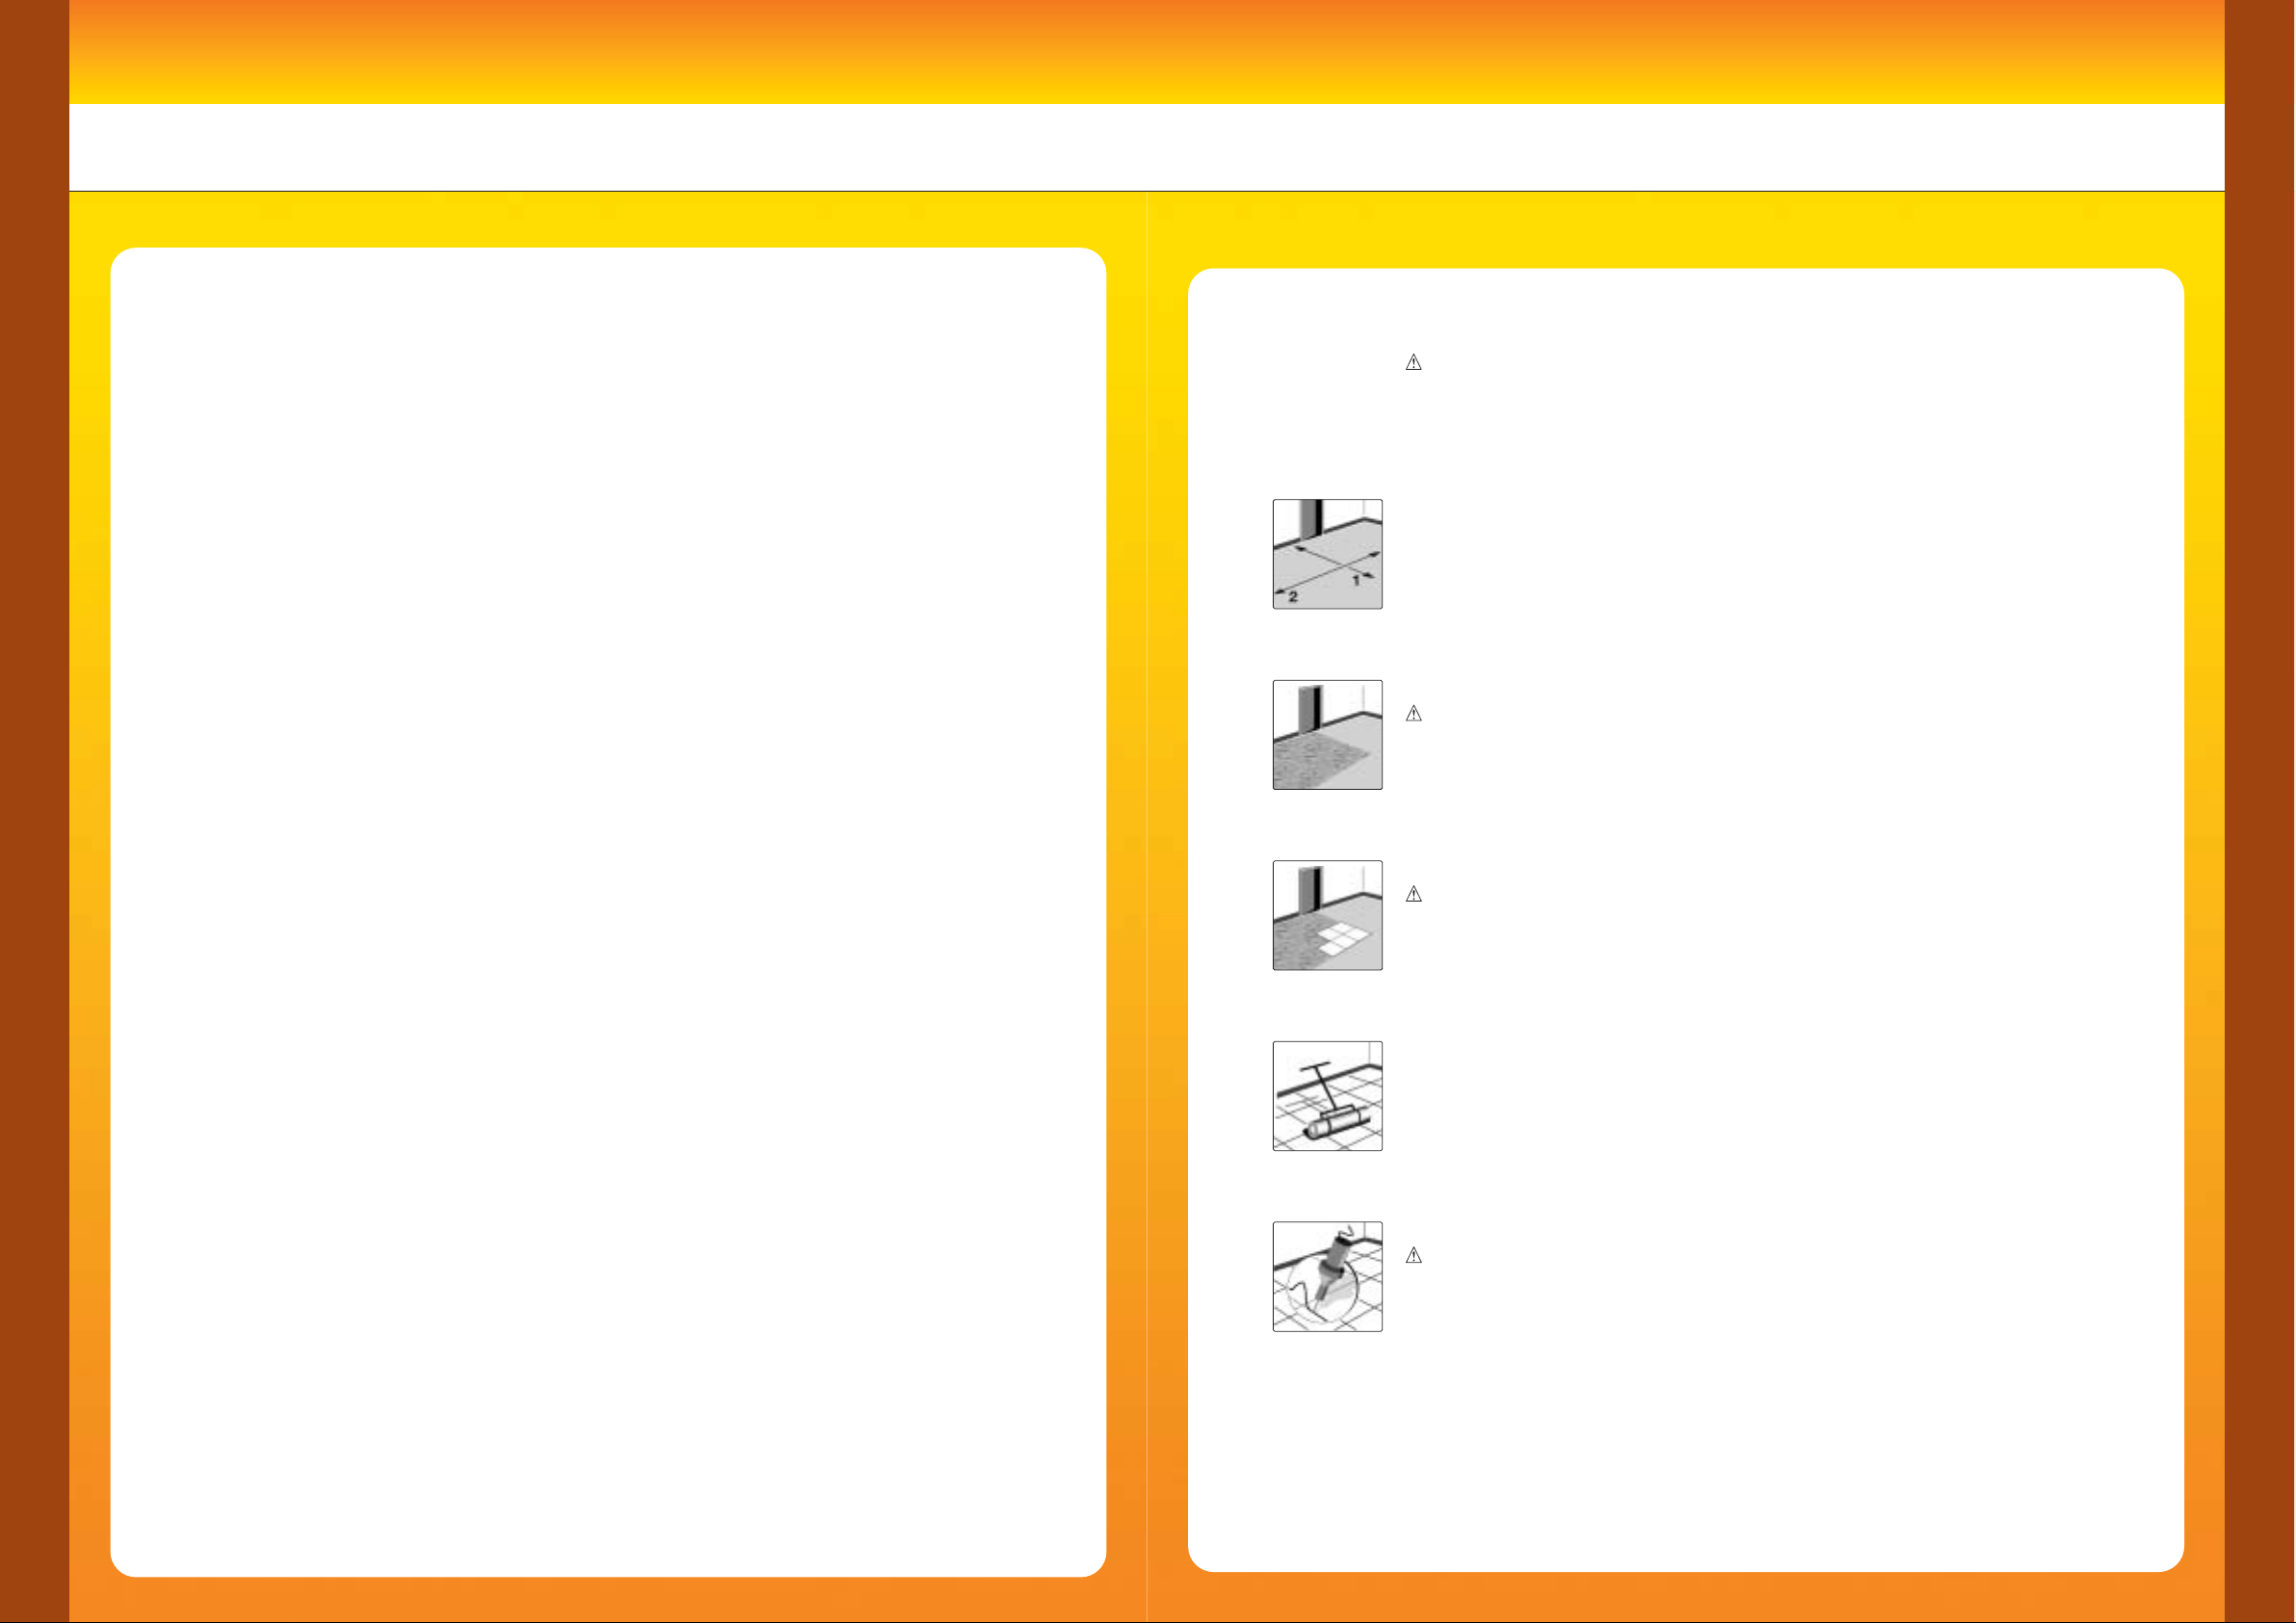
1. Trace a line perpendicular to the main entrance.
Trace a perpendicular line to this axis ensuring equal cuts for tiles on both
sides.
2. Apply adhesi ve to a few square metres of subfloor in one quarter.
Insufficient open time of the adhesive will cause bubbles.
If open time is too long the adhesive transfer will be poor.
3. Press each tile into position ensuring joints are butted tight.
Beware installation directions according to pattern.
4. Smooth down manually then roll with a 50 kg flooring roller.
5. If necessar y hea t weld seams 24 hour s after installation.
Do not traffic the floorcovering for 48 hours after installation.
Unpack the tiles 24 hours before laying and make sure they are stacked horizontally.
Minimum ambiant temperature must be 15 °C.

173
172
Technical
guide
Technical guideTechnical guide Technical guide
Overall adhesion with tackifier emulsion adhesive
A gripping primer compatible with the tackifier emulsion adhesive and the subfloor must be applied before gluing.
1 - Positioning of the floor covering
The tiles should be removed from their box at least 24 hour s before laying and placed in the room in which they are to
be used
2 - Tackifier emulsion adhesive
The tackifier emulsion is applied in a single coat:
• using a finely notched trowel, quantity 100 to 150 g/m
2
, type A1,
• using a foam roller, quantity 100 to 150 g/m
2
.
3 - Laying of tiles. Alignment.
A - When laying the tiles, the following points must be respected:
• use whole tiles or large cut tiles (more than 50% of the original tile size), in heavy traffic zones
(door thresholds, corners in corridors, waiting areas),
• align a row of tiles along the main access pa ths,
• align one of the start lines with the longest wall-to-wall direction in the room.
B - Alignment.
Trace a guide line along which the tiles are to be laid (see fig 1).
4 - Preparation of subfloor and laying of tiles.
Beware installation directions according to the pattern.
• Spread the tackifier emulsion adhesive over half the room.
• Lay the first row of tiles along the axis perpendicular to the door.
• Block this row in place using the wall as a support (see fig 2).
• Lay the following rows of tiles and block them against the first row.
5 - Smoothing.
This operation must be carried out in two stages .
• Smooth down manually.
• Roll with a 50 kg flooring roller over the entire surface.
Positioning of furniture.
When positioning furniture, pay attention not to drag heavy objects
over the floorcovering
Laying procedure for Saga
1
2
Tracing the guide lines:
• axis perpendicular to main entrance,
• the perpendicularity of this axis is
balanced by the tile cuts.
• Starting in the middle of the room, lay
the tiles of the middle row. Block this
row in place using the wall
perpendicular to this row as a support.
• Lay the following rows of tiles and
block them against the first row.
1
1
2
2
Technical
guide
Other cases:
Reverse lay the following products: Nera Contract, Taralay Comfort. Please note the reverse lay symbols on the pac kaging.
Most sheet products are laid by overlapping the edges and cutting through.
Tarasafe Standard, Tarasafe Iona, Tarasafe Comfort, Tarasafe Plus, Tarasafe Ultra, Tarasafe Style, Tarasafe Super however should be laid with a 1 mm
gap to allow for the grooving machine. Grooving should be done manually.
1. Lay fir st length along guide line, ensuring sheets are laid lengthways
in the same direction as the light falls.
Beware installation directions according to pattern.
2. Fold back sheets half way.
3. Use a finely serrated trowel to apply the single stick acrylic emulsion adhesi ve.
The adhesive manufacturer's instructions must be followed.
Insufficient open time of the adhesive will cause bubbles.
If the open time is too long the adhesive transfer will be poor.
4. Smooth down manually then roll with a 50 kg flooring roller.
5. If necessar y groove and heat weld the joints after 24 hours after installa tion.
Do not traffic the floorcovering for 48 hours after installation
.
Sheet laying procedure
The sheets must be unrolled and left in the room to be covered, with
the adhesive, for at least 24 hours prior to laying.
Minimum temperature must be 15 °C.
 Loading...