

Henderson Srgg42004 Owner's Manual
DELUXE PROPANE GAS GRILL
USER MANUAL
MODEL NO.: SRGG42004 / TV NO.: 108461
Consumer: Retain this manual for future reference.
Installer: Leave this manual with consumer.
FOR OUTDOOR USE ONLY
PLEASE CONTACT 1-866-814-0585 FOR ASSISTANCE
DO NOT RETURN TO PLACE OF PURCHASE
OFFICE HOURS 9AM TO 5PM EST

SAFETY INSTRUCTIONS
If you smell gas:
1. Shut off gas to the appliance.
2. Extinguish any open flame.
3. Open Lid.
4. If odor continues, keep away from the appliance and immediately call your gas supplier or your
fire department.
1. Do not store or use gasoline or other flammable liquids OR vapors in the vicinity of this or any
other appliance.
2. An LP cylinder not connected for use shall not be stored in the vicinity of this or any other
appliance.
DANGER
WARNING
2

TABLE OF CONTENTS
SECTION ONE
Safety Instructions ………………………4
Placement of the Grill ……………………8
SECTION TWO
Exploded View……………………………9
Part List and Hardware List ……………10
Assembly Instructions…….………….…11
SECTION THREE
Gas Hook-Up……………………………. 22
Leak Testing…………………………….. 25
Installer Final Check………………….. 26
Read this User Manual carefully and
completely before using your grill to reduce
the risk of fire, burn hazard or other injury.
3
SECTION FOUR
Operating Instructions………….……..27
Lighting Instructions………………….. 28
SECTION FIVE
Using the Side Burner………….………30
Care & Maintenance……………………31
How to Replace Main Burner …………32
Trouble Shooting………………………..33
SECTION SIX
Limited Warranty ……………….….……34
SAFETY INSTRUCTIONS
RECOGNIZED SAFETY SYMBOLS, WORDS AND LABELS
WARNING
Do not try lighting this appliance without first
reading the “LIGHTING INSTRUCTIONS” section
of this manual.
DO NOT USE ALUMINUM FOIL TO LINE
THE GRILL RACKS OR GRILL BOTTOM.
This can severely upset combustion airflow or
trap excessive heat in the control area.
INSECT WARNING!!! Spiders and insects can nest
in the burners of this and any other grill, and cause
the gas to flow improperly. This is a very dangerous
condition, which can cause a fire to occur behind
and beneath the valve panel, thereby damaging the
grill and making it unsafe to operate. Inspect the
grill twice a year.
GAS INSTALLATION CODES
The installation must conform with local codes or, in
the absence of local codes, with the national fuel
gas code, ANSIZ223.1/NFPA 54, natural gas and
propane installation code, CSA B149.1, or propane
storage and handling code, B149.2, as applicable.
LP Gas Cylinder must be fitted with Overfill Protection Device (OPD).
WARNING:
a) DO NOT store a spare LP-gas cylinder under or near this ap pliance.
b) NEVER fill the cylinder beyond 80% full.
c) If the information in “a” and “b” is not followed exactly, a fire causing death or serious injury
may occur.
DO NOT LEAVE THE GRILL UNATTENDED
WHILE COOKING.
4
SAFETY INSTRUCTIONS
RECOGNIZED SAFETY SYMBOLS, WORDS AND LABELS
WARNING: Always keep your face and body as far away from the burner as possible when lighting.
WARNING: IMPORTANT!
BEFORE LIGHTING…
Inspect the gas supply hose prior to turning the gas “ON”. If there is evidence of cuts, wear , or abrasion, it must
be replaced prior to use. Do not use the grill if the odor of gas is present. Only the pressure regulator and hose
assembly supplied with the unit should be used. Never substitute regulators for those supplied with the grill.
If a replacement is necessary, contact the factory for proper replacement.
Screw the regulator onto the cylinder. Check the hose and regulator connections with a soap and water
solution before operating the grill.
Keep a spray bottle of soap water near the gas supply
valve and check the connections before each use. See
leak testing section.
Do not attempt to light the grill if odor of gas is present.
Call for customer service 1-866-814-0585
5

SAFETY INSTRUCTIONS
TESTED IN ACCORDANCE WITH ANSI
Z21.58-2007 / CSA 1.6-2007 STANDARD FOR
OUTDOOR COOKING GAS APPLIANCES. THIS
GRILL IS FOR OUTDOOR USE ONLY.
Check your local building codes for the proper
method of installation. In the absence of local
codes, you must conform with either the National
Fuel Gas Code, ANSI Z223.1/NFPA 54, or
CAN/CSA-B149.1, Natural Gas and propane
Installation Code. Electrical Code, ANSI/NFPA 70.
CALIFORNIA PROPOSITION 65-WARNING
The burning of gas fuel generates some
byproducts, which are known by the State of
California to cause cancer or reproductive harm. To
minimize exposure to these substances, always
operate this unit according to the use and care
manual, ensuring you provide good ventilation
when cooking with gas.
SAFETY PRACTICES TO AVOID
PERSONAL INJURY
When properly cared for, your grill will give safe,
reliable service for many years. However, extreme
care must be used since the grill produces intense
heat and that can increase accident potential. When
using this appliance basic safety practices must be
followed, including the following:
Do not repair or replace any part of the grill unless
specifically recommended in this manual. All other
service should be referred to a qualified technician.
This outdoor cooking gas appliance is not intended to
be installed in or on recreational vehicles and/or
boats.
CHILDREN SHOULD NOT BE LEFT ALONE OR
UNATTENDED IN AN AREA WHERE THE GRILL IS
BEING USED. NEVER ALLOW THEM TO SIT,
STAND OR PLAY ON OR AROUND THE GRILL AT
ANY TIME.
DO NOT STORE ITEMS OF INTEREST TO
CHILDREN AROUND OR BELOW THE GRILL OR IN
THE CART. NEVER ALLOW CHILDREN TO CRAWL
INSIDE OF THE CART.
Never let clothing, pot holders or other flammable
materials come in contact with or too close to any
grate, burner or hot surface until it has cooled. Fabric
may ignite and result in personal injury.
For personal safety , wear p roper appa rel. Loose fitting
garments or sleeves should never be worn while
using this appliance. Some synthetic fabrics are
highly flammable and should not be worn while
cooking.
Only certain types of glass, heatproof glass
ceramic, earthenware, or other glazed utensils are
suitable for grill use. These types of materials
may break with sudden temperature changes. Use
only on low or medium heat settings according to
the manufacturer’s directions.
Do not heat unopened food containers as a build-up
of pressure may cause the container to burst.
Use a covered hand when opening the grill lid. Never
lean over an open grill.
WHEN LIGHTING A BURNER, ALWAYS PAY CLOSE
ATTENTION TO WHAT YOU ARE DOING. BE
CERTAIN YOU ARE TURNING THE IGNITER
LABELED FOR THE BURNER YOU INTEND ON
USING.
6

SAFETY INSTRUCTIONS
When using the grill, do not touch the grill rack, burner
grate or immediate surroundings as these areas
become extremely hot and could cause burns. Use
only dry potholders. Moist or damp potholders on hot
surfaces may cause burns from steam. Do not use a
towel or bulky cloth in place of potholders. Do not let
potholders touch hot portions of the grill rack.
Grease is flammable. Let hot grease cool before
attempting to handle it. Avoid letting excess grease
deposits collect in the grease slide panel bottom at
the bottom of the grill’s firebox. Clean often.
For proper lighting and performance of the burners
keep the burner ports clean. It is necessary to clean
them periodically for optimum performance. The
burners will only operate in one position and must be
mounted correctly for safe operation.
Clean the grill with caution. Avoid steam burns; do not
use a wet sponge or cloth to clean the grill while it is
hot. Some cleaners produce noxious fumes or can
ignite if applied to a hot surface.
Be sure all grill controls are turned off and the grill is
cool before using any type of aerosol cleaner on or
around the grill. The chemical that produces the
spraying action could, in the presence of heat, ignite
or cause metal parts to corrode.
Do not use the grill for cooking excessively fatty
meats or products, which promote flare-ups. Do not
operate the grill under overhead combustible
construction.
Use only in well ventilated areas. Do not use in
buildings, garages, sheds, breezeways or other such
enclosed areas. THIS UNIT IS FOR OUTDOOR USE
ONLY.
Keep the area surrounding the grill free from
combustible materials, trash, or combustible fluids and
vapors such as gasoline or charcoal lighter fluid. Do not
obstruct the flow of combustion and ventilation air. If the
unit is stored indoors ensure that it is cool. If propane is
used, the cylinder must be unhooked and the propane
cylinder stored outside in a well-ventilated area, out of
the reach of children.
DO NOT USE BRIQUETTES OF ANY KIND IN THE
GRILL.
The grill is designed for optimum performance without
the use of briquettes. Do not place briquettes on the
radiant as this will block off the area for the grill burners
to vent. Adding briquettes can damage ignition
components and knobs, and void the warranty.
Keep the back of the cart free and clear from debris.
Keep any electrical supply cord, or the rotisserie motor
cord away from the heated areas of the grill.
Never use the grill in extremely windy conditions. If
located in a consistently windy area (oceanfront,
mountaintop, etc.) a windbreak will be required (see
below). Always adh ere to the specified clearance.
NEVER USE A DENTED OR RUSTY PROPANE
CYLINDER.
7

PLACEMENT OF THE GRILL
CLEARANCE
To Non-Combustible Construction
MINIMUM CLEARANCE:
2’ clearance from both sides of combustible
material, and 3’ clearance from the back.
LOCA TION
When determining a suitable location take into
account concerns such as exposure to wind,
proximity to traffic paths and keeping any gas supply
lines as short as possible. Locate the grill only in a
well-ventilated area. Never locate the grill in a
building, garage, breezeway, shed or other such
enclosed areas. During heavy use, the grill will
produce a lot of smoke. Lock the wheels after the grill
is placed in a suitable position.
8
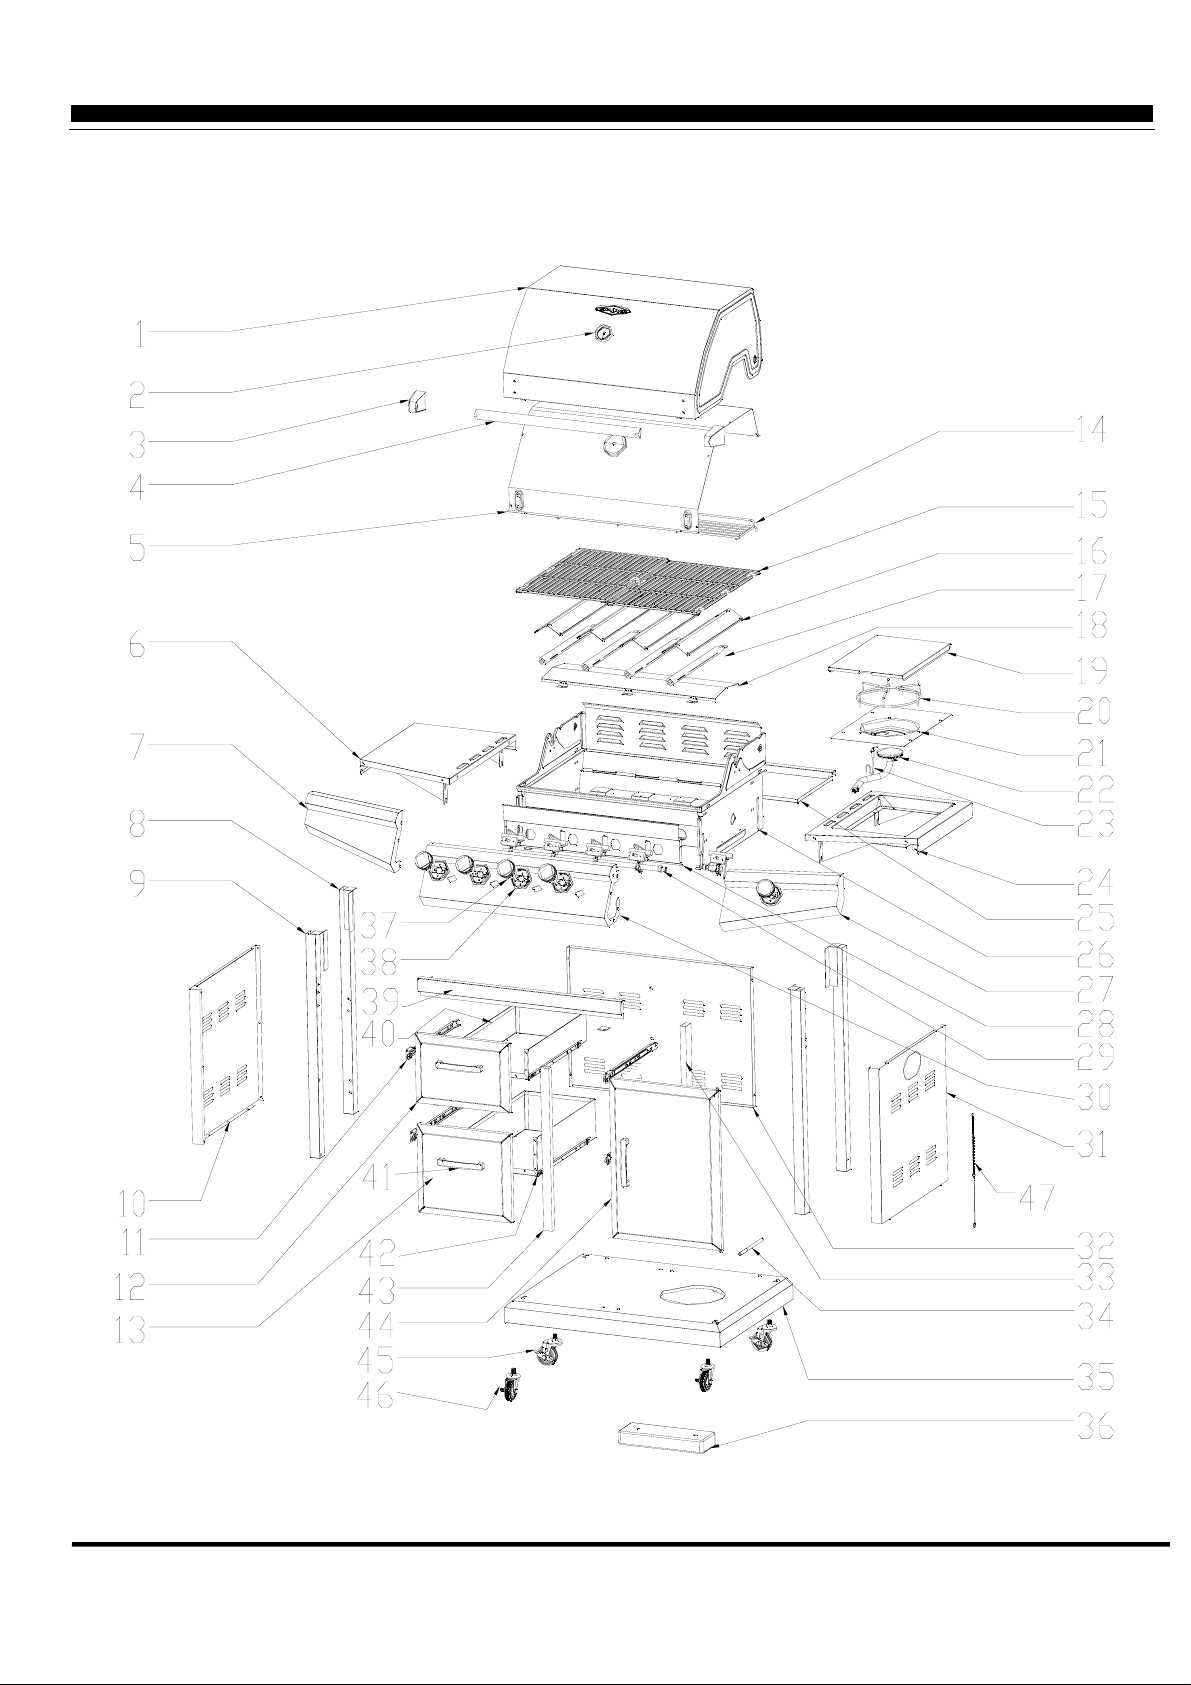
EXPLODED VIEW
9
PART LIST
1. Lid, 1 pc
2. Thermometer, 1 pc
3. Lid handle end cap, 2 pcs
4. Lid handle, 1 pc
5. Heat isolation lid, 1pc
6. Left side panel, 1 pc
7. Left side front panel, 1 pc
8. Rear legs, 2 pcs
9. Front legs, 2 pcs
10. Cart left panel, 1pc
11. Drawer sliding track, 4 pcs
12. Top drawer front panel, 1pc
13. Lower drawer front panel, 1 pc
14. Warming rack, 1 pc
15. Main burner cooking grate, 2 pcs
16. Flame tamer, 4 pcs
17. Tube burner, 4 pcs
18. Grill body heat isolation panel, 1 pc
19. Right side burner lid, 1 pc
20. Right side burner frame, 1 pc
21. Right side burner fire bowl, 1 pc
22. Right side burner, 1 pc
23. Electrode, 2 pcs
24. Right side shelf, 1 pc
25. Grease tray, 1 pc
26. Grill body, 1 pc
27. Right side burner control panel, 1 pc
28. Main burner front heat isolation panel, 1 pc
29. Valve assembly, 1 pc
30. Main burner control panel, 1pc
31. Cart right panel, 1 pc
32. Cart rear panel, 1 pc
33. Drawer rear fixing bar, 1 pc
34. Cylinder locking bolt, 1 pc
35. Cart bottom panel, 1 pc
36. Weight base, 1 pc
37. Control knob, 5 pc
38. Control knob bezel, 5pc
39. Cart horizontal bar, 1 pc
40. Top drawer body, 1 pc
41. Handle, 3 pcs
42. Lower drawer body, 1 pc
43. Drawer front fixing bar, 1 pc
44. Cart door, 1 pc
45. Locking caster, 2 pc
46. Non-locking caster, 2pc
47. Match lighter, 1pc
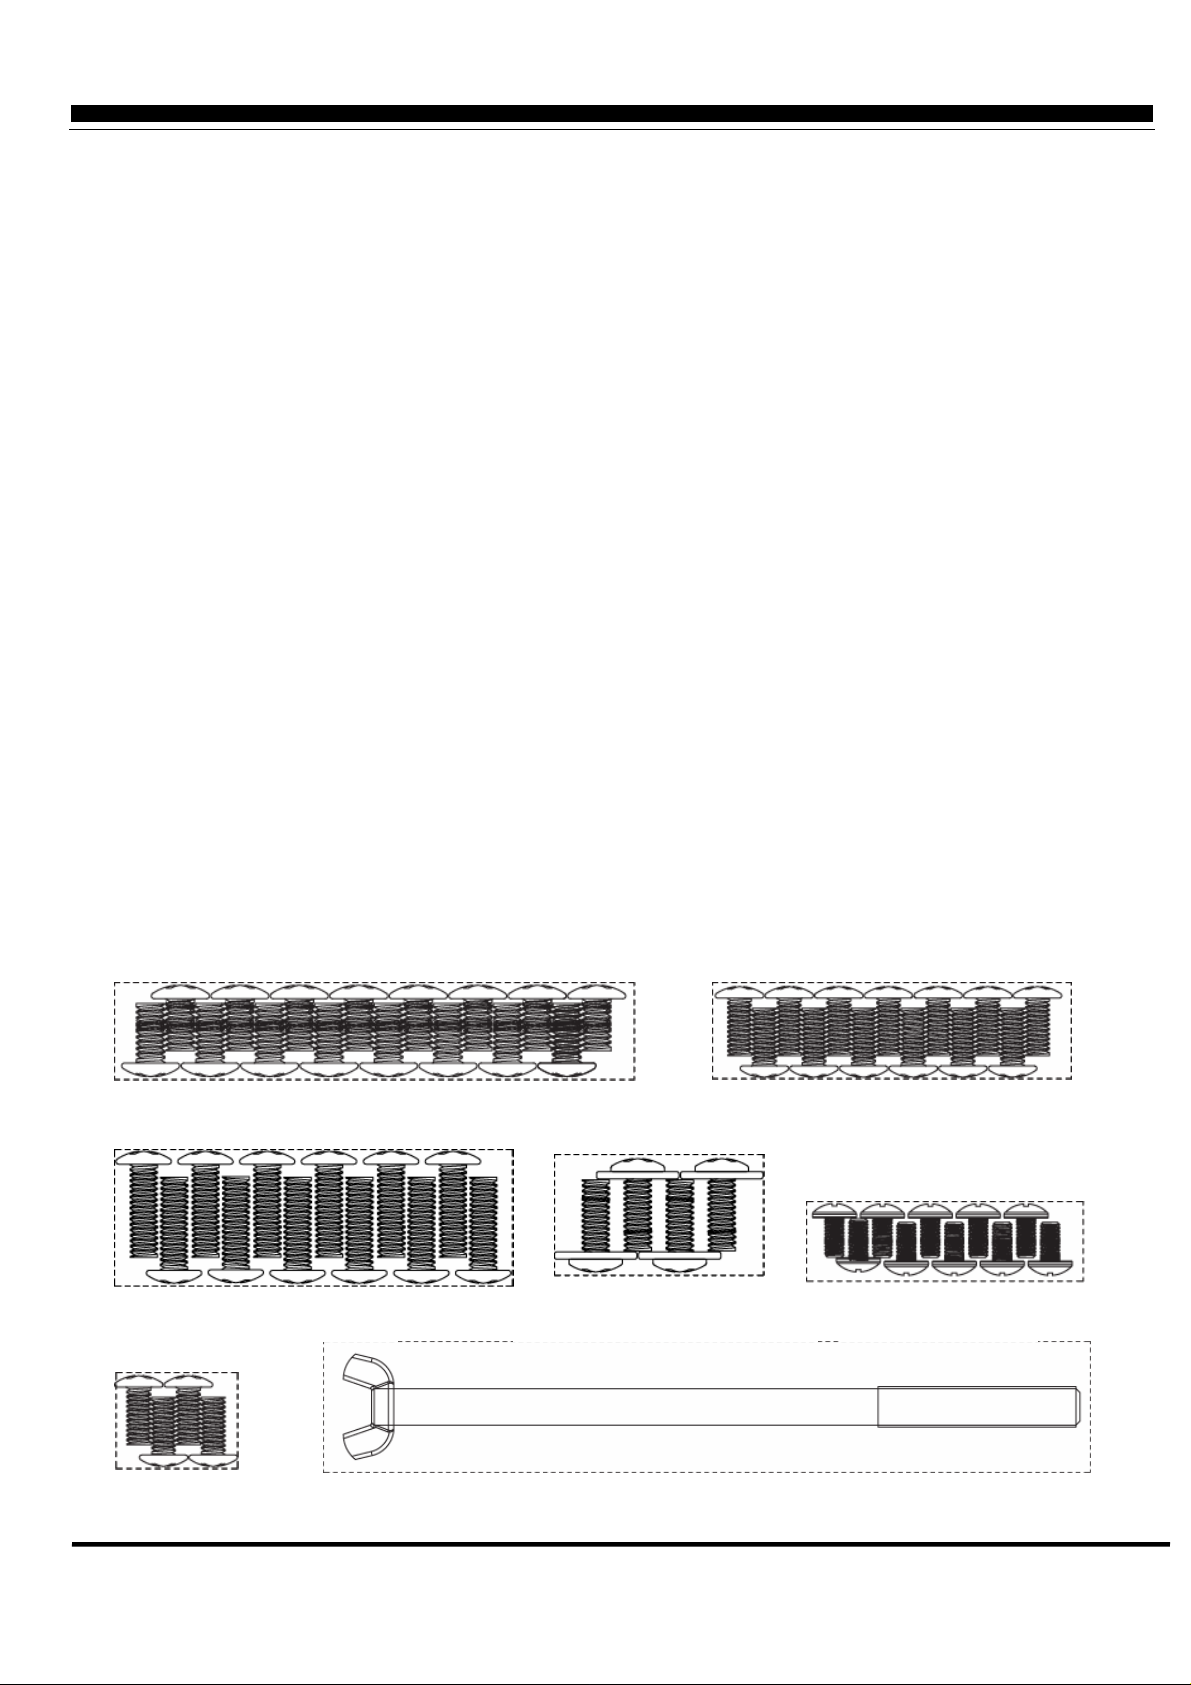
HARDWARE LIST
M6x12 bolt (16pcs) M5x12 bolt (13pcs)
M6x20 bolt (12pcs) ST5x8 bolt (10pcs)
M6x16 bolt with washer (4pcs)
M4x12 bolt (4pcs) Cylinder locking bolt (1pc)
10
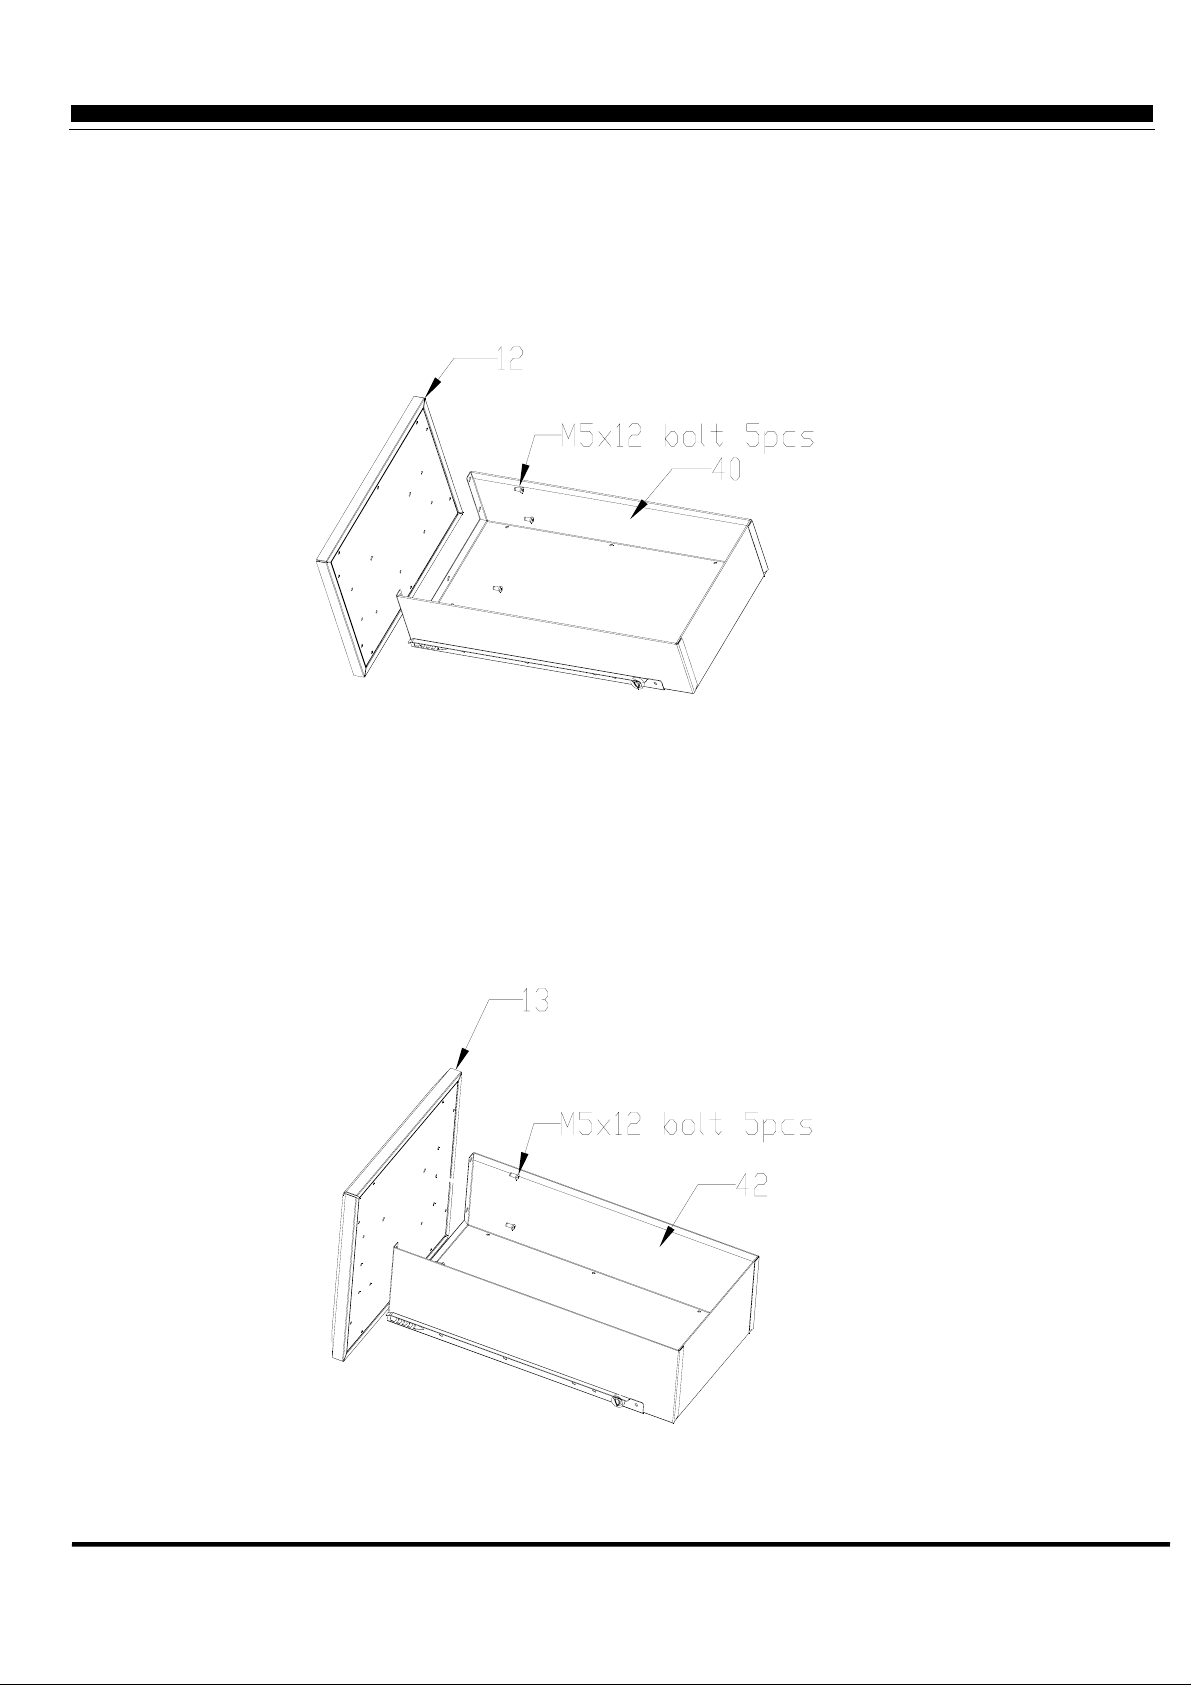
ASSEMBLY INSTRUCTIONS
STEP 1
Fix (12) top drawer front panel onto (40) top drawer body with 5pcs M5 x 12 bolts.
STEP 2
Fix (13) lower drawer front panel onto (42) lower drawer body with 5pcs M5 x 12 bolts.
11
 Loading...