

USER MANUAL
MW10Q15

Features
Brows e the Web.
Vis it your f avori te webs ite s
Check y our e-m ail
Keep in t ouch wi th fr ie nds a nd fami ly
Wat ch YouTube ™ video s
Brows e the wor ld’ s most po pul ar
video -shar ing c om mun ity
Read yo ur favo rit e bo oks
Downl oad tho usa nd s of bo oks .
Disco ver man y Win do ws ap p
Conne ct to the I nte rnet wi reles sly
High- speed W i-F i 80 2.11 b /g/ n netwo rking
Enjoy y our med ia li br ary a nywhe re
Porta ble pow erh ou se pl ays pop ular mu sic ,
video ,and ph oto f or mat s
TF card i ncrea ses y ou r sto rage ca pacit y
(up to 32 G B suppo rte d)
Built -in cam era
Conve nient f ron t- fac ing and r ear cam era
Autom atic or ien ta tio n detec tion
Read an y way you w ant ; th e dis play ad justs
autom atica lly !
1
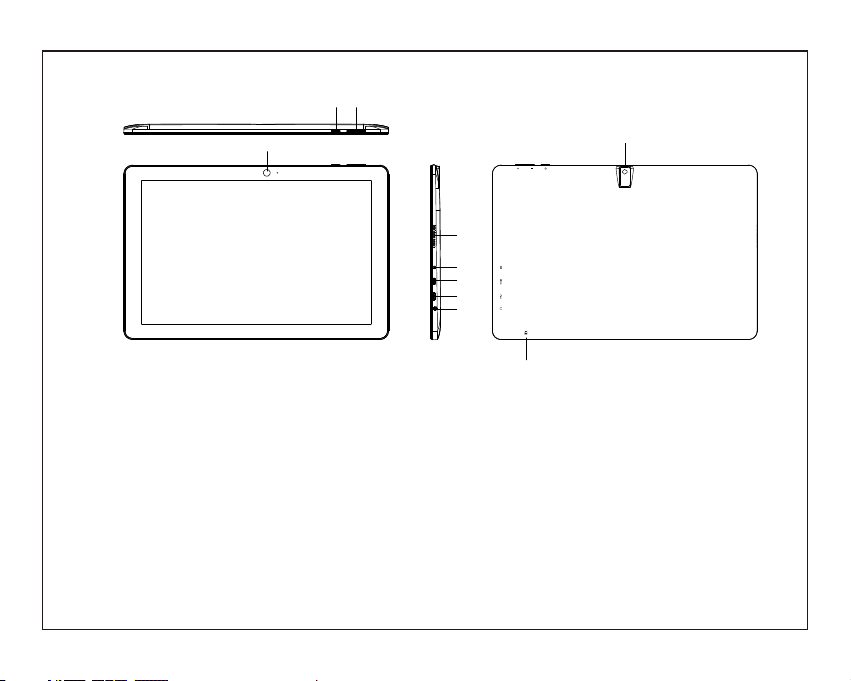
Unit at a Glance
1 2
3
1. POWER
Press to turn the unit on, or to turn the scr een
on or off .
Press and hold to access the Power Off menu.
Keep pressing power button for 3 seco nds and
device will reset automatically.
2. Volume +/Volume-
3. FRONT CAMERA
9
4
5
6
7
8
10
4. SPEAKER
5.DC IN
USB
6.
Connect to a USB device.
7. HDMI
8. Headphone
Audio output connection for headp hones .
9. REAR CAMERA
2
10. TF CARD
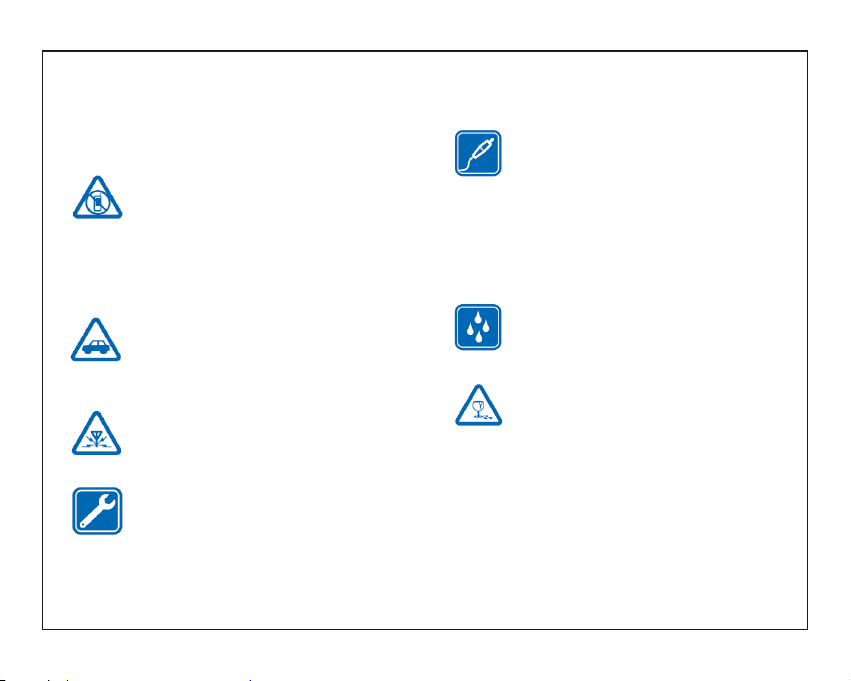
Safety Information
Read th e safet y inf or mat ion bef ore usi ng
the tab let.
witch off in restricted areas
Switch the device off when mobile PC use
is not allowed or when it may cause
interference or danger, for example, in
aircraft, in hospitals or near medical
equipment, fuel, chemicals, or blasting
areas. Obey all instructions in restricted
areas.
road safety comes first
Obey all local laws. Always keep your
hands free to operate the vehicle while
driving. Your first consideration while
driving should be road safety.
interference
All wireless devices may be susceptible to
interference, which could affect
performance
qualified service
Only qualified personnel may install or
repair this product.
batteries, chargers, and other
accessories
Use only batteries, chargers, and other
accessories approved by S805Gfor use
with this
device. Third-party chargers that comply
with the IEC/EN 62684 standard, and that
can connect to your device micro USB
connector, may be compatible. Do not
connect incompatible products.
keep your device dry
Your device is not water-resistant. Keep it
dry.
glass parts
The device screen is made of glass. This
glass can break if the device is dropped on
a hard surface or receives a substantial
impact. If the glass breaks, do not touch
the glass parts of the device or attempt to
remove the broken glass from the device.
Stop using the device until the glass is
replaced by qualified service personnel.
3

Charging the Battery
Charg ing the B att ery
The tab let has a b uil t- in ba ttery a nd the ba tte ry
comes p artia lly c ha rge d. You must f ully ch arg e
the bat tery be for e using y our dev ice for t he fi rst
time. Af ter the f irs t charg e, you ca n use the
devic e while c har gi ng. Al ways ch arge th e
batte ry usin g the 5 V/2A pow er adap ter
provi ded.
Charg ing via p owe r adapt er
Conne ct the st and ar d USB e nd of the U SB cabl e
to the po wer ada pte r. Co nne ct the Mi cro-U SB
end of th e USB cab le to y ou r tab let. Then pl ug
the pow er adap ter i nt o the m ains so cket.
OR
Charg ing via t he US B cable
Conne ct the st and ar d USB e nd of the U SB cabl e
to your P C. Th en conn ect the M icr o-USB e nd of
the USB c able to t he po rt of the t ablet .
An indi cator l igh t ab ove t he powe r butto n wil l
illum inate , ind ic ati ng char ging is i n pro gress .
Indic ator li ght
If the ba ttery i s com plete ly disc harge d, yo u
canno t turn on t he de vi ce, e ven wit h the USB
power a dapte r con ne cte d. Allow a d eplet ed
batte ry to cha rge f or a few mi nutes b efore y ou
try to tu rn on the d evi ce.
Note: You c annot s uff icien tly c harge t he batt ery
using t he USB ca ble a nd y our P C due to
incor rect cu rre nt.
To check th e batte ry st atus, t ap the ba ttery i con
on the bo ttom of t he sc reen.
Power b utton
4

Turning the Tablet On or Off
The fol lowin g scr ee n dra wings a re only f or
refer ence an d ple as e ref er to act ual scr een
drawi ngs.
To tur n on your t ablet
1. Pres s and hol d for a bout 2 se conds t o turn
on your t ablet .
2. If the l ock scr een i mage di splay s, swip e you r
finge r from th e bot tom of th e displ ay
to swit ch to the l ogi n scree n, and th en ente r
passw ord to lo g in to W in dow s.
·Pleas e first c rea te a Micr osoft a ccoun t.
The tab let is re ady f or use af ter the W indow s
Start s creen d isp la ys.
To tur n off the s creen
·When th e table t is tu rned on , press t o turn
off t he scre en to sav e batte ry
power.
·Or you ca n swipe f rom t he righ t edge of t he
displ ay to acc ess t he menu . Tap All
Setti ngs to di spl ay the se tting s. Tap Sy stem→
Power & Sleep t o set t he scre en to
be turn ed off after a s et time p eri od.
NOTE: I f your ta ble t is in a sle ep stat e, pres s
or tap ho me butt on to t urn on th e scree n.
To tur n off the t ablet
·Press a nd hold u nti l you see “ Slide t o shut
down yo ur PC” on t he sc re en.
Slide t o shut do wn yo ur t abl et.
·
You ca n also tu rn of f the t ab let i n deskt op and
table t modes :
5

In desktop mode, tap on the bottom of the
screen to access the menu.
Tap Power→Shut down to turn off the tablet.
To turn off the tablet in tablet mode, first enable the
tablet mode by swiping
the screen from the right to access the menu. In
addition to the action center, it
also allows access to general settings like airplane
mode, rotation lock, and Wi-Fi.
Tap Table mode to enable the tablet mode. Tap
Power→Shut down to turn off
the tablet.
Built-in Applications
Windo ws 10 com es wi th b uil t-in ap ps like M ap,
Photo s, Mail & C ale nd ar, Mu sic and
Vid eo. And th ese app s use One Dri ve to bac k up
your in forma tio n an d syn c
seaml essly a cro ss y our W indow s 10 devi ces , so
you’r e never f ar fr om what y ou need .
6

Touch-Screen Navigation
Your t ablet h as a mu lti-t ouch di splay. You can
touch t he scre en to o pe rat e the tab let.
Swipe right
Swiping-in from the right edge of the
display reveals the menu.
This menu provides access to the action
center and general setting
options.
Swipe left
Swiping slowly from the left edge to the
right edge of the display
reveals thumbnails of the applications.
Swipe down
Swiping-in from the top to the bottom of
an application docks or closes the
application.
Connecting Your Tablet to
a Wi-Fi Network
1. Tap th e Wi-Fi s ymbol o n the bot tom o f the
scree n. Tap Wi -Fi to en able th e Wi- Fi
funct ion.
·A list of av ailab le wi re les s netwo rks wil l
appea r.
2. Tap a ne twork t o conne ct to it.
3. If you w ant you r tab let to au tomat icall y
conne ct to the n etw ork whe n it’s
avail able, t ap Co nn ect a utoma tical ly.
4. Tap Co nnect .
5. If pro mpted , typ e your ne twork s ecuri ty ke y
(netw ork pas swo rd ), an d then ta p
Next.
6. Choo se whet her o r no t you w ant to sh are wit h
other c omput ers a nd d evi ces on
the net work.
·Choos e No if you ’re c on nec ting to a n etwor k
in a publ ic plac e lik e a Ca fé.
To discon nect fr om a wi re les s netwo rk
1. Tap th e Wi-Fi s ymbol a nd then t ap th e
netwo rk with a c onn ec ted s tatus .
2. Tap Di sconn ect.
7

Troubleshooting
1.1 Device can not connect to Wi-Fi
-- Ensure the wireless network is working by testing
it using another wireless device.
-- Ensure the device and the wireless router is within
the range of the wireless network to be connected
too. Walls or other obstructions will reduce the
possible distances between wireless devices.
-- Ensure the security password being used is
correct. 1.2 Device doesn’t turn on
-- You can not turn on the device when the battery
charge is below the critical level, please charge the
battery.
-- Press the Power button for 10s times on the
device and check if it is restarting is normally or not.
-- Check if the charger is connected correctly.
1.3 Heat Issues
-- When running multiple applications, using the
screen on its brightest setting, or when being
charged, this device can get quite hot. This is normal
and should not cause any inconvenience when in
use.
1.4 System has anomalies and doesn’t work
correctly
-- Installing some third-party applications may cause
the system not to operate correctly. Press the Power
button for 10s times device will Re-boot.
1.5 Cannot set E-mail or registration application
Ensure that the MID is connected to a Wi-Fi
–
network and can connect to the Internet.
-- Ensure you E-mail settings have been entered
correctly for the account being accessed.
-- Make sure your system time and local time are
correct.
1.6 Can not record
-- Press the Power button for 10s times, then
check if the record function works correctly.
1.7 The stand-by time of the device is too short
-- The duration of the lithium battery varies with
environmental temperature changes and the
service conditions. If the environment
temperature is too low or too high, the duration
of the battery will be affected. It is
recommended to use this device at normal
temperature.
-- Battery life is dependent on usage. High
volume, WIFI, and the frequent use may cause
the battery to be drained at a higher rate.
1.8 No sound via earphone
– Please check if the volume setting is 0
-- Please check if audio file is broken, and try to
play another audio file to confirm. If the audio
file is broken, it may cause severe noise or
static.
1.9 The color distortion of video or picture display
9

Troubleshooting
Specifications
– Press the Power button for 10s times on the
device to resolve this issue.
1.10 Can not copy files
-- Please check if the device is connected to the
computer correctly.
– Please check if the memory space is full
-- Please check if the USB cable is broken.
1.11 Other troubles
Please follow up the next step to fix the other
troubles before you return the MID/Tablet PC to us:
-- Step 1: Press the Power button for 10s times,
then check if the function works correctly;
-- Step 2: Upgrade the firmware from the CD and
restart the MID/Tablet PC, then check if the
function works correctly.
Pro ces sor
Sto rag e
Displa y
Wi- Fi Net worki ng IE EE 80 2.11 b/g/n
Audio Ou tpu t 3.5 mm he adp hon e
PC In ter fac e USB 2.0 hi gh sp eed
Camera
Ope rat ing
Sys tem
Power
P Adapte r(D C IN 5V, 3A)ower
Speake rs
10
INT EL Z8 350 W IND OWS
RAM
ROM
10.1” IPS
Capacitive touch screen
Fro nt
Rear
WIN DOW S 10
Rechar gea ble L i-p oly b att ery
1x1W spe ake r
2G
32 GB
LCD (800X1280),
2 M
5 M

FCC Statement
This equipment has been tested and found to comply with the limits for a Class B
digital device, pursuant to part 15 of the FCC rules. These limits are designed to
provide reasonable protection against harmful interference in a residential installation.
This equipment generates, uses and can radiate radio frequency energy and, if not
installed and used in accordance with the instructions, may cause harmful interference
to radio communications. However, there is no guarantee that interference will not
occur in a particular installation. If this equipment does cause harmful interference to
radio or television reception, which can be determined by turning the equipment off
and on, the user is encouraged to try to correct the interference by one or more of the
following measures:
-Reorient or relocate the receiving antenna.
-Increase the separation between the equipment and receiver.
-Connect the equipment into an outlet on a circuit different from that to which the
receiver is connected.
-Consult the dealer or an experienced radio/TV technician for help.
To assure continued compliance, any changes or modifications not expressly
approved by the party.
Responsible for compliance could void the user's authority to operate this
equipment. (Example- use only shielded interface cables when connecting to
computer or peripheral devices).
This equipment complies with Part 15 of the FCC Rules. Operation is subject to
the following two conditions:
(1) This device may not cause harmful interference, and
(2) This device must accept any interference received, including interference that
may cause undesired operation.
RF warning statement:
The device has been evaluated to meet general RF exposure requirement.
The device can be used in portable exposure condition without restriction.
 Loading...