

Helo Fusion 60, Fusion 90, FUSION, Fusion 80 Instructions For Installation And Use Manual
INSTRUCTIONS FOR INSTALLATION AND USE
FUSION
ELECTRIC SAUNA HEATER:
1117 - 60 - 0405
1117 - 80 - 0405
1117 - 90 - 0405
CONTROL PANEL:
1601 - 20
7014251 314 SKLS 2 C

Contents
1. Quick instructions for use of the sauna heater ....................................................................... 3.
1.1 Check before taking a sauna bath ................................................................................................................. 3.
1.2 Quick start of the sauna heater ..................................................................................................................... 3.
2. Information for users .............................................................................................................. 4.
2.1. Sauna heater and its components ................................................................................................................. 4.
2.2. Sauna room .................................................................................................................................................... 5.
2.3. Recommended sauna room ventilation ........................................................................................................ 5.
2.4. Heating the sauna ......................................................................................................................................... 5.
2.5. Sauna heater stones ....................................................................................................................................... 5.
2.6. Operation of the sauna heater controls ......................................................................................................... 7.
2.6.1. Control centre operation modes ....................................................................................................... 7.
2.6.2. Time setting ...................................................................................................................................... 8.
2.6.3. Checking the bathing program ........................................................................................................ 9.
2.6.4. Setting the bathing program ............................................................................................................ 10.
2.6.5. Setting the remote control mode ..................................................................................................... 13.
2.7. Special functions in steam sauna mode ............................................................................... 14.
2.7.1.Drying mode ........................................................................................................................................ 14.
2.7.2.Water tank filling notification ............................................................................................................. 14.
2.8.Light and fan ................................................................................................................................ 15.
2.9.Maintenance ................................................................................................................................. 16.
3. Instructions for the installer ................................................................................................... 17.
3.1. Preparing for sauna heater installation ........................................................................................................ 17.
3.2. Installation .................................................................................................................................................... 17.
3.3. Recommended sauna room ventilation ....................................................................................................... 20.
3.4. Main connection ........................................................................................................................................... 20.
3.5. Block diagram of the electric and HPAC connections ............................................................................... 21.
3.6. Electric heating toggle ................................................................................................................................. 22.
3.7. Maximum setting for bathing time .............................................................................................................. 22.
3.8. Sauna heater remote control ........................................................................................................................ 23.
3.9. Locating the connection box for connection cable in the sauna room ...................................................... 24.
3.10. Control centre error messages ...................................................................................................................... 25.
Spare parts for the FUSION electric sauna heater ..................................................................... 27.
ROHS .......................................................................................................................................... 28.
2
1. Quick instructions for use of the sauna heater
1.1 Check before taking a sauna bath
The sauna room is suitable for taking a sauna bath.
The door and the window are closed.
The sauna heater is topped with stones that comply with the manufacturer's recommendations, the
heating elements are covered with stones, and the stones are piled sparsely.
NOTE: Structural clay tiles are not allowed.
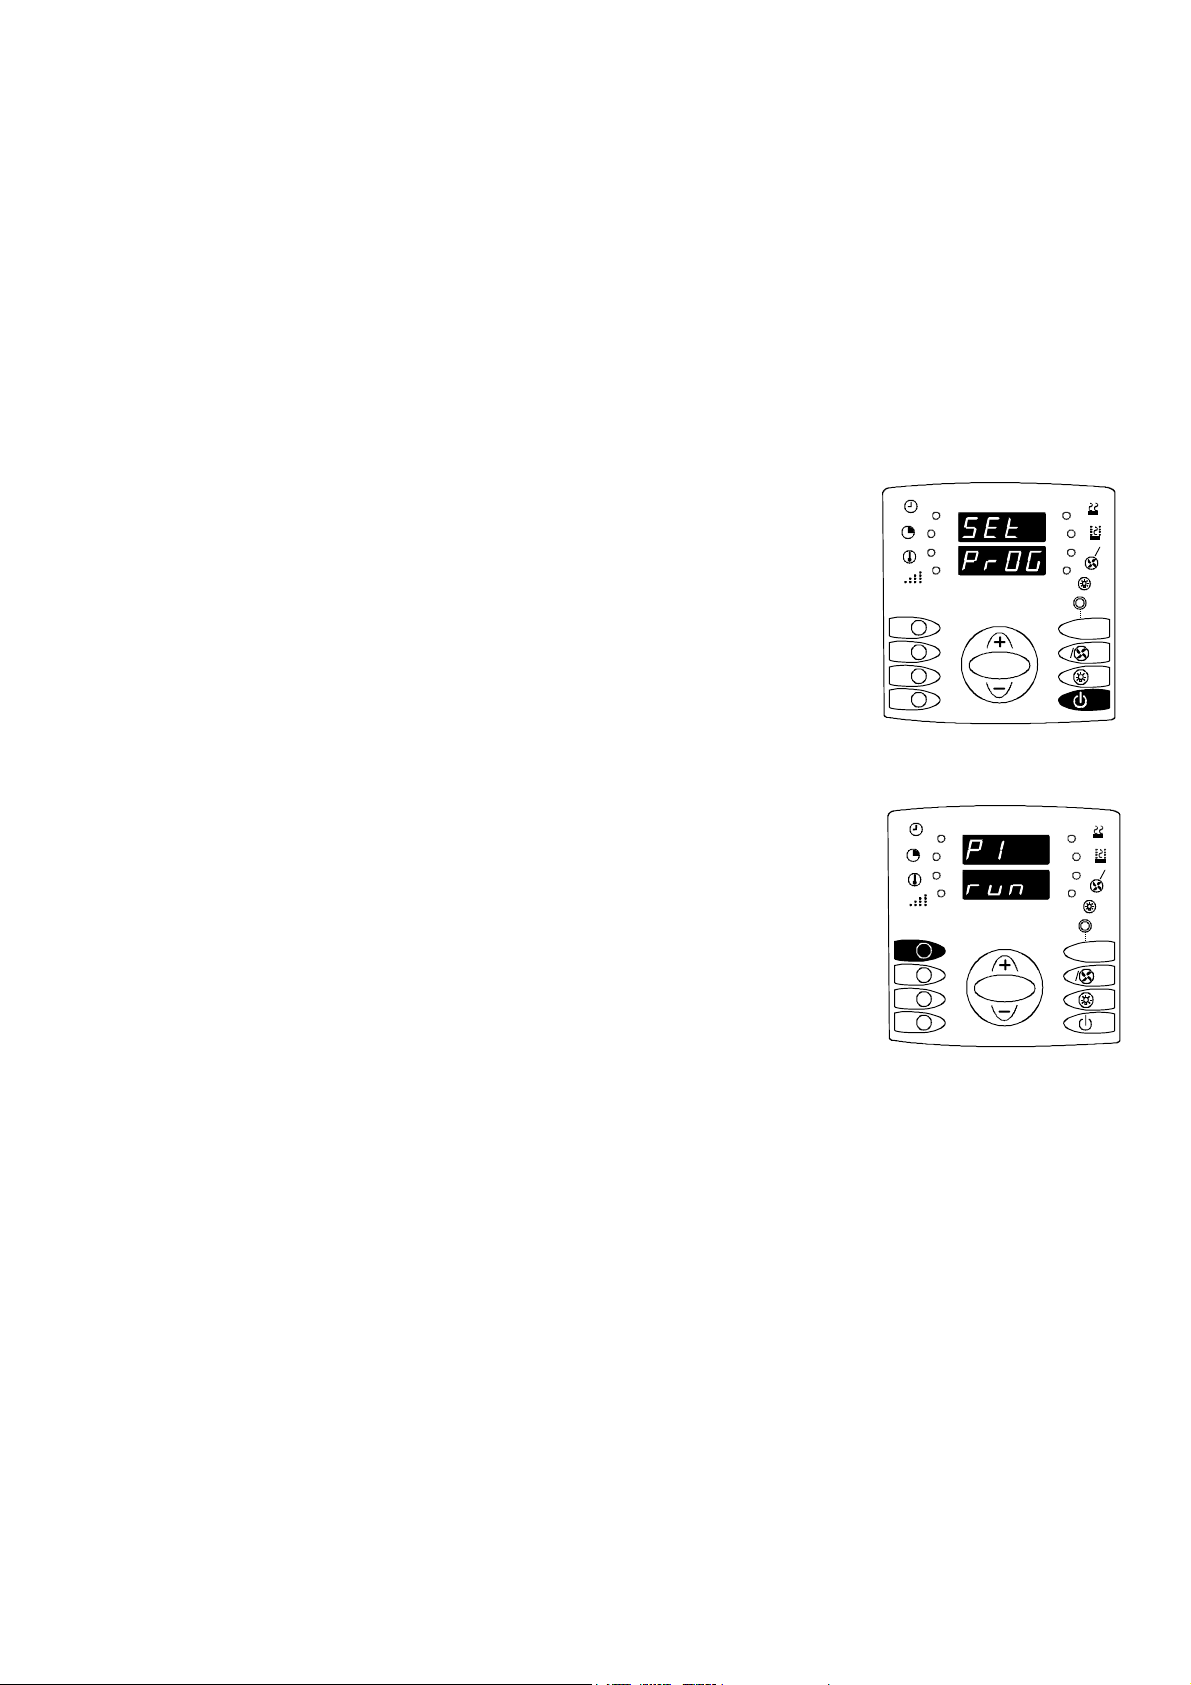
1.2 Quick start of the sauna heater
Press the Start button, when the control centre is in standby
mode (display dark). "SET PROG" is displayed and the
control centre goes to use / programming mode and
waits for user's selection.
Select one of the pre-programmes sauna programs with the buttons 1 -4
(memory slot 1 selected in the picture). The factory settings for the memory
slots 1 -4 are as follows:
Memory slot 1: Normal sauna / 80°C / 2 hours
Memory slot 2: Normal sauna / 90°C / 2 hours
Memory slot 3: Steam sauna / 50°C / 60% / 2 hours
Memory slot 4: Steam sauna / 60°C / 38% / 2 hours
Memory slot contents may be reviewed without turning the sauna heater on and the contents may freely
be modified to accommodate user preferences. For more detailed instructions, see 2.6 "Using the sauna
heater control device."
If a sauna heater with manual water intake and a steam sauna program is selected, make sure that there is
enough water in the water tank. Filling the tank is significantly safer when the sauna heater is cold.
Persons with reduced physical and mental capacity, sensory handicap, or little experience and knowledge
about how the device is operated (e.g. children), should only operate the device while supervised or
according to instructions given by the persons in charge of their safety.
Make sure that children aren't playing with the sauna heater.
1
2
3
4
1
2
3
4
OK
OK
A
A
A
R
A
R
3

2. Information for users
2.1. Sauna heater and its components
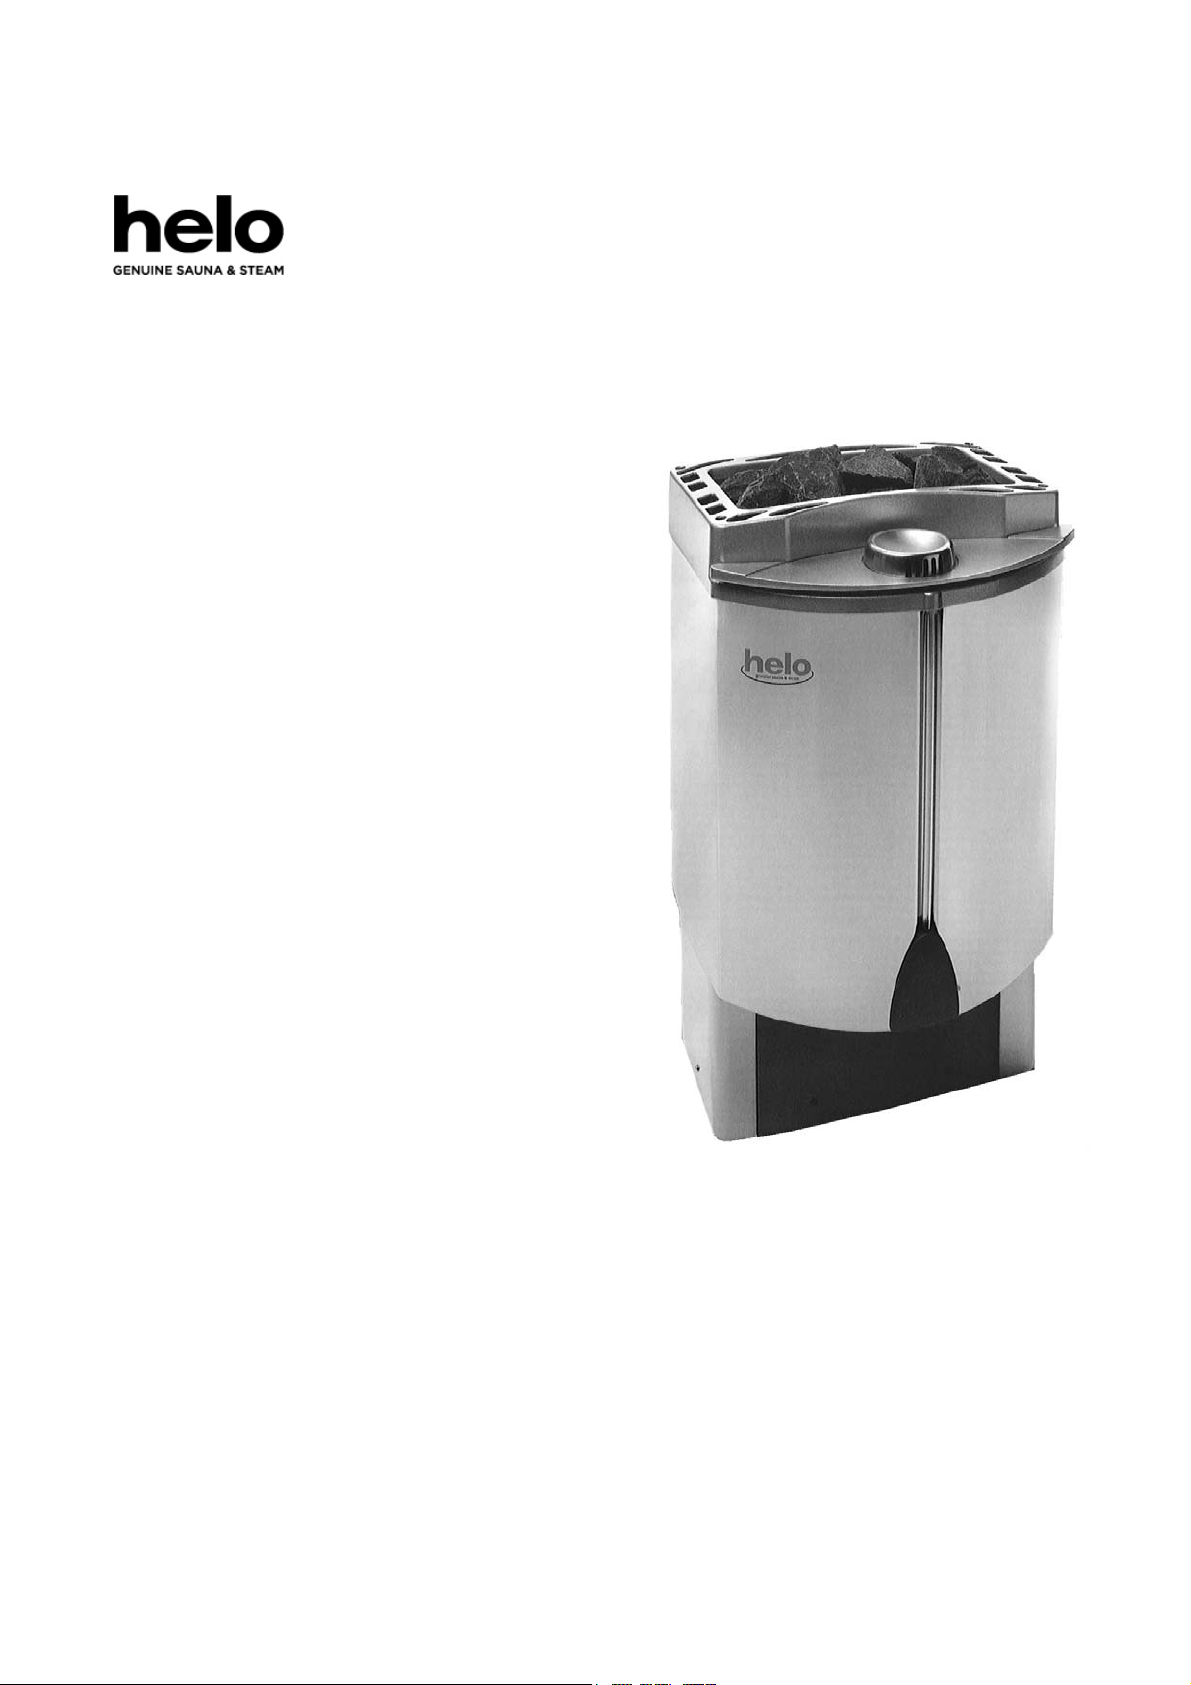
Sauna heater
The Fusion's design and technical properties make it a unique sauna heater. It combines traditional dry
and hot, and a lower temperature and moist way of sauna bathing. The integrated steamer in the sauna
heater makes this possible. The water vapours the steamer produces increases the pleasure of sauna
bathing and it has beneficial effects on skin and health.
The steamer's water tank is situated in the front of the sauna heater, which makes the steam spread more
quickly into the sauna room. It also facilitates maintenance of the water tank. The scent cup on top of
the water tank may be used for aromatherapic scents to increase the invigorating effects of sauna
bathing. NOTE: Do not use scents in the water tank!
There are two possible ways of filling the tank with water, depending on the sauna heater.
Manual water intake
If the sauna heater is equipped with manual water intake, the filling is done by raising the scent cup and
then pouring water into the tank with a jug or similar, up to the max marking. The tank should be filled
always before turning the sauna heater on, because the scent cup will heat up to scalding temperatures
when the sauna heater is turned on.
The water tank capacity is about 5 litres, and there is an indicator at the front of the sauna heater for
viewing the water level.
Automatic water intake (optional)
There is an automatic water intake feature in some models of the sauna heater. This means that the sauna
heater has a water connection and automatic water level measuring. The sensor in the tank senses when
there is a need to increase water in the tank and automatically fills the tank.
Sensors
Two sensors are installed in the sauna room: one temperature sensor and and one humidity sensor. An
electrician installs the sensors, placing them in predetermined points in the sauna room.
Temperature sensor OLET 19
The temperature sensor monitors the temperature of the sauna room and controls the sauna heater
output so that the desired temperature is kept as stably as possible. The sensor has in-built temperature
limiter. The limiter cuts power off the sauna heater, if the temperature in the sauna room raises
dangerously high. Tripping of the limiter will cause an error message in the control centre display, see
page
Humidity sensor OLET 21
The humidity sensor monitors the air humidity in the sauna room and it controls the steamer so that the
humidity is as stable as possible all though the sauna bathing. When the steam feature is in use, also the
humidity sensor measures the temperature of the sauna room.
4

Digital control centre
With the control centre the user can set the steamer function, temperature, starting time, bathing time,
etc. An electrician installs the control centre outside the sauna room either as surface mounting or as
flush mounting. The user can set the time easily, or it may be left for the installer to set. For additional
information on the control centre, see page 7 2.6 – Operation of the sauna heater controls.
2.2. Sauna room
The walls and ceiling of a sauna room should be thermally well insulated. All surfaces that store heat,
such as tiled and plastered surfaces must be insulated. It is recommended to use wooden panel cladding
inside the sauna room. If there are heat storing elements in the sauna room, such as decorative stone,
glass etc., note that these elements may extend the pre-heating period even though the sauna room is
otherwise well insulated (see page 17, 3.1 Preparing for sauna heater installation ).
2.3. Recommended sauna room ventilation
For additional information on recommended sauna room ventilation, see page 20, 3.3 – Recommended
sauna room ventilation.
2.4. Heating the sauna
Before turning the sauna heater on, make sure the sauna room is suitable for taking a sauna bath. When
heated for the first time, the sauna heater may emit some odour. If you detect any odour while the sauna
heater warms up, disconnect the sauna heater briefly, and air the room. Then turn the sauna heater back
on.
Sauna heater with a separate control centre, see page 7, 2.6 - Operation of the sauna heater controls.
You should turn the sauna heater on roughly an hour before you plan to take a sauna bath, so that the
stones have time to heat up properly and the air warms up evenly in the sauna room.
Do not put any objects on the sauna heater. Do not dry clothes on the sauna heater or anywhere
in its vicinity.
2.5. Sauna heater stones
Quality stones meet the following requirements:
1. Sauna stones should withstand heat and heat variation caused by vaporisation of the water thrown on
the stones.
2. Stones should be rinsed before use in order to avoid odour and dust.
3. Sauna stones should have an uneven surface to supply a larger surface for the water to evaporate from.
4. Sauna stones should be large enough, measuring about 50–80 mm to allow good ventilation between
the stones. This extends the useful life of the heating elements.
5
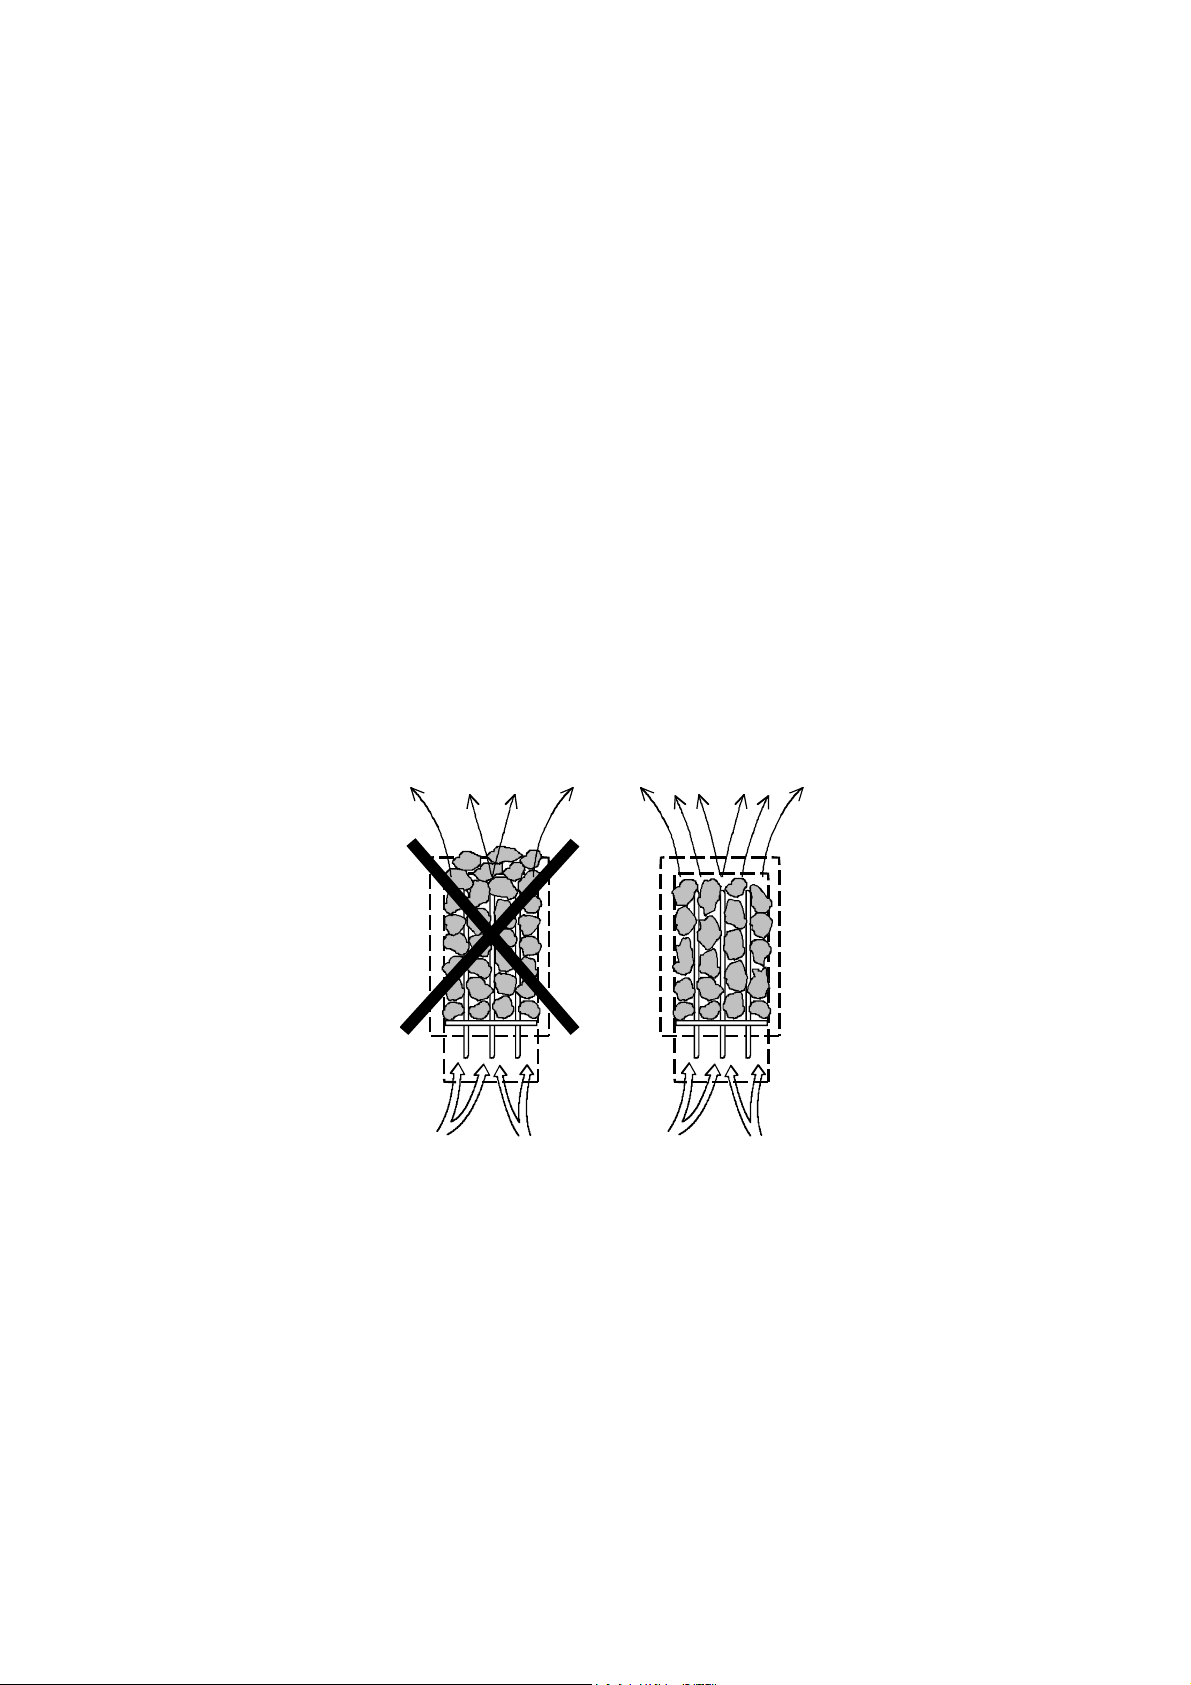
Sauna stones should be piled sparsely in order to enhance ventilation between the stones. Do not bend
the heating elements together or against the frame.
Rearrange the stones regularly (at least once a year)and replace small and broken stones with new, larger
stones.
Stones are piled so that they cover the heating elements. Do not, however, pile a large heap of stones on
the heating elements. For appropriate amount of stones, see table 1 on page 19. The small stones
possibly found in the package must not be put into the sauna heater.
The warranty does not cover defects resulting from poor ventilation caused by small and tightly packed
stones.
Structural clay tiles are not allowed. They may cause damage to the sauna heater that will not be covered
by the warranty.
6
2.6. Operation of the sauna heater controls
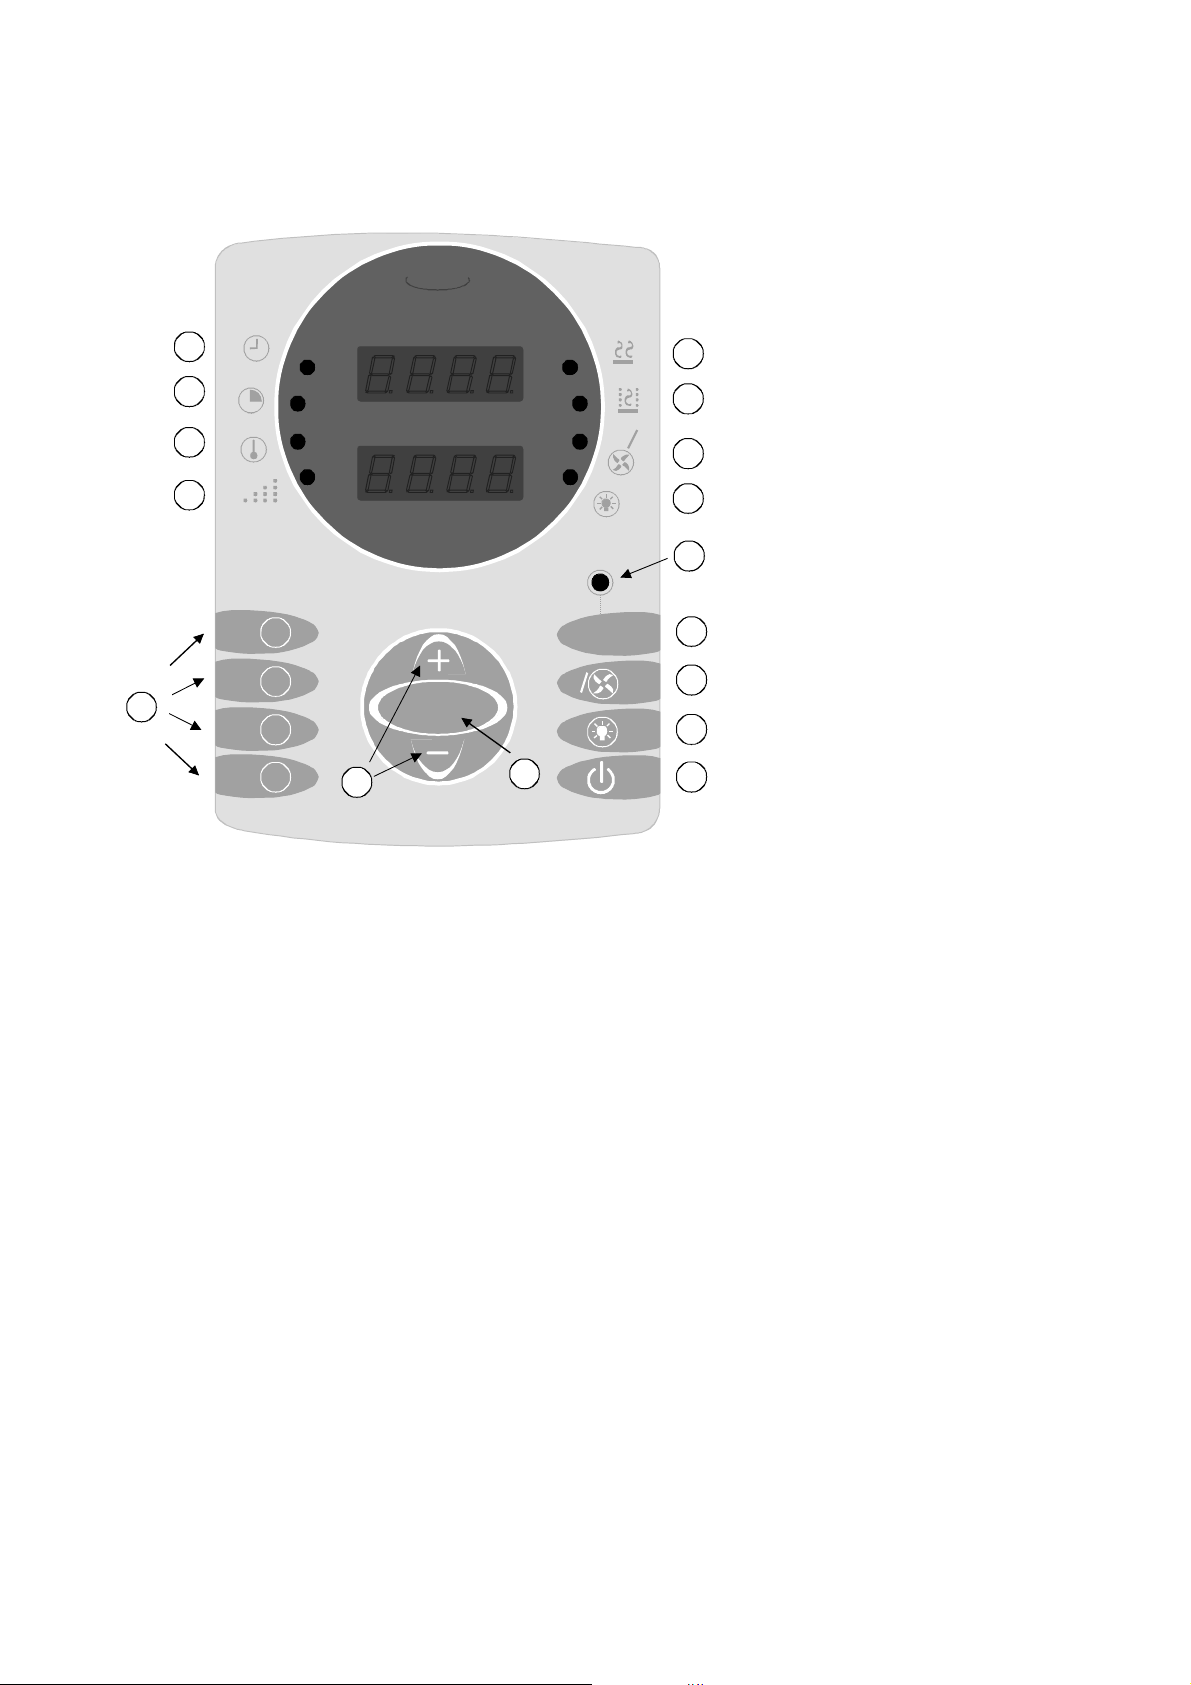
Control centre buttons
helo
1. Start / Stop
2. Light
3. Fan
11
10
9
A
4. Remote control
12
5. Selection / Acknowledgement
6. Arrow up / down
13
7. Memory slots
14
Indicator lights of the control centre
8
15
8. Humidity
16
9. Temperature
10. Operating time
11. Pre-selection time
1
2
7
3
4
6
OK
5
R
A
4
12. Normal sauna
13. Steam sauna
3
14. Fan
15. Light
2
16. Remote control
1
2.6.1. Control centre operation modes
Standby mode: The control centre display is dark and the following functions are possible.
• Checking and setting the time
• Checking the memory slot contents
• Setting the remote control mode
Use / Basic mode of the control centre when the Start button programming mode
programming is pressed. The following functions are possible in this
mode
• Starting the sauna heater as quick selection (Memory slots 1-4)
• Programming the memory slots
• Setting the mode, time, temperature, humidity and pre-selection time for bathing
7

Pre-selection mode: If there is a pre-selection time set in the use / programming mode,
the control centre goes into this mode as soon as the settings are
saved. The following settings may be modified in this mode
• Pre-selection time
Heating mode: The control centre goes into heating mode after the pre-selection
time has expired or when a quick selection is used. The following
settings may be modified in this mode
• Bathing time
• Bathing temperature
• Humidity (only when the bathing mode is steam sauna)
Drying mode: This mode is in use only when the bathing mode is steam sauna. The
control centre goes automatically into this mode as soon as the bathing
time has expired. The drying time is 30 minutes at 90 °C (these settings
can not be modified). The drying mode may be aborted by pressing the
Start / Stop button.
NOTE: If bathing is stopped before the bathing time has expired,
the control centre will not go into drying mode, but directly into
standby mode.
Remote control mode: If the sauna heater is equipped with a remote control device, the control
centre may be set in a remote control mode. The sauna heater may then be
remotely started with desired quick selection program. For more information
about remote controlling, see 2.6.5 Setting the remote control mode, and 3.8
Sauna heater remote control.
The following functions are independent of the control centre mode, so they
may be used always
• Lighting controls
• Fan controls
2.6.2. Time setting
If power is cut off for over 30 seconds (either from the sauna heater main switch or due to blackout), the
control centre clock will reset to factory setting (12:00). During shorter cut offs (under 30 seconds),
control centre backup use will keep the clock in time. Checking and setting the time may only be done
when the control centre is in standby mode.
1. With the control centre in basic mode, press the OK button.
The upper display shows the software version and the lower display shows
the time. The hour separator (dot) flashes to indicate that the clock in running.
If no button is pressed within 5 seconds, the control centre returns to standby
mode.
1
2
3
4
OK
A
R
A
8

2. When the OK button is pressed again, the hour separator stops
flashing to indicate the clock is stopped and may now be set to
desired time. The setting
is done by pressing either arrow up (+) or arrow down (-) buttons. A
short press will step a minute at a time and a long press will scroll the
number with acceleratingspeed.
1
2
3
4
OK
3. When the desired time is displayed, confirm the setting by pressing OK. The hour
separator starts flashing to indicate that the clock in running. In 5 seconds the control
centre returns automatically to standby mode.
2.6.3. Checking the bathing program
Fusion sauna heater control centre is equipped with 4 memory slots which may be programmed with
unique bathing programs. As factory settings the memory slots 1 and 2 are programmed with normal
sauna programs and the slots 3 and 4 with steam sauna programs. It is possible to program a personal
bathing program into the memory slots. These programs are stored in the memory, even if power is cut
off the control centre. Bathing programs can be checked when the control centre is in standby mode.
For more detailed instructions for setting bathing programs, see 2.6.4 - Setting bathing program and Saving bathing program. page 12
1. With the control centre in standby mode, press and keep pressed the number of the
memory slot you wish check and keep the button pressed. The upper display shows the
number of the memory slot. Keep the button pressed.
2. After about 2 seconds the display show the set values for that memory slot. The upper
display shows bathing time and the lower display shows bathing temperature. If a steam
sauna program is stored in the memory slot, the lower display shows first the bathing
temperature and then the humidity setting.
3. The indicator light by the display indicate, which value is shown on the display. The
control centre returns to standby mode when the button is released
NOTE: If the memory slot buttons are pressed when the control centre is in use / programming mode,
the sauna heater will turn on immediately with the program stored in that memory slot (see 1.2 - Quick
start of the sauna heater).
A
R
A
9
 Loading...