

Helo 1714-45-1718, 1714-60-1718, 1714-80-1718, 1714-90-1718 Instructions For Installation And Use Manual
INSTRUCTIONS FOR INSTALLATION AND USE
SAUNA HEATER Typ 1714-45-1718
Typ 1714-60-1718
Typ 1714-80-1718
Typ 1714-90-1718
VOLTAGE 230V 3~
230V 1N~
400V 3N~
INSTALLATION OF THE HEATER
For information about how to install the heater, please see page 3. When mounting the heater, please take
note of the following:
- Follow the give instructions
- Wood panelling is the approved material for walls and ceiling in the sauna room.
- Check that the wall panelling is secured where the screws will be fastened.
- Only one sauna unit may be installed in a sauna room.
- The heater must not be installed in a niche nor must it be surrounded by a compact heater quard.
MAIN CONNECTION
The sauna heater must be connected to the power supply by a qualified electrician and in compliance with
current regulations. The cable used must be at least oil resistant rubber coated HO7RN-F type. Also other
cables coming from the heater (such as those for the signal lamp, locking circuit for other heating appliances)
should be of corresponding type and have a similar cross-section as the above mentioned. The lid of the
connection box can be opened by removing (pulling) the knobs, unscrewing the two screws under the side
cover plate and by carefully pulling the bottom part of the side cover plate outwards and down.
SAUNA STONE
Sauna stones may be dusty, we recommend that they are rinced before being placed in the rock
compartment. Put the larges stones at the bottom. Do not pack stones tight but place them to allow good air
circulation. To prevent damage to the sauna unit, the stones must be replaced if they begin to flake.
NB!
The 4,5kW heater must not be used with the bigger stone compartment
TEMPERATURE CONTROL
The thermostat control is set to the desired temperature. The sauna will reach the desired temperature in
about 60 minutes, depending on the size and the construction of the sauna room.
OVERHEATING PROTECTION
If for any reason the air temperature exceeds acceptable limits, the overheating protection automatically cuts
off the power supply. When the heater has cooled down the power can be on again by pressing the reset
button. Before pressing the reset button, the possible cause of overheating should be invesigated.
THE TIMER
The timer, whish is the main power switch of the sauna unit, automatically shuts off the unit at the desired
time.
8 + 4 hour preselection timer setting
The preselector timer allows between 1 and 8 hours presetting, and the maximum running time is always 4
hours.
The preselector timer may be used to in advance set the time when the sauna is to start: If you want to use
the sauna "at once", the switch is set anywhere between 1 and 4 hours, and the unit is on.
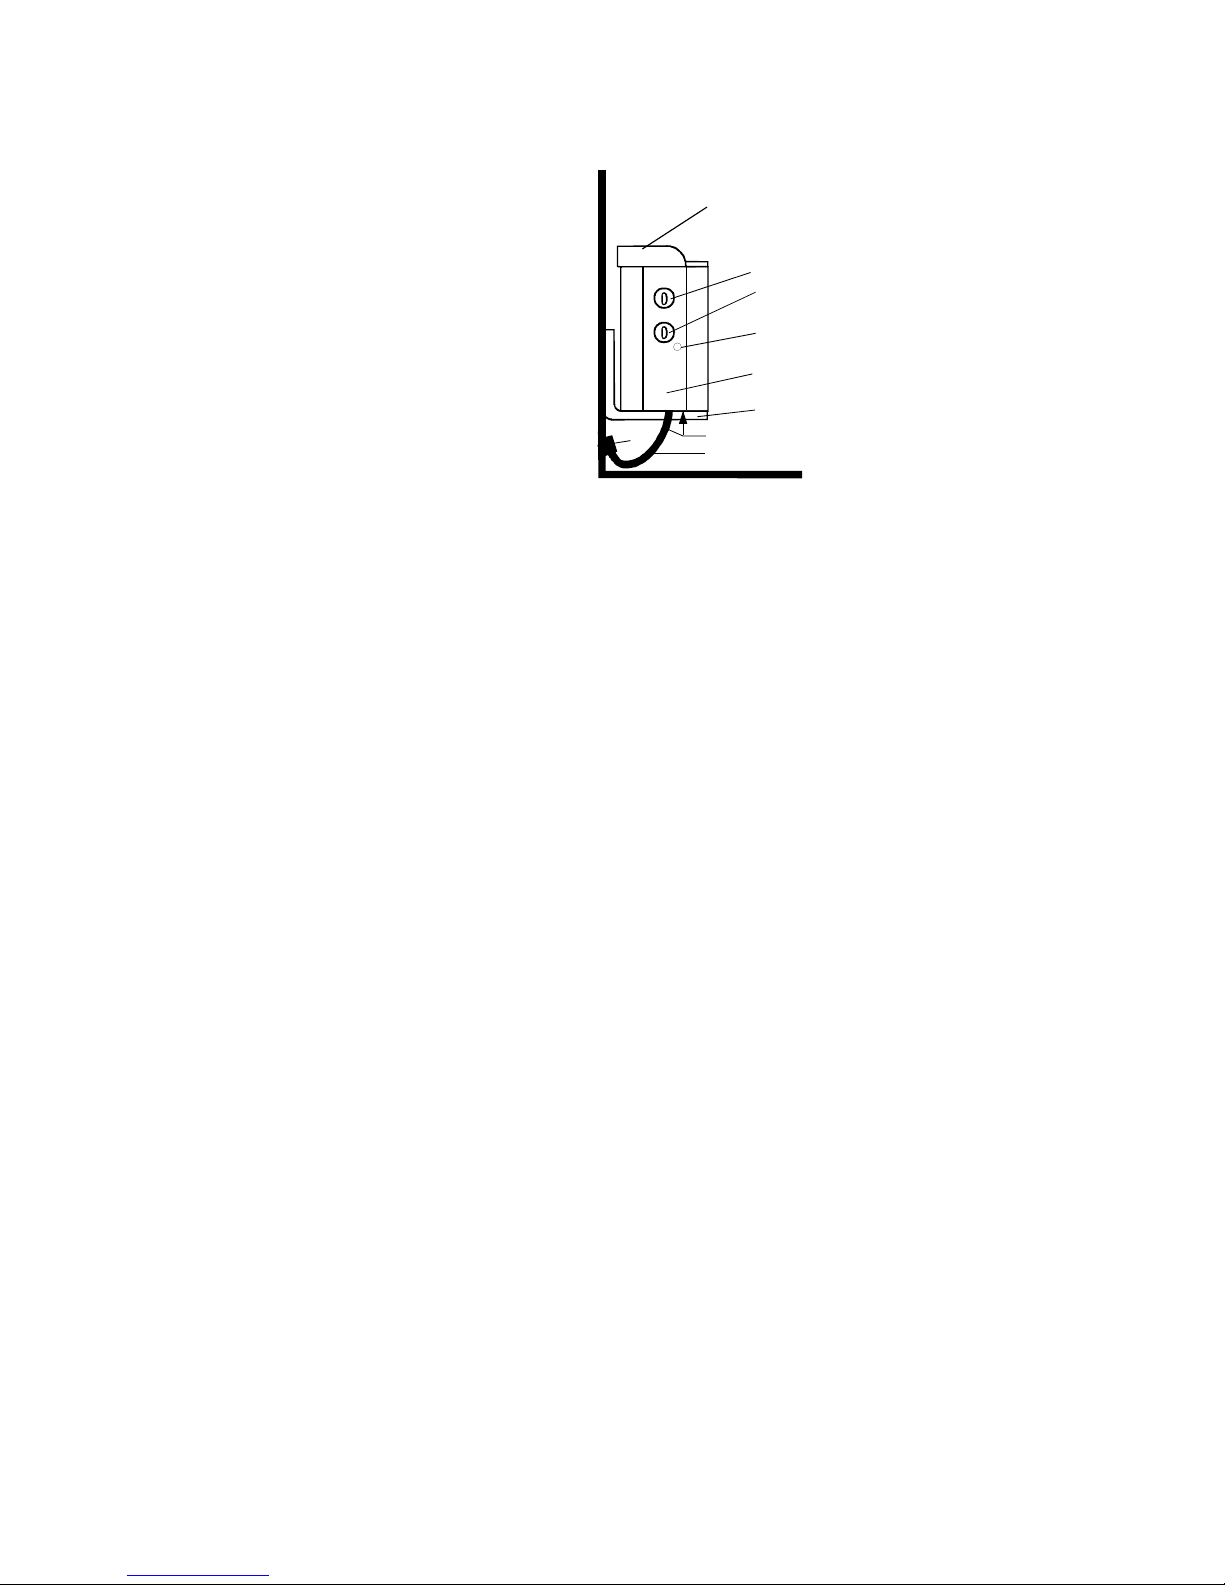
1. Top
2. Timer
3. Thermostat
4. Overheating
protection reset
5. Connection box
6. Mounting bracket
7. Screws for the
connection box
8. Power supply cord
9. Junction box
1
2
3
4
5
6
9
7
8
7014380
314 SKSO 30 E

2
1
2
a
b
c
3
INSTALLATION INSTRUCTIONS
1. The supporting bracket is to be
fastened onto the wall in accordance
with the measure stated on the next
page.
3. The heater is to be mounted onto the
supporting brackets so that the
connection box and the knobs (if there
are any) will be visible and easy to
reach. The highest part of the top
should always be closest to the wall. If
this is not the case the top should be
turned around immediately. The top is
fastened with two screws on each side
of the rock container, see drawing.
Screws
 Loading...