

Page 1
559-734-7451 800-367-5480 [email protected]
INSTALLATION INSTRUCTIONS
Adjustable Sway Bar End Links
Thank you for purchasing a quality Hellwig Product.
PLEASE READ THIS INSTRUCTION SHEET COMPLETELY BEFORE STARTING YOUR INSTALLATION
Hellwig Products Company, located in Visalia, California was founded in 1946 with solutions for load control
of loaded passenger cars. The family operated company produces components for trucks, RVs, muscle cars and
military vehicles. Hellwig is ISO9001 certified and is proud to develop, test and manufacture products in the
USA.
7960 ( R-7960) 4/2/2014
Page 2

BE SURE THE CUSTOMER RECEIVES THIS INSTRUCTION SHEET, ALL WARNING
559-734-7451 800-367-5480 [email protected]
TORQUE TABLE
SAFETY:
NOTE:
SUSPENSION, AS IF DRIVING DOWN THE ROAD.
NOTE:
NOTE:
ADDITIONAL CLEVIS KIT (P/N 7964)
BEFORE STARTING YOUR INSTALLATION, BE SURE TO SET PARKING BRAKE AND CHOCK THE WHEELS.
TO EASE INSTALLATION AND TO PROPERLY ADJUST SWAY BAR, THE WEIGHT OF THE VEHICLE MUST BE ON THE
THIS KIT INCLUDES LOCK NUTS WHICH REQUIRE TIGHTENING WITH A WRENCH AFTER BEING STARTED BY HAND.
IF YOUR END LINK ATTACHES TO THE VEHICLE OR THE SWAY BAR WITH A VERTICAL BOLT, YOU MAY NEED AN
BOLT SIZE: 3/8” = 20-30 ft. lbs. – 7/16” = 35-45 ft. lbs. – 1/2” = 50-70 ft. lbs. – 9/16” = 70-90 ft. lbs.
DO NOT RAISE THE VEHICLE BY FRAME.
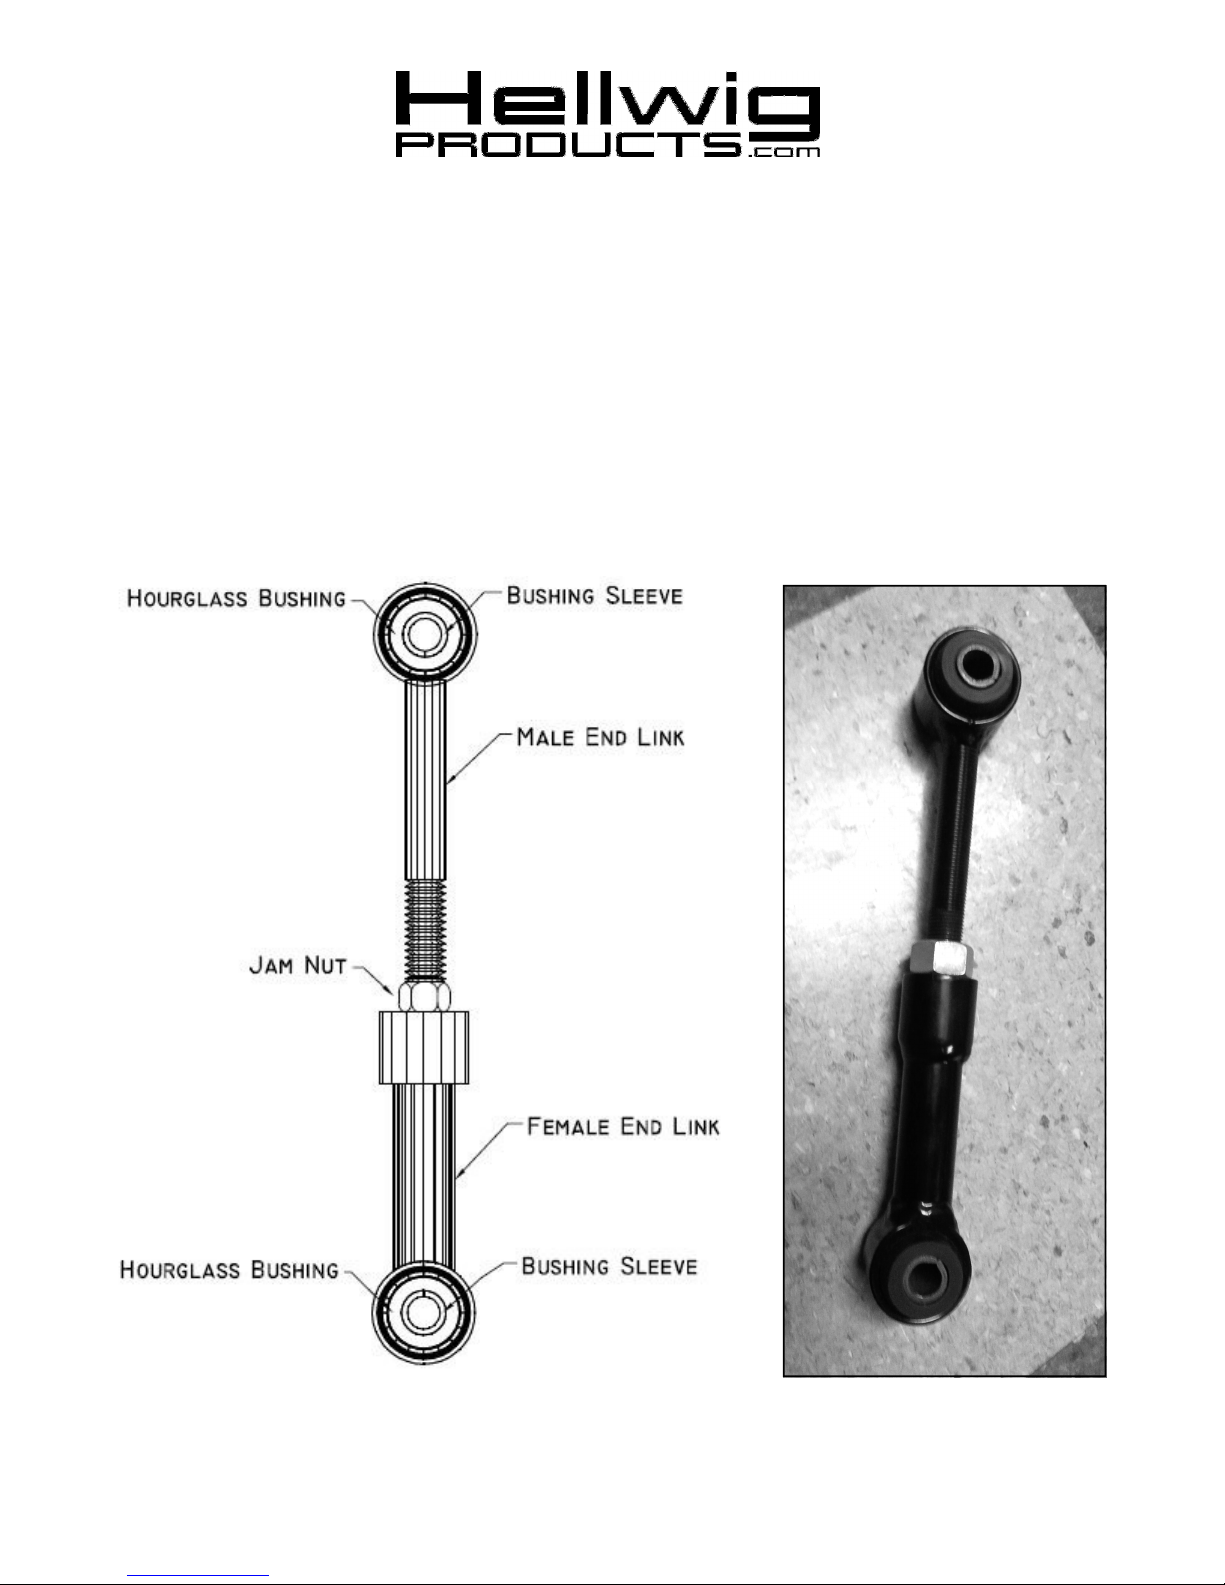
1. Thread the 9/16” nut onto the male end link to use as the jam nut once the end link is assembled.
2. Thread the male and female end links together, leaving the jam nut loose at this time.
3. Lubricate the outside of the polyurethane hourglass bushings and press them into the hoops on both
ends of the end link.
4. Lubricate the outside of the metal sleeve and tap it into the hourglass bushings.
5. Bolt the end link to the vehicle using the 7/16” bolts, washers and lock nuts included.
6. Adjust the end link length so the sway bar arms are parallel to the ground. You must have a minimum
of 7 threads engaged when adjusting the end link height.
7. Bolt the end link to the sway bar using the 7/16” bolts, washers and lock nuts.
8. Tighten the 9/16” nut to keep the end link in position.
9. Bounce the vehicle checking for clearance on all undercarriage components shocks, exhaust etc. Test
drive the vehicle and recheck your installation. Recheck periodically on a regular basis thereafter.
ATTENTION INSTALLER:
AND NOTE CARDS AND THE WARRANTY FORM.
Maintenance and Inspection:
Your Hellwig Suspension Product is built to last. However, as with all vehicle systems, it requires routine
inspection. Inspect your Hellwig installation looking for secure hardware and tight fitting brackets and bushings. If you do not perform this inspection, have your professional mechanic inspect as described.
7960 ( R-7960) 4/2/2014
 Loading...