

Page 1
559-734-7451 800-367-5480 FAX 559-734-7460
INSTALLATION INSTRUCTIONS
FRONT STABILIZER BAR
Ford F150, Expedition
Thank you for purchasing a quality Hellwig Product.
1
2
TORQUETABLE
BOLT SIZE:3/8” = 20-30 ft. lbs. – 7/16” = 35-45 ft. lbs. – ½” = 50-70 ft. lbs. – 9/16” = 70-90 ft. lbs.
SAFETY: BEFORE STARTING YOUR INSTALLATION,BE SURE TO SET PARKINGBRAKE AND CHOCK THE WHEELS.
NOTE: TO EASE INSTALLATION AND TOPROPERLY ADJUSTBAR, THE WEIGHT OF THE VEHICLEMUSTBE ON THE SUSPEN-
SION, AS IF DRIVING DOWN THE ROAD. DO NOT RAISE THE VEHICLE BY FRAME.
NOTE: THIS UNIT IS DESIGNED TO REPLACE THEFACTORYINSTALLEDFRONTANTI SWAY BAR USING THE FACTORY U-
PLATE MOUNTINGBOLTS.
1. Remove the factory installed front anti-sway and all the mounting hardware. Do not discard the factoryU-plate mounting bolts as they
will be needed to install the new front sway bar. If vehicle is 2006 or newer, see page 2 to re-use factory end links. If re-using factory
end links is not desired, go to step 2.
2. Locate and remove the factorysway bar end links from the vehicles lower control arms ( both left and right hand side ).
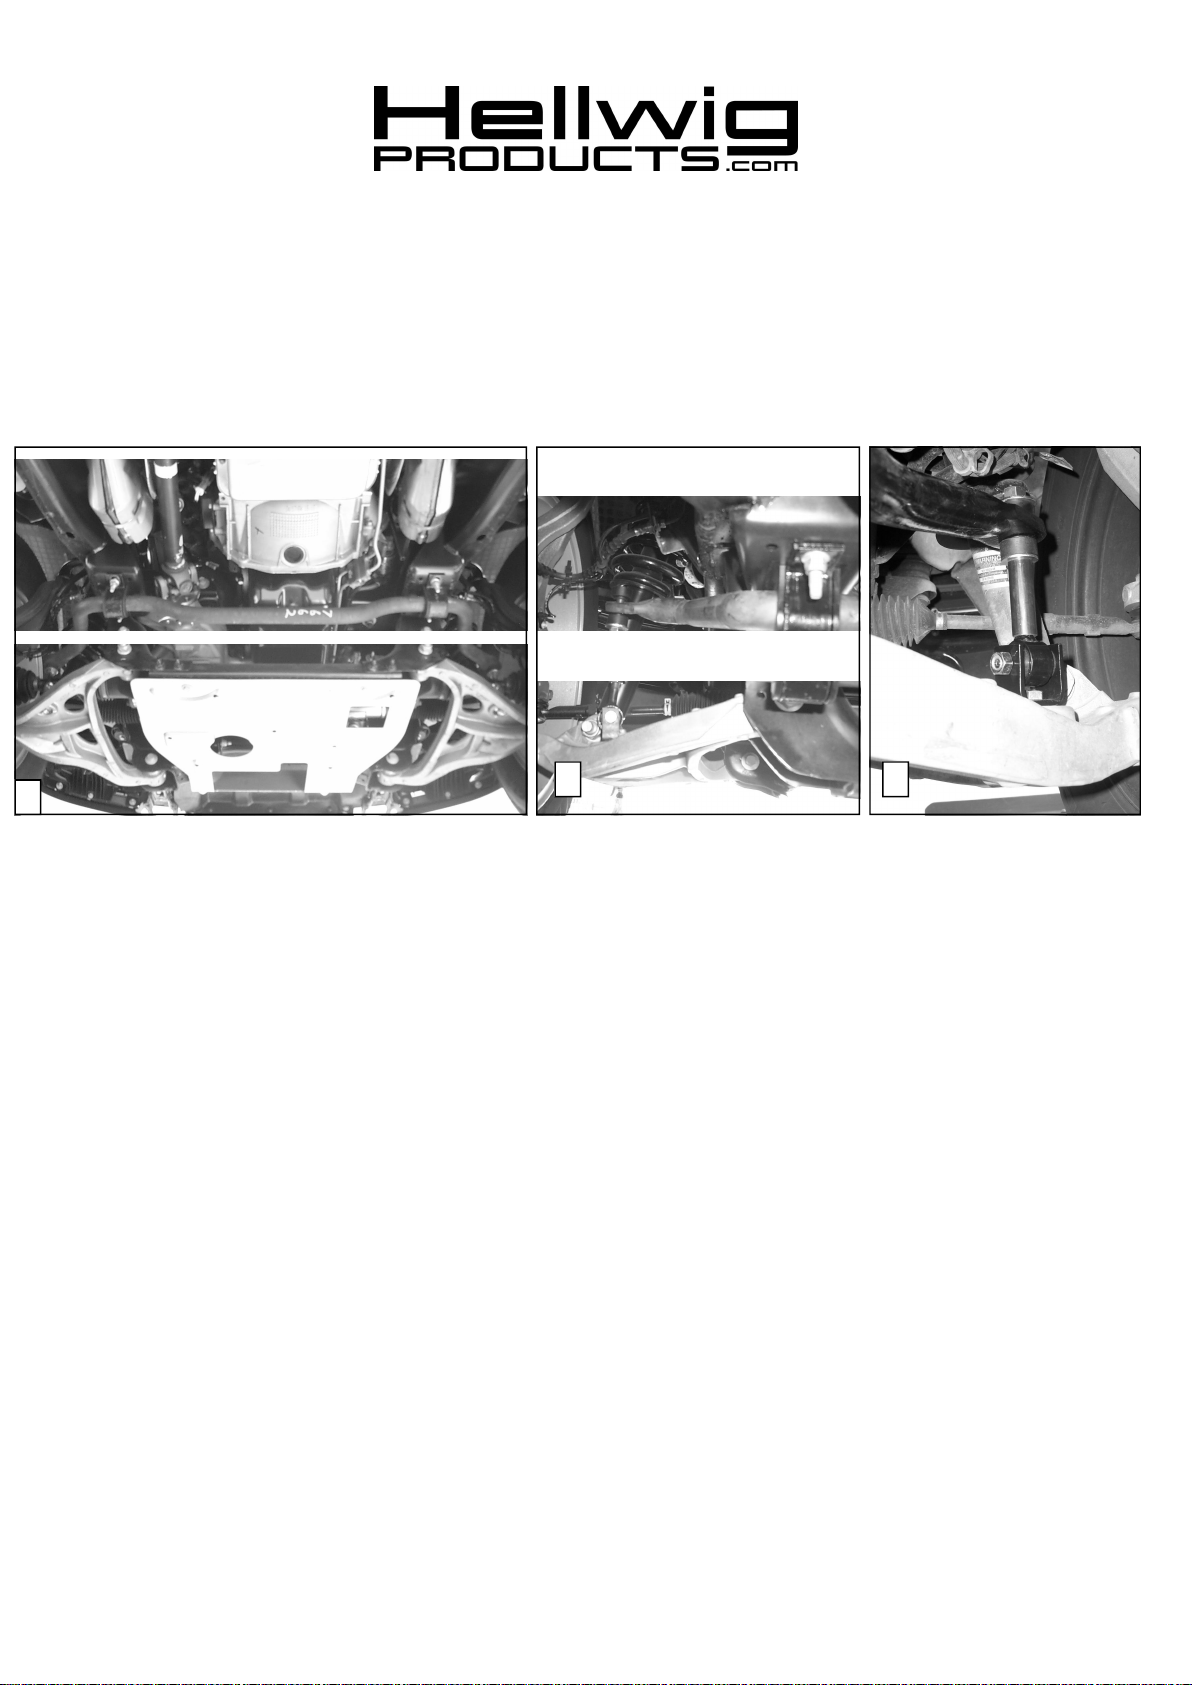
3. Install the D-shaped poly bushings on the new sway bar in as close a possible location as the factory sway bar. ( see photo one ( 1 ).
4. Install the hour glass shaped poly bushings and insert them into the sleeved ends of the end links. Insert the steel sleeve through the poly
bushings. Slightly grease the poly bushings and the steel sleeves to ease installation ( taking care as to not damage the bushings ). Install
the remainder of the round poly bushings on the end links as in photo three ( 3 ).
5. Install the clevis brackets on the vehicles lower control arms where the factory end links were mounted. Use the 1/2” x 1-1/2” cap screws
and tighten slightly. Install the sleeved end of the end links to the clevis brackets using mounting hardware provided. Leaveloose at this
time to allow for adjustment later. ( Orient the clevis brackets as shown in photo ( 3 ) for best fit ).
6. Position the sway bar up on the vehicles frame, using the U-plate brackets and the factorymounting bolts that were removed in step (1).
Leave loose at this time to allow for adjustmentlater. Lift the arms of the sway bar over the installed end links and finish the installation as in photo. ( See photos one ( 1 ) and three ( 3 ).
7. With the sway bar properly aligned and the end links straight up and down as possible. Torque the U-plate mounting bolts on the frame to
factory specifications. Torque the clevis bracket on the lower control arms to the specified rate. Tighten the end link just slightly that the
poly bushings start to bulge. Do not over tighten or damagecan occur to the poly bushings.
8. Test drive your vehicle and recheck your installation. Re-adjust and torque as necessary. Recheck your installation on a regular basis
thereafter.
3
ATTENTION INSTALLER: BE SURE THE CUSTOMER RECEIVES THIS INSTRUCTION SHEET, ALL WARNING
AND NOTE CARDS AND THE WARRANTYFORM.
7689 ( R-7689) 07/12/2007
Page 2
559-734-7451 800-367-5480 FAX 559-734-7460
4
Special Instructions for re-use of factory end links on 2006 and newer models.
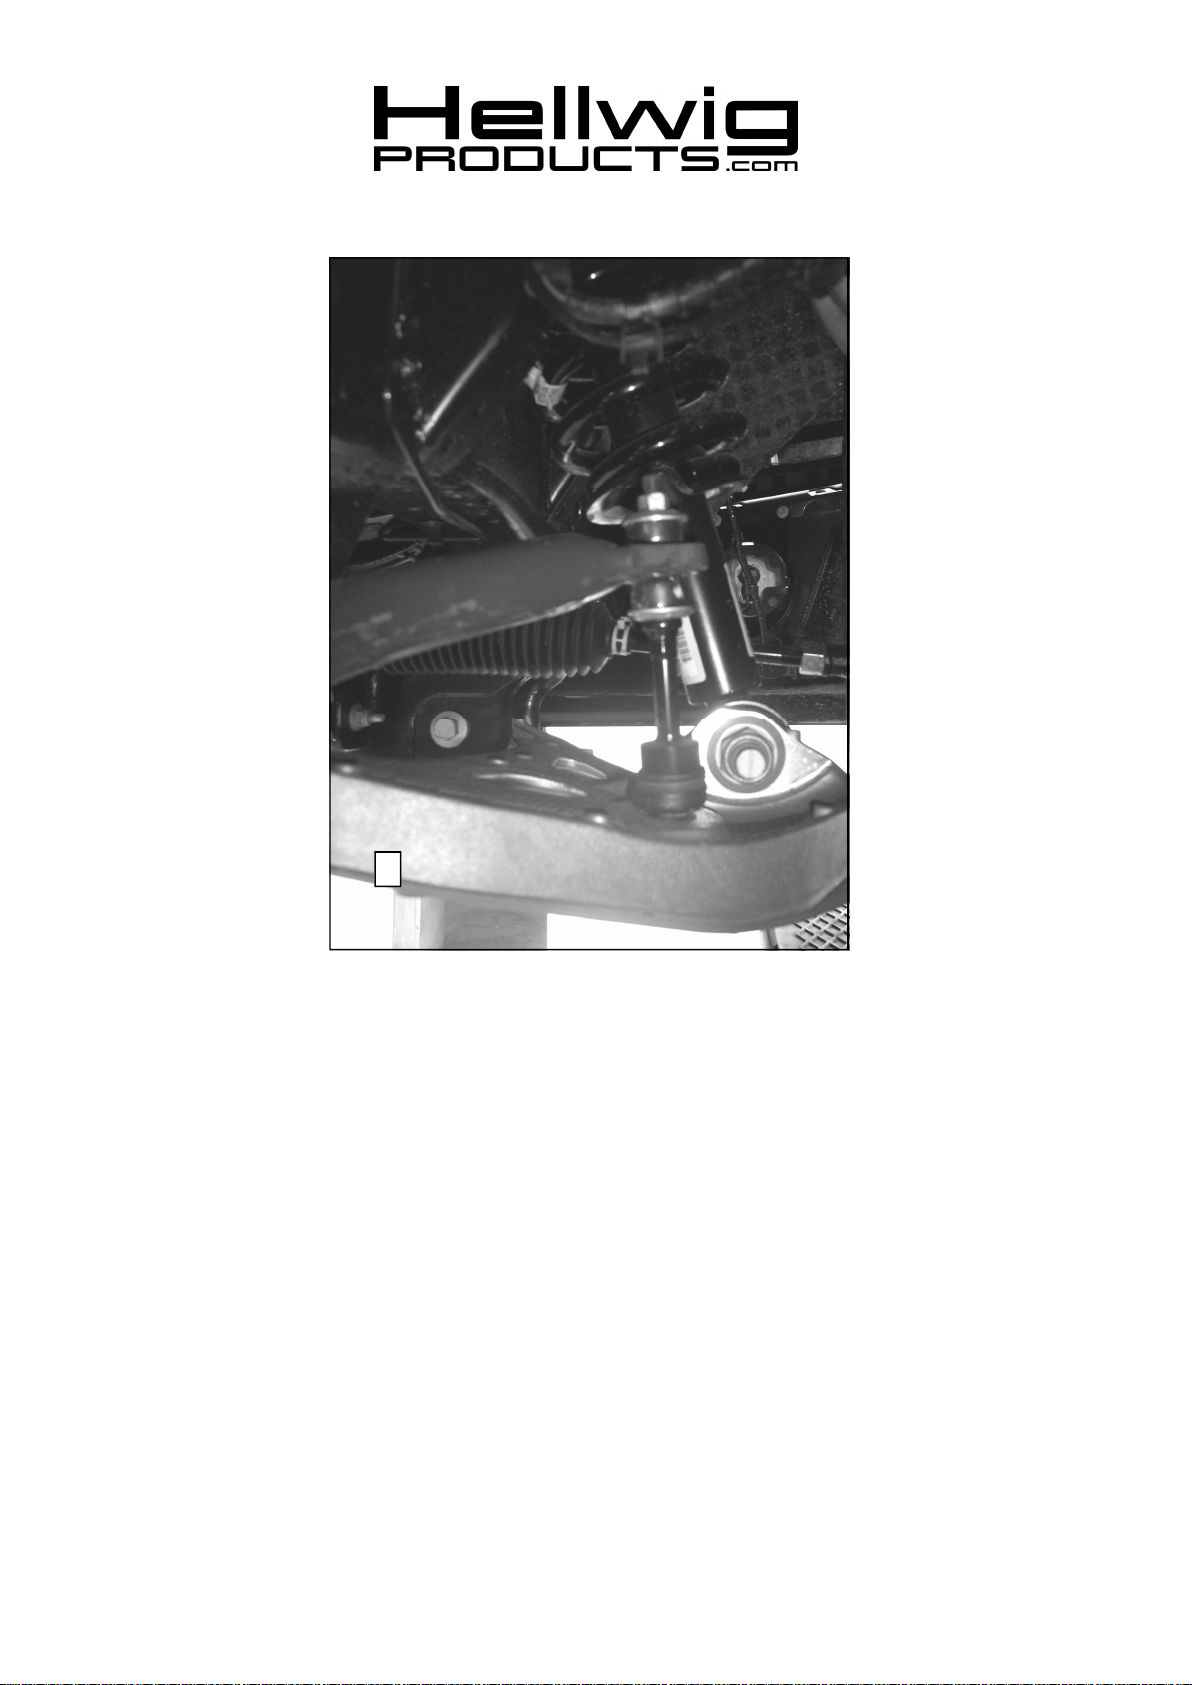
1. 2006 and newer vehicles may re-use the factory end links if desired as the Hellwig swaybar is a direct replacement for the factory sway
bar on these vehicles. See photo (4). If the end links on your vehicle look like photo (4) the factory end links can be re-used if they are in
good condition.
2. Install the D-shaped poly bushings on the new sway bar in as close a possible location as the factory sway bar. See photo one ( 1 ).
3. Position the sway bar up on the vehicles frame, using the U-plate brackets and the factorymounting bolts that were removed in step (1).
Leave loose at this time to allow for adjustmentlater. Lift the arms of the sway bar over the installed end links and finish the installation as in photo. See photos one ( 1 ) and four( 4).
4. With the sway bar properly aligned and the end links straight up and down as possible. Torque the U-plate mounting bolts on the frame
and end link bolts to factory specifications.
5. Test drive your vehicle and recheck your installation. Re-adjust and torque as necessary. Recheck your installation on a regular basis
thereafter.
7689 ( R-7689) 07/12/2007
 Loading...