

Page 1
559-734-7451 800-367-5480 FAX 559-734-7460
INSTALLATION INSTRUCTIONS
Rear Stabilizer Bar
Thank you for purchasing a quality Hellwig Product.
PLEASE READ THIS INSTRUCTION SHEET COMPLETELY BEFORE STARTING YOUR INSTALLATION
1
4
7/16” Bushing
Sleeve
Female End
Link
3
2
Male End Link
1/2” Bushing
Sleeve
5/8” Hourglass
Bushing
Jam Nut
3/4” Hourglass
Bushing
7643 ( R-7643 ) 03/22/2013
Page 2
559-734-7451 800-367-5480 FAX 559-734-7460
TORQUE TABLE
SAFETY:
NOTE:
SUSPENSION, AS IF DRIVING DOWN THE ROAD.
NOTE:
WARD AND ATTACHES TO THE SHOCK MOUNTS USING THE ADAPTER PLATES AND U-BOLTS PROVIDED.
NOTE:
HAND.
BEFORE STARTING YOUR INSTALLATION, BE SURE TO SET PARKING BRAKE AND CHOCK THE WHEELS.
TO EASE INSTALLATION AND TO PROPERLY ADJUST BAR, THE WEIGHT OF THE VEHICLE MUST BE ON THE
THIS UNIT IS DESIGNED TO MOUNT OVER THE TOP OF THE DIFFERENTIAL WITH THE ARMS POINTING FOR-
THIS KIT INCLUDES LOCK NUTS WHICH REQUIRE TIGHTENING WITH A WRENCH AFTER BEING STARTED BY
BOLT SIZE: 3/8” = 20-30 ft. lbs. – 7/16” = 35-45 ft. lbs. – 1/2” = 50-70 ft. lbs. – 9/16” = 70-90 ft. lbs.
DO NOT RAISE THE VEHICLE BY FRAME.
Driver Side Passenger Side
7
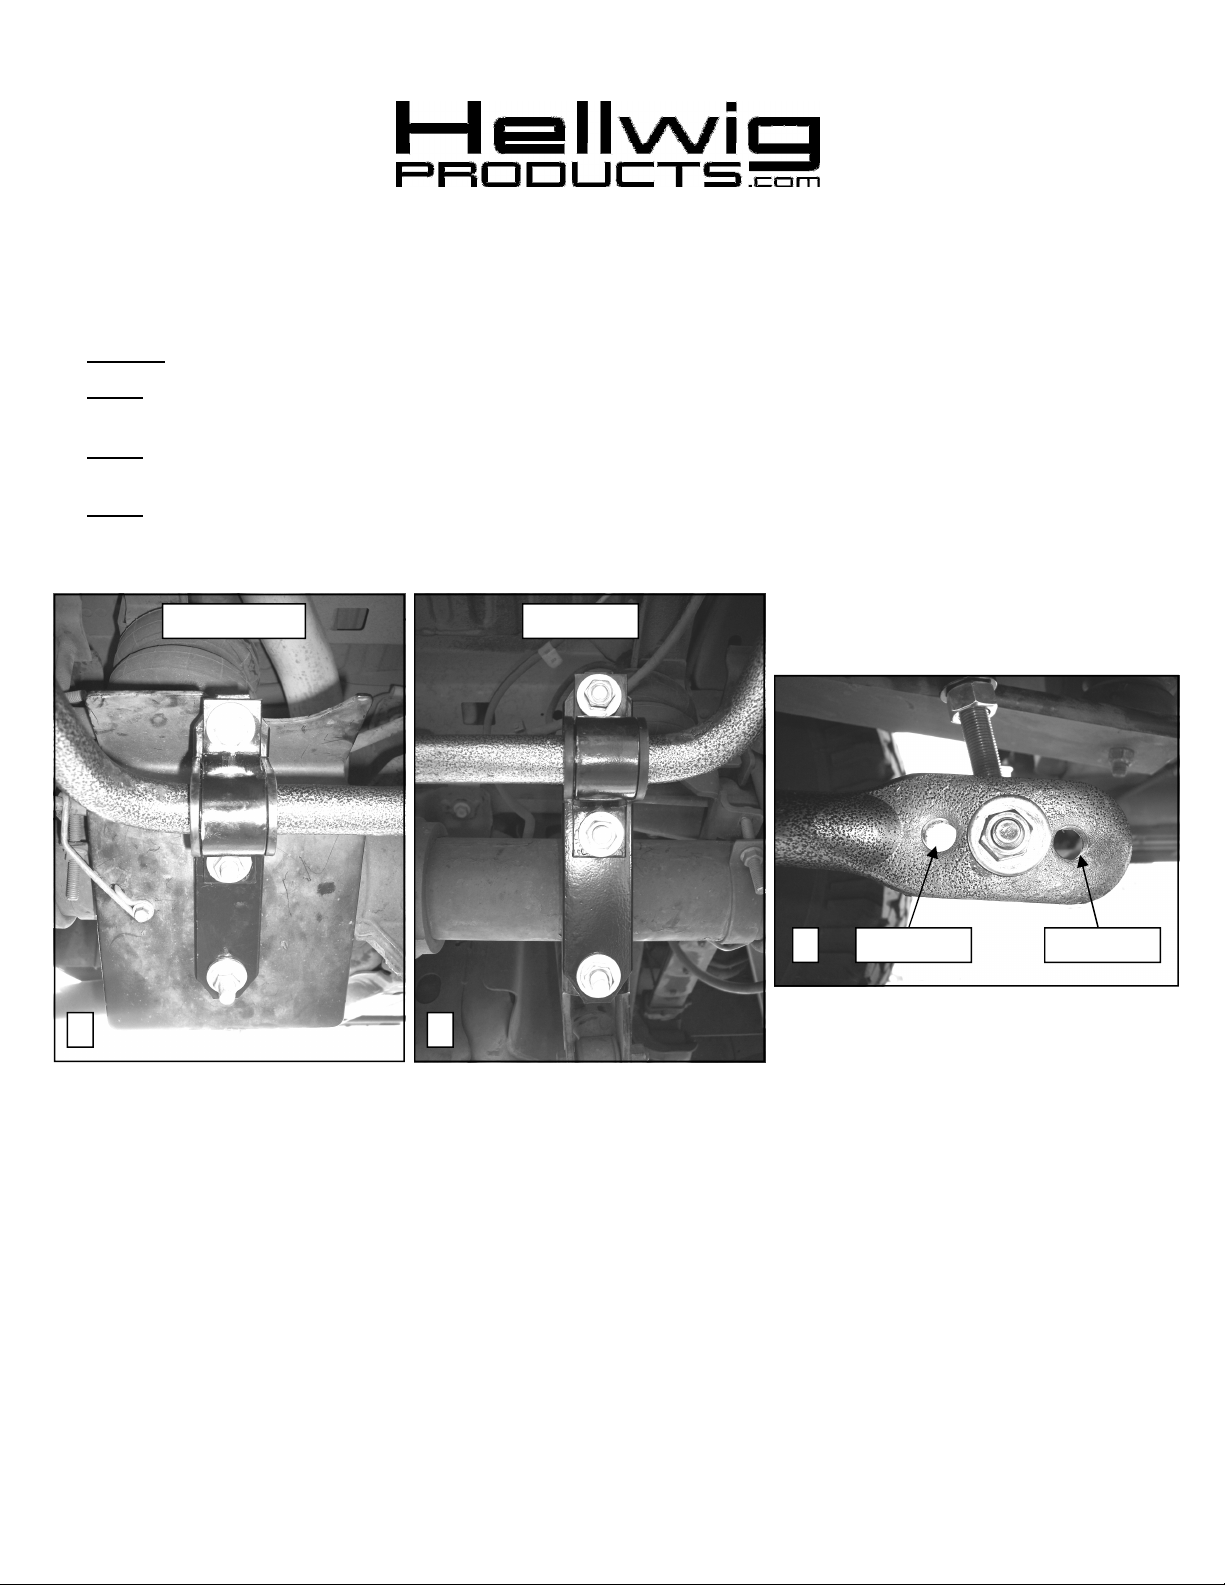
Stiffest Hole Softest Hole
5 6
Maintenance and Inspection:
Your Hellwig Suspension Product is built to last. However, as with all vehicle systems, it requires routine
inspection. Inspect your Hellwig installation looking for secure hardware and tight fitting brackets and
bushings. If you do not perform this inspection, have your professional mechanic inspect as described.
7643 ( R-7643 ) 03/22/2013
Page 3
559-734-7451 800-367-5480 FAX 559-734-7460
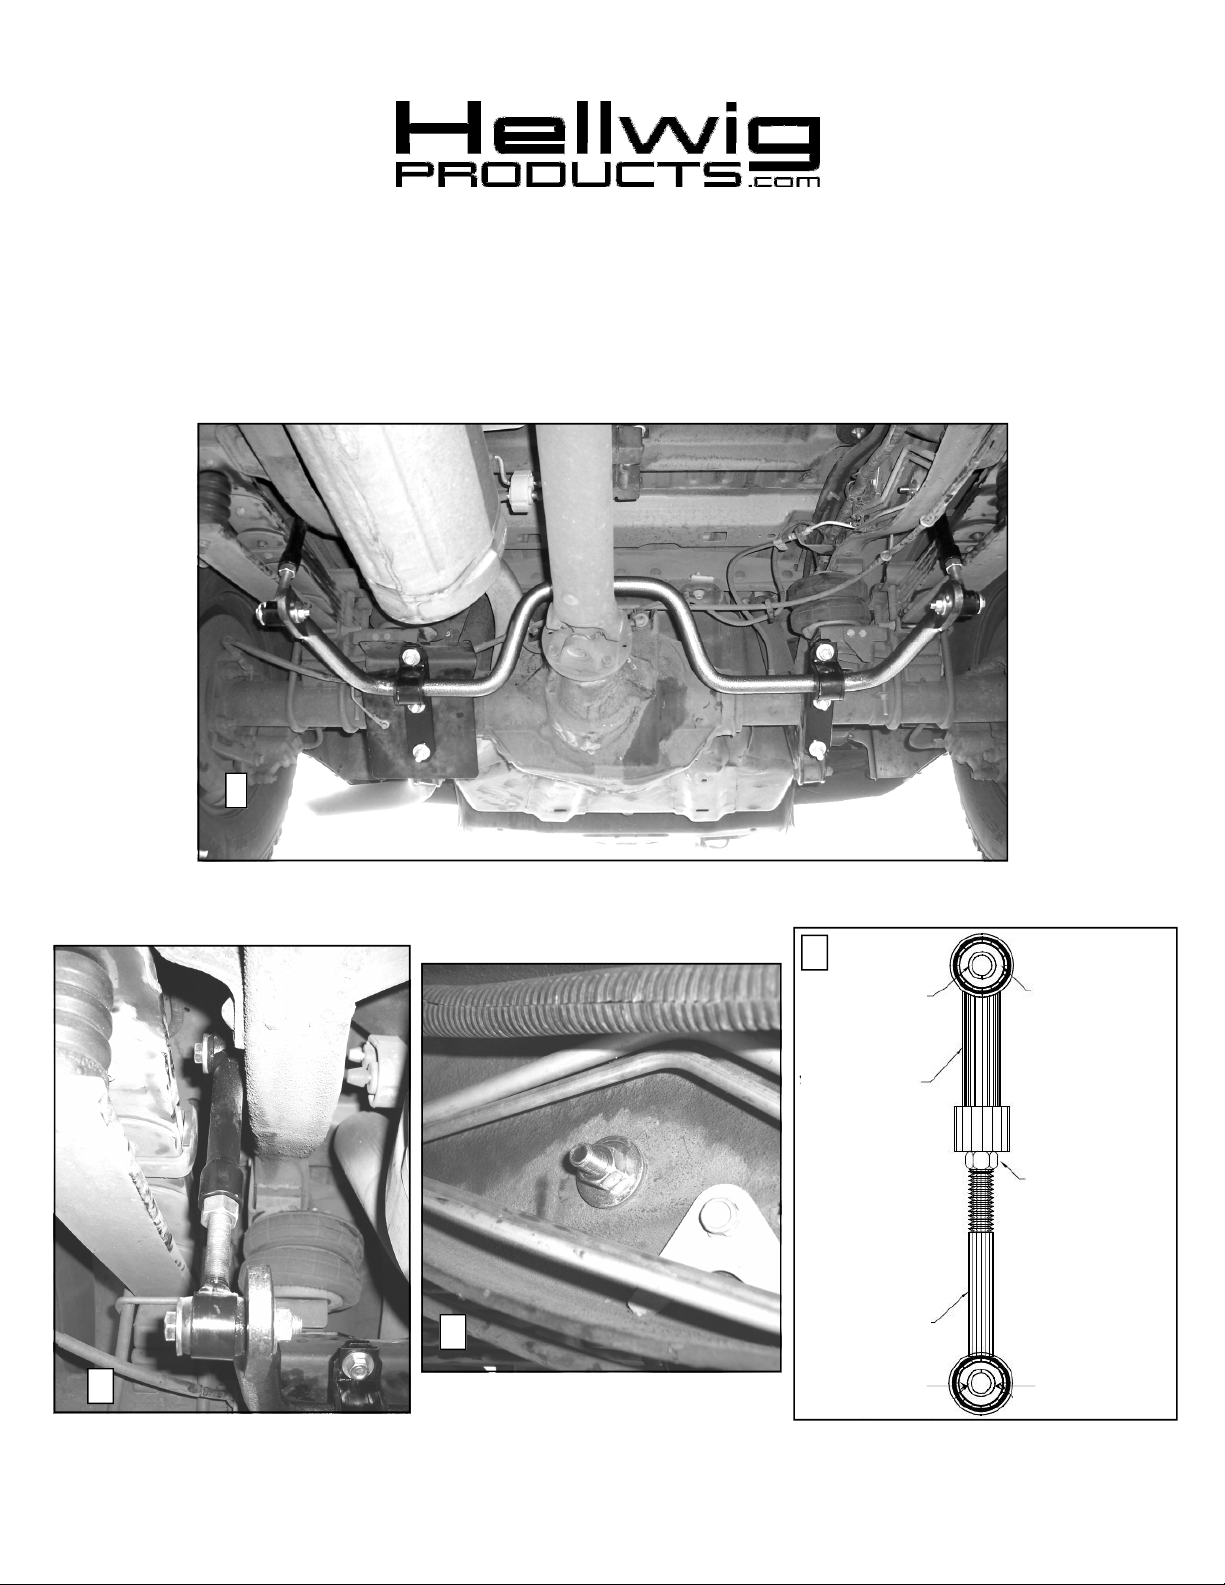
1. Install the D-shaped polyurethane bushings on the straight areas of the bar close to the shoulders or corners of the sway bar. To avoid any possible bushing noise, apply a thin layer of grease to the inside of
the D-bushing.
2. Remove the factory U-bolts that hold the lower shock mounts to the axle. These will be replaced with
the new U-bolts which are provided. Position the 3-hole adapter plates onto the U-bolts so that they are
flat against the lower shock mount brackets. The third hole will be above the rear axle. See photos 5
and 6.
3. Position the U-plates over the D-shaped bushing that are installed on the sway bar. Position the U-plates
and bushings so they line up with the U-bolts that are installed on the shock mount brackets. The Uplates will mount on the top hole of the 3-hole plate and the upper leg of the U-bolt. Use standard 1/2”
hex nuts on the U-bolts and 1/2” lock nuts on the upper bolt. See photos 5 and 6.
4. Lubricate the outside and then install the hourglass bushings with the 3/4” hole in the male side of the
end link. Then lubricate the outside and insert the sleeve with the 1/2” hole. Repeat for the female side
but using the hourglass bushings with the 5/8” hole and sleeve with the 7/16” holes. Fully assemble the
end link following Photo 4. Leave loose at this time.
5. Attach end links to frame rail in the factory hole with the female side up using the 7/16 hardware and
lock nuts. See Photo 3.
6. Swing the sway bar arms up so they are level with the ground, adjust the end link length so the sway bar
arms are parallel to the ground and attach to the last hole using the 1/2” hardware and lock nuts. See
Photo 2.
7. This bar has three holes for adjustment, we recommend starting on the furthest out, softest setting and
then moving the end link to a different holes to match your driving style once you are familiar with the
vehicle’s new handling characteristics. See Photo 7.
8. Center the bar between the frame rails and then torque all mounting hardware to the specified rate including U-plate bolts, U-bolts, end link jam nuts and end link bolts. Double nut U-bolts.
9. Bounce the vehicle check for clearance on all undercarriage components ie: exhaust, shocks, differential, wires, brake and fuel lines.
10. Test drive the vehicle and recheck your installation . Adjust as needed. Recheck your installation after
one week of driving and on a monthly regular basis thereafter.
ATTENTION INSTALLER: BE SURE THE CUSTOMER RECEIVES THIS INSTRUCTION SHEET, ALL
WARNING AND NOTE CARDS AND THE WARRANTY FORM.
7643 ( R-7643 ) 03/22/2013
 Loading...