

Page 1
559-734-7451 800-367-5480 FAX 559-734-7460
INSTALLATION INSTRUCTIONS
FRONT STABILIZER BAR
1963-66A-Body Mopar
Thank you for purchasing a quality HellwigProduct.
PLEASE READ THISINSTRUCTION SHEET COMPLETELY BEFORE STARTINGYOUR INSTALLATION
1
SAFETY: BEFORE STARTING YOUR INSTALLATION, BE SURE TO SET PARKING BRAKE AND
CHOCK TIRES.
NOTE: TO EASE INSTALLATION AND TO PROPERLY ADJUST THE SWAY BAR, THE WEIGHT
OF THE VEHICLE MUST BE ON THE SUSPENSION AS IF DRIVING DOWN THE ROAD.
DO NOT RAISE THE VEHICLE BY THE FRAME.
NOTE: THIS UNIT IS DESIGNED AS A REPLACEMENT FOR THE FACTORY INSTALLED FRONT
ANTI-SWAY BAR OR AS AN ADDITION IF NOT EQUIPPED.
NOTE: THIS KIT INCLUDES LOCK NUTS WHICH REQUIRE TIGHTENING WITH A WRENCH
AFTER BEING STARTED BY HAND.
55914 ( R-55914) 02/12/2010
Page 2
2
1. If equipped, remove the factory installed anti sway bar and the mounting hardware.
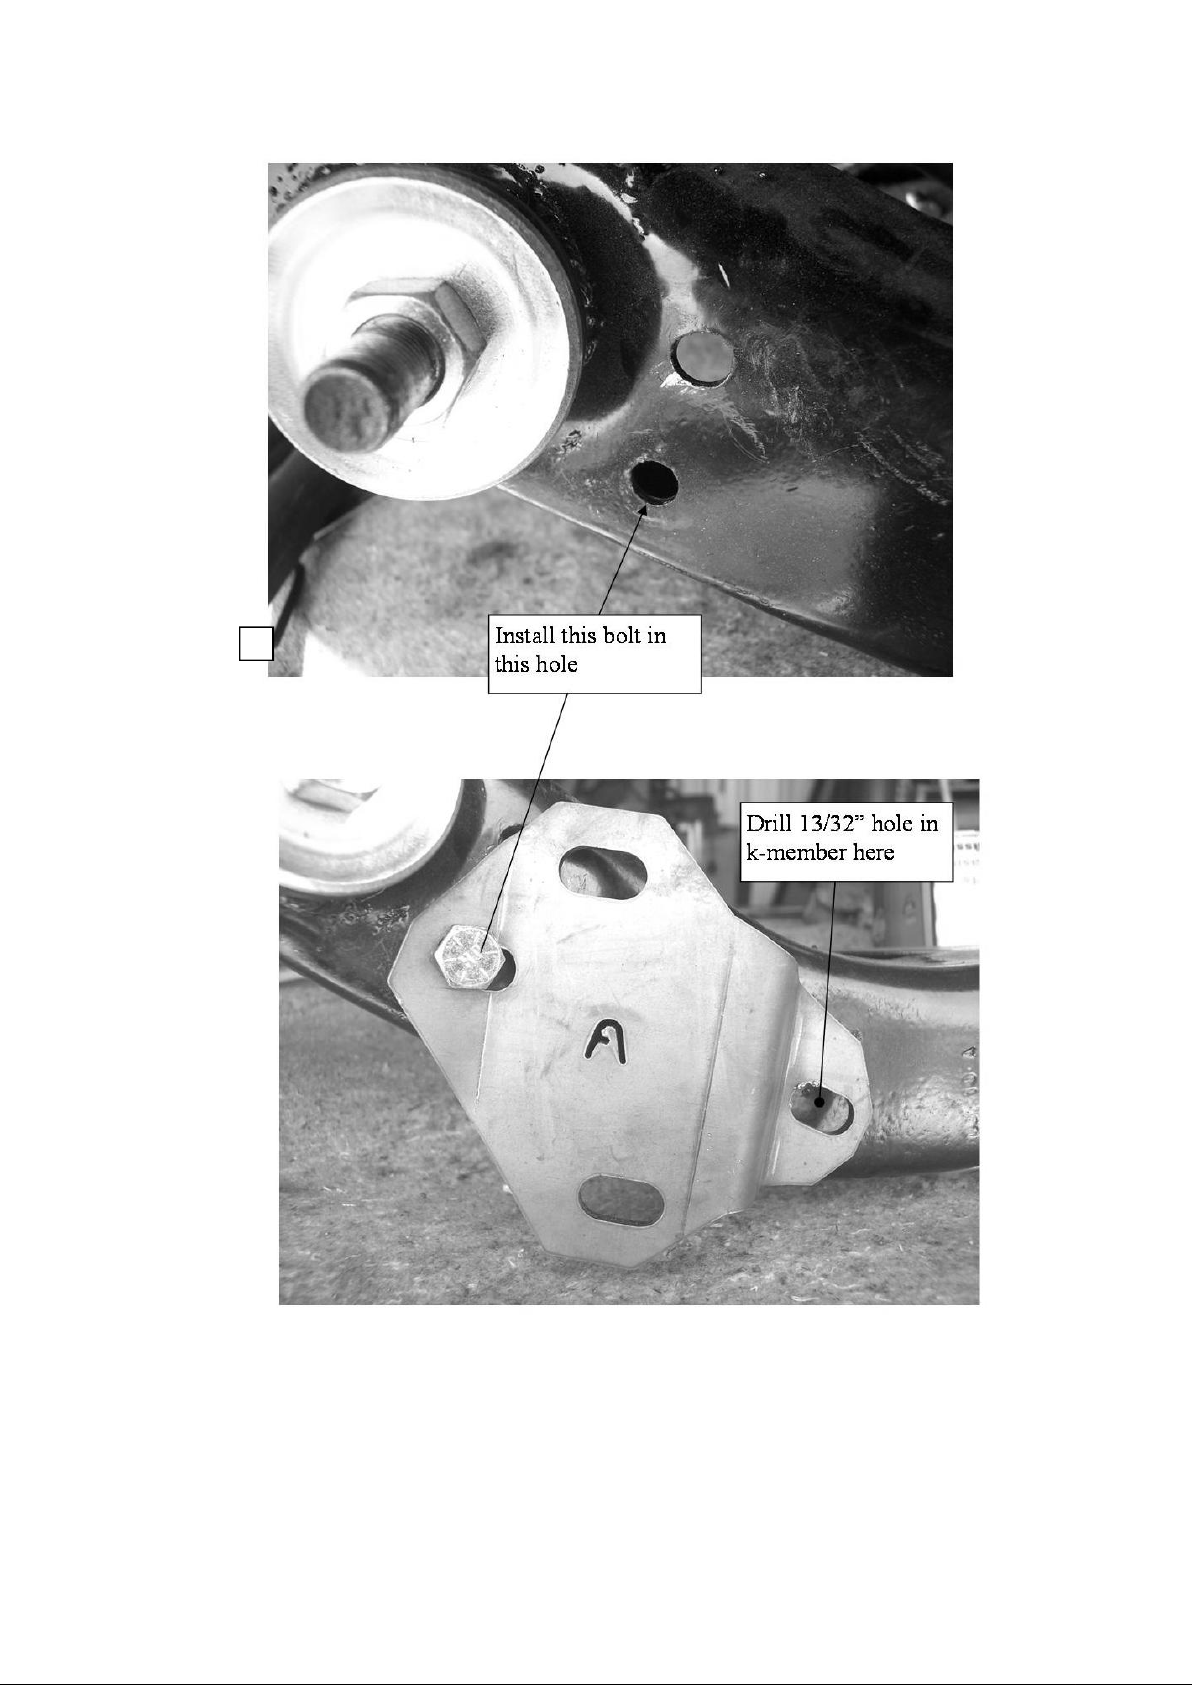
2. Locate holes in K-member and install the mounting brackets as shown in photo (2). Attach the
mounting brackets with 3/8-16 X 1” bolts, washers, and locknuts. Tighten frame bolts to 25 ft-lb.
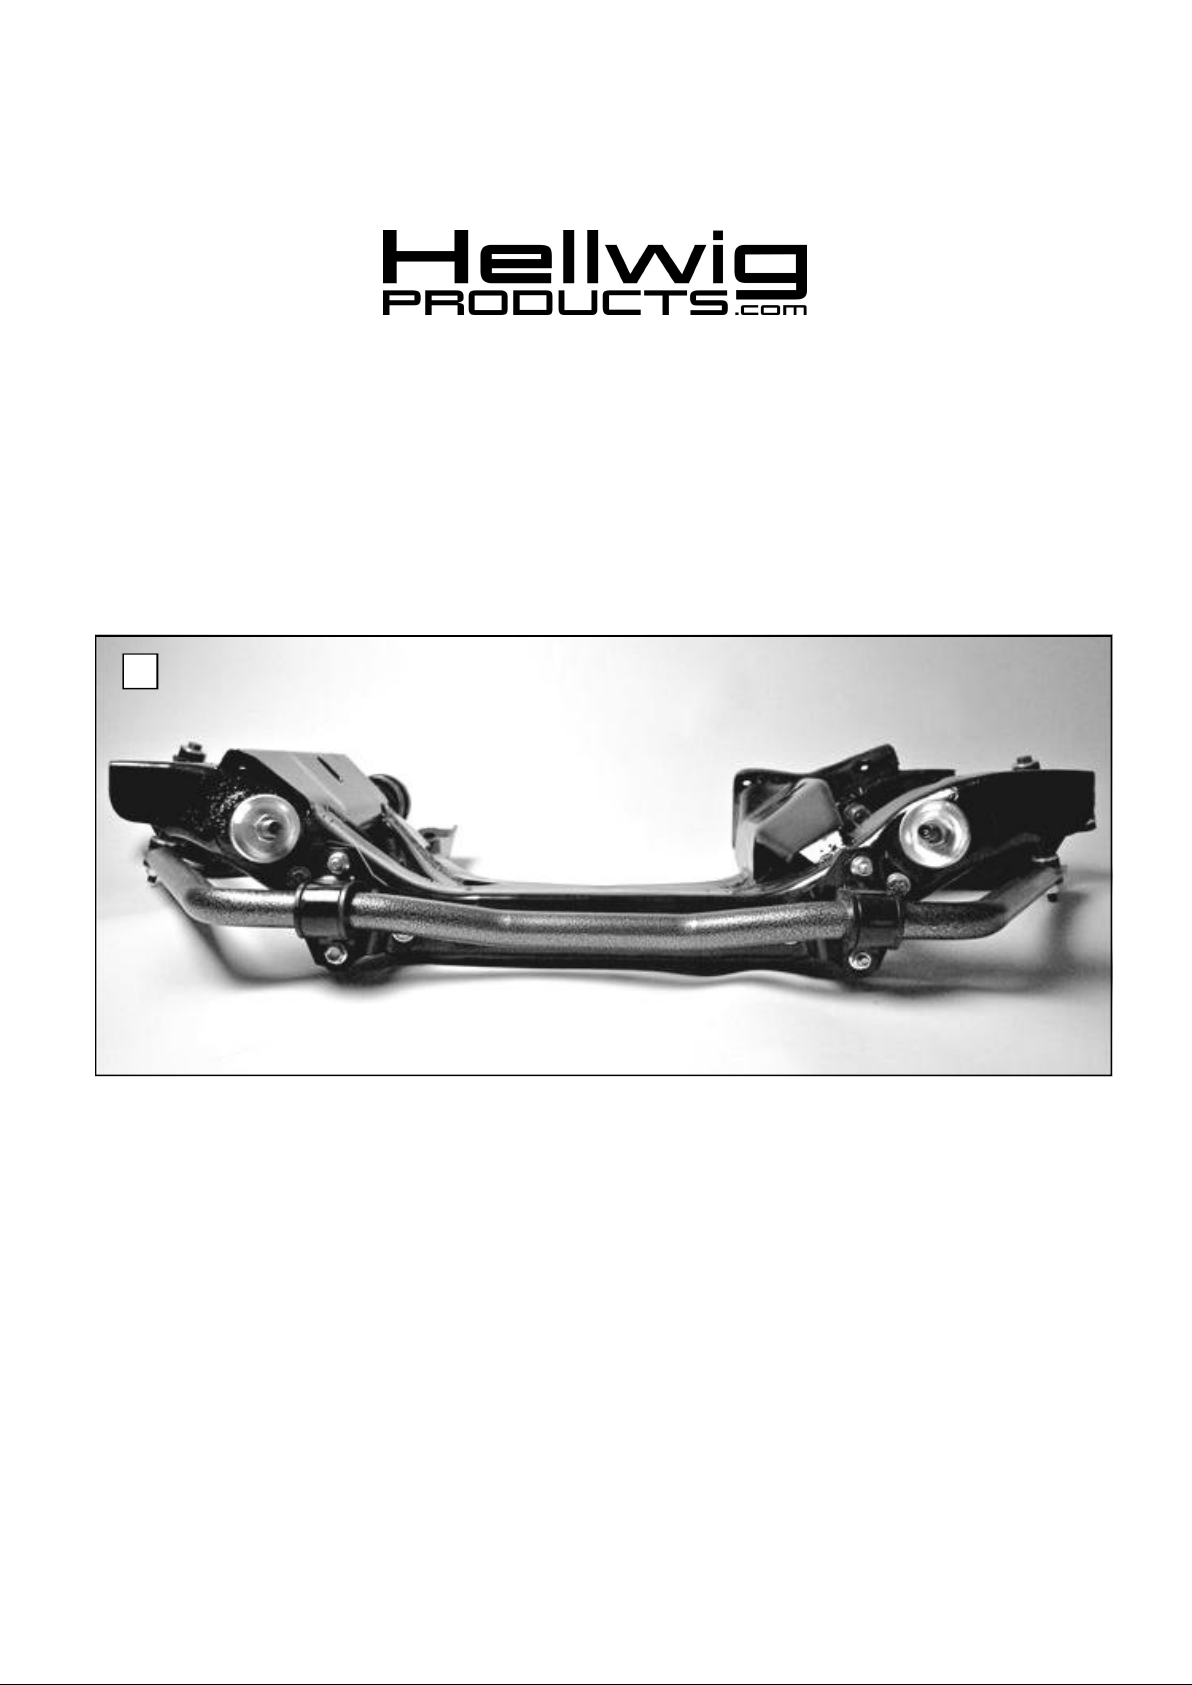
3. Lubricate and install the D-shaped polyurethane bushings on the new sway bar in locations shown in
photo (1). Attach U-plates to bushings and mount sway bar to brackets with the center hump oriented downward using the 3/8 –16 X 1” bolts and flanged nuts. Leave loose at this time for adjustment later.
55914 ( R-55914) 02/12/2010
Page 3
4
5
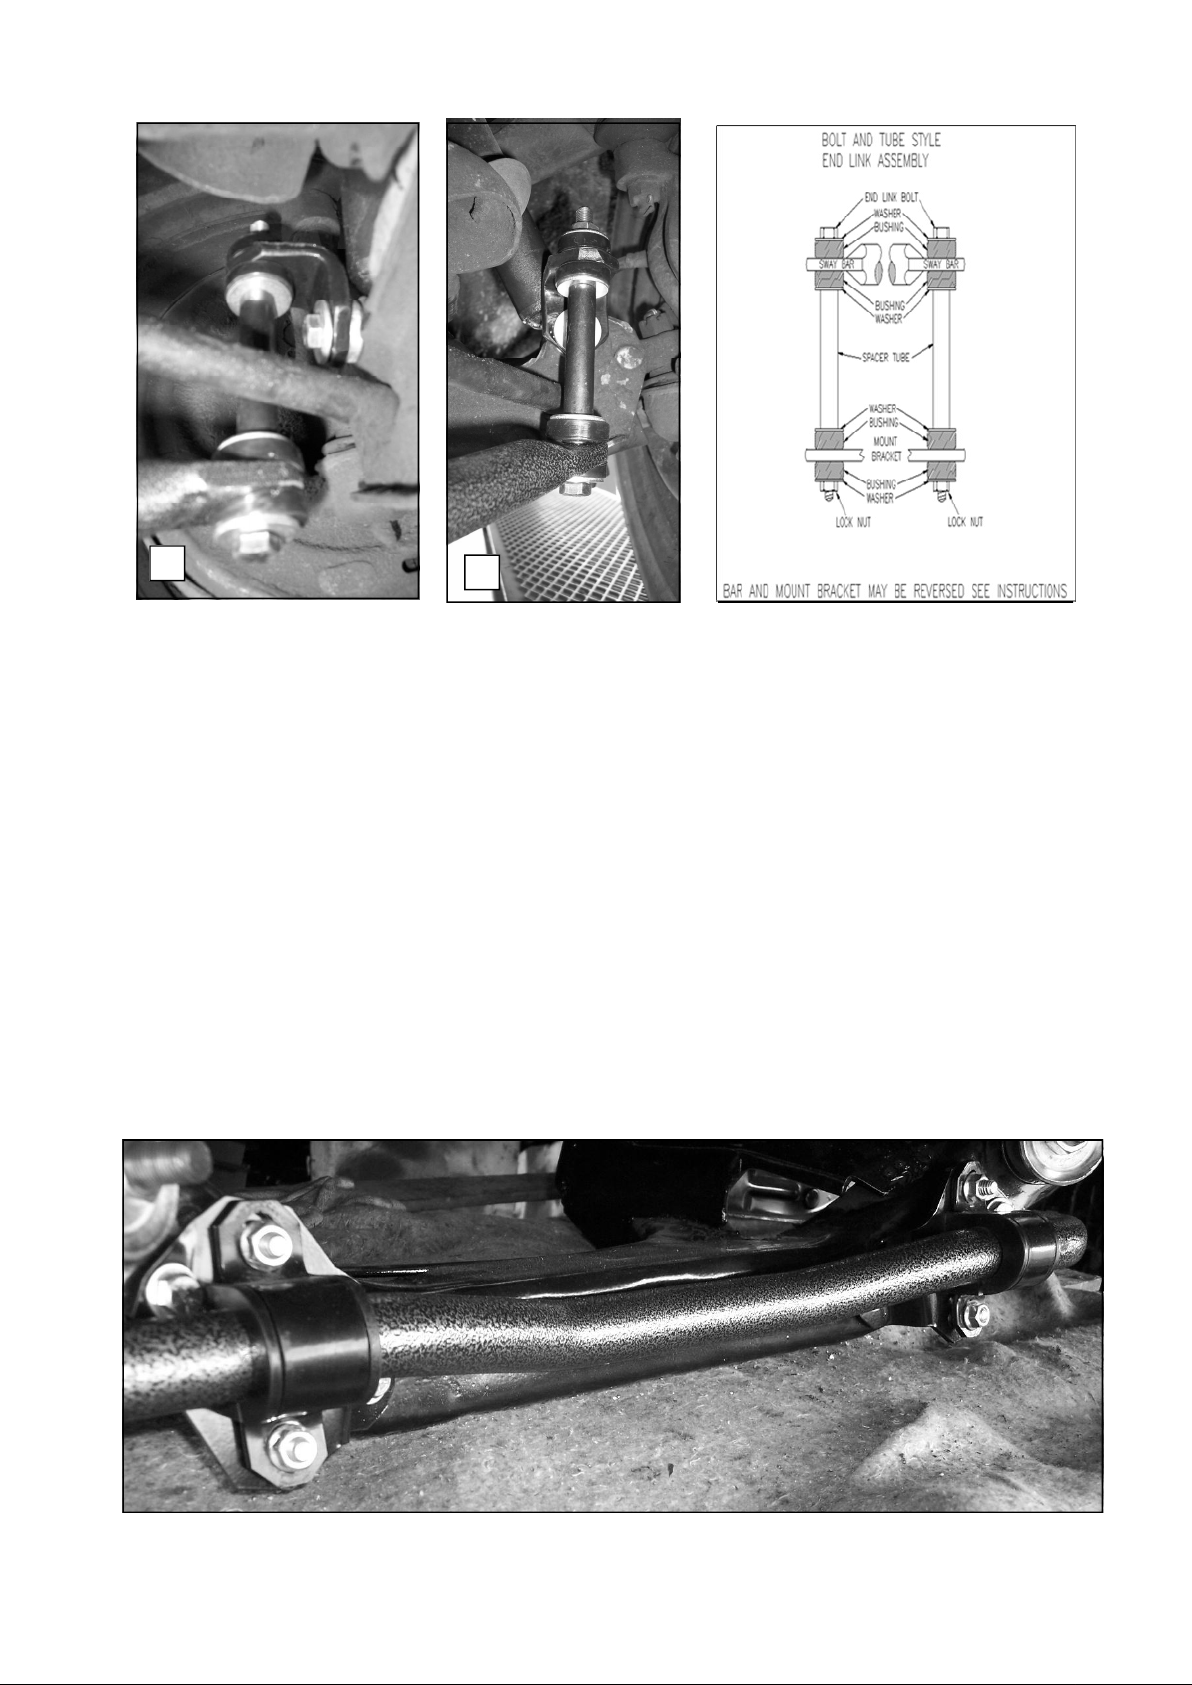
4. If equipped with factory sway bar mounts, assemble end links as shown in diagram above. Tighten
nut until bushings bulge slightly
5. If not equipped with factory sway bar mounts, remove lower shock bolt and attach angle brackets to
lower control arm as shown in photos (4) & (5) using 7/16-20 x 2-3/4” bolt with thick washer placed
between control arm and bracket. Torque bolt to 40-45 ft-lb.
6. Install the end link assemblies through the coined ends of the anti sway bar. (SEE PHOTOS 2 & 3 ).
Tighten locknuts just enough so that the poly bushings start to bulge. Do not over tighten.
7. Center sway bar in bushings and align crossbars for best fit. When satisfied with alignment of sway
bar, tighten flange nuts to 25 ft-lb.
8. Be sure that all bolts are tightened to specifications. Re-check your installation, check for clearance
on all undercarriage components; wiring, springs, fuel and brake lines.
9. Turn wheels full lock left and then right, check for clearance on tires, wheels and steering components, brake components and hoses. If equipped with disk brakes check clearance of calipers and
hoses to shock mounting bolt, end link bracket, and end links.
10. After one week of driving recheck your installation. Re-check on regular basis thereafter.
ATTENTION INSTALLER: BE SURE THAT THE CUSTOMER RECEIVES THIS INSTRUCTION
SHEET, ALL IMORTANT NOTE CARDS AND THE WARRANTY
FORM
55914 ( R-55914) 02/12/2010
 Loading...