

Page 1
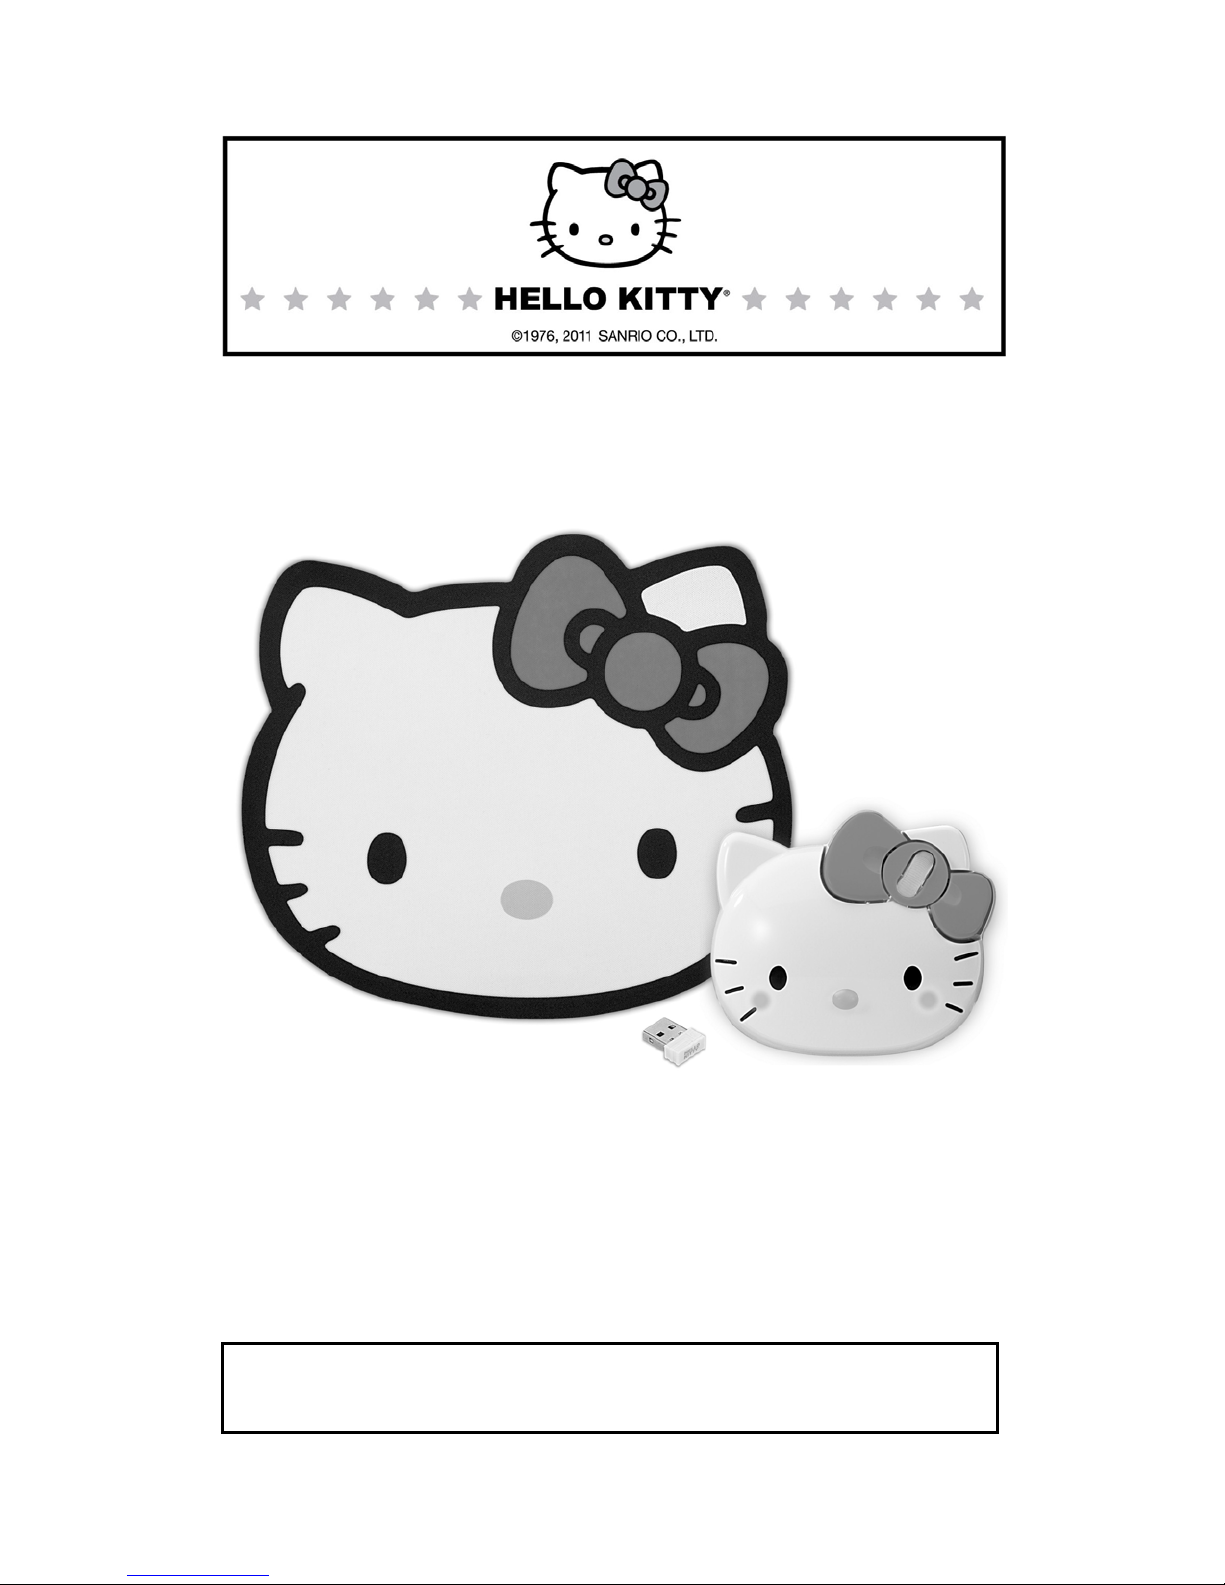
2.4GHz WIRELESS OPTICAL MOUSE
PLEASE READ THIS USER MANUAL COMPLETELY BEFORE OPERATING
THIS UNIT AND RETAIN THIS BOOKLET FOR FUTURE REFERENCE
KT4093
USER MANUAL
Page 2
WELCOME TO HELLO KITTY CUSTOMERS
We have taken great care t o ma ke su re t h at y ou r Hell o Kit ty prod u ct wa s in pe rf e ct w ork ing o rde r w hen it
left our factory. It has been designed to give you many years of enjoyment and trouble free operation.
Read this manual before operating this unit to become familiar with its features and obtain the
performance that will bring you continued enjoyment for many years. For f uture reference, record the
serial number in the space provided.
Model Number: KT4093 Serial Number: _____________________
Please read the manual thoroughly before using this device. If the device is damaged in transit, do not
install or use it and contact your dealer.
Keep this manual for future use!
Your set should include the following:
1 x Hello Kitty Wireless Optical Mouse
1 x Nano USB Receiver
1 x Hello Kitty Fabric Mouse Pad
1 x User Manual
COMPLIANCE WITH FCC REGULATIONS
This device complies with Part 15 of the FCC Rules. Op e r atio n is su bje ct to the foll ow ing two cond it i on s:
(1) this device may not cause harmful interference, an d
(2) this device must accept any interference received, including interference that may cause
undesired operation.
This equipment has been tested and found to comply with the limits for a Class B digital device, pursuant
to Part 15 of the FCC Rules. These limits are designed to provide reasonable protection against harmful
interference in a residential installation. This eq uipment generates, uses and can radiate radio frequency
energy and, if not installed and used in accordance with the instructions, may cause harmf ul interference
to radio communications. However, th ere is no guarantee that interference will not occur in a particular
installation. If this equipment does cause harmful interference to radio or television reception, which can
be determined by turning the equipment off and on, the user is encouraged to try to correct the
interference by one or more of the following measures:
- Reorient or relocate the receiving antenn a.
- Increase the separation betw een the equipment and receiver.
- Connect the equipment into an outlet on a circuit different from that to which the receiver is
connected.
- Consult the dealer or an experienced radio/TV technician for help.
CAUTION: Changes or modific ations not expressly approved by the part y responsible for compliance
could void the user’s authority to operate the equipment.
FUNCTIONS AND CONTROLS
1
Page 3

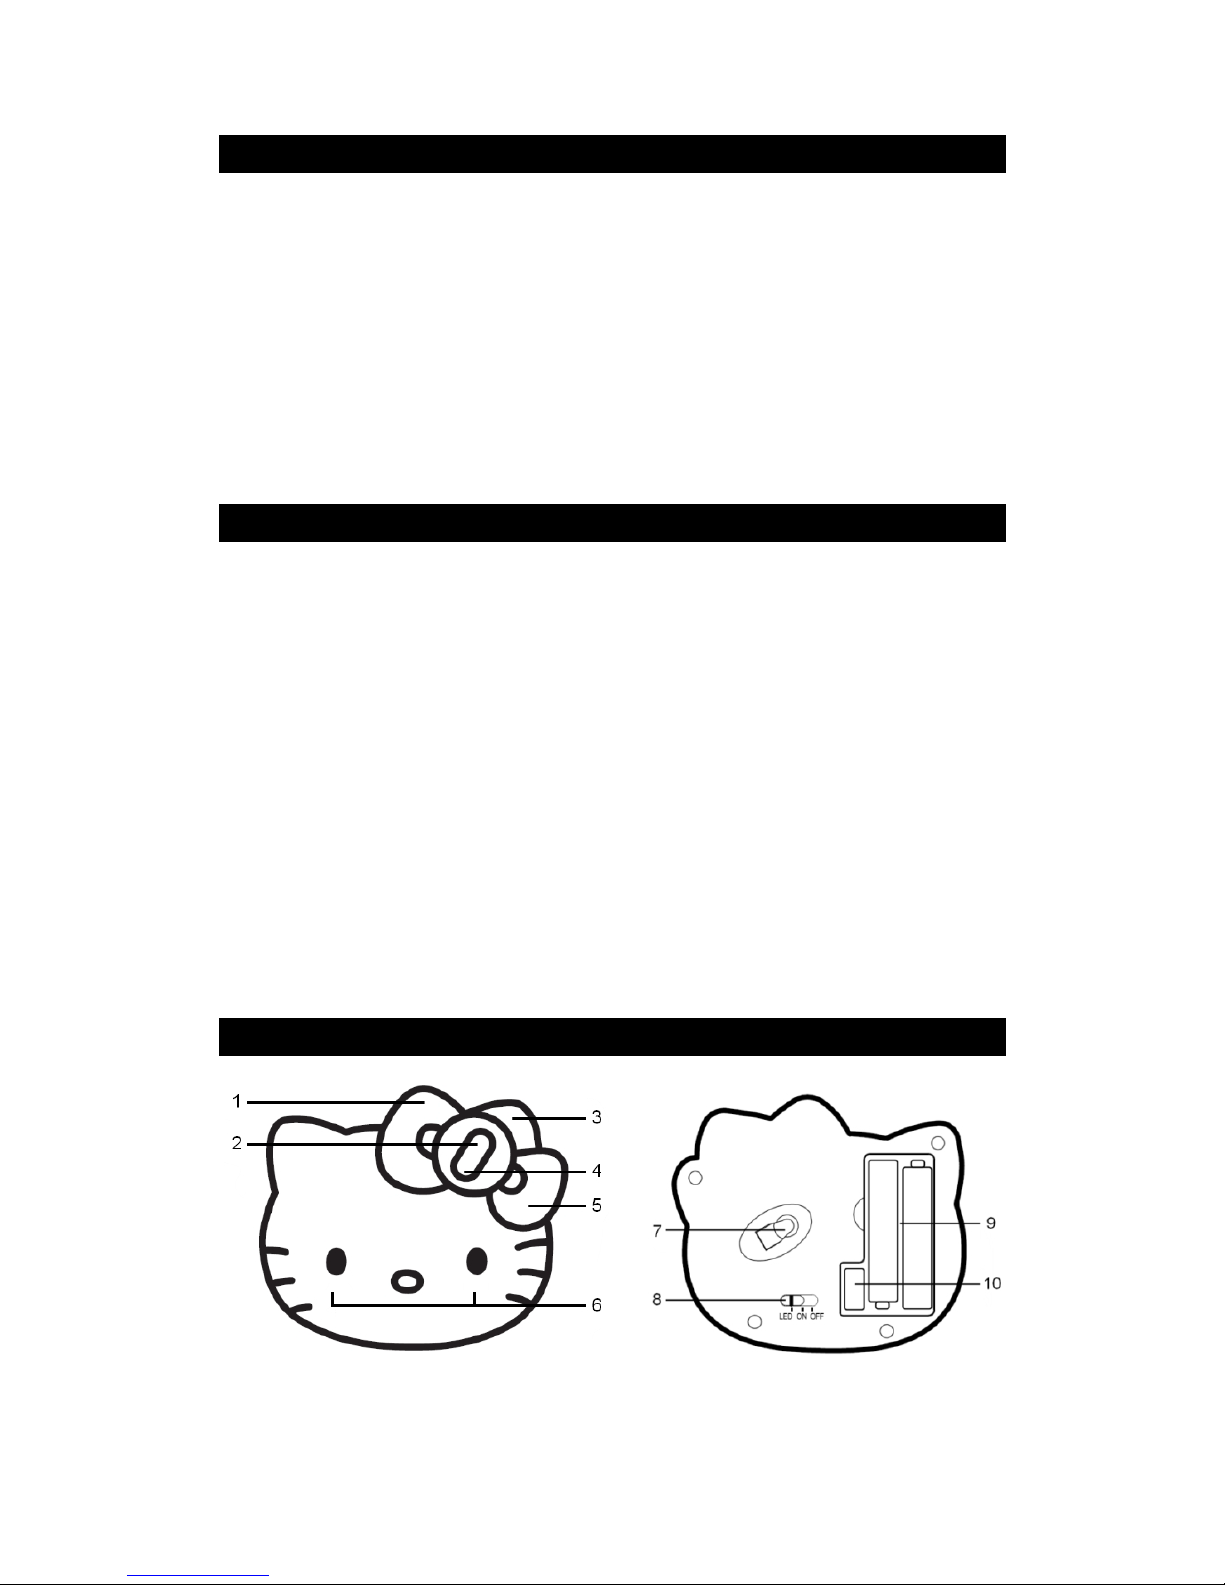
Item Description
1 Left Button
2 Scroll Wheel with Button (Middle Button): works in Windows based PC only
3 Battery Low Indicator: red LED hidden under cabinet which will flash when
batteries are almost exhausted.
4 Blue LED: hidden beneath the Scroll Wheel
5 Right Button
6 Red Cheek LEDs: hidden beneath the cabinet
7 Optical Sensor System: red light will be emitted when power is turned on
8 Power Switch
- LED position: turns mouse on including Blue Bow and Red Cheek LEDs .
- ON: turns mouse on without LED lighting to extend battery life.
- OFF: turns mouse off (recommended when not in use).
9 Battery Compartment: hidden underneath cover and holds 2 x AAA batteries (not
included)
10 Nano USB Receiver Storage Compartment: hidden underneath Battery
Compartment Cover. Always store the USB Receiver here if the mouse is not to be
used for a long time.
GETTING STARTED
Installing/Replacing Batteries
This Wireless Optical Mouse operates on two ‘AAA' (UM-4) size batteries (not included).
1. Remove the battery compartment cover located at the bo ttom cabinet.
2. Remove all old batteries at the same time (if any).
3. Following the polarity diagram shown inside the battery compartment, insert two fresh
‘AAA' (UM-4) size alkaline batteries or Ni-MH rechargeable batteries (not included).
4. Replace the battery compartment cover making sure it is securely closed.
IMPORTANT
: Be sure that the batteries are installed correctly. Wrong polarity may
damage the unit.
5. When the Battery Low Indicator flashes, the batteries are near exhaustion level. Please
remove all the old batteries and replace with fresh good quality alkaline or NiMH batteries
as soon as possible.
WARNINGS!
Batteries must be installed or replaced by an adult.
The use of good quality alk aline batteries is recommended.
Place batt eries based on the polari ty shown on the battery compartment.
Only use the recommended type of batteries.
Non rechargeable batteries are not to be recharged
Rechargeable batteries are only to be charged under adult supervision
Rechargeable batt eries are to be removed before being charged.
DO NOT mix different types of batteries together.
DO NOT mix new and old batteries together.
If you do not use the product for an extended period of time, we recommend that you take
out the batteries. Remove exhausted batteries from the product. Battery leak may
cause damage.
DO NOT short circuit the terminals of the battery.
DO NOT throw batteries into an open flame. They may explode.
Keep the packaging for future reference as it contains important information
Installing of the Nano USB Receiver (Compatible with OS: Windows 2000/XP/Vista/7 and Mac OS X
10.5 – 10.6)
1. Remove the Battery Compartment Cover and carefully slide out the Nano USB Receiver from its
designated compartment adjacent to the battery compartment.
2. Insert the Nano USB Receiver of the Optical Mouse directly into a USB port (USB 1.1-3.0) of your
computer running on either Windows or Mac OS.
2
Page 4
3. Your Nano Receiver will be automatically installed by the plug and play function of the Windows or
Mac OS.
Note: There is no need to remove the Nano USB Receiver from the USB port of your computer even
after turning off unless you need to free up the USB port for other device.
Manual Pairing
This product features auto ID pairing f uncti on. T he Nano USB Rec eiver an d th e wireles s mouse will pair
automatically once they are activated. Should there be any problem in auto ID pairing, please follow the
steps below to complete pairing manually.
The manual pairing steps have to be carried o ut within 5 seconds if a successful connection is to be
established between the Mouse and the Nano receiver. Make sure that the Mouse is no further than 3
feet (1m) away from the Nano receiver.
1. Unplug the Nano Receiver from the PC.
2. Slide the Pow er Switch of the Mous e to “ON”. Press the Left, Middle and Right Butto ns at the same
time for 3-5 seconds. The Battery Low Indicator will start flashing to reactivate t he auto ID pairing
function again.
3. Within 5 seconds, reinsert the Nano Receiver into the USB port of your PC. If pairing is successful,
the Battery Low Indicator of the Mouse will light steadily for a while and turn off again.
OPERATING INSTRUCTIONS
Decorative Lighting
Underneath the Hello Kitty bow and cheeks area, there are one blue LED and two red LED s respectively.
They will be turned on when you slide the Power Switch to the “LED” position and are there only for
decorative purposes. This decorative lighting will consume more power and thus shorten the battery life.
To conserve battery power, you can choose to turn off these lights by sliding the Power Switch to the
“ON” position instead.
Left Button
Use this button to select an item from a pop up or pull down menu or to click a functi on butto n.
Right Button
Use this button to access the quick menu of a related function.
Scroll Wheel with Button (Middle Button)
1. Under normal operation, rotate the Scroll Wheel for fast browsing up/down in an internet browser and
in other document files.
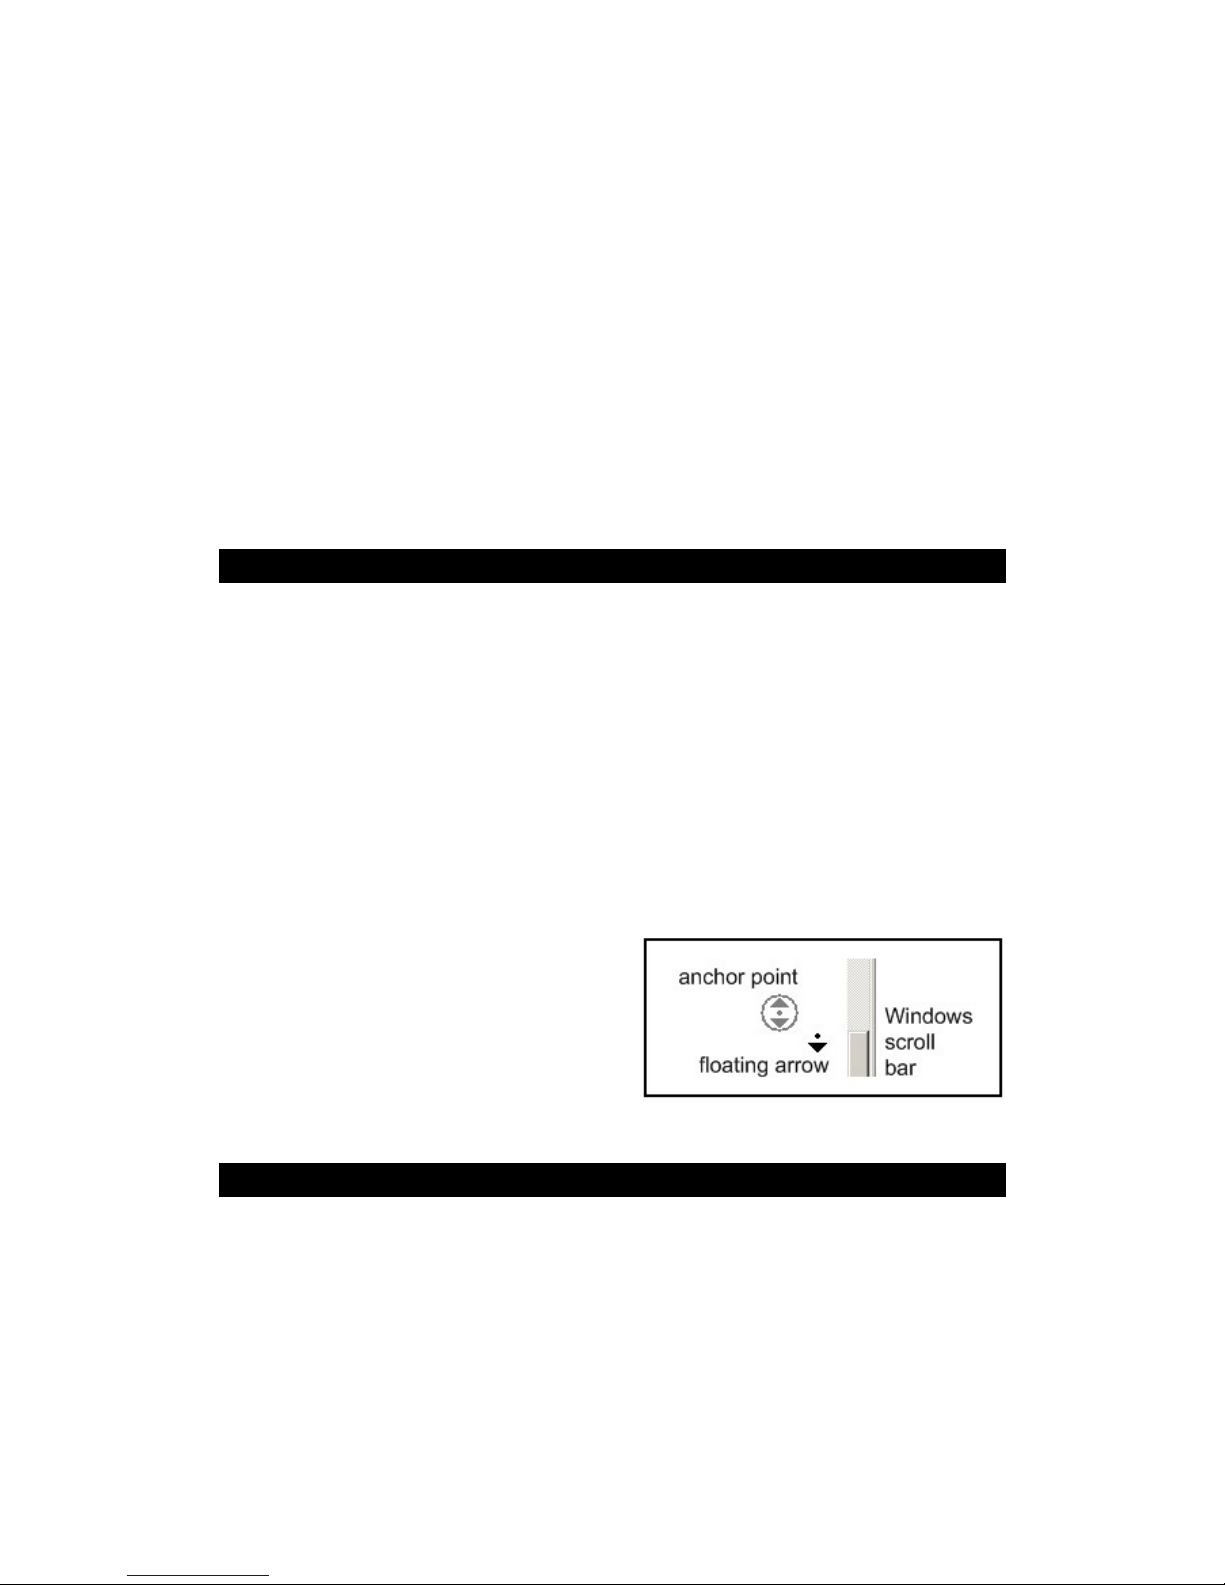
2. For Windows users only : To enable smo oth auto scro lling, pre ss the Scroll Whee l Button. A double
arrow icon, showing the anchor point, and a
floating arrow icon, showing the current mouse
position, will appear. To scroll up/down, move
the mouse until the floating arrow icon becomes
an up/down arrow. The farther away the floating
arrow is from the anchor point, the faster the
scrolling speed. Press the Middle Button again
to exit the auto scroll function when you have
finished.
CARE AND MAINTENANCE
1. Turn off your mouse by sliding Power LED/On/Off switch to “off” when not in use to cons erve bat tery
power.
2. Turn the mouse upside down to clean the Optic al Sensor carefully with a lint-free cloth. Dust or dirt
may affect its performance.
3. Also clean out dust or dirt accumu lated ins ide the scroll w heel comp artment to as sure smoot h rotatio n
of the Scroll Wheel.
4. Clean the externa l surfa ce of you r mous e with a dam p (neve r wet) cl oth. Mild cleani ng agent speci ally
formulated for cleaning mouse or keyboard may be used. Ho wever, solvent or detergent should
never be used.
5. If the mouse is not to be used for a prolonged period, remove all batteries from its battery
compartment. Also remove the USB Nano Rece iver from your PC or Mac computer and store it
inside the designated sto rage compartment adjacent to the battery compartment of the mouse to
3
Page 5

prevent loss.
HINTS ON PROPER USE OF YOUR MOUSE
Medical research suggests that physical discomfort and injury to nerves, tendons, and muscles may be
related to repetitive m otio n, an i m prop er ly set up w ork area, in c orre ct body posture, and bad work habit s.
To reduce the risk of discomfort and injury, follow the precaut ions below:
Stand, stretch, and move ar ound several times every hour.
Switch hands while performing tasks. Use shortcut keys to avoid repetitive or awkward mouse
movements.
Relax your shoulders and keep your elbows at your sides. Adjust the position of the keyboard
position so that you don’t have to stretch to reach it.
Adjust your position so that you don’t have to bend your wrists to type; avoid placing your wrists on a
sharp edge.
If you experience conti nual discomfort or numbness in your hands, wrists, arms, shoulders, neck or back
while typing, you are advised to consult a qualified medical professional.
TROUBLESHOOTING GUIDE
Symptom Possible Problems Solution
Mouse does not
turn on.
Mouse cursor
does not move
even when the
optical senser
light is on.
Mouse cursor
response is
abnormal or
slow.
- Batteries may be incorrectly
installed.
- Batteries may be dead.
- Power Switch is not set to either
“ON” or “LED” position.
- Nano USB Receiver is not
properly installed on computer.
- Mouse is running on a highly
reflective surface, e.g. chrome
plated surface
- There may be interference from
another RF device nearby.
- There may be another Hello Kitty
Wireless Mouse working nearby.
- Reinstall fresh AAA (UM-4) batteries
according to the polarity diagram.
- Replace all exhausted bat teri es wit h
fresh ones at the same time.
- Set Power Switch to “On” or “LED”
position
- Unplug the Nano USB Receiver from
the USB port of the PC and try
another available port.
- Try to use the supplied mouse pad or
similar surface.
- Please try to move away from the
possible sources of interf erence.
- Try to do the manual pairing
procedure to solve the possible ID
crash/loss problem.
Transmitter
(in Mouse unit) Specifications
Sensor System Optical LED
Resolution 1000dpi
Wireless Frequency 2.405 – 2.476GHz
Modulation GFSK with 2-way “Frequency Agility Protocol” coding
Number of Channels 32
Number of Pairing ID 16777216
Bit Rate 1Mbps
Working Distance About 30 feet / 9m
Power Source 2 x DC1.5V ‘AAA’ (UM-4) alkaline batteries (Not included)
Current Consumption 30mA (max.) with decorative LEDs on
15mA (max.) with decorative LEDs off
Receiver
Specifications
Interface USB port (type A socket)
Compatibility USB 1.1 – 3.0
Power Source DC5V 10%
Current Consumption 30mA (max.)
SPECIFICATIONS
4
Page 6

Working Environment
Limits
Temperature Range 32° - 104°F / 0° – 40°C
Humidity Range 85% Relative Humidity or less
Battery life may vary depending on usage.
Specifications may change without notice due to continuous product enhancement.
90 DAY LIMITED WARRANTY AND SERVICE
(Valid in the U.S.A. Only)
SPECTRA MERCHANDISING INTERNATIONAL, INC. warrants this unit to be free from defective
materials or factory workman shi p for a p eri od of 90 day s from the dat e of ori gi nal customer purc hase a nd
provided the product is utilized within the U.S.A. This warrant y is not assignable or transferable. O ur
obligation under this w arranty is the re p ai r or rep lacem ent of the def ecti ve unit o r any pa rt the reof, exc ept
batteries, when it is returned to the SPECTRA Service Department, accompanied by proof of the date of
original consumer purchase, such as a duplicate copy of a sales receipt.
You must pay all shipping charges required to ship the product to SPECTRA for warranty service. If the
product is repaired or replaced under warranty, the return charges will be at SPECTRA’s expense. There
are no other express warranties other than those stated herein.
This warranty is valid only in accordance with the conditions set forth below:
1. The warranty applies to the SPECTRA product only while:
a. It remains in the possession of the original purchaser and proof of purchase is demonstrated.
b. It has not been subjected to accident, misuse, abuse, improper service, usage outside the
descriptions and warnings covered within the user manual or non-SPECTRA approved
modifications.
c. Claims are made within the warranty period.
2. This warranty does not cover damage or equipment failure caused by electrical wiring not in
compliance with electrical codes or SPECTRA user manual specifications, or failure to provide
reasonable care and necessary maintenance as outlined in the user manual.
3. Warranty of all SPECTRA products applies to residential use only and is void when products are used
in a nonresidential environment or installed outside the United States.
This warranty gives you specific legal rights, and you may also have other rights which vary from state to
state. TO OBTAIN SERVICE please remove all batteries (if any) and pack the unit carefully and send it
freight prepaid to SPECTRA at the address shown below. IF THE UNIT IS RETURNED WITHIN THE
WARRANTY PERIOD shown above, please include a proof of purchase (dated cash register receipt) so
that we may establish y our eligib ility fo r warranty service and repai r of the unit w ithout cost. Also in clude a
note with a description explaining how the unit is defective. A customer service representative may need
to contact you regarding the status of your repair, so please include your name, address, phone nu mber
and email address to expedite the process.
IF THE UNIT IS OUTSIDE THE WARRANTY PERIOD, please include a check for $12.00 to cover the
cost of repair, handling and return postage. All out of warranty returns must be sent prepaid.
It is recommended that you contact SPECTRA first at 1-800-777-5331 or by email at
[email protected] for updated information on the unit requiring service. In some cases the
model you have may be discontinued, and SPECTRA reserves the right to offer alternative options for
repair or replacement.
SPECTRA MERCHANDISING INTERNATIONAL, INC.
4230 North Normandy Avenue,
Chicago, IL 606 34, USA.
1-800-777-5331
To register your product, visit the link on the website below to enter your information.
http://www.spectraintl.com/wform.htm
Printed in China
5
 Loading...