

Page 1
OWNER'S MANUAL
KT2056
ICE-CREAM CONE CLOCK RADIO
R
1976, 2004 Sanrio Co., Ltd.
C
Page 2
WARNING
TO PREVENT FIRE OR SHOCK HAZARD, DO NOT USE THIS PLUG WITH AN
EXTENSION CORD, RECEPTACLE OR OTHER OUTLET UNLESS THE BLADES
CAN BE FULLY INSERTED TO PREVENT BLADE EXPOSURE. TO PREVENT FIRE
OR SHOCK HAZARD, DO NOT EXPOSE THIS APPLIANCE TO RAIN OR MOISTURE.
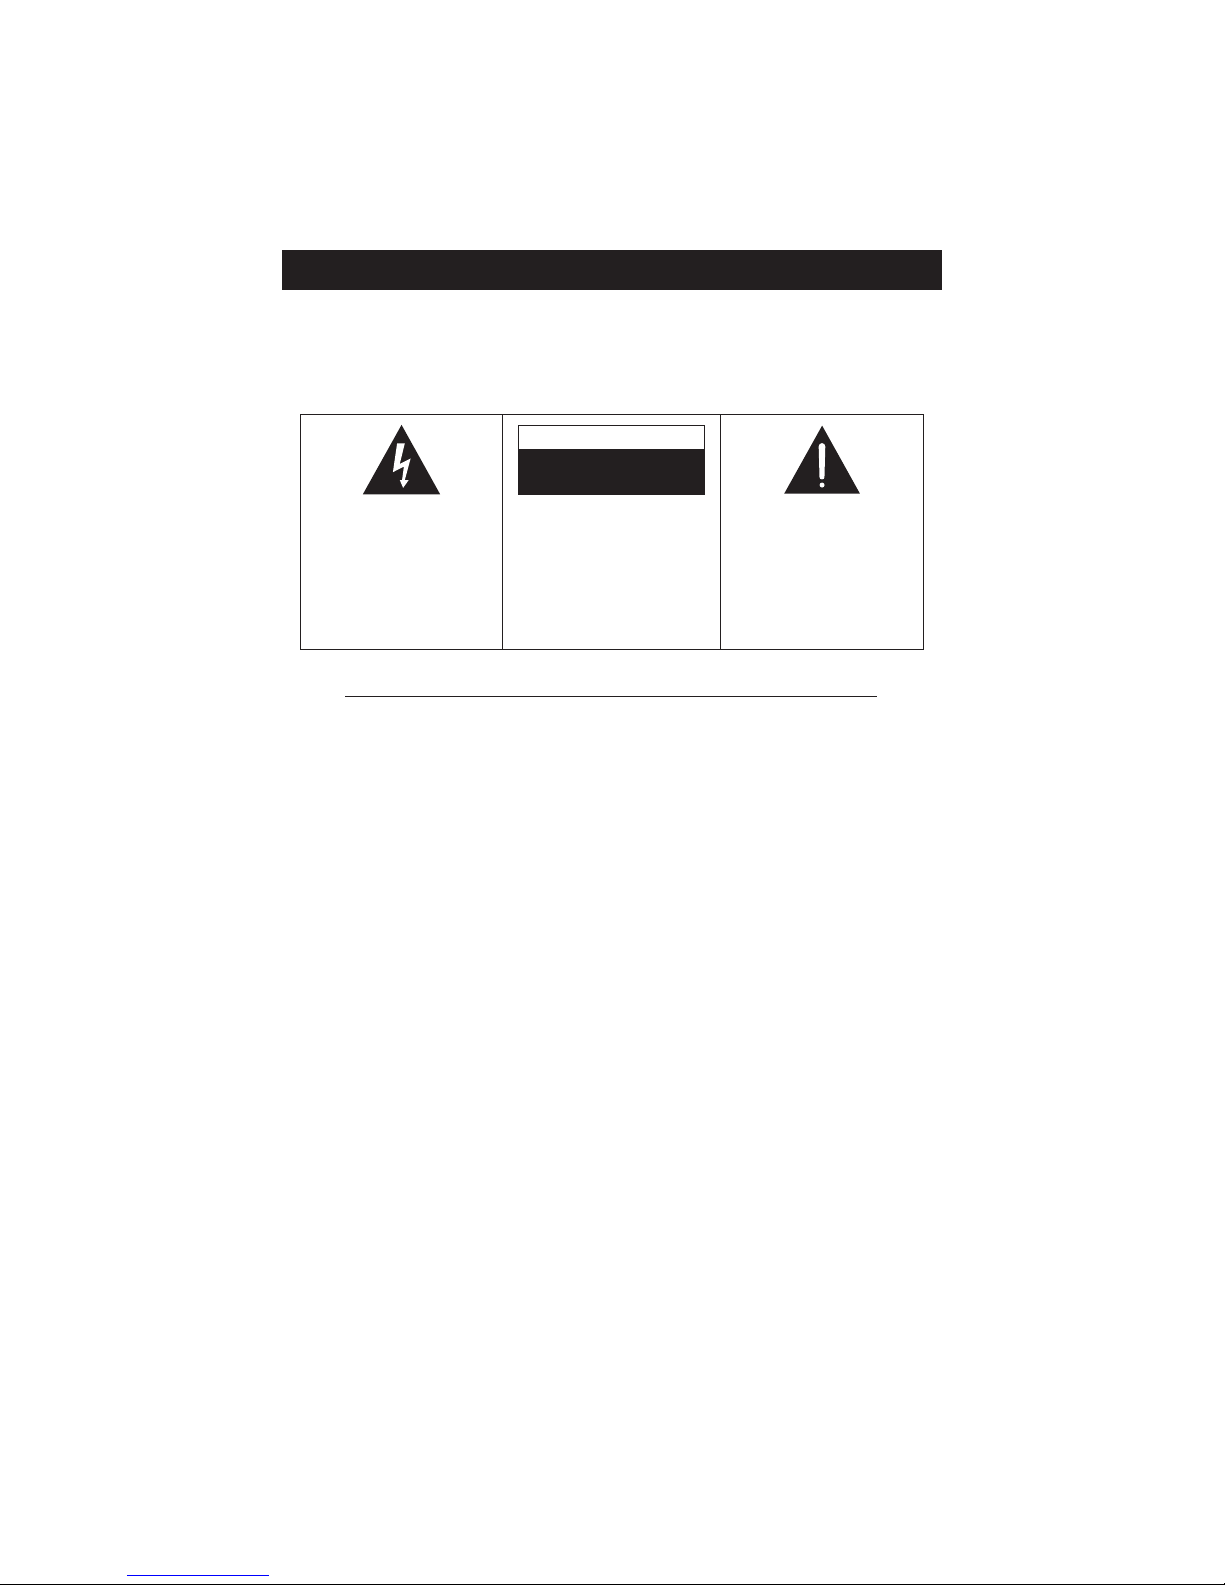
The light ning flash wi th ar rowhead symbol , wi thin an equi lat er al triangl e i s int ende d t o
alert the us er to t he pr ese nce of
uni nsu lated 'dang erous vol tage'
withi n t he pr oduc t' s enc losu re
that may be of sufficient
magni tude t o con sti tut e a risk
of el ect ric sho ck to per sons.
The exclamation point within
an equilateral triangle is intended to alert the user to
the presence of important
operating and maintenance
(servicing) instructions in
the literature accompanying the appliance. .
CAUT ION : TO REDU CE THE
RISK OF ELECTRIC SHO CK
DO NOT REMOVE COVER
(ON BACK), NO USER
SERVI CE A BL E PART S I NS IDE
REFER SERVICING TO
QUALIFIED SERVICE
PERSONNEL. .
WARNING
DO NO T OPEN
RIS K OF ELEC TRIC SH OCK
IMPORTANT SAFETY INSTRUCTIONS
1. R ea d these i ns truct ions.
2. K ee p these i nstruct ions.
3. H ee d all war nings.
4. F ollow al l ins tr uctio ns .
5. D o not u se t his a pp aratu s near wa ter.
6. C le an on ly w ith d ry c lot h.
7. Do not block any ventilation openings. Install in accordance with the manufacturer's
in struc tions.
8. Do not install near any heat sources such as radiators, heat registers, stoves, or other
apparatus (including amp li fiers ) that pr oduce h ea t.
9. Do not defeat the safety purpose of the polarized or grounding-type plug. A polarized
plug has two blades with one wider than the other. A grounding type plug has two blades
and a th ir d g rounding prong. The wide blade or the third prong are provided fo r you r
saf et y. If th e pro vi ded p lug d oes n ot f i t into yo ur ou tlet, c onsul t an electrician for
replacement o f the o bs olete outle t.
10. Protect the power cord from being walked on or pinched particularly at plugs,
convenience receptacles, and the point where they exit from the apparatus.
11. Onl y use a ttach me nts / a ccess or ies s pecif ie d by th e m an ufact ur er.
12. Unplug this apparatus during lightning storms or when unused fo r lon g per io ds of ti me .
13. Refer all servicing to qualified service personnel. Servicing is required when the
apparatus has been damaged in any way, such as power-supply cord or plug is
damaged, liquid has been spilled or objects have fallen into the apparatus, the
apparatus has been ex posed t o rai n or mo istur e, d oes n ot op erate n ormal ly, o r h as
be en d ropped.
14. This appliance shall not be exposed to dripping or splashing water and that no objec t
filled with liquids such as vases shall be placed on the apparatus.
1
Page 3

2
The Sure-Alarm battery back-up system will remember the time and alarm settings
of cours e, but it c an do more t han th at. As long as ther e is a fresh 9 - volt battery
installed, the Sure-Alarm system will operate the radio or buzzer alarm to wake
you up even if the p owe r i s off a t y our n orm al wake up time.
We have taken great care to make sure that your Clock Radio was in perfect
working order when it left our factory. It has been designed to give you many years
of enjoyment and trouble free operation. Read this manual before operating this
unit to become familiar with its features and obtain the performance that will bring
you continued enjoyment f or many yea rs.
For future reference, record the serial number in the space provided.
Model : KT2056
Serial Nu mbe r :
Welc ome to the wor ld of H ello Kitty.
.
Page 4
3
IMPORTANT NOTES
Avoi d inst al ling the uni t in locat ions desc ri bed bel ow :
Places exposed to direct sunlight or close to heat radi at i on app lianc es such
as el ec tric heat er s.
D us ty pl ac es .
Pl aces su bj ec t t o co nstant vi br at ion.
H um id or m oi st pl aces .
POWER SOURCE
Thi s radi o i s des igne d to ope rate on nor mal 120 V 60Hz AC power onl y. Do not
attempt to ope rat e the radi o on any ot her power so ur ce . You could cause damage
to the radi o that is not co ve r ed by yo ur war rant y.
Thi s radi o sh oul d be conne ct ed t o an AC out let t hat is al ways ' live '. Do not co nne ct
it to an out let that is co nt rol led by a wal l swi tch . When the power to the radi o is
int errupt ed, the Sur e Al ar m batter y bac k up sy st em tak es over to maintain the time
and al ar m se tti ngs . To maximize the life of the bac k up bat ter y, ke ep the radi o
conne ct ed to a ' live' AC ou tlet at al l times .
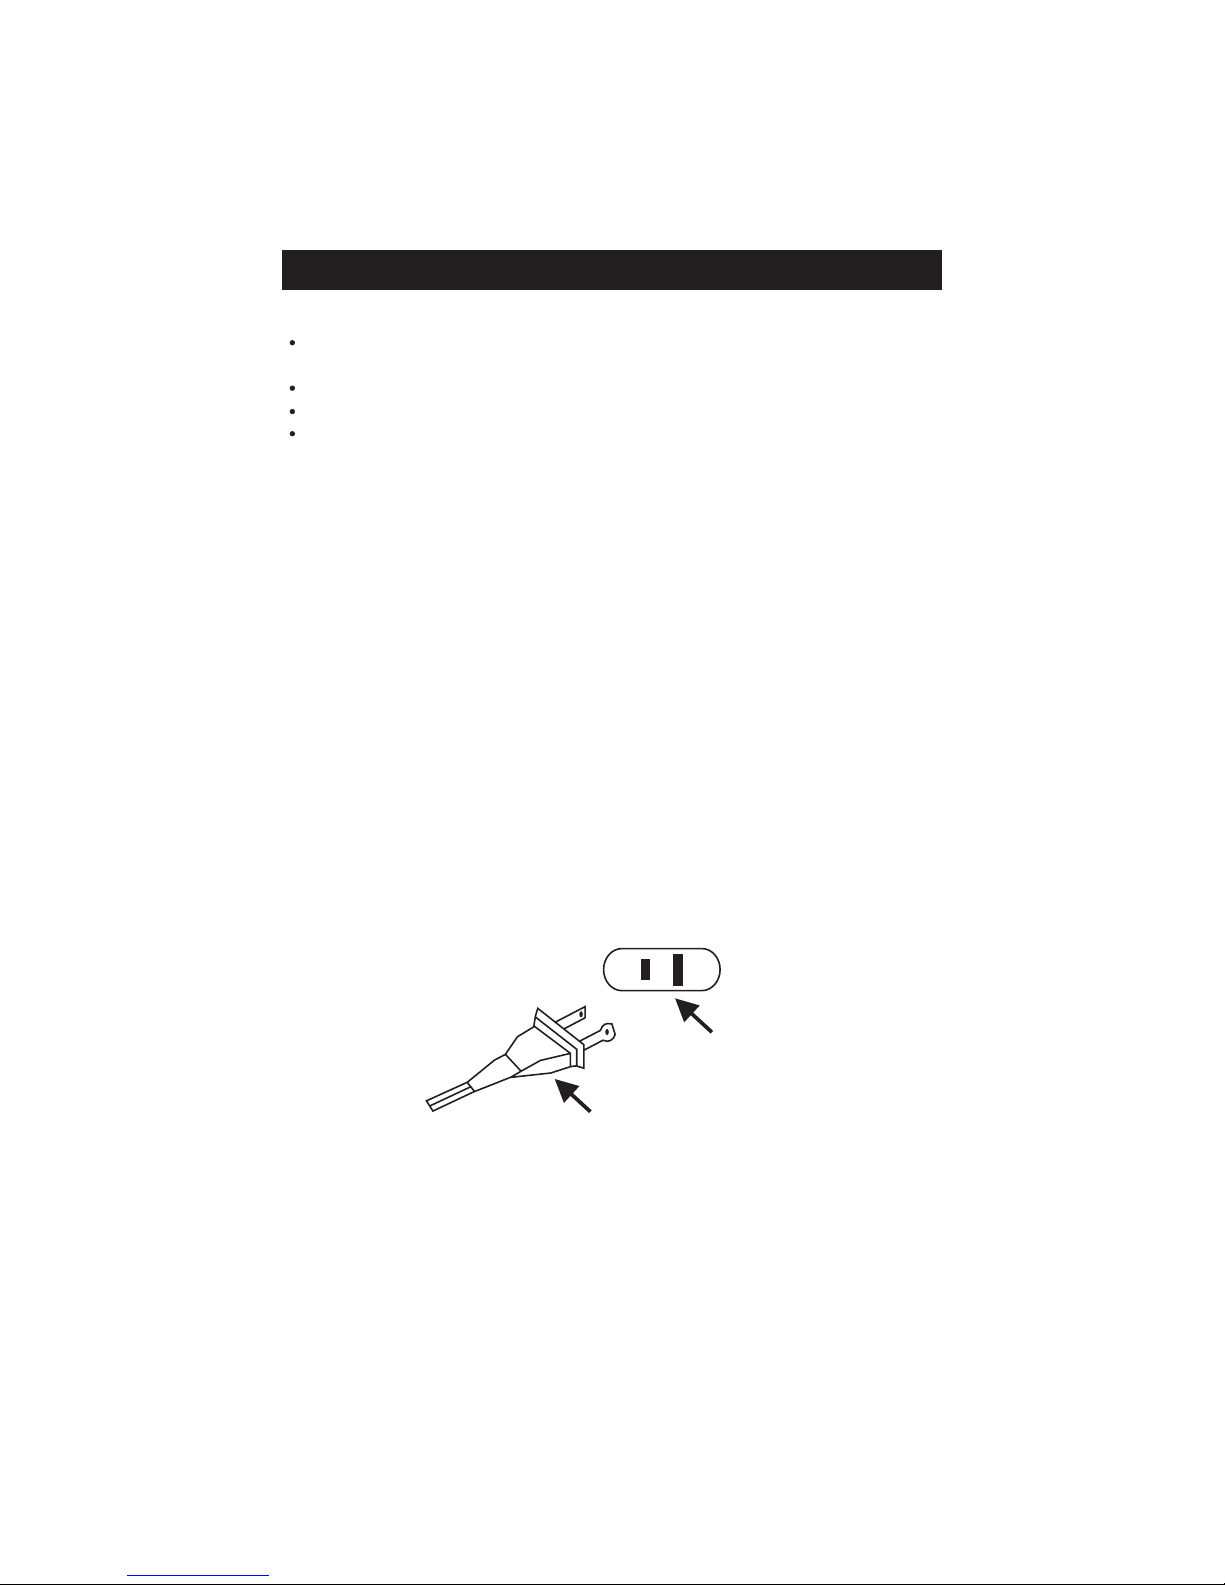
Thi s r adi o us es a polar ize d AC pl ug which has one bl ade wi der t hat the ot her . Thi s
plug wi l l onl y f it i nt o a pol ari ze d AC out let . Thi s is a safety f eat ure. I f the pl ug wi ll not
fit, you may have an ol der non -pol ar ized AC outlet . Do not def eat the saf et y feat ur e
by tr yi ng to fi le the wi der bl ade , or r epl acing the pl ug. Cont ac t an el ec t rici an to
repl ace y our out dat ed out let .
AC Outlet
AC Plug
Page 5

4
PREPARATION FOR USE
UNPACKING AND SET UP
Rem ove the cl ock radi o from the car ton and rem ove al l packi ng mat er i al from
the cl ock radi o. We sugg est that you save the packi ng m at er ial , in t he
unlikel y even t that your radi o ever nee ds t o be ret ur ned for ser vi ce. Th e
original car ton and packi ng mater ial i s the onl y saf e way to pack your radi o to
prot ect it for m dam age in transi t.
Remove any descri pt ive labe ls or st icker s on the f ront or top of the cabi net . Do
not remove any labe ls or sticker s from the back or bot tom of the cabi net .
Not e the ser ial num ber on the bot tom of your radi o and write this num ber in the
spa ce provi ded on P age 2 of t hi s m anu al.
Place your cl ock radi o on a level surface such as a t abl e, desk or shel f, conve ni ent
to an AC out let , out of di r ect sunl ight , and aw ay from sources of excess hea t,
d irt, du st, moi st ur e, hu midi t y, or vi br at ion.
Unwind the A C pow er cor d and ext end it t o it s ful l leng th. Th e FM ant enn a is
built in to this cord. It must be fully ext ended to pr ovi de the best FM recep ti on.
SURE-ALARM BATTERY BACK UP SYSTEM
The Sure- Alar m bat tery back up syst em in thi s cl ock r adi o will maint ai n the tim e
and al ar m set tings in the even t of a tem porar y pow er inter rupt ion. When the AC
pow er is r est ored t he time and al ar m set ti ngs wil l be cor r ect . If the AC pow er is
off at your wake up time, the Sur e- A lar m syst em w ill use t he bat ter y pow er to
turn on the radio or buzze r alarm as usua l, as long as t he back up bat ter y i s
inst alled a nd h as su ffici ent p ower rem aini ng.
The Sur e- A lar m bat ter y back up syst em requ ir es one 9- vol t bat tery, not i ncl uded.
We recom mend that you inst all an al kal ine bat tery for long est li fe and best
perf ormance .
.
Page 6
5
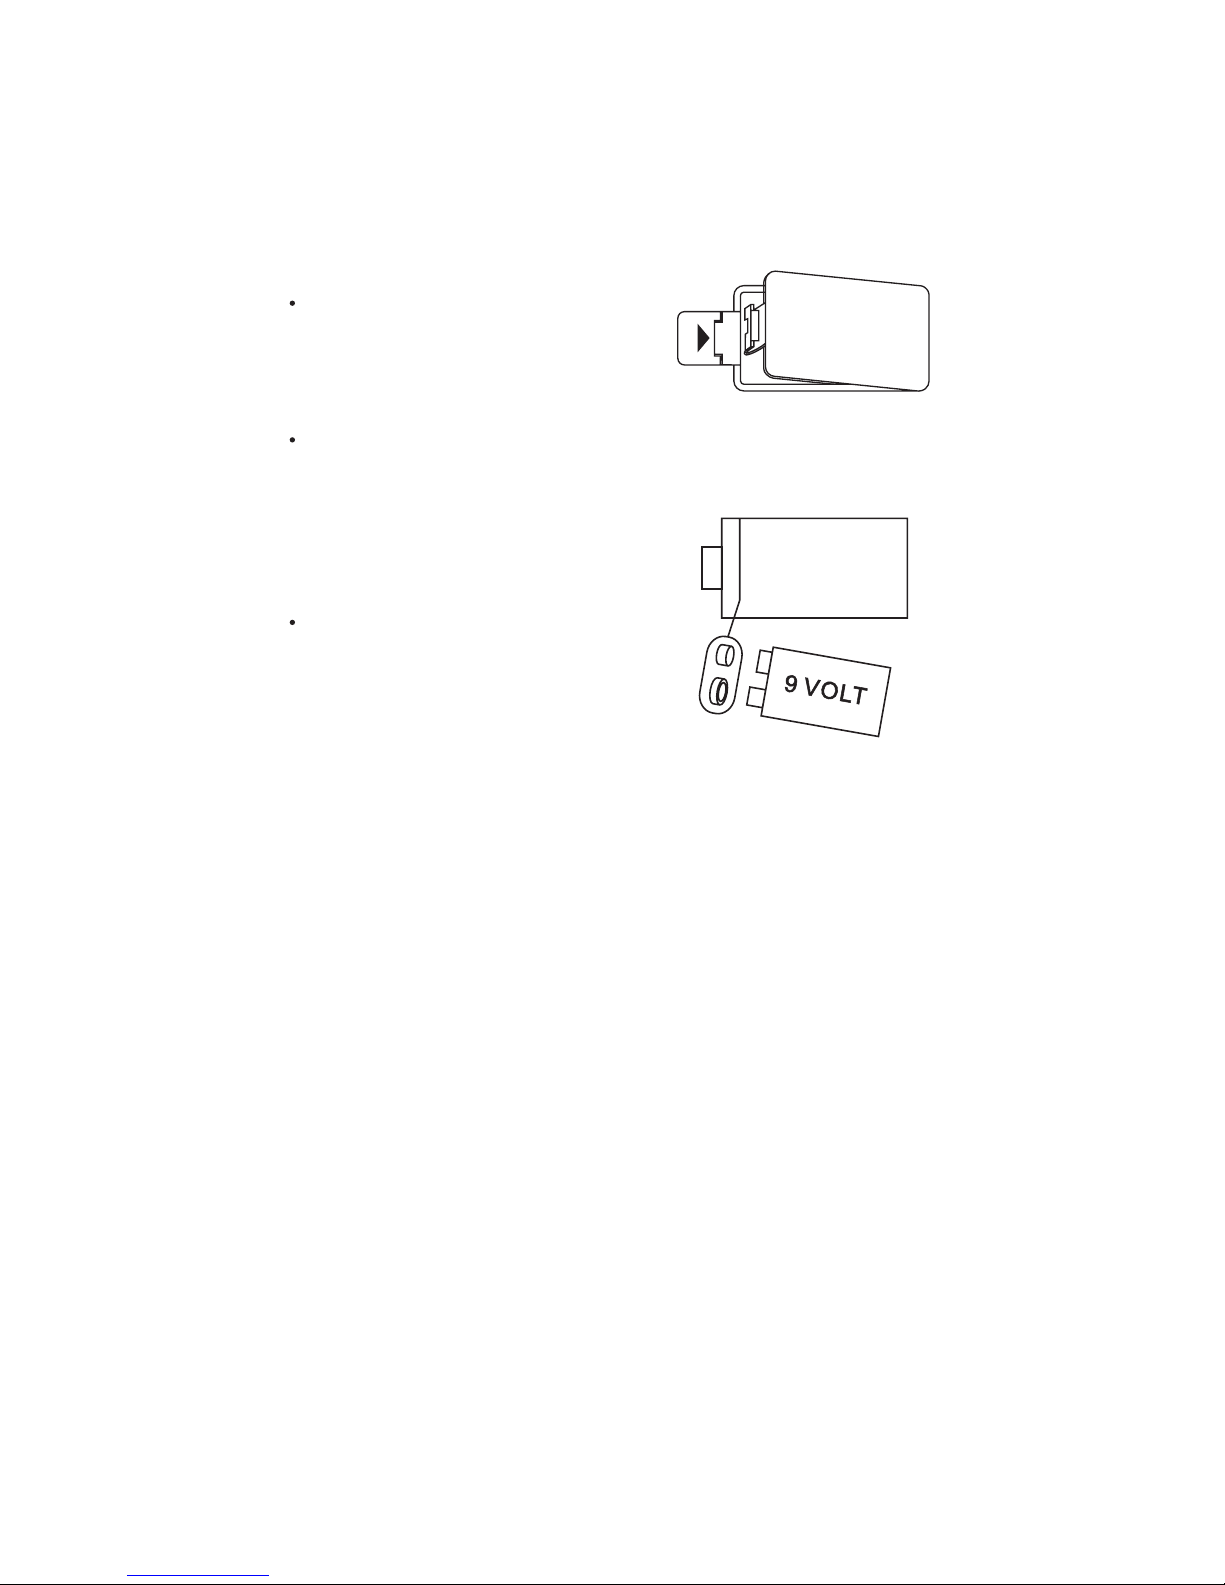
To instal l the b att ery
:
Ope n the ba ttery com partmen t cov er on the
bo ttom of the r ad io by pressi ng the t ab in
the directi on of t he arr ow.
Connect the 9-vol t battery t o the ba ttery
clip. It can only be connected one way.
Push the battery into the battery
com partment and replace the cover.
.
.
.
.
POWER FA ILURE IND ICATOR
If no battery is installed in the radio, or if the battery in the compartm ent i s weak or
dead, the t ime a nd alarm settin gs wi ll be lost if th e pow er is interrupted. When the
AC power is restore d the cloc k dis pla y wil l beg in fl ashing. This indicate s tha t
the time displ ay is i nco rre ct an d nee ds to b e res et.
IMPOR TANT :
After you reset the time, be sure to reset your alarm settings as well .
.
OPEN
Page 7
6
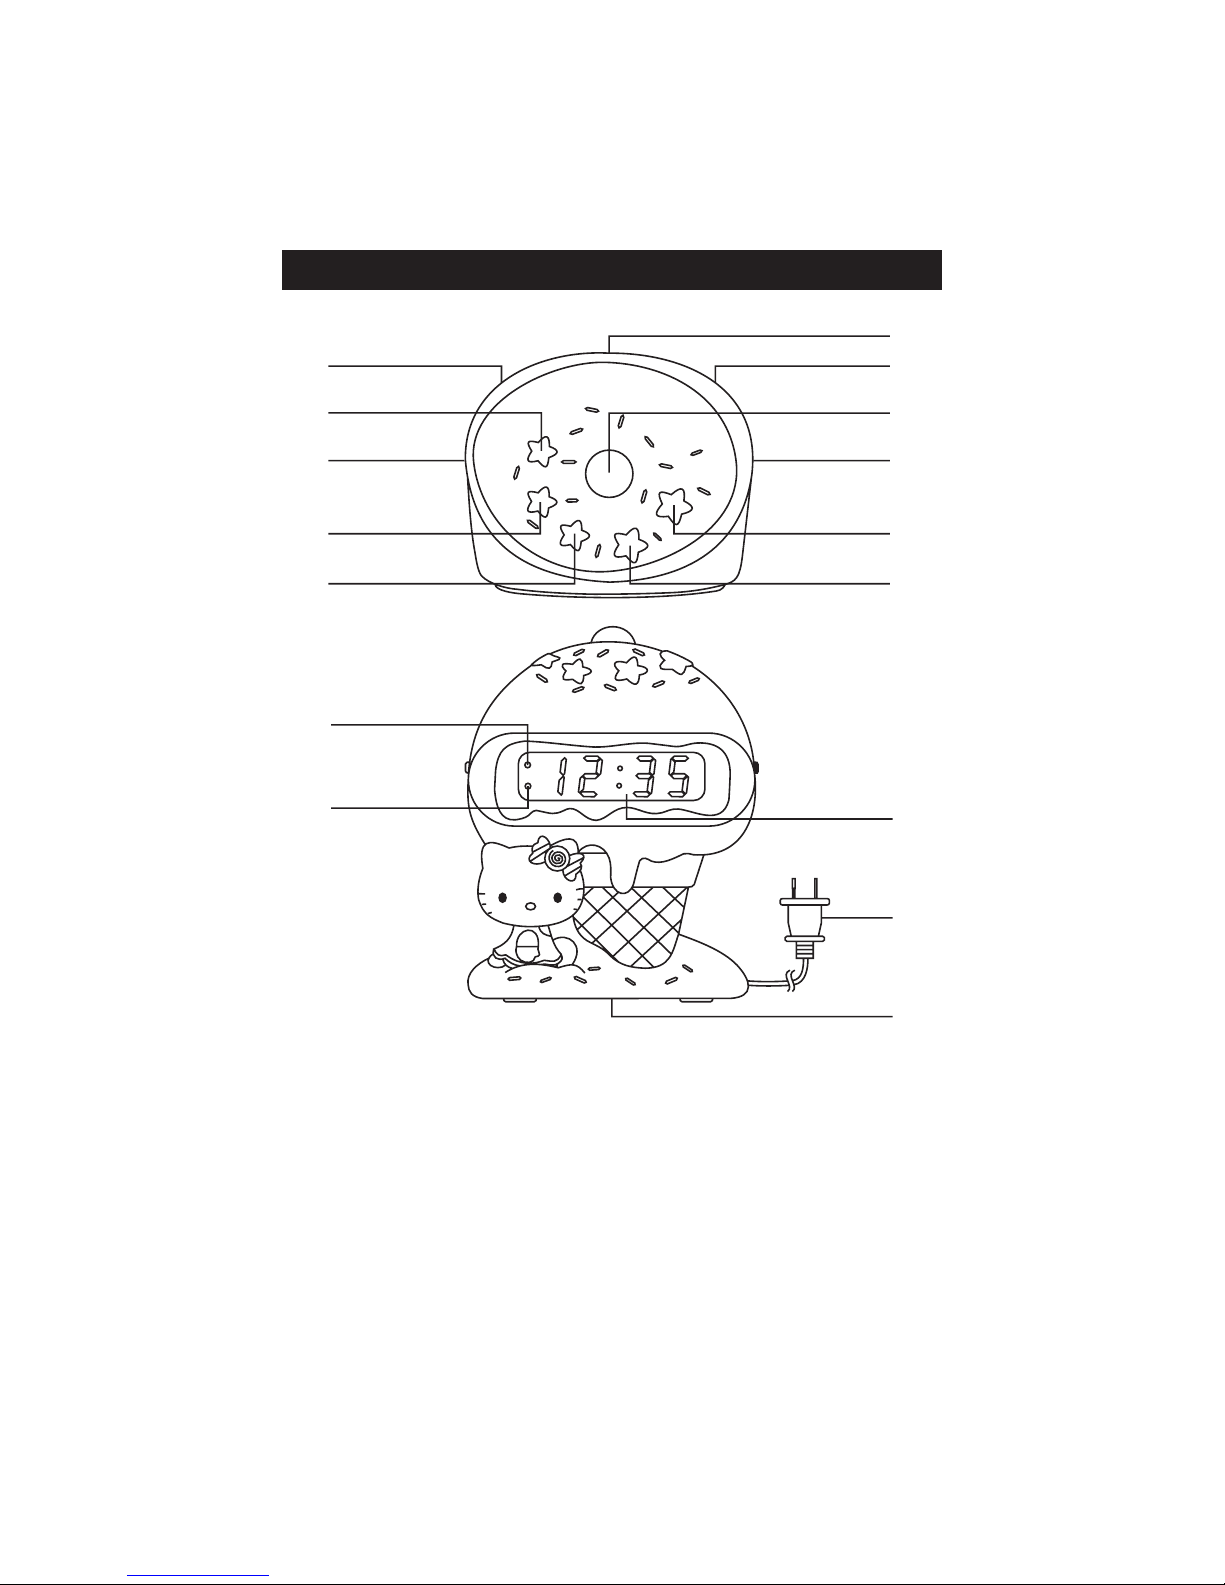
LOCATION OF CONTROLS AND INDICATORS
2
1
3
4
5
7
6
8
9
10
11
12
13
14
15
16
1. ALARM Sel ect or Sw itch.
(BUZZER /AU TO /ON /OFF)
2. TIME Button.
3. BAND (AM /FM )Selector Swi tch .
4. MIN. (Minute) Button.
5. HOUR But ton .
6. Speake r. (At r ear cabinet)
7. VOLUME C ont rol.
8. SNOOZE B utt on.
9. TUNING Contro l.
10. SLEEP Button.
11. ALAR M Button.
12. PM Indicator.
13. ALM (Ala rm) ' On' Indicator.
14. Time LED Display.
15. AC Power C ord .
16. Batte ry Co mpartment.
(At botto m of ca binet)
Page 8
7
OPERATING INSTRUCTIONS
SETTING THE CLOCK
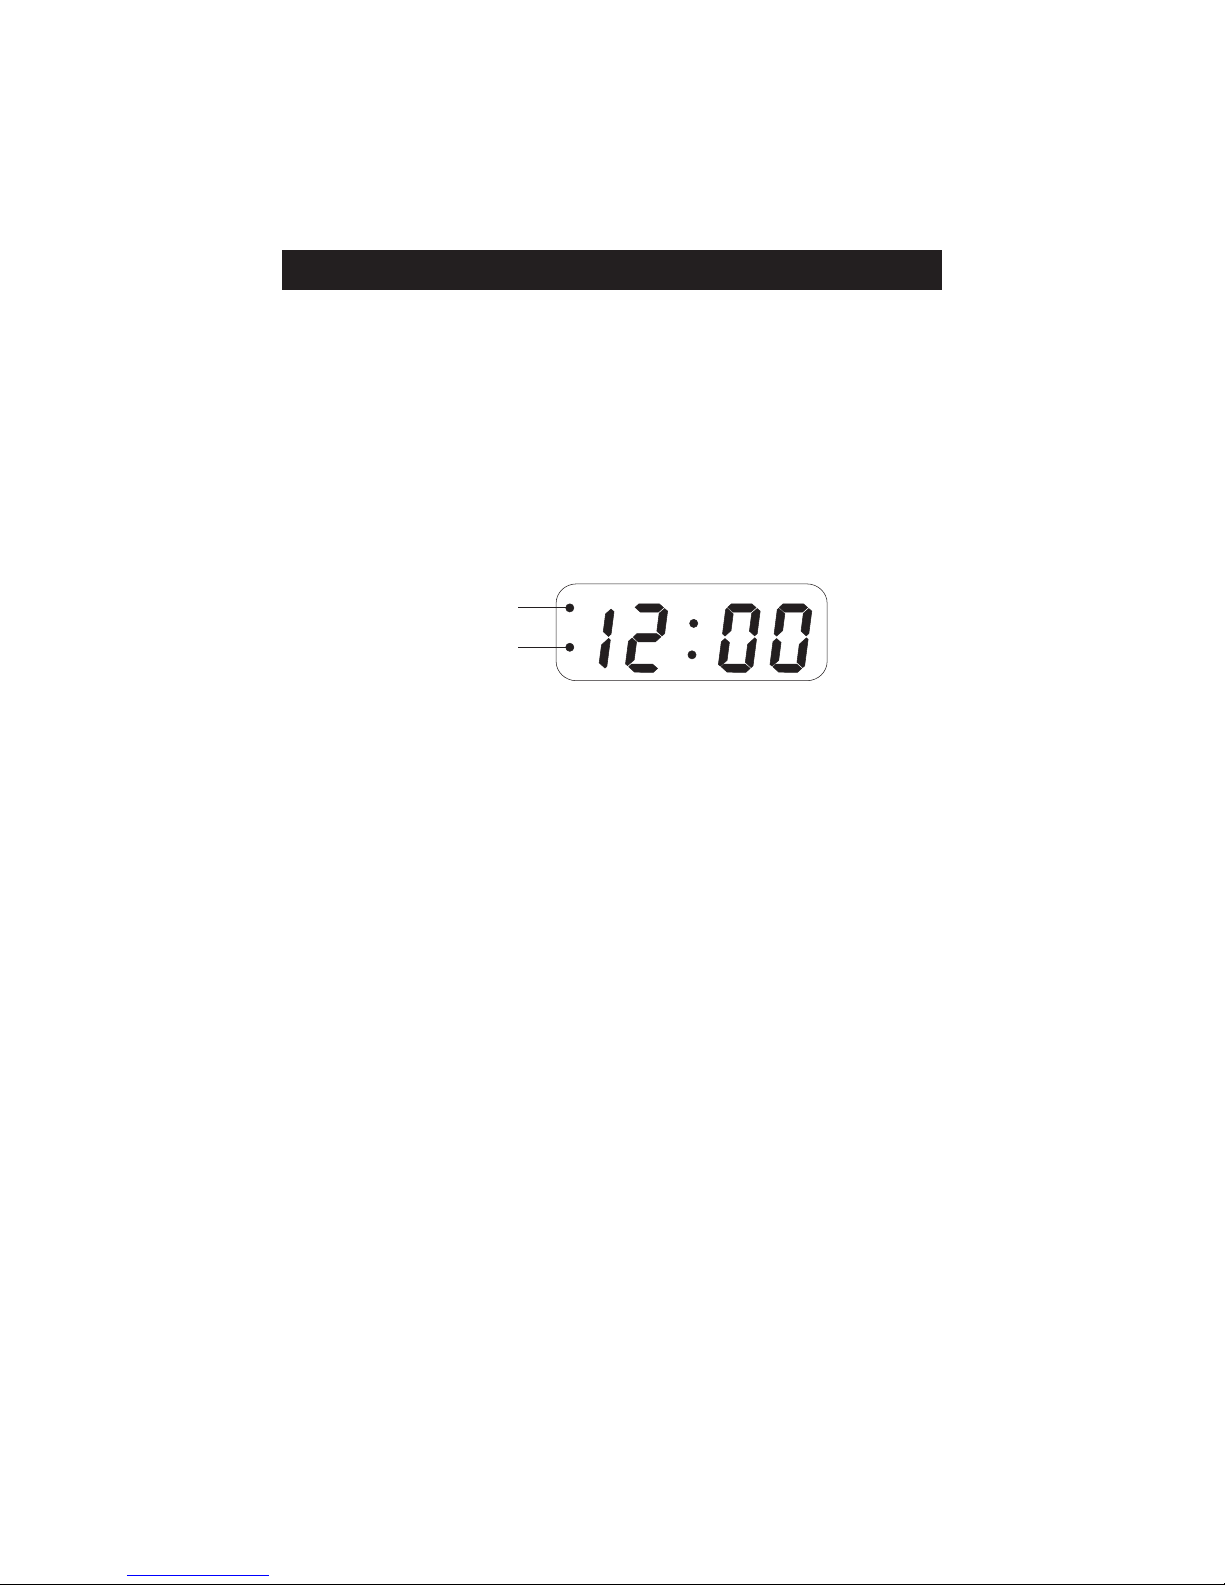
When you connect the radio to your AC outlet for the first time, the clock display will
begin flashing "12:00" . The flashing will stop when you set the time.
1. D epress the TIME b utt on an d the HOUR button to se t the c orr ect H our.
2. Depress the TIME button and the MIN button to set the correct Minute.
PM indicator
ALM indicator
NOTE : Be sure to observe the PM indicator to make sure that the time is set
correctly for AM or PM. If the PM indicator is 'On', the time displayed is
"PM". If the PM indicator is 'Off' , the time display is "AM".
SETTI NG THE WAKE UP TIMES
1. Depress the ALARM button and the HOUR button to set the correct wake
up Hour.
2. Depress the ALARM button and the MIN button to set the correct wake
u p Minute.
NOTE : Be sure that you have set the wake up time correctly by observing the PM
indicator. If the PM indicator is 'On', the wake up time is "PM". If the PM
indicator is 'Off', the wake up time is "AM".
CHECK ING THE WAKE U P TIMES
Whenever you want to check the wake up time, simply press ALARM button.
The display will change from the correct time to the wake up time. Release
the ALARM button to return to the correct time.
.
Page 9

8
LISTENING TO THE RADIO
1. Set t he BA ND se lector to the des ire d ban d, AM or F M.
2. Set the VOLUME control to a low setting.
3. Slide the ALARM switch to the O N po sition.
4. Select your desired station with the TUNING control.
5. Adjust the VOLUME control to a desired setting.
6. When you finished listening, slide the ALARM selector to the OFF position to
tu rn th e radio 'Off '.
ANTENNA INFORMATION
AM - T he AM bar a nte nna i s i n sid e the c abinet . If the AM re ception is weak, change
the p ositio n o f t he cabinet until th e i nte rnal antenna picks u p t he strongest
s ign al
FM - The FM antenna is built-in to the AC power cord. If the FM reception is weak
try v arying t he pos ition an d dir ect ion o f the po wer c ord u ntil you f ind t he
stronge st si gna l.
WAKE TO RADIO
1. Slide the ALARM selector to the ON position and select the band, station, and
volume level that you wish to hear when the alarm comes 'On', th en sli de the
ALARM selector to the AUTO position and the ALM indicator wil l lig ht up.
2. Reconfirm the wake up time settings by pressing the ALARM button.
3. The radio will turn 'On' at the selected wake up time. It will play for about two
ho urs a nd th en sh ut off au tom ati cally.
4. To stop the radio sooner, pre ss t he AL ARM bu tto n. Th e ra dio wi ll s top but
the a larm rem ain s set a nd will tur n the r adi o on again a t t he sa me ti me on t h e
following day.
5. I f you do not want t he alarm to t urn the ra dio o n o n t he following day, set the
ALA RM se lector to the 'OFF' posit ion .
Page 10

9
WAKE TO B UZZER
1. Set the ALARM selector to the BUZZER position. The ALM indicator will light up
to confir m tha t the a larm is set.
2. The buzzer will sound at the selected wake up time . It will continue for about
two hours a nd th en sh ut off au tomatically.
3. To stop the buzzer sooner, press the ALARM button. The buzze r wil l sto p but
the alarm remains set and will turn the buzzer on again at the s ame t ime o n
the following day.
4. If you do no t wan t the a larm to turn t he bu zze r on on the following day, set the
ALARM selector to the 'OFF' position.
SNOOZE ALARM
When the radio or buzzer alarm sounds in the morning, you may press the SNOOZE
button fo r a few m ore m inutes sleep. The alarm will stop for approximately 9
minutes a nd th en tu rn on again.
.
.
Page 11

10
SLEEP TO MU SIC TIMER
You can program the sleep timer to play the radio for up to 1 hour 59 minutes and
then shut off automatically.
1. Slide the ALARM selector to either "OFF", "BUZZER" or " AUTO" position.
2. Press the SLEEP button, the display will briefly show "0:59". While holding the
SLEEP button, press the HOUR button, the display shows "1:59" and the radio
will begin to play. After 1 hour 59 minutes the radio will shut off automatically.
3. To adjust the amount of time that the radio will play before shutting off, hold the
S LEE P button, then pre ss th e MIN (M inute) b utton or H OUR b u tton to adj ust t he
des ire d sleep time.
4. To cancel the sleep timer before it counts down to "00" and shuts the radio
" off ", pr ess t he SNO OZE b utt on.
IMPORTANT:
Remember that the station and volume settings you choose for the Sleep To Music
operation are the same settings as you will hear if you set the alarm for wa ke to r adio
in the following morning.
.
.
Page 12

11
CARE AND MAINTENANCE
There are no user serviceable parts inside this clock radio. Please refer all service
problem s t o a q ual ified se rvi ce fa cil ity. S ee th e a tta che d warran ty card for
further details.
If t he ca bin et bec omes dusty, wi pe th e exteri or wit h a s oft d ust cl oth o nly. N ever
use dusting sprays or polishes on the cabinet.
If the cabinet becomes dirty or smudged with fingerprints it may b e wiped wit h a
soft cloth that has been slightly dampened with a mild soap and water solution.
Always disconnect the power cord from the AC outlet before cleaning, and never
allow any liquid to get inside the cabinet.
NOTE : If the re is n o bat tery in the ba ck- up ba ttery compartment, the Time and
Ala rm se tti ngs w ill b e l ost w hen t he AC power cord is disconnect f or
cle ani ng. R ese t the c lock and wa ke up ti me after re con nec ting the AC
power cor d.
Page 13

12
COMPLIANCE WITH FCC REGULATIONS
This equipment has been tested and found to co mply with the
limit s for a Radio R eceiver, pursuant to Part 1 5 of the FCC Rules.
These limits are designed to provide reasonable protection
against harmful interference in a residential installation. This
equipment generates, uses and can radiate radio frequency
energy and, if not installed and used in accordance with the
instructions, may cause harmful interference to radio
communications. However, there is no guarantee that
interference will not occur in a particular installation. If this
equipment does cause harmful interference to radio or television
reception, which can be determined by turning the equipment off
and on, the user is encouraged to try to correct the interference by
one or more of the following measures:
- Reorient or relocate the receiving antenna.
- Increase the separation between the equipment and receiver.
- Connect the equipment into an outlet on a circuit different from
that to which the receiver is connected.
- Consult the dealer or an experienced radio technician for help.
SERVICE
Distributed by:
Spectra Merchandising International, Inc.
Chicago Industry Tech Park
4230 North Normandy Avenue
Chicago, IL 60634, U.S.A.
Please ha ve mo del n umber read y, for Cus tom er Se rvice, cal l 1-8 00-777-5331
Printed in China
Please refer to the instructions on the enclosed warranty card f or
retur ning your u nit for ser vice. Whe n returni ng the unit , please
remov e b atterie s to prevent da mage t o t he uni t i n transit and/or
from pos sible batt ery le akage. We are not responsible for
batte ries retu rned with t he product or for t he cost of replacement.
 Loading...