

Hello Kitty KT2017 Owner's Manual
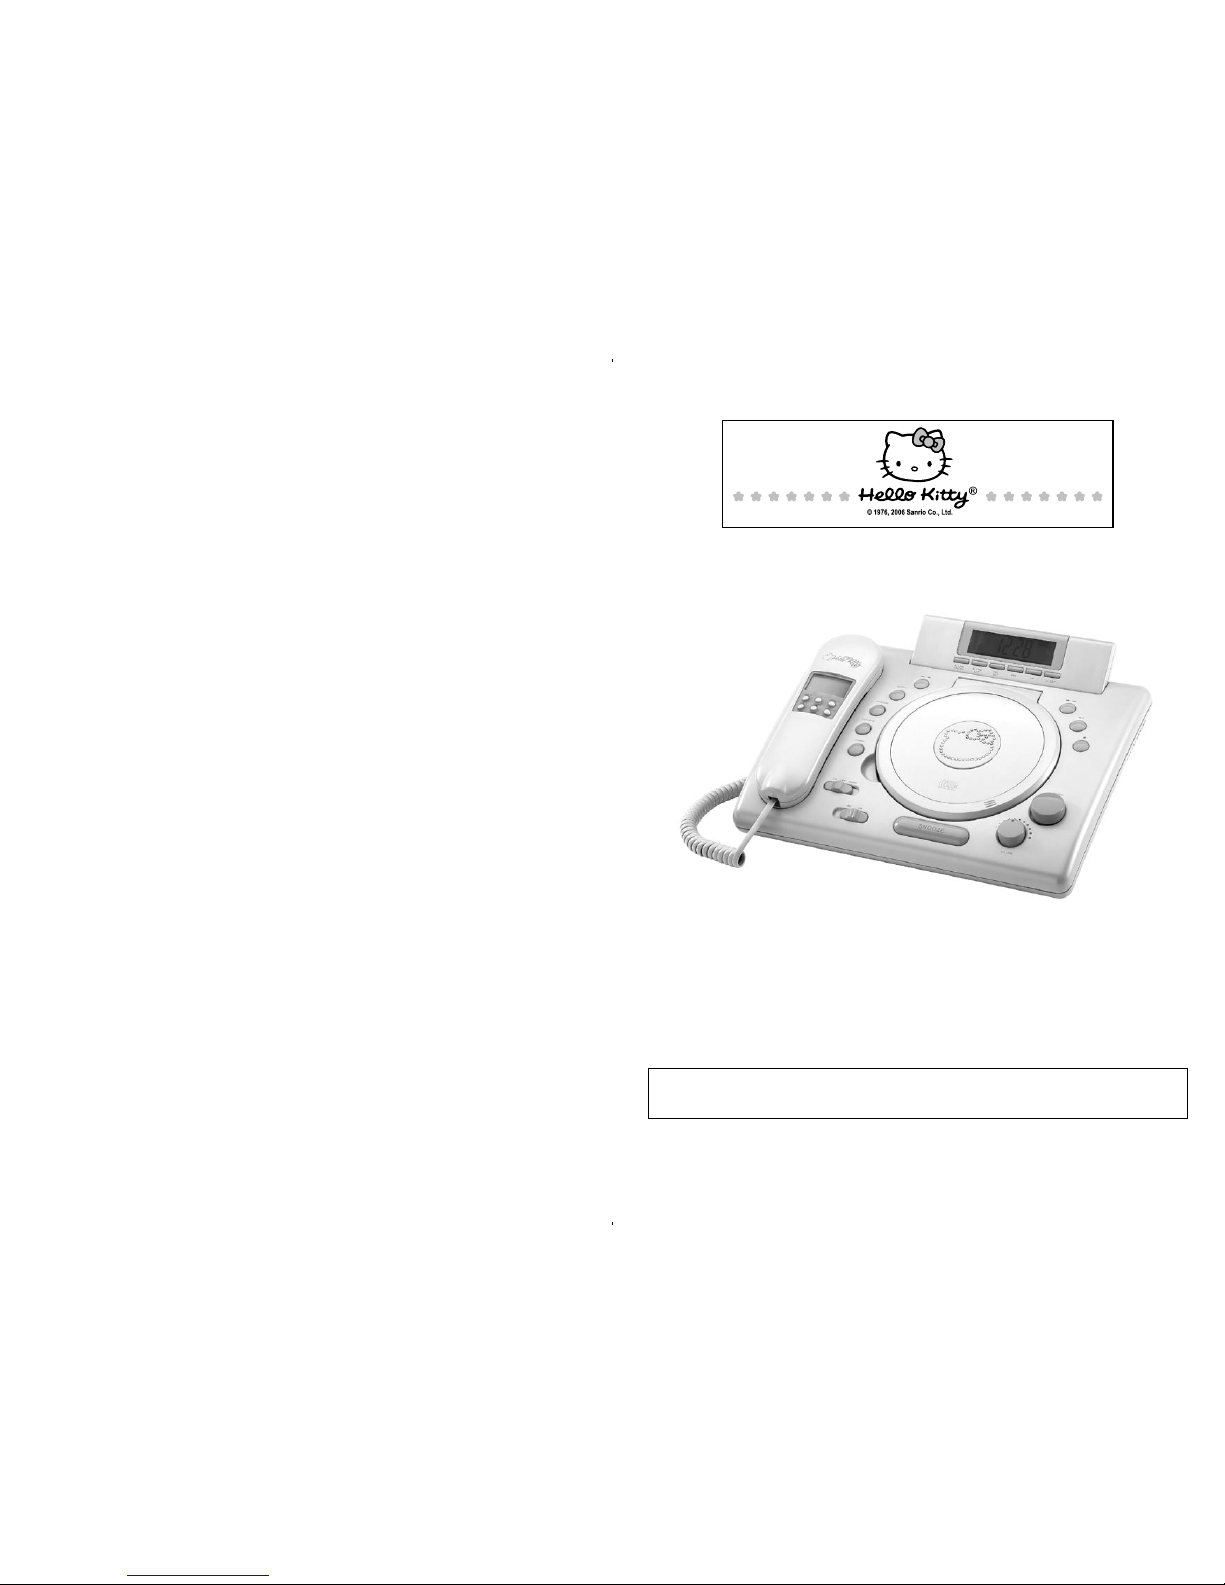
CD DUAL ALARM CLOCK RADIO WITH CALLER ID PHONE
SUBSCRIPTION TO CALLER ID SERVICE FROM YOUR LOCAL TELEPHONE
COMPANY IS REQUIRED FOR ALL CALLER ID FEATURES TO OPERATE CORRECTLY
PLEASE READ AND FOLLOW THIS MANUAL BEFORE USING YOUR
TELEPHONE AND KEEP IT FOR FUTURE REFERENCE
OWNER’S MANUAL
KT2017
When using your telephone equipment, basic safety precautions should always be followed to
reduce the risk of fire or electric shock and injury to persons including the following:
1. Read and understand all instructions.
2. Follow all warnings and instructions marked on the product.
3. Unplug this product from the wall outlet before cleaning. Do not use liquid or aerosol
cleaners. Use a damp cloth for cleaning.
4. Do not use this product near water, for example, near a bath tub, wash bowl, kitchen sink,
or laundry tub, in a wet basement, or near a swimming pool.
5. Do not place this product on an unstable cart, stand, or table. The product may fall, causing
serious damage to the product.
6. Slots and openings in the enclosure and the back or bottom are provided for ventilation
to prevent overheating. These openings must not be blocked or covered. The openings
should never be blocked by placing the product on a bed, sofa, rug, or other similar surface.
This product should never be placed near or over a radiator or heat register. This product
should not be placed in a built-in installation unless proper ventilation is provided.
7. This product should be operated only from the type of power source indicated on the
marking label. If you are not sure of the type of power supply to your home, consult your
dealer or local power company.
8. Do not allow anything to rest on the power cord. Do not locate this product where the cord
will be abused by persons walking on it.
9. Do not overload wall outlets and extension cords as this can result in the risk of fire or
electric shock.
10. Never push objects of any kind into this product through enclosure slots as they may touch
voltage points or short out parts that could result in a risk of fire or electric shock. Never spill
liquid of any kind on the product.
11. Do not disassemble this product. Take it to a qualified service technician or service center
when repair work is required. Opening or removing covers may expose you to voltage
or other risks. Incorrect reassembly can cause electric shock when the appliance is
subsequently used.
12. Unplug this product from the wall outlet and refer to qualified service personnel under the
following conditions:
A. When the power supply cord or plug is damaged or frayed.
B. If liquid has been spilled into the product.
C. If the product has been exposed to rain or water.
D. If the product does not operate normally by following the operating instructions. Adjust
only those controls that are covered by the operating instructions. Improper adjustment
of other controls may result in damage and may require extensive work by a qualified
technician to restore the product to normal operation.
E. If the product has been dropped or the enclosure has been damaged.
F. If the product exhibits a distinct change in performance.
13. Avoid using a telephone during an electrical storm. There may be a remote risk of electric
shock from lightning.
IMPORTANT SAFETY INSTRUCTIONS
This symbol is to alert you the important
operating or servicing instructions that may
appear in your owner’s manual. Always follow
basic safety precautions when using this product
to reduce the risk of injury, fire or electric shock.
2 3
This equipment complies with Part 68 of the FCC Rules. The label affixed to this equipment
contains, among other information, the FCC Registration Number and Ringer Equivalence
Number (REN) for this equipment. We suggest that you review the following information
provided by the FCC.
NOTIFICATION TO THE TELEPHONE COMPANY
Notification to the telephone company is no longer required prior connecting the registered
equipment. However, upon request from the telephone company the user shall tell the
telephone company which line the equipment is connected to as well as the registration
number and the ringer equivalence of the registered protective circuitry. In most, but not all
areas, the sum of all REN’s should be 5.0 or less.
MALFUNCTION OF THE EQUIPMENT
If the device is not operating properly, the user should immediately disconnect it from the
telephone line as it may cause harm to the telephone network. In the event service is needed
the user should contact:
Service Department
Spectra Merchandising International Inc.,
Chicago Industry Tech Park
4230 North Normandy Avenue,
Chicago, IL 60634, U.S.A.
Tel (773) 202-8408 or toll –free hotline 1-800-777-5331
TELEPHONE CONNECTION REQUIREMENTS
Except for ringers provided by telephone company, all connections to the telephone network
except for made through standard plugs telephone company provided jacks, or equivalent, in
such a manner as to allow for easy and immediate disconnection of the terminal equipment.
Standard jacks should be so arranged that, if the connected plug is withdrawn, no interference
to the operation of the equipment at the customer’s premises which remains connected to
the telephone network shall occur by reason of such withdrawal.
INCIDENCE OF HARM
Should terminal equipment or protective circuitry causes harm to the telephone network, the
telephone company shall, where practical, notify the customer that temporary discontinuance
of service may be required. However, where prior notices are not practical, the telephone
company may temporarily discontinue service if such action is deemed reasonable in the
circumstances. In the case of such temporary discontinuance, the telephone company shall
promptly notify the customer who has the right to bring a complaint to the FCC if he feels the
disconnection is not warranted.
14. Do not use the telephone to report a gas leak in the vicinity of a leak.
15. Never install telephone wiring during a lightning storm.
16. Never install telephone jacks in wet locations unless the jack is specifically designed for
wet locations.
17. Never touch uninsulated telephone wires or terminals unless the telephone line has
been disconnected at the network interface.
18. Use caution when installing or modifying telephone lines.
SAVE THIS INSTRUCTION
FCC INFORMATION
4 5
A. Operating from the AC-DC Adaptor
This unit should always be used with the included AC-DC adaptor.
1. Insert the adaptor’s plug into the DC Jack at the back of the base.
2. Plug the AC-DC adaptor into a 120V AC 60Hz electrical outlet. When the AC-DC
adaptor is in use, the batteries will not be drained.
3. If the unit is not to be used for an extended period of time, unplug the AC-DC
adaptor from the mains and the unit. Also remove the batteries from inside the
battery compartment.
Use only with Class 2 power unit 9VDC 1000mA
B. Installing the Batteries
1. Open the battery cover located on the bottom of the base. Install the batteries
according to the illustrated diagram.
IMPORTANT: Be sure that the batteries are installed correctly. Wrong polarity may damage
the unit.
2. For better performance and longer operating time, we recommend the use of alkaline
batteries.
CHANGES IN TELEPHONE COMPANY EQUIPMENT OR FACILITIES
This unit is designed to operate from the supplied AC-DC adaptor with a 9VDC 1000mA
output. It is also equipped with a battery back-up system for the clock that is powered by 3 x
1.5V ‘AAA” batteries (not included).
BATTERY BACK – UP SYSTEM
The Battery Back-up System ensures the clock and alarm settings will be retained during
a power interruption or power outage (in order to preserve the battery life the Display will
not light). All clock settings will be kept in memory, however, the clock time may require
adjustment for exact accuracy once the power returns. If a battery is not installed, the LCD
will blink”12:00” when the power is restored. This will indicate that you have to reset the time
and alarm settings.
POWER SOURCE
The telephone company may make changes in its communications facilities, equipment,
operations or procedures, where such action is reasonably required and proper in its
business. Should any such changes render the customer’s terminal equipment incompatible
with the telephone company facilities, the customer shall be given adequate notice to make
modifications to maintain uninterrupted service.
General
The FCC prohibits customer-provided terminal equipment to be connected to party lines or
to be used in conjunction with a coin telephone service.
Installation
This device is equipped with a USOC RJ11C standard miniature modular jack and is designed
to plug directly into a modular jack.
***THIS TELEPHONE HAS BEEN CERTIFIED AS HEARING AID COMPATIBLE ***
(a) Do not mix old and new batteries.
(b) Do not mix alkaline, standard (carbon-zinc) or rechargeable (nickel-cadmium)
batteries.
3. If the unit is not to be used for an extended period of time, remove all the batteries. Old
or leaking batteries can cause damage to the unit and will void the warranty.
4. Do not try to recharge batteries not intended to be recharged; they can overheat, rupture
and leak. (Follow batteries manufacturer’s directions).
5. Do not dispose of batteries in fire, batteries may leak or explode.
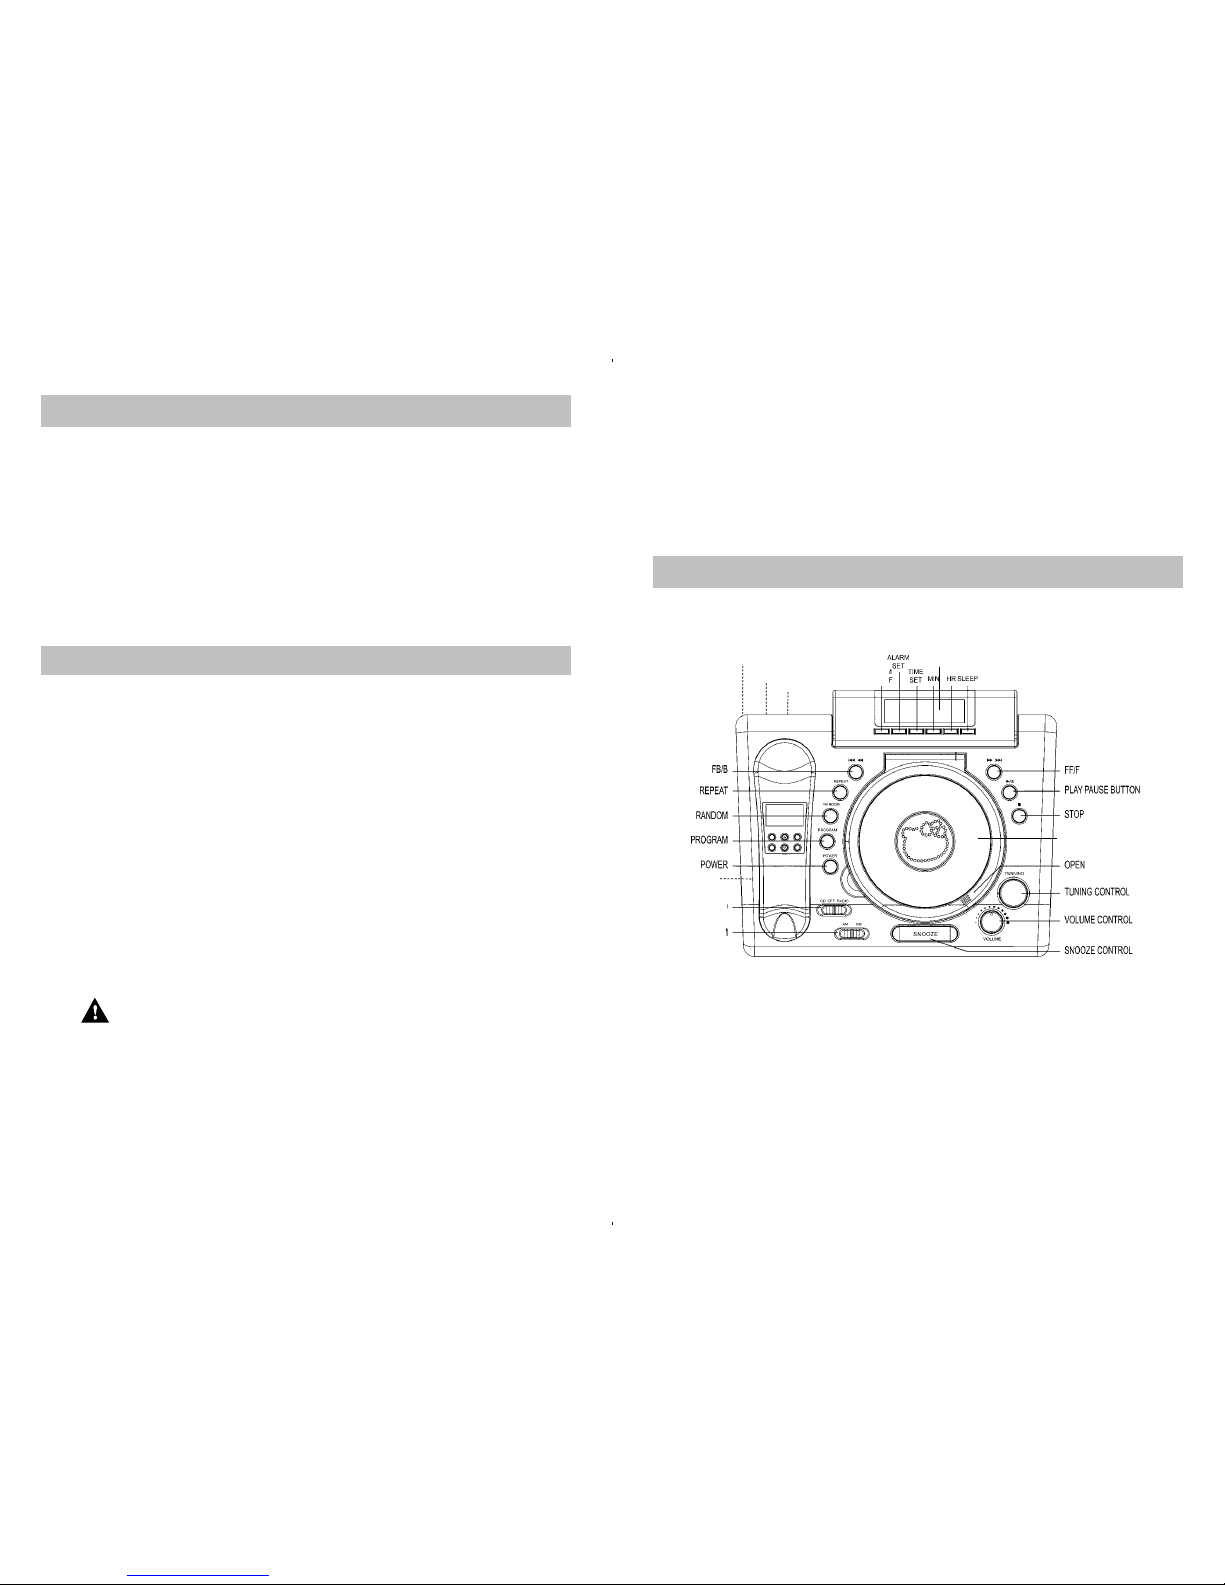
LOCATION OF CONTROLS
ALARM SELECT
ON/OFF
LCD
DC JACK
FUNCTION
SELECTOR
(CD/BUZZ/RADIO)
BAND SELECTOR
(AM/FM)
CD DOOR
LINE IN JACK
RINGER SWITCH
HANDSET JACK

6 7
1. Set the band switch to the desired band, am or fm.
2. Adjust volume to a low setting.
3. Press the power button once to turn the unit on.
4. Select your desired station with the tuning knob. The station frequency will be displayed
in the LCD.
5. Adjust volume to your desired listening level.
6. When you have finished listening, press the power button again to turn the unit off
Note: This player plays not only commercial CDs but also self-compiled CD-R/RW discs.
1. Press to open the CD door. Load your disc (with label facing up) into the CD compartment
and close the CD door.
2. Slide the function selector to CD position.
3. Press the power button to turn on the unit. Total track numbers on the disc will be shown
in the LCD after a few seconds.
4. Press to start playback from the first track.
5. Rotate volume to obtain the desired sound level from the built-in speakers.
6. To pause playing, press once and to resume playing, press again.
7. You can choose to play your favorite track directly by pressing either or
.
8. To locate a particular passage within a track, keep or
depressed until it is found.
Note: Low level audio will be heard during the search process to assist in locating correct
point in the track.
9. To repeat a particular track, press repeat once or until the REPEAT icon appears in the
LCD.
10. To repeat the entire CD, press repeat twice or until the REPEAT ALL icon appears in the
LCD. Press again to resume to normal playback. The REPEAT icon will go off.
11. To stop playing, press .
12. When you wish to turn off the CD PLAYER, press the power button again.
TIME SETTING
1. Press and hold the time set button.
2. Press min. button to adjust the minute.
3. Press hr. button to adjust the hour.
4. Release the time set button when the correct time is shown in the LCD.
NOTE: Be sure to observe the PM indicator to make sure that the time is set correctly for AM
or PM. If the PM indicator is ‘On’, the time displayed is “PM”. If the PM indicator is
‘Off, the time displayed is “AM “. It is important that the “AM” or “PM” setting is correct
for proper operation of the Alarm function.
RADIO OPERATION
RANDOM PLAYBACK
Enables all the tracks on a disc to be played in a Random sequence.
1. In STOP mode press random button once. Icon, RANDOM, appears in the LCD and a
track is selected at random and playback will begin.
2. Press to play another track randomly.
3. To stop playing, press .
4. Press the power button again to turn the player off.
CD PROGRAMMED PLAY
This function allows the tracks to be played in a programmed sequence.
1. In CD stop mode, press program button once. Icon, PROG, will appear and flash
together with the Program Channel No. “0” in the LCD.
Note: If the “RANDOM” Indicator has already turned on indicating the player is in RANDOM
mode then the program function will be disabled.
2. Press
or to select your desired track. The selected track No. will flash.
3. While the selected track is flashing, press program button again to store your selection.
The Program Channel No. will return to “0”
4. Press or
to select the next song to be programmed and press program button
to store selection.
5. You may repeat steps 2 - 4 to program as many as 20 tracks.
6. Press
to start playing the tracks in the programmed sequence.
Note: The Player will stop when the last programmed track has finished playing but the
programmed tracks still remain in the memory and will not disappear. Any time
you want to listen to the programmed tracks again, simply press program followed
by
to start.
7. You may repeat the current programmed track or all the programmed tracks by pressing
repeat once or twice.
8. To check the programmed memories, press program repeatedly in stop mode. The LCD
will show the total programmed tracks in sequence.
Attention: After pressing the program button never press otherwise all the
programmed tracks will be erased.
9. To cancel programmed play, press the program button then again in STOP mode or
open the CD door.
10. When you wish to turn off the CD Player, press power again.
Notes on CD-R/RW Discs
• Because of non-standardized format definition/production of CD-R/RW, playback quality
& performance are not guaranteed.
• Manufacturer is not responsible for the playability of CD-R/RW due to recording
conditions such as PC performance, writing software, media ability, etc.
• Do not attach a label or seal to either side of the CD-R/RW disc. It may cause a
malfunction.
This unit allows you to set two different wake-up times which you can choose to use
independently or simultaneously ALARM1 or ALARM2 or ALARM1 and 2.
ALARM OPERATION
CD OPERATION
 Loading...