

Page 1
Stainless Steel Milk Frother
User Manual
Model Number: MF3
READ AND SAVE THESE INSTRUCTIONS
Page 2
IMPORTANT
Read and follow the instruct ions in this user manual even if you feel y ou ar e familiar with the product, and find a
place to keep it handy for future reference.
For your convenience recor d t he c omplete model number (lo cat ed on the product identificatio n plate) and the
date you received the product, together with your purchase rece ipt and at t ach to the warranty and service
information. Retain in the event that warranty service is required.
NOTE: The rating of this pr oduct ( as marked on the product identif ication plate) is based on specif ic lo ading
tests. Normal use or the use of oth er r ecommended attachments may draw significantly les s power.
IMPORTANT SAFEGUARDS
When using any electr i cally powered product, basic safety precautions should always be followed,
including the following:
PLEASE READ ALL INSTRUCTI ONS CAREFULLY BEFORE USING THIS PRODUCT
WARNING!: - to reduce the risk of fire, ele ctrical shock or injury to persons or property:
• Carefully read all instruct ions before operating your new pr oduct for the first time and save for fut ur e
reference.
• Remove and safely discard any packaging material and promotional labels before us in g t he Milk Frother
for the first time.
• To eliminate a choking hazard for young children, remove and s afely discard the protective cover fitted to
the plug of this appliance.
• Ensure the Milk Frother is properly assembled befor e use. Follow the instructions provided in this
manual.
• Do not place the Milk Frother near the edge of a bench or table during operation. Ensure the power cord
does not hang over the edge of the bench or table, touch hot surfa ces or become knotted.
• Do not place the Milk Frother on or near a hot gas or electric burner, or where it coul d touch a heated
oven.
• This Milk Frother is not intended to be operated by means of an external ti me r or separ at e r emote
control system.
• Do not operate on a sink or drain board or polished wood surfaces.
• Ensure the appliance is operat ed on a clean, dry and level surface.
• This Milk Frother has been designed to heat and froth dairy milk and other milk alternativ es. I t is not
intended to thicken or heat ot her food s ubs t ances like cream, custard, gravies etc.
• This appliance is not designed for commercial or industrial us e.
• Use caution when pouring w ar med m il k from the Milk Frother as hot milk can scald.
• Do not operate the appliance without liquid. Always fill to at le ast t he ‘Min’ mark and never fill past the
‘Max’ mark.
• This appliance is not intended f or use by persons (including childr en) w it h r educed physical, sensory or
mental capabilities, or lack of experience and knowledge, unless they have been given super vision or
instruction concerning use of the appliance by a person responsible for their safety.
• Children should be supervised t o ensure they do not play with the appliance.
• This appliance is for household use only. Do not use this appliance for anything other than its intended
use. Do not use in moving v ehicle s or boat s. Do not use outdoors. Misuse may cause injury.
• The installation of a residu al cur r ent device (safety switch) is recommended to provide ad ditional safety
protection when using ele ctrical appliances. It is advisable that a safety switch w it h a r at ed r esi dual
operating current not exceeding 30mA be installed in the electrical circuit supplying the appliance. See
your electrician for professional advice.
• This appliance contains no user serviceable parts. Any maintenance other than cleaning should be
performed by a qualified person.
Page 3

• Do not immerse unit, power plug or power cord in water, or any other liquid.
• Never operate any appliance w ith a damaged power cord or plug, sh ould the appliance malfun ct ion, or if
it has been damaged in any manner.
• Do not leave the appliance unattended whilst it is on.
FEATURES
BEFORE FIRST USE
• Carefully remove your Milk Froth er from the box and remove any packaging materials.
• Clean the jug and accessories, as described in this manual, before first use.
• Fully unwind the power cord.
INSTRUCTIONS
1. Place the Milk Frother on a flat, level surface. Choose the appropriate whisk, and insert it firmly onto
the shaft at the base of the jug.
2. Pour the milk into the jug according to the max & min mark inside the jug. Max capacity chart is
below for your reference.
3. Place the lid firmly onto the jug, then press the button to turn on.
Transparent lid
Silicon ring
Jug – Stainless
steel housing
Indicator lights
On/Off button
Power base
with cord
Whisk for heating
milk
Whisk for frothing
milk
K
L
I
M
1
2
3
Page 4

Whisk
Function
Max capacity
Time (approx)
Frothing Cold Milk
115ml
65 seconds
Frothing & Heating
115ml
80-90 seconds
Heating (a small amount
of froth)
240ml
130-140 seconds
1. Frothing & Heating Milk / Heating Milk: Press the On/Off button to start. The blue and red indicator
lights will illuminate to show that the unit is in operation. The blue light will turn off after the cycle has
finished. The red light will start to flash for 30 seconds.
2. Frothing Cold Milk: Press the On/Off button once to start. Both indicator lights will illuminate to show
the unit is in operation. Press and hold the On/Off button for a further 1-2 seconds to switch cycles;
only the blue light will remain on.
The blue light will turn off after the cycle has finished. The red light will illuminate and start to flash
for 30 seconds.
HANDY HINTS
• Always use the Milk Frother first to froth/heat your milk. While it is operating, prepare your coffee or
hot chocolate.
• Use whole milk for best results – fat content >3.0%
• Milk heats to approximately 65+/-5°C. This is the ideal temperature, as it ensures the flavour of the
coffee is not impaired, and it also means you do not have to wait as long to drink your coffee.
• Keep the whisks in a safe place, because they are small they can be easily misplaced.
• After each froth/heat wait 2 minutes to allow the thermostat to rest. After 2 minutes the Milk Frother
can be used again. To shorten this time, rinse with cold water and wipe dry after each use.
• This Milk Frother is design to heat plain milk only.
RECIPES
Frothed Milk
Hot Milk
Cappuccino
1/3 espresso
Add 2/3 frothed milk
Top with cocoa powder
Café Latte
1/3 espresso shot
Add 2/3 heated milk and stir
Latte Macchiato
Pour frothed milk in a tall glass
Add espresso carefully along the rim of th e glass
Hot Chocolate
Pour heated milk into a large mug
Add chocolate powder and stir to mix
Top with marshmallows if desired
Instant Frothy Coffee
Make an instant coffee
Add frothed milk
Instant Milky Coffee
Place instant coffee in a cup/mug
Add hot milk and stir to mix
Page 5

CLEANING
1. Before commencing any cleaning, turn the power off at the outlet and remove the power plug.
2. Remove the jug from the power base.
3. Separate the lid and the silicon ring from the jug.
4. Flush and clean the jug with warm soapy water. This should be done immediately after each use.
5. Rinse the lid and silicon ring in warm water. Wash in soapy water if necessary.
6. Clean the jug body with a soft damp cloth. NEVER use harsh cleaning agents or abrasive materials.
7. Wash the whisks in warm soapy water and dry thoroughly. Store in a safe place.
NOTE: T he Milk Frother or any of its accessories are NOT dishwasher safe.
TROUBLESHOOTING
Item
Issue
Reason
Solution
1
Indicator light doesn’t work / jug
doesn’t work
Plug is not inserted properly.
Re-insert plug.
Jug isn’t connected to power base
proper.
Remove jug and replace
correctly.
No power in the jack.
Check the electric circuit.
Problem with components.
Repair/replace.*
2
Jug doesn’t work after operation
Jug temperature is too high.
Rinse cold water inside the jug
to reduce temperature.
Jug is damaged from immersion in
water.
Repair/replace.*
3
Motor doesn’t work
Jug wasn’t cleaned after use – milk
can lock the mechanism.
Clean and move the shaft
sleeve of motor by hand to
loosen it.
Motor damage.
Repair/replace.*
4
Not heating
Machine is damaged.
Repair/replace.*
5
Charring
Dosage of milk either too little or
too much.
Ensure the milk is over the
minimum mark, and not past
the maximum mark.
Jug was reused without
cleaning/rinsing.
Always clean after each use.
Actual voltage is much lower than
specified voltage.
Ensure you use the appropriate
voltage.
*Please refer to your warranty card in regards to repair/replacement information.
CUSTOMER SERVICE
Australian Customer Service
GAF Control (Sales) Pty Ltd
P.O Box 19
Altona North Victoria 3025
Phone: 1300 659 489
Hours: 9am-5pm (EST) Mon-Fri
www.gafcontrol.com.au
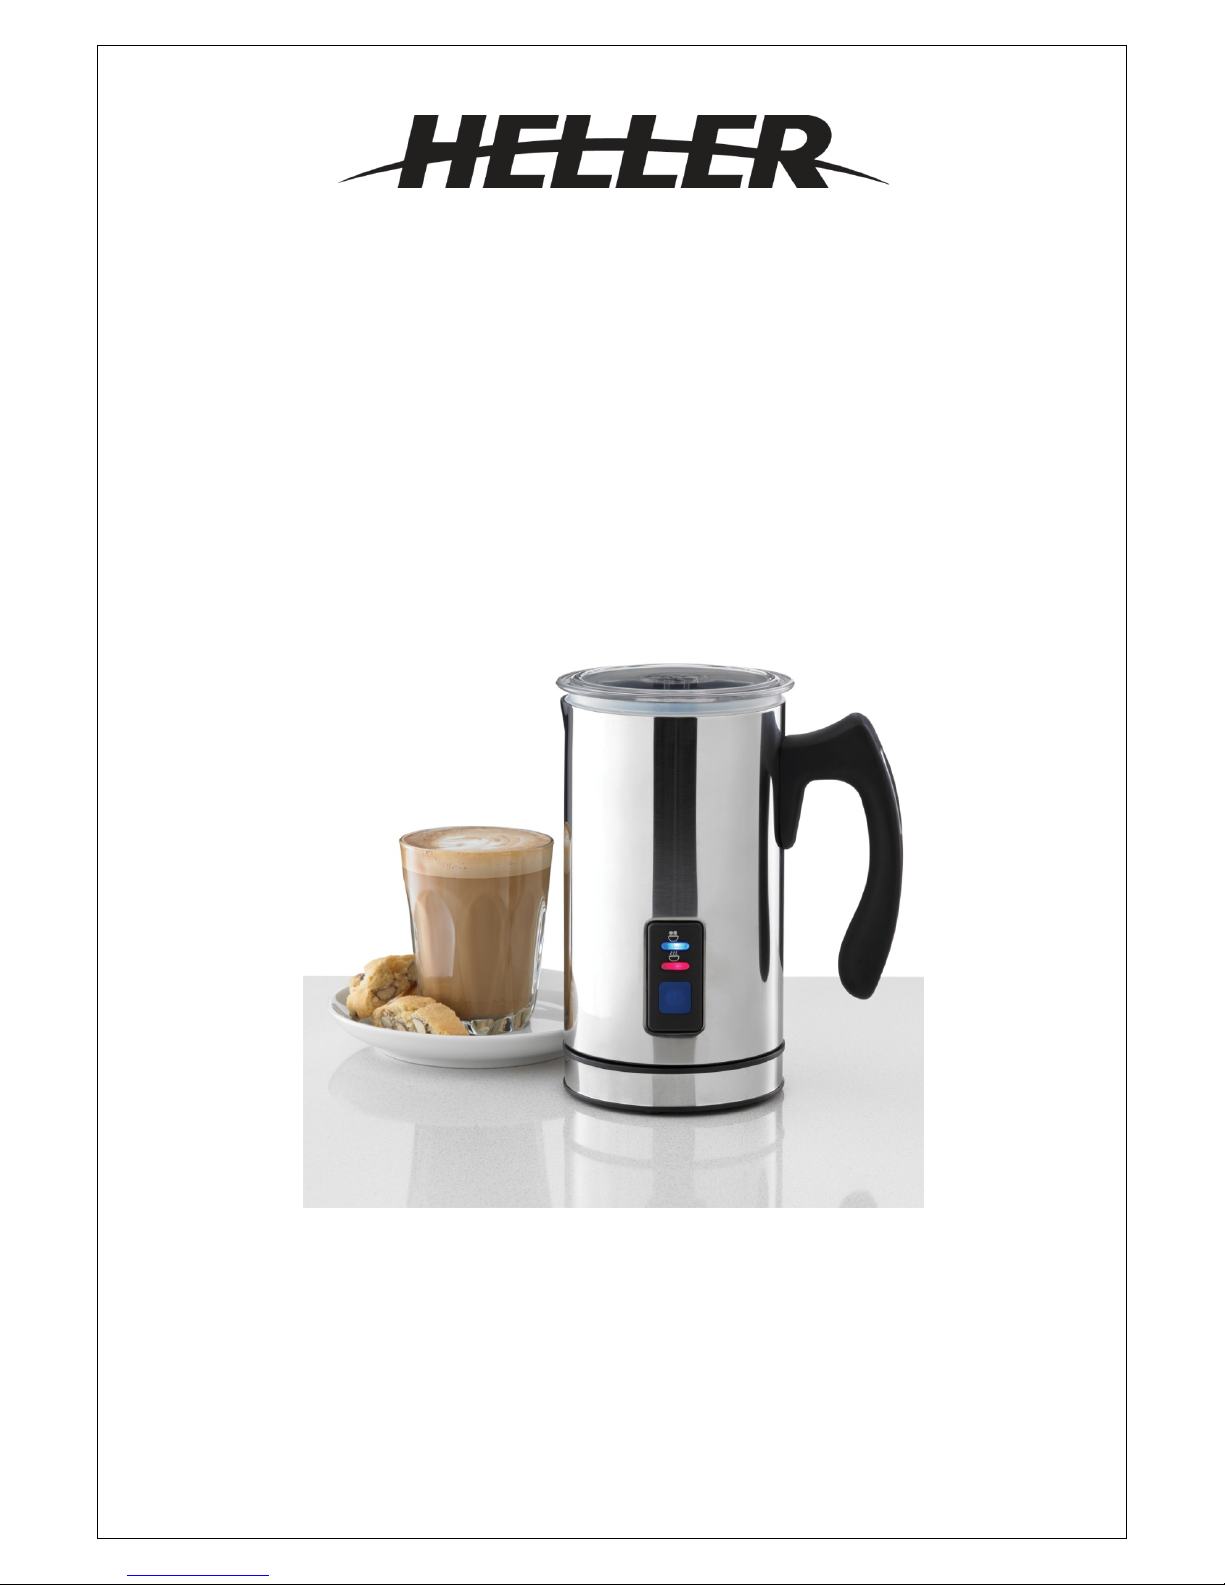
*This product may vary slightly to the product illustrated due to ongoing product development.
 Loading...