

Page 1
USER MANUAL
4 Slice Toaster
Model Number: HPMT124-S
READ AND SAVE THESE INSTRUCTIONS
Page 2
IMPORTANT
Read and follow the instructions in this user manual even if you feel you are familiar with the product, and
find a place to keep it handy for future reference.
For your convenience record the complete model number (located on the product identification plate) and
the date you received the product, together with your purchase receipt and attach to the warranty and
service information. Retain in the event that warranty service is required.
NOTE: The rating of this product (as marked on the product identification plate) is based on specific loading
tests. Normal use or the use of other recommended attachments may draw significantly less power.
IMPORTANT SAFEGUARDS
When using any electrically powered product, basic safety precautions should always be followed,
including the following:
PLEASE READ ALL INSTRUCTIONS CAREFULLY BEFORE USING THIS PRODUCT
WARNING!: - to reduce the risk of fire, electrical shock or injury to persons or property:
• Read all instructions before, and follow whilst using the appliance.
• Do not touch hot surfaces. Use handles or knobs.
• To protect against electric shock do NOT immerse cord, plug or body of unit in water or liquid.
• Close supervision is necessary when any appliance is used near children or infirm persons.
• This appliance is not for use by young children of infirm persons unless they have been adequately
supervised by a responsible person to ensure that they can use the appliance safely.
• Unplug from outlet when not in use and before cleaning. Allow to cool before putting on or taking off
parts, and before cleaning the appliance.
• Do not operate any appliance with a damaged cord or plug or after the appliance malfunctions, or
has been dropped or damaged in any manner. Contact customer service for replacement,
examination, repair or adjustment.
• If the supply cord is damaged, it must not be replaced by the manufacturer or similarly qualified
person in order to avoid a hazard. No user serviceable parts are inside.
• A distance of at least 10cm should be maintained between the toaster and the wall.
• Do not place below or near curtains or other combustible materials.
• The use of accessory attachments NOT recommended by the appliance manufacturer may cause
injuries.
• Do not use on an unstable surface, always use on a flat steady surface.
• Do not use outdoors or in damp moist areas.
• Do not let the cord hang over the edge of the table or counter, or touch hot surfaces.
• Do not place on or near a hot gas or electric element, or in a heated oven.
• To disconnect, press CANCEL, then grasp the plug and remove from wall outlet. Never pull by the
cord.
• Do not use appliance for other than its intended purpose.
• Do not move HOT appliance before allowing to cool.
• Do not cover or place items on top of the unit.
• Do not attempt to dislodge food when the toaster is plugged into an electrical outlet.
• Do not toast buttered breads.
• Never force food into toasting slot, they should fit freely between the guard wires.
• Press CANCEL to stop any cooking function.
• Clean out accumulated crumbs frequently to avoid risk of fire or toaster malfunction.
Page 3

• This appliance is not a toy. Young children should be supervised to ensure they do not play with the
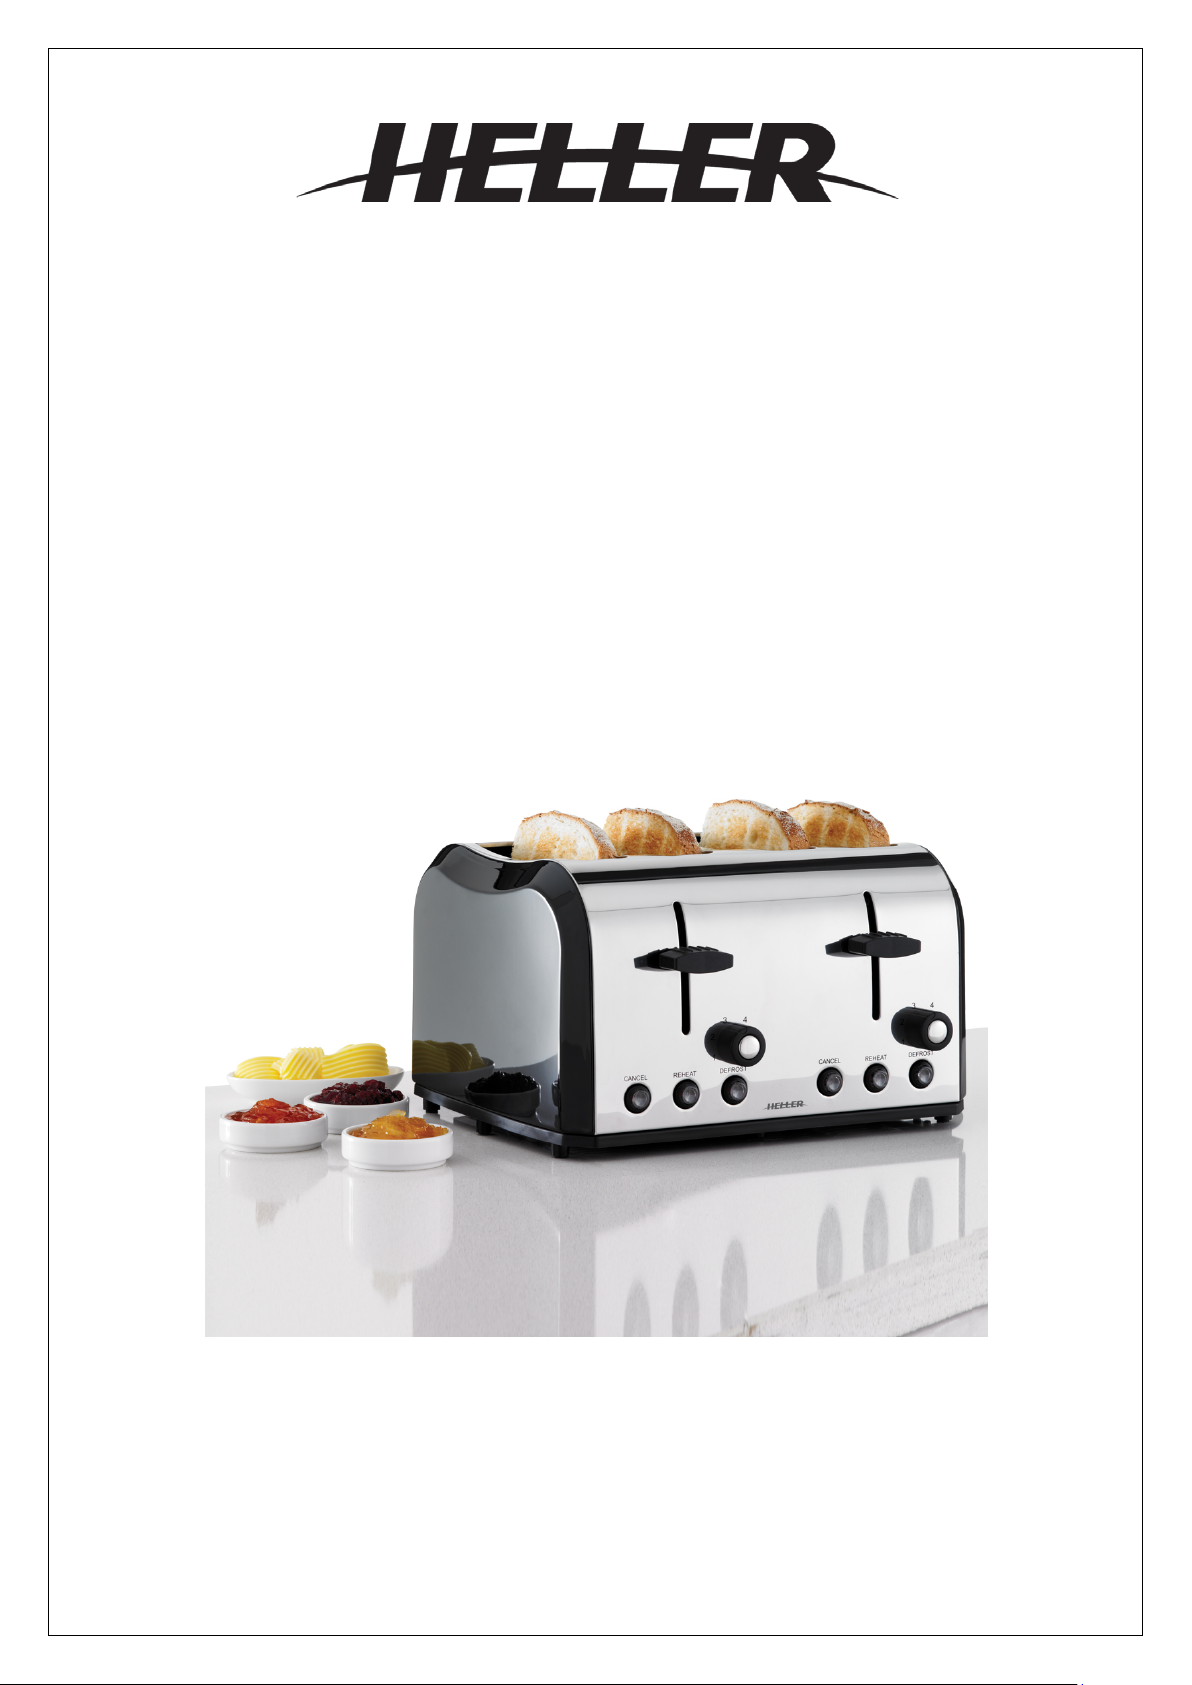
Extra wide toasting slots x 4
High lift levers
Variable
Defrost button
Reheat button
Cancel button
Removable
crumb trays
appliance.
• Do not lift the toaster by placing your fingers inside or near the bread slots.
• This appliance is not intended to be operated by means of an external timer or separate remote
control system.
• Do not touch the internal parts of the toaster with any implement.
• To avoid the possibility of fire, do not leave toaster unattended during use.
• DO NOT IMMERSE THE TOASTER IN WATER.
FEATURES
browning
controls
BEFORE FIRST USE
Carefully remove the toaster from the box. Remove all packaging from inside the toasting slots. You may
wish to retain the packaging.
Before using your toaster for the first time, you need to cure the elements. This will remove the protective
coating. This may smell slightly, but it is nothing to worry about, just ensure the room is well ventilated.
Check that there is nothing between the slots, set the variable browning control to the highest setting and
operate the toaster without bread by pressing down on the high lift level. When the cycle has completed,
leave it to cool down fully, and then you can use it normally.
Page 4

PREPARATION
1. Place the toaster upright, on a stable, level, heat resistant surface.
2. Do not put it on or near anything that may be damaged by even moderate heat.
3. Do not place near or below curtains or other combustible materials.
4. Ensure the cable doesn’t overhang, and can’t be caught or tripped over.
5. Plug it into a wall socket.
FUNCTIONS
Cancel button: The toasting process can be cancelled/stopped at any time by pressing the cancel button.
Defrost button: The defrost function allows you to toast bread straight from the freezer. Insert the bread
into the toasting slots, press the high lift lever down and press the defrost button. The defrost button will
illuminate. Your toaster will extend the cooking time to allow the bread to defrost and toast. Please still keep
and eye on your toast to ensure it does not burn.
Reheat button: the reheat function will allow you to heat up toast that has cooled or gone cold. Press the
high lift lever down, then press the reheat button. The reheat button indicator light will illuminate. As your
bread is already toasted, keep an eye on your toast to ensure it does not burn. This function can only be
used for dry toast, not buttered toast.
High lift lever: The high lift lever helps you to remove the toast. When toasting has finished, simply lift the
loading handle upwards from its resting position to raise the toast. This is ideal for smaller items such as
crumpets.
TOASTING
WARNING: Never force bread into the toasting slots. Bread should fit easily into the slots. Never toast
slices of bread that have been buttered.
1. Set the required level of toasting by turning the variable browning control from left to right. The
higher the setting the darker the toast will be.
2. Place the bread into the toasting slots. You can toast one, two, three or four slices of bread at a
time, but only place one slice of bread in each slot. Press the high lift lever down until it locks into
place. NOTE: the lever will not lock into place if your toaster is not connected to a power supply.
3. When the toasting cycle has finished, the loading handle will rise and the toasted bread can be
removed. You can lift the loading handle upwards beyond its rest position to help you remove the
toast.
4. If the toast is not cooked enough, it can be toasted again. Turn the variable browning control to a
lower setting and keep an eye on the toast to ensure it doesn’t burn.
NOTE: I n the unlikely event that the bread becomes jammed, switch off the toaster at the power outlet
before carefully easing out the bread taking care not to damage the heating element.
WARNING: Do not use a knife or any other implements to remove jammed bread!!!
HINTS & TIPS
1. Old (yesterday’s) bread contains less moisture than fresh bread, so it makes a crisper toast.
2. Breads that vary in thickness, size and freshness will all brown differently.
3. Thin bread cooks faster than thick bread, so you should use a lower setting.
4. Sweet bread products brown much more quickly than ordinary bread, so they should be toasted on
a lower setting.
Page 5

CARE & MAINTENANCE
1. Unplug the toaster when not in use, before moving, or cleaning. Let it cool completely before
cleaning or storing.
2. Wipe the outside of the toaster with a soft damp cloth. If necessary use a little dish washing liquid.
3. Do not let anything enter the toasting slots, you might damage the elements.
4. Do not immerse the toaster in water or any other liquid!
5. Do not use harsh or abrasive cleaning agents or solvents.
CRUMB REMOVAL
It is important that crumbs are not allowed to build up inside the base of the toaster. Allowing crumbs to
build up is unhygienic, and could cause a fire hazard, so remove them frequently.
Crumbs can be removed by simply sliding out the crumb tray and tipping the crumbs out. Always make
sure that your toaster has completely cooled down and is disconnected from the power supply. Always
replace the crumb tray before using the toaster.
CUSTOMER SERVICE
Australian Customer Service
GAF Control (Sales) Pty Ltd
P.O Box 19
Altona North, Victoria, 3025
Phone: 1300 659 489
Hours: 9am-5pm (EST) Mon-Fri
www.gafcontrol.com.au
*This product may vary slightly to the product illustrated due to ongoing product development.
 Loading...