

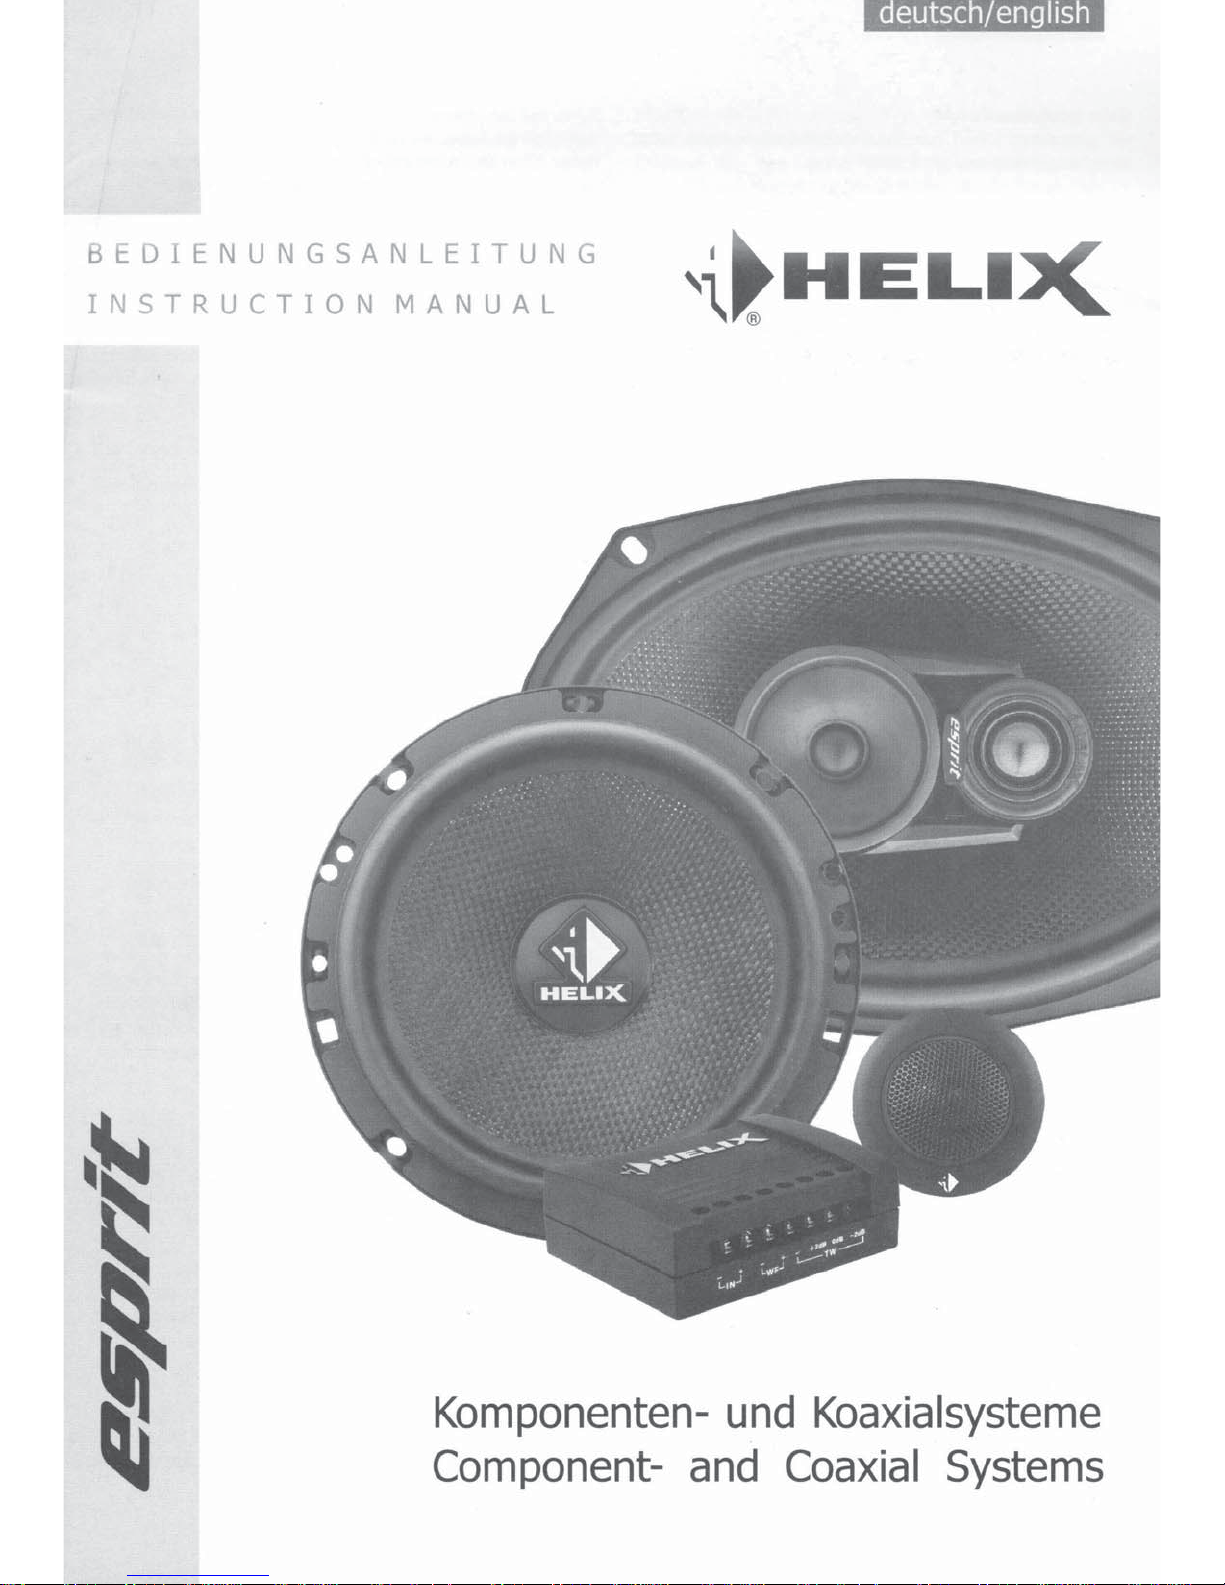
HELIX E 52C ESPRIT, E62C ESPRIT, E 5X ESPRIT, E 6X ESPRIT, E 69X ESPRIT Instruction Manual
...Page 1
BEDIENUNGSANLEITUNG
INSTRUCTION
MANUAL
Komponenten- und Koaxialsysteme
Component- and Coaxial Systems
Page 2

-
Sehr geehrter Kunde
wir gratulieren Ihnen zum Kauf dieses hochwertigen Lautsprechersystems aus der
ESPRIT-Serie
.
Dieses Produkt aus dem HELIX-Sortiment beweist, dass
guter
Klang und ausgezeichnete Qualitat nicht unbedingt
teuer sein muss und uberzeugt
deshalb besonders Car-Hifi-
Einsteiger und preisbewusste Kaufer, die Wert
auf
ein gun-
stiges Preis/Leistungsverhaltnis legen.
Das
Team von
AUDIOTEC
FISCHER
wunscht Ihnen viel
SpaB
und Horgenuss
mit
Ihren neuen HELIX-Lautsprechern.
Uber HELIX
Seit ihrer EinfOhrung im Jahr 1997 setzt die Marke
HELIX
immer wieder MaBstabe
fOr
Klang, Technik und Qualitat
in
der
Entwicklung und Fertigung von Lautsprechern und
Ver-
starkern.
Diese herausragende
Stellung wird durch wirkliche Innovationen, z. B. der Erforschung neuer Schaltungskonzepte
und Materialien, erreicht und gibt jedem HELIX-Kunden die
Sicherheit, ein erstklassiges Produkt auf dem neuesten
Stand der Technik
zu
besitzen.
AUDIOTEC
FISCHER,
die Firma hinter der Marke HELIX,
wurde im Jahr 1990 gegrundet.
Sie
gehort heute
zu
den
renommiertesten Unternehmen im
Car
Hili Markt weltweit.
Allgemeine Hinweise
Diese Bedienungsanleitung hilft Ihnen
bei
der problemlosen
Installation Ihrer
HELIX
ESPRIT-Lautsprecher. Bitte lesen
Sie
sich diese Anleitung vor dem Einbau genau durch und
machen
Sie
sich
mit Ihrem
neuen
Lautsprechersystem
vertraut.
Ihr
Kaufbeleg dient a
is
Garantienachweis
fUr
etwaige
Repa-
raturen oder Austausch. Bitte heben
Sie
ihren Kaufbeleg,
Bedienungsanleitung
und
Originalverpackung sorgfaltig auf.
Hinweise vor der Installation
Es
wird empfohlen, Ihre
HELIX
ESPRIT-Lautsprecher nur
von einem autorisierten
HELIX-Handler einbauen
zu
lassen.
Dies garantiert eine hochwertige Installation und erspart
Ihnen eine Menge
Zeit und Aufwand. Sollten
Sie
sich dazu
entscheiden, die Installation
selbst auszuflihren, gehen
Sie
bitte nach den folgenden Anweisungen vor.
Nichtbeachtung der folgenden Hinweise kann
zu
Verletzungen und/oder Schaden an
Ihrem
Fahrzeug
oder den Lautsprechern fi.ihren.
A. Stellen
Sie
sicher, dass der Lautsprecher
in
die ausge-
wahlte
Einbauoffnung passt, und dass genugend Einbau-
tiefe vorhanden ist, urn den Magnet aufzunehmen .
B.
Pru
fen
Sie,
ob der Freiraum zwischen dem Lautsprecher
und
anderen
Teilen,
wie
z.
B.
Fenster,
Fensterkurbel, Fenster-
heber,
Sitze etc. ausreichend ist. Dies ist besonders wichtig,
wenn
Einbauplatze ausgeschnitten werden mussen.
Vollstandige Daten uber die Einbautiefe und den Durchmesser der Lautsprecher finden
Sie
in
den Einbaudiagrammen
dieser
Anleitung.
Bitte stell en
Sie
sicher, dass die Auflageflache der Laut-
sprecher moglichst plan und stabil ist.
C.
Die
Qualitat und Sorg fait der Installation hat entschei-
denden Einfluss auf
den
Klang
des Lautsprechers. Bitte flih-
ren
Sie
jede Installation mit groBtmoglicher Sorgfalt durch.
D.Installieren
Sie
die Lautsprecher bitte nicht an Orten, an
denen Wasser
auf
die Chassis tropfen kann .
E. Bitte vermeiden
Sie
akustische Kurzschlusse (Luft-
durchlassigkeit
der Montagepla
tte
zwischen Membran und
Kerb), die
Ausl6schungen
tiefer
Frequenzen
zur Feige haben.
Diese konnen durch den Einbau des Lautsprechers
in
einem
zu
groBen Ausschnitt oder
auf
unebener Flache auftreten.
F.
In
machen Fallen ist eine Verstarkung der Montageplatte
notig,
urn
dem Lautsprecher eine stabile, ebene und ver-
windungsfreie Auflageflache
zu
bieten.
Dies
erreichen
Sie,
indem
Sie
den Lautsprecher
auf
einen
stabilen Holz- oder Metallring montieren, oder diesen
Ring
hinter die Montagepla tte setzen, damit der Lautsprecher
eine
stabile Aufnahme hat. Bitte wenden
Sie
sich
an
einen
Einbauspezialisten
fUr
weitere Anregungen.
G.
Wenn
Sie
Lautsprecher
in
ihrem Auto tauschen mochten,
muss ein Einbauplatz
fUr
diesen geschaffen werden .
In
den meisten Fallen sind Originaleinbauplatze
in
den
TOren,
Karosserieoffnungen oder der Heckablage vorhan-
den.
Bi
tte
nutzen Sie, wenn moglich, die vorgesehenen
Originaleinbauplitze Ihres Fahrzeug s. Sollten keine
Originaleinbauplatze vorhanden sein, muss ein sicherer und
geeigneter
Einbauplatz
fUr
den Lautsprecher gescha ffen
werden.
WICHTIG:
Bitte schneiden Sie NIEMALS Metall aus der
Karosserie aus . Dies kann ein tragender Teil des
Fahrzeugs sein, der die Stabilitat der Karosserie und
des
Fahrzeugs gewahrleistet.
Installation der HELIX ESPRIT-Lautsprecher
Wir empfehlen Ihnen, einen kurzen Funktionstest des kompletten
Systems
bei
geringer Lautstarke durchzuflihren, urn
sicherzugehen, dass
aile Komponenten vor ihrer endgulti-
gen Montage auch korrekt funktionieren.
VORSICHT:
Stellen
Sie
sicher, dass aile
Kabel
geschOtzt und sicher ver-
legt
sind und nicht
an
scharfen Kanten beschadigt werden
ktinnen.
Dies kann
zu
Kurzschlussen flihren, die unweigerlich eine
Beschadigung ihres Steuergerats und/oder Ihres
Verstarkers verursachen.
Stellen
Sie
ebenfalls
sicher,
dass
aile
Kabel
ohne
Spannung
und
mit der
ausreichenden
Lange
am
Lautsprecher
befestigt si
nd.
Befestigung der HELIX ESPRIT-Lautsprecher
Wenn aile Komponenten richtig angeschlossen sind und den
Funktionstest bestanden haben, ki:innen
Sie
die Laut-
sprecher
in
ihrer endgultigen Position befestigen .
l.Setzen
Sie
den Lautsprecher
in
seinen Montagering, wie
unter
.,Einbau Woofer" beschrieben.
2.Setzen
Sie
den Lautsprecher mit dem Montagering
in
seine Einbauoffnung und
prOfen
Sie,
ob die
Sch
rauben
in
der richtigen Position
mit
den Befestigungslochern stehen.
Bitte benutzen
Sie
die mitgelieferten Schraubenclips
urn
die
Befestigungsschrauben
zu
sichern. Ziehen
Sie
aile
Schrauben vorsichtig und fest an.
3.
Setzen
Sie
das Lautsprechergitter zwischen den Kerb und
den Montagering, und
stell
en
Sie
sicher,
dass
das
Gi
tter
Kontakt
mit
der Aufnahme im Montagering hat.
Ausstattungsmerkmale
Komponentensysteme
• Tiefmittelti:iner
mit
gewebter Fiberglass-Membran
• 25mm Seidenkalotten-Hochtoner
mit
Neodymmagnet
• Separate Frequenzweiche
mit
integriertem
Hochtonschutz
• Spezielle Gummisicke
fUr
hochste Belastbarkeit und
lange Lebensdauer
• Hochwertiger, stabiler Metallkorb zur Vermeidung
sti:irender Resonanzen
• Euro-DIN-Korb
fUr
problemlosen Einbau
in
fast
aile Fahrzeugtypen
• Stabiles Abdeckgitter zum Schutz der Lautsprecher
Koaxialsysteme
• Tiefmittelti:iner
mit
gewebter Fiberglass-Membran
• integrierter 19mm Hochtoner mit Seidenkalotte und
Neodymmagnet
• 360° drehbarer und 25° schwenkbarer Hochtoner
• Spezielle Gummisicke
fUr
htichste Belastbarkeit und
lange Lebensdauer
• Hochwertiger, stabiler Meta
II
korb zur Vermeidung
storender Resonanzen
• Euro-DIN-Korb
fUr
problemlosen Einbau
in
fast
aile Fahrzeugtypen
• Stabiles Abdeckgitter zum Schutz der Lautsprecher
E
69X
:
• 160x230mm Tiefttiner
mit
gewebter Fiberglas-
Membran
• Integrierter
SO
mm Mylar-Mittelti:iner
•
19mm Hochti:iner
mit
Seidenkalotte und
Neodymmagnet
• Spezielle Gummisicke fUr hochste Belastbarkeit und
lange Lebensdauer
• Hochwertiger, stabiler Metallkorb zur Vermeidung
sttirender Resonanzen
• Euro-DIN-Korb
fUr
problemlosen Einbau
in
fast
aile Fahrzeugtypen
• Stabiles Metallgitter zum Schutz der Lautsprecher
Einbau
Woofer
~~\-
-
<llllll@
~~{1(17--<llllll@
Ruckan~
-+
Page 3
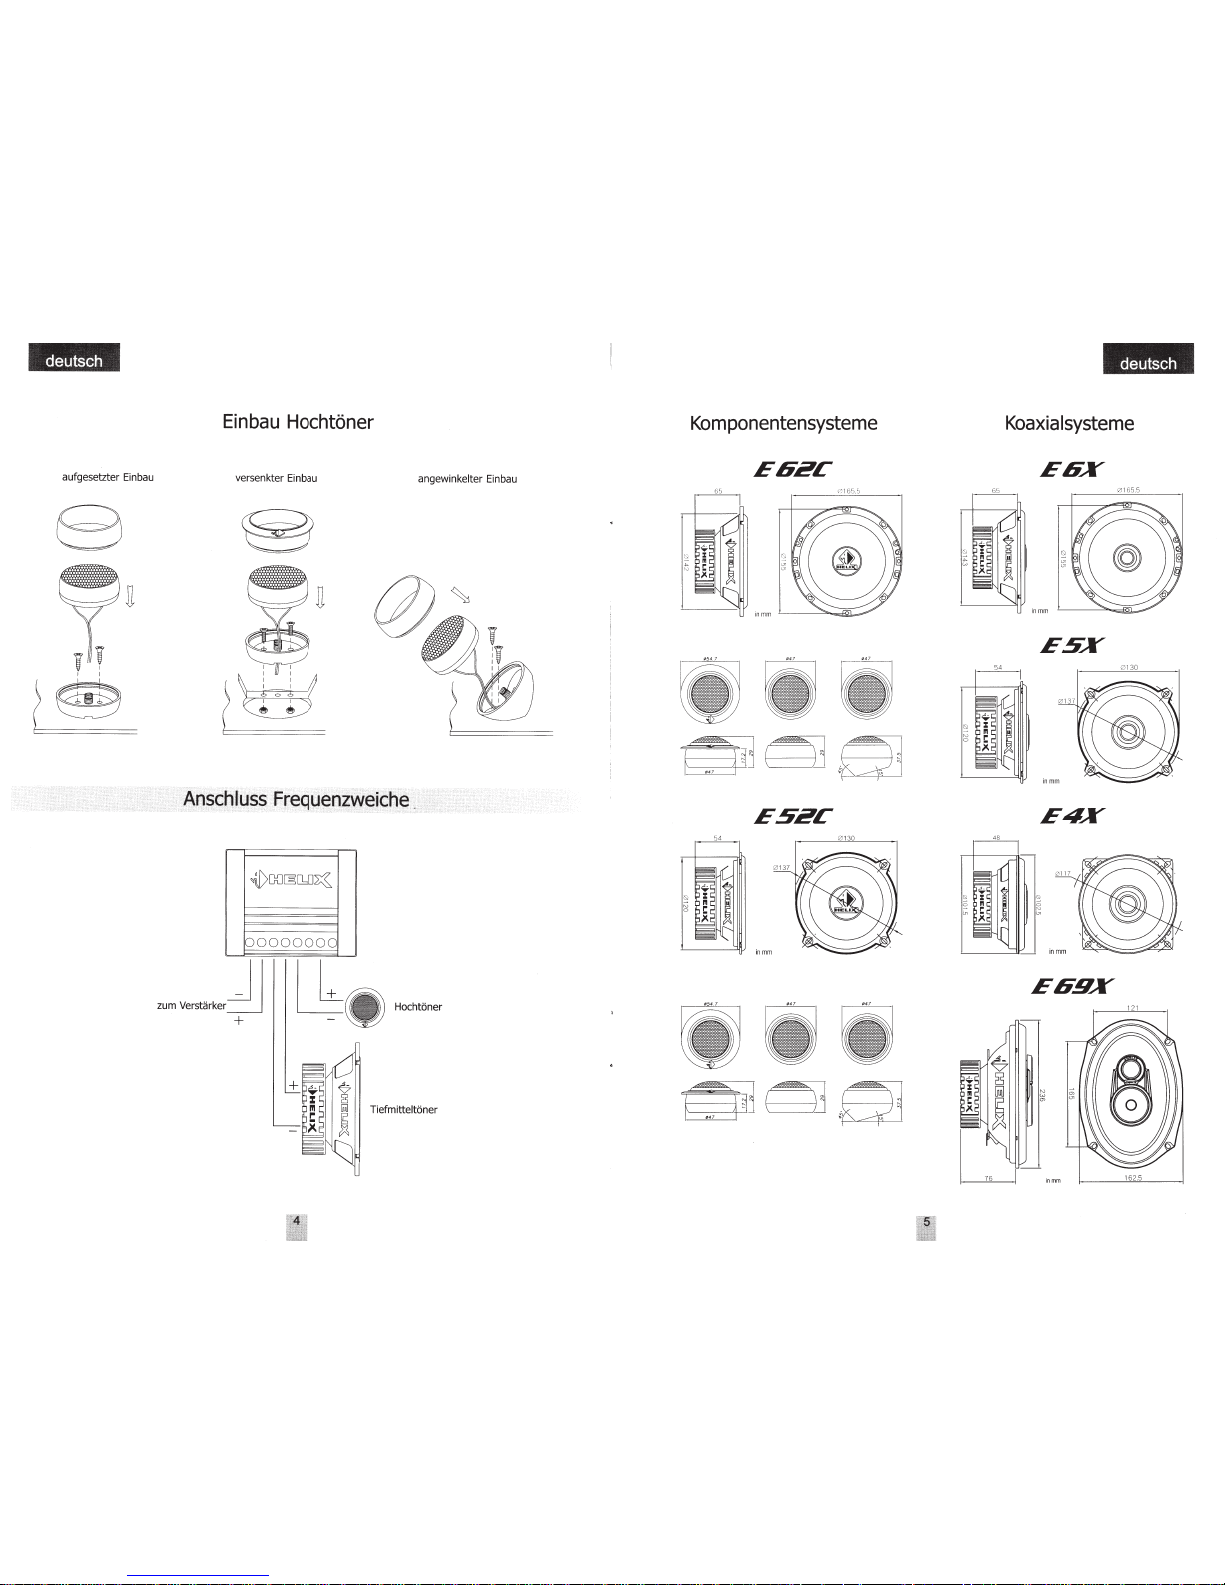
Einbau
Hochtoner
aufgesetzter
Einbau
versenkter
Einbau
angewinkelter
Einbau
8
~
,
_________
/ u
u
fl!li
(~
I W I
(li::d
Anschluss
Frequenzweiche
.
,~[}{][~[1,0~
1
0000000
rum_,._J
I
Lb
Hochtoner
+
Tiefmitteltoner
Komponentensysteme
E6eC
__ 6,,_1
0lfi')!J
in
mm
'
"'-
..6a
../
~dSj
ESeC
54
1
'i
!j.J
i
nmm
~dc==l
~J
"~
Koaxialsysteme
, _s
_,
I
E6X
ESX
E4X
i
nmm
E69X
"
w
'
"'
1nmm
01
65.5
Page 4

Technische
Daten
Leistung
RMS
I
Max
50
I
150
Watt
60
I
180
Watt
Frequenzbereich
60
Hz
-
25.000
Hz
50
Hz
-
25.000
Hz
Wirkungsgrad
90
dB 1W
I
1m 91 dB
1W
I
1m
Impedanz 4
Ohm
4
Ohm
Einbautiefe 54mm 65mm
Leistung
RM5
I
Max
30
I
90
Watt
40
I
120
Watt
50
I
150
Watt
50
I
150
Watt
Frequenzbereich
80
Hz
-
22.000
Hz
65
Hz
-
22.000
Hz
55
Hz
-
22.000
Hz
35 Hz -
22.000
Hz
Wirkungsgrad
89dB1WI1m
90dB1WI1m
91dB1W
I 1m 92
dB
1W
1
1m
Impedanz
40hm
4
Ohm
4
Ohm
40hm
Einbautiefe
48mm 54mm
65mm 76mm
Garantiebestimmungen
HELIX-Produkte geniessen aufgrund ihres hohen Qualitatsniv
ea
us international einen ausgezeichneten Ruf. Daher
gewahren
wir
eine Garantie von 2 Jahren.
a) Das
Produkt
muss in einwandfreier Original-
verpackung verschickt werden.
b)
Das
Produkt
muss frachtfrei
z
ug
estellt
werden, d.h.
Porto
und Risiko gehen
zu
Ihren Lasten
c)
Die
Kaufquittung muss beiliegen.
Die
Produkte
werden wahrend der gesamten Fertigung stan-
dig
kontrolliert
und gepruft. Bitte beachten
Sie
im Servicefall
folgende Hinweise:
5.
Von
der Garantie ausgenommen sind:
1.
Die 2-jahrige Garantiezeit beginnt
mit
dem Kauf
des
Produktes
und gilt nur fUr
den Erstbesitzer.
2.
Wahrend der Garantiezeit beseitigen
wir
etwaige
Mangel,
die nachweislich
auf
Material- oder Fabrika-
tionsfehlern beruhen, nach unserer W
ah
l dur
ch
Au
s-
tausch oder Nachbesserung d
er
defekten
Teile. Weitergehende Anspruche, insbesondere
auf
Minderung, Wandlung, Schadenersatz oder Folge-
schaden sind ausgeschlossen. Ersetzte
Teile
gehen in
das Eigentum von
AUDIOTEC
FISCHER
uber.
Die
Garantiezeit wird von einer Garantieleistung durch uns
nicht beruhrt.
3.
Am
Produkt
durfen keine unsachgemaBen Eingriffe vor-
genommen worden
se
in.
4.
Bei
Inanspruchnahme der Garantie w
en
den
Sie
sich
bitt
e zuerst an Ihren Fachhandler.
Sollte
es
notwendig
sein, das
Produkt
an uns einzuschicken,
so
beachten
Sie
bitte folgende Hinweise:
:
lfi
6
[t
H~fi
:
,r
a) Transportschaden, sichtbar oder unsichtbar
(R
ekla-
mationen
fUr
solche
Schaden
mussen umgehend bei
der Transportfir
ma
eingereicht werden)
b) Kratzer in Metallteil en, Frontabdeckung en usw.
Diese
Defekte mussen innerhalb von 5 Tagen
nac
h
Kauf
direkt
bei
I
hrem
Fachhandler
rekl
amie
rt
Fehler,
die durch fehlerhafte Montage, falschen Anschluss, unsachgemaBe Bedienung, Beanspruchung oder
auBe
re
gewaltsame Einwirkung entstanden
sind.
d) UnsachgemaB reparierte oder geanderte
Ge
rate,
die
von anderer
Se
ite als von uns geoffnet wurde
n.
e) Folgeschaden an fremden Geraten
f)
Kostenerstattung bei Schadensbehebung durch
Dritte ohne un
se
r vorherig
es
Einverstandnis
g) Gerae
mit
entfernten Typenschilde
rn
oder
Seriennummern.
)
l
l
Dear customer
Congratulations on your purc
ha
se
of
this high quality loud-
speaker system
of
the
ESPRIT
series.
This
HELIX
product shows that perfect sound and e
xce
llent
quality
not
necessarily
ha
ve to be expensive. Therefore
it
particularly convinces car hifi newcomers and buyers who
set
val
ue on a favourab
le
price-perfor
ma
nce ratio.
AUDIOTEC
FISCHER
wishes
you
maximum enjoyment and
listening pleasure with your new H
ELI
X speakers.
About HELIX
Since
its introduction in 1997 the
HELIX
brand sets new
standards for sound e
xce
ll
ence,
technology and quali
ty
in
the d
eve
lopment and production of loudspeake
rs
and ampli-
fiers.
This outstanding position has been earned with tr
ue
inno-
vations, e.g. the exploration
of
new circuitry concepts and
materials, and guarant
ees
that every HELIX customer owns
a
fir
st
class
state-of-the-a
rt
produ
ct
.
AUDIOTEC
FISCHER,
the company behind HELIX, was
fo
un-
ded
in
1990.
Today
it
is one
of
the world's most renowned
enterprises in the car hifi mar
ke
t.
General information
This manual has been designed to make HELIX
ESP
R
IT
automotive loudspeaker
installation
and ownership as
trouble-free
as
possible. Pl
ease
r
ead
through this
ma
n
ua
l
completely before attempting any
installation
steps and
familiari
ze
yourself with your new speaker system.
You
will
need your purchase
rece
i
pt
as
proof
of
purchase for
any and all warranty
re
pa
i
rs
and
for insu
ra
nee
purposes.
Keep
your receipt, owner's
ma
nu
al, and packing materials in
a safe location for possible futu
re
use.
Pre-installation instructions
It
is recommended that you have your new
HELIX
ESPRIT
automotive loudspeakers professiona
ll
y
installed
by
your
authori
ze
d
HELIX
dealer. This wi
ll
ensure the
use
of proper
installation techniqu
es
and material
s,
and w
il
l
sa
ve much
time
and
effort.
If
you choose to perform your own installa-
tion read the
following
inform
at
i
on
and precautions
ca
reful-
ly.
Failure
to
follow
the
stated precautions may resu
lt
in
personal injury
and/or
damage the audio system
or
vehicle.
A. Always
ma
ke sure the sp
ea
ker will
eas
ily fit i
nt
o the inten-
ded mounting location and
that
there is adequate cavi
ty
depth
to
accept the magnet structure.
B.
Check
for adequate clearance between speaker and win
-
dow, window crank, power window mechanism,
se
at, glove
box, rear deck torsion bars, and other items which may
interfere with the speaker's mounting. Th
is
is
especially
importa
nt
if
any hole
cutt
ing is
req
ui
red
.
Com
plete
speaker, mounting size
and
depth requirements
can be found at the end of th
is
manual. A good way to
confirm speaker place meet on a door or body panel is to
place the
spea
ke
r's die cast mounting ring onto the
su
rf
a
ce.
C
heck
for a fiat mount
in
g sur
face,
free fr
om
all
obstruc
bon
.
C.
The method
of
in
st
allation
c
h
osen
and level
of
execution
wi
ll
effect t
he
overa
ll
performance
of
the
spea
ke
r system.
Tre
at
each installati
on
step with a high degr
ee
of
atte
nt
ion.
D.
Do
not
mount the speaker where water
ma
y splash the
woofer cone.
A p
las
tic cup or
so
me heavy gauge plastic sheeting may be
needed in some l
oca
tions that are ex
posed
to mois
tur
e
fr
om
behind the
bod
y panel.
E.Care
must be t
aken
to
prevent l
ow
frequen
cy
cancell
at
ion
caused by air leakage between the front and r
ea
r
of
the spe-
a
ke
r (such
as
when mounted on a curved or uneven s
urf
a-
ce
,
or
when mounted in an oversi
ze
d hole).
F.
Mounting panel r
ei
nf
or
cem
ent
may be necessary in some
cases
in order to prevent su
rf
ace flex. This
can
be achieved
by mounting the speaker on a metal or wooden
su
b-baffle
behind the body
or
door panel.
Consul
t an installation spe-
cialist for further directio
n.
G. U
nl
ess
you
a
re
replacing existi
ng
speakers
of
sa
me siz
e,
mo
unt
ing locations will have to be cut i
nt
o the doors, body
panels, or
rea
r deck.
In
some c
ases
speaker mounting hol
es
wi
ll
be p
re
cut
in
t
he
doors, body panels, or rear deck stee
l.
Du
e to their st
ru
ctural in
te
grity and a
cc
e
ss
ibili
ty
. These precut mounting holes should be used whenever
poss
ible.
IMPORTANT:
Never cut any metal
that
is an integral
part
of
an
automobile's safety
or
structural supportsystem.
HELIX ESPRIT Speaker
In
stallation
NOTE.
HELIX strongly recommends that you operate the
complete audio system at low volume
be
fore fi
na
l installa-
tion
of
your
HELIX
ESP
R
IT
automotive loud
spea
kers. Th
is
will
allow a trial listening test before
secu
ring the loudspea-
kers into their mounting locations.
'IU
Fi
H
!i
ti!~H
Page 5

CAUTION:
Make sure
that
all speaker wiring
is
fully protected
from cutting or wear.
Any
short circuits developing
as a result could severely damage the radio/cassette
unit
or
amplifier. Make sure
that
all speaker wires
easily reach the speaker terminals with stress on the
wire
or
connectors.
Securing
the
loudspeaker
Once you have tested the complete speaker system and
have confirmed correct operation, turn the audio system
off
and prepare the loudspeaker for final mounting.
l.Piace the loudspeaker within the mounting ring
as
shown
in
the illustration below.
2. Position the loudspeaker assembly into the mounting hole
and
confirm correct mounting screw hole location.
Proceed
to insert mounting screws through the loudspeaker mounting assembly and
use
the provided screw clips to capture
the screw. Tighten all screws evenly.
3.
Place
the speaker grille within the basket
and
mounting
ring and make sure the grille makes contact with the grille
mounting adhesive.
Main
features
Component systems
• Woofer speaker with woven fiberglass cone
• 25mm
/1"
silk dome tweeter with neodymium magnet
• separate crossover with tweeter protection
• special rubber edge surround for high loadability
and long service life
• high-quality, stable metal basket for reducing
resonance
• Euro-DIN basket for easy installation
in
virtually any
vehicle type
• solid grille for effective speaker protection
Coaxial systems
• Woofer speaker with woven fiber glass cone
• integrated 19mm
1 0.75" silk dome tweeter with
neodymium magnet
• 360° rotatable and 25° tiltable tweeter
• special rubber edge surround for high loadability and
long service life
• high-quality, stable metal basket for reducing resonance
• Euro-DIN basket for easy installation
in
virtually any
vehicle type
• solid grille for effective speaker protection
E 69X:
• 160x230mm
I 6"x9" woofer with woven fiber glass cone
• integrated 50mm
1
2"
mylar midrange
• 19mm
I 0.75" silk dome tweeter with neodymium magnet
• special rubber edge surround for high loadability
and long service life
• high-quality, stable metal basket for reducing
resonance
• Euro-DIN basket for easy installation
in
virtually any
vehicle type
• solid grille for effective speaker protection
Woofer
installation
~~
-
<!l!lll@
~~1--<!l!lll@
~re-~
-+
-
Tweeter
installation
Flush
mount
Surface mount
Angle mount
8
®
n
n
~
i
111
f
~~
Crossover
connection
"~[}{]~[1,0
~
.,,.,,.~
:=U
tweeter
+
mid/bass speaker
Page 6

Component
systems
E6i?C
55
01 05.5
~~.c=5l
~
J
~
E5i?C
54
~~a
Coaxial
systems
E6X
E5X
E4X
s
E6.9X
~
w
~
0 165.5
..
Technical
data
Power
handling
RMS I Max
50 I 150
watts
60
/180
watts
Frequency
response
60
Hz -25.000
Hz
50
Hz -25.000
Hz
Sensitivity
90
dB
1W
/1m
91
dB
1W
/1m
Impedance 4
ohms
4
ohms
Mounting depth
54mm /2.
12"
65mm /2.
56"
Power
handling
RMS I Max
30/90
watts
40 I 120
watts
50 I 150
watts
I
50 I 150
watts
Frequency
response
80
Hz -22.000
Hz
65
Hz -22.000
Hz
55
Hz -22.000
Hz
I
35
Hz -22.000
Hz
Sensitivity
89
dB
1W
/1m
90
dB
1W
/1m
91
dB
1W
/1m
I
92dB
1W
/1m
'
Impedance
4
ohms
4
ohms
4
ohms
I
4
ohms
Mounting depth
48mm
/1.89"
54mm
/2.16"
65mm
/2.56"
I
76mm
/3"
Warranty
regulations
Due
to
the
high
quali
ty
standard
HELIX
products
achie
ved
an
excellent
international
reputation. Therefore
we
grant a warranty
period
of 2 years.
The
products
are
care
fully
checked
and
tested
during
the
entire
production
process. In
the
case
of
service
note
the
following:
1)
The 2 years
warranty
period
commences
with
the
purchase
of
the
product
and
is
applicable
only
to
the
original
buyer.
2)
During
the
warranty
period
we
will
rectify
any
defects
due
to
faulty
material
or
workmanship
by
replacing
or
repa-
ring
the
defective
part
at
our
decision.
Further
claims,
and
in
particular
those
for
price
reduction,
cancellation
of
sa
le,
compensat
ion
for
damages
or
subse-
quential
damages,
are
excluded.
The
warranty
period
is
not
altered
by
the
fact
that
we
have
carried
out
warranty
work
.
3)
Unauthorized
tampering
with
the
product
will
invalidate
this
warranty.
4)
Consult
your
authorized
dealer
first,
if
warranty
service
is
needed.
Should
it
be
necessary
to
return
the
product
to
the
factory,
please
insure
that
a)
the
product
is
packed
in
original
factory
packing
in
good
condition
11
b)
the
product
is
shipped
prepaid,
i.e. at
your
expense
and
risk
c)
the
receipt/invoice
as
proof
of
purchase
is
enclosed
5)
Excluded
from
the
warranty
are:
a)
Shipping
damages,
either
readily
apparent
or
concea-
led
(claims
for
such
damages
must
be
immediately
notified
to
the
forwarding
agent).
b)
Scratches
in
metal
parts,
front
panels
or
covers
etc
.
This
must
be
notified
to
your
dealer
within 5 days
of
pur-
chase
.
c)
Defects
caused
by
incorrect
installation
or
connec-
tion,
by
ope
ration
errors,
by
overloading
or
by
external
force.
d)
Products
which
have
been
repaired
incorrectly
or
modified
or
where
the
product
has
been
opened
by
other
persons
than
us.
e)
Consequential
damages
to
other
equipments.
f)
Reimbursement
when
repairing
damages
by
third
parties
without
our
previous
permission
.
g)
Products
with
removed
serial
numbers.
Page 7

AUDIOTEC
FISCHER
AUDIOTEC
D-57392
Tel.:
Fax:
helix@audiotec-fischer.com
www.audiotec-fischer.com
FISCHER
Hi.inegraben
Schmallenberg
+
49
29
72
+
49
29
72
26
97
97
GmbH
88
88 88
0
Page 8

 Loading...