

Page 1
The Helios 3-Point Lighting Kit offers a total of 1600 Watts of lighting
power in a compact kit perfect for shooting both on location and in the
studio. Each of the three Tungsten Fresnel lights in the kit produces
powerful, smooth focusing, bright and even illumination, useful for a
variety of video and photographic applications. The top quality, lightweight
construction of both the lights and the wheeled carry case make this the
ideal on-the-go kit, containing everything you need to get up and running
with a complete lighting setup in minutes.
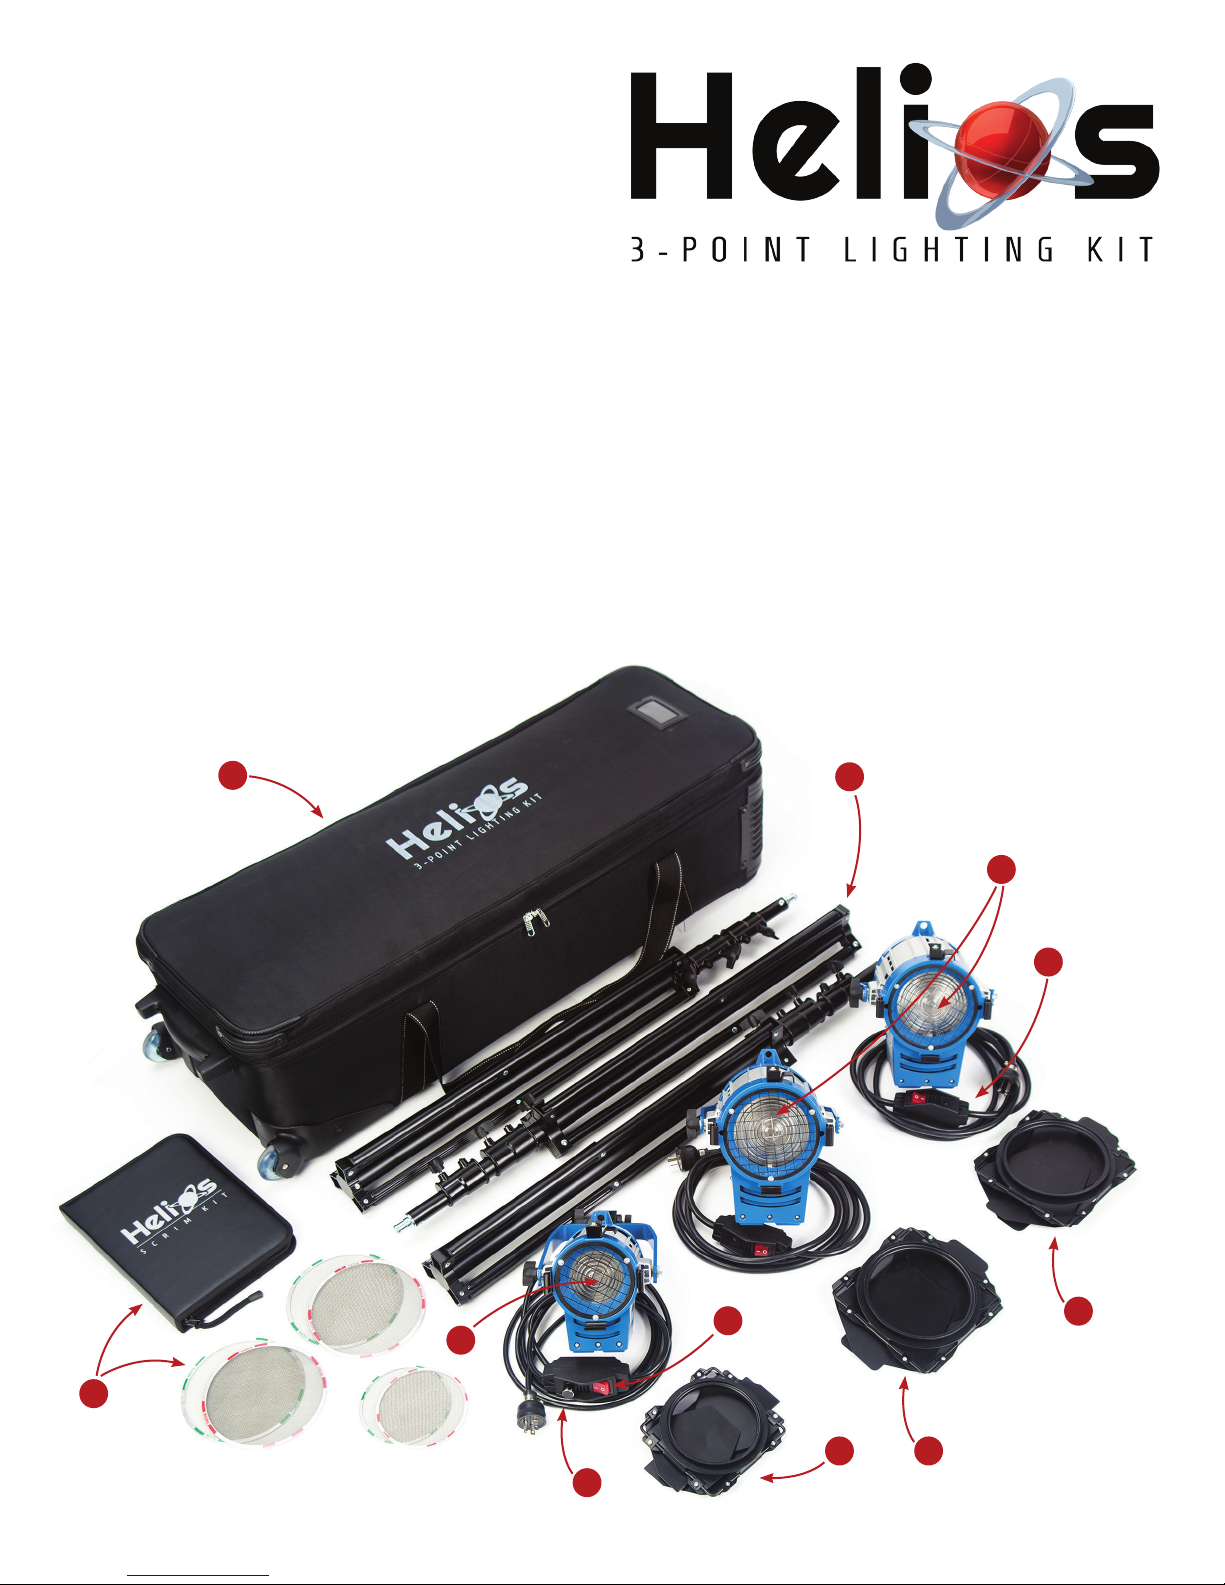
• Kit includes a rugged padded wheeled case (1) containing one 300W (2)
and two 650W (5) Tungsten Fresnel lights plus barndoors (8), light stands
(7), bulbs and single and double wire scrims for each light (9).
• The 3.2” Fresnel lens of the Helios 300 and the 4.3” Fresnel lens of the Helios
650 produces a soft, even light field which is adjustable from spot to flood.
• The included 4-leaf barndoors and the single and double wire scrims for
each light allow you to alter the shape and intensity of the light
• Light yoke attaches to any 5/8” (16mm) stud.
• Bonus Helios Scrim Kit (9) includes one 5” Full Single Wire Scrim, one 5”
Full Double Wire Scrim, two 6 5/8” Full Single Wire Scrims, two 6 5/8” Full
Double Wire Scrims and an attractive zippered Scrim Kit Wallet
Getting Started Guide
What’s Included:
1 Heavy-Duty Padded Wheeled Carry Case (1)
1 300W Helios 300 Compact Tungsten Fresnel Light (2)
with 11’ cord with inline switch (3) & dimmer (4)
2 650W Helios 650 Compact Tungsten Fresnel Lights (5)
with 11’ cord and inline switch (6)
3 8’ Light Stands (7)
3 4-Leaf Barndoors (8) (2 large for Helios 650s, 1 small for Helios 300)
2 650W Lamp Bulbs
1 300W Lamp Bulb
1 Helios Scrim Kit (9)
1
3
2
7
5
6
8
9
88
4
(continued on reverse >)
Page 2
Getting Started Guide (continued)
Attaching Barndoor
Accessory to Helios Lights
11
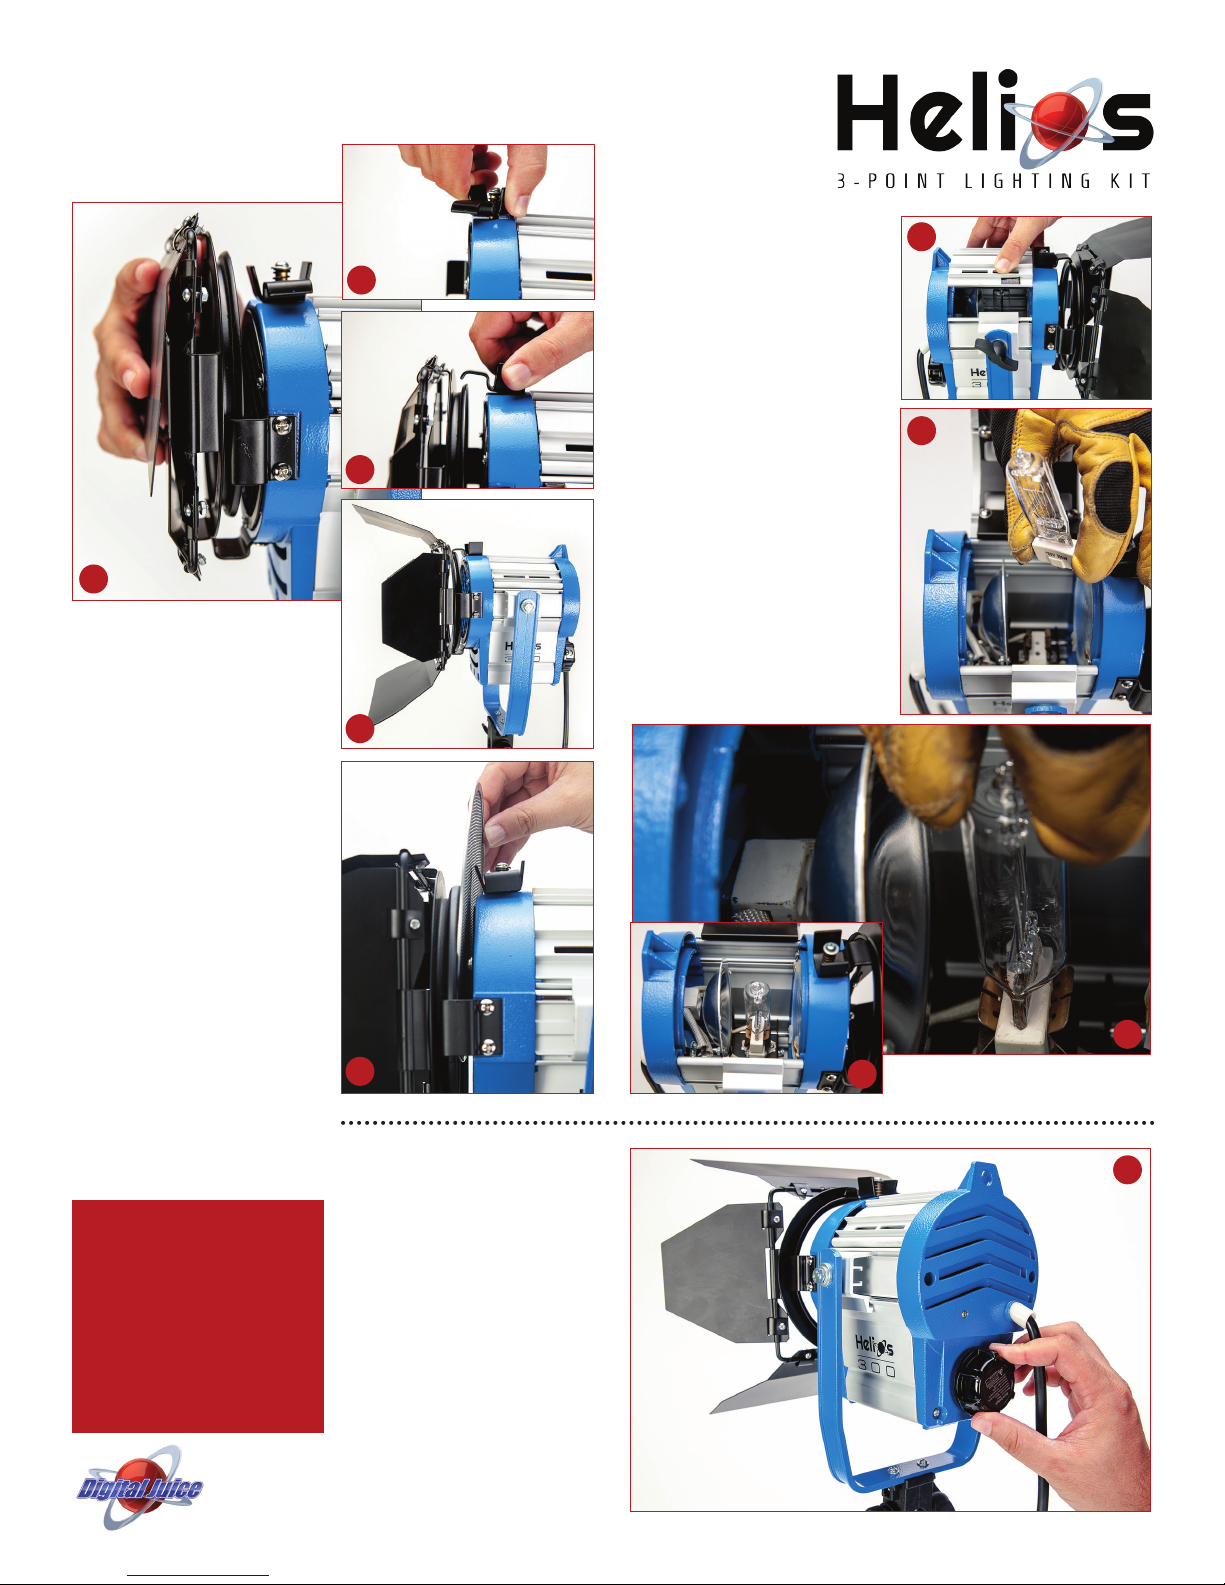
1) Squeeze the sides of the springloaded clip on the top of the Helios
light, while lifting it and turning to
the side, so that it no longer hangs
over the front of the light. (10)
2) Slide the grooves on the round
frame at the back of the barndoor
attachment onto the other three
clips on the front of the light. (11)
3) Squeeze the sides of the top
clip once more, pulling it up and
turning it so it is facing forward
again, sitting in the groove on the
back of the barndoor attachment,
and holding it in place. (12)
4) Adjust the position of the 4
barndoor leaves until the light is
shaped to your needs. (13)
Note: The wire mesh scrims provided
with the Helios Scrim Kit can also be
added to the light behind the barndoor
unit, resting on the same clips. Just
open the top clip, slide the scrim in
and then re-lock the top clip. (14)
CAUTION: When you first use
your Helios light you may notice
some light smoke being emitted
from the unit. This is due to the
burning off of manufacturing
residue and is normal with any
high-heat element. It should not
last long and does not indicate a
faulty unit.
10
12
13
14
Adjusting the Helios Light
from Spot to Flood
1) To adjust the Helios light between
spot and flood illumination, simply
turn the worm-gear driven knob on
the back of the light. Turning knob
counterclockwise moves the bulb
and reflector closer to the Fresnel
lens, providing a more spread out
flood light. Turning knob clockwise
moves lamp and reflector further
from the lens, focussing the light
to a spot. (19)
Installing Lamp Bulbs in
Helios Lights
1) Apply pressure on the hinged,
rounded lamp cavity door on the
side of the light where you can see
an “OPEN” sticker. It should easily
swing open. (15)
2) Handle the tungsten bulb
with gloves in order to avoid
contaminating the glass with
oils and salts from your skin.
This can cause hot spots on the
bulb and/or cause it to burn out
prematurely. (16)
3) Fit the bulb into the lamp socket
inside the cavity, applying a light
pressure to make sure it is seated
properly. (17, 18)
4) Snap the lamp cavity door shut
once more and start using your
Helios light.
15
16
17
18
19
www.digitaljuice.com
 Loading...