

Page 1

88844.314
hilft!
Wir sind für Sie da!
Schnelle Hilfe 24/7
www.held-hilft.de
Ersatzteil-Sofort-Hilfe:
0571-7983810
31-08-2018
5 mm
4 x
1
6
5,8 x 55
2 x
11
4 x 9
4 x
17
2835
Das beigefügte Wandbefestigungsmaterial (Dübel und Schrauben) eignet sich nur für
festes Mauerwerk (z.B.: Beton- oder Ziegelwände). Für andere Wandaufbauten sind
eventuell Spezialdübel und andere Schrauben notwendig. Ziehen Sie gegebenfalls
eine Fachkraft zu Rate.
2840
5 x 30
2 x
2824
12
18
2802
1 x
2863
8 x 30
2 x
2842
5 x 25
6 x
2860
2
7
13
18
4 x
3
2801
HÄFELE
4 x
8
1122
R
1 x
2881
2 x 2 x
L
14
6,3 x 11
8 x
2815
6,3 x 16
8 x
2816
1 x
2880
5285.400
3,5 x 15
28 x
4
9
15
2 x
19
2804
4 x
2865
4 x 30
3 x
2830
5
10
Silikon 25ml
16
8 x 30
12 x
2861
4 x
1121
1 x
1970
2 x
5284.400
0 10 20 30 40
De begeleidende wandmontage hardware (pluggen en schroeven) is alleen geschikt
voor massief metselwerk (bijvoorbeeld beton of bakstenen muren). Voor andere
muur structuren zijn eventueel bijzondere ankerbouten en andere noodzakelijke.
Draai indien nodig, een deskundige.
Le mur d'accompagnement matériel de montage (chevilles et les vis) ne convient
que pour la maçonnerie solide (par exemple en béton ou des murs de briques).
Pour les structures de mur d'autres sont peut-etre spéciale boulons d'ancrage et
d'autres nécessaires. Serrer le cas échéant, un expert.
28
1 x
23
1 x
29
1 x
24
28
1 x
1 x
25
29
1 x
1 x
26
30
1 x
2 x
27
31
1 x
1 x
Il muro di accompagnamento hardware di montaggio (tasselli e viti) è'e adatto
solo per muratura piena (ad esempio calcestruzzo o muratura). Per le altre strutture
murarie sono forse speciali bulloni di ancoraggio e necessari di altri. Serrare se
necessario, un esperto.
The accompanying wall mounting hardware (anchors and screws) is suitable only
for solid masonry (eg concrete or brick walls). For other wall structures are
possibly special anchor bolts and other necessary. Tighten if necessary, an expert.
6,3 x 11
4 x
1 2
1
2802
3
8 x
2815
R
1 x
13
2881
L
1 x
14
2880
2 x 2 x
18
5285.400
11
3
2
1
3
2
1
3
14
R
L
L
3
14
1
18
3
10
18
3
18
18
3
3
14
1
22
2
1
13
R
5
5
32
1 x
8 x 30
4 x
2
5
2
2801
5
12 x
2861
6
1 x
2863
3
33
1 x
18
34
1 x
5 x 25
6 x
6
2860
18
6
1 x
2863
2.
5 mm
28
25
5
26
2
6
18
5
1.
38mm
29
23
6
27
1
1
1
1
24
5
6
5
6
18
Seite 1 von 3
Page 2
88844.314
4
23
22
21
26
26
28
3,5 x 15
1 x
6
R
20 min.
24
6
1
27
27
6
29
21
4
6
7
8
D Leim
GB Glue
NL Lijm
PL Klej
TR Tutkal
F Colle
I Colla
6
2863
25
6
Wichtig !
Montieren Sie den Boden
an der Vorderkante bündig
mit der Zarge !
7
4
4
28
20
HÄFELE
7
16 x
2804
19
3,5 x 15
4
19
4
12 x
2 x
2 x
5284.400
4
4
29
19
Wichtig !
Montieren Sie den Boden
an der Vorderkante bündig
mit der Zarge !
4 x
1122
4 x 30
15
HÄFELE
7
20
2 x
HÄFELE
7
5
25
Montieren Sie den Boden so
das die Excenter nach unten zeigen !
8
2
HÄFELE
7
HÄFELE
7
28
6,3 x 16
8 x
8
9
2816
9
4 x
10
2865
9
33
4
10
4 x
1121
10
16
8
8
8
16
8
9
10
8
4
4
34
33
30
4
30
19
30
HÄFELE
19
32
30
15
15
Klick!
HÄFELE
34
31
Klick!
HÄFELE
29
29
31
19
8
HÄFELE
19
9
4
10
32
10
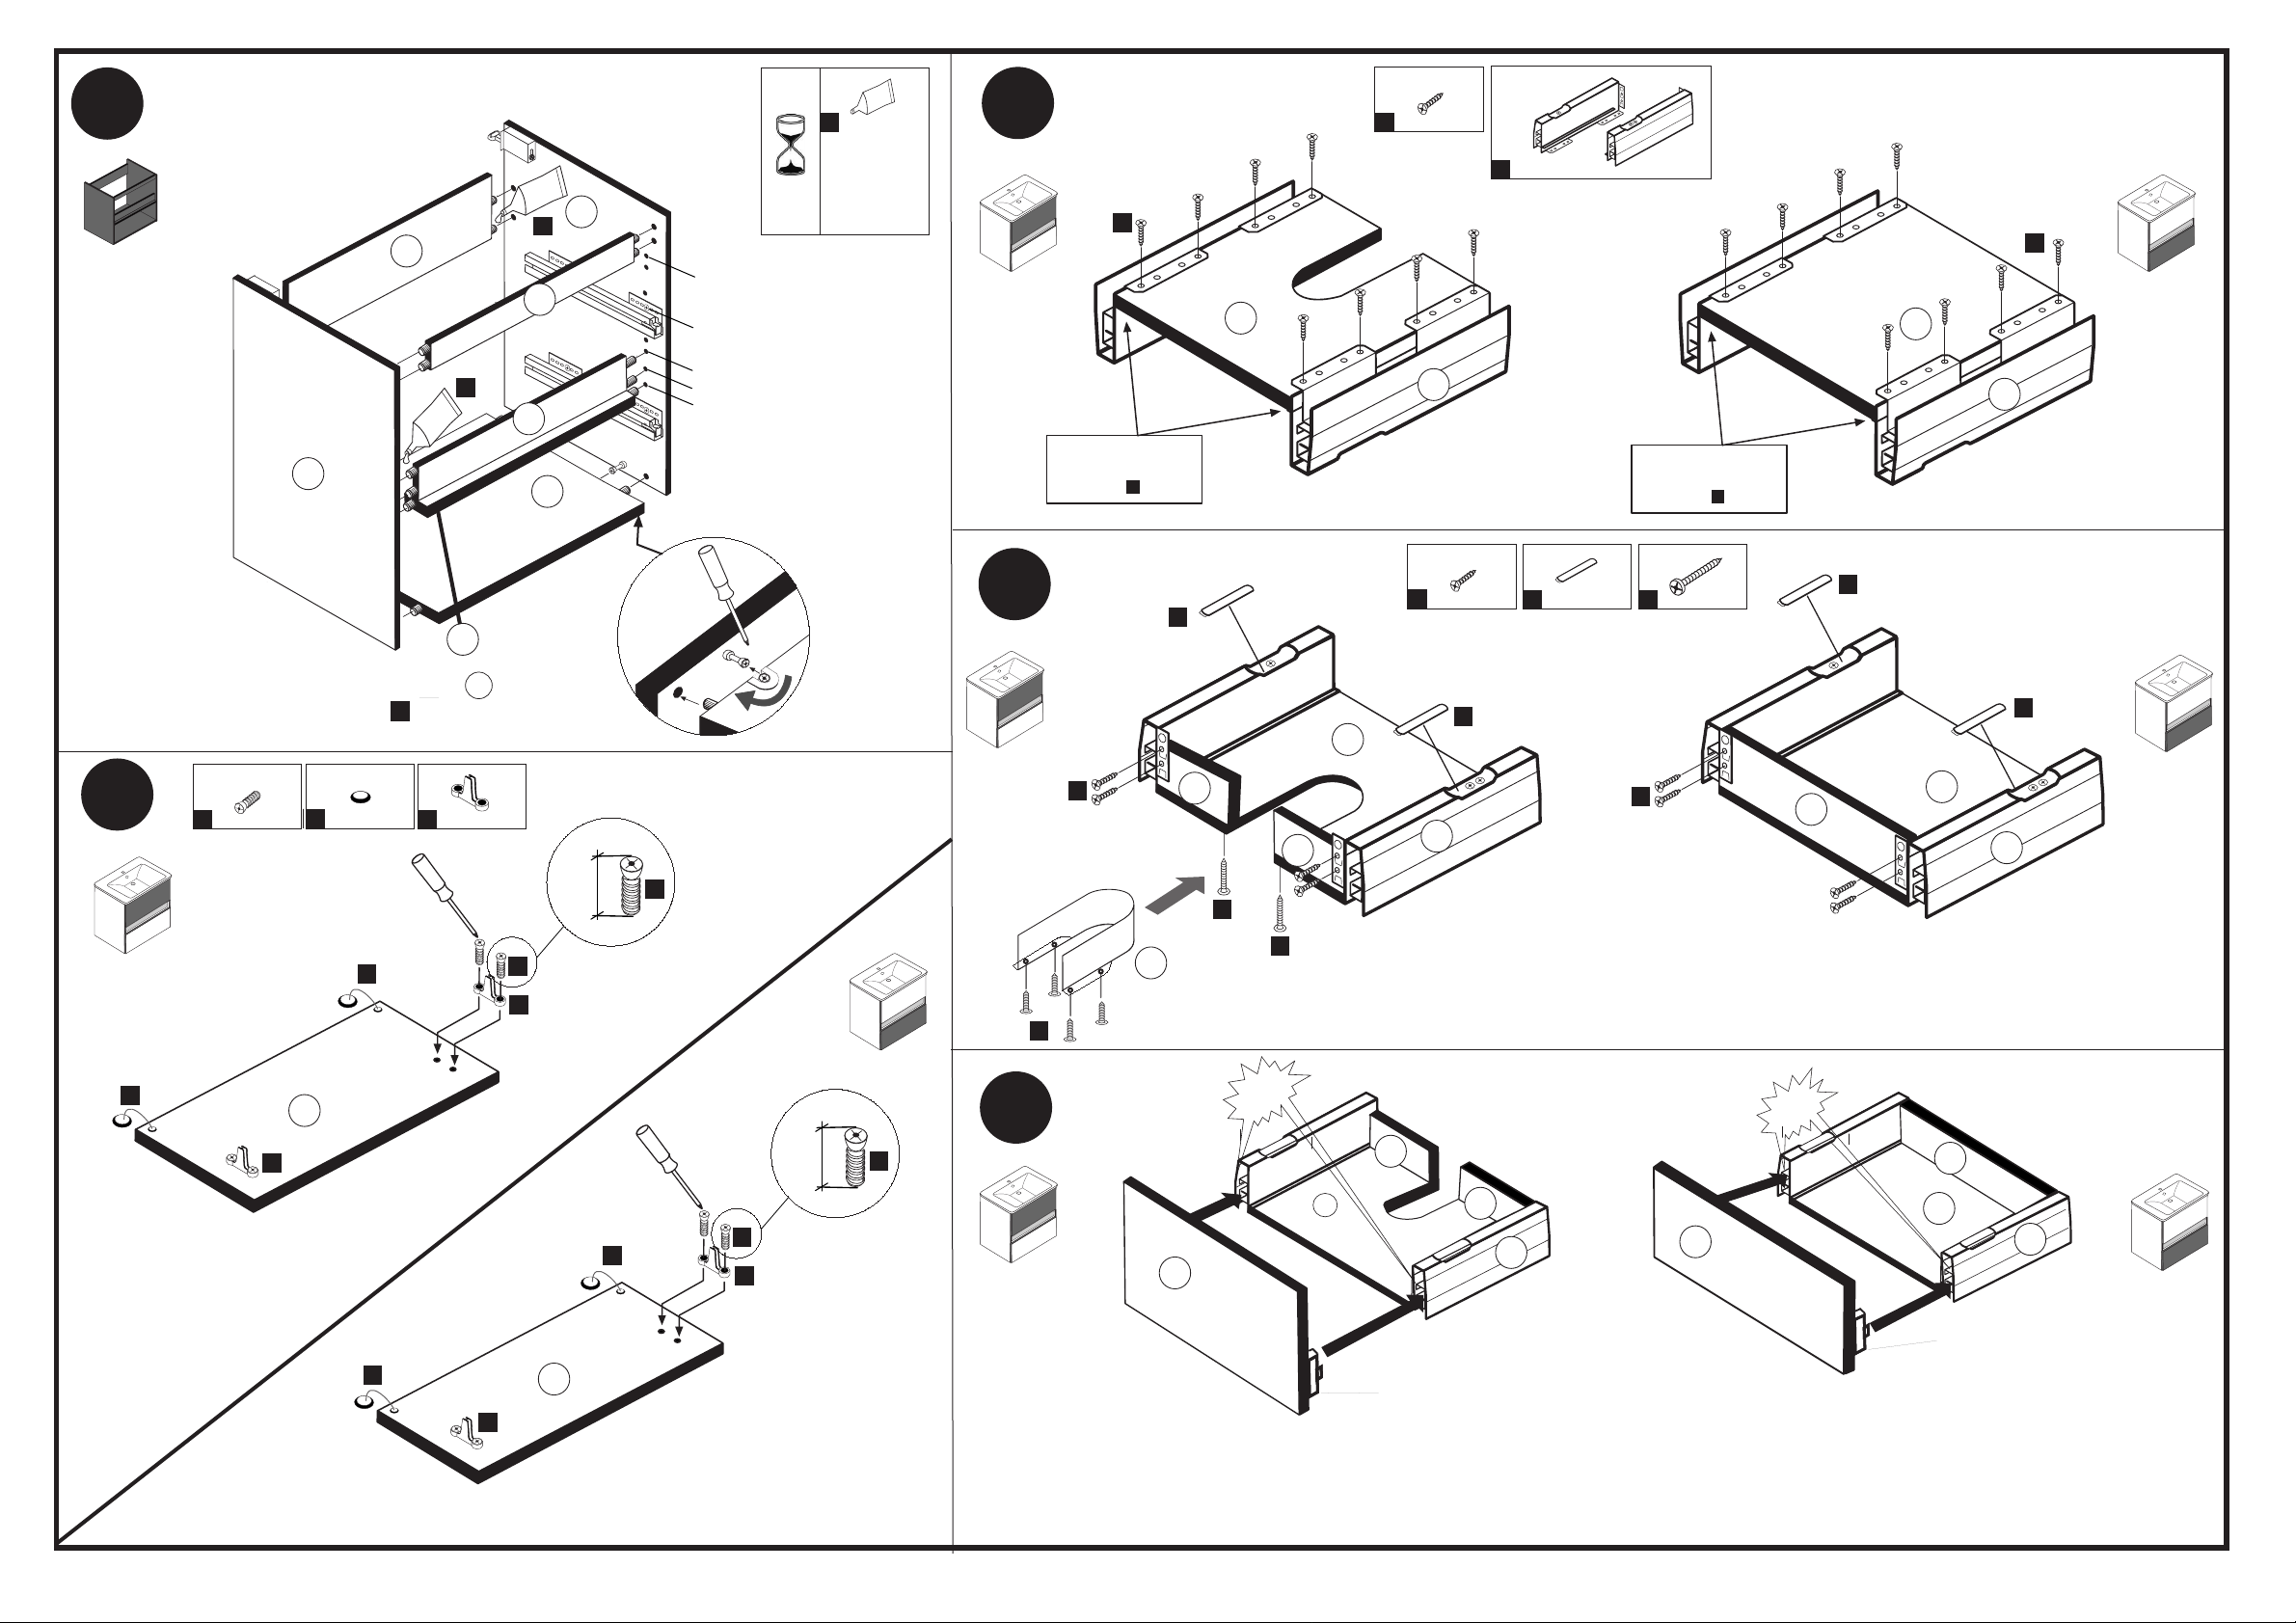
Hinweis !
Wie Sie den Schubkasten einhängen müssen entnehmen Sie bitte dem beigefügten
Montagezettel der Firma HÄFELE.
Zusätzlich finden Sie auf dem Montagezettel folgende Abbildungen und Montagehilfen:
- Montage der Abdeckkappe
- Einstellen der Schubkastenblende
- Aushängen des Schubkastens
- Abnehmen der Schubkastenblende
Seite 2 von 3
Page 3

88844.314
2. 3.1.
4 x 30
9 10
R
15
1 x
2830
R
15
1.
L
4 x 9
17
21
4 x
2835
5 x 30
2 x
2824
L
R
21
5 mm
4 x
L
R
5 mm
4 x
21
R
21
2.
R
L
21
21
4
5,8 x 55
2 x
11
2840
12
8 x 30
2 x
2842
Silikon 25ml
1211
16
1 x
1970
Waschbeckenmontage
1. Silikon auf Stirnkante der Seiten auftragen
2. Waschbecken auflegen
12
R
L
3. Fuge zwischen Waschbecken und Wand
mit Silikon abdichten
4. Seitliche Fugen zwischen Waschbecken
13
11
und Unterschrank mit Silikon abdichten
3.
Silikon
R
R
Silikon
4.
2.
R
R
Silikon
1.
Silikon
im Lieferu
mfang
nicht enthalten
Seite 3 von 3
Page 4

4/8
4/8
32 mm
44 mm
32 mm
44 mm
96 mm
32 mm
44 mm
119 mm
32 mm
44 mm
HDE 10.11.09
Maße in mm – Dimensions in mm – Dimensions en mm – Medidas en mm - Misure in mm
A
B
4
E
Variante
Version
Versión
Versione
2
E
Variante
Version
Versión
Versione
1
1
Ø5/12
+0,5
E
Ø10/12
+0,5
E
Page 5

5/8
5/8
HDE 10.11.09
Maße in mm – Dimensions in mm – Dimensions en mm – Medidas en mm - Misure in mm
5
1
2
Einstellung
En
Fr
Es
It
 Loading...