

Page 1
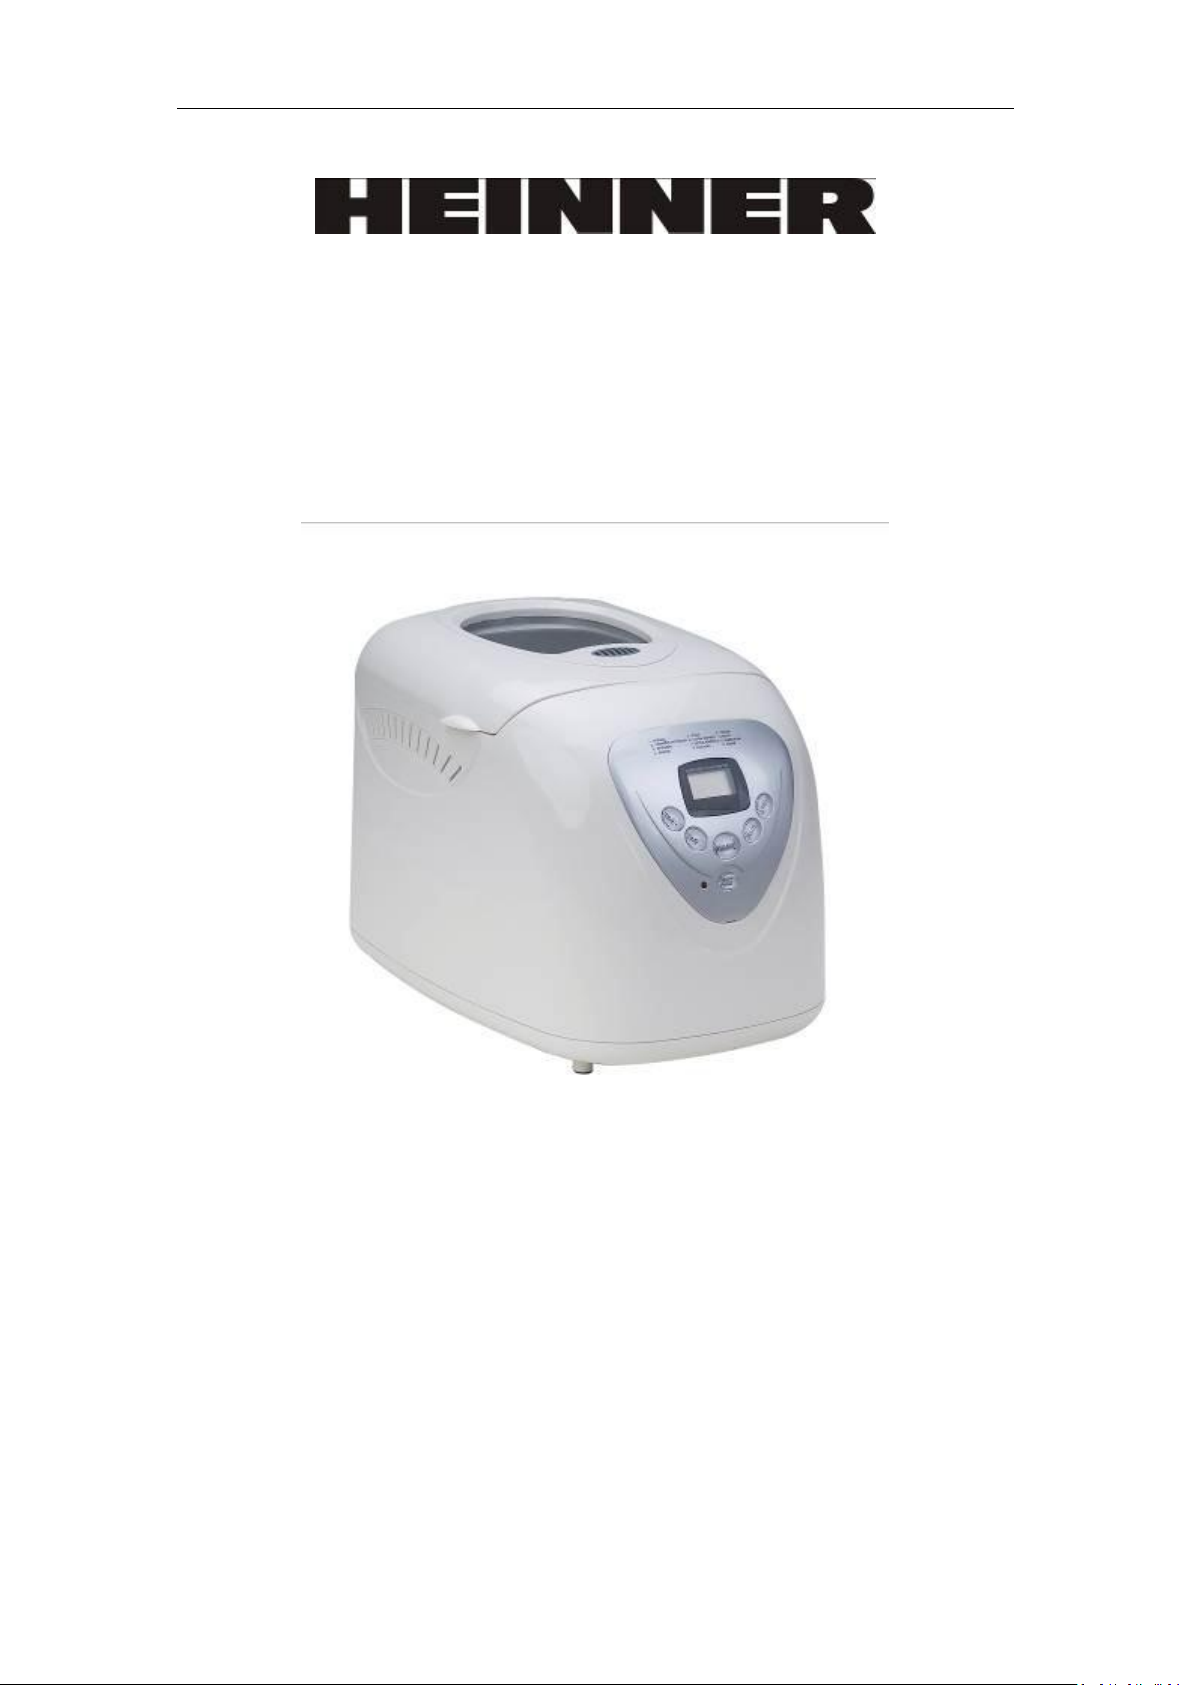
MASINA DE FACUT PAINE
BreadExpress 950
Alimentare : 220-240V~50Hz
Putere: 700W
Cititi cu atentie manualul inainte de a utiliza aparatul
Instructiuni generale de siguranta
Page 2

1
Page 3

Utilizarea oricarui aparat electric necesita respectarea urmatoarelor instructiuni
minime de siguranta. Exista riscul ranirii personale si apoi riscul distrugerii aparatului.
Aceste riscuri sunt indicate in manual prin conventiile urmatoare:
ATENTIE: Risc de accidentare personala
IMPORTANT: Deteriorare a aparatului.
In plus, va oferim urmatoarele sfaturi de siguranta:
Locatia
• Intotdeauna plasati aparatul departe de marginea spatiului de lucru.
• Asigurati-va ca aparatul este utilizat pe o suprafata dreapta si stabila.
• A nu se folosi in aer liber.
Cablul de alimentare
• Cablul trebuie sa fie bine intins de la priza la unitatea centrala fara noduri sau
fara sa fie indoit.
• Nu lasati cablul sa atarne peste marginea spatiului de lucru, acolo unde un copil
l-ar putea atinge.
• Nu lasati cablul intr-un spatiu liber, de exemplu, intre o priza joasa si o masa.
• NU lasati cablul pe aragaz sau pe un prajitor de paine sau orice alta suprafata
fierbinte care l-ar putea deteriora.
Siguranta
• ATENTIE: Nu atingeti suprafetele fierbinti. Folositi manusi de bucatarie la
scoaterea tavii cu paine. Nu acoperiti orificiile de eliminare a aburilor.
• ATENTIE: Evitati contactul cu partile in miscare.
• Pentru a va proteja impotriva unui soc electric, nu introduceti cablul sau stecherul
in apa sau alt lichid.
• Fiti deosebit de atent la mutarea aparatului cu continut fierbinte.
• Nu folositi aparatul de facut paine drept loc de depozitare pentru alte obiecte si
nu introduceti ustensile de bucatarie, deoarece exista riscul de incendiu sau de soc
electric.
• Nu utilizati aparatul avand mainile ude sau umede.
Copiii
Nu lasati copiii sa utilizeze acest aparat. Copiii sunt vulnerabili in bucatarie, in special
atunci cand nu sunt supravegheati, cand aparatele electrocasnice sunt in functiune
sau alimentele preparate sunt scoase.
Instruiti copiii cu privire la pericolele potentiale din bucatarie, si avertizati-i cu privire
la riscul atingerii suprafetelor la care nu ar trebui sa aiba acces.
Alte instructiuni de siguranta
• Nu utilizati aparatul daca cablul este deteriorat.
• Utilizarea accesoriilor nerecomandate de producator poate deteriora
aparatul de facut paine.
2
Page 4

• Nu plasati aparatul pe sau langa surse de caldura precum aragaz, cuptoare,
arzatoare etc.
• Pentru a evita deteriorarea aparatului nu plasati nicio tava de copt sau
obiect deasupra aparatului.
• Nu curatati cu lavete sau bureti. Nu spalati tava de copt, lama de amestec,
cana de masurat sau lingura in masina de spalat vase
• Tineti aparatul si cablul departe de caldura, soare, umezeala, margini
ascutite si altele de acest gen.
• Tava de copt trebuie pusa corect la loc inainte de pornirea aparatului.
• Intotdeauna scoateti cablul din priza ori de cate ori nu utilizati masina, la
atasarea accesoriilor, la curatare sau cand apar defectiuni. Trageti de stecher, nu
de cablu.
Inaintea primei utilizari
Inaintea primei utilizari, va rugam sa cititi acest manual si sa il pastrati pentru o
consultare ulterioara. Acordati o atentie speciala instructiunilor de siguranta.
1 Cu atentie, scoateti masina din ambalaj.
2 Stergeti praful care ar putea sa se fi acumulat.
3 Stergeti tava de copt, lama de amestecare si suprafata exterioara a
aparatului cu o laveta umeda si curata. Tava este tratata astfel incat
ingredientele sa nu se lipeasca. Nu utilizati niciun fel de bureti sau perii abrazive
pe aparat si accesorii.
4 La prima utilizare, folositi putin ulei, unt sau margarina pentru a unge tava si
puneti la copt tava goala pentru 10 minute (selectati programul Extrabake).
5 Mai curatati o data.
6 Plasati lama de amestecare in axul tavii.
In procesul de productie este necesara ungerea usoara a anumitor parti ale
aparatului. Acest lucru poate duce la emiterea unor vapori la prima utilizare,
ceea ce este perfect normal.
Caracteristici electrice
Verificati ca tensiunea inscrisa pe aparat sa corespunda cu cea a casei dvs (curent
alternativ - AC). Daca prizele din casa dvs nu se potrivesc cu stecherul aparatului,
acesta trebuie inlocuit.
Nota: Daca stecherul scos din priza este deteriorat, trebuie inlocuit si distrus,
pentru ca poate reprezenta un pericol de elctrocutare.
ATENTIE: Aparatul necesita o priza cu impamantare.
Daca siguranta de 13 amp trebuie schimbata. trebuie folosita tot o siguranta
BS1362 de 13 amp.
Despre masina de facut paine
• Un beep “Fruit and Nut” (Fructe si nuci) semnalizeaza momentul in care aceste
ingrediente pot fi adaugate, pentru a nu fi sfaramate de lama.
• Exista setarea de extra-crust (coaja mai groasa) pentru crearea unei coji mai
groase a painii (numai pentru anumite programe).
3
Page 5
Despre retete
Retetele din acest manual sunt orientative. De preferat sa consultati si indicatiile
existente pe cutia cu faina speciala pentru masina de paine.
• Intotdeauna adaugati ingredientele in ordinea indicata.
• Masurarea cu strictete a ingredientelor este vitala. Nu folositi cantitati mari.
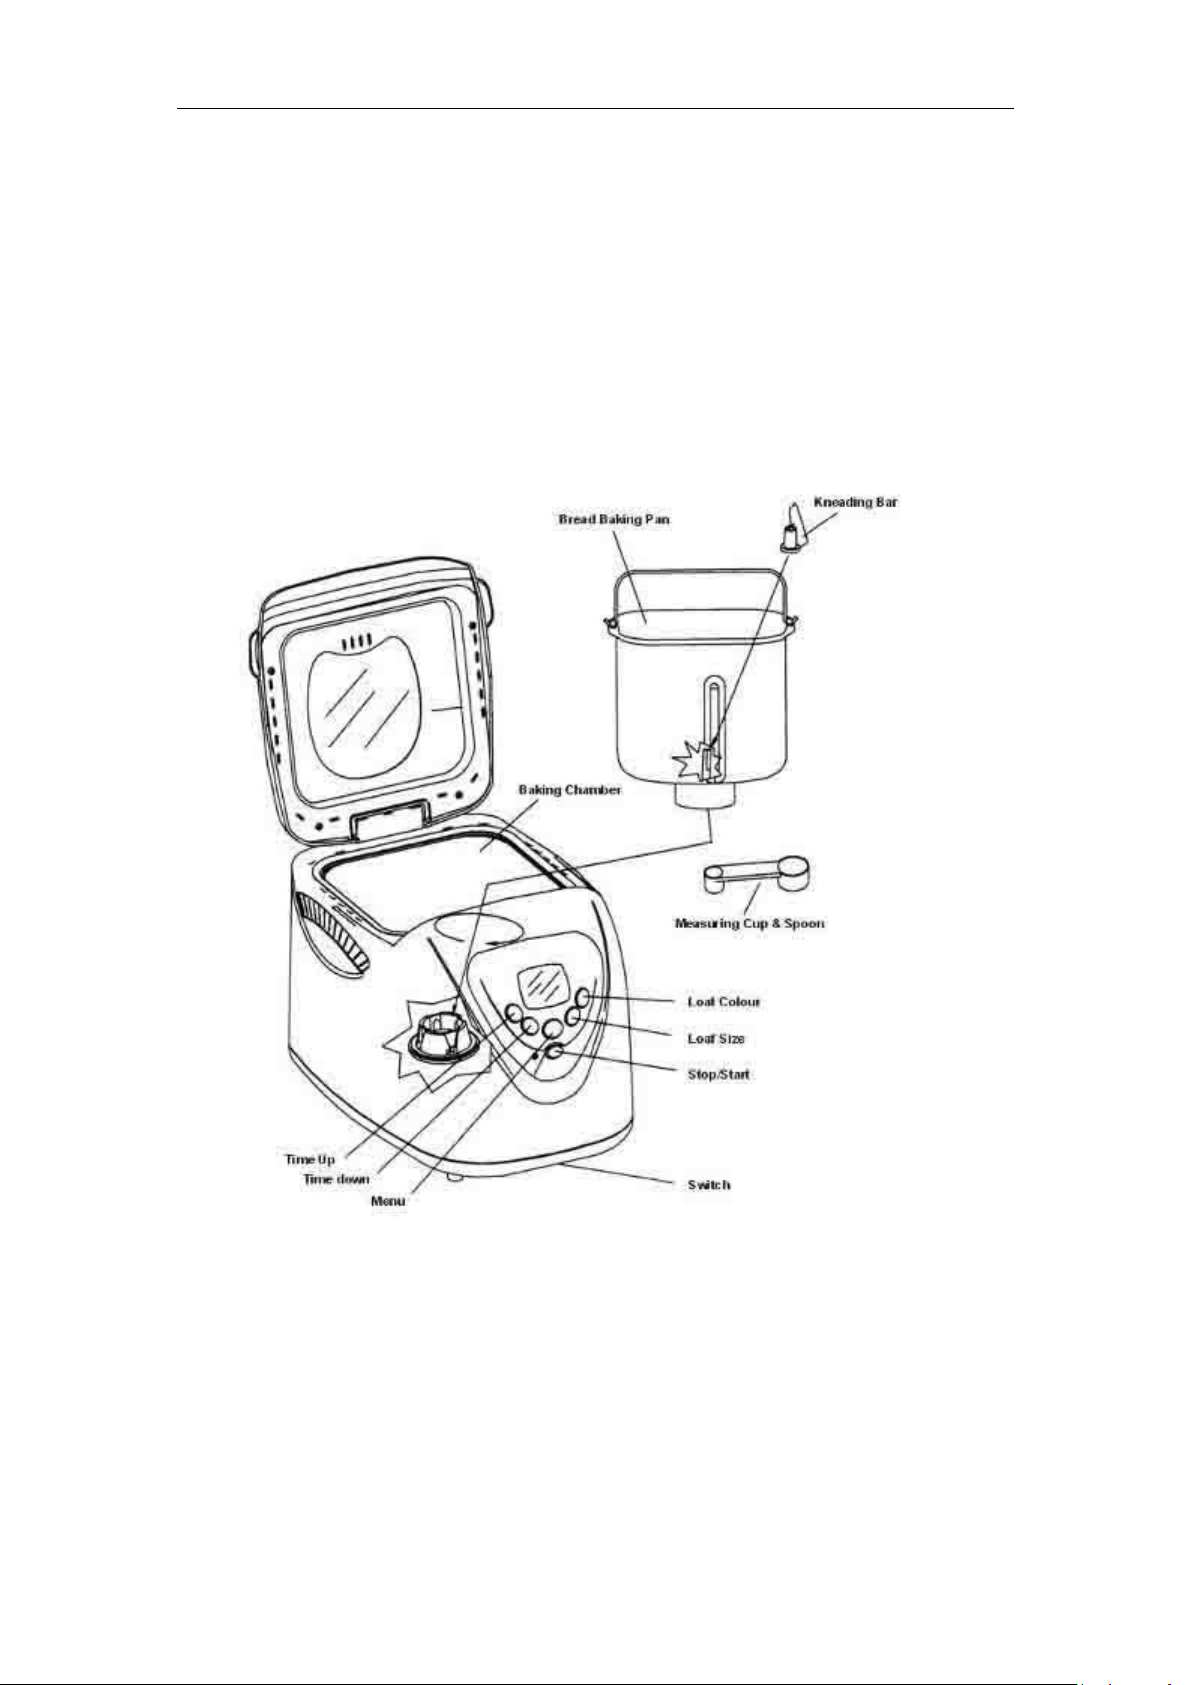
Componente
Butoane panou de control, ecran si functii
Ecran
Color: Arata nivelul de coacere (colorare) selectat
Size: Arata greutatea selectata
Select: Arata numarul programului
Arata timpul ramas pana la teminarea pprogramului
(3:20, de exemplu, inseamna 3 ore si 20 minute; 0:20 este 20 minute)
Arata atentionarea de temeperatura – vezi capitolul “Rezolvare probleme”
4
Page 6

Butoane setare timp
Folositi pentru a intarzia inceperea programului de facut paine.
Start
Tineti apasati butonul pentru aproximativ 1 secunda, pana se aude un bip si pe ecran
apare semnalizarea de incepere a programului.
Stop
Apasati pe stop pentru aprox. 2 secunde, pana se aude un bip de confirmare.
Buton de meniu
Alegerea unuia dintre cele 12 programe de facut paine.
Buton alegere marime
Marimea este setata pentru o paine cu coaja. Pentru o paine de marime normala
(2lb=950g si 2.5lbs=1125g) apasati butonul o data.
Descrierea programelor
1 Basic white (3:00 si 2:53)
Pentru paine alba si neagra. De asemenea, pentru paine cu diverse arome, cu
ierburi si stafide.
2 French (3:50 si 3:40)
Pentru paine usoara ca painea frantuzeasca, care are o coaja mai tare si o
textura usoara.
3 Wholewheat (3:40 si 3:32)
Pentru coacerea painii integrale.
Aceasta setare are un timp de incalzire mai lung, pentru a permite graului sa
absoarba apa si sa se umfle. Nu este recomandata folosirea timerului de
intarziere a inceperii programului, acesta afectand calitatea painii.
4 Quick (1:40)
Pentru preparare rapida a painii albe . Painea preparata la acest program este
mai mica si cu o textura mai densa.
5 Sweet (2:55 si 2:50)
Pentru prepararea painii dulci, care are o crusta mai groasa si mai crocanta,
produsa de arderea zaharului.
6 Fastbake - I (00:58)
Prepararea painii de 950g intr-un timp scurt.
7 Fastbake - II(00:58)
Prepararea painii de 1125g intr-un timp scurt.
8 Dough (1:30)
5
Page 7

Aceasta setare este pentru pregatirea aluatului, dar nu si finalizarea
preparatului. Aluatul facut poate fi folosit apoi pentru modelarea gogosilor,
blat pizza etc. Orice fel de aluat poate fi preparat cu aceasta setare. Nu
depasiti 1kg de ingrediente.
9 Jam (1:20)
Folositi aceasta setare pentru prepararea gemurilor din fructe proaspete sau
a marmeladei. Nu mariti cantitatea si nu lasati sa fiarba peste capacitatea
tavii. Daca acest lucru se intampla, opriti masina. Scoateti tava cu atentie,
lasati sa se raceasca si curatati.
10 Cake (2:50)
Cu aceasta setare, aparatul va mixa ingredientele si apoi va coace pentru un
timp predefinit. Este necesar sa amestecati separat in doua boluri
ingredientele (vezi retetele), inainte de a introduce in tava.
11 Sandwich (3:00 si 2:55)
Pentru pregatirea painii cu o textura usoara, dar cu o coaja mai moale si mai
groasa.
12 Bake (1:00)
Aceasta setare este doar pentru copt si poate fi folosita pentru a creste
timpul de coacere pentru setarile selectate. Este foarte folositoare pentru
pregatirea gemului si a marmeladei. La pornirea acestei setari, timpul este de
minim o ora (1:00) si se numara in intervale de 10 minute. Va trebui sa opriti
manual setarea, apasand pe butonul de stop, atunci cand folositi procesul
Extrabake. Este recomandata verificarea starii gemului sau a painii din 10 in
10 minute. Apasand ▲, va creste timpul in unitati de 10 minute. La
selectarea optiunii Extrabake chiar dupa alt program, daca apare mesajul
H:HH pe ecran, scoateti capacul, scoateti tava si lasati sa se raceasca pentru
cateva minute. Dupa ce s-a racit, puneti la loc tava, ingredientele, setati
programul si apasati start.
Utilizarea masinii de facut paine
1. Scoateti tava
Ridicati capacul si scoateti tava ridicand manerul, rasucind in sens invers
acelor de ceas si ridicand. Puneti tava pe suprafata de lucru. Este important
ca tava sa fie umpluta cu ingrediente in afara masinii, pentru ca sa nu acestea
sa patrunda in masina si sa atinga elementele de incalzire.
2. Atasarea lamei
Atasati lama de framantare/amestecare, apasand.
3. Masurarea ingredientelor
Masurati cantitatile de ingrediente necesare si adaugati-le in tava in ordinea
de pe reteta.
• La adaugarea drojdiei, asigurati-va ca nu intra in contact cu apa sau
orice alt lichid, pentru ca va incepe sa dospeasca imediat.
• Folositi apa calduta (21-28°C).
6
Page 8

4. Plasarea tavii
Puneti la loc tava de copt in masina, rasucind in sensul acelor de ceas. Puneti
capacul.
5. Introduceti stecherul in priza
Introduceti stecherul in priza. Aparatul va fi automat setat la meniul Basic
Bread si cu un timp normal.
• De fiecare data cand veti apasa un buton veti auzi un bip de confirmare.
6. Selectati programul
Alegeti setarea dorita din lista, apasand butonul Menu
7. Selectati greutatea
Apasati butonul, pentru a alege intre crocant si mica/mare. Setarea automata
este pe crusty (crocanta) la pornirea aparatului.
8. Selectati culoarea
Selectati culoarea dorita pentru coaja, apasand butonul Colour.
9. Selectati timpul de asteptare (intarziere a inceperii procesului)
Daca doriti ca painea sa fie gata mai tarziu, selectati timpul de intarziere ca in
sectiunea urmatoare.
10. Start
Apasati butonul Start/Stop pentru pornirea masinii. Timpul ramas se va
numara in unitati de un minut.
11. Procesul
Masina de facut paine va trece automat prin stadiile programate, asa cum
este indicat in sectiunea “Ciclul de coacere”. Daca masina a fost programata
la un al doilea proces de framantare, un semnal sonor va va avertiza ca
fructele sau alunele pot fi adaugate.
• Este posibil ca sa iasa aburi prin orificii in timpul coacerii. Este normal.
12. Terminare
La terminarea programului, ecranul va arata 0:00 si va aparea semnalul
sonor.
13. Pastrarea caldurii
Functia de pastrare a preparatului cald va face ca aerul cald sa circule pentru
inca 60 de minute pentru majoritatea setarilor (vezi sectiunea “Ciclul de
coacere”). Pentru cele mai bune rezultate, scoateti tava de copt si painea in
acest timp sau in moemntul in care programul initial s-a terminat. 10
semnale sonore se vor auzi la terminarea programului de pastrare la
caldura.
14. Scoateti tava
Apasti stop. Deschideti capacul.
ATENTIE: Folositi manusi de bucatarie la scoaterea tavii (cu atentie, este foarte
fierbinte!).
15. Scoateti painea
Lasati painea sa se raceasca in tava pentru 15 minute, apoi rasturnati tava cu
7
Page 9

susul in jos si bateti usor pana ce painea se desprinde. Lasati painea sa se
raceasca pe un platou. Umpleti tava de copt cu apa calda imediat, pentru ca lama
sa nu se intepeneasca in ax.
• Din cand in cand, lama va ramane in paine. Asteptati sa se raceasca
painea si apoi indeparati lama cu o lingura de lemn sau de plastic, pentru a nu
zgaria suprafata antiaderenta.
16. Intotdeauna scoateti din priza aparatul dupa utilizare.
• Nu deschideti capacul in timpul functionarii aparatului, pentru ca va fi afectata
calitatea painii, in special capacitatea de a creste. Deschideti capacul doar atunci
cand in reteta este mentionata adaugarea ingredientelor aditionale.
Nota: temperatura camerei
Masina functioneaza bine intr-o gama larga de temperaturi, dar pot exista
diferente in marimile painilor de la temperaturi ale camerei mai mari la cele mai mici.
Temperatura camerei recomandata este intre 15 si 34°C.
Folosirea cronometrului
Utilizati timerul cand vreti ca painea sa fie gata mai tarziu, sau sa fie preparata
peste noapte si gata dimineata. Poate fi facuta o setare de maxim 13 ore. Verificati
daca functia este disponibila, consultand sectiunea “Ciclul de coacere”. Nu folositi
aceasta optiune pentru retete care contin ingrediente perisabile precum oua, lapte,
smantana sau branza.
1. Hotarati ora la care vreti ca painea sa fie gata si calculati diferenta de timp dintre
momentul actual si acea ora. De exemplu, vreti sa aveti painea maine la ora 8:00,
acum este ora 19:30, diferenta este de 12 ore si jumatate.
2. Introduceti acest timp apasand butoanele “Time T” si “Time S. Sagetile vor selecta
timpul in sus sau in jos, in perioade de 10 minute. Dupa ce ati apasat butonul Start,
va aparea mesajul (:).
3. Daca ati selectat gresit timpul, apasati stop timp de 2 secunde. Timerul va fi
resetat si puteti repeta pasul 1 si 2.
4. Perioada de amanare este de maxim 13 ore. Atunci painea va fi gata de a fi scoasa
din masina, vezi sectiunea “Scoaterea tavii”.
Avertizare sonora
Se aude un beep atunci cand:
- se apasa un buton;
- in timpul celui de-al doilea ciclu de framantare al anumitor programe pentru a
indica timpul la care alte ingrediente, precum cereale, fructe etc pot fi adaugate;
- programul se termina;
- la terminarea functiei de pastrare la cald.
8
Page 10

Intrerupere curent
Dupa o intrerupere brusca de curent,
- daca programul nu a atins inca faza 1, apasati Start si programul va continua.
- daca a depasit acest punct procesul trebuie reluat de la inceput. Tava de copt
trebuie golita de ingrediente si inlocuite cu altele.
Felierea si pastrarea painii
Pentru cele mai bune rezultate, puneti painea pe un suport de sarma si
lasati-o sa se raceasca pentru 15-30 de minute inainte de a o taia.
Folositi un cutit electric sau un cutit manual ascutit pentru felii egale.
Pastrati painea nefolosita intr-o punga bine inchisa la temperatura camerei
pana la trei zile. Daca vremea este foarte calda si umeda, pastrati la frigider
peste noapte.
Pentru depozitarea pentru o perioada mai lunga, puneti painea intr-un
container acoperit si puneti-o la congelator
Daca pastrati painea in frigider, lasati-o cateva minute sa revina la
temperatura camerei inainte de servire.
Pentru ca painea facuta in casa nu contine conservanti, tinde sa se usuce si se
poate strica mai repede decat cea din comert.
Resturile intarite de paine pot fi taiate in cuburi de 1.3 sau 2.5 cm si folosite
pentru prepararea crutoanelor, a budincii de paine sau a umpluturii pentru
diverse retete.
Curatare si intretinere
Atentie: Pentru a preveni riscul de electrocutare, scoateti din priza masina inainte
de a o curate!
1. Asteptati sa se raceasca masina.
IMPORTANT: Nu scufundati in apa sau alt lichid si nu stropiti nici corpul masinii, nici
capacul, deoarece exista riscul deteriorarii si/sau al socului electric.
2. Exterior: Stergeti capacul si corpul masinii cu o carpa umeda sau cu un burete usor
umed.
3. Interior: Folositi o carpa sau un burete umed pentru a curata interiorul masinii.
4. Tava de copt: Curatati tava cu apa calda, nu este necesar detergent. Evitati sa
zgariati suprafata anti-aderenta. Uscati complet inainte de a o plasa in
compartimentul de copt.
5. Nu spalati la masina de spalat vase tava de copt, cana de masurat, lingura sau
lama.
6. Nu lasati tava prea mult in apa, pentru ca poate dauna functionarii.
7. Daca lama ramane blocata in tava, turnati apa fierbinte si lasati 30 de minute,
dupa care se poate curata usor.
8. Inainte de a depozita aparatul, asigurati-va ca este complet racit.
Nu folositi urmatoarele substante pentru curatare:
Dizolvant de vopsea, benzina , ustensile din metal, pudra de lacuit, lavete
impregnate cu substante chimice
9
Page 11

Ingrijire speciala pentru suprafata non-aderenta
Evitati deteriorarea stratului non-aderent. Nu folositi ustensile din metal
precum spatule, cutite, furculite etc.
Stratul nonaderent isi poate schimba culoarea dupa o utilizare indelungata.
Acest lucru este cauzat doar de umezeala si vaporii de abur si nu va afecta
calitatea painii sau a functionarii aparatului.
Gaura din centrul lamei de curatat trebuie curatata, apoi adaugati o picatura
de ulei si repozitionati in tava de copt. Acest lucru va preveni lipirea lamei.
Pastrati toate orificiile curatate de praf.
Depozitarea masinii
Uscati bine toate componentele inainte de depozitare, inclusiv aburul de pe
fereastra masinii. Inchideti capacul si nu puneti nimic deasupra.
Nota: NU utilizati agenti de curatare abrazivi sau chimici pentru ca vor dauna
suprafetei non-aderente a masinii
Informatii despre ingrediente
Sfaturi pentru copt
De multe ori se spune ca a gati este o arta, bazata pe creativitatea bucatarului, in
timp ce coacerea painii este mai mult o stiinta. Acest lucru inseamna ca procesul
combinarii fainei, apei si a drojdiei duce la o reactie a carui produs este painea.
Trebuie sa va reamintiti ca atunci cand ingredientele sunt combinate, produc un
rezultat specific.
Cititi cu atentie informatiile urmatoare pentru a obtine o mai buna intelegere a
importantei pe care fiecare ingredient o are in procesul de coacere a painii.
Nota importanta despre faina
Tipurile de faina, desi arata aproape la fel, pot fi foarte diferite datorita modului in
care cerealele au fost cultivate, macinate, depozitate etc. Este folositor sa
experimentati lucrul cu diferite tipuri de faina, pentru a gasi tipul cel mai bun pentru
a face paine. Depozitarea este foarte importanta, toate tipurile de faina trebuind sa
fie tinute intr-un container etans.
Faina obisnuita (pentru orice tip de aluat)
Acest tip de faina este un amestec de faina rafinata de grau fina si faina de grau mai
tare (grea). Este potrivita mai ales pentru prepararea torturilor si a prajiturilor, si
pentru painea-la-minut.
10
Page 12

Faina alba concentrata/faina de paine
Faina pentru paine este o faina cu multe proteine/gluten, care a fost tratata astfel
incat aluatul sa poata fi usor framantat. De obicei, acest tip de faina are o
concentratie mai mare de gluten decat faina obisnuia, insa poate varia. Faina
obisnuita si faina alba concetrata sunt recomandate pentru prepararea painii cu
acest aparat.
Faina de grau integrala
Faina integrala contine tot bobul de grau macinat, cu nucleul acestuia, tegumentul si
germenii, ceea ce o face mai grea si mai bogata in nutrienti decat faina alba. Painile
facute cu aceasta faina sunt de obicei mai mici si mai grele decat painile albe. Pentru
a remedia acest lucru, puteti amesteca faina integrala cu faina alba sau cea
obisnuita.
Faina care dospeste
Acest tip de faina contine ingrediente de dospire nenecesare care vor interfera cu
prepararea painii si a prajiturilor. Nu este recomandata pentru folosire.
Faina de tarate
Aceasta faina neprocesata si cea din germeni de grau sunt facute din partea
exterioara mai tare a bobului de grau sau secara, separata de faina obisnuita prin
cernere. Acest tip de faina este, de obicei, adaugata in cantitati mici pentru coacerea
painii pentru un plus de nutrienti si aroma, si pentru a imbogati textura painii.
Fulgi de ovaz (Ovaz macinat)
Fulgii de ovaz provin din ovazul macinat. Acestia sunt folositi pentru imbogatirea
aromei si pentru textura painii.
Alte ingrediente
Drojdii (drojdie uscata)
Prin fermentare, drojdia produce un gaz (dioxid de carbon) care face ca
painea sa creasca. Pentru a produce acest gaz, drojdia are nevoie sa reactioneze cu
zahar si carbohidrati din faina. Drojdia granulara rapida este folosita in majoritatea
retetelor in care este nevoie de dospirea aluatului.
Sunt trei tipuri de drojdie disponibila pe piata: drojdie proaspata, drojdie
traditionala uscata si drojdie cu actiune rapida. Este recomandata folosirea drojdiei
cu actiune rapida. Drojdia proaspata nu este recomadata. Depozitati drojdia
conform instructiunilor producatorilor si verificati periodic data expirarii. Daca
deschideti un pachet, este important ca restul sa fie imediat resigilat si pus la frigider
pentru utilizari ulterioare. De multe ori aluatul nu creste datorita folosirii unei drojdii
vechi sau care nu a fost pastrata corespunzator.
Puteti folosi urmatorul test pentru a determina daca drojdia este inactive
(statuta, veche):
1. Puneti o jumatate de cana de apa intr-un bol.
2. Amestecati o lingurita de zahar in apa si apoi presarati doua lingurite de
drojdie la suprafata.
3. Puneti bolul intr-o zona calda si lasati 10 minute.
4. Amestecul ar trebui sa produca o spuma si se degaja un miros puternic de
11
Page 13

drojdie. Daca acest lucru nu se intampla, aruncati amestecul si incepeti
din nou cu un alt pachet de drojdie uscata.
Zahar
Zaharul este important pentru culoarea si aroma painii si este important in
reactia cu drojdia, ajutand-o sa fermenteze. Nu se pot folosi indulcitori artificiali ca
substitut, pentru ca drojdia nu va avea reactie la acestia.
Sare
Sarea este necesara pentru a echilibra gustul painii si al prajiturilor si da
culoarea coajei care se formeaza in timpul coacerii. Sarea limiteaza, de asemenea,
dospirea drojdiei, asa ca nu adaugati o cantitate mai mare de sare decat cea
recomandata in reteta. Poate fi redusa insa, pentru motive dietetice.
Lichide/lapte
Lichidele precum laptele sau combinatia de lapte praf si apa pot fi folosite la
prepararea painii. Laptele da un gust bun, o textura moale si inmoaie coaja, in timp
ce apa simpla produce o coaja mai crocanta. Unele lichide precum suc de portocale,
mere etc. pot fi adaugate ca aroma.
Nota: Pentru majoritatea retetelor recomandam lapte degresat.
Oua
Ouale dau texturii aluatului de gogosi si prajituri o structura mai densa si
moale.
Ulei de floarea-soarelui
'Scurteaza' sau domoleste textura painii cu drojdie. Se pot folosi ca
substituenti untul sau margarina. Daca se adauga unt sau margarina scoase direct
din frigider, trebuie lasate sa se topeasca putin pentru ca aluatul sa fie mai bine
omogenizat.
Praf de copt
Praful de copt este un ingredient care se foloseste la prepararea prajiturilor,
facand ca acestea sa creasca in timpul coptului. Nu este necesar ca aluatul sa fie lasat
sa se ridice.
Bicarbonat de sodiu
Bicarbonatul de sodiu este un alt agent care ajuta la dospirea preparatelor si
nu trebuie confundat cu praful de copt. De asemenea, nici bicarbonatul de sodiu nu
necesita ca aluatul sa fie lasat sa dospeasca, pentru ca reactia chimica are loc in
timpul procesului de copt.
Masurarea ingredientelor
Pasul-cheie in utilizarea masinii de facut paine este masurarea cu precizie a
ingredientelor. Este extrem de important sa masurati corect fiecare lichid si
ingredient uscat pentru ca, altfel, rezultatul procesului poate fi alterat. Ordinea
adaugarii ingredientelor trebuie respectata, de asemenea.
Masuratorile pentru lichide difera de cele pentru ingredientele uscate si sunt
urmatoarele:
Masurarea lichidelor
Folositi cana de masurat atasata. La citirea cantitatilor, cana trebuie sa fie
pusa pe o suprafata orizontala dreapta si vazuta la nivelul ochiului (nu intr-un alt
12
Page 14

unghi). Nivelul lichidului trebuie sa fie acelasi cu cel inscriptionat pe cana. Utilizarea
unor cantitati “la ochi” nu da rezultate bune.
Masuratori pentru ingrediente uscate
Aceste masuratori (in special pentru faina) trebuie facute folosind cana de
masurat atasata. Cana este creata dupa standardul american de 8 fluid oz –
standardul englezesc este de 10fl oz. Masuratoarea pentru ingredientele uscate
trebuie facuta cu atentie, adaugand cu lingurita ingredientele in cana iar la umplere,
niveland cu un cutit. Apasarea cu mana sau cu lingura va duce la marirea cantitatii si
astfel reteta nu va fi respectata. Nu cerneti faina, decat daca se mentioneaza in
reteta.
La masurarea unor cantitati mici de ingrediente lichide sau solide (drojdie,
zahar, sare, lapte praf, miere, melasa etc), trebuie folosita lingura de masurare
atasata.
Masurarea trebuie sa fie echilibrata pentru producerea celor mai bune
rezultate.
Masina Dumneavoastra de paine produce foarte usor alimente delicioase. Tot
ce trebuie sa faceti este sa respectati cu atentie reteta. In mod normal, in activitatea
de gatit zilnica, “un varf de asta si un pic de cealalata” dau savoare mancarii, insa nu
si in cazul masinii de paine. In acest caz, cantitatile indicate trebuie respectate cu
strictete.
Temperatura ingredientelor
Toate ingredientele si ustensilele folosite, inclusiv masina, tava si in special
lichidele (apa sau lapte) trebuie sa fie la temperatura camerei (21 o C-70F).
Daca ingredientele sunt prea reci, sub 10 C (50 F), atunci drojdia nu va fermenta.
Lichidele foarte fierbinti, peste 40C (104F) pot distruge efectul drojdiei.
Glazuri speciale pentru paini
Puteti da un “finisaj” profesional painii. Selectati una dintre urmatoarele glazuri sau
toppinguri pentru a da un plus de savoare painii:
Glazura de ou
Bateti 1 ou mare si 1 lingura de apa impreuna, si aplicati cu o pensula un strat gros
deasupra produsului. Aplicati numai inainte de a pune aluatul la copt.
Glazura de unt topit
Aplicati cu o pensula unt topit peste painea proaspat scoasa din masina, pentru a
obtine o coaja mai moale.
Glazura cu lapte
Pentru o coaja lucioasa si mai moale, dati cu pensula inmuiata in lapte sau smantana
peste painea proaspat coapta.
Glazura cu zahar
Amestecati o ceasca de zahar cernut cu 1 sau 2 linguri de lapte, pentru realizarea
unei glazuri mai groase, si puneti-o peste painea cu stafide sau alte paini dulci.
Mac/Susan/Chimen/Fulgi de ovaz
Presarati cu una dintre variantele de mai sus, peste painea proaspat-glazurata.
13
Page 15

Alte sfaturi
- Puneti toate ingredientele in tava de copt, astfel incat drojdia sa nu intre in
contact cu niciun lichid.
- Dupa ce ati terminat de facut aluat in masina, atunci cand lasati drojdia sa
creasca in afara masinii, lasati 30 de minute sau pana cand aluatul a crescut
dublu fata de dimensiunea initiala. Aluatul trebuie usor uns si acoperit cu
hartie de copt si un prosop uscat. Trebuie pus intr-un loc cald, departe de
curenti de aer.
- Umiditatea poate cauza probleme, asa ca umiditatea si altitudini mari
necesita ajustari ale retetei. Pentru umiditate mare, adaugati inca o lingura
de faina, daca observati compozitia fiind prea lichida. Pentru altitudini mari,
scadeti cantitatea de drojdie cu aproximativ ¼ lingurita, si scadeti putin
cantitatea de zahar sau/si apa sau lapte.
- Atunci cand, in reteta, se mentioneaza “o suprafata tapetata usor cu faina”,
folositi 1 sau 2 linguri de faina. Pentru o manipulare mai usoara a aluatului,
puteti sa va dati cu faina pe degete sau pe ustensilele cu care lucrati.
- Daca aluatul pe care il intindeti se trage inapoi, lasati-l sa “se odihneasca”
pentru cateva minute inainte de a-l intinde din nou.
- Aluatul poate fi infasurat in folie de plastic si pastrat la congelator pentru
utilizare ulterioara.
- Dupa 5 minute de framantare a aluatului, deschideti capacul si verificati
consistenta aluatului. Ar trebui sa formeze o minge moale, neteda. Daca este
prea uscat, adaugati apa. Daca este prea umed, adaugati faina (cate ½ lingura
o data).
Retete
Toate retetele urmatoare folosesc urmatoarea metoda:
1. Masurati toate ingredientele si adaugati in tava de copt.
2. Utilizati apa calduta (21-28 grade).
3. Introduceti tava in masina, inchideti capacul.
4. Selectati programul.
5. Apasati butonul de start.
6. Cand painea este gata, scoateti tava, folosind manusi de bucatarie.
7. Scoateti painea din tava (si, daca este necesar, lama de amestec din paine).
8. Lasati sa se raceasca inainte sa feliati.
Aceasta metoda este modificata printr-o nota la sfarsitul fiecare retete, acolo unde
este necesar.
14
Page 16

Retete pentru paine
1. Retete pentru paine normala
Paine alba clasica 0.4535
680g 900g
Apa 1+1/8 cana 1+1/2 cana
Lapte praf degresat 2+1/2 linguri 4 linguri
Ulei de floarea-soarelui 2+1/2 linguri 4 linguri
Zahar 2+1/4 linguri 3 linguri
Sare 1+1/4 lingurite 2 lingurite
Faina alba de grau 3 cani 4 cani
Drojdie cu actiune rapida 1+1/4 lingurita 1+1/4 lingurita
Program 1Basic 1Basic
Paine neagra
680g 900g
Apa 1 cana 1+1/2 cana
Lapte praf degresat 2 linguri 3 linguri
Ulei de floarea-soarelui 2 linguri 3 linguri
Zahar 2+1/2 linguri 4 linguri
Sare 1+1/4 lingurita 2 lingurite
Faina alba de grau 3 cani 4 cani
Drojdie cu actiune rapida 1+1/4 lingurita 1+1/2 lingurita
Programul 1 Basic 1 Basic
Paine italiana cu ierburi
680g 900g
Apa 1+1/8 cani 1+1/2 cani
Lapte praf degresat 2+1/2 linguri 3 linguri
Ulei floarea-soarelui 2+1/2 linguri 3 linguri
Zahar 2+1/4 linguri 2+1/2 linguri
Sare 1+1/2 lingurite 2 lingurite
Faina alba de grau 3 cani 4 cani
Maghiran uscat 1+1/2 lingurite 2 lingurite
Busuioc uscat 1+1/2 lingurite 2 lingurite
Cimbru uscat 1+1/2 lingurite 1+1/2 lingurite
Drojdie cu actiune rapida 1+1/4 lingurite 1+1/4 lingurite
Programul 1 Basic 1 Basic
15
Page 17

Paine cu branza si ceapa
680g 900g
Apa 1 cana 1+1/4 cana
Lapte praf degresat 2 linguri 2+1/2 linguri
Zahar 1 linguri 2 linguri
Sare 1/2 lingurita 1 lingurita
Granule de ceapa 1+1/2 linguri 2 linguri
Branza cheddar rasa 1 cana 1+1/2 cana
Faina alba de grau 3 cani 4 cani
Drojdie cu actiune rapida 1+1/2 lingurita 1+3/4 lingurita
Programul 1 Basic 1 Basic
Paine cu stafide
680g 900g
Apa 1+1/4 cana 1+1/2 cana
Lapte praf degresat 3 linguri 4 linguri
Ulei de floarea-soarelui 3 linguri 4 linguri
Zahar 2 linguri 3 linguri
Sare 1+1/2 lingurita 2 lingurite
Scortisoara ¾ lingurita 1 lingurita
Faina alba de grau 3 cani 4 cani
Drojdie cu actiune rapida 1+1/2 lingurita 2 lingurite
Stafide* 5/8 cana ¾ cana
Programul 1 Basic 1 Basic
*Adaugati stafidele dupa semnalul sonor.
Paine cu rosii uscate
680g 900g
Apa 1 cana 1+1/3 cana
Lapte praf degresat 2+1/2 linguri 3 linguri
Ulei de floarea-soarelui 2+1/4 linguri 3 linguri
Zahar 1+1/4 linguri 1+1/2 lingura
Sare 1+1/4 lingurita 1+1/2 lingurita
Mix de ierburi uscate 1+1/2 lingurita 2 lingurite
Faina alba de grau 3 cani 4 cani
Drojdie cu actiune rapida 1+1/4 lingurita 1+1/2 lingurita
Rosii uscate la soare 3/8 cana ½ cana
Programul 1 Basic 1 Basic
Paine cu malt
680g 900g
Apa 1 cana 1+1/4 cana
Sare 1 lingurita 1 lingurita
16
Page 18

Ulei de floarea-soarelui 2 lingurite 3 lingurite
Melasa neagra 1+1/2 lingura 2+1/2 linguri
Extract de malt 2 linguri 3 linguri
Faina obisnuita 3 cani 4 cani
Drojdie cu actiune rapida 1 lingurita 1+1/4 lingurita
Stafide din struguri de masa* 1/2 cana ¾ cana
Programul 1 Basic 1 Basic
*Adaugati stafidele dupa semnalul sonor.
2. Retete pentru paine frantuzeasca
Paine frantuzeasca
680g 900g
Apa 1 cana 1+1/4 cana
Lapte praf degresat 2 linguri 2+1/2 linguri
Zahar 1 lingura 1+1/4 linguri
Sare 1 lingurita 1+1/4 lingurita
Ulei de floarea-soarelui 1 lingura 1+1/2 lingura
Faina alba de grau 3 cani 4 cani
Drojdie cu actiune rapida 1 lingurita 1+1/4 lingurita
Programul 2 French 2 French
3. Retete pentru paine integrala
Paine din faina integrala de grau
680g 900g
Apa 1+1/8 cana 1+5/8 cana
Lapte praf degresat 1+1/2 linguri 3 linguri
Ulei de floarea-soarelui 2 linguri 3 linguri
Zahar brun 2+1/2 linguri 3+1/2 linguri
Sare 1+1/4 lingurita 1+1/2 lingurita
Faina de grau integrala 3 cani 4 cani
Drojdie cu actiune rapida 1+1/4 lingurita 1+1/2 lingurita
Tableta Vitamina C (zdrobita) 1x100mg 1x100mg
Programul 3 Wholewheat 3 Wholewheat
Paine din cereale
680g 900g
Apa 1+1/8 cana 1+5/8 cana
Lapte praf degresat 2 linguri 3 linguri
Ulei de floarea-soarelui 2 linguri 3 linguri
Zahar brun fin 2+1/2 linguri 5 linguri
Sare 1+1/4 lingurita 2 lingurite
Faina neagra din cereale 3 cani 4 cani
Drojdie cu actiune rapida 1+1/4 lingurita 1 lingurita
17
Page 19

Tableta de Vitamina C - 1x100mg
Programul 3 Wholewheat 3 Wholewheat
4. Retete cu preparare rapida (programul Quick)
Paine cu banane si nuci
Grup 1 de ingrediente
Unt (topit) 2 linguri
Lapte 1 lingura
Banana zdrobita 1 cana
Ou 1
Nuci (maruntite) ½ cana
Lamaie 1 lingurita
Grup 2 de ingrediente
Faina simpla 1+1/2 cana
Bicarbonat de sodiu ½ lingurita
Praf de copt ¼ lingurita
Zahar ½ cana
Sare ¼ lingurita
Programul 4 Quick
Metoda
1. Intr-un bol amestecati ingredientele din grupul 1.
2. Intr-un alt bol amestecati ingredientele din grupul 2.
3. Puneti compozitiile din cele doua boluri in tava de copt.
Paine din fulgi de ovaz
Lapte 1 cana
Oua (batute) 2
Ulei de floarea-soarelui 1/2 lingurita
Golden syrup (melasa) 2 linguri
Zahar ¼ cana
Sare 1 lingurita
Faina simpla 2 cana
Fulgi de ovaz 1 cana
Praf de copt ½ lingurita
Bicarbonat de sodiu ½ lingurita
Programul 4 Quick
5. Retete dulci
Baton cu fructe
680g 900g
Apa 1+1/8 cana 1+1/3 cana
Lapte praf degresat 2+1/2 linguri 3 linguri
18
Page 20

Ulei de floarea-soarelui 2+1/2 linguri 3 linguri
Zahar 1/4 lingura 1/3 lingura
Sare 1+1/4 lingurita 1+1/2 lingurita
Faina alba de grau 3 cani 4 cani
Nucsoara ¾ lingurita 1 lingurita
Drojdie cu actiune rapida 1+1/4 lingurita 1+1/2 lingurita
Mix de fructe uscate * ½ cana 2/3 cana
Programul 5 Sweet 5 Sweet
*Adaugati fructele dupa semnalul sonor.
Paine cu ciocolata 680g 900g
Apa 1 cana 1+1/2 cana
Oua (batute) 1 mediu 1 mediu
Lapte praf degresat 1 lingura 1+1/2 lingura
Ulei de floarea-soarelui 1 lingura 1+1/2 lingura
Zahar ½ cana ¾ cana
Sare 1/2 lingurita 1 lingurita
Nuci (maruntite)* ¼ cana Faina alba de grau 2+1/8 cana 3 cani
Praf de cacao ½ cana ¾ cana
Drojdie cu actiune rapida 1 lingurita 1+1/2 lingurite
Programul 5 Sweet 5 Sweet
*Adaugati nucile dupa semnalul sonor.
6. Retete pentru Fastbake
Paine alba mica
Apa 270ml
Faina alba de grau 3 cani
Lapte praf degresat 2 linguri
Sare 1 lingurita
Zahar 4 linguri
Ulei de floarea-soarelui 4 linguri
Drojdie cu actiune rapida 3 lingurite
Programul 6 Fastbake
7. Retete pentru Fastbake
Paine mare alba
Apa 360ml
Faina alba de grau 4 cani
Lapte praf degresat 3 linguri
Sare 1+1/2 lingurita
19
Page 21

Zahar 5 lingurite
Ulei de floarea-soarelui 5 linguri
Drojdie cu actiune rapida 3+1/2 lingurite
Programul 7 Fastbake
8. Retete de aluat
Rulouri de paine alba
Apa 1+1/4 cana
Lapte praf degresat 1 lingura
Unt topit 2 linguri
Zahar 2 linguri
Sare 1+1/2 lingurita
Faina alba de grau 3+1/4 cani
Drojdie cu actiune rapida 1+1/2 lingurita
Programul 8 Dough
Metoda
1. Framantati si formati aluatul in 6 rulouri.
2. Puneti rulourile intr-o tava unsa cu ulei.
3. Dati pe deasupra rulourilor cu o pensula inmuiata in unt topit.
4. Acoperiti pentru 20-25 minute.
5. Lasati sa creasca pana cand se dubleaza ca marime.
6. Puneti la copt pentru aproximativ 15-20 minute la 190°C
Rulouri de paine integrala
Apa 1+1/4 cana
Lapte praf degresat 2 lingura
Unt topit 2 linguri
Miere 2 linguri
Zahar brun 1 lingura
Sare 1+1/2 lingurita
Faina integrala de grau 3+1/4 cani
Drojdie cu actiune rapida 1+1/2 lingurita
Programul 8 Dough
Metoda
Aceeasi ca cea de la rulourile de paine alba.
Chifle impletite fierbinti
Apa 1 cana
Unt topit ¼ cana
Zahar ¼ cana
Ou (batut) 1
Sare 1 lingurita
20
Page 22

Faina alba de grau 3+3/4 cani
Scortisoara 1 lingurita
Nucsoara ¼ lingurita
Stafide 1 cana
Drojdie cu actiune rapida 1+1/2 lingurita
Programul 8 Dough
Metoda
1. Divizati aluatul in 8-12 bucati. Dati forma si turtiti putin.
2. Glazurati cu ou si lapte (dar nu si crucea din mijloc).
3. Acoperiti si lasati sa creasca 30 min.
4. Coaceti la cuptor la 375°F (190°C) pentru 16-18 minute.
Blat pizza
Apa 1 cana
Unt topit 1 lingurita
Zahar 2 linguri
Sare 1 lingurita
Faina alba de grau 2+3/4 cani
Drojdie cu actiune rapida 1 lingurita
Programul 8 Dough
Metoda
1. Pre-incalziti cuptorul.
2. Formati un aluat intins si rotund. Puneti intr-o tava unsa. Ungeti putin aluatul cu
ulei.
3. Acoperiti pentru 15 minute si lasati sa creasca.
4. Adaugati toppingul dorit.
5. Coaceti la aproximativ 220 grade C pana capata o culoare aurie-maronie.
9. Retete de gem
Marmelada
Suc de la portocale 3 portocale medii
Coaja rasa de portocala 2
Zahar conservant 1 cana
Apa 1 lingura
Pectina, daca este nevoie 2 lingurite
Programul 9 Jam
Comentarii
Incalziti borcanele inainte de a le umple;
Folositi un timp extra de fierbere daca este nevoie, in functie de marimea
portocalelor si consistenta marmeladei;
Indepartati lama inainte de a turna marmelada in borcane;
21
Page 23

Nu ridicati capacul in timpul functionarii masinii;
Portocalele care trebuie folosite pentru prepararea marmeladei sunt cele de
Sevilla, dar acestea nu se gasesc decat in luna Ianuarie. Daca se folosesc alt fel
de portocale, adaugati pectina pentru intarirea gemului.
Aceasta reteta produce un borcan mediu de marmelada (400g).
Gem de zmeura si mere
Zmeura inghetata, masurata inainte de decongelare 2 cani
Bucati de mere (curatate de coaja si cotor) 1 cana
Zahar conservant 1 cana
Suc de lamaie 3 linguri
Programul 9 Jam
Comentarii
Incalziti borcanele inainte de a le umple.
Indepartati lama inainte de a turna marmelada in borcane.
Nu ridicati capacul in timpul functionarii masinii.
10. Retete de prajituri
Reteta de mix clasica
Grup ingrediente nr. 1
Unt topit ¾ cana
Esenta vanilie ¼ lingurita
Oua (batute) 3 medii
Suc de lamaie 2 lingurite
Grup ingrediente nr. 2
Faina simpla 1+5/8 cana
Praf de copt 2 lingurite
Zahar pudra 1 cana
Programul 10 Cake
Metoda
1. Amestecati ingredientele din grupul 1 intr-un bol.
2. Amestecati ingredientele din grupul 2 in alt bol.
3. Combinati cele doua compozitii pana se omogenizeaza.
4. Turnati amestecul in tava de copt.
Prajitura cu fructe asortate
Grup ingrediente 1
Unt topit ¾ cana
Esenta vanilie ¼ lingurita
Oua (batute) 3 medii
Suc de lamaie 2 lingurite
22
Page 24

Fructe uscate amestec 5/8 cana
Grup ingrediente nr. 2
Faina simpla 1+5/8 cana
Praf de copt 2 lingurite
Zahar 1 cana
Scortisoara macinata ¼ lingurita
Nucsoara macinata ¼ lingurita
Programul 10 Cake
Metoda
Urmati metoda de la reteta de mix de prajituri clasica.
11. Retete de paine pentru sandwich-uri
Paine de sandwich
680g 900g
Apa 260 ml 1+1/3 cana
Margarina moale sau unt 1+1/2 linguri 2 linguri
Sare ½ lingurita 1 lingurita
Ulei de floarea-soarelui 1+1/2 lingura 2 linguri
Zahar 3 linguri 3+1/2 linguri
Faina alba de grau 3 cani 4 cani
Drojdie cu actiune rapida ¾ lingurita 1 lingurita
Programul 11 Sandwich 11 Sandwich
23
Page 25

Program
(timp)
Tip paine
Framantare1
(min)
Dospire1
(min)
Framantare2
(min)
Dospire2
(min)
Dospire3
(min)
Copt
(min)
Total
(ore)
Tinut
la
cald
(min)
1Basic
9
20
14*
25
45
60
2:53
60
Clasica, cu
coaja
10
20
15*
25
45
65
3:00
60
2French
16
40
19*
30
50
65
3:40
60
Franzela, cu
coaja
18
40
22*
30
50
70
3:50
60
3Wholewheat
9
25
18*
35
70
55
3:32
60
Integrala, cu
coaja
10
25
20*
35
70
60
3:40
60
4Quick
7 5 8
80
1:40
60
5Sweet
10 5 20*
30
55
50
2:50
60
Dulce, cu
coaja
10 5 20*
30
55
55
5:55
60
6Ultra fast-1
12 11
35
0:58
7Ultra fast-2
9 9
40
0:58
8Dough
20
30
40 1:30
9Jam
20
15+
45+mixing
20
1:20
10Cake
10 5 20
30
35
70
2:50
60
11Sandwich
15
40
5*
25
40
50
2:55
60
Sandwich, cu
coaja
15
40
5*
25
40
55
3:00
60
12Bake
60
1:00
60
Ciclul de coacere – timpi
*Semnal sonor, ingredientele pot fi adaugate
Intrebari despre performantele masinii si mod de operare
Intrebare nr. 1
Ce ar trebui sa fac daca lama de framantare ramane in paine?
Scoateti lama cu ajutorul unor palete de plastic inainte de a felia painea. Pentru ca
lama poate fi demontata din tava, nu reprezinta o defectiune daca ramane in paine.
Intrebare nr. 2
De ce uneori painea are faina pe coaja laterala?
In unele cazuri, faina poate sa ramana neamestecata in colturile tavii de copt. Daca
se intampla acest lucru, pur si simplu acea portiune poate fi mancata sau indpartata
cu un cutit.
24
Page 26

Intrebare nr. 3
De ce nu se mixeaza aluatul? Aud motorul pornit.
S-ar putea ca tava de copt sau lama de framantat sa nu fie instalate corect.
Asigurati-va ca tava este pozitionata corect si ca a facut “click” pe fundul masinii de
facut paine.
Intrebare nr. 4
De ce nu pot folosi timerul atunci cand folosesc lapte proaspat pentru prepararea
painii?
Laptele se va altera daca ramane pentru prea mult timp neutilizat in masina.
Ingrediente proaspete precum oua si lapte nu trebuie folosite atunci cand doriti sa
amanati momentul inceperii automate a prepararii painii.
Intrebare nr. 5
De ce trebuie sa adaug ingredientele intr-o anumita ordine?
Acest lucru este necesar pentru ca masina sa amestece ingredientele in cel mai
eficient mod posibil. De asemenea, in felul acesta, drojdia nu intra in contact direct
cu lichidele, ceea ce este esential.
Intrebare nr. 6
Daca am setat masina sa aiba gata painea dimineata, de ce se aud zgomote de la
masina noaptea tarziu?
Masina trebuie sa porneasca atunci cand timpul de intarziere s-a scurt, pentru ca
painea sa fie gata la ora dorita si setata anterior. Sunetele sunt produse de motor, in
timpul framantarii painii. Este o operatiune normala, nu o defectiune.
Intrebare nr. 7
Lama este blocata in tava de copt. Dupa ce am copt paine, cum o scot?
Acest lucru se poate intampla. Lasati sa curga apa calda sau fierbinte peste lama, si
aceasta se va debloca. Daca nu se intampla acest lucru, lasati in apa calda timp de 30
de minute.
Intrebare nr. 8
Pot spala tava de copt in masina de spalat vase?
Nu. Tava de copt si lama trebuie spalate manual.
Intrebare nr. 9
Ce se intampla daca las painea coapta in masina?
E recomandat sa lasati painea timp de o ora, daca aplicati functia “keep warm”.
Daca depasiti aceasta perioada painea se poate umezi, pentru ca aburul nu are unde
sa se evapore. Scoateti si lasati sa se raceasca pe un suport de sarma.
Intrebare nr. 10
De ce a fost framantat aluatul doar partial? De ce nu a fost mixat complet?
25
Page 27

Aluatul poate fi prea greu sau prea uscat. Ingredientele pot sa fi fost introduse in
ordine gresita sau tava si lama incorect asamblate.
Intrebare nr. 11
De ce nu a crescut painea?
Se poate ca drojdia sa fi fost expirata sau sa nu fi fost adaugata deloc. De asemenea,
daca nu s-a realizat mixarea completa a ingredientelor, acest lucru se poate
intampla.
Intrebare nr. 12
De ce nu pot seta un timp mai mare de 13 ore de amanare a inceperii programului?
Care e timpul minim cu care poate fi amanat ciclul de pregatire a painii?
Timpul maxim de intarziere este de 13 ore, incluzand timpul de coacere. De ex,
setarea 1 (basic small) are un ciclu de 3:20. Acesta poate fi intarziat sa inceapa cu
maxim 9:40. Timpul minim de amanare este de 10 minute.
Intrebari despre ingrediente si retete
Intrebare nr. 13
Cand stiu ca trebuie sa adaug stafide, nuci, etc la restul compozitiei?
Se aude un semnal sonor pentru a semnala faptul ca puteti adauga fructele in timpul
celui de-al doilea ciclu de framantat.
Intrebare nr. 14
De ce painea este umeda? Ce pot face?
Umiditatea poate afecta aluatul. Adaugati inca o lingura de faina. De asemenea,
altitudinile mari pot avea acelasi efect. Scadeti cantitatea de drojdie cu ¼ lingurite si
cantitatea de zahar si/sau lapte/apa.
Intrebare nr. 15
De ce painea creste si apoi scade brusc sau crapa?
Painea se poate sa fi crescut prea mult. Pentru a reduce aceasta, reduceti cantitatea
de drojdie si/sau cresteti cantitatea de sare.
Intrebare nr. 16
Pot folosi retele mele preferate de paine (cu drojdie traditionala) in masina de
facut paine?
Da, dar va trebui sa incercati de mai multe ori pana veti obtine cantitatea optima de
ingrediente.Sa nu depasiti niciodatat cantitatea de 5 cani de ingrediente uscate in
total.
Intrebare nr. 17
Este important ca ingredientele sa fie la temperatura camerei inainte de a le
introduce in tava de copt?
Da, chiar daca amanati timpul de incepere al procesului (Apa trebuie sa aiba
26
Page 28

temperatura intre 21 si 28 grade C).
Intrebare nr. 18
De ce variaza painile in dimensiune si greutate? Painile integrale sunt intotdeauna
mai mici. Gresesc cu ceva?
Nu, este normal ca painile din faina integrala sa fie mai grele si mai mici de cat
painea clasica sau cea frantuzeasca. Faina integrala este mai grea decat cea alba,
deci nu va creste atat de mult in procesul de copt. Acelasi lucru este valabi.l pentru
painea cu fructe, ovaz, etc.
Intrebare nr. 19
Pot amesteca inainte drojdia cu apa?
Nu, drojdia trebuie tinuta uscata si pusa in tava ultima, deasupra fainii; acest lucru
este deosebit de important, mai ales in cazul in care alegeti sa amanati inceperea
procesului.
Intrebare nr. 20
De ce se formeaza o gaura la baza painii?
Gaura se formeaza datorita lamei de framantat.
ELIMINAREA DESEURILOR IN MOD RESPONSABIL FATA DE MEDIU
Poti ajuta la protejarea mediului!
Va rugam sa respectati regulamentele si legile locale: duceti echipamentele electrice
nefunctionale catre un centru de colectare al echipamentelor electrice uzate.
Importator: Asesoft Distribution
Europolis Logistic Park, Italia Street, 1-7, Chaijna, Ilfov, Romania
Tel: +4021 256 00 86, www.heinner.com
27
Page 29
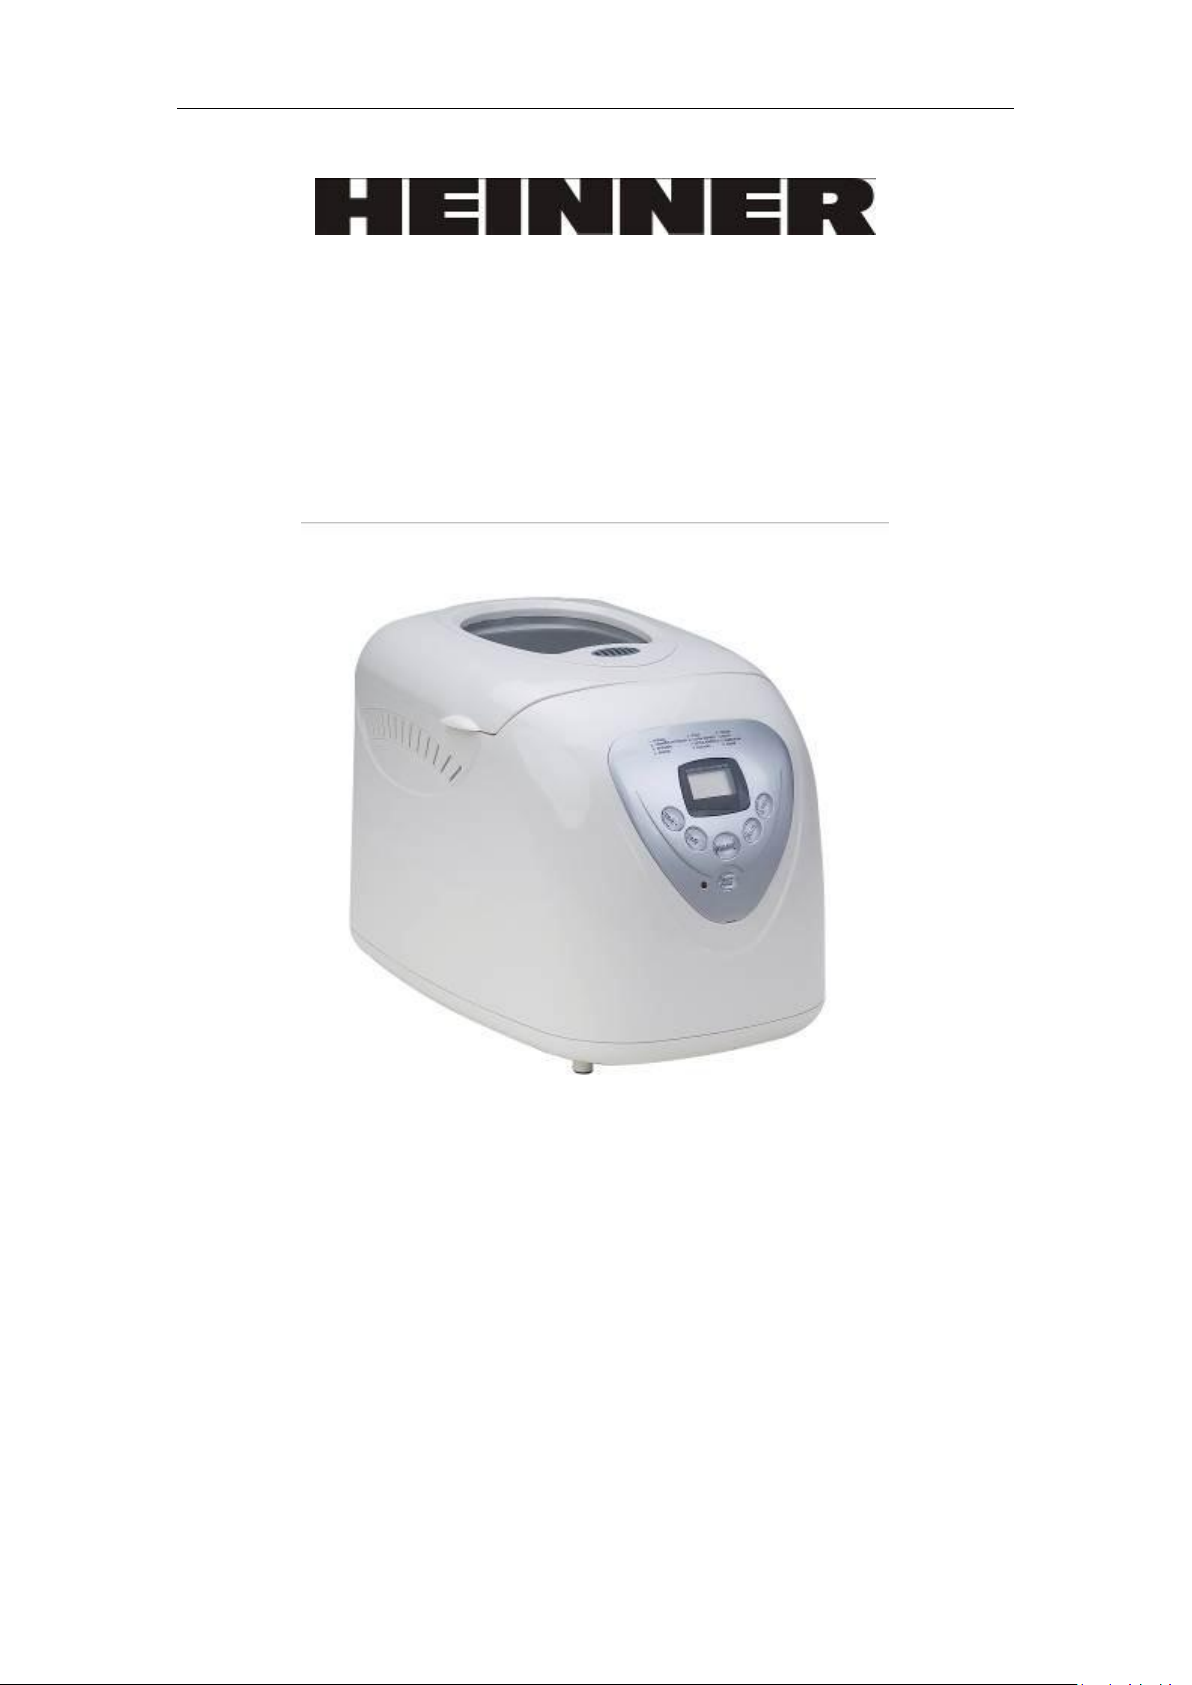
BREAD MAKER
BreadExpress 950
Voltage : 220-240V~50Hz
Power700W
Please read this instruction manual careful before use it
General Safety Instructions
28
Page 30

The use of any electrical appliance requires the following of basic common sense
safety rules.
Primarily there is danger of personal injury and secondly the danger of damage the
property and the appliance. These are indicated in the text by the following two
conventions:
WARNING: Danger of personal injury
IMPORTANT: Damage to the appliance
In addition we offer the following essential safety advice.
Location
• Always locate your appliance away from the edge of a worktop.
• Ensure that the appliance is used on a firm, flat surface.
• Do not use outdoors.
Mains lead
• The mains lead should reach from the socket to the base unit without
straining the connections.
• Do not let the mains lead hang over the edge of a worktop where a child
could reach it.
• Do not let the lead run across an open space e.g. between a low socket and
table.
• Do not let the lead run across a cooker or toaster or other hot area which
might damage the cable.
Your safety
• WARNING: Do not touch hot surfaces. Use over mitts or oven gloves when
removing the hot bread pan. Do not cover the steam vent openings under any
circumstances.
• WARNING: Avoid contact with moving parts.
• To protect against electrical shock, do not immerse cord or plug in water or
other liquid.
• Extreme caution must be observed when moving an appliance with hot
contents.
• Do not use Breadmaker for storage purposes nor insert any utensils, as they
may create a fire or electric shock hazard.
• Do not use use the appliance with wet or moist hands.
Children
Never allow a child to operate this appliance. Children are vulnerable in the kitchen
particularly when unsupervised and if appliances are being used or cooking is being
carried out. Teach children to be aware of dangers in the kitchen, warm them of the
dangers of reaching up to areas where they cannot see properly or should not be
reaching.
Other safety considerations
• If the mains lead of this appliance is damaged do not use it.
• The use of accessory attachments not recommended by the manufacturer
may cause damage to the Breadmaker.
• Do not place the appliance on or near heat sources such as gas or electric
stove ovens, or burners.
• To avoid damaging the appliance, do not place the baking pan or any object
on the top of the unit.
29
Page 31

• Do not clean with scouring pads. Do not wash the baking pan, kneading blade
measuring cup or spoon in a dishwasher.
• Keep the appliance and the cable away from heat, direct sunlight, moisture,
sharp edges and the like.
• The baking pan must be in place prior to switching on the appliance.
• Always remove the plug from the socket whenever the machine is not in use,
when attaching accessory parts, cleaning the machine or whenever a disturbance
occurs. Pull on the plug, not the cable.
Before first use
Before first use, please take a few minutes to read this instruction book and to find
a place to keep it handy for reference. Pay particular attention to the safety
instructions.
1 Carefully unpack the breadmaker and remove all packaging materials.
2 Remove any dust that may have accumulated during packing
3 Wipe the baking pan, kneading blade and outside surface of the breadmaker
with a clean, damp cloth. The bread pan is non-stick coated. Do not use scouring
pads or any abrasives on any part of the breadmaker.
4 For first time use use oil, butter or margerine to grease the bread pan and
bake empty for about 10 minutes (select the Extrabake program).
5 Clean once more.
6 Place the kneading blade on the axle in the baking pan.
In manufacture it is necessary to lightly grease some parts of the appliance. This
may result in the unit emitting some vapour when first used, this is normal.
Electrical requirements
Check that the voltage on the rating plate of your appliance corresponds with your
house electricity supply which must be A.C. (Alternating Current). If the socket
outlets in your home are not suitable for the plug supplied with this appliance, the
plug should be removed and the appropriate one fitted.
Note: The plug removed from the mains lead, if severed, must be destroyed as a
plug with bared flexible cord is hazardous if engaged into a live socket outlet.
WARNING: THIS APPLIANCE MUST BE EARTHED.
Should the fuse in the 13 amp plug require changing a 13 amp BS1362 fuse must be
fitted.
About this breadmaker
• A Fruit and Nut beep signals when extra ingredients can be added so
they don't get chopped by the kneading blade.
• There is a crusty setting to create that extra crusty loaf (certain
programs only).
About the recipes
The recipes in this booklet have been thoroughly tested to ensure best results. On
the same time it is recommended to respect the indication from special bread floor
package.
• Always add ingredients in the order they are listed in the recipe.
• Accurate measuring of ingredients is vital.
Do not use large amounts.
30
Page 32
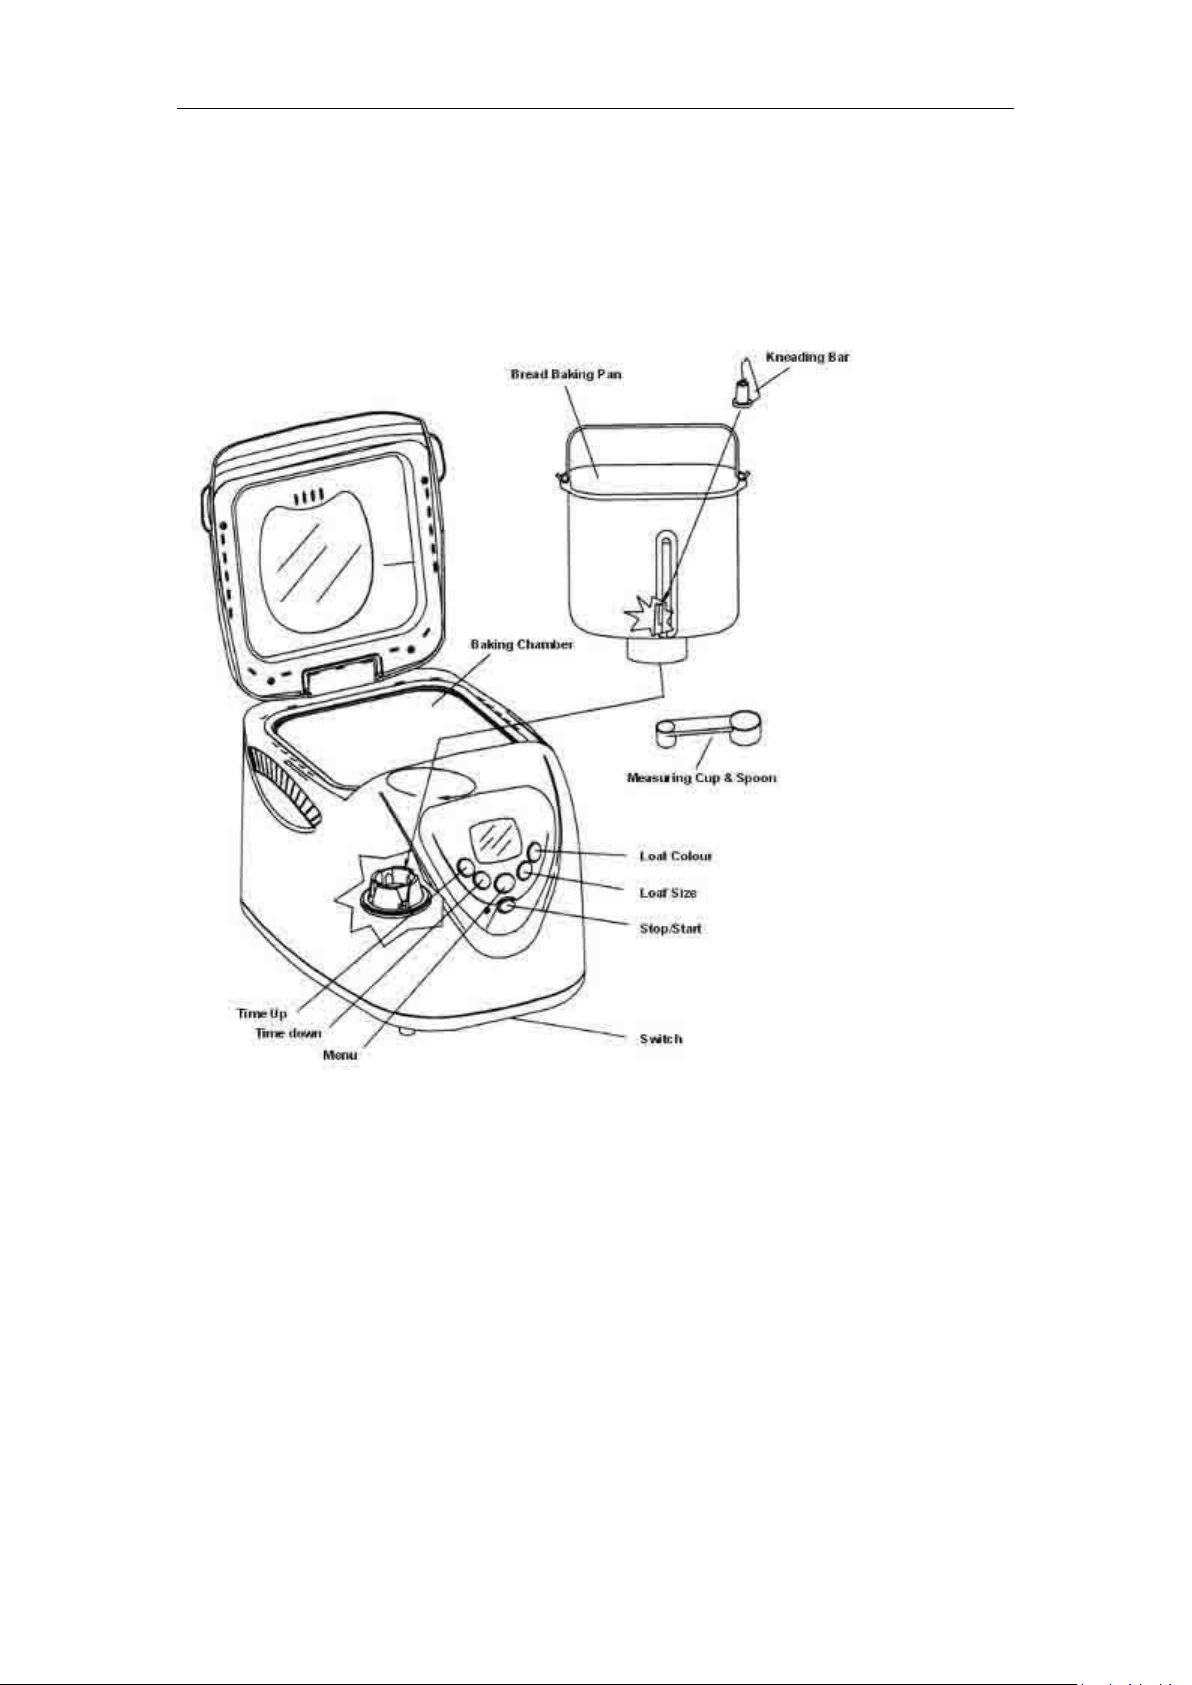
Components
Control panel buttons, display & functions
Display window
Color: Shows browning level selected
Size: Shows weight selected
Program: Shows the program number
Shows time left before completion
(3:20, for example: 3 hours and 20minutes; 0:20 is for 20 minutes)
Show temperature warning - see 'Troubleshooting'
31
Page 33

Timer delay buttons
Use to delay the start of bread for selecting crust colour from light, making (all
programs except Fastbake) medium or dark (certain programs only)
Start
Press to start for approx 1 second, a beep program sounds and the colon (:) flashes
and the program starts
Stop
Press to stop for approx 2 seconds. When the breadmaker is switched on beep
sounds to confirm
Menu button
For choosing the bread making from the list 1 to 12
Loaf size button
The loaf size defaults to crusty. For loaves (2lb and 2.5lbs) press loaf size once.
Program descriptions
1 Basic white (3:00 and 2:53)
For white and brown bread. Also for flavored breads with added herbs and
raisins.
2 French (3:50 and 3:40)
For the baking of light weight bread such as French bread which has a crisper
crust and light texture.
3 Whole-wheat (3:40 and 3:32)
For the baking of bread containing significant amounts of whole-wheat. This
setting has longer preheat time to allow the grain to soak up the water and expand.
It is not advised to use the delay timer as this can produce poor results.
4 Quick (1:40)
For white bread that is required in a shorter time. Bread baked on this setting
is usually smaller with a dense texture.
5 Sweet (2:55 and 2:50)
For the baking of sweet type bread which gives a crisper crust than on basic
setting. The crisper crust is produced by the sugar 'burning'.
6 Ultra fast - 1 (00:58)
Kneading rise and baking 2LB bread in a short time.
7 Ultra fast - 2 (00:58)
Kneading rise and baking 2.5LB bread in a short time.
8 Dough (1:30)
This setting only makes the dough and will not bake the final bread. Remove
the dough and shape it to make bread rolls, pizza, etc. Any dough can be prepared
on this setting. Do not exceed 1kg (2lb) of combined ingredients.
9 Jam (1:20)
32
Page 34

Use this setting for making jam from fresh fruits and marmalade. Do not
increase the quantity or allow the recipe to boil over the pan into baking chamber.
Should this happen, stop the machine immediately. Remove the pan carefully, allow
cooling a little and cleaning thoroughly.
10 Cake (2:50)
This setting will mix ingredients and then bake for a preset time. It is required to
mix two groups of ingredients in bowls before adding to the bread maker (see cake
recipes).
11 Sandwich (3:00 and 2:55)
This is to bake light textured bread but with a softer and thicker crust.
12 Extra bake (1:00)
This setting is bake only and can be used to increase the baking time on selected
settings. This is especially useful to help 'set' jams and marmalade. When started the
default time is 1 hour (1:00) minimum and counts down in 10 minute intervals. You
will have to manually switch this off by pressing the stop button, when you have
completed the Extra bake process. It is advised that you check the condition of the
bread or jam after 10 minutes and at 10 minute intervals. Pressing ▲ increases the
time in increments of 10 minutes. When selecting Extra bake straight after another
program, if the message H:HH is displayed, open the lid, remove the pan and allow
to cool for 10 minutes. When cool, replace the baking pan and its contents, set
program and press start.
Using your bread maker
1. Take out the pan
Open the lid and remove the pan by lifting the handle, turning anti- clockwise
and lifting out. Place on the work surface. It is important that the pan is filled with
ingredients outside the machine so that any accidental spillage is not ignited by the
heating elements.
2. Attach the blade
Attach the kneading blade to the shaft, by pushing on.
3. Measure ingredients
Measure the ingredients required and add them all into the pan in the order
listed. See later section 'Measuring your ingredients').
• When adding the yeast to the baking pan, take care that the yeast does
not come into contact with the water or any other liquid, as it will start to activate
immediately.
• Use tepid water 21-28°C.
4. Put pan back in
33
Page 35

Place the baking pan back in the bread maker, turning clockwise to lock into
place. Close the lid.
5. Plug in
Plug into the power supply. The bread maker will automatically be set to
basic bread menu and normal time.
• Every time you press a button you will hear a beep to confirm.
6. Select program
Choose the desired setting from the list by pressing the Menu button.
7. Select weight
Press Loaf size button to choose between crusty and small/large. The setting
defaults to crusty when the bread maker is switched on.
8. Select color
Choose desired crust color by pressing color button.
9. Select the delay time
If you wish the bread to be ready later, set the time delay now, as described in
next section.
10. Start
Press the Start Stop button to start the machine. The remaining time will count
down in one minute increments.
11. Progress
The breadmaker will automatically proceed through the programmed stages as
shown in the 'Baking cycle times' section. If the breadmaker has a program selected
that has a second kneading process, beeps sound to inform that fruits and/or nuts
may be added.
• It is possible that steam will escape through the vents during baking, this is
normal.
12. Finish
When the program is completed and the bread is baked the display shows 0:00
and the beeper will sound.
13. Keep warm
The keep warm function will circulate hot air for a further 60 minutes on most
settings (see 'Baking cycle times' section). For best results, remove the baking pan
and loaf within this period or when the initial program is completed. 10 beeps will be
heard when the keep warm period is finished.
34
Page 36

14. Remove the food
Press Stop. Open the lid.
WARNING: Use oven gloves when removing the baking pan (talking care as it is
very hot).
15. Turn out the bread
Allow the bread to cool in the pan for 15 minutes, then turn the pan upside down
and tap the bread from the pan onto a rack to cool. Fill the pan with warm water
immediately to prevent the blade from sticking to the shaft.
• Occasionally the kneading blade will stay in the loaf. Wait until the loaf is cool
and then remove the blade with a wooden or plastic utensil to avoid damage to the
non-stick surface.
16. Always unplug the appliance after use.
• Do not open the lid whilst the bread maker is operating as this will affect the
quality of the bread, especially its ability to rise properly. Only open the lid when the
recipe needs you to add additional ingredients, see recipes.
Room temperature note
The bread maker will work well in a wide range of temperatures, but there could be
a difference in loaf size between a very warm room and a very cold room. We
recommend the room temperature should be between 15°C and 34°C.
Using the timer
Use the timer when you want the bread ready later, or in the morning. A maximum
of 13 hours can be set. Check if function is available by consulting 'Baking cycle
times' section. Do not use this function with recipes that use perishable ingredients
such as eggs, fresh milk, sour cream, or cheese.
Decide when you want the bread to be ready and calculate the difference in time
between now and then. For example, if you want a loaf at 8am, and it is now 7:30
p.m., the difference is 12 ½ hours.
Enter this time by pressing 'Time T' and 'Time S' buttons. Arrows will move time up
or down in 10-minute increments. After you have pressed Start, the colon will flash.
If you have selected the wrong time press stop for 2 seconds. The timer will go back
to the program time, repeat step 1 and 2.
The timer delay is up to a maximum of 13 hours. This is when the bread will be ready
to be removed from the machine, see page 8 item 14 'Remove the food'.
Beeper
The beeper sounds :
- when pressing any button;
- during the second kneading cycle of certain programs to indicate that cereals,
fruit, nuts or other ingredients can be added;
- when the program finishes;
35
Page 37

- when keep warm finishes.
Power interruption
After a brief power supply failure:
- If the program has not yet reached rise 1, press start and the program will
continue using the automatic repeat function;
- If it has gone beyond this point the process must be started from the very
beginning. The ingredients will have to be discarded and you must start again
with fresh ingredients.
Slicing and storing bread
For best results place bread on a wire rack and allow to cool for 15-30 minutes
before slicing. Use an electric knife or a sharp knife with a serrated blade for even
slices.
Store unused bread tightly covered in a plastic bag at room temperature for up to
three days. If weather is hot and humid, store in the refrigerator overnight.
For longer storage (up to one month), place bread in a tightly covered container
in the freezer. If you store the bread in the refrigerator, leave it out to bring it to
room temperature before serving. Since homemade bread has no preservatives it
tends to dry out and become stale faster than commercially made bread.
Leftover slightly hardened bread may be cut into 1.3 cm (half inch) or 2.5 cm (1
inch) cubes and used in favourite recipes to make croutons, bread pudding or
stuffing.
Care and cleaning
Caution : To prevent electrical shock, unplug the unit before cleaning.
Walt until the bread maker has cooled.
IMPORTANT : Do not immerse or splash either the body or lid in any liquid as this
may cause damage and/or electric shock.
Exterior : Wipe the lid and outer body of the unit with a damp cloth or slightly
dampened sponge.
Interior : Use a damp cloth or sponge to wipe the interior of the bread maker.
Baking pan : Clean the baking pan with warm water, soap is not necessary. Avoid
scratching the non-stick surface. Dry it thoroughly before placing it back in the
baking chamber.
- Do not wash the baking pan, measuring cup, spoon or kneading blades in
the dishwasher.
- Do not soak the baking pan for long periods as this could interfere with the
working of the drive shaft.
- If the paddle becomes stuck in the bread pan, pour hot water over it and
36
Page 38

allow to soak for 30 minutes. This will enable you to remove the paddle
more easily.
- Be sure the appliance is completely cooled before storing away.
- Do not use any of these when cleaning : paint thinner, benzene, steel wool
pads, polishing powder, chemical dust cloth
Special care for the non-stick finish
Avoid damaging the coating. Do not use metal utensils such as spatulas, knives or
forks.
The coating may change colour after long use, this is only caused by moisture and
steam and will not affect the performance of the unit or quality of your bread.
The hole in the center of the kneading blade should be cleaned, then add a drop of
cooking oil and replace it on the spindle in the baking pan. This will prevent sticking
of the blade.
Keep all air vents and openings clear of dust.
Storing the unit
Be sure to dry all parts before storing including wiping any moisture from the
viewing window. Close the lid and do not store anything on top of the lid.
Note: DO NOT use abrasive or strong household cleaners as these will damage the
non-stick surface of the Bread Maker.
Know your ingredients - Understanding baking
It is often said that cooking is an art relying on the creativity of the chef while baking
bread is much more of a science. This means that the process of combining flour,
water and yeast results in a reaction that produces bread. You have to remember
that when the ingredients combine with each other they produce a specific result.
Read the following information carefully to gain a better understanding of the
importance that each ingredient plays in the bread making process.
Important note on flours
Flours, while visibly similar, can be very different by virtue of how they were grown,
milled, stored, etc. You may find that you will have to experiment with different
brands of flour to help you make that perfect loaf. Storage is also very important, as
all flours should be kept in an airtight container.
All-purpose flour/plain flour
All-purpose flour is a blend of refined hard and soft wheat flours especially suitable
for making cake. This type of flour should be used for recipes in the cake/quick bread
section.
37
Page 39

Strong white flour/bread flour
Bread flour is a high gluten/protein flour that has been treated with conditioners
that give dough a greater suitability for kneading. Bread flour typically has a higher
gluten concentration than all-purpose flour, however, depending on different milling
practices, this may vary. Strong plain flour or bread flour is recommended for use
with this bread maker.
Whole wheat flour/whole meal flour
Whole wheat flour/whole meal flour is milled from the entire wheat kernel which
contains the bran and germ and makes it heavier and richer in nutrients than while
flour. Breads made with this flour are usually smaller and heavier than white loaves.
To overcome this whole wheat flour/whole meal flour can be mixed with Bread flour
or strong plain flour to produce a high light textured bread.
Self-rising flour
Self-rising flour contains unnecessary leavening ingredients that will interfere with
bread and cake making. It is not recommended for use.
Bran
Bran (unprocessed) & Wheat Germ are the coarse outer portions of the wheat or rye
grains separated from flour by sifting or bolting. They are often added in small
quantities to bread for nutritional enrichment, heartless and flavor. They are also
used to enhance the texture of bread.
Oatmeal
Oatmeal comes from rolled or steel-cut oats. They are used primarily to enhance
flavor and texture.
Other ingredients
Yeasts (active dry yeast)
Yeast through a fermentation process produces gas (carbon dioxide) necessary to
make the bread rise. Yeast must be able to feed on sugar and flour carbohydrates in
order to produce this gas. Fast action granular yeast is used in all recipes that call for
yeast. There are basically three different types of yeast available, fresh, traditional
dry active and fast action. It is recommended that fast action yeast be used. Fresh
or compressed cake yeast is not recommended as they will produce poor results.
Store yeast according to manufacturer’s instructions. Ensure your yeast is fresh by
checking its expiration date. Once a package or can of yeast is opened it is important
that the remaining contents be immediately resealed and refrigerated as soon as
possible for future use. Often bread or dough, which fails to rise, is due to stale yeast
being used. The following test can be used to determine whether your yeast is stale
and inactive :
Place half a cup of lukewarm water into a small bowl or cup.
38
Page 40

Stir 1 tsp. of sugar into the water then sprinkle 2 tsp. of yeast over the
surface.
Place bowl or cup in a warm area and allow to sit for 10 minutes undisturbed.
The mixture should foam and produce a strong yeast aroma. If this does not
occur, discard mixture and start again with another packet of dried yeast.
Sugar
Sugar is important for the color and flavor of breads. It is also food for the yeast as it
is part of the fermentation process. Artificial sweeteners cannot be used as a
substitute for sugar as the yeast will not react properly with them.
Salt
Salt is necessary to balance the flavor of breads and cakes, as well as for the crust
color that develops during baking. Salt also limits the growth of yeast so the amounts
shown in the recipes should not be increased. For dietary reasons it may be reduced,
however, your baking may suffer.
Liquids/milk
Liquids such as milk or a combination of powdered milk and water can be used
when making bread. Milk will improve flavor provide a velvety texture and soften
the crust, while water alone will produce a crispier crust. Some liquids call for juice
(orange, apple, etc) to be added as a flavor enhancer. Note: For most recipes we
suggest the use of dry skimmed milk.
Eggs - Eggs add richness and a velvety texture to bread dough’s and cakes.
Sunflower oil
‘Shortens’ or tenderizes the texture of yeast breads. Butter or margarine can be
used as a substitute. If butter or margarine is used direct from the refrigerator it
should be softened for easier blending during the mixing cycle.
Baking powder
Baking powder is a raising agent used in cakes. This type of raising agent does not
require rising time before baking as the chemical reaction works when liquid
ingredients are added.
Bicarbonate of soda
Bicarbonate of soda is another raising agent not to be confused or substituted for
baking powder. It also does not require rising time before baking as the chemical
reaction works during the baking process.
39
Page 41

Measuring ingredients
The key and most important step when using your bread maker is measuring your
ingredients precisely and accurately. It is extremely important to measure each
liquid and dry ingredient properly or it could result in a poor or unacceptable baking
result. The ingredients must also be added into the baking pan in the order that they
are given in each recipe. Liquid and dry measurements are done somewhat
differently and are as follows:
Liquid measurements
Use the cup provided. When reading amounts, the measuring cup must be placed
on a horizontal flat surface and viewed at eye level (not on an angle). The liquid level
line must be aligned to the mark of measurement. A 'guesstimate' is not good
enough as it could throw out the critical balance of the recipe.
Dry measurements
Dry measurements (especially flours) must be done using the measuring cup
provided. The measuring cup is based on the American standard 8 fluid oz cup British cup is 10 fluid oz. Dry measuring must be done by gently spooning ingredients
into the measuring cup and then once filled, leveling off with a knife. Scooping or
tapping a measuring cup will pack the ingredients and you will end up with more
than is required. This extra amount could affect the balance of the recipe. Do not sift
the flour, unless stated.
When measuring small amounts of dry or liquid ingredients (i.e. yeast, sugar, salt,
powered milk, honey, molasses) the measuring spoon which is provided must be
used. Measurements must be level, not heaped as this small difference could throw
out the critical balance of the recipe.
Your breadmaker produces delicious baked goods with ease. This machine requires
only that you carefully follow the recipe instructions. In basic cooking, normally 'a
pinch of this and a dash of that' is fine but not for breadmakers. Using an automatic
breadmaker requires you accurately measure each ingredient for best results.
Ingredient temperatures
All ingredients, including the machine and pan, and especially liquids (water or
milk), should be warmed to room temperature 21 C (70 F). If ingredients are too
cold, below 10 C (50 F), they will not activate the yeast. Extremely hot liquids, above
40 C (104 F), may kill the yeast.
Creating your own yeast breads
With the bread maker, even the most inexperienced baker can achieve the satisfying
experience of baking a loaf of bread. All of the mystery and hard work is gone. Inside
this talented machine with an electronic brain, the dough is mixed, kneaded, proofed
and baked without you being present. The automatic bread maker can also just
40
Page 42

prepare the dough and when it's ready, you shape, allow to rise and bake in a
conventional oven. The recipes on the following pages are 'tailored' for this bread
maker. Each recipe features ingredients that best compliment a particular loaf of
bread, and each was tested in our machines. It is extremely important not to exceed
the amounts of flour specified in each of the replaces or else it could result in
unsatisfactory baking performance. When creating your own yeast bread recipes or
baking an old favorite, use the recipes in this cookbook as a guide for converting
portions from your recipe to your bread maker.
Special glazes to enhance your bread.
Egg glaze
Beat 1 large egg and 1 tablespoon of water together, brush generously. Note: apply
only to doughs before baking.
Melted butter crust
Brush melted butter over just baked bread for a softer tender crust.
Milk glass
For a softer, shiny crust, brush just baked bread with milk or cream.
Sweet icing glaze
Mix 1 cup sifted icing sugar with 1 to 2 tablespoons of milk to make a glaze
consistency and drizzle over raisin bread or sweet breads.
Poppy/Sesame/Caraway seed/Oatmeal
Sprinkle your choice of these seeds generously over just glazed bread.
Other tips
Place all recipe ingredients into the baking pan so that yeast is not touching
any liquid. After completing the process of making dough in your bread
maker, typically when letting dough rise outside the bread maker, allow 30
minutes or until dough doubles in size. Dough should be lightly greased and
covered with grease proof paper and a dry towel. It should be placed in a
warm area free from drafts.
Humidity can cause problems, therefore humidity and high altitudes require
adjustments. For high humidity, add an extra tablespoon of flour if
consistency is not right. For high altitudes, decrease yeast amount by
approximately ¼ teaspoon, and decrease sugar and/or water or milk slightly.
The DOUGH setting is great for mixing, kneading and proofing (allowing
dough to rise) richer dough like croissant doughs. Use the automatic bread
maker to prepare this dough so all you need to do is shape and bake it
according to your recipe.
When recipes call for a 'lightly floured surface', use about 1 to 2 tablespoons
41
Page 43

of flour on the surface. You may want to lightly flour your fingers or rolling
pin for easy dough manipulation.
When you let dough 'rest' and 'rise' according to a recipe, place it in a warm,
draught-free area. If the dough does not double in size, it may not produce a
tender product.
If the dough you are rolling shrinks back, let it rest covered for a few minutes
before rolling again.
Dough may be wrapped in plastic and stored in a freezer for later use. Bring
the dough to room temperature before using.
After 5 minutes of kneading, open the lid and check the dough consistency.
The dough should form a soft, smooth ball. If too dry, add liquid. If too wet,
add flour (½ to tablespoon at a time).
Recipes
All of the following recipes use this same general method :
1. Measure ingredients into baking pan.
2. Use tepid water 21-28
3. Insert baking pan securely into unit, close lid.
4. Select appropriate bread setting.
5. Push start button.
6. When bread is done, remove pan from unit using even mitts.
7. Remove bread from baking pan (and kneading blade from bread if
necessary).
8. Allow to cool before slicing.
1、Recips for basic breads
Basic white bread
1.5lb 2lb
water 1+1/8cup 1+1/2cups
Skimmed milk powder 2+1/2tbsp 4tbsp
Sunflower oil 2+1/2 tbsp 4 tbsp
Suger 2+1/4 tbsp 3 tbsp
Salt 1+1/4tsp 2tsp
Strong white bread flour 3cups 4cups
Fast action yeast 1+1/4tsp 1+1/4tsp
Use setting 1Basic 1Basic
Softgrain bread
1.5 lb 2 lb
Water 1+1/8 cup 1+1/2cup
Skimmed milk powder 2+1/2 tbsp 4 tbsp
Sunflower oil 2+1/2 tbsp 4 tbsp
Sugar 2+1/4 tbsp 3 tbsp
42
Page 44

Salt 1+1/4 tsp 2 tsp
Strong white bread flour 3 cups 4 cups
Fast action yeast 1+1/4 tsp 1+1/4 tsp
Use setting 1 Basic 1 Basic
Brown loaf
1.5 lb 2 lb
Water 1 cup 1+1/2 cup
Skimmed milk powder 2 tbsp 3 tbsp
Sunflower oil 2 tbsp 3 tbsp
Sugar 2+1/2 tbsp 4 tbsp
Salt 1+1/4 tsp 2 tsp
Strong white bread flour 3 cups 4 cups
Fast action yeast 1+1/4 tsp 1+1/2 tsp
Use setting 1 Basic 1 Basic
Italian herb bread
1.5 lb 2 lb
Water 1+1/8 cup 1+1/2 cup
Skimmed milk powder 2+1/2 tbsp 3 tbsp
Sunflower oil 2+1/2 tbsp 3 tbsp
Sugar 2+1/4 tbsp 2+1/2 tbsp
Salt 1+1/2 tsp 2 tsp
Strong white bread flour 3 cups 4 cups
Dried marjoram 1+1/2 tsp 2 tsp
Dried basil 1+1/2 tsp 2 tsp
Dried thyme 1+1/2 tsp 1+1/2 tsp
Fast action yeast 1+1/4 tsp 1+1/4 tsp
Use setting 1 Basic 1 Basic
Cheese & onion bread
1.5lb 2lb
Water 1cup 1+1/4cup
Skimmed milk powder 2tbsp 2+1/2tbs
Sugar 1tbsp 2tbsp
Salt 1/2tsp 1tsp
Onion granules 1+1/2tbsp 2tbsp
Mature grated cheddar cheese 1cup 1+1/2cups
Strong white bread flour 3cups 4cups
Fast action yeast 1+1/2tsp 1+3/4tsp
Use setting 1 Basic 1 Basic
43
Page 45

Raisin bread
1.5lb 2lb
Water 1+1/4cup 1+1/2cup
Skimmed milk powder 3tbsp 4tbsp
Sunflower oil 3tbsp 4tbsp
Sugar 2tbsp 3tbsp
Salt 1+1/2tsp 2 tsp
Cinnamon 3/4tsp 1tsp
Strong white bread flour 1+1/2tsp 2tsp
Fast action yeast 1+1/2tsp 2tsp
Raisins* 5/8cup 3/4cup
Using setting 1Basic 1Basic
*Add the fruit when beeper sounds.
Sun-dried tomato loaf
1.5lb 2lb
Water 1 cup 1+1/3 cups
Skimmed milk powder 2+1/2tbsp 3tbsp
Sunflower oil 2+1/4 tbsp 3 tbsp
Sugar 1+1/4 tbsp 1+1/2 tbsp
Salt 1+1/4 tsp 1+1/2 tsp
Died mixed herbs 1+1/2 tsp 2 tsp
Strong white bread flour 3 cups 4 cups
Fast action yeast 1+1/4 tsp 1+1/2 tsp
Sun-dried tomatoes 3/8 cup 1/2 cup
Using setting 1 Basic 1 Basic
Malt loaf
1.5lb 2lb
Water 1cup 1+1/4cup
Salt 1 tsp 1 tsp
Sunflower oil 2 tsp 3 tbsp
Black treacle 1+1/2 tbsp 2+1/2 tbsp
Malt extract 2 tbsp 3 tbsp
Plain flour 3cups 4cups
Fast action yeast 1 tsp 1+1/4 tsp
Sultanas 1/2 cup 3/4 cup
Using setting 1 Basic 1 Basic
*Add the fruit when the beeper sounds.
44
Page 46

2、Recipes for french breads
French bread
1.5 lb 2 lb
Water 1 cup 1+1/4 cup
Skimmed milk powder 2 tbsp 2+1/2 tbsp
Sugar 1 tbsp 1+1/4 tbsp
Salt 1 tsp 1+1/4 tsp
Sunflower oil 1 tbsp 1+1/2 tbsp
Strong white bread flour 3 cup 4 cup
Fast action yeast 1 tsp 1+1/4 tsp
Using setting 2 French 2 French
3、Recipes for whole wheat bread
Whole wheat bread
1.5lb 2lb
Water 1+1/8cup 1+5/8 cup
Skimmed milk powder 1+1/2 tbsp 3 tbsp
Sunflower oil 2 tbsp 3 tbsp
Brown sugar 2+1/2 tbsp 3+1/2 tbsp
Salt 1+1/4 tsp 1+1/2 tsp
Strong wholemeal bread flour 3cups 4cups
Fast action yeast 1+1/4 tsp 1+1/2 tsp
Vitamin C tablet (crushed) 1x100mg 1x100mg
Using setting 3 Whole wheat
Granary loaf
1.5 lb 2 lb
Water 1+1/8cup 1+5/8cup
Skimmed milk powder 2 tbsp 3 tbsp
Sunflower oil 2 tbsp 3 tbsp
Soft brown sugar 2+1/2 tbsp 5 tbsp
Salt 1+1/4 tsp 2 tsp
Granary malted brown bread flour 3cup 4cup
Fast action yeast 1+1/4 tsp 1 tsp
Vitamin C tablet - 1x100mg
Using setting 3 Whole wheat
4、Recipes for quick setting
Banana and nut bread
45
Page 47

Ingredients group1
Butter(melted) 2tbsp
Milk 1tbsp
Mashed banana 1cup
Egg 1
Walnuts(chopped) 1/2cup
Lemon 1tsp
Ingredients group 2
Plain flour 1+1/2cup
Bicarboante of soda 1/2tsp
Baking powder 1/4tsp
Sugar 1/2cup
Salt 1/4tsp
Using setting 4Quick
Method
1. Mix group1 together in a separate bowl.
2. Mix group2 together in a second bowl.
3. Pour mixture into bread pan.
Porridge oats bread
Milk 1cup
Egg(beaten) 2
Sunflower oil 1/2tsp
Golden syrup 2tbsp
Sugar 1/4cup
Salt 1tsp
Plain flour 2cup
Porridge powder 1cup
Baking powder 1/2tsp
Bicarboante of soda 1/2tsp
Using setting 4Basic
5、 Sweet
Mixed fruit loaf
1.5lb 2lb
Water 1+1/8cup 1+1/3cup
Skimmed milk powder 2+1/2tbsp 3tbsp
Sunflower oil 2+1/2tbsp 3tbsp
Sugar 1/4tbsp 1/3tbsp
Salt 1+1/4tsp 1+1/2tsp
Strong white bread flour 3cup 4cup
Nutmeg 3/4tsp 1tsp
46
Page 48

Fast action yeast 1+1/4tsp 1+1/2tsp
Dried mixed fruit 1/2 cup 2/3cup
Using setting 5Sweet 5Sweet
*Add the fruit when the beeper sounds.
Chocolate bread
1.5lb 2lb
Water 1cup 1+1/2cup
Egg (beaten) 1medium 1medium
Skimmed milk powder 1tbsp 1+1/2tbsp
Sunflower oil 1tbsp 1+1/2tbsp
Sugar 1/2cup 3/4cup
Salt 1/2tsp 1tsp
Walnuts(shopped) 1/4cup -
Strong white bread flour 2+1/8cup 3cup
Cocoa powder 1/2cup 3/4cup
Fast action yeast 1tsp 1+1/2tsp
Using setting 5Sweet 5Sweet
*Add the walnuts when the beeper sounds.
6、Recipes for FastbakeI
Fastbake small white
Water 270ml
Strong white bread flour 3cup
Skimmed milk powder 2tbsp
Salt 1tsp
Sugar 4tsp
Sunflower oil 4tbsp
Fast action yeast 3tsp
Using setting 6 Fastbake
7、Recipes for FastbakeII
Fastbake large white
Water 360ml
Strong white bread flour 4cup
Skimmed milk powder 3tbsp
Salt 1+1/2tsp
Sugar 5tsp
Sunflower oil 5tbsp
Fast action yeast 3+1/2tsp
Using setting 7 Fastbake
8、Recipes for dough
47
Page 49

White bread rolls
Water 1+1/4cup
Skimmed milk powder 1tbsp
Butter(melted) 2tbsp
Sugar 2tbsp
Salt 1+1/2tsp
Strong white bread flour 3+1/4cup
Fast action yeast 1+1/2tsp
Using setting 8Dough
Method
1. Knead and shape the dough into 6 rolls.
2. Place on a greased baking tray.
3. Brush lightly with melted butter.
4. Cover for 20-25 minutes.
5. Allow to rise until they are double in size and glaze.
6. Bake for approx 15-20 minutes at 190℃。
Whole wheat bread rolls
Water 1+1/4cup
Skimmed milk powder 2tbsp
Butter(melted) 2tbsp
Honey 2tbsp
Brown Sugar 1tbsp
Salt 1+1/2tsp
Strong whole wheat bread flour 3+1/4cup
Fast action yeast 1+1/2tsp
Using setting 8Dough
Method
Follow method given for white rolls.
Hot cross buns
Water 1cup
Butter(melted) 1/4cup
Sugar 1/4cup
Egg(beaten) 1
Salt 1tsp
Strong white bread flour 3+3/4cup
Cinnamon 1tsp
Nutmeg 1/4tsp
Raisins 1cup
Using setting 8Dough
48
Page 50

Method
1. Divide into 8-12 pieces, Shape and flatten slightly.
2. Glaze with egg and milk (but not cross).
3. Cover and allow to rise for 30 minutes.
4. Bake in oven 375℉(190℃)for 16-18 minutes.
Pizza base
Water 1cup
Butter(melted) 1tbsp
Sugar 2tbsp
Salt 1tsp
Strong white bread flour 2+3/4cup
Fast action yeast 1tsp
Using setting 8Dough
Method
1. Pre-heat oven.
2. Shape into a flat round shape. Place on a greased baking tray. Brush lightly with oil.
3. Cover for 15 minutes and allow to rise.
4. Add your desired topping.
5. Bake at approx 200℃ until golden brown.
9、Recipes for jams
Marmalade
Juice from oranges 3medium
Rind of oranges grated 2
Preserving sugar 1cup
Water 1tbsp
Pectin if needed 2tsp
Using setting 9Jam
Comments
· Warm the jars before filling.
· Use extra bake time if needed according to set of the marmalade and the size of the oranges.
·Remove the paddle with tongs before pouring the marmalade into the jars.
·Do not lift the lid during mixing.
·Seville oranges should be used for marmalade but are only available in January.
·If using other oranges pectin will be needed to firm up the marmalade.
·This recipe will fill approximately 1 medium(400g) jar.
Raspberry and apple jam
Raspberries, frozen, measured before defrosting 2cup
Chopped baking apples (peeled and cored) 1cup
49
Page 51

Preserving sugar 1cup
Lemon juice 3tsp
Using setting 9Jam
Comments
·Warm the jars before filling.
·Use tongs to remove the paddle before pouring the jam into prepared jars.
·Do not open lid during mixing.
10、recipes for cakes
Standard cake mix
Ingredients group1
Butter(melted) 3/4cup
Vanilla essence 1/4tsp
Egg(beaten) 3 medium
Lemon juice 2tsp
Ingredients group2
Plain flour 1+5/8cup
Baking powder 2tsp
Caster sugar 1cup
Using setting 10Cake
Method
1. Mix group 1 together in a separate bowl.
2. Sieve group 2 together in a second bowl.
3. Combine group 1 and group 2 together until mixed.
4. Pour mixture into bread pan.
Mixed fruit cake
Ingredients group1
Butter(melted) 3/4cup
Vanilla essence 1/4tsp
Egg 3
Lemon juice 2tsp
Dried mixed fruit 5/8cup
Ingredients group2
Plain flour 1+5/8cup
Baking powder 2tsp
Sugar 1cup
Ground cinnamon 1/4tsp
Ground nutmeg 1/4tsp
50
Page 52

Using setting 10Cake
Method
Follow method given for standard cake mix.
11、Recipes for sandwich breads
Sandwich loaf
1.5lb 2lb
Water 260ml 1+1/3cups
Butter (melted) 1+1/2tbsp 2tbsp
Salt 1/2tsp 1tsp
Sunflower oil 1+1/2tbsp 2tbsp
Sugar 3tbsp 3+1/2tbsp
Strong white bread flour 3 cup 4cup
Fast action yeast 3/4tsp 1tsp
Using setting 11Sandwich
Softgrain sandwich loaf
1.5lb 2lb
Water 260ml 1+1/3cups
Butter(melted) 1+1/2tbsp 2tbsp
Salt 1/2tsp 1tsp
Sunflower oil 1+1/2tbsp 2tbsp
Sugar 3tbsp 3+1/2tbsp
Strong white bread flour 3cup 4cup
Fast action yeast 3/4tsp 1tsp
Using setting 11 Sandwich
51
Page 53

Backing cycles
Program no.
(timp)
Bread type
Knead1
(min)
Rise1
(min)
Knead2
(min)
Rise2
(min)
Rise3
(min)
Bake
(min)
Total
(hours)
Keep
Warm
(min)
1Basic 1.5lb
9
20
14*
25
45
60
2:53
60
Basic 2 lb
10
20
15*
25
45
65
3:00
60
2French 1.5lb
16
40
19*
30
50
65
3:40
60
French 2lb
18
40
22*
30
50
70
3:50
60
3Wholewheat
1.5lb
9
25
18*
35
70
55
3:32
60
Wholewheat 2lb
10
25
20*
35
70
60
3:40
60
4Quick
7 5 8
80
1:40
60
5Sweet 1.5lb
10 5 20*
30
55
50
2:50
60
Sweet 2lb
10 5 20*
30
55
55
5:55
60
6Ultra fast-1
12 11
35
0:58
7Ultra fast-2
9 9
40
0:58
8Dough
20
30
40 1:30
9Jam
20
15+
45+mixing
20
1:20
10Cake
10 5 20
30
35
70
2:50
60
11Sandwich 1.5lb
15
40
5*
25
40
50
2:55
60
Sandwich 2lb
15
40
5*
25
40
55
3:00
60
12Bake
60
1:00
60
*ten beeps, ingredients can be added
Question about general performance and operation
Question 1
What should I do if the kneading blade comes out with the bread?
Remove it with a pair of plastic tongs before slicing the bread. Since the blade can
be disconnected from the pan, it is not a malfunction if it comes out in your bread.
Question 2
Why does my bread sometimes have some flour on the side crust?
In some cases, the flour mix may remain on the comers of the baking pan. When this
happens, it usually can be eaten or simply trim off that portion of the outer crust
with a sharp knife.
Question 3
Why isn't the dough mixing? I can hear the motor running.
The Kneading Blade or baking pan may not be inserted property. Make sure the pan
52
Page 54

is facing the right-way and that it has 'clicked' and seated into the bottom of the
bread maker.
Question 4
How long does it take to make bread?
Timings for each setting are outlined earlier.
Question 5
Why Can't I use the timer when baking with fresh milk?
The milk will spoil if left sitting in the machine too long. Fresh ingredients such as
eggs and milk should never be used with the delayed timer feature.
Question 6
Why do I have to add the ingredients in a certain order?
This allows the bread maker to mix the ingredients in the most efficient manner
possible. It also serves to keep the yeast from combining with the liquid before the
dough is started to mix which is essential on the time delay.
Question 7
When setting the timer for morning, why does the machine make
sounds late at night?
The machine must start operation when the time delay reaches the start time of the
program so that the bread will be ready. These sounds are made by the motor when
kneading the dough. It is a normal operation not a malfunction.
Question 8
The kneading blade is stuck in the bread pan. After baking how do I
get it out?
The kneading blade may 'stick' in place after baking. Running warm or hot water over
the blade should loosen it enough to be removed. If still stuck, soak in hot water for
about 30 minutes.
Question 9
Can I wash the baking pan in the dishwasher?
No. The Baking pan and kneading blade must be washed by hand.
Question 10
What will happen if I leave the finished bread in the baking pan?
Whilst still in the breadmaker for the first hour after baking is complete the bread
'keeps warm' to prevent it becoming 'soggy'. Leaving the bread in the breadmaker
after the keep warm period may result in a 'soggy' loaf of bread as excess steam
(moisture) would not be able to escape. Remove and allow to cool on a wire rack
after baking to prevent this.
Question 11
Why did the dough only partially mix? Why didn't it mix completely?
The dough may be too heavy or dry. Also the kneading blade or baking pan may not
be inserted properly. Ingredients may have been added in the wrong order.
53
Page 55

Question 12
Why didn't the bread rise?
The yeast could be bad past it's sell by date or possibly no yeast was added at all.
Also, if the mixing was not complete rising problems could develop.
Question 13
Why can't the delayed finish be set for more than 13 hours? What is
the minimum time a cycle may be delayed?
The maximum length of delay is 13 hours including the total cycle time. For excample.
Setting 1 (basic small) has a cycle time of 3:20. This start is delayed by a maximum of
9:40. The minimum length of delay for each setting is 10 minutes. The delay clock
increases and decreases in increments of 10 minutes.
Questions about ingredients and recipes
Question 14
How do I know when to add raisins, nuts, etc. to the bread?
There is a beeper tone to signal that you may add raisins, nuts etc. during the second
kneading cycle. Note: See 'Baking cycle times' chart for 'Add nuts & raisins' time.
In some cases, ingredients can be broken up during the initial kneading cycle. Each
recipe indicates the best time to add fruit and nuts to the dough.
Question 15
How come my bread comes out too moist? What can I do?
Humidity may affect the dough. Add an extra tablespoon of flour. Also, high altitiude
may have the same effect. Decrease the amount of yeast by ¼ teaspoon and
decrease the sugar and/or water/milk slightly.
Question 16
Why do I get air bubbles at the top of the bread?
This can be caused by using too much yeast. Decrease the yeast by ¼ tsp.
Question 17
Why does my bread rise and then collapse or crater?
The bread may be rising too much. To reduce the rate of rising reduce the amount of
yeast and/or increase the amount of salt.
Question 18
Can I use my favourite bread recipes (traditional yeast bread) in my bread
machine?
Yes, but you will need to experiment to get the right proportion of ingredients.
Become familiar with the unit and make several loaves of bread before you begin
experimenting. Never exceed a total amount of 5 cups dry ingredients (that includes
the total amount of flour, oats, oatmeal, bran). Use the recipes in this book to help
54
Page 56

Note: There is a preheat at the beginning of the
wheat cycle. It is normal for there to be no dough
blade activity during this time.
determine the ratio to dry ingredients to liquid and amounts of yeast, sugar, salt and
oil/butter/margarine to use. We advise creating your own bread recipes using the
basic mode, then progress to the others using the Banking cycle times chart as a
guide.
Question 19
Is it important for ingredients to be at room temperature before adding them to
the baking pan?
Yes, even when the delay timer is being used. (Water must be between 21 C and 28
C).
Question 20
Why do the loaves vary in height and weight? wheat/whole wheat breads are
always shorter. Something wrong?
No. It is normal for Whole Wheat and Wholemeal breads to be shorter and denser
than Basic or French breads. Whole Wheat and Wholemeal flour are heavier than
white bread flour therefore they don't rise as much during the bread making process.
This is alos true for bread containing fruit, nuts oats and bran.
Question 21
Can I premix the yeast with water?
No, the yeast must be kept dry and put into the baking pan last, above the flour, this
is especially important when the delay timer is being used.
Question 22
Why is there a large hold in the base of the bread?
This hole has been created by the kneading blade. Sometimes this hole is larger than
normal. This is because the dough has rested to the side of the blade after the
second kneading cycle - normal with bread makers. You could position the dough
evently in the base of the pan.
Trouble Shooting Guide
PROBLEM
The Bread Maker Machine Will Not Start
Cause 1: The appliance is not plugged in correctly to power outlet.
Solutions: Always plug appliance correctly into 230-240 volt power outlet.
PROBLEM
The Bread Maker Does Not Bake the Bread
Cause: The DOUGH program was selected.
Solution: Choose the appropriate program for the recipe you have chosen..
PROBLEM
Bread Collapses When Bread
55
Page 57

Cause1: Salt was reduced or omitted.
Solution: Measure salt carefully using standard measuring spoons that have been
leveled off.
Cause 2: Too much liquid was used.
Solution: If dough is too wet the bread will collapse. In future reduce water or liquid
by at least 1 tablespoon and up to 4 tablespoons Let the machine knead too dry, add
additional water 1 tablespoon at a time, up to 4 tablespoons.
Cause 3: Warm weather, high humidity or overheated liquid all speed up yeast action
which may cause the dough to rise too fast and the bread to collapse during baking.
Solution: If room temperature is over 27 centigrade degrees try using chilled water.
Try reducing the amount of yeast used by 1/4 teaspoon.
PROBLEM
The Bread or Dough Did Not Rise Enough
Cause 1: Not enough sugar was used.
Solution: Measure sugar carefully. Do not reduce amount of sugar or sugar
sweeteners in a recipe. DO not use artificial sweeteners.
Cause 2: Yeast did not activate.
Solution: Make sure yeast is fresh, check “use-by” date.
Yeast should be placed in a little hollow well made in the flour.
Cause 3: Too much salt inhibited rising.
Solution: Use amount specified in recipe and measure carefully.
Cause 4: High altitude.
Solution: For every 1,000 feet over 3,000 feet above sea level, reduce the water by 1
tablespoon up to 4 tablespoons maximum.
PROBLEM
The Loaf of Bread is Small or Out of Shape
Cause: Too much flour was used.
Solution: Measure flour carefully. Spoon flour into measuring cup being careful not to
pack down. Level cup off with a knife.
PROBLEM
Bread Rose too high, Touching the Lid
Cause 1: Weather very hot and/or humid.
Solution: Do not bake bread in the machine until the weather is cooler and/or less
humid.
Cause 2: Too much or wrong type of yeast used.
Solution: Measure yeast carefully. Active dry yeast is recommended for all recipes in
this booklet.
PROBLEM
Bread Did Not Bake Thoroughly
Solution: Do not open lid during final rising and baking cycle.
Cause 1: Lid was opened during baking.
Cause 2: Ingredients were not measured correctly.
Solution: Measure carefully, remembering to level off all cup and spoon
measurements of dry ingredients.
56
Page 58
Note: DO NOT use abrasive or strong household cleaners as these will
damage the non-stick surface of the Bread Maker.
Cause 3: Machine is being used in a very cold room.
Solution: Only use appliance in warm location.
Cleaning and Storage
Disconnect the machine from power outer and allow it cool down completely before
you start to clean it.
1. Clean the inside of the machine with a damp, slightly soapy dish cloth.
Wipe over again with a clean damp cloth to remove any of the soapy
residue.
2. To clean the Bread Pan. Rub the inside and outside of the pan with a
damp cloth. Kneading Bar: If the kneading bar is difficult to remove from
the axle, soak the bread pan in water beforehand.
3. Lid and window: Clean the lid and machine inside outside with a slightly
damp cloth.
Environment friendly disposal
You can help protect the environment!
Please remember to respect the local regulations: hand in the non-working electrical
equipment’s to an appropriate waste disposal center.
Importer: Asesoft Distribution
Europolis Logistic Park, Italia Street, 1-7, Chaijna, Ilfov, Romania
Tel: +4021 256 00 86, www.heinner.com, www.asesoftdistribution.com
57
Page 59
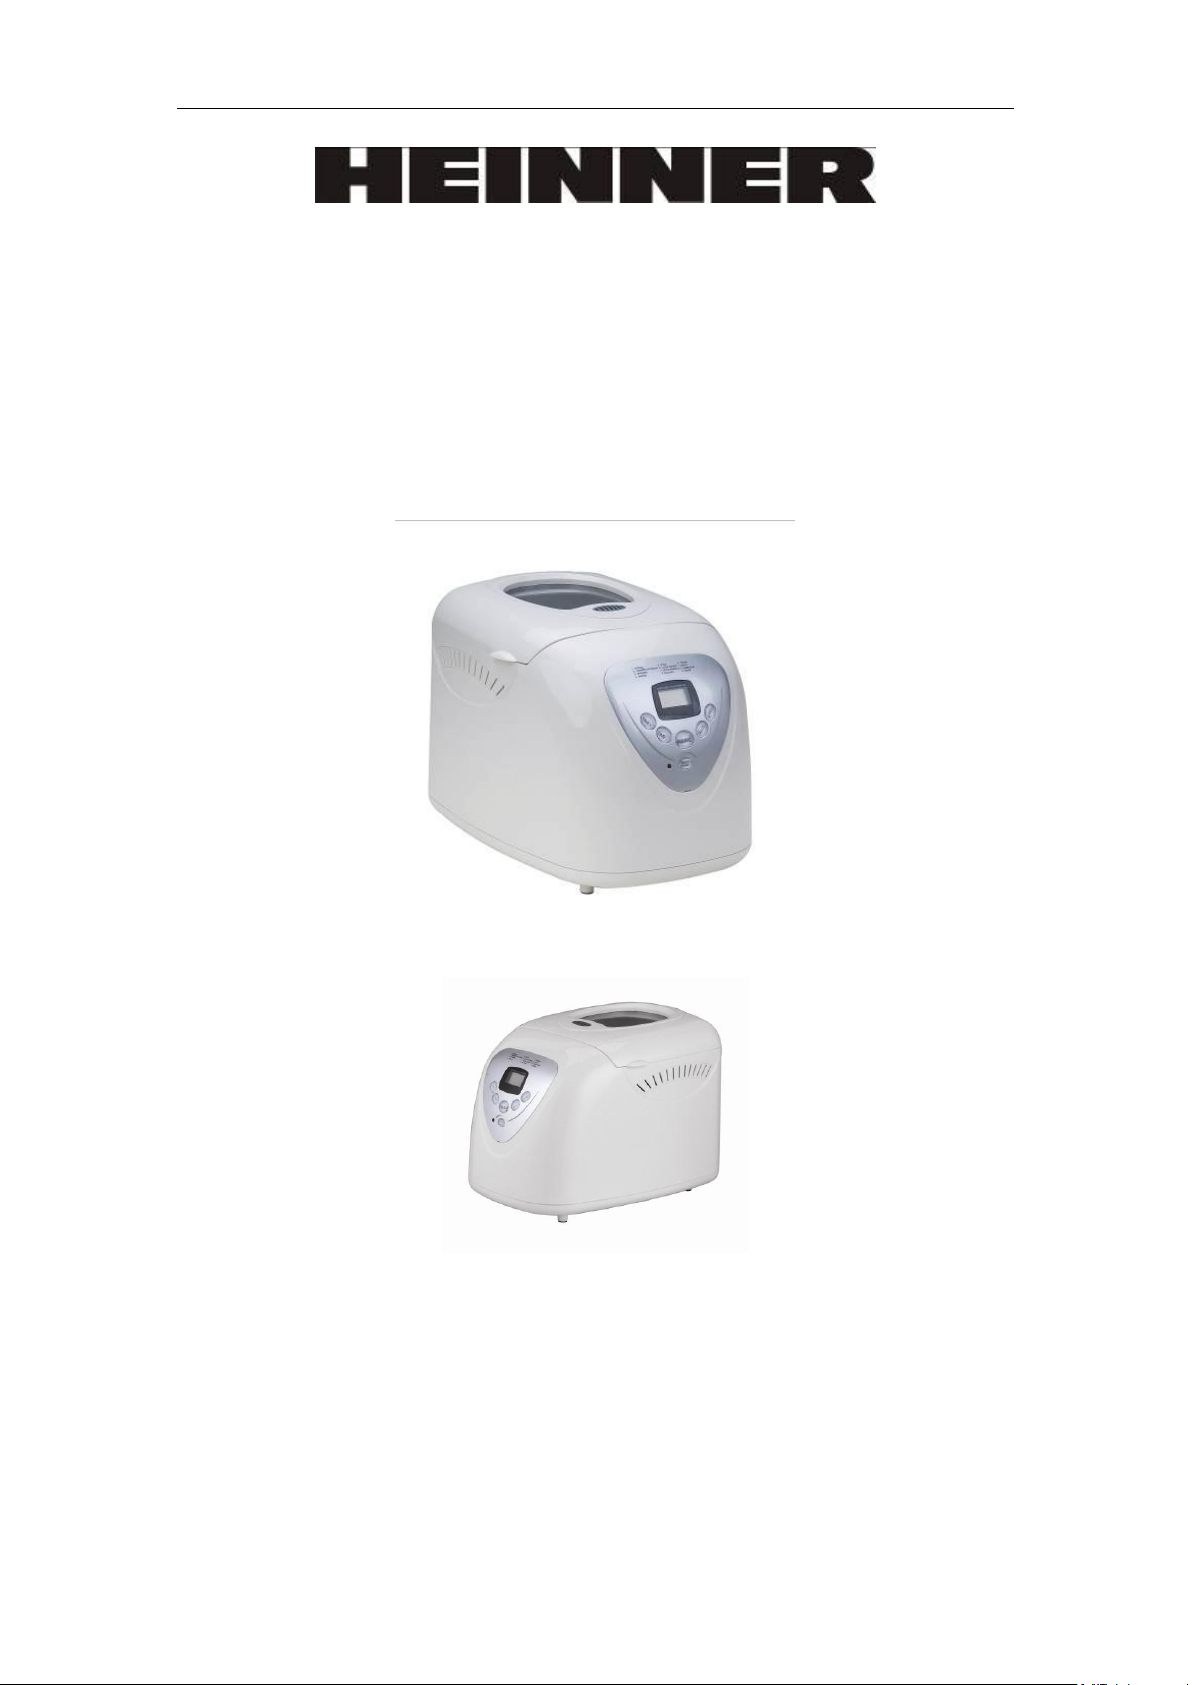
Инструкции за употреба
Хлебопекарна
BreadExpress 950
Захранване: 220-240V~50Hz
Мощност: 700W
58
Page 60

Преди употреба прочетете внимателно упътването!
Общи инструкции за безопасност
Употребата на който и да е електрически уред изисква спазването на следните минимални
мерки за безопасност. Има риск от наранявания и повреда на уреда.
Тези рискове са указани в упътването като следните:
ВНИМАНИЕ: Риск от наранявания
ВАЖНО: Повреда на уреда
Предлагаме ви следните съвети за безопасност:
Местоположение
Винаги поставяйте уреда далеч от края на работният плот.
Уверете се, че уреда се използва на равна и стабилна повърхност.
Да не се използва на открито.
Захранващият кабел
Кабела трябва да бъде опънат от контакта към хлебопекарната без да има възли и без да бъде
подгънат.
Не оставяйте кабела да виси от края на работният плот, където някое дете може да го достигне.
Не оставяйте кабела на открито място, като например, между нисък контакт и маса.
Не оставяйте кабела на печка, тостер или на друга гореща повърхност, която би могла да го
повреди.
Безопасност
ВНИМАНИЕ: Не докосвайте горещите повърхности на уреда. Използвайте ръкохватки, когато
вадите тавата с хляба. Не покриваите изходите за отвеждане на парата.
ВНИМАНИЕ: Избягвайте контакта с подвижните части.
За да се предпазите от токов удар, не потапяйте кабела или щепсела във вода или друга
течност.
Бъдете много внимателни при местенето на уреда с горещо съдържание.
Не използвайте хлебопекарната за съхранение на други предмети и не поставяйте кухненски
прибори, тъй като има опасност от токов удар или пожар.
Не използвайте уреда ако ръцете ви са мокри или влажни.
Децата
Не оставяйте децата да използват уреда. Децата са уязвими в кухнята, особено когато не са
наблюдавани, когато домакинските уреди функционират или приготвените продукти са
извадени.
Инструктирайте децата относно потенциалните опасности в кухнята и ги предупредете за риска
при докосване на повърхностите, до които не би трябвало да имат достъп.
Други инструкции за безопасност
Не използвайте уреда ако кабелът е повреден.
Употребата на непрепоръчани от производителя части, може да повреди хлебопекарната.
Не поставяйте уреда на или в близост до топлинни източници, като печка, фурна, газов котлон,
т.н.
За да избегнете повредата на уреда, не поставяйте никаква тава или друг предмет отгоре на
хлебопекарната.
Не почиствайте с гъби или кърпи. Не мийте тавата за печене, бъркалката, мерителната кана или
лъжицата в миялната машина.
Дръжте уреда и кабела далеч от топлина, слънце, влага, остри ръбове и други подобни.
Тавата трябва да бъде поставена правилно преди включването на уреда.
Винаги вадете кабела от контакта, когато не използвате уреда, при допир на частите, при
почистване или когато се появят дефекти. Издърпайте за щекера, не за кабела.
Преди първата употреба
...............................................................................................................
59
Page 61

Преди първата употреба, моля да прочетете това ръководство и да го запазите за бъдещи справки.
Обърнете специално внимание на инструкциите за безопасност.
1 Извадете внимателно уреда от опаковката.
2 Избършете прахта, която може да се е събрала.
3 Избършете тавата за печене, бъркалката и външната повърхност с влажна и чиста кърпа. Тавата
е обработена, така че да не се залепват продуктите. Не използвйте никакви телени гъби по уреда
и отделните части.
4 При първата употреба, използвайте малко олио, масло или маргарин, за да намажете тавата и
сложете празната тава на печене за 10 минути (изберете програмата Extrabake).
5 Почистете тавата още веднъж.
6 Поставете бъркалката в задвижващият мост.
Има определени части на пекарната, които трябва да бъдат намазани с мазнина при печене. Това
може да доведе до Това може да доведе до отделяне на пара при първата употреба, което е
напълно нормално.
Електрически характеристики
Проверете напрежението на уреда дали съвпада с това на електрическата ви мрежа. Ако
контактите от дома ви не съвпадат с щекера, той трябва да бъде сменен.
Бележка: Ако изваденият от контакта щекер е повреден, трябва да бъде сменен и унищожен,
защото предтавлява опасност от токов удар.
ВНИМАНИЕ: Уреда има нужда от заземен контакт.
Ако защитата от 13 ампера трябва да бъде сменена, трябва да се използва защита BS1362 от 13
амп.
Относно хлебопекарната
Звуков сигнал “Fruit and Nut” сигнализира момента в който продуктите могат да бъдат
добавени, за да не бъдат разбити от острието.
Има настройката extra-crust (по-дебела коричка), за получаването на по-дебела кора на хляба
(само за някои програми).
Относно рецептите
Рецептите в това ръководство са ориентировъчни. Желателно е да се консултирате и с указанията
от кутията със специално брашно за хлебпекрни.
Винаги добавяйте продуктите по указаният ред.
Стриктното премерване на продуктите е от съществено значение. Не използвайте големи
количества.
60
Page 62
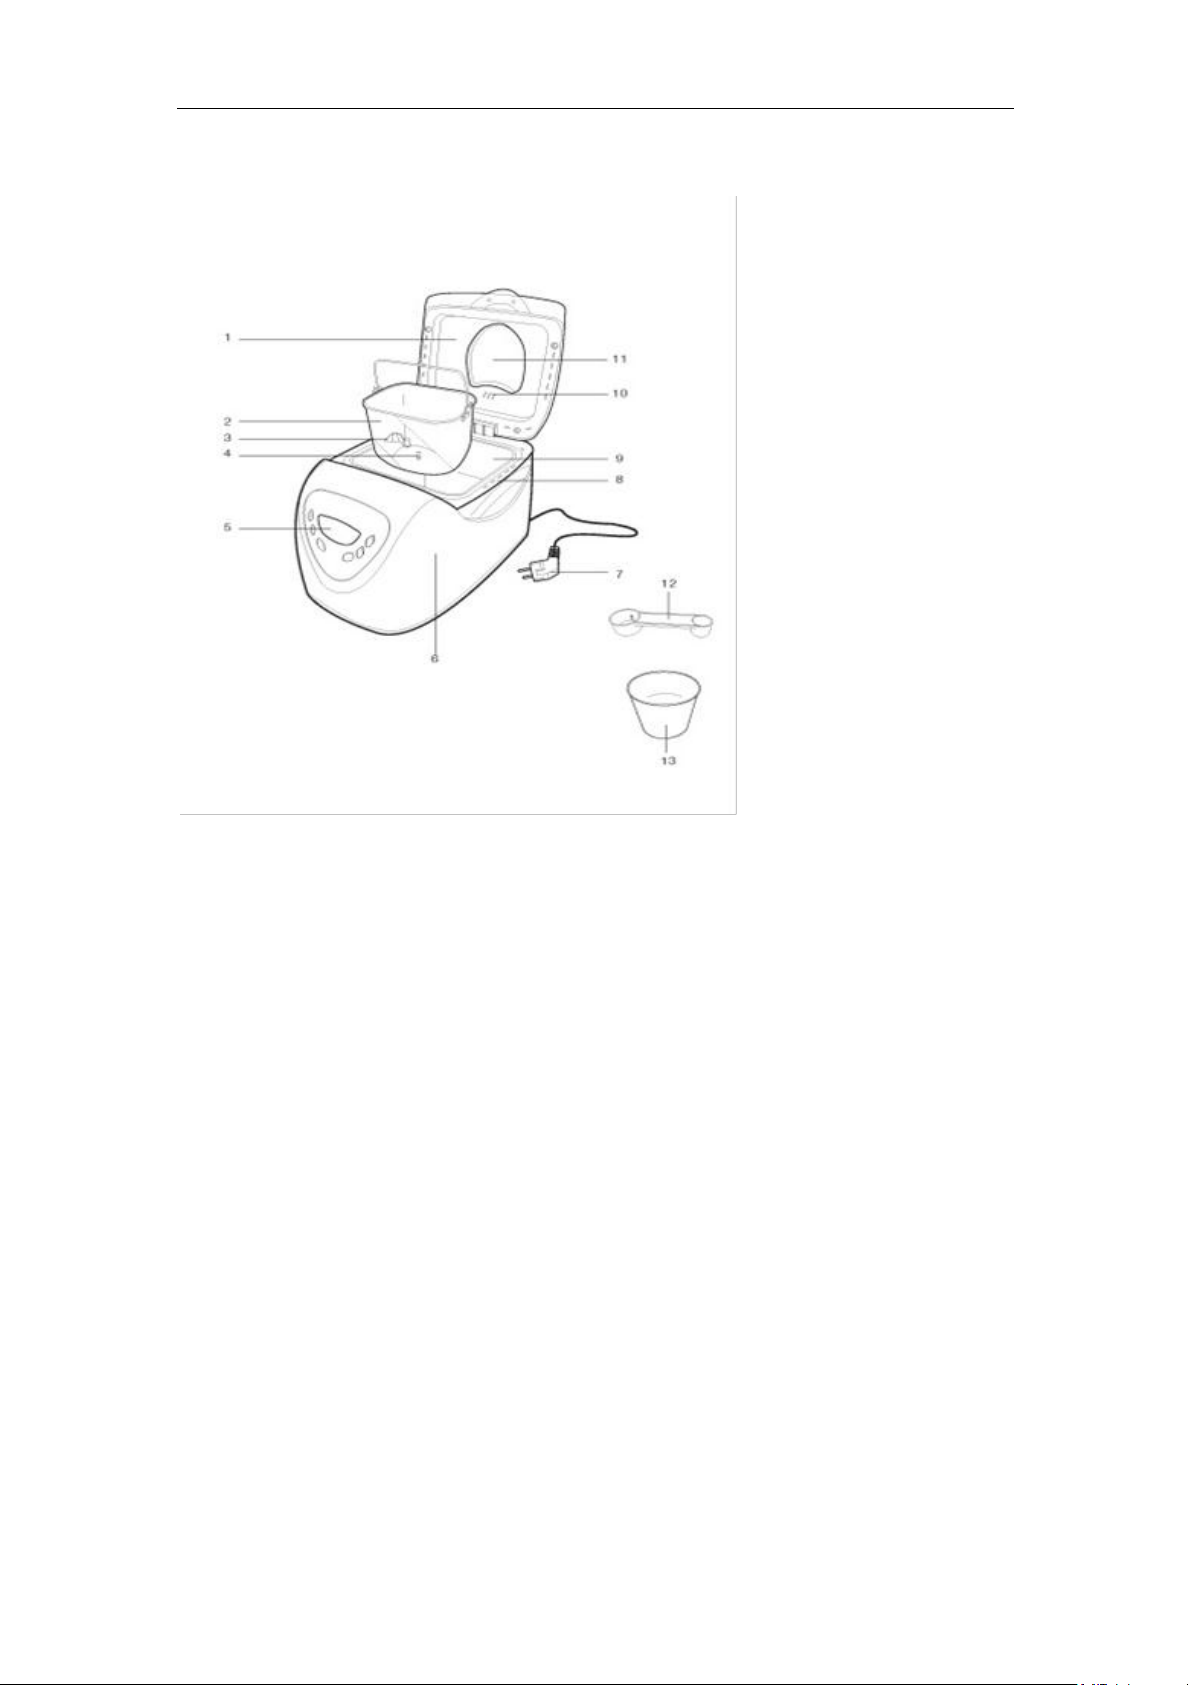
Съставни части
1. Капак
2. Тава за печене
3. Бъркалка
4. Задвижващ мост
5. Контролен панел с LCD дисплей
6. Въшен корпус
7. Кабел
8. Вентилационни отвори
9. Отделение за печене
10. Отвори за пара
11. Прозорче за наблюдение
12. Мерителна лъжица
13. Мерителна купа
Бутони на контролното пано, екран и функции
Екран
Color: Показва степента на опичане
Size: Показва избраното тегло
Select: Показва номера на програмата
Показва останалото време до края на програмата
(3:20, например означава 3 часа и 20 минути; 0:20 означава 20 минути)
Показва предупреждение за температурата – виж раздел “Разрешаване на проблеми”.
Бутони настройка на времето
Използвайте за забавяне на старта на програмата за печене на хляб.
61
Page 63

Start
Задръжте натиснат бутона за около една минута, докато се чуе бип и на екрана се покаже
сигнализацията за старта на програмата.
Stop
Натиснете бутона, за около 2 секунди, докато се чуе бип за потвърждение.
Бутон за меню
Избора се една от 12-те програми за печене на хляб.
Бутон за избор на количество
Количеството е настроено за хляб с кора. За един хляб с нормални размери (2lb=950g и
2.5lbs=1125g) натиснете бутона веднъж.
Описание на програмите
1. Обикновен бял (3:00 и 2:53)
За бял и черен хляб. Също така, за хляб с различни аромати, с подправки и стафиди.
2. Френски (3:50 и 3:40)
За лек хляб като френският, който има по-твърда кора, и лека консистенция.
3. Пълнозърнес (3:40 и 3:32)
За печене на пълнозърнест хляб.
Времето за загряване е по-дълго на тази настройка, за да позволи на зърното да попие
вода и да набъбне.
4. Бърз (1:40)
За бързо приготвяне на бял хляб. Хляба приготвен на тази програма е по-малък и с
по-плътна текстура.
5. Сладък(2:55 и 2:50)
За приготвяне на сладък хляб, care are o crusta mai groasa si mai crocanta, produsa de
arderea zaharului.
6. Fastbake - I (00:58)
Приготвяне на 950 гр. хляб за кратко време.
7. Fastbake - II(00:58)
Приготвяне на 1125 гр. хляб за кратко време.
8. Тесто (1:30)
Тази настройка е за приготвяне на тестото, но не приключва печенето. Приготвеното тесто
може да бъде използван за оформяне на понички, блат за пица, т.н. С тази настройка
може да бъде приготвен всякакъв тип тесто. Не използвайте повече от 1 кг. съставки.
9. Сладка (1:20)
Използвайте тази настройка за приготвяне на пресни плодови сладка или мармалад. Не
превишавайте количеството на продуктите и не оставяйте да извира извън тавата. Ако
това се случи, спрете уреда. Извадете внимателно тавата, оставете я да изстине и
почистете.
10. Сладкиши (2:50)
С тази настройка, уреда ще смеси съставките, след което ще изпече сместта за
предварително зададено време. Необходимо е да смесите отделно в две купи съставките
(виж рецептите), преди да ги поставите отново в тавата.
62
Page 64

11. Сандвичи (3:00 и 2:55)
За приготвяне на хляб с лека текстура, но с по-мека и по-дебела коричка.
12. Печене (1:00)
Тази настройка е само за печене и може да бъде използвана за увеличаване на времето
за печене за избраните настройки. Полезна е за приготвянето на сладкото и мармалада.
При включването на тези настройки, времето е мин. един час и се брои на интервали от
десет минути. Тогава когато използвате процеса Extrabake, ще трябва да спрете ръчно
настройката , натискайки бутона стоп. Препоръчително е да се проверява състоянието на
сладкото и на хляба през 10 минути. Натискайки ▲, ще се увеличи времето на интервали
по 10 минути. Ако се появи на екрана съобщението H:HH при избор на опцията
Extrabake, махнете капака и извадете тавата за няколко минути и я оставете да изстине.
След като тавата е изстинала, сложете на място тавата, продуктите за новия хляб,
настройте програмата и натиснете старт.
Употреба на хлебопекарната
1. Извадете тавата
Повдигнете капака и извадете тавата, завъртайки в обратна посока на часовниковата стрелка.
Сложете тавата на работната повърхност. Важно е да напълните тавата с продуктите извън
хлебопекарната, за да не попаднат върху нагряващите части на хлебопекарната.
2. Закачане на острието
Сложете острието за раздробяване/месене като го натиснете.
3. Премерване на продуктите
Премерете необходимите количества продукти и ги добавете по реда от рецептата.
Уверерете се, че при добавянето на маята тя няма да влезе в контакт с вода или друга
течност, защото веднага ще започне да набухва.
Използвайте топла вода (21-28°C).
4. Поставяне на тавата
Поставете тавата за печене в хлебопекарната, завъртайки в посока на часовниковата стрелка.
Сложете капака.
5. Включете щекера в контакта
Поставете щекера в контакта. Уреда ще бъде автоматично настроен на менюто „Basic Bread“ с
нормално време.
6. Изберете програмата
Изберете желаната настройка от списъка.
7. Изберете теглото
Натиснете бутона Loaf Size, за да изберете между крокант и малко/голямо. Автоматичната настройка при
включване на уреда е за крокантен.
8. Изберете цвета
Изберете желаният цвят за кората на хляба, натискайки бутона Colour.
9. Изберете времето на изчакване (започване на печенето със закъскение)
Ако желаете хляба да бъде готов по-късно, изберете времето на забавяне в следващият раздел.
10. Старт
Натиснете бутона Start/Stop за включване на хлебопекарната. Оставащото време ще се измерва в
единици от по една минута.
11. Процеса на печене
Хлебопекарната ще премите автоматично през стадиите на печене, както е показано в раздела
„Цикъл на печене“/ Ако хлебопекарната е била програмирана на втори процес на месене, един
звуков сигнал ще сигнализира, че можете да добавите продуктите.
12. При приключване на програмата, екрана ще покаже 0:00 и ще се чуе звуков сингал.
13. Запазване на топлинатая
За повечето настройки, функцията за запазване на приготвеният топъл хляб, кара топлият въздух
да циркулира още 60 минути след като е бил опечен хляба (виж раздел „Цикъл на печене). За
най-добри резултати, извадете тавата за печене и хляба през това време или в момента, в който
63
Page 65

програмата е приключила. При приключване на програмата ще се чуят десет звуково сигнала.
14. Извадете тавата
Натиснете стоп. Отворете капака.
ВНИМАНИЕ: Използвайте ръкохватки при изваждането на тавата (внимавайте, тавата е много
гореща!)
15. Извадете хляба
Оставете хляба да изстине в тавата за около 15 минути, след което обърнете тавата надолу и
ударете леко дъното докато се отлепи хляба. Оставете хляба да доизстине. Напълнете веднага
тавата с топла вода, за да не се блокира острието в задвижващият мост.
От време на време, острието може да остане в хляба. Изчакаите да изстине хляба. След
което махнете острието с дървена лъжица, за да не надраска незалепващата повърхност.
16. След употреба на уреда, винаги го изключвайте от контакта.
Не отваряйте капака по време на работа на уреда, защото това ще повлияе на качеството
на хляба, особено на възможността за набухване.
Бележка: стайната температура
Хлебопекарната функционира добре в широк температурен диапазон, но могат да съществуват
разлики в размера на хляба в зависимост от стайната температура. Препоръчаната стайна
температура е между 15 и 34°C.
Употреба на хронометъра
Използвайте таймера когато искате хляба да бъде готов по-късно или да бъде печен през нощта и
да е готов сутринта. Може да се направи настройка за максимум 13 часа. Проверете дали
функцията е достъпна, консултирайки раздела „Цикъл на печене“. Не използвайте тази опция за
рецепти които съдържат нетрайни продукти като яйца, мляко, сметана или сирене.
1. Изберете часа, в който искате хляба да бъде готов и сметнете разликата между
актуланото време и избраният час. Например, изкате да имате готов хляба утре в 8:00 час,
а сега е 19:30 час, разликата е 12 часа и половина.
2. Въведете това време натискайки бутоните “Time T” si “Time S“. Стрелките ще избират
времето на интервали от по 10 минути. След като сте натиснали бутона Старт, ще се
появи съобщението (:).
3. Ако сте избрали грешно времето, натиснете стоп време за 2 секунди. Таймера ще се
нулира и ще можете да повторите стъпка 1 и 2.
4. Максималното време за отлагане е 13 часа.
Звуков сигнал
Чува се един бип, тогава когато:
-Се натиска някой бутон;
-По време на вторият цикъл на месене, за да сигнализира, че могат да се добавят други
съставки, като ядки, плодове, т.н.;
-Свършва програмата;
-При приключване на програмата за поддържане на топлината.
-
Прекъсване на електричеството
След рязко спиране на тока,
-Ако програмата не е достигнала фаза 1, натиснете Старт и програмата ще продължи
-Ако програмата е преминала фаза 1, процеса трябва да бъде започнат наново. Тавата за
печене трябва да бъде изпразнена от продуктите и те да бъдат сменени с други.
Рязане и съхранение на хляба
За най-добри резутати, сложете хляба на една подложка и го оставете за около 15-30
минути да изстинепреди да го нарежете.
Използвайте електрически нож или ръчен за хляб.
Съхранявайте хляба в затворена торбичка на стайна температура до три дни. Ако
времето е много топло и влажно, нощтно време съхранявайте хляба в хладилника.
За по-дълго съхранение на хляба, сложете го в една затворена кутия и го сложете в
64
Page 66

камерата.
Тъй като домашният хляб не съдържа консерванти, клони към по-бързо изсъхване и
разваляне в сравнение с този от търговската мрежа.
Твърдите остатъци от хляба могат да бъдат нарязани на кубчета по 1.3 или 2.5 см. и да се
използват за приготвяне на крутони.
Почистване и поддръжка
Внимание: За да предотвратите риска от токов удар, изключвайте от контакта преди
почистване!
1. Изчакайте хлебопекарната да изстине
ВАЖНО: Не потапяйте във вода или друга течност, не пръскайте корпуса и нито капака, тъй като
съществува риска за повреда и/или токов удар.
2. Отвън: избършете корпусая и капака с влажна кърпа или с леко мокра гъба.
3. Отвътре: за почистване на вътрешната част използвайте влажна кърпа или гъба.
4. Тавата за печене: Почистете тавата с топла вода, не е необходим препарат. Избягвайте
надраскванията по незалепващата повърхност. Подсушете напълно преди да я поставите
в отделението за печене.
5. Не мийте тавата, мерителната чаша, лъжицата или бъркалката в миялна машина.
6. Не оставяйте тавата прекалено дълго във вода.
7. Ако острието остане блокирано в тавата, изсипете гореща вода и оставете да се накисне
30 минути, след което може да се почисти лесно.
8. Преди да оставите уреда на съхранение, уверете се че е изстинал напълно.
Не използвайте следните вещества за почистване:
Разтворител за боя, бензин, метални прибори, гъби напоени с химически вещества.
Специална поддръжка за незалепващата повърхност
Избягвайте износването на незалепващата повърхност. Не използвайте метални прибори
като шпакли, ножове, вилици, т.н.
Незалепващото покритие може да си промени цвета след продължителна употреба. Това
се получава от влагата и парата и не влияе на качеството на хляба или на
финкционалността на уреда.
Отвора в средата на бъркалката трябва да се почисти, след което добавете една капка
олио и поставете тавата. Това ще предотврати залепването на бъркалката
Почиствайте всички отвори от праха.
Съхранение на хлебопекарната
Преди съхранение, подсушете всички части, включително и прозорчето на хлебопекарната.
Затворете капака и не поставяйте нищо отгоре.
Бележка: НЕ използвайте абразивни или химически почистващи вещества, тъй като ще повредят
незалепващата повърхност.
Информации относно съставките
Съвети за печене
Много често се казва, че готвенето е изкуство, основаваща се на креативността на готвача, докато
печенето на гляб е повече наука. Това означава, че процеса на комбиниране на брашното, водата
и маята водят до реакция, чийто резултат е хляба. Не трябва да забравяте, че когато са
комбинирани, те произвебдат специфичен резултат.
Прочетете внимателно следните информации, за да разберете по-добре важността на всеки
продукт в процеса на печене на хляба.
Важна бележка за брашното
Видовете брашно, въпреки че изглеждат еднакво, могат да бъдат много различни благодарение на
65
Page 67

начина по който житните култури са били отгледани, смляни, съхраняван, т.н. Полезно е да
експериментирате с различни видове брашно, за да откриете най-добрият тип. Съхранявайте
брашното в запечатани кутии.
Обикновено брашно (за всеки тип тесто)
Този тип брашно е смесижа от рафинирано пшеничен брашно и брашно от по-тежко жито.
Подходящо е за приготвяне на торти, сладкиши и пресен хляб.
Бяло концентрирано брашно
Брашното за хляба съдържа много протеини/глутен, което е обработено така че тестото да бъде
лесно за месене. Обикновено този тип брашно им висока концентрация на глутен в сравнение с
обикновеното брашно. Обикновеното брашно о бялото са препоръчани за приготвяне на хляб с
този уред.
Пълнозърнесто пшенично брашно
Пълнозърнестото брашно съдържа цялото смляно пшенично зърно, което прави брашното
по-тежко и богато на хранителни вещества в сравнение с бялото брашно. Хлябовете направени с
такова брашно обикновено са по-малки и по-тежки от белите хлябове.
Брашно което вкисва
Този тип брашно не се препоръчва за приготвяне на хляб, тъй като този тип брашно съдържа
съставки които ферментират и пречат на процеса на печене.
Брашно от пшенични трици
Това брашно е направено от външната част на пшеничното или ръженото зърно, получено чрез
пресяване. Тои тип брашно се добавя в малки количества за обогатяване на хранителните
вещества на хляба и аромата.
Овесено брашно
Това брашно се използва за обогатяване на арома и текстурата на хляба.
Други съставки
Мая (мая на прах)
При ферментацията си, маята произвежда газ, който кара хляба да набухне. За да произведе този
газ, маята има нужда да реагира със захарта и въглехидратите от брашното. Грнулираната мая е
най-използвана в повечето рецепти, в които е необходимо втасването на тестото.
Има три вида мая на пазара: прясна мая, обикновена суха мая и мая с бързо действие.
Препоръчва се употребата на мая с бързо действие. Не се препоръчва прясната мая. След като
отворите пакет с мая, приберете останалото количество в хладилника. Много често тестот втасва
добре заради стара мая.
Можете да използвате следният тест за определяне на маята:
1. Сложете половин чаша вода в една купа.
2. Разбъркайте една лъжица захар във вода, след което поръсете две лужички мая.
3. Сложете купата на топло място и изчакайте 10 минути.
4. Сместа би трябвало да направи пяна и да отделя силна миризма на мая. Ако това не се
случи, изхвърлете сместта и започнете нов пакет суха мая.
Захар
Захарта е важна за цвета и аромата на хляба при рекцията с маята, помагаки ѝ да втаса. Не могат
да се използват изкуствени подсладители, защото маята няма да реагира.
Сол
Солта е необходима за уравновесяване на вкуса на хляба и сладкишите и придава цвета на
кората на хляба.
66
Page 68

Течности/мляко
Течностите като млякото или сместта от мляко на прах и вода могат да се използват при
приготвянето на хляба. Млякото придава приятен вкус и прави коричката мека докато, а чистата
вода прави кората твърда. Могат да бъдат добавени за аромат сок от ябълки, портокали.
Бележка: За повечето рецепти препоръчваме обезмаслено масло.
Яйца
Яйцата придават по-плътна текстура на тестото.
Слънчогледово олио
Сбива тестото. Може да се използват заместители като масло или маргарин. Трябв да се оставят
да се стопят преди да ги добавите към тестото, за да може по-лесни да се омгензира.
Бакпулвер
Бакпулвера е съставка за печене, която се използва за приготвяна на сладкиши карайки ги да
набухват по време на печене. Не е необходимо тестот да бъде оставяно да втаса.
Сода за хляб
Содата за хляб друга съставка, която помага за набухването на изделията, която не трябва да
бъде смесвана бакпулвера. Също така содата за хляб няма нужда да бъде оставяна да втасва,
защото химическата реакция се произвежда по време на печенето.
Премерване на продуктите
Използвайте суха мерителна кана. При меренето на съставките каната трябва да бъде поставена
на равна повърхност и да се гледа на нивото на очите. Използването на количества, премерени
„на око“ не дават добри резултати.
Измервания на сухи съставки
Тези измервания (особено за брашното) трябва да се направят с приложената мерителна кана.
Каната е направена по американският стандарт течност унция (fluid oz)- англииският стандарт е
10fl oz. Сухите съставки трябва да се добавят в каната с лъжица, а при напълване трябва да бъдат
изравнени с лужица. Ако притискате с лъжицата, количеството ще се увеличи. Не пресявайте
брашното, освен ако това не се споменава в рецептата.
При премерването на малки количества като мая, захар, мляко на прах, мед, педмез, трябва да
използвате мерителната лъжица.
Вашата хлебопекарна произвежда много лесно вкусни изделия, само трябва да спазвате
рецептата. По принцип в ежедневното в кухнята „една щипка от това“ и „една щипка от
онова“ придават вкус на храната, но не и в случая с хлебопекарната. Тук трябва да се спазват
стриктно указаните количества.
Температура на съставките
Всички съставки, приставки, сключително и хлебопекарната трябва да бъдат на стайна
температура (21 o C-70F).
Ако съставките са прекалено студени, под 10 0С, тогава маята няма да втаса. Мого горещите
течности над 40С могат да развалят ефекта на маята.
Специални глазури за хляба
Направете един професионален финисаж на хляба. Избере една от следните глазури или топинги
на хляба:
Яйчена глазура
Разбийте 1 яйце и 1 лъжица вода и разнесете един дебел пласт на изделието. Нанесете само
преди да сложите тестото на печене.
Глазура от топено масло
Нанесете с една четка по тукущо изпеченият хляб топено малсо, за да стане коричката по-мека.
67
Page 69

Млечна глазура
За лъскава и по-мека коричка, минете по прясно изпечениат хляб с една четка натопена в мляко
или сметана.
Глазура със захар
Смесете една чашка захар с 1 или 2 лъжици мляко, за да получите по-дебела глазура. Нанасяйте
я върху хляб със стафиди и други слаки хлябове.
Мак/сусан/кимион/овесени ядки
Поръсете с един от горните варианти, над прясно глазурираният хляб.
Други съвети
-Сложете всички продукти в тавата, така че маята да не влиза в контакт с никакви течности.
-След като сте приключили с приготвянето на тестото в уреда, тогава когато оставяте маята да
набухне тестото извън хлебопекарната трябва да го покриете с хартия за печене и една
кърпа. Оставете тестото на топло място, далеч от течението.
-Влажността може да причини проблеми, така че влагата и голямата надморска височина
изискват нагаждане на рецептата.
-Когато в рецептата се посочва набрашняване на стените на тавата, използвайте 1 или 2
лъжици брашно.
-Ако тестото което разстилате се връща назад, оставете го няколко минути да престои.
-Тестото може да бъде завито във фолио и да се остави в камерата за по-късна употреба.
Рецепти
Свички рецепти от по-долу използват следният метод:
1. Измерете всички продукти и ги сложете в тавата.
2. Използвайте топла вода (21-28 градуса).
3. Поставете тавата в хлебопекарната и затворете капака.
4. Изберете порограмата.
5. Натиснете бутона за старт.
6. Когато хляба е готов, извадете тавата, използвайки ръкохватки.
7. Извадете хляба от тавата (ак е необходимо извадете и бъркалката)
8. Оставете да изстине преди да нарежете на фелии.
Този метод е променен във всяка рецепта, там където е необходимо с една бележка на края на
рецептата.
Рецепти за хляб
1. Рецепти за нормален хляб
Класически бял хляб 0.4535
680g 900g
Вода 1+1/8 чаша 1+1/2 чаша
Обезмаслено мляко на прах 2+1/2 лъжици 4 лъжици
Слънчогледово олио 2+1/2 лъжици 4 лъжици
Захар 2+1/4 лъжици 3 лъжици
Сол 1+1/4 лъжички 2 лъжички
Бяло пшенично брашно 3 чаши 4 чаши
Мая с бързо действие 1+1/4 лъцичка 1+1/4лъжичка
Програма 1Basic 1Basic
68
Page 70

Черен хляб
680g 900g
Вода 1 чаша 1+1/2 чаша
Обезмаслено мляко на прах 2 лъжици 3 лъжици
Слънчогледово олио 2 лъжици 3 лъжици
Захар 2+1/2 лъжици 4 лъжици
Сол 1+1/4 лъжичка 2 лъжичка
Бяло брашно 3 чаши 4 cani
Мая с бързо дейсвие 1+1/4 лъжичка 1+1/2 лъжичка
Програма 1 Basic 1 Basic
Италиански хляб със зелении
680g 900g
Вода 1+1/8 чаши 1+1/2 чаши
Обезмаслено мляко на прах 2+1/2 лъжици 3 лъжици
Слънчогледово олио 2+1/2 лъжици 3 лъжици
Захар 2+1/4 лъжици 2+1/2 лъжици
Сол 1+1/2 лъжички 2 лъжички
Бяло брашно 3 чаши 4 чаши
Сух маргарин 1+1/2 лъжички 2 лъжички
Сух босилек 1+1/2 лъжички 2 лъжички
Суха чубрица 1+1/2 лъжички 1+1/2 лъжички
Мая с бързо действие 1+1/4 лъжички 1+1/4 лъжички
Програма 1 Basic 1 Basic
Хляб със сирене и лук
680g 900g
Вода 1 чаша 1+1/4 чаша
Обезмаслено мляко на прах 2 лъжици 2+1/2 лъжици
Захар 1 лъжици 2 лъжици
Сол 1/2 lingurita 1 лъжичка
Гранули лук 1+1/2 лъжици 2 лъжичка
Настъргано сирене чедър 1 чаша 1+1/2чаша
Бяло брашно 3 чаша 4 чаша
Мая с бързо действие 1+1/2лъжичка 1+3/4 лъжичка
Програма 1 Basic 1 Basic
Хляб със стафиди
680g 900g
Вода 1+1/4 чаша 1+1/2 чаша
Обезмаслено мляко на прах 3 лъжици 4 лъжици
Слънчогледово олио 3 лъжици 4 лъжици
69
Page 71

Захар 2 лъжици 3 лъжици
Сол 1+1/2 лъжици 2 лъжичка
Канела ¾ лъжичка 1 лъжичка
Бяло брашно 3 cani 4 cani
Мая с бързо действие 1+1/2 лъжичка 2 лъжичка
Стафиди 5/8 чаша ¾ чаша
Програмата 1 Basic 1 Basic
*Добавете стафидите след звуковият сигнал.
Хляб със сушени домати
680g 900g
Вода 1 чаша 1+1/3 чаша
Обезмаслено мляко на прах 2+1/2 лъжици 3 лъжици
Слънчогледово олио 2+1/4 лъжици 3 лъжици
Захар 1+1/4 лъжици 1+1/2 лъжици
Сол 1+1/4 лъжичка 1+1/2 лъжичка
Микс от сухи подправки 1+1/2 лъжичка 2 лъжичка
Бяло брашно 3 cani 4 cani
Мая с бързо действие 1+1/4 лъжичка 1+1/2 лъжичка
Изсушени на слънце домати 3/8 cana ½ cana
Програма 1 Basic 1 Basic
Хляб с малц
680g 900g
Вода 1 чаша 1+1/4 чаша
Сол 1 лъжичка 1 лъжичка
Слънчогледово олио 2 лъцички 3 лъжичка
Черен пезмет 1+1/2 лъжици 2+1/2 лъжичка
Екстракт от малц 2 лъжици 3 лъжици
Обикновено брашно 3 чаши 4 чаши
Мая с бързо действие 1 лъжичка 1+1/4 лъжичка
Стафиди от десертно грозде* 1/2 чаша ¾ чаша
Програма 1 Basic 1 Basic
*Adaugati stafidele dupa semnalul sonor.
2. Рецепти за френски хляб
Френски хляб
680g 900g
Вода 1 чаша 1+1/4 чаша
Обезмаслено мляко на прах 2 лъжици 2+1/2 лъжици
Захар 1 лъжици 1+1/4 лъжици
70
Page 72

Сол 1 лъжичка 1+1/4 лъжичка
Слънчогледово олио 1 лъжици 1+1/2 лъжици
Бяло брашно 3 cani 4 cani
Мая с бързо действие 1 лъжичка 1+1/4 лъжичка
Програма 2 French 2 French
3. Рецепти за пълнозърнест хляб
Хляб от пълнозърнесто брашно
680g 900g
Вода 1+1/8 чаша 1+5/8 чаша
Обезмалсено мляко на прах 1+1/2 лъжици 3 лъжици
Слънчогледово олио 2 лъжици 3 linguri
Кафява Захар 2+1/2 лъжици 3+1/2 лъжици
Сол 1+1/4 лъжичка 1+1/2 лъжичка
Пълнозърнесто брашно 3 cani 4 cani
Мая с бързо действие 1+1/4 лъжичка 1+1/2 лъжичка
Таблетка витамин С (стрита) 1x100mg 1x100mg
Програма 3 Wholewheat 3 Wholewheat
Пълнозърнест хляб
680g 900g
Вода 1+1/8 чаша 1+5/8 чаша
Обезмаслено мляко на прах 2 лъжици 3 лъжици
Слънчогледово олио 2 лъжици 3 лъжици
Финна кафява захар 2+1/2 лъжици 5 лъжици
Сол 1+1/4 лъжичка 2 лъжичка
Черно брашно 3 cani 4 cani
Мая с бързо действие 1+1/4 лъжичка 1 лъжичка
Таблетка витамин С (стрита) - 1x100mg
Програма 3 Wholewheat 3 Wholewheat
4. Рецепти за бързо приготвяне (програматаl Quick)
Хляб с банани и орехи
Съставки група 1
Масло(стопено) 2 лъжици
Мляко 1 лъжичка
Надробен банан 1 cana
Яйце 1
Орехи(наситнени) ½ cana
Лимон 1 лъжичка
Суставки група 2
Обикновено брашно 1+1/2 cana
Сода бикарбонат ½ лъжичка
71
Page 73

Бакпулвер ¼ лъжичка
Захар ½ cana
Сол ¼ лъжичка
Програма 4 Quick
Метод
4. Смесете съставките от група 1.
5. В друга купа смесете продуктите от група 2.
6. Сложете смесите в тавата.
Хляб от овесени ядки
Мляко 1 чаша
Яйца(разбити) 2
Слънчогледово олио 1/2 лъжичка
Меласа 2 лъжици
Захар ¼ cana
Сол 1 лъжичка
Обикновено брашно 2 cana
Овесени ядки 1 cana
Бакпулвер ½ лъжичка
Сода бикарбонат ½ лъжичка
Програма 4 Quick
5. Сладки рецепти
Батон с плодове
680g 900g
Вода 1+1/8 чаша 1+1/3 чаша
Обезмаслено мляко на прах 2+1/2 лъжици 3 лъжици
Слънчогледово олио 2+1/2 лъжици 3 лъжици
Захар 1/4 лъжица 1/3 лъжица
Сол 1+1/4 лъжичка 1+1/2 лъжичка
Бяло брашно 3 cani 4 cani
Индийско орехче ¾ lingurita 1 лъжичка
Мая с бързо действие 1+1/4 лъжичка 1+1/2 лъжичка
Mix de fructe uscate * ½ cana 2/3 cana
Програма 5 Sweet 5 Sweet
*Добавете плодовете след звуковият сигнал.
Хляб с шоколад 680g 900g
Вода 1 чаша 1+1/2 чаша
Яйца(разбити) 1 mediu 1 mediu
Обезмаслено мляко на прах 1 лъжици 1+1/2 лъжици
72
Page 74

Слънчогледово олио 1 лъжици 1+1/2 лъжици
Захар ½ cana ¾ cana
Сол 1/2 лъжичка 1 лъжичка
Орехи (наситнени)* ¼ cana Бяло брашно 2+1/8 cana 3 cani
Какао на прах ½ чаша ¾ чаша
Мая с бързо действие 1 лъжичка 1+1/2 лъжичка
Програма 5 Sweet 5 Sweet
*Добавете плодовете след звуковият сигнал.
6. Рецепти за Fastbake
Мал бял хляб
Вода 270ml
Бяло брашно 3 чаша
Обезмаслено мляко на прах 2 лъжици
Сол 1 лъжичка
Захар 4 лъжици
Слънчогледово олио 4 лъжици
Мая с бързо действие 3 лъжичка
Програма 6 Fastbake
7. Рецепти за Fastbake
Голям бял хляб
Вода 360ml
Бяло брашно 4 чаша
Обезмаслено мляко на прах 3 лъжици
Сол 1+1/2 лъжичка
Захар 5 lingurite
Слънчогледово олио 5 лъжици
Мая с бързо действие 3+1/2 лъжичка
Програма 7 Fastbake
8. Рецепти за тесто
Рула от бял хляб
Вода 1+1/4 чаша
Обезмаслено мляко на прах 1 лъжици
Топено масло 2 лъжици
Захар 2 лъжици
Сол 1+1/2 лъжичка
Бяло брашно 3+1/4 cani
Мая с бързо действие 1+1/2 лъжичка
Програма 8 Dough
73
Page 75

Метод
1. Омесете тестото и оформете 6 рула
2. Сложете рулата в една намазана с масло тава..
3. Намажете отгоре рулата със стопено масло.
4. Покрийте за около 20-25 минути.
5. Оставете да набухне докато се удвои на обем.
6. сложете да се пекат за около 15-20 минути на 190°C
Рула от пълнозърнест хляб
Вода 1+1/4 чаша
Обезмаслено мляко на прах 2 лъжици
Топено масло 2 лъжици
Мед 2 лъжици
Кафява Захар 1 лъжици
Сол 1+1/2 лъжичка
Черно брашно 3+1/4 cani
Мая с бързо действие 1+1/2 лъжичка
Програма 8 Dough
Метод
Метода е същият като при белите рула.
Горещи преплетени кифли
Вода 1 чаша
Топено масло ¼ чаша
Захар ¼ чаша
Разбито яйце 1
Сол 1 лъжичка
Бяло брашно 3+3/4 cani
Канела 1 лъжичка
Индийско орехче ¼ лъжичка
Стафиди 1 чаша
Мая с бързо действие 1+1/2 лъжичка
Програма 8 Dough
Метод
1. Разделете тестото на 8-12 парчета. Придайте им форма и ги сплеснете
леко.
2. Направете глазура с яйце и мляко (без средата).
3. Покрийте и оставете да втаза за 30 min.
4. Печете във фурна на 375°F (190°C) за 16-18 минути.
Блат за пица
74
Page 76

Вода 1 чаша
Топено масло 1 лъжичка
Захар 2 лъжици
Сол 1 лъжичка
Бяло брашно 2+3/4 чаша
Мая с бързо действие 1 лъжичка
Програма 8 Dough
Метод
1. Предварително загрейте фурната.
2. Разстелете тестото в кръгла форма. Сложете го в намаслена тава. Намажете
леко тестото с олио.
3. Покрийте за около 15 минути и оставете да втаса.
4. Добавете желаният топинг.
5. Печете на около 220 0C докато добие златист цвят.
9. Рецепти за сладко
Мармалад
Портокалов сок 3 portocale medii
Рендосана портокалова кора 2
Захар 1 чаша
Вода 1 лъжици
Пектин ако е нужно 2 лъжичка
Програма 9 Jam
Коментарии
Преди да напълните борканите, загрейте ги;
Ако е необходимо, използвайте допълнително реме, в зависимост от
големината на портокалите и консистенцията на мармалада;
Махнете бъркалката преди да разлеете мармалада в бурканите;
Не повдигайте капака по време на работа;
Портокалите кото трябва да бъдат използвани са тези от Sevilla, които се
намират само през януари. Ако използвате друг тип портокали, добавете
пектин за да се сгъсти сладкото.
От тази рецепта излиза се получава сладко около 400g.
Сладко от малини си ябълки
Замразени малини, претеглени преди замразяването 2 чаши
Парчета ябълка (почистени от семките и кората) 1 чаша
Консервирана захар 1 чаша
Лимонов сок 3 лъжици
Програма 9 Jam
75
Page 77

Коментарии
Затоплете бурканите преди напълване.
Махнете бъркалката преди да изсипете мармалада в бурканите. .
Не повдигайте капака докато уреда функционира.
10. Рецепти за сладкиши
Рецепта за класическа смес
Съставки група 1
Топено масло ¾ чаша
Ванилова есенция ¼ лъжичка
Яйца(разбити) 3 medii
Лимонов сок 2 лъжичка
Съставки група 2
Обикновено брашно 1+5/8 чаша
Бакпулвер 2 лъжичка
Пудра захар 1 чаша
Програма 10 Cake
Метод
5. Смесете продуктите от група 1 в една купа.
6. Смесете продуктите от група 2 в друга купа.
7. Смесете двете композиции докато се омогенизират.
8. Изсипете сместа в тавата.
Сладкиш с микс от плодове
Съставки група 1
Топено масло ¾ чаша
Ванилова есенция ¼ лъжичка
Яйца (разбити) 3 medii
Лимонов сок 2 лъжичка
Микс от сухо плодове 5/8 чаша
Съставки група 2
Обикновено брашно 1+5/8 чаша
Бакпулвер 2 лъжичка
Захар 1 чаша
Смляна канела ¼ лъжичка
Смляно индийско орехче ¼ лъжичка
Програма 10 Cake
Метод
Проследете метода от рецептата за сладкиши.
76
Page 78

11. рецепти за хляб за сандвичи
Хляб за сандвичи
680g 900g
Вода 260 ml 1+1/3 чаша
Мек маргарин или масло 1+1/2 лъжица 2 лъжици
Сол ½ лъжичка 1 лъжичка
Слънчогледово олио 1+1/2 лъжица 2 лъжици
Захар 3 лъжици 3+1/2 лъжици
Бяло брашно 3 чаши 4 чаши
Мая с бързо действие ¾ лъжичка 1 лъжичка
77
Page 79

Програма
(време)
Вид хляб
Месене1
(мин)
Втасване1
(мин)
Месене 2
(мин)
Втасване
2
(мин)
Втасва
не 3
(мин)
Печене
(min)
Общо
(часов
е)
Поддържане на
топлината
(мин.)
1Basic
9
20
14*
25
45
60
2:53
60
класически
10
20
15*
25
45
65
3:00
60
2Френски
16
40
19*
30
50
65
3:40
60
Франзелка
18
40
22*
30
50
70
3:50
60
3 Пълнозърнест
9
25
18*
35
70
55
3:32
60
Пълнозърнест с
кора
10
25
20*
35
70
60
3:40
60
4Бърз
7 5 8
80
1:40
60
5Сладък
10 5 20*
30
55
50
2:50
60
Сладък с
кора
10 5 20*
30
55
55
5:55
60
6 Ултрабърз
-1
12 11
35
0:58
7Ултрабърз2
9 9
40
0:58
8Тесто
20
30
40 1:30
9Сладко
20
15+
45+смесв
ане
20
1:20
10Сладкиши
10 5 20
30
35
70
2:50
60
11Сандвичи
15
40
5*
25
40
50
2:55
60
Сандвич с
кора
15
40
5*
25
40
55
3:00
60
12Печене
60
1:00
60
Цикъл на печене – времена
* Звуков сигнал, съставките могат да бъдат добавени.
Въпроси за функциналността на хлебопекарната и начина на работа
Въпрос nr. 1
Какво би трябвало да направя ако бъркалката остане вътре в хляба?
Извадете бъркалката с помощта на шпакла преди да нарежете хляба. Това не
представлява дефект.
Въпрос nr. 2
Защо понякога хляба има брашно по страничната кора?
78
Page 80

В някои случаи, брашното може да остане неразбъркана по ъглите на тавата.
Ако това се случи, този очастък просто може да се изреже с ножа или да се
изяде.
Въпрос nr. 3
Защо не се разбърква тестото? Чувам мотора включен.
Възможное тавата или бъркалката да не са поставени правилно. Уверете се, че
тавата и бъркалката са поствени правилно.
Въпрос nr. 4
Защо не мога да зиползвам таймера когато слагам прясно мляко?
Млякото ще се пресече ако остане твърде дълго неизползван в хлебопекарната.
Пресните продукти като яйца и мляко не трябва да се използват когато изкате
да отложите момента на започване на печенето.
Въпрос nr. 5
Защо трябва да добавям продуктите в определен ред?
Това е необходимо защото хлебопекарната трябва да ги разбърка по
най-ефикасният възможен начин. Също така, по този начин, маята не влиза в
директен контакт с течностите, което е много важно.
Въпрос nr. 6
Ако съм настроил хлебопекарната на приготви хляба сутринта, защо чувам
шум късно през нощта?
Хлебопекарната трябва да започне работа когато времето е преди изтичане, за
да бъде хляба готов в настроеният час. Звуците, които се чуват са от мотора по
време на месенето на хляба. Това е нормално и не е дефект.
Въпрос nr. 7
Бъркалката е блокрана в тавата, как да я извадя?
Това може да се случи. Оставете да тече топла или гореща вода по бъркалката,
така ще се отблокира. Ако не се получи така, накиснете за 30 минути.
Въпрос nr. 8
Мога ли да мия тавата за печене в миялна машина?
Не. Тавата и бъркалката трябва да се мият ръчно.
Въпрос nr. 9
Какво ще стане ако оставя изпеченият хляб в тавата?
Препоръчва се да оставите хляба за един час ако използвате функцията “keep
warm”. Ако надвишите това време, хляба ще се увлажни, защото парата нма
къде да се изпари. Извадете хляба и го оставете да изстине.
Въпрос nr. 10
Защо тестото е било омесено само частичн? Защо не се е омесило напълно?
79
Page 81

Тестото може да бъде прекалено тежко или прекалено сухо. Може да са били
поставени съставките в грешен ред или тавата и бъркалката да с а били сложени
грешно.
Въпрос nr. 11
Защо хлба не набухна?
Може маята да е била с изтекъл срок или да сте пропуснали да я сложите.
Въпрос nr. 12
Защо не мога да настроя време по-дълго от 13 часа: Кое минималното време
на отлагане за печене на хляба?
Максималното време на закъснение е 13 ore, вклщчвайки времето за месене.
Например, настройката 1 (basic small) има цикъл от 3:20 часа. Това може да
бъде отложено заяпочването на приготвянето на хлява с 9:40 часа.
Минималното време на отлагане е 10 минути.
Въпроси за съставките и рецептите
Въпрос nr. 13
Кога знам, че трябва да добавя стафидите, орехоте, т.н. към останалата смес?
Чува се звуков сигнал, който сигнализира факта, че можете да добавите
плодовете по време на вторият цикъл на месене.
Въпрос nr. 14
Защо хляба е влажен? Какво мога да напраявя?
Влагата може да повлияе на тестото. Добавете още една лъжица брашно. Също
така, високите надморски нива могат да имат същият ефект. Намалете
количеството на маята ¼ лъжичка и количеството захар и/или мляко/вода.
Въпрос nr. 15
Защо хляба бухва и после спада или се напуква?
Може хляба да е бухнал прекалено много. За да промените това, намалете
количеството мая и/или увеличете количеството на солта.
Въпрос nr. 16
Мога ли да използвам моите любими рецепти за хляб (с нормална мая) в
хлебопекарната?
Да, но ще трябва да опитате повече пъти шдокато получите оптималното
количество съставки. Никога да не превишавате общото количество н съхи
съставко от 5 чаши.
Въпрос nr. 17
Важно ли е продуктите да бъдат със стсйна температура?
Да, дори и ако отложите времето на старта на печене(водата трябвая да има
стайна температура мецду 21 и 28 градуса C).
80
Page 82

Въпрос nr. 18
Защо хлябовете варират по големина и тегло? Пълнозърнестите хлябове,
винаги са по-малки. Бъркам ли някъде?
Не, нормално е хлябовете от пълнозърнес хляб да бъдат по-тежки и по-малки.
Пълнозърнестото брашно е по-тежко, така че то ще набухне по-малко. Същото е
валидно за хляба с плодове и др.
Въпрос nr. 19
Мога ли да рзбъркам предварително маята с вода?
Не, маята трябва да се пази суха в тавата и трябва да се сложи последна, над
брашното; това е много важно, особено в случай че сте избрали отлагането на
старта на процеса на опичане.
Въпрос nr. 20
Защо се получава дупка в основата на хляба?
Дупката се получава заради бъркалката за месене.
ИЗХВЪРЛЯНЕТО НА ОТПАДЪЦИТЕ ПО ОТГОВОРЕН ЗА ОКОЛНАТА СРЕДА НАЧИН
Можете да помогнете за опазване на околната среда!
Моля, спазвайте местните правила и закони: занесете отпадъците от електрически уреди в
специализиран събирателен пункт.
www.heinner.com
81
 Loading...