

HeimVision HM202 User manual
HD Smart Wi-Fi Camera
HM202
User Manual
Please read all instructions carefully before using this product and keep this User Manual as a
reference for future use. This user manual will be updated regularly due to product upgrade or other
reasons. HeimVision reserves the right to change the contents without notice.
V1.02
Product Overview and Main Features..........................01
Download the App into Your Mobile Device.................. |
01 |
Account Registration and Login................................................................... |
02 |
Connecting the Camera to Your Mobile Device............ |
02 |
1.Connecting by Scanning the QR Code.................................................. |
02 |
2.Connecting by AP Hotspot....................................................................... |
04 |
*Off-line Direct AP Connection................................................................ |
06 |
Functions Introduction............................................... |
08 |
1. Pan & Tilt Control and Preset................................................................... |
08 |
2. Video Playback........................................................................................ |
09 |
3. Video Cut Only Available in the Camera with Cloud Service .................... |
10 |
4. Messages Only Available in the Camera with Cloud Service ................. |
11 |
5. The microSD Card................................................................................... |
11 |
6. Optional Cloud Service............................................................................ |
12 |
7. Other Functions Introduction.................................................................. |
13 |
How to Watch the Videos on the Computer..................15
Troubleshooting Guide............................................... |
15 |

Product Overview and Main Features
Micro SD Card Slot |
Reset |
Antenna |
Lens |
Night Vision |
|
IR LED |
|


 Speaker
Microphone

 Power Input
Cloud Storage |
High Definition Recording |
Remote Switch |
Audible Alarm |
Scheduled Recording |
iOS Supported |
Android Supported |
Two-way Audio |
Remote Monitor |
Wireless Connection |
IR-CUT
Micro SD Card Storage |
Infrared Night Vision |
P2P Service |
Pan & Tilt |
Motion Detection |
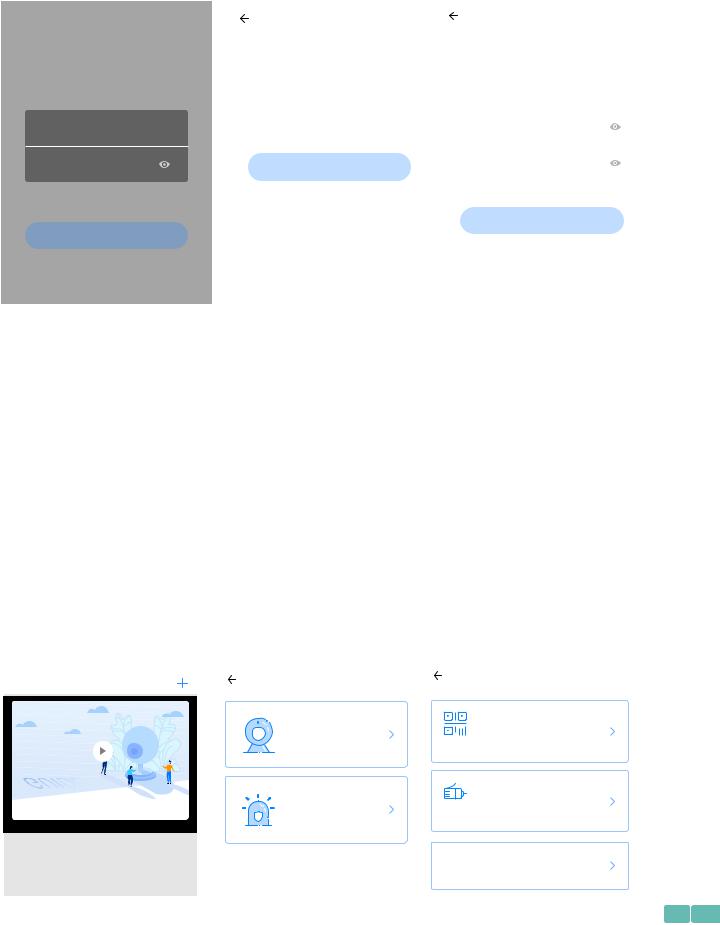
Download the App into Your Mobile Device
Option1:SearchanddownloadYCC365PlusfromAppStoreor GooglePlay;
Option2:ScantheQRcodebelowtodownload.
For Android |
For iOS |
01
Account Registration and Login
Please register an account with a valid email address at your first use of this App, then log in.
Hi, |
|
Email address |
Password |
|||
|
|
|
|
|||
You are welcome |
|
The password length is 6-26 digits, |
||||
|
|
|
Email address |
consisting of uppercase letters, lowercase |
||
|
|
|
letters and numerals |
|||
|
Email address |
|
|
Password |
||
|
|
|
||||
|
|
|
||||
|
|
|
|
|
|
|
|
Password |
|
Next |
Confirmation password |
||
Sign Up |
Forget password |
|
|
|
|
|
|
|
|
|
|||
|
|
|
|
|
Next |
|
|
Log in |
|
|
|
|
|
Local login
Note: Log in with mobile phone number is only applicable to Vietnam.
Connecting the Camera to Your Mobile Device
IMPORTANT:
For all connecting options, you will hear "Please configure camera by scanning code or AP hotspot"
after the camera is powered on. Use the pin to press and hold the Reset button for 5-6s to reset the
camera if no voice prompts. You will hear "Reset Success" at a successful reset;
This camera only supports 2.4GHz Wi-Fi;
For a stable network connection, please make sure the camera and the mobile device are close to
the router.
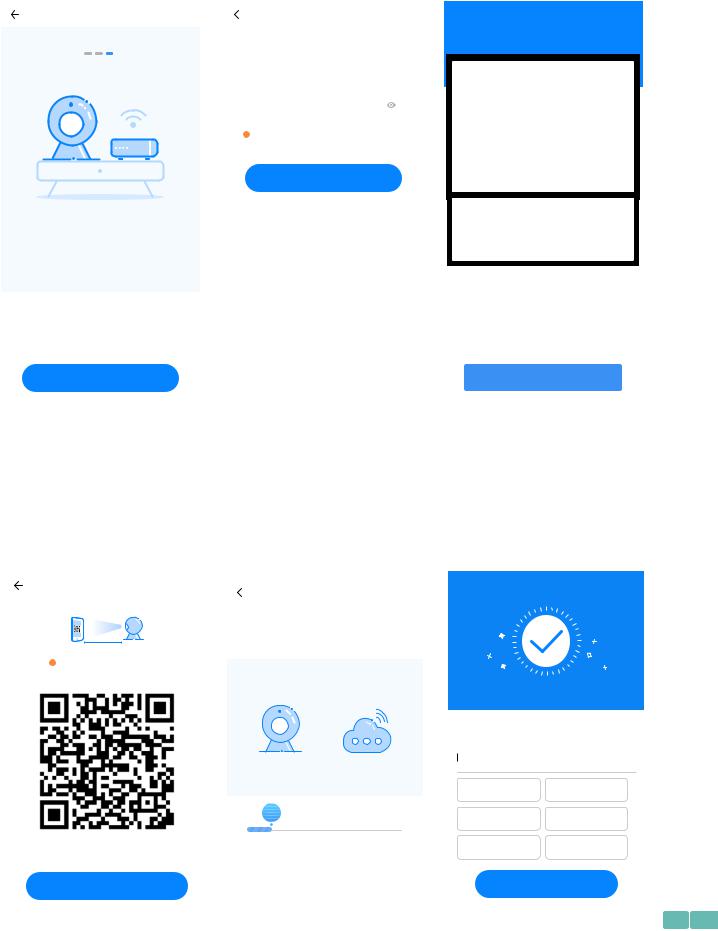
1. Connecting by Scanning the QR Code
Step1:ConnectthemobiledevicetoyourWi-Fi,thenlogintoYCC365Plus.Click + intheupperright
corner,selecttheIntelligentcameraandDeviceaddingbyscanningthecode;
YCC365 Plus |
Add the device |
Add the device |
|
||
|
|
|
|
|
Device adding by scanning |
|
Intelligent camera |
the code |
|
Pair with Wi-Fi by scanning QR code |
|
|
|
|
|
|
on the mobile phone |
GUIDE |
|
Addition by connecting to |
|
|
|
|
|
network cable |
The starter guide video |
Smart annunciator |
Only applicable for the device with the |
|
|
network cable socket |
|
AP |
Addition of AP hotspot |
|
Pair with Wi-Fi by connection with AP |
|
|
|
hotspot of the device |
02
Step 2: Tick If you have finished the above steps, click Connect to the Network, then click Connect
to the network. Select the Wi-Fi your mobile device is connected, enter the correct password
and click Next to continue;
Add the device |
|
|
|
1/3 |
Network testing |
|
|
||||||
|
|
|
Connect to Wi-Fi |
|||
|
|
|
Input Wi-Fi name |
|
Switch the network |
|
|
|
|
|
|
|
|
|
|
|
Input Wi-Fi password |
|
|
|
|
|
|
|
|
||
|
|
|
! 5GHz wireless network is not supported |
|||
What requirements does the device have on Wi-Fi>
Next
3. Place the device as close to the router as possible, and thus reduce the obstacle between the router and the camera
Exit
Network testing results:Normal
Network information |
|
Wi-Fi frequency range |
2.4G |
Wi-Fi quality |
Good |
|
Network-induced |
|
delay is 327ms |
|
Network stability is |
|
Good |
Server status |
Connection |
|
success |
Test results |
|
Your network is normal |
|
The network is normal |
|
 If you have finished the above steps, click Connect to the Network
Connect to the Network |
Finish |
Tip: Click Network Testing in the upper right corner of Connect to Wi-Fi interface to check the status
of your Wi-Fi connection.
Step 3: Align the QR code on your mobile device with the camera lens and keep a distance of 4-8 inches;
Step4:ClickIheardthe"beep" voicetoconnecttotheInternetafter2beepsfromthecamera.During
theprocess,youwillhear"PleasewaitforWi-Ficonnecting"and"PleasewaitforInternet
connecting".Whenyouhear"Internetconnected,welcometousecloudcamera",thecamerais
connectedsuccessfully.
2/3 |
|
2/3 |
3/3 |
|
|
|
!
The camera is connecting the the network
The connection will take about 1-2 minutes. Wait a moment
10~20cm
Align the QR code the camera lens
Addition is successful |
|
Device name |
|
Click to input the device name or choose the following name |
|
Bedroom |
Living room |
16% |
Entrance |
Second bedroom |
|
Office |
Meeting Room |
The router and mobile phone shall be as close to the device as
No voice is heard? |
possible |
I heard the "beep" voice |
Start to experience |
03
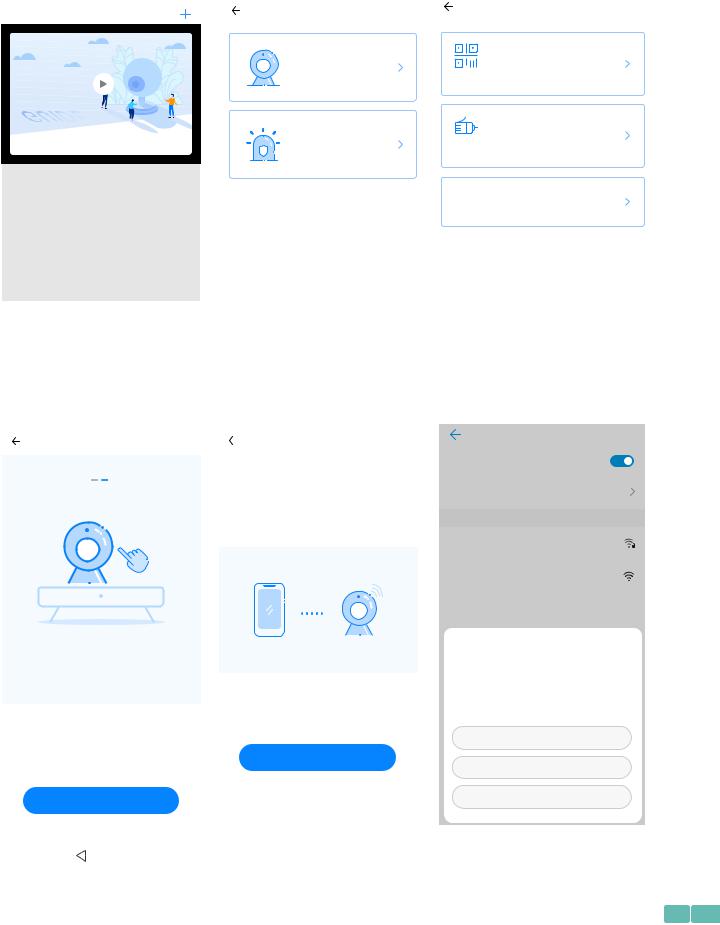
2. Connecting by AP Hotspot
Step 1: Connect the mobile device to your Wi-Fi, then log in to YCC365 Plus. Click + in the upper right
corner, select Intelligent camera and Addition of AP hotspot;
YCC365 Plus |
Add the device |
Add the device |
|
||
|
|
|
|
|
Device adding by scanning the |
|
Intelligent camera |
code |
|
Pair with Wi-Fi by scanning QR code on |
|
|
|
|
|
|
the mobile phone |
GUIDE |
|
Addition by connecting to |
|
|
|
|
|
network cable |
The starter guide video |
Smart annunciator |
Only applicable for the device with the |
|
|
network cable socket |
|
AP |
Addition of AP hotspot |
|
Pair with Wi-Fi by connection with AP |
|
|
|
hotspot of the device |
Step2:TickIfyouhavefinishedtheabovesteps,clickNext,thenclickNexttoentertheNetwork
configurationinterface;
Step 3: Click Go to Setting to enter the network setting interface of the mobile device, then connect to
the CLOUDCAM_XXXX Wi-Fi;
Device configuration |
|
1/3 |
|
|
|
|
|
|
|
|
|
WLAN |
|
|
|
|
||||||
|
|
|
|
|
|
|
|
|
|
|
|
|
|
|
||||||||
|
|
|
|
|
|
Network configuration |
|
|
WLAN |
|
|
|
|
|||||||||
|
|
|
|
|
|
|
|
|
|
|
|
|
|
|
||||||||
|
|
|
|
|
|
|
|
|
|
WLAN |
Off |
|
||||||||||
|
|
|
|
|
|
|
|
|
|
|
|
|
|
|
|
|
|
|
||||
|
|
|
|
|
|
|
|
|
|
|
|
|
|
|
|
|
|
|
||||
|
|
|
|
|
|
The device will start Wi-Fi with "CLOUDCAM_XXXX" |
Enhanced Internet experience |
|
||||||||||||||
|
|
|
|
|
|
|
|
|
|
|||||||||||||
|
|
|
|
|
|
field. Click the button in the lower part to the setting |
|
|
|
|
|
|
|
|
|
|||||||
|
|
|
|
|
|
|
interface for connecting to this Wi-Fi |
|
|
AVAILABLE NETWORKS |
|
|
|
|
||||||||
|
|
|
|
|
|
|
|
|
|
|
|
|
|
HeimVision |
|
|
|
|
||||
|
|
|
|
|
|
|
|
|
|
|
|
|
|
|
|
Connected |
|
|
|
|
||
|
|
|
|
|
|
|
|
|
|
|
|
|
|
|
|
|
|
|
|
|||
|
|
|
|
|
|
|
|
|
|
|
|
|
|
CLOUDCAM_146b9c7cbe76 |
|
|
|
|
||||
|
|
|
|
|
|
|
|
|
|
|
|
|
|
|
|
Saved |
|
|
|
|
||
|
|
|
|
|
|
|
|
|
|
|
|
|
|
|
|
|
|
|||||
|
|
|
|
|
|
|
|
|
|
|
|
|
|
|
|
|
|
|
|
|
|
|
2. Keep pressing "SET" or "RESET" key, for at |
|
|
|
|
|
|
|
|
|
|
|
|
|
CLOUDCAM_146b9c7cbe76 |
|
|||||||
|
|
|
|
|
|
|
|
|
|
|
|
|
|
|||||||||
|
|
|
|
|
|
|
|
|
|
|
|
|
|
|||||||||
|
|
|
|
|
|
|
|
|
|
|
|
|
|
|
|
|
|
|||||
|
|
|
|
|
|
|
|
|
|
|
|
|
Signal strength |
Excellent |
|
|||||||
|
least 5 seconds |
|
|
|
|
|
|
|
|
|
|
|
|
|
|
|||||||
|
|
|
|
|
|
|
|
|
|
|
|
|
|
|
|
|
|
|
||||
|
|
|
|
|
|
|
|
|
|
|
|
|
|
|
|
|
|
|
|
|
|
|
|
|
|
|
|
|
|
|
|
|
|
|
|
|
|
|
|
|
Encryption Type |
None |
|
||
|
|
|
|
|
|
|
|
|
|
|
|
|
|
|
|
|
|
|
|
|
|
|
How to connect the device>
CONNECT
Go to Setting
FORGET
 If you have finished the above steps, click Next
CANCEL
Next
Step 4: Tap to get back to YCC365 Plus to enter Networkconfiguration interface, then click Next to
continue;
04
 Loading...