

Page 1

Page 2

USER GUIDE
Congratulations on your new HEGEL!
Our products are based on a simple philosophy:
The component shall reproduce the original musical sound, purely and naturally.
It uses Scandinavian design reflecting natural music reproduction and styling to fit in with any interior.
The products are easy to operate and are manufactured according to the best quality principles.
All HEGEL products are created with acoustical instruments in a concert situation as point of
reference. The music is reproduced exactly like the original and is limited only by the quality of the
recording.
Our aim is to give you the best possible music experience!
SOUND ADVICE
The Hegel H1 Integrated Amplifier is easy to connect and operate and requires no prior technical
knowledge. However, to get the most out of the amplifier's superior sound and music quality, we have
provided a brief description of the connections and use of the amplifier in order to provide a total
music experience.
We recommend keeping this user guide for future reference.
Page 3

GENERAL USE
The amplifier is switched on with the button in the middle of the front panel. A blue light indicates it is
switched on. To the left the channel selector with selections: Balanced, DVD, CD, Tape, Tuner and
Auxiliary and to the right the volume control. A blue light will show the selected input channel.
The default input when switching on the H1 is the balanced input.
When the mute button on the Hegel Remote Control is pressed the speaker outputs are muted. Mute is
indicated by a flashing blue power light. To go back to normal operation press the mute button on the
remote control one more time.
Avoid connecting input cables or selecting inputs with the source selector switch if the volume setting
of the amplifier is not fully turned down.
After the amplifier is switched on, there is a delay of some seconds for the music signal to reach the
speaker outputs.
To get the best sound possible we recommend to use the H1 amplifier with a high quality sound
source, a very good choice would be the Hegel CD2A CD-player.
Page 4
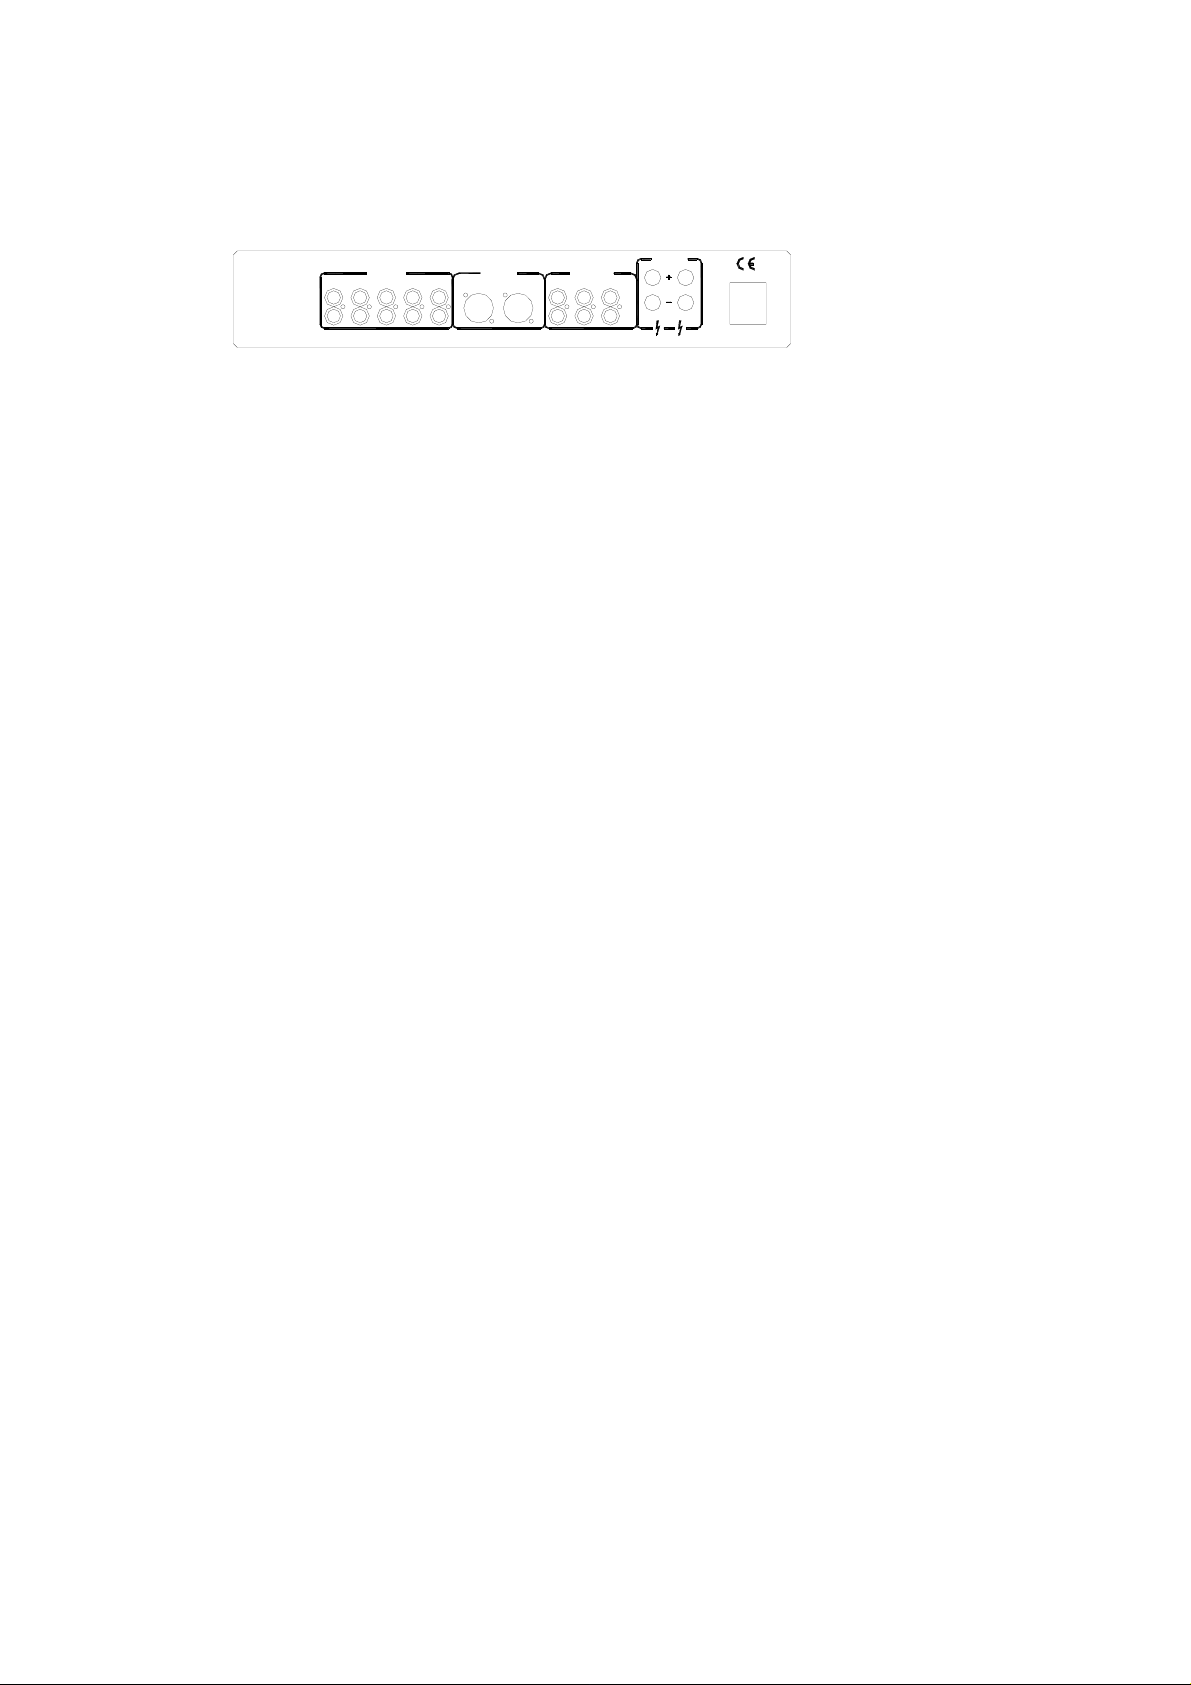
Audio Outputs
Right channel
H1
Integrated Audio Ampl ifier
Hegel Oslo. Norway
Amplifier circuit protected by
Hegel US Patent no.6.275.104
DVD
Unbalanced Input
CD Tape Aux.Tuner
Balanced Input
Right Left
Unbalanced Output
PreOut 1Tape PreOut 2
Left channel
Left
Right
From left to right the connectors are:
Signal input Phono / RCA, right / left DVD
Signal input Phono / RCA, right / left CD
Signal input Phono / RCA, right / left tape
Signal input Phono / RCA, right / left tuner
Signal input Phono / RCA, right / left Aux.
Balanced signal input XLR right / left
Tape output Phono / RCA, right / left
Pre output 1 Phono / RCA, right / left
Pre output 2 Phono / RCA, right / left
Speaker output right
Speaker output left
AC Power connection 230V / 115V / 100V AC dependent on country. Fuse holder.
The preamplifier section of the H1 has two types of audio inputs: unbalanced audio signal with RCA
plugs (phono plugs) and true balanced audio signal with XLR plugs (pin 2 is positive phase, pin 3 is
negative phase and pin 1 is chassis earth).
Page 5

HEGEL REMOTE CONTROL RC2
The Hegel H1 can be controlled by the included Hegel system remote control RC2. Like other Hegel
products, the number of buttons on the RC2 is kept to a minimum.
The volume setting, input source and mute function of the H1 can be operated by using the remote
control. The Hegel system remote control will also control other Hegel products like CD players and
preamplifiers, avoiding the need for several different remote control devices.
The remote control uses two standard 1.5-volt LR03 AAA batteries. To insert the batteries please use a
normal type cross head screwdriver to gently remove the four screws in the bottom of the remote
control. Be careful and use a normal cross head screwdriver to remove the four Philips cross head
screws. Do not use a Pozidrive cross head screwdriver, it can damage the head of the screws.
Be sure to insert the batteries with the correct polarity with + sign and – sign as shown inside the
battery holder, and be careful when inserting the batteries to not damage the battery holder.
Be careful when inserting the screws after fitting the batteries. Please turn the screws gently by hand
first to avoid damaging the threads in the remote control body. The threads are made in a soft metal
and can be damaged if screws are inserted by force. Do not tighten the screws to hard, as this also can
damage the screws and the soft metal body of the remote control.
Please do not drop the remote control hard down in the floor, as this can damage internal parts of the
remote control and the battery holder.
To avoid damage to the remote control by leakage from the batteries during transport and storage, the
remote control is supplied without batteries from Hegel.
USE & PLACEMENT
The HEGEL H1 should be placed on a flat, hard surface for proper cooling. The amplifier performs
best after being switched on for about 1 hour for heating up. A certain space is required for air
circulation above and below the amplifier. The amplifier must never be placed on a carpet or similar
surface that obstructs air circulation through the component. Nor must it be covered while in use or
placed on a narrow shelf or in another confined space.
We do not recommend placing a CD-player or similar device directly on top of the H1. Both the H1
and the CD-player will get warm, and they will not perform in a optimal way. A much better solution
is to have the H1 and the CD-player on separate shelves or placed besides each other.
The amplifier will automatically switch itself off if overheated.
The amplifier will need some break-in time before maximum sound quality can be experienced.
Never lift the H1 by holding around the volume knob or input selector knob. The H1 is heavy, and
applying pressure can damage the knobs.
Page 6

TRANSPORT AND SHIPPING OF AMPLIFIER
If you are packing the amplifier for shipping please follow these instructions to secure the volume and
source knobs are not damaged in transport:
1. Put the plastic bag around the amplifier, putting the bag on from the front panel side of the
amplifier. Leave about 10cm of open room between bottom end of plastic bag and volume and
source knobs, making sure the plastic bag bottom end will not touch the knobs during transport.
2. Insert the amplifier in the two white shock absorbers, one in the left side and one in the right side
of the amplifier. It will be most easy to fit the left hand side shock absorber first by putting the left
hand side shock absorber down on the floor and putting the amplifier down into the shock
absorber. Hold the amplifier firmly in the middle of the front panel and the middle of the back
panel and be careful to not hold around the volume and source knobs. Then put the right hand
shock absorber on the amplifier.
3. Insert the amplifier into the cardboard box by first lowering the front panel side against one side of
the cardboard box. Then lower the back side of the amplifier into the cardboard box.
4. Make sure the plastic bag is still loose around the volume and source knobs to avoid any damage to
the knobs during transport.
CLEANING
The top cover, side panels and knobs are made of brushed / blasted and anodized aluminum, while the
front panel is made of solid, powder coated aluminum. Fingerprints or stains on the front panel, knobs
or top cover can be removed with a cloth moistened with warm water or with a mild detergent suitable
for cleaning mirrors and bathroom.
We have found that the detergent Bio-Tex OXI effect supplied in an orange plastic spray can is
working particularly well in cleaning the front panel, top cover and side panels.
We wish you good luck in setting up and connecting your new amplifier and hope that it will give you
many years of joyful natural sounding music experiences!
Page 7

TECHNICAL SPECIFICATIONS
H1 Integrated Amplifier
Power output 120W + 120W at 8 Ohms
Minimum load Loudspeaker impedance down to 2 ohms can be used.
Input Sources 6 remote controllable inputs switched by gold plated relays
Input Terminals Gold plated Phono / RCA unbalanced and gold plated XLR balanced
Output Terminals One set of gold plated speaker terminals each channel
Line level Outputs Gold plated Phono / RCA unbalanced tape out, Preout 1 and Preout 2
Frequency response Less than +/- 0.1 dB deviation 20Hz-20kHz
Phase response Less than 2 degrees deviation 20Hz-20kHz
Signal-to-noise ratio More than 100dB
Crosstalk Less than -100dB
Distortion Less than 0.004% @ 50W 8 Ohms 1kHz
Intermodulation Less than 0.01% (19kHz + 20kHz)
Damping factor More than 1000 ( main power output stage )
Remote Control Philips RC-5 compatible IR system 36kHz modulation
Dimensions 8cm x 43cm x 45cm (HxWxD), 15kg shipment weight.
NOTE & WARNING
Hegel products should only be opened or serviced by certified technicians. The devices contain
electronic components that can cause severe electric shock. Work performed on Hegel products by
unqualified personnel can cause serious damage and personal injury.
Opening of the product by non-authorized personnel will void the guarantee.
The products must not be exposed to rain or moisture.
GUARANTEE
All Hegel products come with a 2-year guarantee against defective materials and workmanship.
In case you should need any assistance with your Hegel product please find your nearest dealer or
distributor by looking at the Hegel web site http:\\www.hegel.com
If you should have any problems locating your dealer or distributor please e-mail to [email protected]
www.hegel.com [email protected]
 Loading...