

V 1.5.1 Stand: 31.07.2007
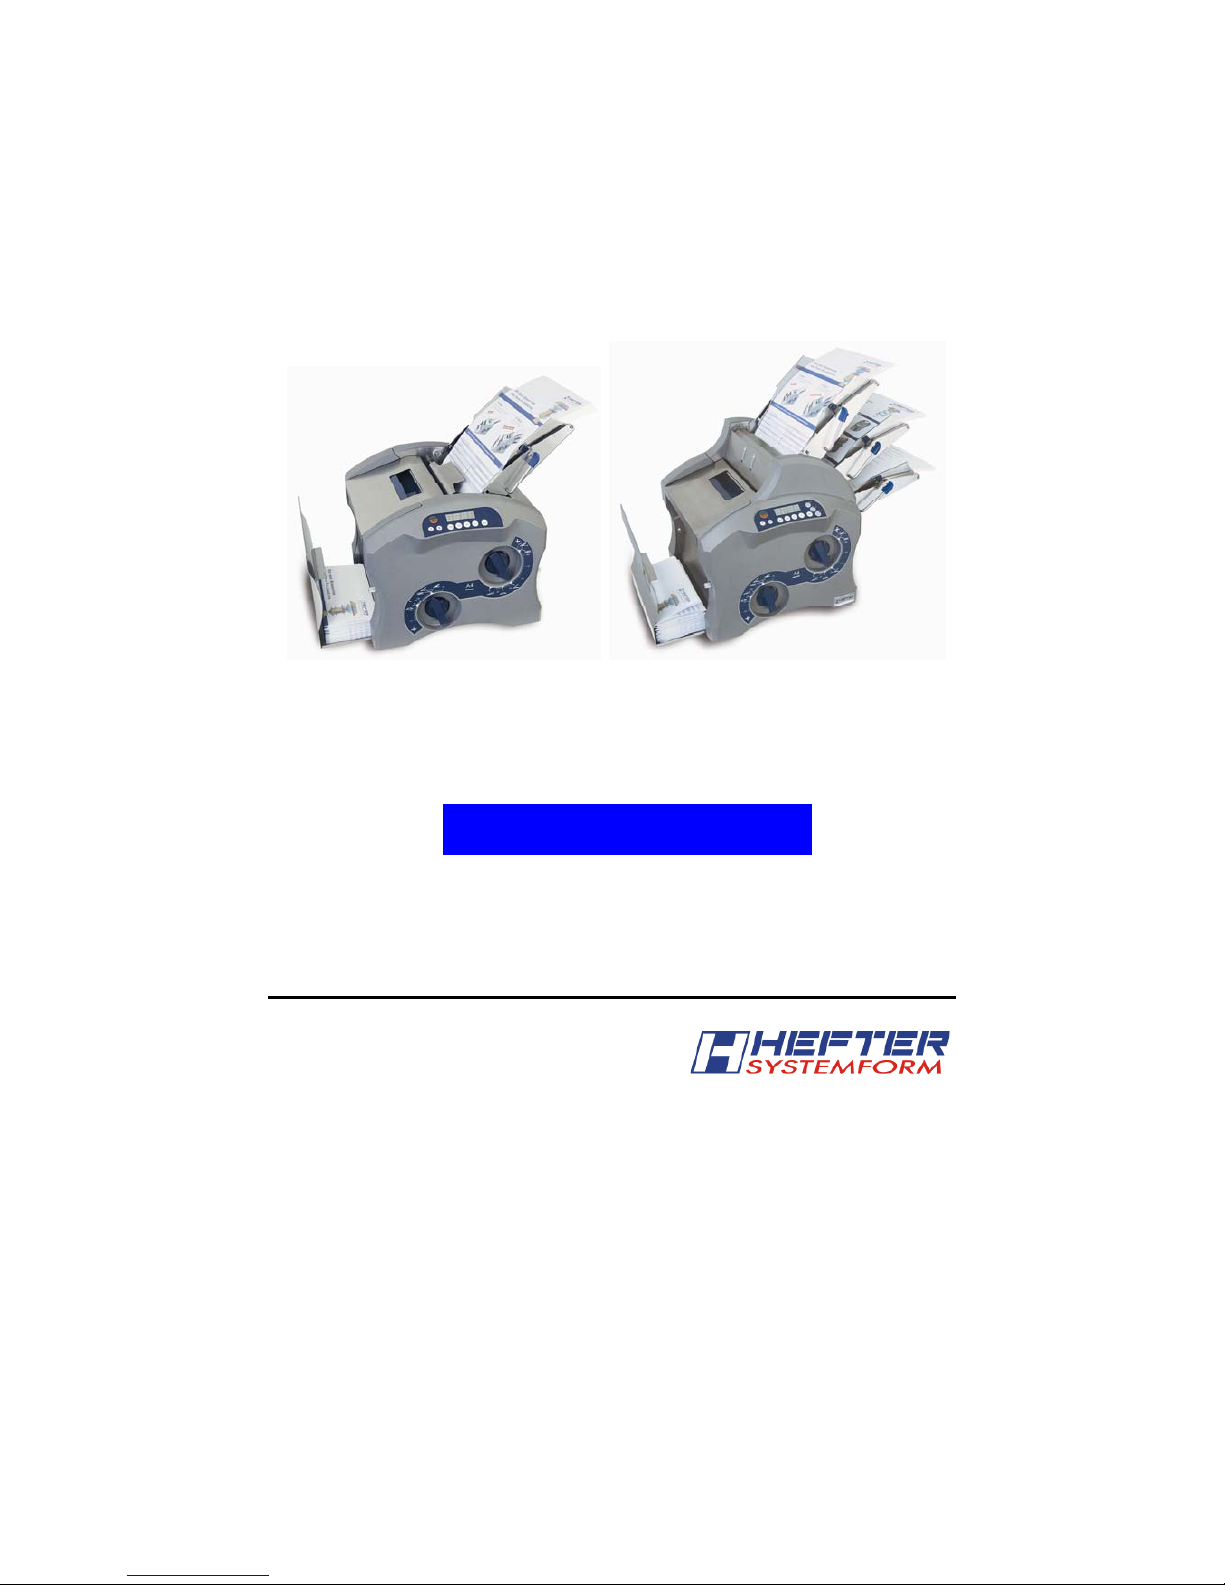
Table Folder
TF M series
MINI plus
MULTI plus
OPERATING MANUAL

V 1.5.1 Stand: 31.07.2007
INDEX
1. INTRODUCTION
1.1. General information.........................................................................2
1.2. User information..............................................................................2
1.3. Safety instructions...........................................................................3
2. PREPARATION FOR USING THE FOLDER
2.1. Names of the control elements .......................................................4
2.2. Installation and start-up...................................................................5
2.3. Set-up of the receiving tray.............................................................7
2.4. Paper feeding..................................................................................7
2.4.1 - for the TF MINI plus (1 single feeding station) ....................................7
2.4.2 - for the TF MULTI plus (3 feeding stations)..........................................7
2.5. Daily Mail ........................................................................................8
3. WORKING WITH THE MACHINE
3.1. Switch on the machine.................................................................. 9
3.2. Select the operating mode and the feeding station.......................9
3.2.1 - without pre-counter..............................................................................9
3.2.2 - with pre-counter...................................................................................9
3.2.3 - Folding of single sheets (daily mail) ....................................................9
3.2.4 - Cascade function (only with the TF MULTI plus) ................................9
3.3. Select the fold type........................................................................10
3.4. Set-up instructions ........................................................................10
3.4.1. – Set-up 1 – DIN A4 sheet - wrap fold (c fold).....................................10
3.4.2. – Set-up 2 – DIN A4 sheet - z fold.......................................................10
3.4.3. – Set-up 3 – DIN A4 sheet - single fold ...............................................10
3.4.4. – Set-up 4 – DIN A4 sheet - double-parallel fold.................................10
3.4.5. – Set-up 5 – DIN A4 sheet - door fold..................................................10
3.5 How to correct the fold position...................................................11
3.6 How to correct the feeding station (diagonally) .......................... 13
3.7 How to change the paper pressure............................................. 13
3.8 Additional Set-ups and indications..............................................14
4. REFERENCE PART
4.1. Error handling..................................................................................15
4.2. Changing paper cassette, paper feed roller and pad......................16
4.3. Technical data.................................................................................17
4.4. Maintenance and cleaning..............................................................18
4.5. Repair and customer service ..........................................................18
4.6. CE certificate...................................................................................19

1. INTRODUCTION
2
1.1. General information
The folder TF M series is a folding machine which has been constructed for the office
environment. It can process documents with different widths as well as various fold types.
The different fold types can be adjusted at the fold plates.
1.2. User information
The folder TF M series is a folding machine which is only destined for the folding of paper.
Any other use is not according to its specifications. The manufacturer/supplier is not liable
for any damage resulting of such un-allowed handling.
Use according to its specifications also includes the consideration of the operating manual
and the compliance with the maintenance instructions.
Any service, repair and maintenance must only be performed by skilled persons of the
manufacturer or by authorized persons.
The folder TF M series is a table top machine and can, therefore, be placed onto an
existing table or a cabinet with a plane, scratch resistant and antislip surface. There do not
exist any special requirements with regard to the warranty of the stability duri ng operation.
The mains voltage must correspond to the indication on the type plate and the power.
Just printed documents must be dried completely before they can be processed. Otherwise
the rollers will get dirty.
Very bent or wavy sheets must be smoothed before the folding process starts.

1. INTRODUCTION
3
1.3. Safety instructions
a. The machine must be used only in a technical good condition as well as in
accordance with the regulations, also considering the safety and risk according to
the operating instructions.
b. The operating instructions must be stored close to the machine and ready to
hand.
c. The manufacturer cannot be h eld li able for any personal injury or material
damage occurred due to inadequate handling of the machine.
d. Do only use the power cord supplied or released by HEFTER Systemform. Take
care that the connexion cable is not damaged.
e. In case of re-locating the TF M series from a cold environment: You must wait at
least 2 hours before starting the machine. The TF M series adapts to the room
temperature automatically. Possible humidity escapes.
f. In case of unauthorized reconstruction or changes of the machine the
manufacturer does not undertake any liability.
For your own safety
a. Before starting the machine you need to read the operating instruction and store it
ready to hand.
b. Do not grip into the machine during the operation => Risk of injury!
c. Long hair, clothes such as ties and jewellery can be grasped by the rotary wheels.
Use of the machine under these circumstances is inadequate.
d. Connect the folder only to a plug with grounded contact.
e. Before any grip into the machine it must first be switched of and the power cord
must be disconnected.
f. Do not put any small/thin objects into the machine ⇒ Risk of electrocute!
g. In case of any problems with the TF M series switch the machine of, disconnect
the power cord and have the machine checked by a HEFTER Systemform
Service Technician.
h. Before you clean the TF M series or remove it do not forget to disconnect the
power cord.
i. Disconnect the power cord in case of a thunderstorm or if the machine is not used
for a longer period of time.
j. Have the maintenance a nd repair works only done by a HEFTER Systemform
Service Technician or by skilled personnel, authorized by HEFTER Systemform.
In case of non compliance the warranty claim will stop.
k. The machine must be protec ted against splash water.
l. Take care that no liquids get into the machine.

2. PREPARATION FOR USING THE FOLDER
4
2.1 Names of the control elements
1. Main switch (= rear)
+ Socket for the power connection
+ fixing for the safety device
2. Paper pressure spring
+ Adjusting wheel for the paper feeding angle
3. Feeding station (incl. lever)
4. Adjustment of paper width ( incl. clamping lever)
5. Guiding plate for the daily mail
6. Flap including opening lever
for the paper jam removal
7. Drawer for the paper stacking
8. Display and control unit
Adjusting wheels for the fold plates
9. Position marker A for the
first
fold plate (= Quickadjustment incl. closing pusher)
Vernier adjustment A
10. Position marker B (=Quickadjust.) for
second
fold plate (incl. closing pusher)
Vernier adjustment B
11. Display
a. Display for sheet counter
b. Countdown information
c. Display for machine status
d. Display for the speed
12. Start / Stop button
13. Speed buttons
a. > = Reduce
b. >> = Increase
14. Adjustment for pre-counter
a. 1000 preset
b. 100 preset
c. 10 preset
d. 1 preset
15. Reset button
Display and control unit for TF MINI plus

2. PREPARATION FOR USING THE FOLDER
5
16. Display
a. Display for sheet counter
b. Countdown display
c. Display for machine status
d. Display for the speed
17. Start / Stop button
18. Speed buttons
a. > = Reduce
b. >> = Increase
19. Adjustment for pre-counter
a. 1000 preset
b. 100 preset
c. 10 preset
d. 1 preset
20. Reset button
21. Select button for the paper tray 1, 2 or 3
(You can chose each paper tray independent from each other!)
22. LED display: Green: Paper tray active
Red flashing: Paper tray active / no paper available
or Paper Jam
LED off: Paper tray not selected
2.2. Installation and start-up
The folder TF M-series is delivered completely assembled and can be installed
easily.
Delivery
a. Folder TF M-series incl. paper tray(s)
b. Power cord
c. Operating manual
Installation
a. Unpack the folder TF M-series
(Packing can be used for re-transport, e.g. in case of repair).
b. Place the folder to its location (plane, antislip and scratch resistant surface).
Display and control unit for TF MULTIplus

2. PREPARATION FOR USING THE FOLDER
6
c. Remove the transportation lock
d. Fit in the paper tray(s) (two notches for fitting, one left and one on the right side)
and turn it backwards to the required position (photos 01, 02 and 03).
Caution
: Do not get your fingers caught when turning the paper tray!
e. Plug the power cord to its destined socket at the rear of the machine (see
point 2.1.)
f. Plug the power cord to the wall socket (230V).
Photo 1
TF MINI plus
(replacement)
Photo 02
TF MINI plus
Position 1
daily mail
photo 04
TF MULTI plus
(replacement)
photo 05
TF MULTI plus
Photo 03
TF MINI plus
Position 2
operating mode

2. PREPARATION FOR USING THE FOLDER
7
2.3. Set-up of the receiving tray
Pull out the drawer for the paper tray at the front of the machine (-> photo 03
and 05). Adjust the position needed (stacking width) by moving the drawer
accordingly. No jam may occur (The scores at the drawer help you to find the
correct stacking width)!
2.4. Paper feeding
2.4.1 Paper feeding at the TF MINI plus (= one single feeding station, see photo 06)
Adjust both paper guidances centered and
symmetric and with a minimal slack
to the paper width needed.
To adjust the paper guidances please grab
them with the clambing lever.
NOTE: No jam may occur at the paper
guidance,
the paper needs a slack of ~0,5 mm!
Move the lever of the paper tray (right side)
downwards and position the paper so that it
touches the bottom neatly. Then loose the lever.
Example: For the set-up of the wrap fold for A4 sheets (see point 3.4.1) feed the
paper face up and foot first.
Tip: - Fan the paper before you insert it!
- Always make a test fold to check the fold!
2.4.2 Paper feeding at the TF MULTI plus (= 3 feeding stations, see photo 07)
Adjust both paper guidances of each feeding
station centric and symmetric and with a
minimal slack to the paper width needed.
Please use the scale for that purpose.
To adjust the paper guidances please grab
them with the clambing lever.
NOTE: No jam may occur at the paper guidance,
the paper needs a slack of ~0,5 mm!
Move the lever of the paper tray (right side)
downwards and position the paper so that it
touches the bottom neatly. Then loose the lever.
Abb. 07 – TF MULTI plus
Abb. 06
TF MINI plus

2. PREPARATION FOR USING THE FOLDER
8
Example: For the set-up of the wrap fold for A4 (see point 3.4.1) feed the paper face up
and foot first.
Tip: - Fan the paper before you insert it!
- Always make a test fold to check the fold!
-
Note: When foldings out of 2 or 3 feeding stations are necessary there may be no
paper fed before the folding process starts. Otherwise a paper jam may occur.
Please first insert the documents in the paper tray, then start the folding process.
2.5 Daily mail
Folding of single sheets (Daily mail = semi-automatic processing)
a. Empty the feeding station(s)
b. Turn the feeding station (only at the TF MULTI plus)
forward to the first grid position (see point 2.2.)
c. The two paper guidances will help you to feed the sheets (max.
5 sheets together) centered into the daily mail feeding tray (= paper
feeding) as far as possible. Press slightly so that all sheets will be fed
at the same time.
d. The folder starts automatically.
e. It stops automatically after the folding process
NOTE: The sheets may also be stitched! But this stitching should
always be positioned parallel to the folding wheel
__ = correct,
| = wrong!
Example: For stitched documents = Z-fold for DIN A4
(see under 3.4.1)
Insert the paper face down and with the address field first.

3. WORKING WITH THE MACHINE
9
3.1. Switch on the machine
Before starting the machine take care: long hair, clothes such as ties and jewellery can be
grasped by the rotary wheels.
Turn the main switch to the position I (= On) (see under 2.1)
3.2. Select the operating mode and the paper feeding
In general you can choose from four operating modes:
3.2.1. Folding with counter
a. Insert the paper to be folded (see point 2.4)
b. Control the fold type (see fold t ype set-up un der point 3.3 and 3.4)
c. Activate the appropriate paper tray(s) (only for the TF MULTI plus)
d. Start the folding process by pushing the Start-Stop button (see
under 2.1)
e. The machine stops if
i. There is no more paper or
ii. You push the start-stop button again.
3.2.2. Folding with pre-counter (count down function)
a. Insert the paper to be folded (see point 2.4)
b. Control the fold type (see fold t ype set-up un der point 3.3 and 3.4)
c. Enter the required quantity by means of the preset button. The quantity
is shown on the display (see under 2.1)
(Button 1 = 1000, button 2 = 100, button 3 = 10, button 4 = 1)
(from left to right)
d. Activate the paper tray(s) (only at the TF MULT I plus)
e. Start the folding process by pushing the Start-Stop button. (see
under 2.1)
f. The machine stops if
i. Preset quantity of paper is folded or
ii. There is no paper. In this case please refill the paper tray and push
the start button again or
iii. push the start-stop button again.
3.2.3. Folding of single sheets (see point 2.5 daily mail)
3.2.4 Cascade function (only with the TF MULTI plus)
a. Cascade function stands for an automatic folding of the feeding stations
1, 2 and 3. The sheets are fed from 1 feeding station (e.g. station 1)
until this station is empty. The process will continue from the next station
(e.g. station 2 and 3).
b. The cascade function can be set per key stroke! For this you press the
“keys of the feeding stations 1 and 2” simultaneously for 2-3
seconds.
c. To go back to the standard working mode press the two “keys of the
feeding stations 1 and 2” again for 2-3 seconds.

3. WORKING WITH THE MACHINE
10
3.3. Select the fold type
The TF M series has two
fold pockets!
¾ Position marker A for
the first fold pocket
(incl. closing pusher)
Vernier adjustment A
¾ Position marker B for
the second fold pocket
(incl. closing pusher)
Vernier adjustment B
To change the fold pocket position; first push the position marker A or B down
(Quickadjustment, see point 2.1.).
Now you can adjust the position, depending on the required fold type (acc. to the
scale) (also see under point 3.4)
For just one folding (e.g. single fold) the position marker A is turned completely to the
right side (up to the symbol <).
To fix the fold pocket position release the closing pusher (= locked). The position
marker have to snap in complete (flash with the front cover).
NOTE:
During the changing process of the fold pocket position marker no paper may
be in the folding wheel!
3.4. Set-up instructions
Pos. Feeding
instruction
Paper
size
Fold
type
Address
position
Position
lever, fold
pocket 1
Position
lever, fold
pocket 2
3.4.1.
A4 Wrap
fold
3.4.2.
A4 Z fold
3.4.3.
A4 Single
fold
3.4.4.
A4 Double-
parallel
fold
3.4.5.
A4 Door fold
B
A

3. WORKING WITH THE MACHINE
11
3.5 How to correct the fold position
If you need to change the fold position this can be done very easily (scale +/-)
Move the position marker by using the vernier adjustment A or B.
1. Paper feeding
2. Select fold type
Wrap fold (DIN A4 document)
For the correct result of the wrap fold you need to adjust two fold positions.
The position marker A controls the length A.
The position marker B controls the length B.
To reduce length A = move the position marker A to To increase length A = move the position marker A to +
To reduce length B = move the position marker B to To increase length B = move the position marker B to +
Z-fold (DIN A4 documents)
For the correct result of the Z-fold you need to adjust two fold positions.
The position index A controls the length A.
The position index B controls the length B.
To reduce length A = move the position marker A to To increase length A = move the position marker A to +
To reduce length B = move the position marker B to To increase length B = move the position marker B to +

3. WORKING WITH THE MACHINE
12
Single fold (half fold) (DIN A4 documents)
For the correct result of the single fold you need to close the first fold pocket, meaning the
position index A must be turned clockwise as far as possible.
The position index B controls the length B.
To reduce length B = move the position marker B to To increase length B = move the position marker B to +
Double parallel fold (16” documents)
For the correct result of the double parallel fold you need to adjust two fold positions.
The position index A controls the length A.
The position index B controls the length B.
To reduce length A = move the position marker A to To increase length A = move the position marker A to +
To reduce length B = move the position marker B to To increase length B = move the position marker B to +
Door fold (DIN A4 documents)
For the correct result of the door fold you need to adjust two fold positions.
The position index A controls the length A.
The position index B controls the length B.
To reduce length A = move the position marker A to To increase length A = move the position marker A to +
To reduce length B = move the position marker B to To increase length B = move the position marker B to +

3. WORKING WITH THE MACHINE
13
3.6. How to correct the paper tray
To correct the paper tray diagonally you need to adjust the edgewise pape r guidance
by means of the adjusting wheel for the feeding angle (under the paper tray, right).
Adjusting wheel for the paper feeding angle
3.7. How to change the paper pressure
The paper pressure can be adjusted, depending on the paper qualit y.
The paper pressure spring
is under the paper tray (see 2.1).
You can turn the paper pressure button (open) and move to the appropriate position.
To fix the paper pressure button you turn it again (close).
- for low pressure and
+ for high pressure

3. WORKING WITH THE MACHINE
14
3.8. Additional set-ups and indications
3.8.1 Set-up of the feeding time at the TF Mini plus & TF Multi plus for the daily mail
The machine starts automatically with the daily mail mode according to an
adjustable Time (
factory settings: TF MINI +: 1.0 sec., TF MULT +: 2.0 sec.)
i.e. e.g. 1,0 seconds (MINI +) after inserting the sheets into the daily mail channel!
a. T he feeding time can be set per key stroke! Press the key “reset” for about 4
seconds.
b. Then, the time set will be displayed. You can reduce this time by pressing “ >” or
extend it by pressing “>>”.
c. By pressing the key “reset” again you will reach the standa rd opearting mode. The
time lastly displayed was set and stored.
3.8.2 Set-up of the feeding time of the individual TF Multi plus feeding stations
The feeding times of the individual feeding stations are different since the distances
from each station to the folding wheels vary. – This means that the sheets are fed
with different time lags due to the different distances so that they will reach the
folding wheels at the same time.
Distance feeding station 1 = time lag 1 (factory settings: 0.50 sec.)
Distance feeding station 2 = time lag 2 (factory settings: 0.30 sec.)
Distance feeding station 3 = time lag 3 (factory settings: 0.40 sec.)
a. T he feeding time can be set per key stroke!
Press the respective “feeding station key” about 5 seconds.
b. Then the time set will be displayed which you can reduce by press ing
“>” or extend by pressing “>>”.
NOTE:
Change the feeding time only stepwise and only from one station at a time
so that you can find out if the folding result has been improved.
c. By pressing again the selected “feeding station key” you will be back in the
standard operating mode; the lastly displayed time was set and stored.
3.8.3 Display “Total Number of folds”
a. The total number of any folds made with this folder can be displayed per key
stroke! Just press the keys “10”, “1” and Reset simultaneously.
b. Then the total number of folds will be displayed in steps of thousands,
e.g. 0001. = 1000 folds and . 0012 for total 1012 folds.
c. The display will disappear after a few seconds and you will be back in the
standard operating mode.

4. REFERENCE PART
15
4.1. Error handling
Error description Possible reason Corrective action
No current Check the power supply, the socket
and the cable
Machine does not start
Display does not light up
Fuse blown out Check the fuse (see page 14, fuse
type 1,5 A slow)
Fold pockets are
blocked
Remove any possible paper in the fold
pockets (see drawing page 14)
Paper jam in the
machine
Feeding is blocked Remove any possible paper at the
feeding unit (see point 2.4)
Paper jam in the stacker Stacker is not drawn
out far enough
Move the stacker to the correct
position according to the fold type (see
under 2.3)
Fold A is too short Fold pocket 1 is
displaced
Move the position index A for the fold
A downwards (see under 3.5)
Fold A is too long Fold pocket 1 is
displaced
Move the position index A for the fold
A upwards (see under 3.5)
Fold B is too short Fold pocket 2 is
displaced
Move the position index B for the fold
B upwards (see under 3.5)
Fold B is too long Fold pocket 2 is
displaced
Move the position index B for the fold
B downwards (see under 3.5)
Paper is not fed good
enough
Pressure spring
displaced
Move the pressure spring at the rear
of the paper tray (see under 2.1)
Stronger pressure – Spring to +
Reduced pressure – Spring to -
The fold is to slope Paper try displaced Correct the paper try (see under 3.6)
Paper is not fed together
(only for the TF MULTI+)
Feeding time is
wrong
Correct the feeding time for the
feeding stations (see under 3.8.2)
Error description on the display:
Error 1 Lever for the paper
jam removal is open
Close the lever (see under 2.1)
Error 2 Overpowered
The folder was
overpowered
Switch off the folder, remove a possible
paper jam and switch on the machine.
Error 3 Paper jam in the
machine
Remove any possible paper in the
Machine and the fold pockets (see
drawing page 14)
Error 4 No paper tray
selected (only for
the TF MULTI plus)
Select the paper tray(s) needed (see
under 2.1)

4. REFERENCE PART
16
Before changing the fuse or opening the cover for the paper j am clearance please note:
Machine must be switched off and the power supply must be disconnected!
Now open the cover by means of the lever (in the hollow).
The wheels are now easy to reach and the paper can be removed.
Please do not use force!
4.2. Changing paper cassette, paper feed roller and pad (e.g.abrasion)
First remove the paper cassette. Turn move it out of the two notches for fitting.
it frontwards to the shown position and
To remove the paper feed roller
Press in the direction of the arrow to remove After this, you can remove the pad.
the joint of the shaft. Tip it out.
Remove of a paper jam:
In case of a jam open the cover and remove
the paper.
Opening lever
Change the fuse:
The fuse is located between the
main switch and the socket.
Pull out the fixing unit; then you can
exchange the fuse!

4. REFERENCE PART
17
4.3. Technical data
Paper width: 100 mm – 218 mm (3,94 inch – 8,58 inch)
Paper length: TF MINI plus 80mm - 448mm (3,15“–17,64“)
TF MULTI plus 150mm - 448mm (5,90“–17,64“)
Paper weight: 50 – 150 g/m
2
The total weight for the TF MINI (daily mail) and
TF Multi plus should not exceed 300 g/m
2
!
e.g. 80 g in station 1
e.g. 80 g in station 2
e.g. 80 g in station 3
= 240 g total weight
Display: LCD 4 x 7-Segment display
Loading capacity: TF MINI plus max. 200 sheets
TF MULTI plus max. 600 sheets
(= 3 x 200 sheets)
The loading capacity may vary depending on
the paper quality and its weight.
Performance: TF MINI plus: max. 7.200 sheets/h
Performance: TF MULTI plus max. 6.000 sheets/h
Daily Mail = nest fold: max. 5 sheets, also with horizontal
wire stitches
Electricity: Power supply ~230 V → 24 V = / 2.5 A
230V 50 Hz 5,0 A
110V 60 Hz 10,5 A
Fuse: 1,5 A Slow
Dimensions: TF MINI plus 320 x 377 x 398 mm (L/W/H)
TF MULTI plus 320 x 377 x 483 mm (L/W/H)
Weight: TF MINI plus about 13 kg
TF MULTI plus about 17.5 kg
Environmental conditions: Room temperature 15-40°C
Relative humidity 40-70%
Noise level: max. 73 dBA
Technical data is subject to changes!

4. REFERENCE PART
18
4.4. Maintenance and cleaning
Regular and correct cleaning will contribute to a long life cycle of the machine with
high quality.
Therefore, it is important to clean the machine regularly – especially to remove
any possible paper dust and to clean the folding wheels.
⇒ Before cleaning the machine it must be switched off and the power cord must
be unplugged
⇒ The transport rollers, the running surface and the feed stop must be cleaned
regularly.
⇒ Clean the machine only with a damp, non fuzzy cloth; the best would be using
the special cleaner for rollers (2800020) offered by HEFTER.
IMPORTANT:
Please do not use any aggressive cleaning material! The manufactur er does not
take any responsibility for any other cleaning material.
CAUTION:
Take care that no liquids get into the machine!
4.5. Repair and customer service
Hefter Systemform is always available to you in case of any questions to this
folder TF M series or if service support is needed (www.hefter.de).
Please contact HEFTER Systemform directly or one of our distributors close to
your place. You can find the addresses and phone numbers on page 19 of this
manual or on the label at your machine.

4. REFERENCE PART
19
4.6. CE certificate
Product: Table-top folder
Type: TF MINI plus
TF MULTI plus
The design of this 98/37/EWG
machine conforms with 73/23/EWG
the following regulations: 89/336/EWG
Applied harmonised EN 292-1
standards: EN 292-2
EN 294
EN 349
EN 954-1
EN 1010
EN 1010-1
EN 1050
EN 60204-1
Dipl.-Ing. (FH) Ch. Hefter
Development / Construction
Prien, 28 June 2004
HEFTER Systemform
Sales Departement Central-Repair-Shop
Bernauer Straße 71 Am Mühlbach 6
D – 83209 Prien D – 83209 Prien
+49(0) 8051 / 686 201 +49(0) 8051 / 686 2041
Fax +49(0) 8051 / 686 211 Fax +49(0) 8051 / 686 211
systemform@hefter.de
systemform@hefter.de
www.hefter.de
www.hefter.de
 Loading...