

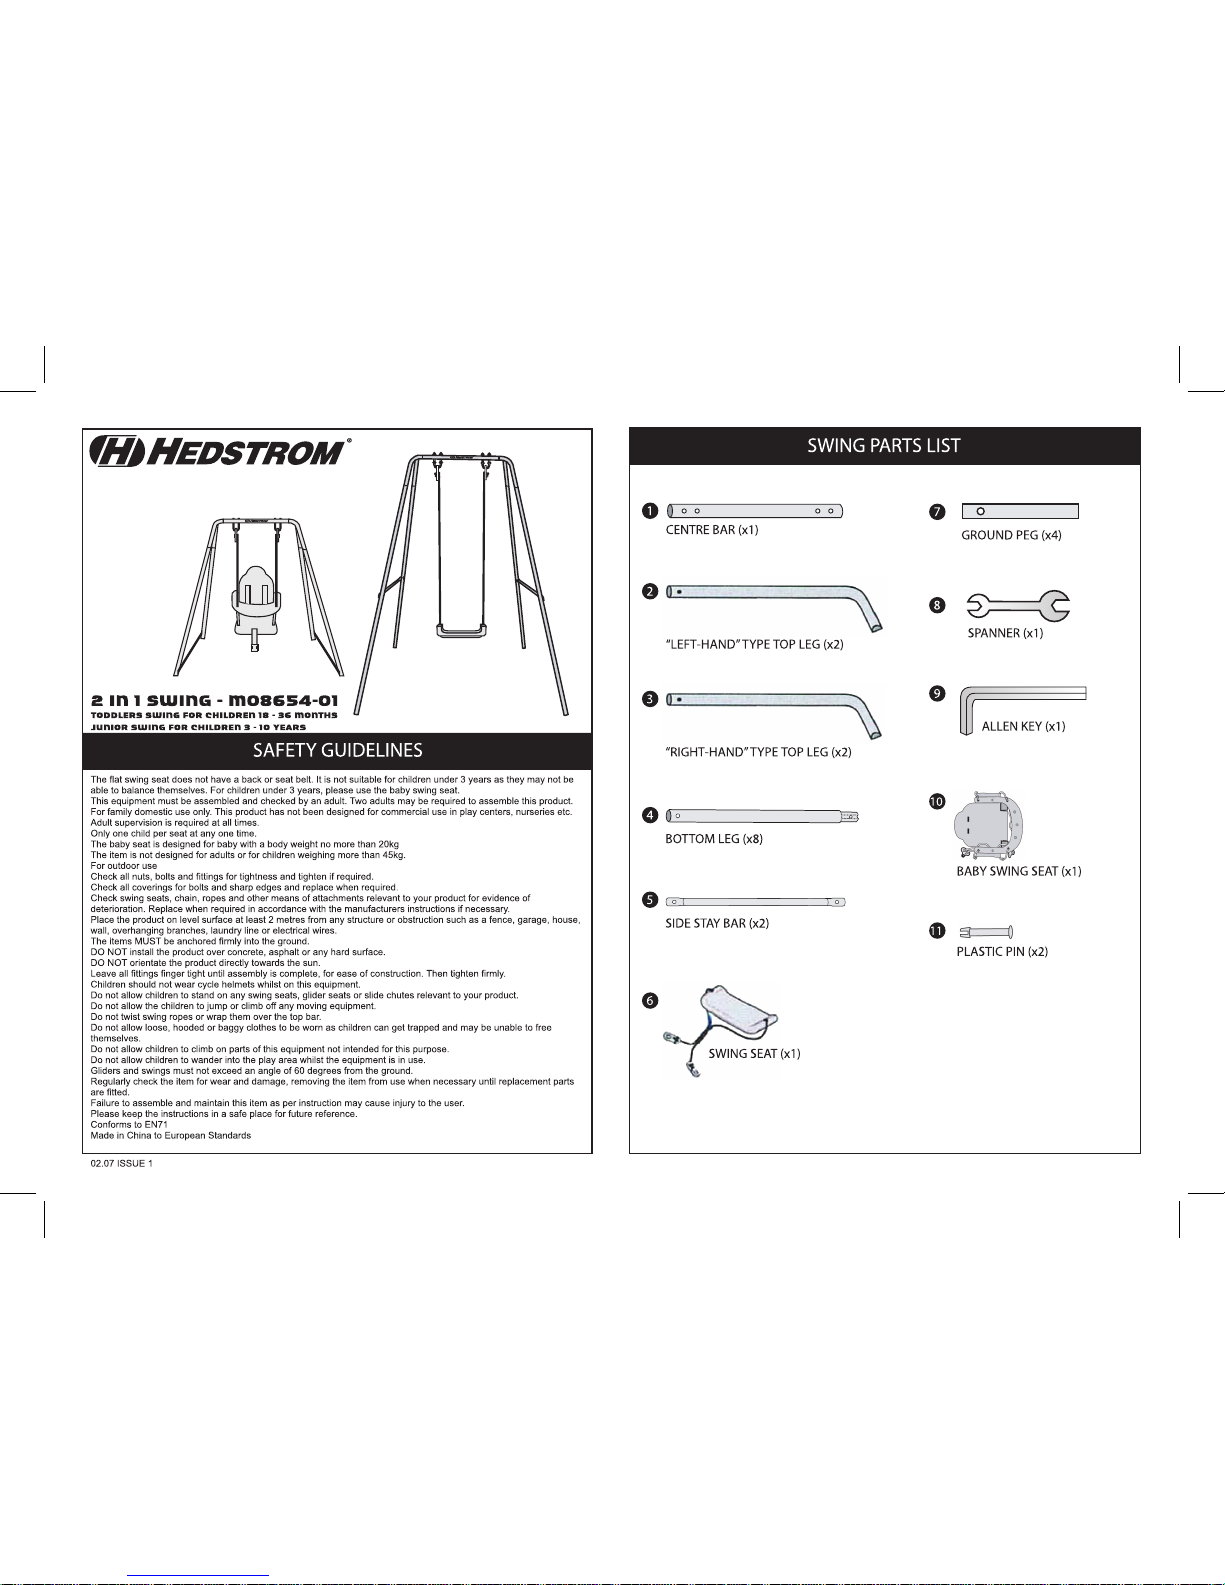
Hedstrom m08654-01 Safety Manuallines
11
10
PLASTIC PIN (X2)
11
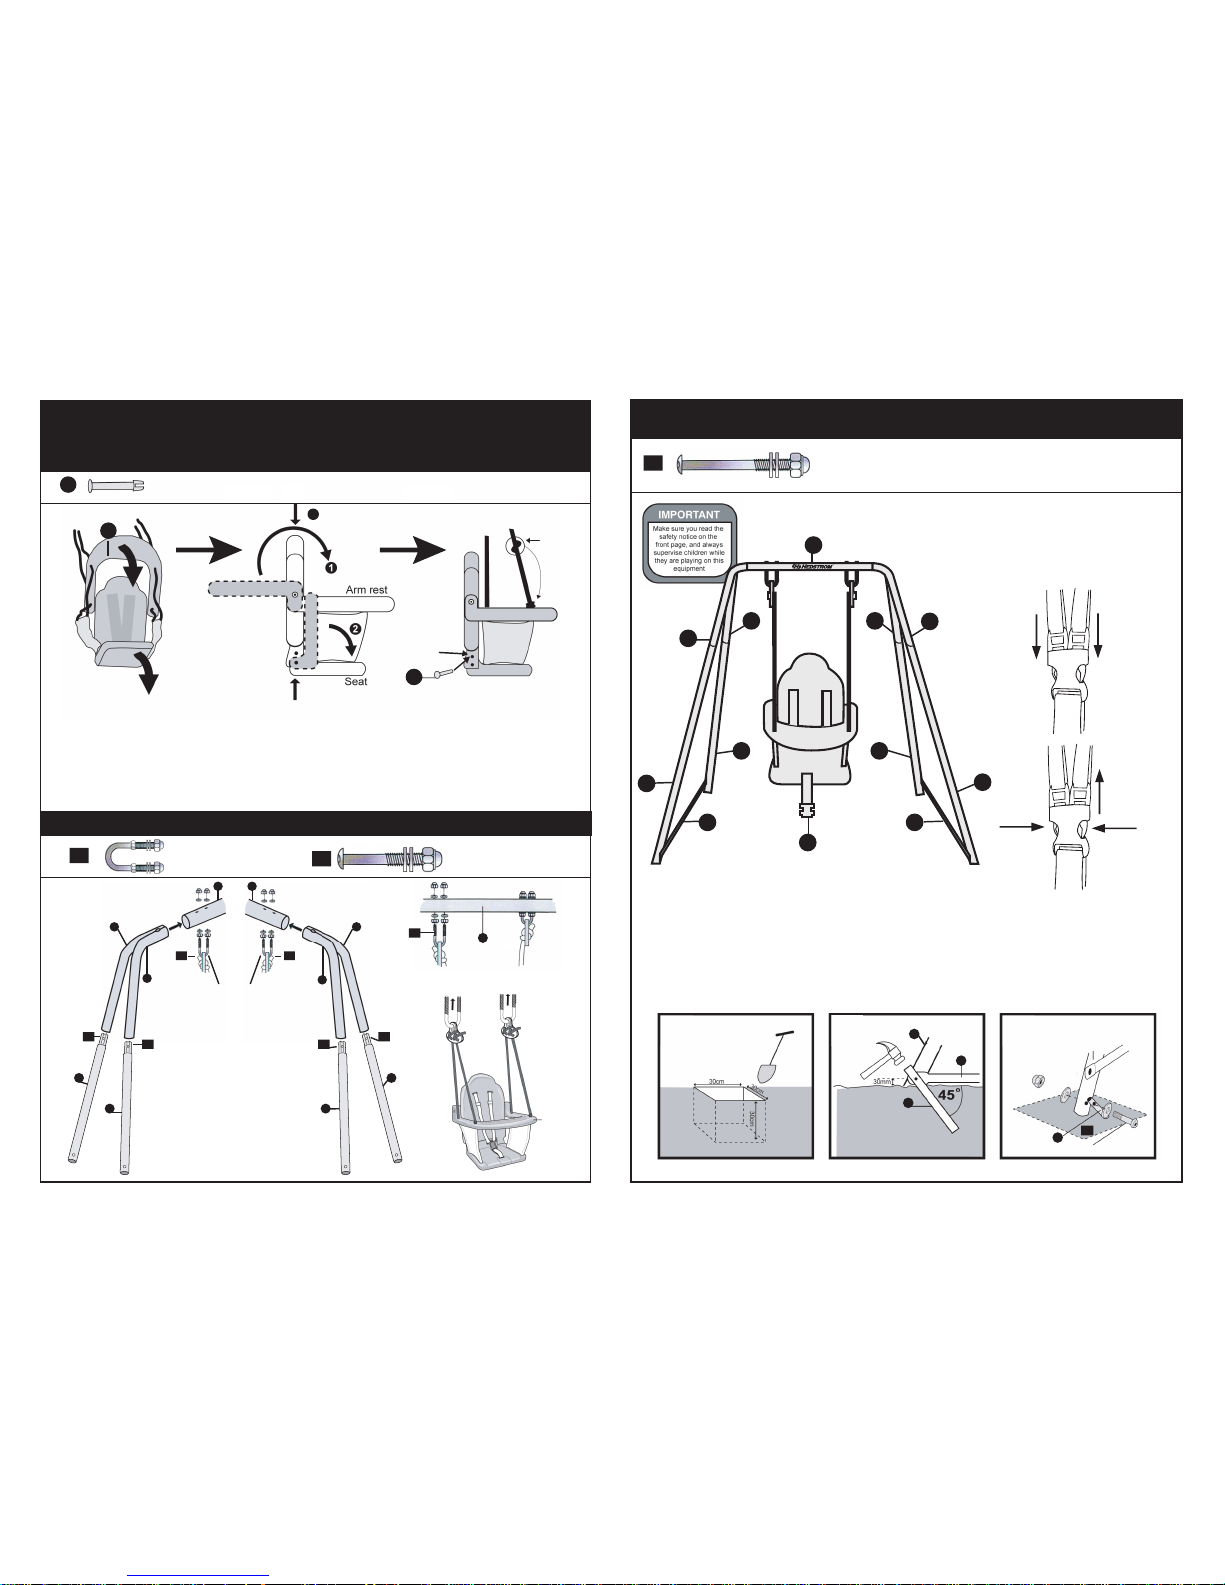
ASSEMBLY INSTRUCTION FOR TODDLER SWING
TODDLER SWING FOR CHILDREN 18 MONTHS TO 36 MONTHS
PLEASE RETAIN UNUSED SWING COMPONENTS FOR ASSEMBLY OF JUNIOR SWING
STEP 1 Frame & Swing Seat Assembly
M6 BOLT 58mm (X4)
F4
Remember to attach the
rope clamp to the U bolt
1
1
4 4
4 4
1
2
2
3
3
F1 F1
F1
F5
F5 F5
F5
M8 U BOLT (x2)
F1
M6 BOLT 35mm (x4)
F5
STEP 2 Frame & Swing Assembly
Note: If the soil is hard enough, it may not be necessary to
concrete the ground pegs of the baby swing. If the pegs are
concreted, additional ground pegs (not provided) will be
required for the single swing.
Note: Additional ground pegs can be requested from MV
customer sevices.
STEP 3
ANCHORING SWING TO GROUND
7
4
5
7
F4
1
2 3
3
2
5 5
10
4
4 4
4
3
Step C:
Once the seat has been aligned, push
the two orange pins firmly into the
sides of the seat until they fully fit into
the backrest. Please note that if the pins
are forced into the seat when it has not
been aligned, it will cause the pins to
break.
Step A:
Carefully fold over the seat
armrest followed by the base
as shown in the diagram.
Step B:
Position the back so that it is at a 90
degree angle to the base, pushing down on
it until it clicks into place. You can check
the seat is aligned as you will be able to
see through the holes on the side of the
seat.
You can
check the
seat is
aligned as
you will be
able to see
through the
holes on the
sides of the
seat.
You can
check the
seat is
aligned as
you will be
able to see
through the
holes on the
sides of the
seat.
Push
Pull
To Open Harness
To Close Harness
Push
Push
To fasten push
both left and right
hand side clips
into the harness
until they click
into place.
Take care when seating your child.
The child must be secured to the
seat by fastening the seat belt
immediately to avoid any injury.
 Loading...