

Page 1
The active noise reduction technology built into these headphones allows them to
reduce annoying low frequency sounds, such as ambient noise found in airplanes,
trains and buses (over 12 dB at 300Hz). These headphones work to reduce the
low frequency ambient sounds without disturbing higher frequency sounds that
are present in the same area (car horns, human voice, telephones and sirens).
Please read these instructions completely before connecting or operating the unit.
Warning: Read all of these instructions before using this device. To reduce
the risk of fire or electric shock, do not expose this device to rain or
moisture.
To reduce the risk of electrical shock, do not open the cabinet. Refer servicing to
qualified personnel only.
Read these instructions and keep these instructions. Heed all warnings.
This device complies with Part 15 of the FCC Rules. Operation is subject to the
following two conditions:
This device may not cause harmful interference;
This device must accept any interference received, including interference that may
cause undesired operation.
Changes or modifications not expressly approved by the party responsible for
compliance could void the user’s authority to operate the equipment.
Caution
1. Prolonged exposure to loud music may cause hearing damage. Hearing experts
advise against continuous extended play and high levels.
2. Do not use while driving motorized vehicles. This may lead to trac accidents
and is illegal in many areas.
3. If you experience ringing in your ears, reduce volume or discontinue use.
4. Do not drop, sit on or allow the headphones to be immersed in water.
Noise Cancelling
Headphones
User Manual
Model #NCH20
ONE | SAFETY PRECAUTIONS
Page 2

Staple your receipt to your manual. You
will need it to obtain warranty service.
Model number ___________________
Date of purchase _________________
1. Safety Precautions
2. Parts and Features
3. Installation Instructions
4. Features and Use
5. Care and Cleaning
6. Troubleshooting
7. Warranty
Installing a battery
1. Press down the tab on the
back of the controller and pull
to open and gain access to the
battery compartment.
2. Insert one R02/AAA battery
in the battery compartment.
Ensure the correct polarity
when installing the battery.
Insert the Negative end first.
3. Align the battery lid with the battery compartment, then snap to close the
battery lid.
SAVE THESE INSTRUCTIONS
TABLE OF CONTENTS
TWO | PARTS AND FEATURES
THREE | INSTALLATION INSTRUCTIONS
Adaptor Plug
Pouch
Mute Switch
Power
Indicator
Volume
Control
Thank you for purchasing our HEC device. This easy to use manual will guide you
in getting the best use of your Noise Cancelling Headphones.
Remember to record the model number. It is located on the front of the packaging.
Shirt Clip
(not shown)
Page 3
Using Your Headphones
1. If you intend to use the headphones for noise reduction only, simply turn the
power switch to the “ON” position. The LED on the controller will light. In this
mode, no cable connection is required.
2. Turn the power switch to “OFF” if noise reduction is no longer required. The unit
will then operate like normal headphones.
Noise cancelling headphones reduce unwanted ambient noise, providing a quieter
environment to enhance your listening experience. These headphones can be
used with or without the noise cancellation feature. Use the supplied plug-in
adaptor for easy connectivity to in-flight music services. Please use the shirt clip
on the back of the controller for secure and easy access to controls. For storage,
simply fold the ear cups in toward the headband and place in your travel pouch.
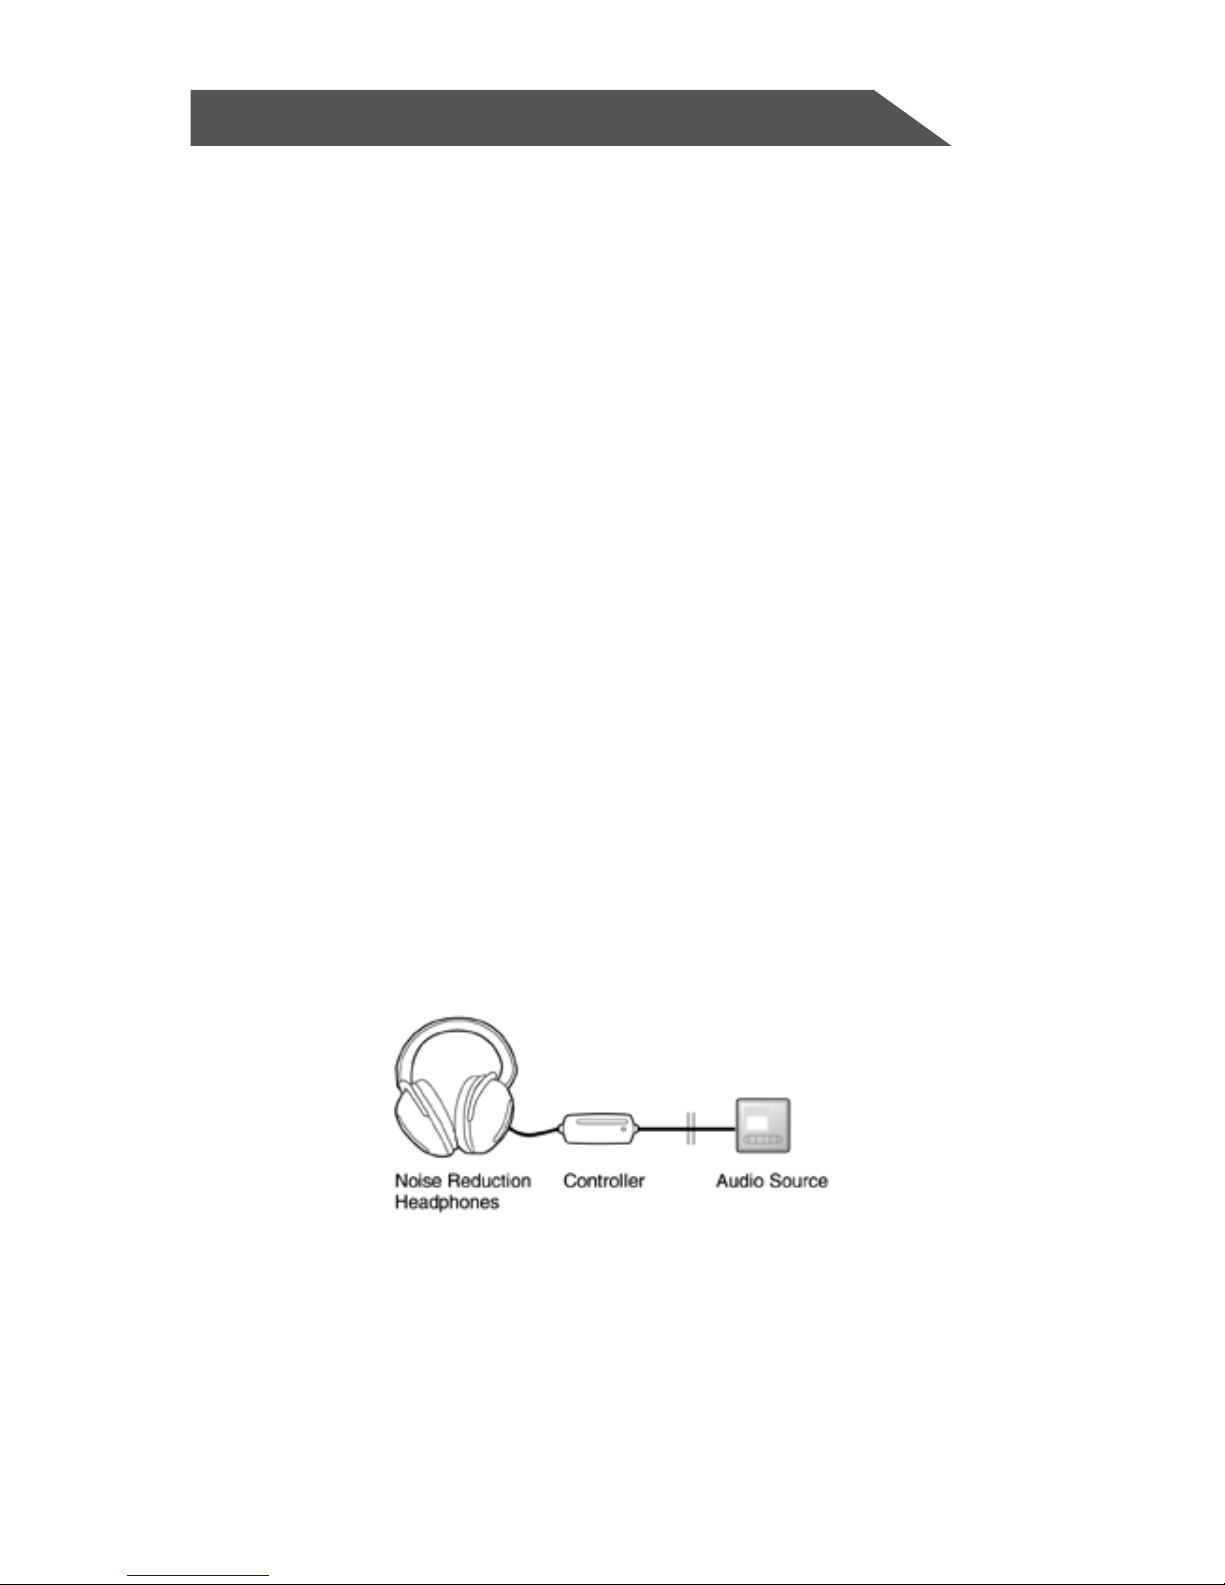
Connection to an Audio Source
You can use the headphones with a variety of audio sources such as CD, DVD, MP3
player, laptop computer or home stereo unit. To make a connection, simply insert
the headphone plug into the phone jack or the audio source.
1. Turn the power switch to “ON” and adjust the volume control to the desired
sound level. Note that the power indicator light is lit.
2. To stop the sound from the headphones temporarily, slide the mute switch to
the right as indicated by the arrow on the cabinet. To cancel the mute function,
slide the mute switch in the opposite direction.
3. Slide the power switch to the “OFF” position to turn o the unit after use.
FOUR | FEATURES AND USE
Page 4

Precautions
Do not use the headphones when use of the electronic equipment is prohibited.
Do not use headphones when driving and cycling.
To prevent hearing damage, avoid using headphones at high volume.
1. Clean your headphones with a damp (never wet) cloth. Solvents or detergents
should never be used.
2. Avoid leaving your headphones in direct sunlight or in hot, humid or dusty
places.
3. Keep your headphones away from heating appliances and sources of electrical
noise such as fluorescent lamps or motors.
SIX | TROUBLESHOOTING
FIVE | CARE AND CLEANING
Symptom Solution
Power does not turn on Check that the battery is installed correctly
Power does not turn on Install a fresh battery
There is no sound Check the connection to the AV device is secure
There is no sound Check that the AV device power is switched on
Specifications
Speaker 40mm Dynamic Driver
Impedance 32 Ohm +/- 10%
Sensitivity 106 dB +/- 3dB @ 1 kHz
Frequency Response 20 Hz to 20 kHz
Active Noise Reduction >12 dB @ 300 Hz
Maximum Power Handling 100mW
Weight Approximately 180g (without battery)
Using the Noise Cancelling Headphones:
1. Connect to the portable media player.
2. Wear the side marked R on your right ear and the one marked L on your left ear.
3. Turn the power on through the remote controller.
4. Turn on the power of the portable media player or AV equipment.
5. After listening to the music, turn o the power of the headphones.
Page 5

SEVEN | LIMITED WARRANTY
This Haier brand product, when shipped
in its original container, will be free from
defective workmanship and materials,
and agrees that it will, at its option, either
repair the defect or replace the defective
product with a new or re-manufactured
equivalent at no change to the purchaser,
for parts or labor for the periods set forth
below: 90 Days
This warranty does not apply to the
appearance of the product or the exterior
of the product, which has been damaged
or defaced, altered or modified in design
or construction. It does not apply to the
additional excluded items set forth below:
The warranty commences on the date
the item was purchased and the original
purchase receipt must be presented to
the authorized service center before
warranty repairs are rendered.
The limited warranty described herein
is in addition to whatever implied
warranties may be granted to purchasers
by law. ALL IMPLIED WARRANTIES
INCLUDING THE WARRANTIES OF
MERCHANT ABILITY AND FITNESS FOR
USE ARE LIMITED TO THE PERIOD(s)
FROM THE DATE OF PURCHASE SET
FORTH BELOW. Some states do not
allow limitations on how long an implied
warranty lasts, so the above limitation
may not apply to you. Neither the
sales personnel of the seller nor any
other person is authorized to make any
warranties other than those described
herein, or to extend the duration of
any warranties beyond the time period
described herein on behalf of Haier.
The warranties described herein shall
be the sole and exclusive warranties
granted by Haier and shall be the sole
and exclusive remedy available to the
purchaser.
Correction of defects in the manner and
for the period of time described herein,
shall constitute complete fulfillment of all
abilities and responsibility of Haier to the
purchaser with respect to the product,
and shall constitute full satisfaction of
all claims, whether based on contract,
negligence, strict duality or otherwise.
In no event shall Haier be liable, or in
any way responsible for any damages or
defects in the product which were caused
by repairs or attempted repairs performed
by anyone other than an authorized
service center or dealer; nor shall Haier
be liable, or in any way responsible for
incidental or consequential economic
or property damage. Some states do
not allow the exclusion of incidental or
consequential damages, so that above
exclusion may not apply to you.
THIS WARRANTY GIVES YOU SPECIFIC
LEGAL RIGHTS. YOU MAY ALSO HAVE
OTHER RIGHTS WHICH VARY FROM STATE
TO STATE.
Warranty period for this product: 90 days
for Labor, and parts. Additional items
excluded from warranty coverage: non
rechargeable batteries.
Where to obtain service: For the location
of the nearest Haier authorized service
center or to obtain product literature,
accessories, supplies or customer
assistance, please call 1-877-337-3639.
What to do to obtain service: ship or carry
in your product to an authorized service
dealer or center . Be sure to have proof of
purchase.
If you ship the product, be sure it is
packaged carefully.
Haier America
New York, NY 10018
Haier America warrants manufacturing
defects in original material, including
original parts and workmanship, under
normal use and conditions, for a period of
ninety (90) days from the date of original
purchase in the US & Canada.
Page 6

La technologie de réduction active du bruit intégrée à ce casque d’écoute permet
la réduction des sons dérangeants de basses fréquences, tels que les bruits de
fond dans les avions, les trains, et les autobus (plus de 12 dB à 300 Hz). Ce casque
d’écoute réduit les sons ambiants à basses fréquences sans nuire aux sons à
fréquences plus élevées présents dans la même zone (klaxon d’automobiles, voix
humaine, téléphones et sirènes). Veuillez lire ces instructions en entier avant de
raccorder ou d’utiliser l’appareil.
Avertissement: Lisez toutes les instructions avant de vous servir de ce dispositif.
Pour réduire les risques d’incendie ou de choc électrique,
n’exposez pas ce dispositif à la pluie ou à l’humidité.
Pour réduire le risque de choc électrique, n’ouvrez pas le boîtier. Consultez un
préposé à l’entretien qualifié seulement pour l’entretien.
Lisez ces instructions et conservez-les. Tenez compte de tous les avertissements.
Cet appareil est conforme à la section 15 des règlements de la FCC. Le
fonctionnement fait l’objet des deux conditions suivantes:
Le dispositif ne peut causer de brouillage préjudiciable;
Le dispositif doit accepter tout brouillage reçu, y compris le brouillage pouvant
occasionner un fonctionnement non souhaitable.
Vos droits d’utilisation de cet appareil peuvent être annulés si des changements
ou modifications non expressément approuvées par la partie responsable de la
conformité y sont apportées.
Mise en garde
1. Une exposition prolongée à de la musique forte peut entraîner des dommages
auditifs. Des spécialistes de l’audition ont recommandé de ne pas écouter de la
musique pendant des périodes prolongées continues et à des niveaux sonores élevés.
2. Ne pas se servir du casque en conduisant un véhicule motorisé. Cela pourrait
mener à des accidents de la circulation et c’est illégal dans plusieurs régions.
3. Si un bourdonnement est entendu dans les oreilles, réduire le volume et cesser
l’utilisation.
4. Faire attention de ne pas échapper le casque d’écoute, de s’asseoir dessus ou
qu’il soit submergé dans l’eau.
Casque d’écoute
suppresseur de bruit
Guide d’utilisation
Modèle no NCH-20
UN | CONSIGNES DE SÉCURITÉ
Page 7

Brochez votre reçu de caisse à votre
guide. Vous en aurez besoin pour obtenir
du service en vertu de la garantie.
Numéro de modèle _______________
Date d’achat _____________________
1. Consignes de sécurité
2. Pièces et caractéristiques
3. Instructions d’installation
4. Caractéristiques et utilisation
5. Entretien et nettoyage
6. Dépannage
7. Garantie
Installation de la pile
1. Appuyez sur la languette à l’arrière
du contrôleur et tirez-la pour ouvrir
et avoir accès au compartiment de
la pile.
2. Insérez une pile R02/AAA dans le
compartiment de la pile. Assurezvous d’insérer la pile en respectant
la polarité. Insérez l’extrémité
négative en premier.
3. Alignez le couvercle de la pile avec le compartiment de la pile, puis appliquez
une pression sur le couvercle pour le fermer.
CONSERVEZ CES INSTRUCTIONS
TABLE DES MATIÈRES
DEUX | PIÈCES ET CARACTÉRISTIQUES
TROIS | INSTRUCTIONS D’INSTALLATION
Adaptateur
Pochette
Interrupteur de
sourdine
Indicateur
d’alimentation
Réglage du
volume
Merci d’avoir acheté ce dispositif HEC. Ce guide facile à suivre vous aidera à utiliser
votre casque d’écoute suppresseur de bruit de façon optimale.
N’oubliez pas de noter le numéro du modèle. Il se trouve sur le devant de
l’emballage.
Attache de
chandail
(non montré)
Contrôleur
Page 8

Utilisation de votre casque d’écoute
1. Si vous avez l’intention d’utiliser le casque d’écoute pour la réduction de bruit
seulement, placez l’interrupteur d’alimentation à la position “ON”. La DEL du
contrôleur s’illuminera. Dans ce mode, aucun branchement de câble n’est requis.
2. Placez interrupteur d’alimentation à la position “OFF” lorsque vous n’avez plus
besoin de la fonction de réduction de bruit. L’appareil fonctionnera alors comme
un casque d’écoute normal.
Le casque d’écoute suppresseur de bruit réduit les bruits ambiants indésirables,
ore un environnement plus tranquille afin d’améliorer votre expérience d’écoute.
Ce casque d’écoute peut être utilisé avec ou sans la fonction de suppression de
bruit.
Utilisez l’adaptateur fourni pour une connectivité facile aux services de musique
en avion. Veuillez utiliser l’attache de chandail situé à l’arrière du contrôleur pour
un accès sécuritaire et facile aux contrôles. Pour le rangement, pliez simplement
les oreillettes dans le serre-tête et placez le casque d’écoute dans votre pochette
de transport.
Raccordement à une source audio
Vous pouvez utiliser le casque d’écoute avec une variété de sources audio telles
que lecteurs de CD, DVD et de MP3 ainsi que les ordinateurs portables et la chaîne
stéréophonique à la maison. Pour établir le branchement, insérez simplement la
prise du casque d’écoute dans la prise d’écouteurs ou dans la source audio.
1. Placez interrupteur d’alimentation à la position “ON” et ajustez le contrôle
du volume au niveau désiré. Veuillez prendre note que le voyant indicateur
d’alimentation est allumé.
2. Pour interrompre le son dans les casques d’écoute, glissez l’interrupteur de
sourdine vers la droite tel qu’indiqué par la flèche sur le contrôleur. Pour annuler
la fonction de sourdine, glissez l’interrupteur de sourdine dans le sens opposé.
3. Placez interrupteur d’alimentation à la position “OFF” pour éteindre l’appareil
après l’utilisation.
QUATRE | CARACTÉRISTIQUES ET UTILISATION
Casque d’écoute de
réduction de bruit
Contrôleur Source audio
Page 9

Consignes de sécurité
Ne pas se servir du casque d’écoute lorsque l’utilisation d’appareils électroniques
est interdite. Ne pas se servir du casque d’écoute en conduisant un véhicule ou en
faisant du vélo.
Pour éviter des dommages auditifs, éviter d’utiliser le casque d’écoute à un
volume élevé.
1. Nettoyez le casque d’écoute avec un chion doux et humide (jamais imbibé).
N’utilisez jamais de solvant ou de détergeant.
2. Évitez de laisser le casque d’écoute sous les rayons directs du soleil ou dans des
endroits chauds, humides ou poussiéreux.
3. Gardez votre casque d’écoute loin des appareils de chauage et des sources de
bruit d’origine électrique tel que les lampes fluorescentes et les moteurs.
SIX | DÉPANNAGE
CINQ | ENTRETIEN ET NETTOYAGE
Symptom Solution
Les écouteurs ne
s'allument pas
Vérifiez si la pile est installée correctement.
Les écouteurs ne
s'allument pas
Installez une pile neuve.
Il n'y a pas de son
Assurez-vous que le branchement à l'appareil
audiovisuel est bien solide.
Il n'y a pas de son Assurez-vous que l'appareil audiovisuel est allumé.
Specifications
Haut-parleur Excitateur dynamique de 40 mm
Impédance 32 ohms ± -10 %
Sensibilité 106 dB+/- 3 dB à l kHz
Réponse de fréquence 20 Hz à 20 kHz
Réduction active de bruit >12 dB à 300 Hz
Puissance maximum
admissible
100 mW
Poids Environ 180 g (sans pile)
Utilisation du casque d’écoute suppresseur de bruit:
1. Branchez le casque d’écoute au lecteur multimédia portatif.
2. Portez l’oreillette droite marquée R sur votre oreille droite et celle marquée L sur
votre oreille gauche.
3. Mettez en marche en vous servant du contrôleur.
4. Mettez le lecteur multimédia portatif ou l’appareil audiovisuel en marche.
5. Lorsque vous avez fini d’écouter de la musique, éteignez le casque d’écoute.
Page 10

SEPT | GARANTIE LIMITÉE
Ce produit de marque Haier, lorsque
vendu dans son emballage d’origine, est
garanti contre tout vice de fabrication
ou de matériau, et Haier s’engage à
réparer le défaut ou remplacer l’appareil
(à sa discrétion) par un produit neuf ou un
équivalent reconditionné sans frais pour
l’acheteur, pour les pièces et la maind’oeuvre au cours des périodes stipulées
ci-dessous : 90 jours
La garantie ne s’applique pas aux défauts
relatifs à l’apparence du produit ou aux
dommages, mutilations, altérations ou
modifications pouvant avoir été subis
par le boîtier de l’appareil. La garantie
ne s’applique pas dans les autres cas
d’exclusion stipulés ci-dessous :
La garantie prend eet à la date originale
d’achat et le reçu d’achat original doit être
présenté au dépositaire autorisé pour que
des réparations soient eectuées en vertu
de la garantie.
La garantie limitée décrite aux présentes
s’applique en plus de toute autre garantie
tacite que ce soit pouvant être conférée aux
acheteurs par la loi. TOUTES LES GARANTIES
TACITES, Y COMPRIS LES GARANTIES DE
QUALITÉ MARCHANDE ET D’ADAPTATION À
UN USAGE PARTICULIER, SONT LIMITÉES,
À COMPTER DE LA DATE D’ACHAT, AUX
PÉRIODES STIPULÉES CI-DESSOUS. Certains
États n’allouent pas de limites concernant
la durée d’une garantie implicite, alors les
limites susmentionnées ne s’appliquent peutêtre pas à vous. Ni le personnel de vente du
détaillant, ni aucune autre personne, n’est
autorisé à conférer quelque garantie que ce
soit autre que celle décrite aux présentes,
ou à prolonger la durée de quelque garantie
que ce soit au-delà de la période stipulée aux
présentes au nom de Haier.
Les garanties décrites aux présentes seront
les seules garanties conférées par Haier et
constitueront le seul et unique recours oert
au client.
La réparation des défectuosités, selon
la façon et durant la période de temps
décrites aux présentes, constitue I’exécution
complète de toutes les obligations et
les responsabilités de Haier vis-à-vis de
I’acheteur en ce qui a trait au produit et
constituera un acquittement complet pour
toute réclamation, qu’elle soit basée sur
le contrat, la négligence, la responsabilité
stricte ou autre. En aucun cas Haier ne
pourra être tenu responsable des dommages
ou des défectuosités causés par des
réparations ou des tentatives de réparation
eectuées ailleurs que dans un centre de
service autorisé ou que chez le détaillant
autorisé. Haier décline par ailleurs toute
responsabilité relativement aux pertes de
profit ou aux dommages à la propriété, qu’ils
soient directs ou indirects. Certains états
ou provinces ne permettent pas d’exclusion
relativement aux dommages directs ou
indirects. Par conséquent, la limitation
précédente peut ne pas s’appliquer à vous.
CETTE GARANTIE VOUS CONFÈRE DES
DROITS SPÉCIFIQUES AU SENS DE LA LOI.
VOUS POURRIEZ BÉNÉFICIER D’AUTRES
DROITS VARIANT D’UN ÉTAT OU D’UNE
PROVINCE À l’AUTRE.
La période de garantie pour ce produit est la
suivante : 90 jours sur la main-d’oeuvre et
sur les pièces. Autres éléments qui ne sont
pas couverts par cette garantie : piles non
rechargeables.
Pour obtenir un service : Pour connaître
l’emplacement du centre de service autorisé
le plus près de chez vous ou obtenir de
la documentation sur le produit, des
accessoires, des fournitures ou du service
à la clientèle, veuillez composer le 1-877337-3639.
En cas de besoin de service : expédiez ou
apportez votre produit chez un détaillant ou
un centre de service autorisé. Assurez-vous
d’avoir une preuve d’achat en main.
Si vous expédiez le produit, assurez-vous de
l’emballer avec soin.
Haier America
New York, NY 10018
Haier America garantit le matériel original,
incluant les pièces d’origine et la maind’oeuvre, contre tout défaut de fabrication
dans des conditions normales d’utilisation,
pour une période de quatre-vingt-dix (90)
jours à partir de la date d’achat originale aux
É.-U. et au Canada.
 Loading...